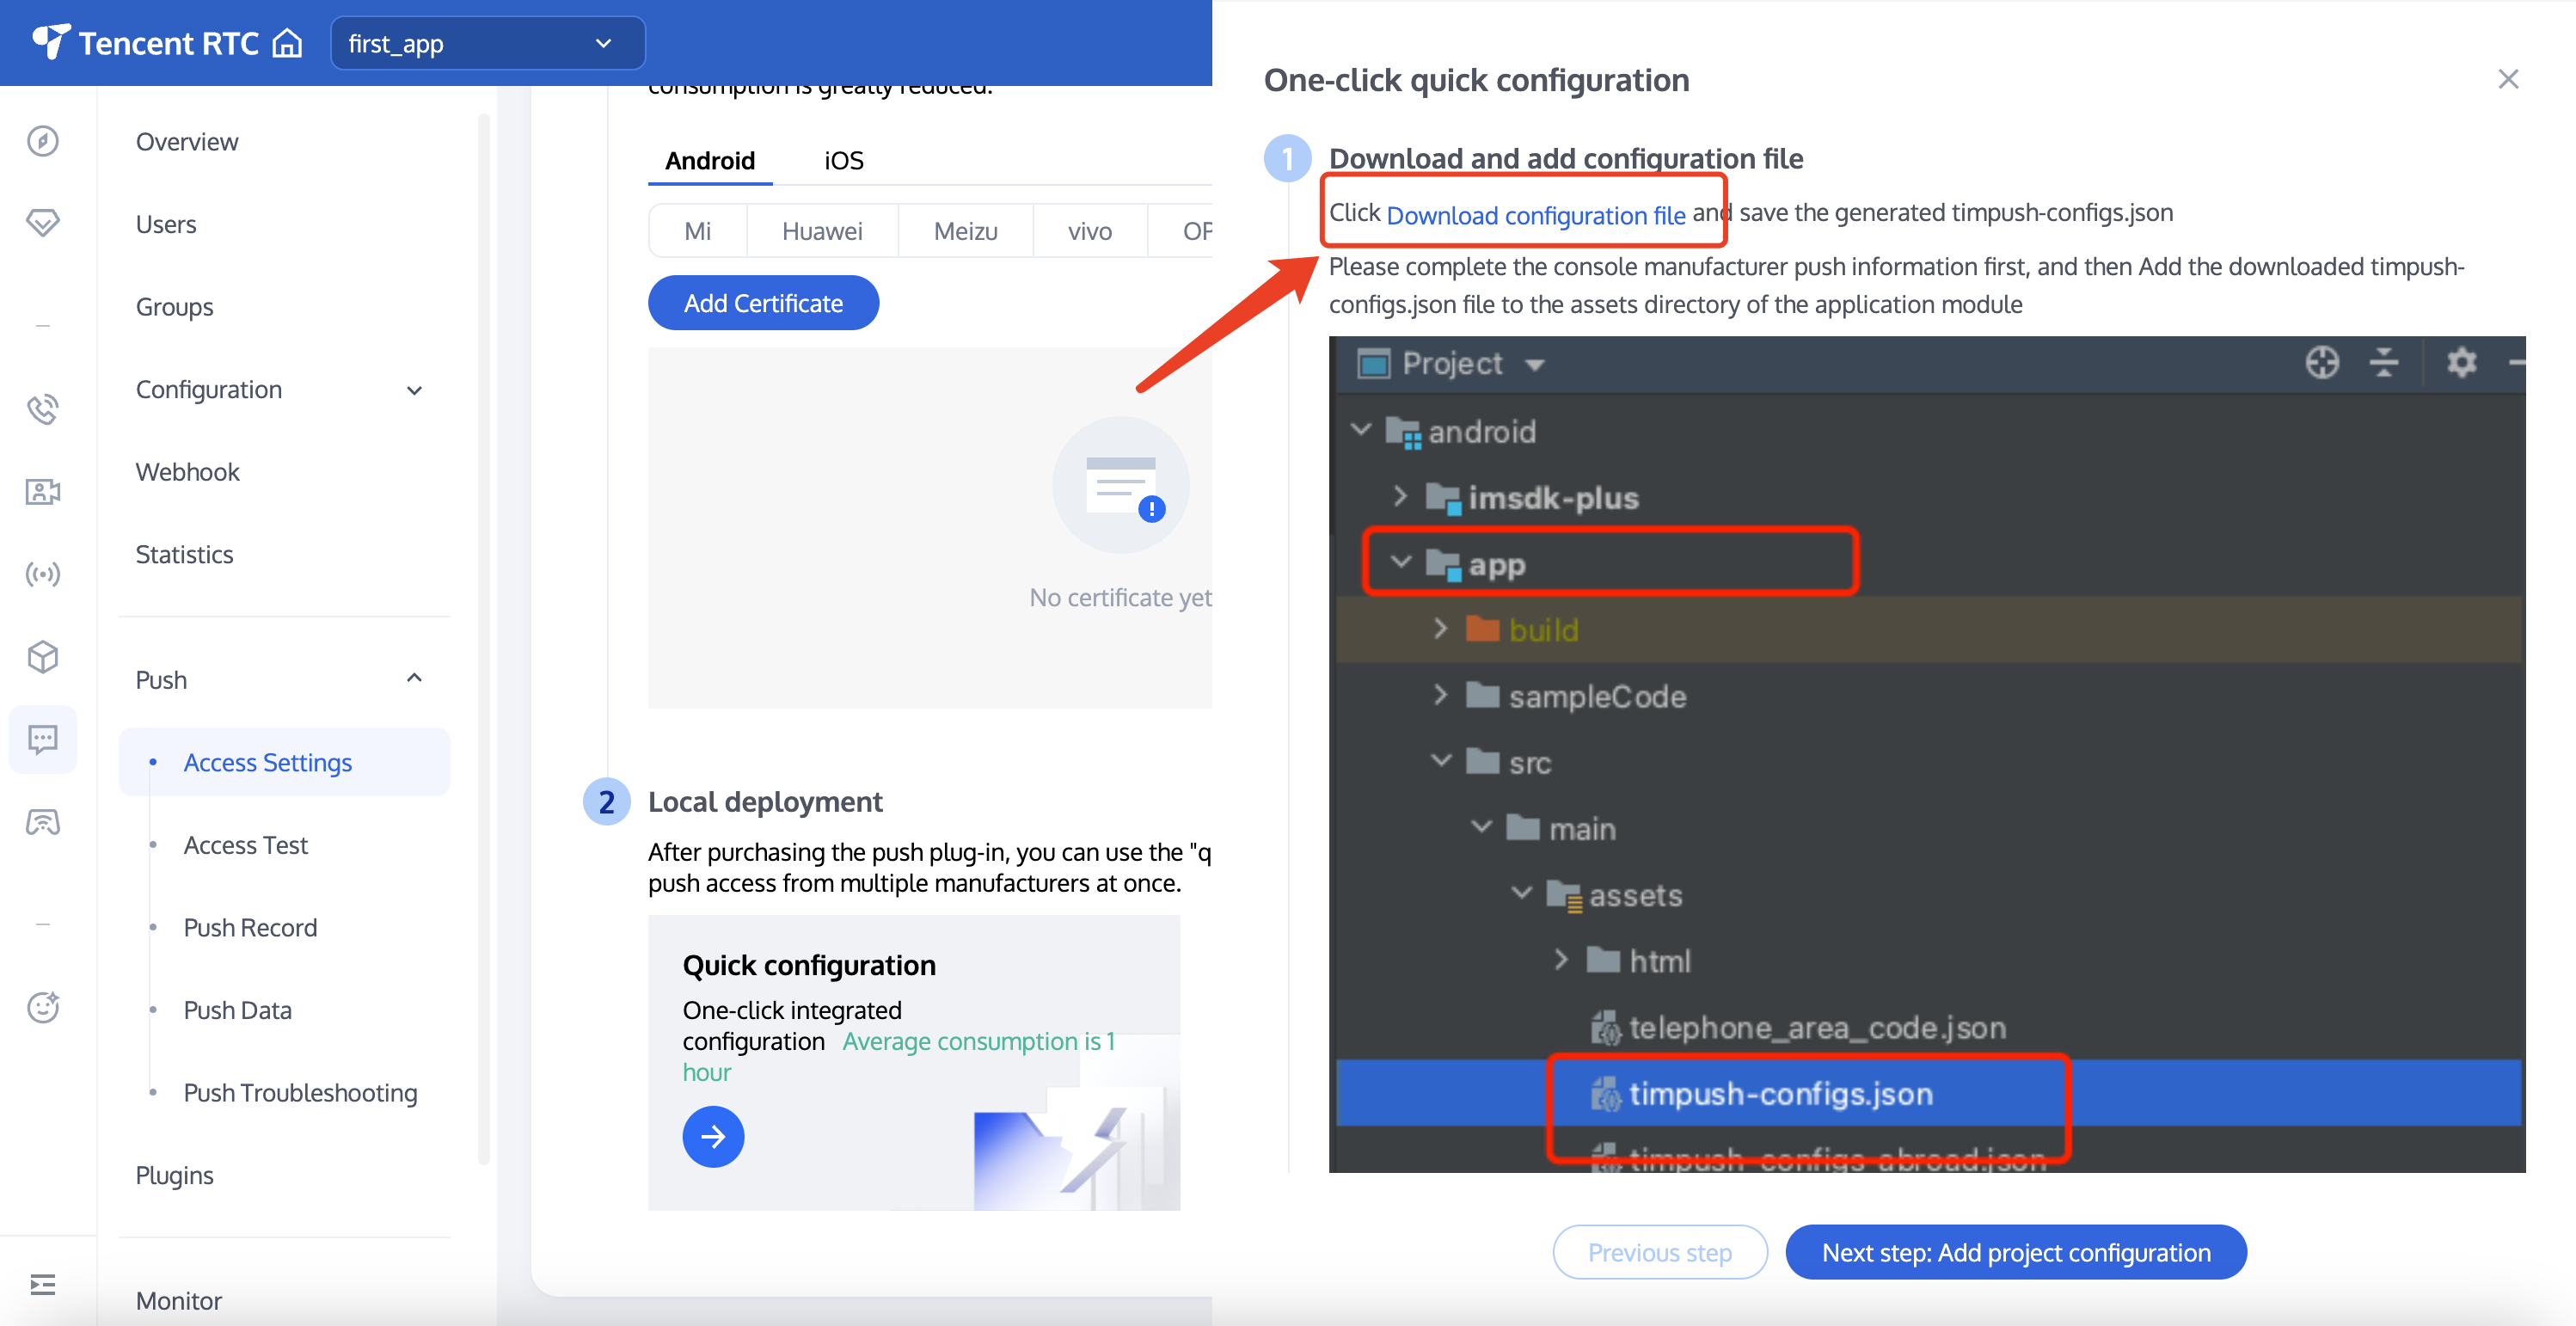
After completing the console manufacturer push information, download and add the configuration file to the project. Add the downloaded timpush-configs.json file to the assets directory of the application module:
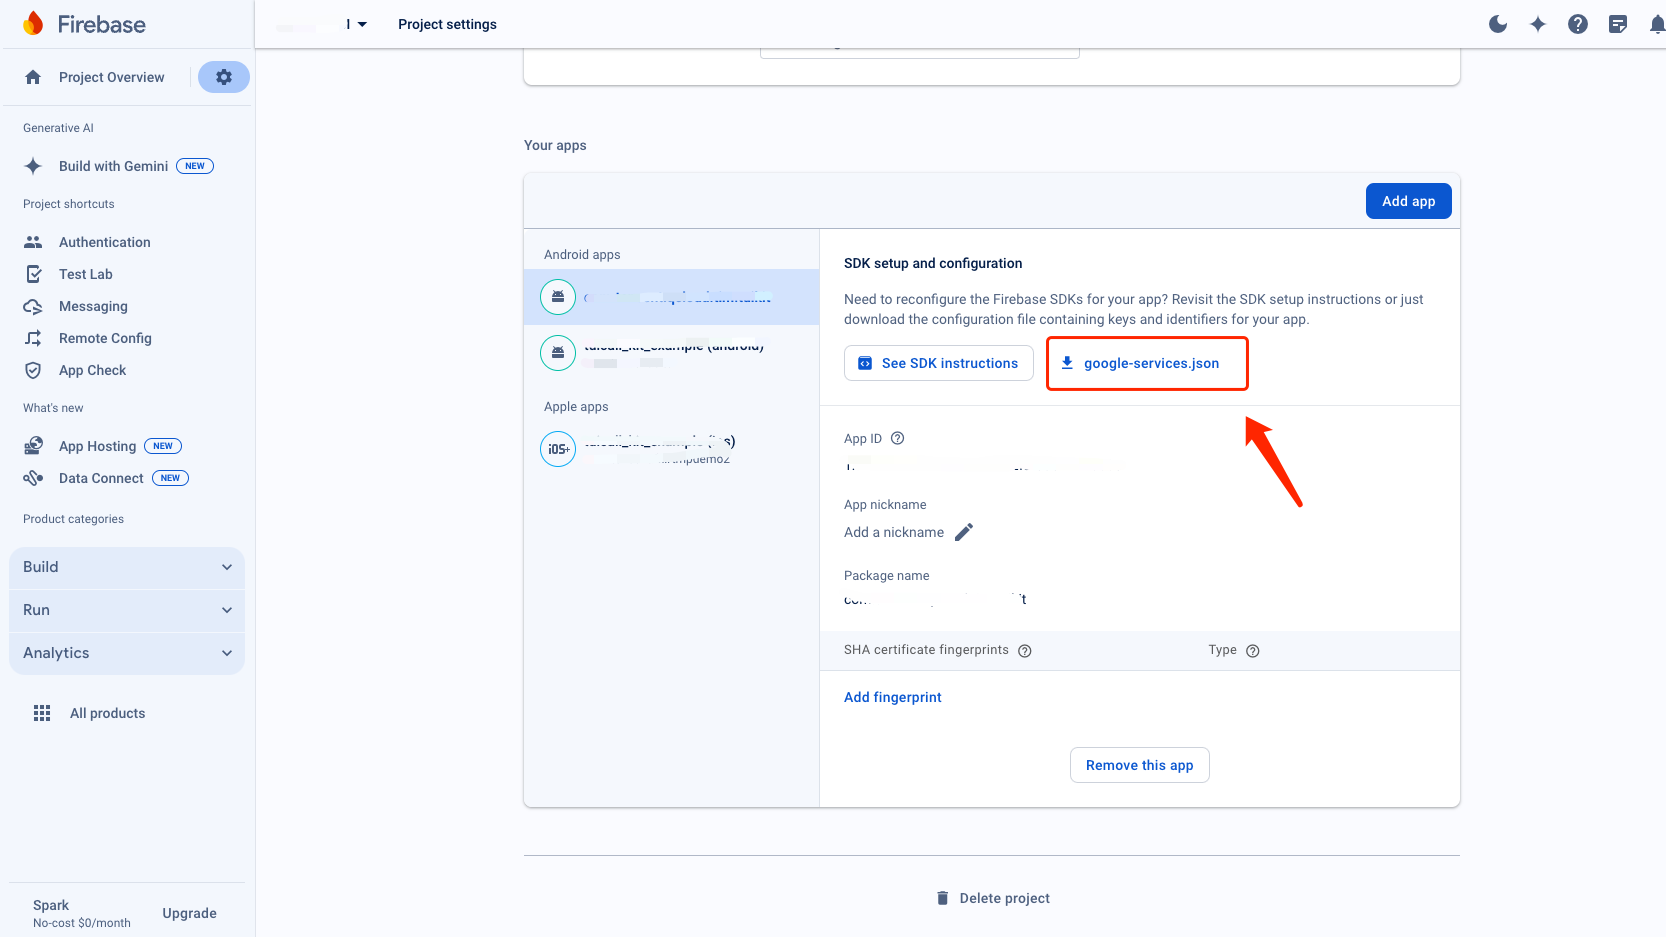
1.Choose to download the configuration file timpush-configs.json
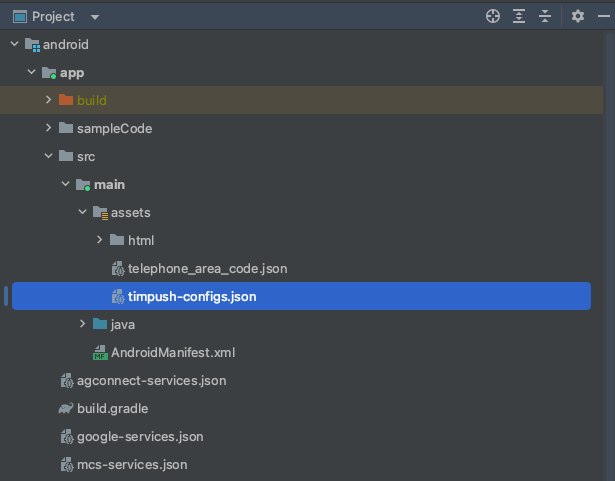
2.Add to the project
Step 2: Integrate the TIMPush plugin
// The version number "VERSION" can be obtained from the Update Log.
// 1. Integration of the push main package is mandatory
// 3. If only the FCM channel is needed, the following packages do not need to be integrated; if you want to prioritize the FCM channel, call the API forceUseFCMPushChannel
1. TIMPush requires integration with IMSDK version 7.6.5011 or above.
2. For users without UI or who haven't integrated other plugins, it is necessary to add integration with TUICore. It supports both source and Maven integration, as follows:
api projects.contains("tuicore")?project(':tuicore'):"com.tencent.liteav.tuikit:tuicore:latest.release"
vivo and Honor configuration
According to vivo and Honor manufacturer's access guidance, it is necessary to add the APPID and APPKEY to the manifest file, otherwise compilation issues will occur.
Method 1
Method 2
android {
...
defaultConfig {
...
manifestPlaceholders =[
"VIVO_APPKEY":"`APPKEY` of the certificate assigned to your application",
"VIVO_APPID":"`APPID` of the certificate assigned to your application",
"HONOR_APPID":"`APPID` of the certificate assigned to your application"
]
}
}
// vivo begin
<meta-data tools:replace="android:value"
android:name="com.vivo.push.api_key"
android:value="`APPKEY` of the certificate assigned to your application"/>
<meta-data tools:replace="android:value"
android:name="com.vivo.push.app_id"
android:value="`APPID` of the certificate assigned to your application"/>
// vivo end
// honor begin
<meta-data tools:replace="android:value"
android:name="com.hihonor.push.app_id"
android:value="`APPID` of the certificate assigned to your application"/>
// honor end
Huawei, HONOR, and Google FCM Adaptation
Follow the vendor method to integrate the corresponding plugin and JSON configuration file.
Note:
The following adaptation for HONOR only requires configuration for version 7.7.5283 and above.
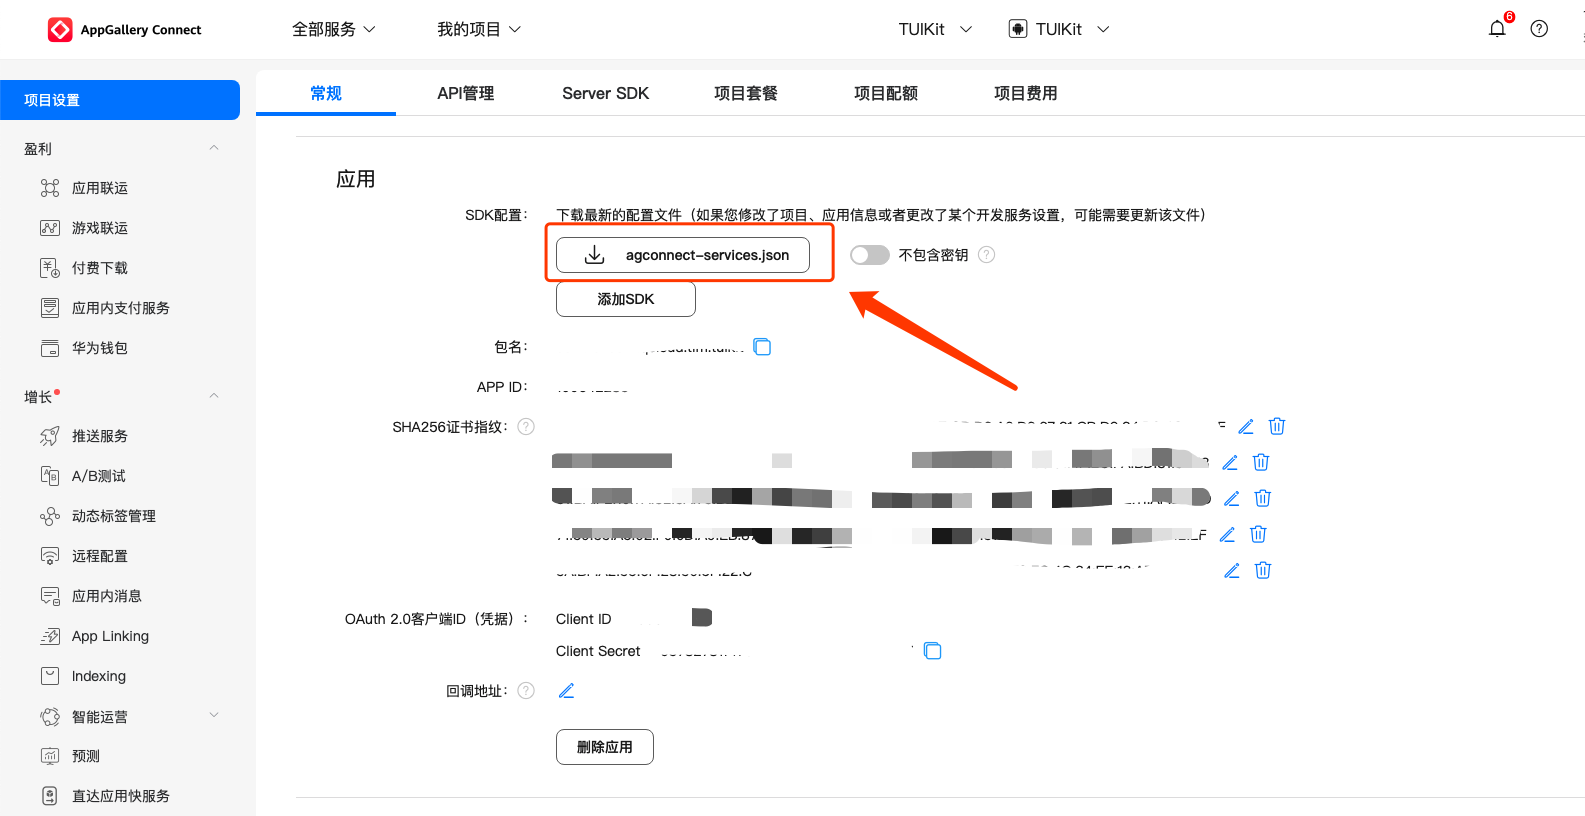
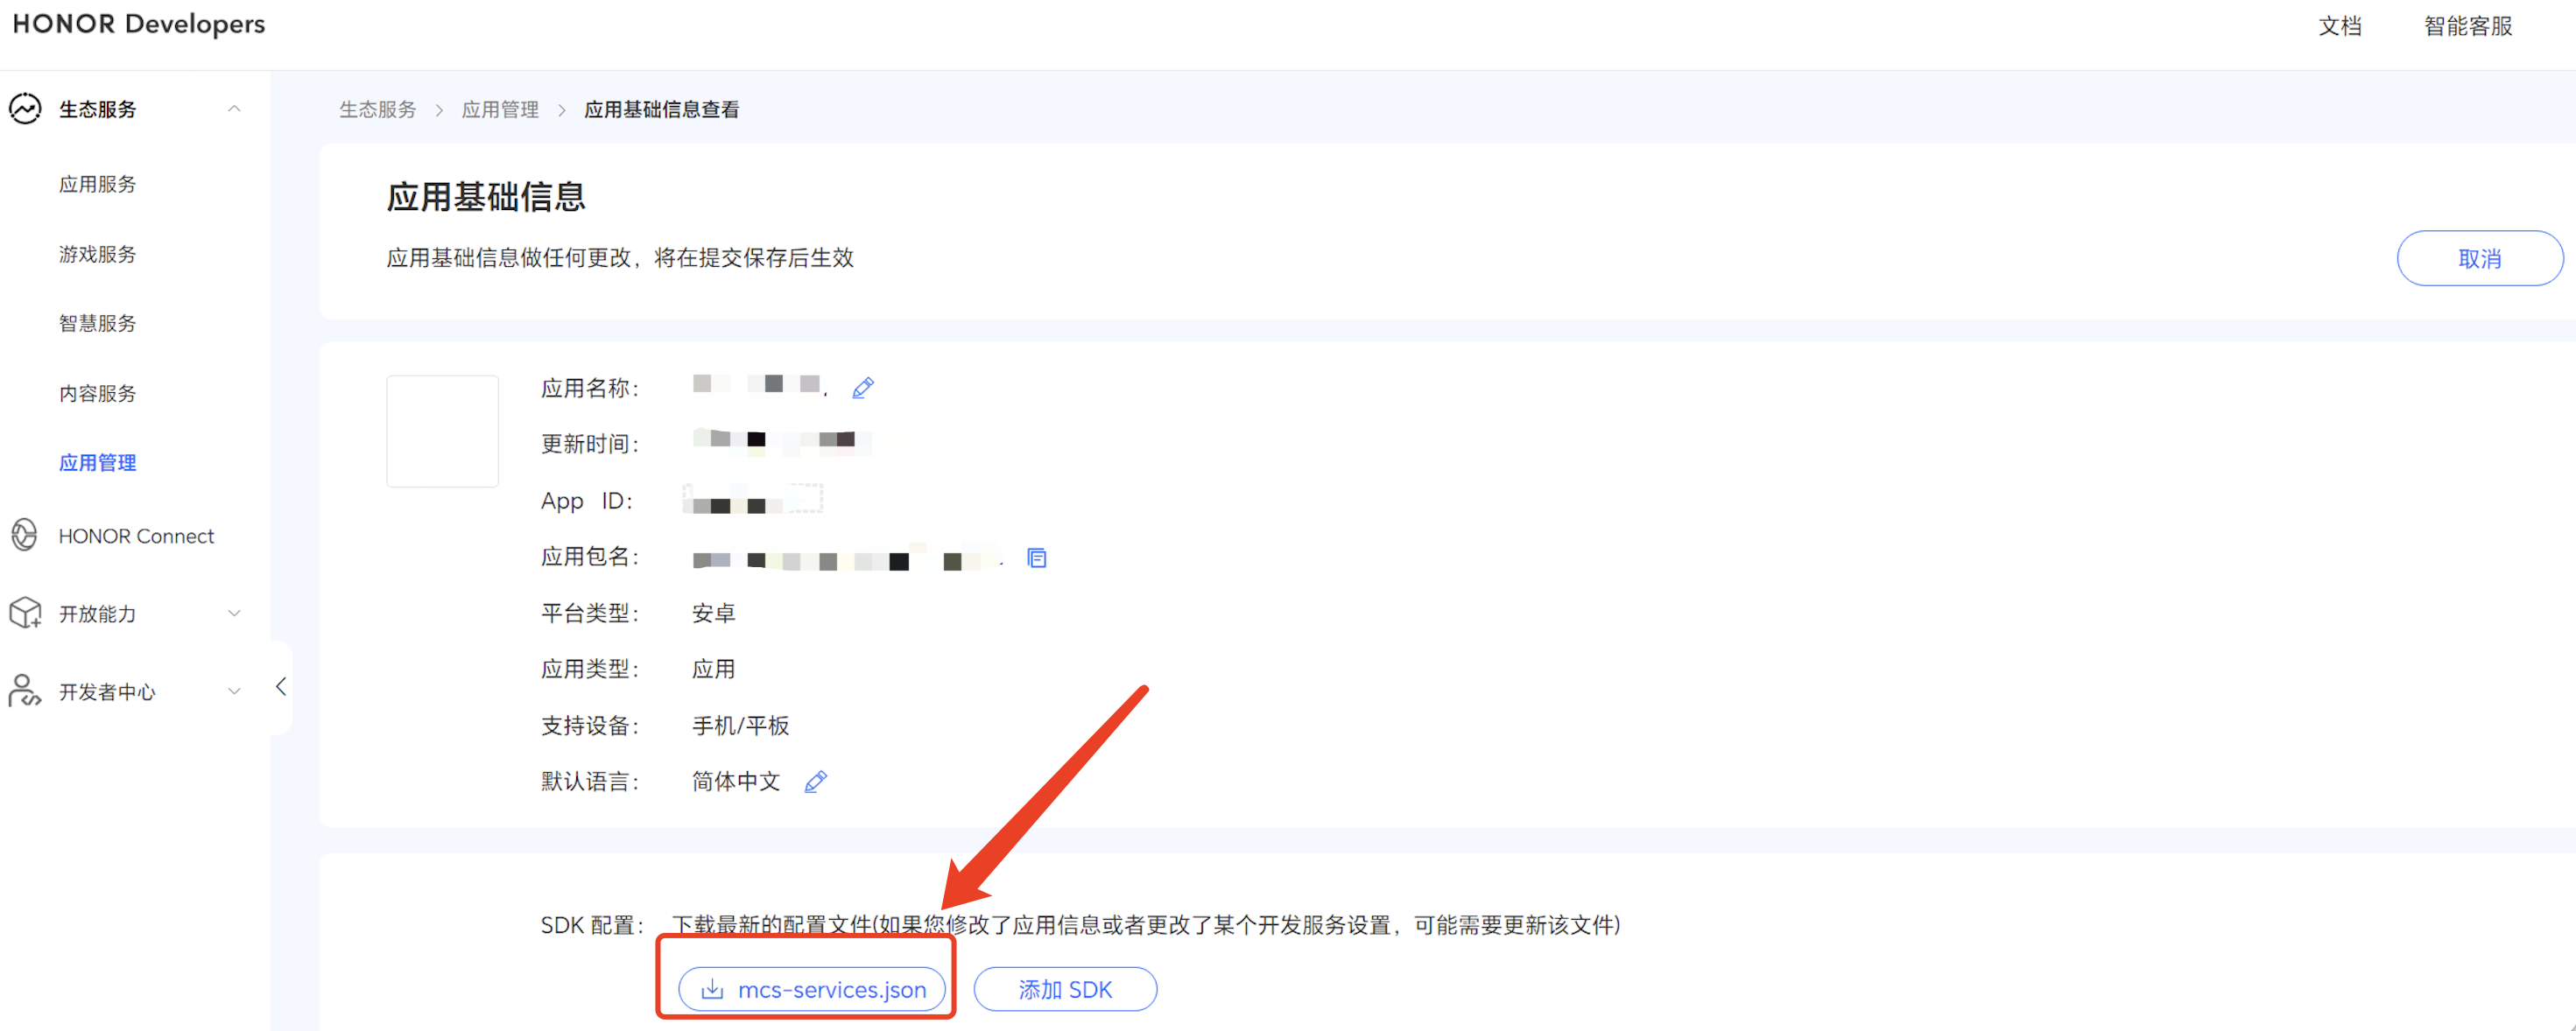
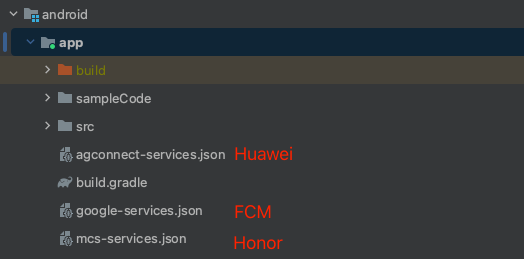
1.1 Download the configuration file and place it under the root directory of the project:
Huawei
HONOR
Google FCM
Operation Path
1.2 Add the following configuration under buildscript -> dependencies in your project-level build.gradle file:
For Gradle version 7.1 and above
Gradle version 7.0
Versions Below Gradle 7.0
Add the following configuration under buildscript -> dependencies in your project-level build.gradle file:
buildscript {
dependencies {
...
classpath 'com.google.gms:google-services:4.3.15'
classpath 'com.huawei.agconnect:agcp:1.6.0.300'
classpath 'com.hihonor.mcs:asplugin:2.0.1.300'
}
}
In the project-level settings.gradle file, add the following repository configurations under pluginManagement -> repositories and dependencyResolutionManagement -> repositories:
// Configure the Maven repository address for HMS Core SDK.
maven {url 'https://developer.huawei.com/repo/'}
maven {url 'https://developer.hihonor.com/repo'}
}
}
1.3 Add the following configuration in the app-level build.gradle file:
apply plugin: 'com.google.gms.google-services'
apply plugin: 'com.huawei.agconnect'
apply plugin: 'com.hihonor.mcs.asplugin'
After the above steps are performed, offline push notifications can be received.
Note:
1. If you want to integrate the TIMPush component as easily as possible, you need to use the login and logout APIs provided by TUILogin of the TUICore component. The TIMPush component will automatically sense login/logout events. If you don't want to use the APIs provided by TUILogin, you need to manually call the registerPush interface of TIMPushManager after completing the login operation.
2. If you only want to support the login-free push feature, you can register for push using the appKey parameter. For more details on sending messages in step 5, see REST API - Initiate All/Tag Push.
Step 3: Set obfuscation rules
In the proguard-rules.pro file, add TIMPush-related classes to the non-obfuscation list:
-keep class com.tencent.qcloud.**{*;}
-keep class com.tencent.timpush.**{*;}
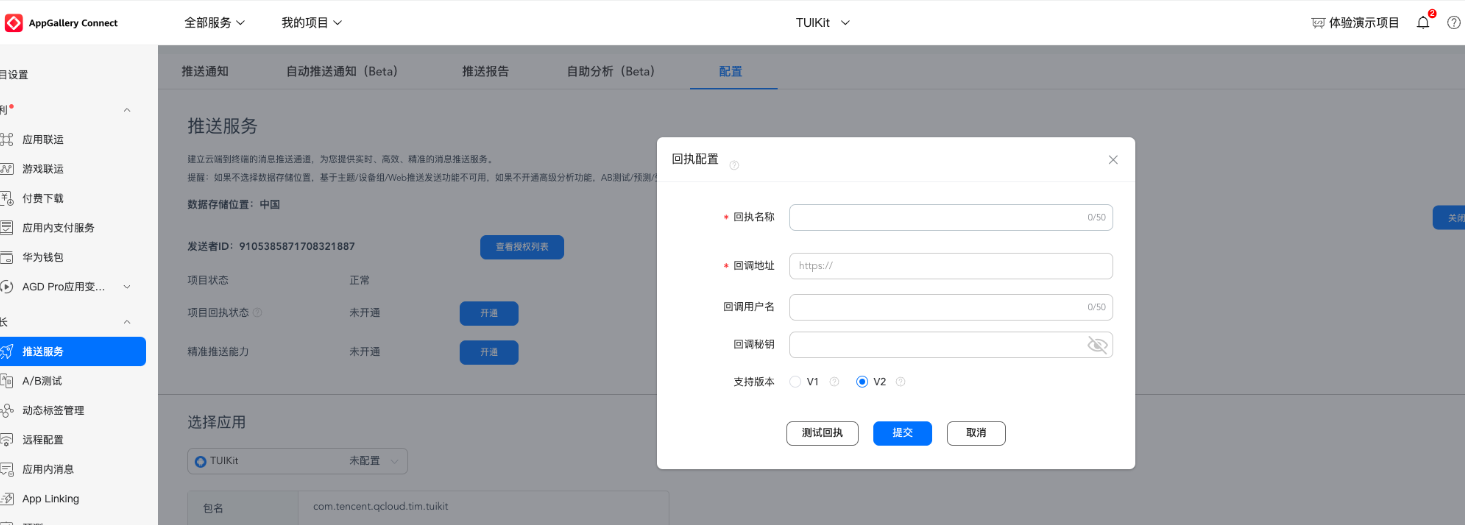
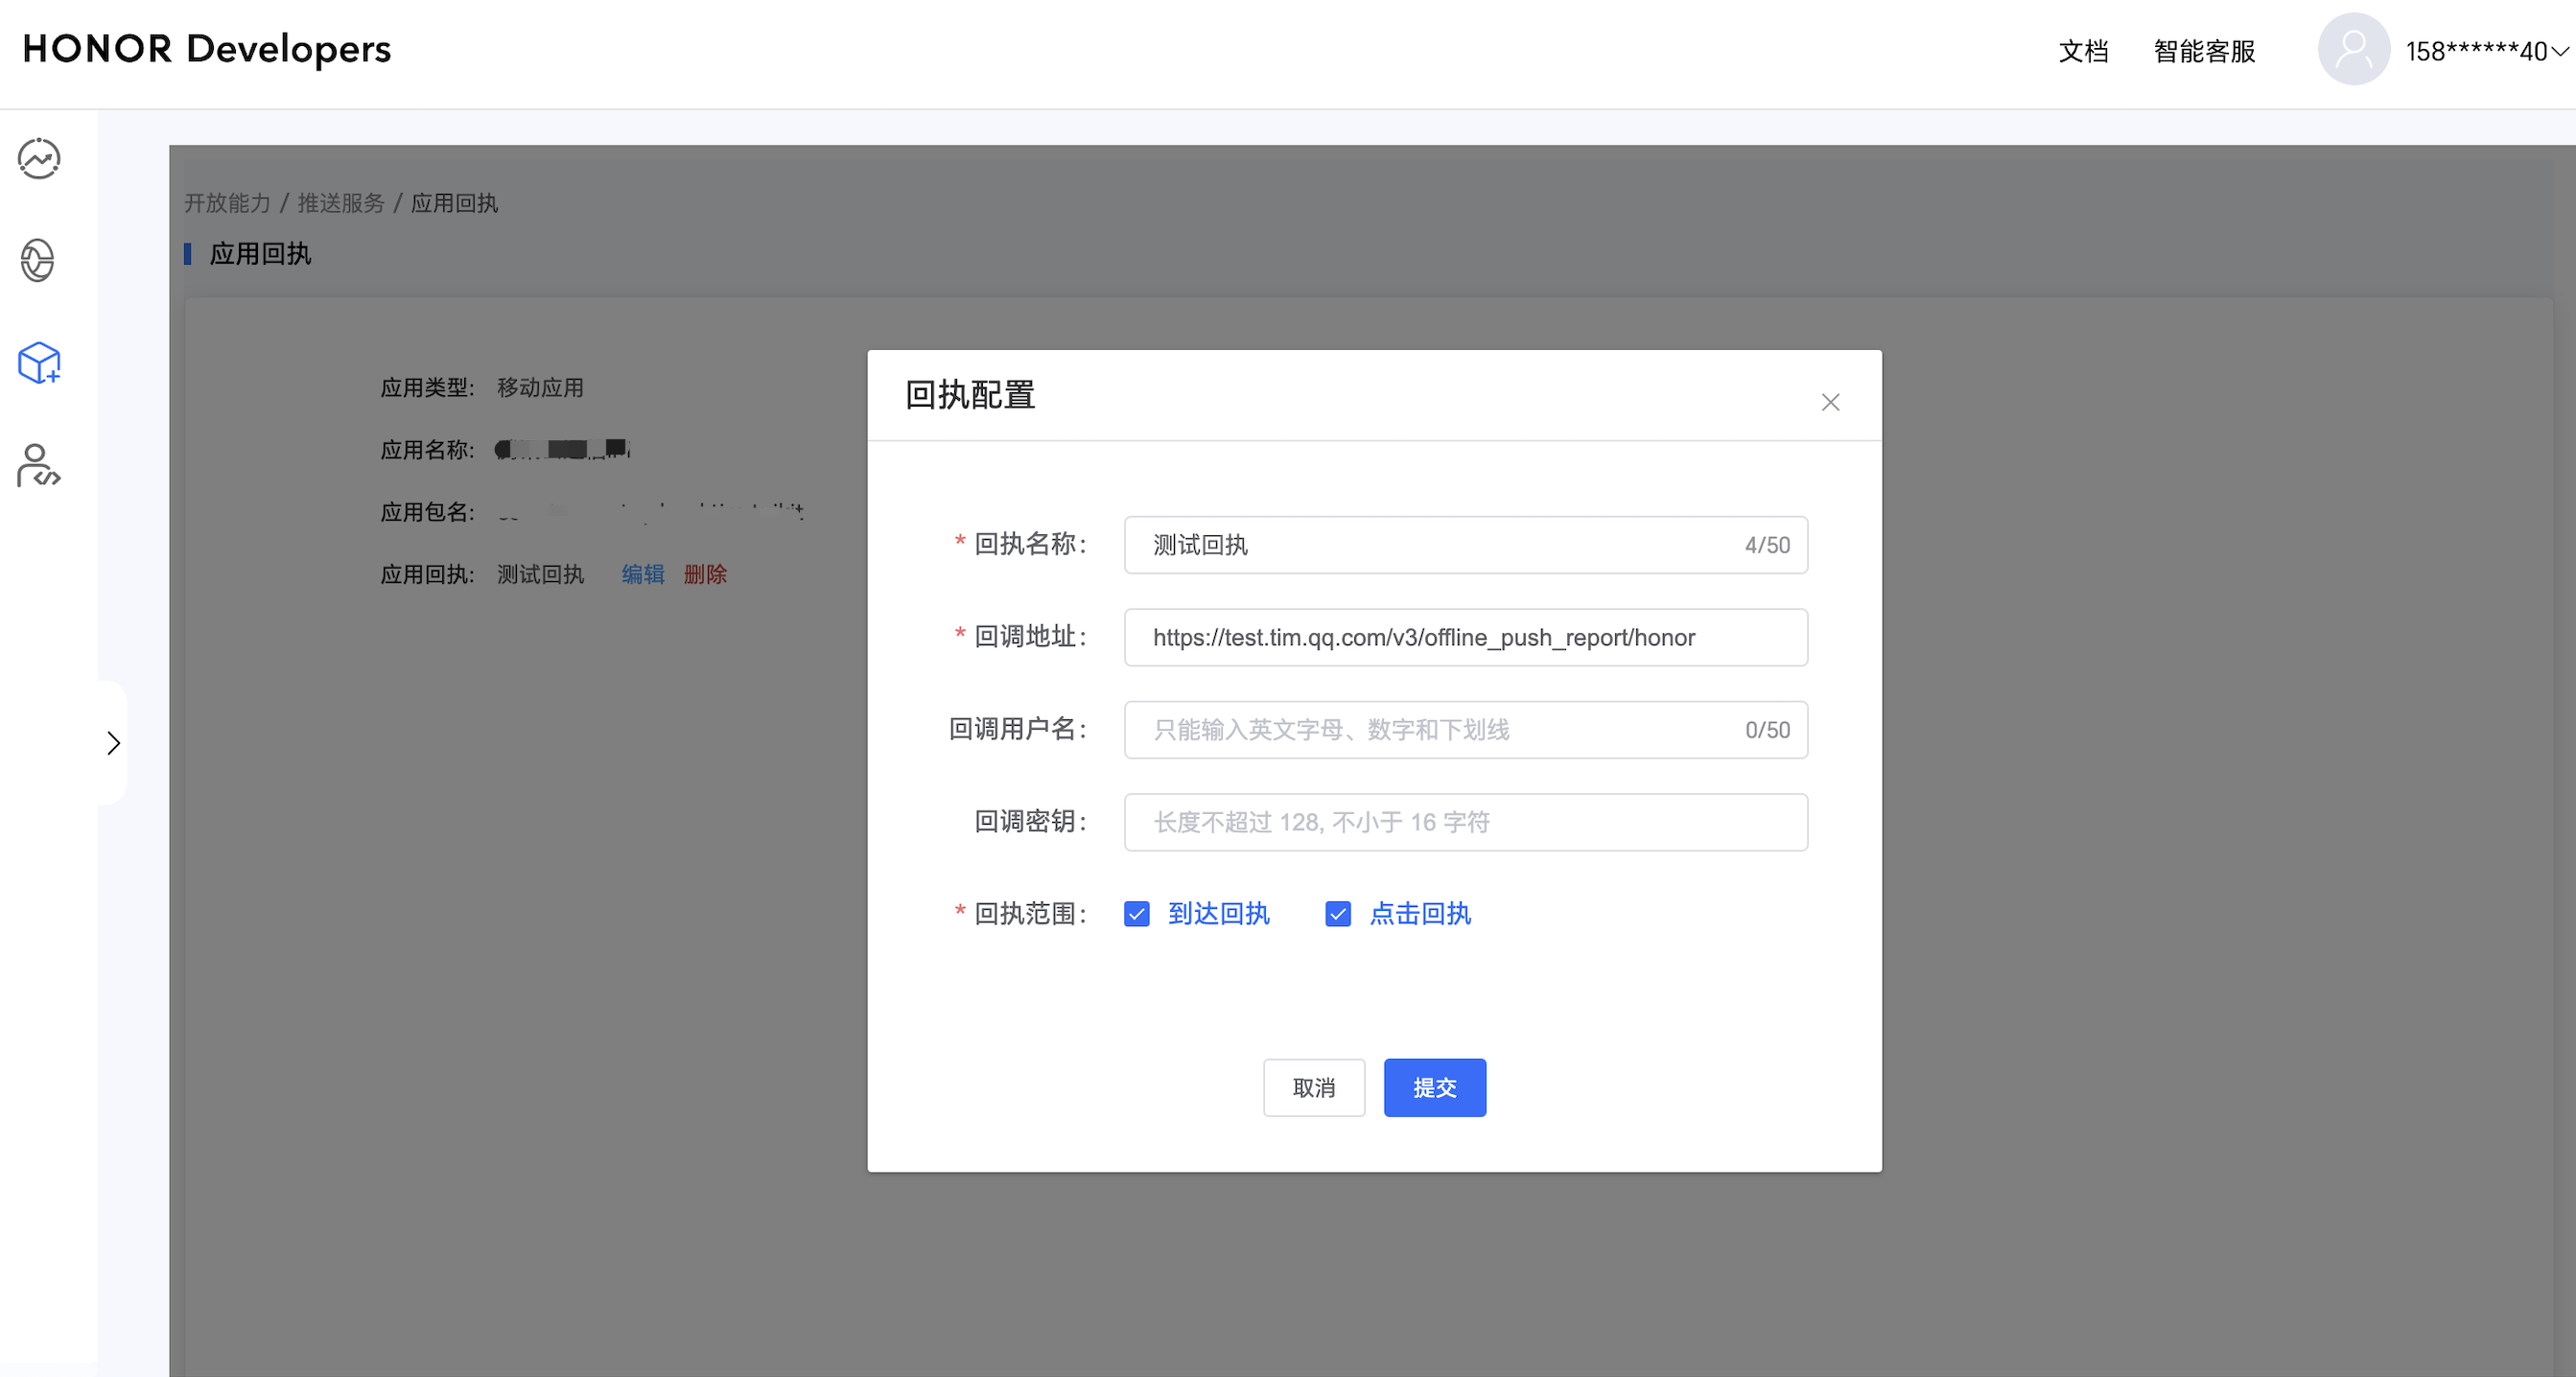
Step 4: Message Delivery Statistics Configuration
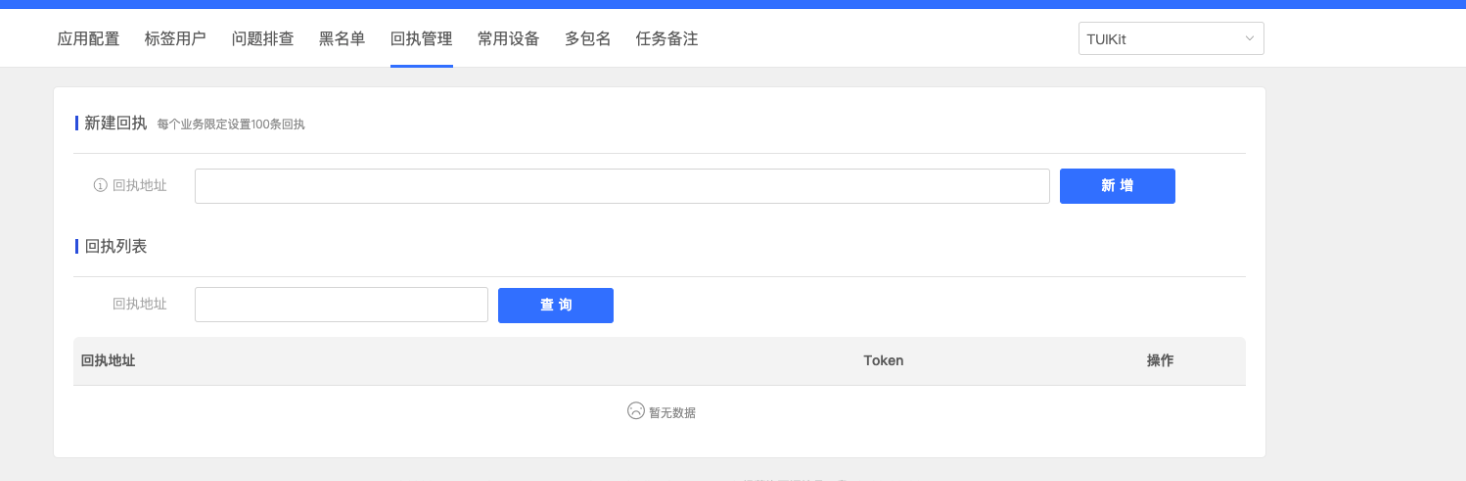
If you need to collect data reach statistics, please complete the configuration as follows:
Huawei Push Certificate ID <= 11344, using Huawei Push v2 interface, does not support Reach and Click Receipt, please regenerate and update Certificate ID.
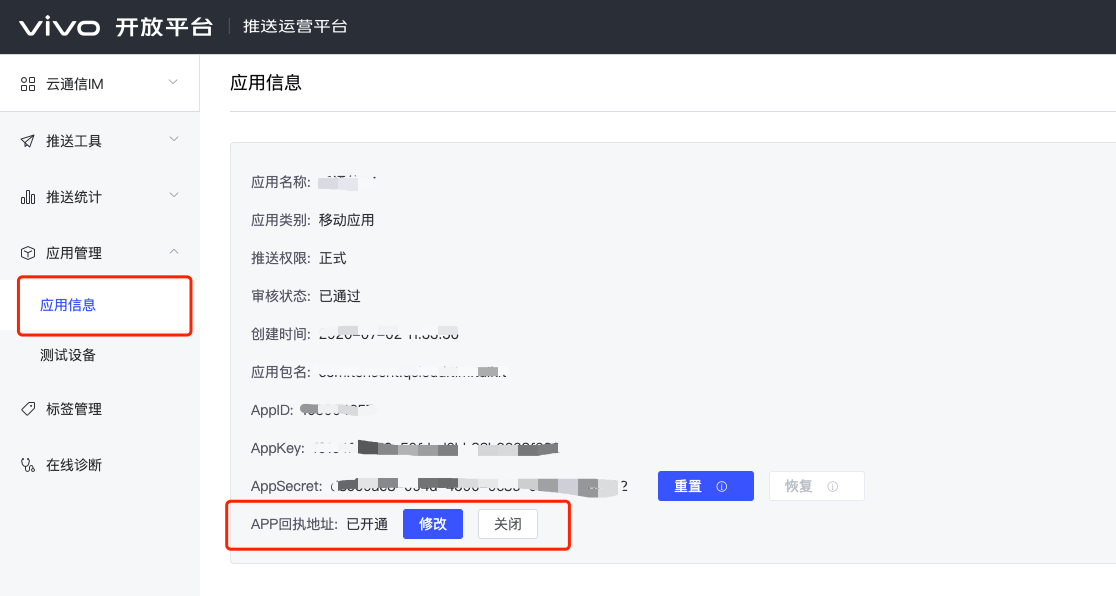
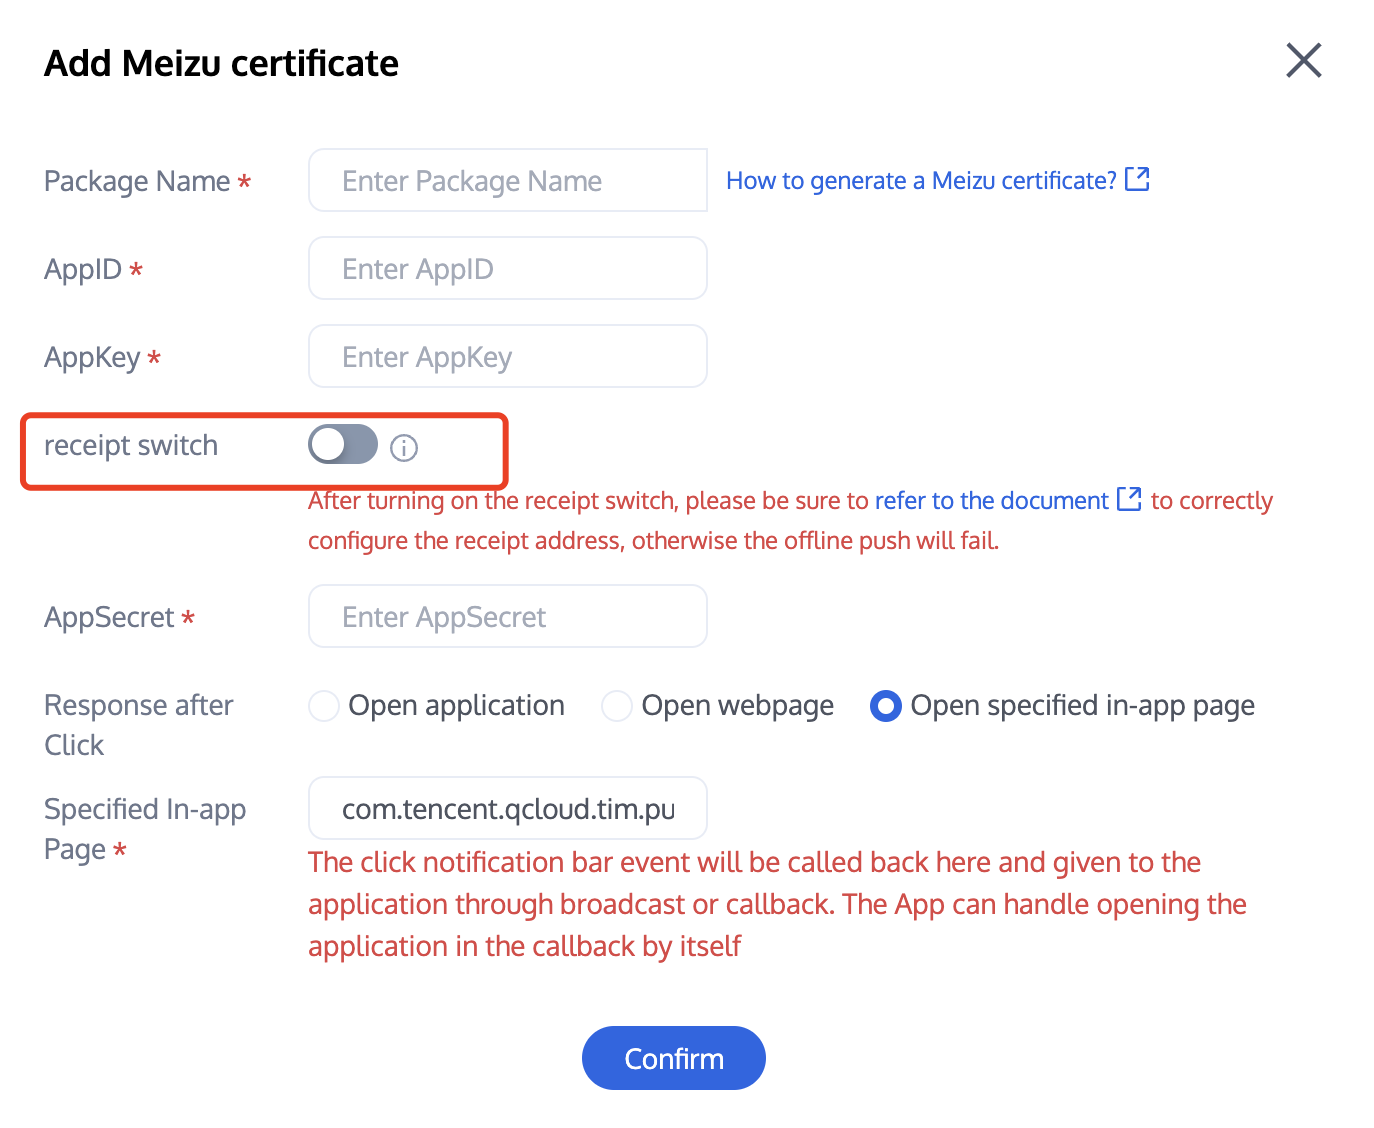
After turning on the receipt toggle, please make sure the receipt address is correctly configured. Not configuring it or configuring the wrong address will affect the push notification feature.
Note:
No configuration for message delivery statistics is required for other supported manufacturers.
FCM currently does not support the push notification statistics feature.
Step 5: Set the offline push parameters when sending a message
When you call sendMessage to send messages, you can use V2TIMOfflinePushInfo to set offline push parameters. Use the setExt method of V2TIMOfflinePushInfo to set custom ext data. When users receive an offline push and launch the app, they can get the ext field in the click notification callback, and then jump to the specified UI interface based on the content of the ext field. For more information, see the sendMessage() method in ChatProvider:
After receiving the push message, clicking the notification bar will trigger the component to callback the click event and pass through the offline message.
1. It is recommended to place the registration callback timing in the onCreate() function of the application.
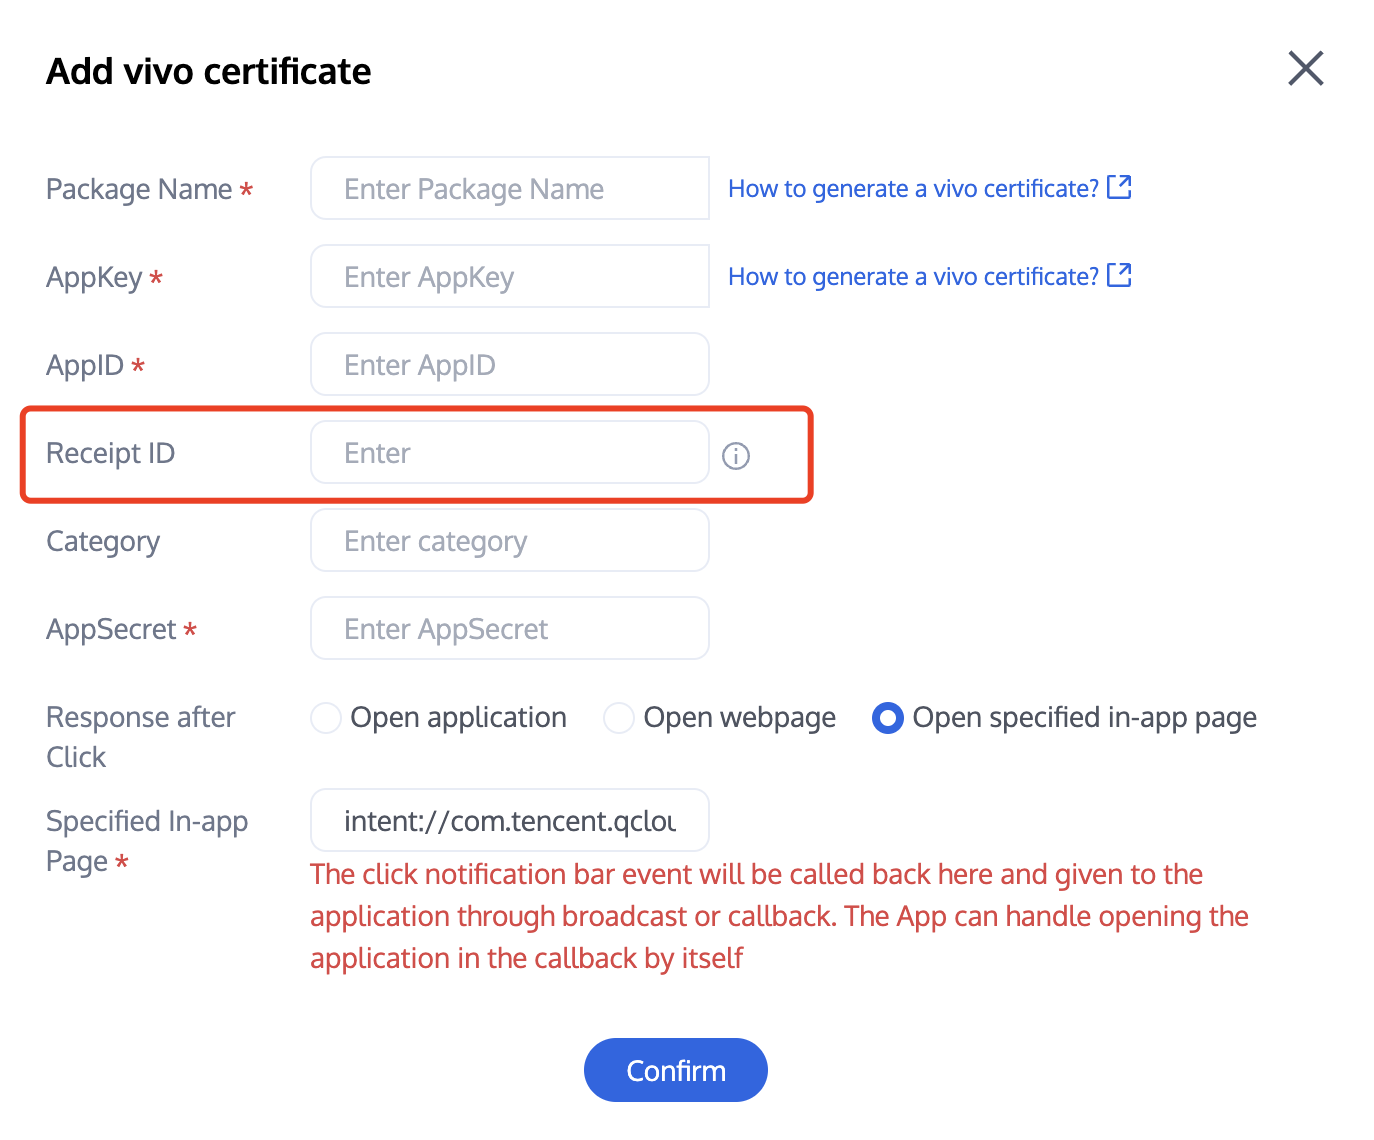
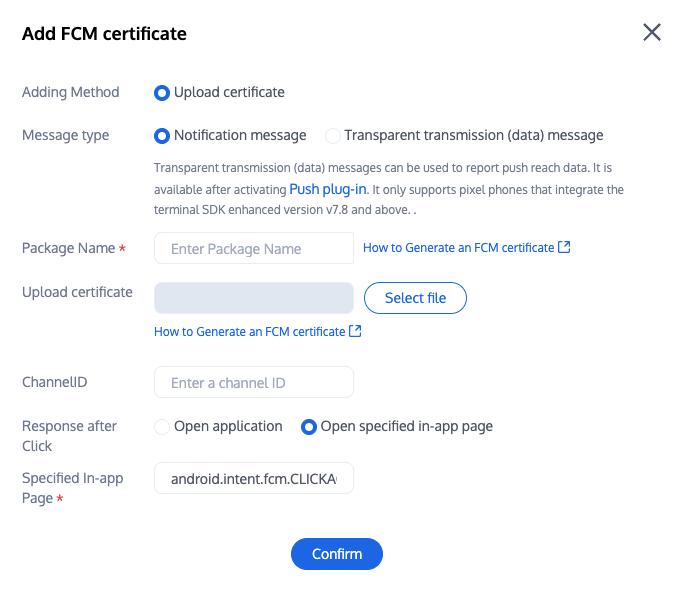
2. Console configuration follow-up actions are configured as follows, select Open the specified interface within the app and do not modify, use the default values.
The component will notify the application in the form of a callback or broadcast, and the application can configure the app's page jump in the callback.
Note:
1. It is recommended to place the registration callback timing in the onCreate() function of the application.
2. Console configuration follow-up actions are configured as follows, select Open the specified interface within the app and do not modify, use the default values.
Congratulations! You have completed the integration of the push plugin. Please be reminded: After the trial period or subscription expires, the push service (including regular message offline push, all-staff/Tag push, etc.) will automatically cease. To avoid affecting the normal use of your services, please make sure to purchase/renew in advance.
Note:
1. Manufacturer offline channels all have message categorization mechanism. Different types will also contain different push policies.
If the push demand belongs to IM type push and you want the push to be delivered in a timely manner, you need to set your application as the corresponding push type according to the manufacturer's rule setting. It will be categorized as a system message type or an important message type with high priority.
Conversely, there are limits on the quantity and frequency of offline push, which may not be pushed to the device in a timely manner.
2. If you are unable to receive push notifications after integration, please first use the Troubleshooting Tool to check the specific reasons. To view push indicator data, please use Statistics query.