TUIKit is a UI component library built on the Chat SDK. It enables rapid implementation of chat, conversation, search, relationship chain, and group management features through ready-to-use UI components. Message sending and receiving are handled by the TUIChat component. This guide explains how to quickly integrate TUIKit and implement its core features.
Key Concepts
Classic UI: Starting from version 5.7.1435, TUIKit supports modular integration and provides the Classic UI (WeChat-style).
Minimalist UI: Starting from version 6.9.3557, TUIKit introduces a new Minimalist UI (WhatsApp-style).
You can select either the Classic or Minimalist UI components as needed. If you are unfamiliar with the appearance of each UI library, see TUIKit UI Library Introduction.
A valid Tencent Cloud account and Chat application. See Enable Service to obtain the following information from the console:
SDKAppID: The Chat application ID from the console, serving as your app’s unique identifier.
SDKSecretKey: The application's secret key.
CocoaPods Integration
1. Create a Podfile. Navigate to your project directory and run the following command to generate a Podfile:
pod init
2. Add the required TUIKit components to your Podfile based on your business needs. Components are independent; adding or removing them does not affect project compilation. TUIKit supports two integration methods:
Remote CocoaPods Integration
Local Development Pods Integration
The following table summarizes the advantages and disadvantages of each integration method:
Integration Method
Scenarios
Advantages
Disadvantages
Remote CocoaPods
Used when no source code modification is required.
To update TUIKit, simply run pod update.
If you modify the source code, running pod update will overwrite your changes with the latest TUIKit version.
Local Development Pods
Recommended for customizing the source code.
If you use your own git repository, you can track changes. Updating other remote Pod libraries with pod update will not overwrite your customizations.
You must manually update your local TUIKit folder by replacing it with the latest source code.
Choose one of the following methods to integrate TUIKit:
Remote CocoaPods Integration
Local DevelopmentPods Integration
Note:
1. Starting from version 8.5.6870, TUIKit supports Swift components.
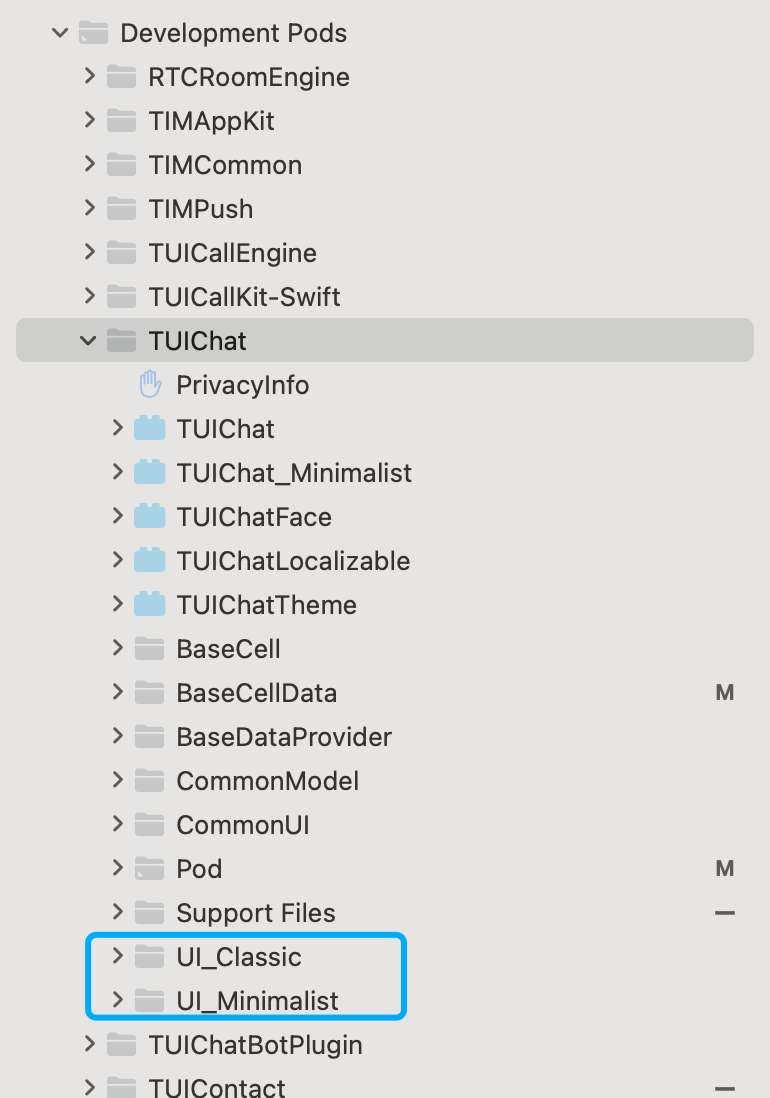
2. If you add only pod 'TUIChat' in your Podfile without specifying Classic or Minimalist UI, both UI component versions will be integrated by default.
3. Classic and Minimalist UI cannot be mixed. When integrating multiple components, select either all Classic UI or all Minimalist UI components. For example, the Classic TUIChat component must be used with Classic TUIConversation and TUIContact components. Similarly, the Minimalist TUIChat component must be used with Minimalist TUIConversation and TUIContact components.
4. If you use Swift, enable use_modular_headers! and use the @import module format for header imports.
Add the required component libraries to your Podfile as needed:
Minimalist UI
Classic UI
Swift
Objective-C
# Uncomment the next line to define a global platform for your project
# ...
source'https://github.com/CocoaPods/Specs.git'
platform :ios, '14.0'
# Prevent `*.xcassets` in TUIKit from conflicting with your project
# Replace `your_project_name` with your actual project name
target 'your_project_name'do
# Comment the next line if you don't want to use dynamic frameworks
# TUIKit components are dependent on static libraries. Therefore, you need to mask the configuration.
# use_frameworks!
# Enable modular headers as needed. Only after you enable modular headers, the Pod module can be imported using @import.
# use_modular_headers!
# Integrate the chat feature
pod 'TUIChat/UI_Minimalist'
# Integrate the conversation list feature
pod 'TUIConversation/UI_Minimalist'
# Integrate the relationship chain feature
pod 'TUIContact/UI_Minimalist'
# Integrate the search feature (To use this feature, you need to purchase the Pro edition 、Pro Plus edition or Enterprise edition)
pod 'TUISearch/UI_Minimalist'
# Integrate the audio/video call feature
pod 'TUICallKit_Swift'
# Integrate Translation Plugin, supported starting from version 7.2 (Value-added feature activation required, please contact Tencent Cloud Business to activate)
pod 'TUITranslationPlugin'
# Integrate Session Tagging Plugin, supported starting from version 7.3
pod 'TUIConversationMarkPlugin'
# Integrate Speech-to-Text Plugin, supported starting from version 7.5
pod 'TUIVoiceToTextPlugin'
# Integrate message push plugin, supported starting from version 7.6
# Replace `your_project_name` with your actual project name
target 'your_project_name'do
# Comment the next line if you don't want to use dynamic frameworks
# TUIKit components are dependent on static libraries. Therefore, you need to mask the configuration.
# use_frameworks!
# Enable modular headers as needed. Only after you enable modular headers, the Pod module can be imported using @import.
# use_modular_headers!
# Integrate the chat feature
pod 'TUIChat/UI_Classic'
# Integrate the conversation list feature
pod 'TUIConversation/UI_Classic'
# Integrate the relationship chain feature
pod 'TUIContact/UI_Classic'
# Integrate the search feature (To use this feature, you need to purchase the Pro edition 、Pro Plus edition or Enterprise edition)
pod 'TUISearch/UI_Classic'
# Integrate the audio/video call feature
pod 'TUICallKit_Swift'
# Integrate Voting Plugin, supported starting from version 7.1
pod 'TUIPollPlugin'
# Integrate Group Chain Plugin, supported starting from version 7.1
pod 'TUIGroupNotePlugin'
# Integrate Translation Plugin, supported starting from version 7.2 (Value-added feature activation required, please contact Tencent Cloud Business to activate)
pod 'TUITranslationPlugin'
# Integrate Session Grouping Plugin, supported starting from version 7.3
pod 'TUIConversationGroupPlugin'
# Integrate Session Tagging Plugin, supported starting from version 7.3
pod 'TUIConversationMarkPlugin'
# Integrate Speech-to-Text Plugin, supported starting from version 7.5
pod 'TUIVoiceToTextPlugin'
# Integrate Customer Service Plugin, supported starting from version 7.6
pod 'TUICustomerServicePlugin'
# Integrate message push plugin, supported starting from version 7.6
After updating your Podfile, run the following command to install the TUIKit components:
pod install
Note:
1. If you cannot install the latest version of TUIKit, run pod repo update to update your local CocoaPods repository, then run pod update to update the component library version.
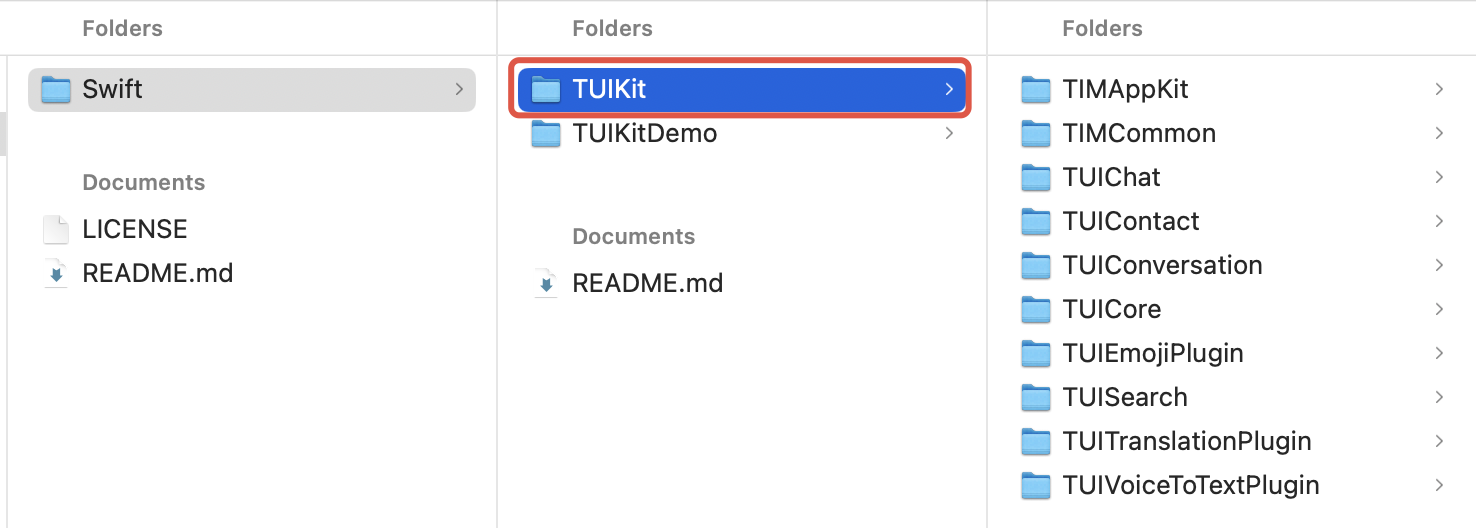
2. Specify the local path for each component in your Podfile. The :path parameter value depends on the TUIKit folder’s location relative to the Podfile:
Common path configurations:
TUIKit is in the parent directory of the Podfile: pod 'TUICore', :path => "../TUIKit/TUICore"
TUIKit is in the current directory of the Podfile: pod 'TUICore', :path => "./TUIKit/TUICore"
TUIKit is in a subdirectory of the Podfile: pod 'TUICore', :path => "TUIKit/TUICore"
The following Podfile path configuration assumes the TUIKit folder is in the parent directory of the Podfile:
DevelopmentPodfile
Swift
Objective-C
# Uncomment the next line to define a global platform for your project
Now you have successfully integrated TUIKit into your project. To continue building basic interfaces such as chat and conversation, see Build Chat Interface and Build Conversation List.
FAQs
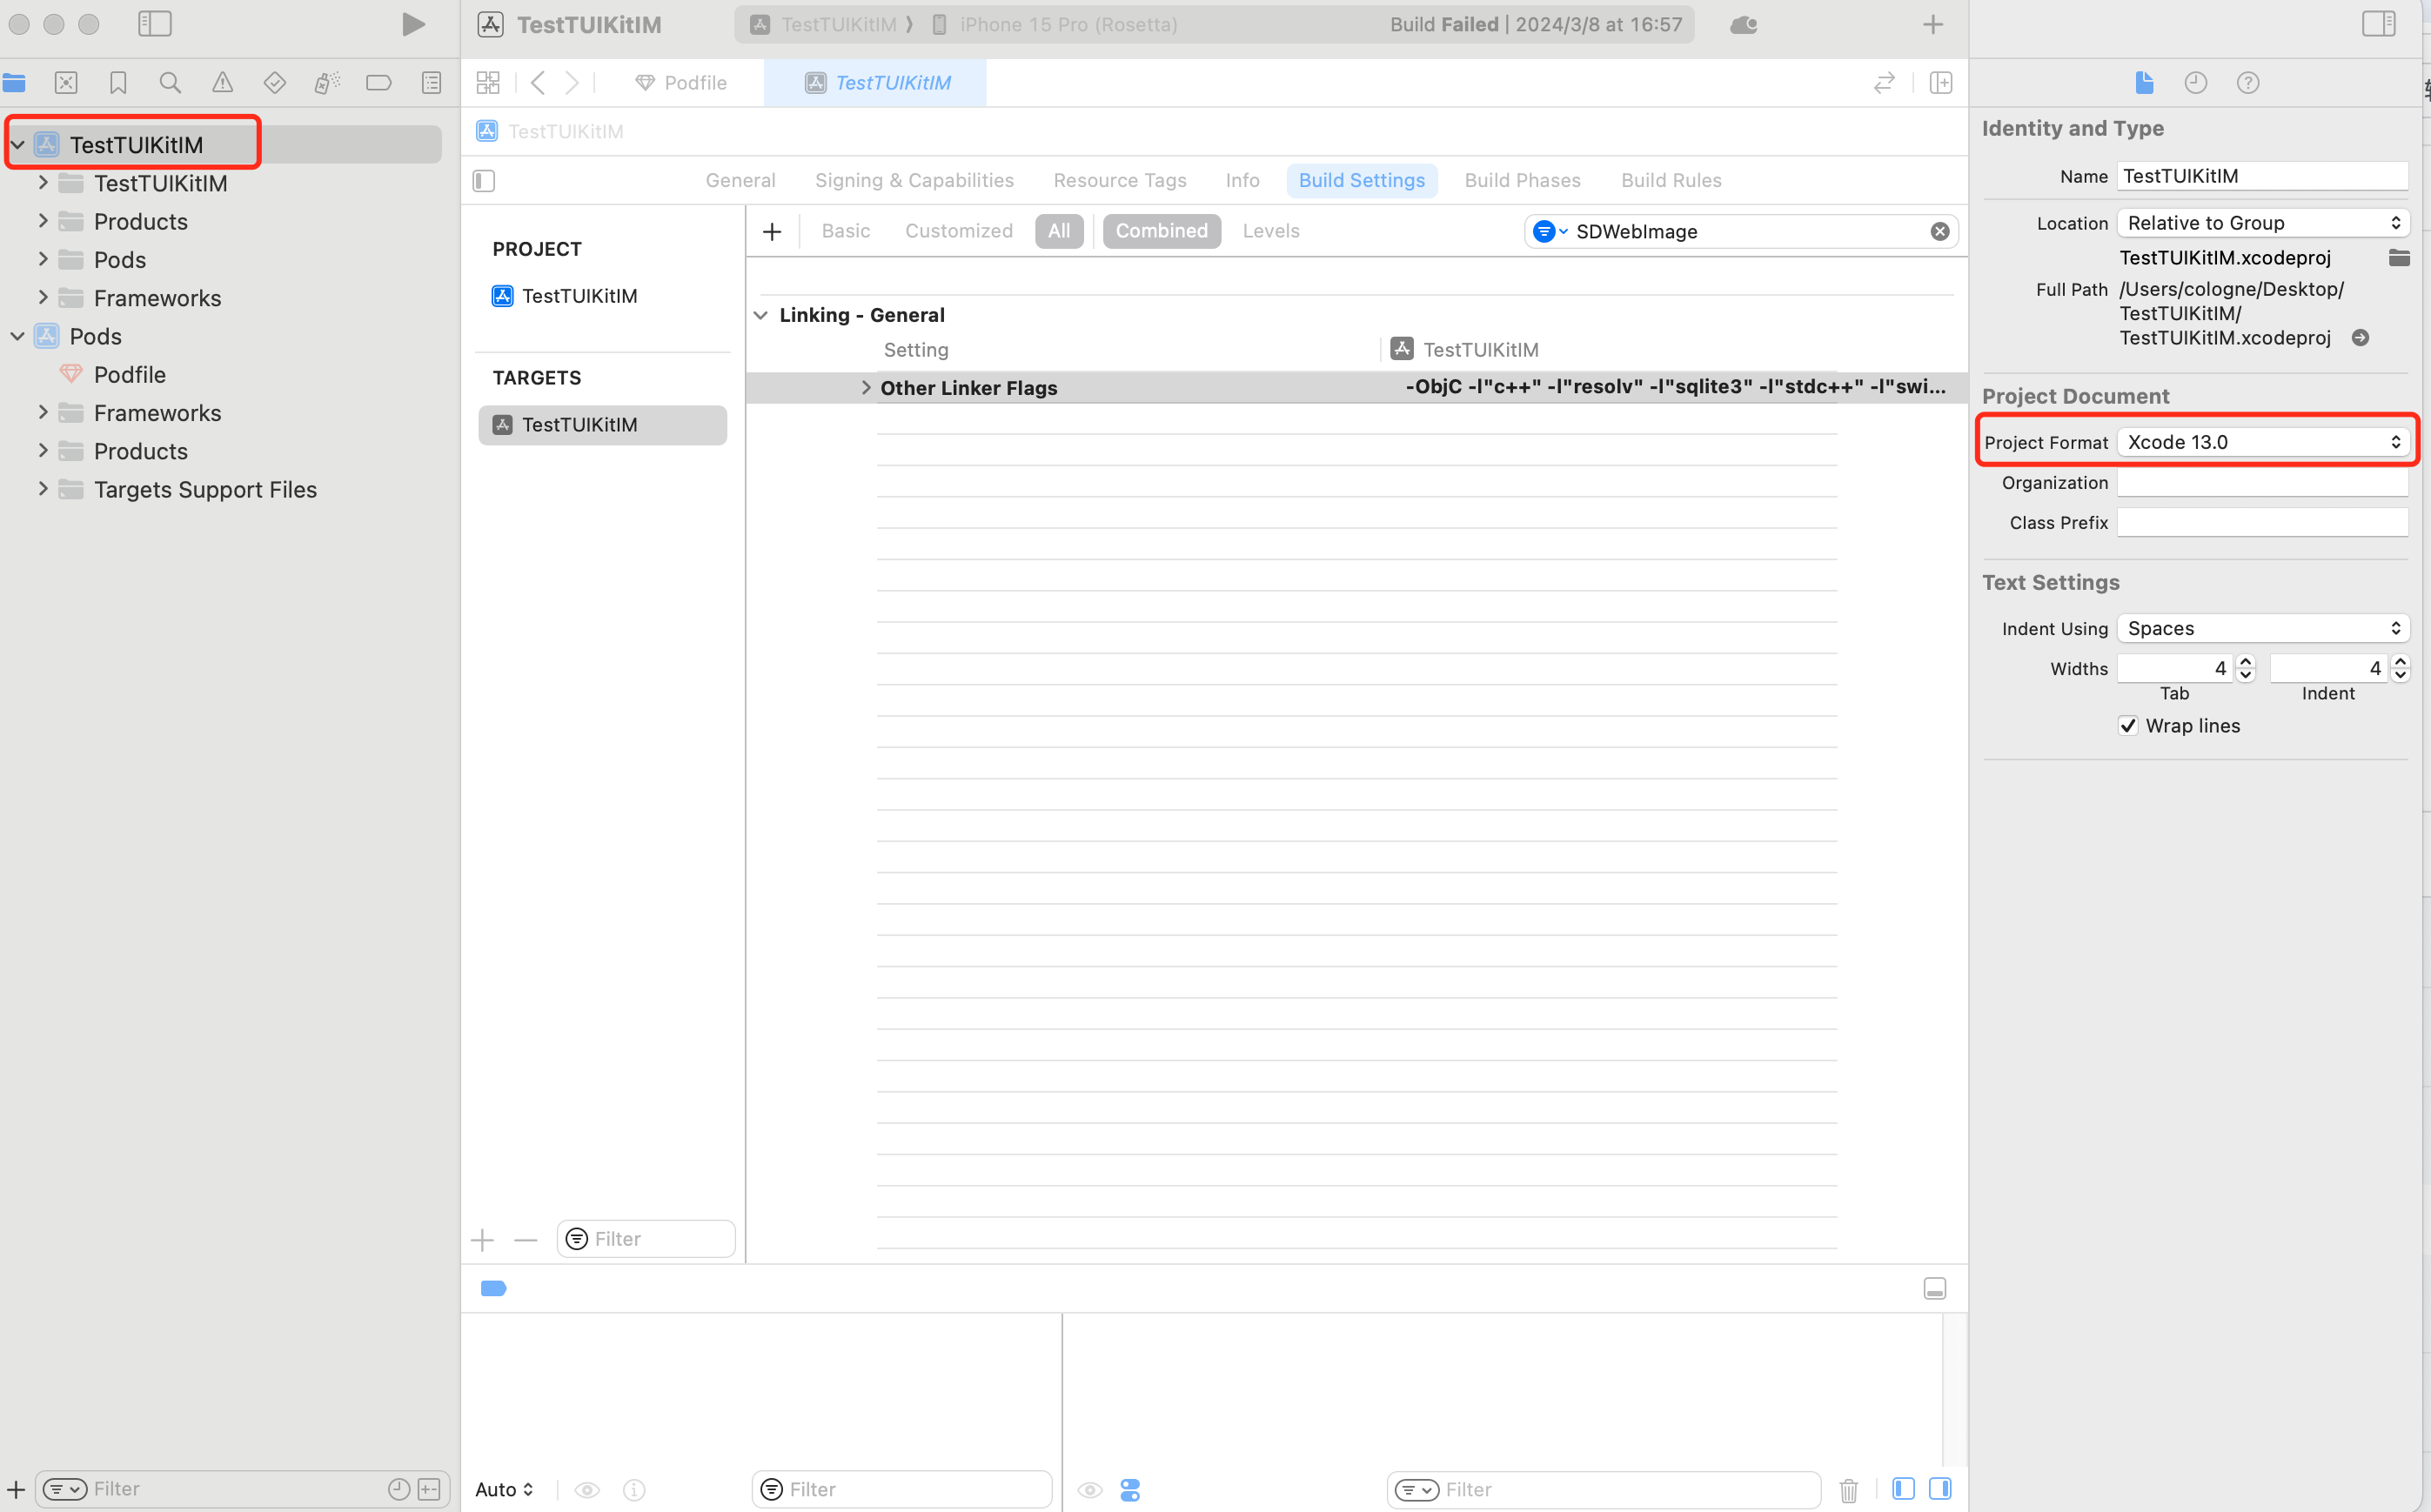
Xcode
Integration Error: [Xcodeproj] Unknown object version (60). (RuntimeError)
When creating a new project with Xcode 15 and integrating TUIKit, this error may occur after running pod install. It is caused by an outdated version of CocoaPods. There are two solutions:
Solution 1: Change your Xcode project’s Project Format version to Xcode 13.0.
Solution 2: Upgrade your local version of CocoaPods. (Upgrade steps not detailed here.)
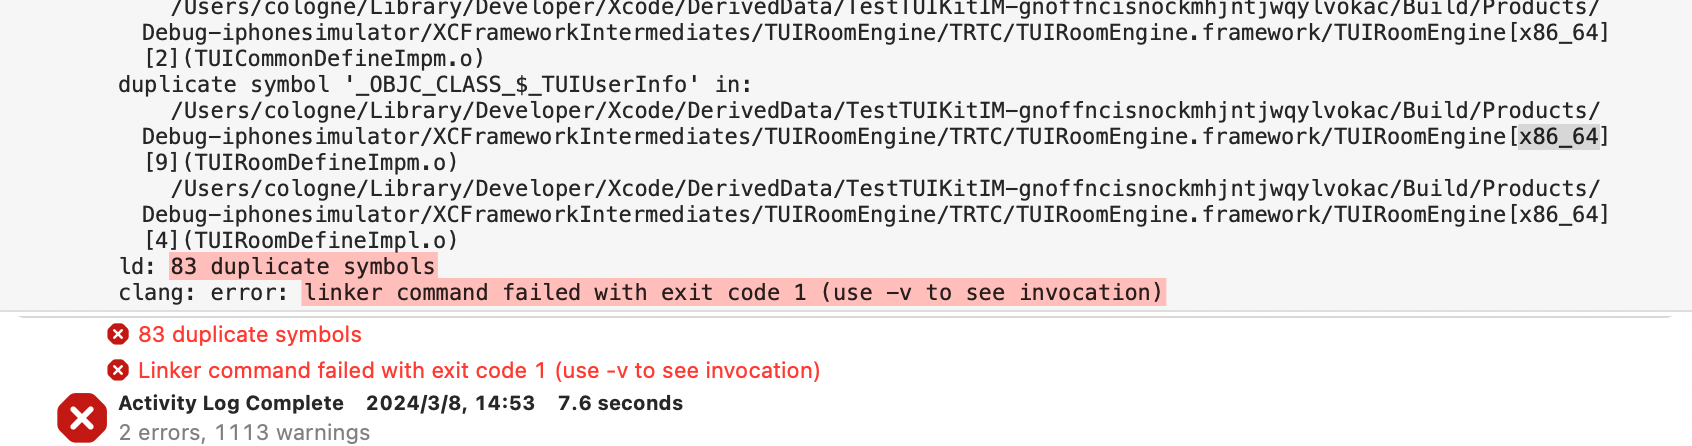
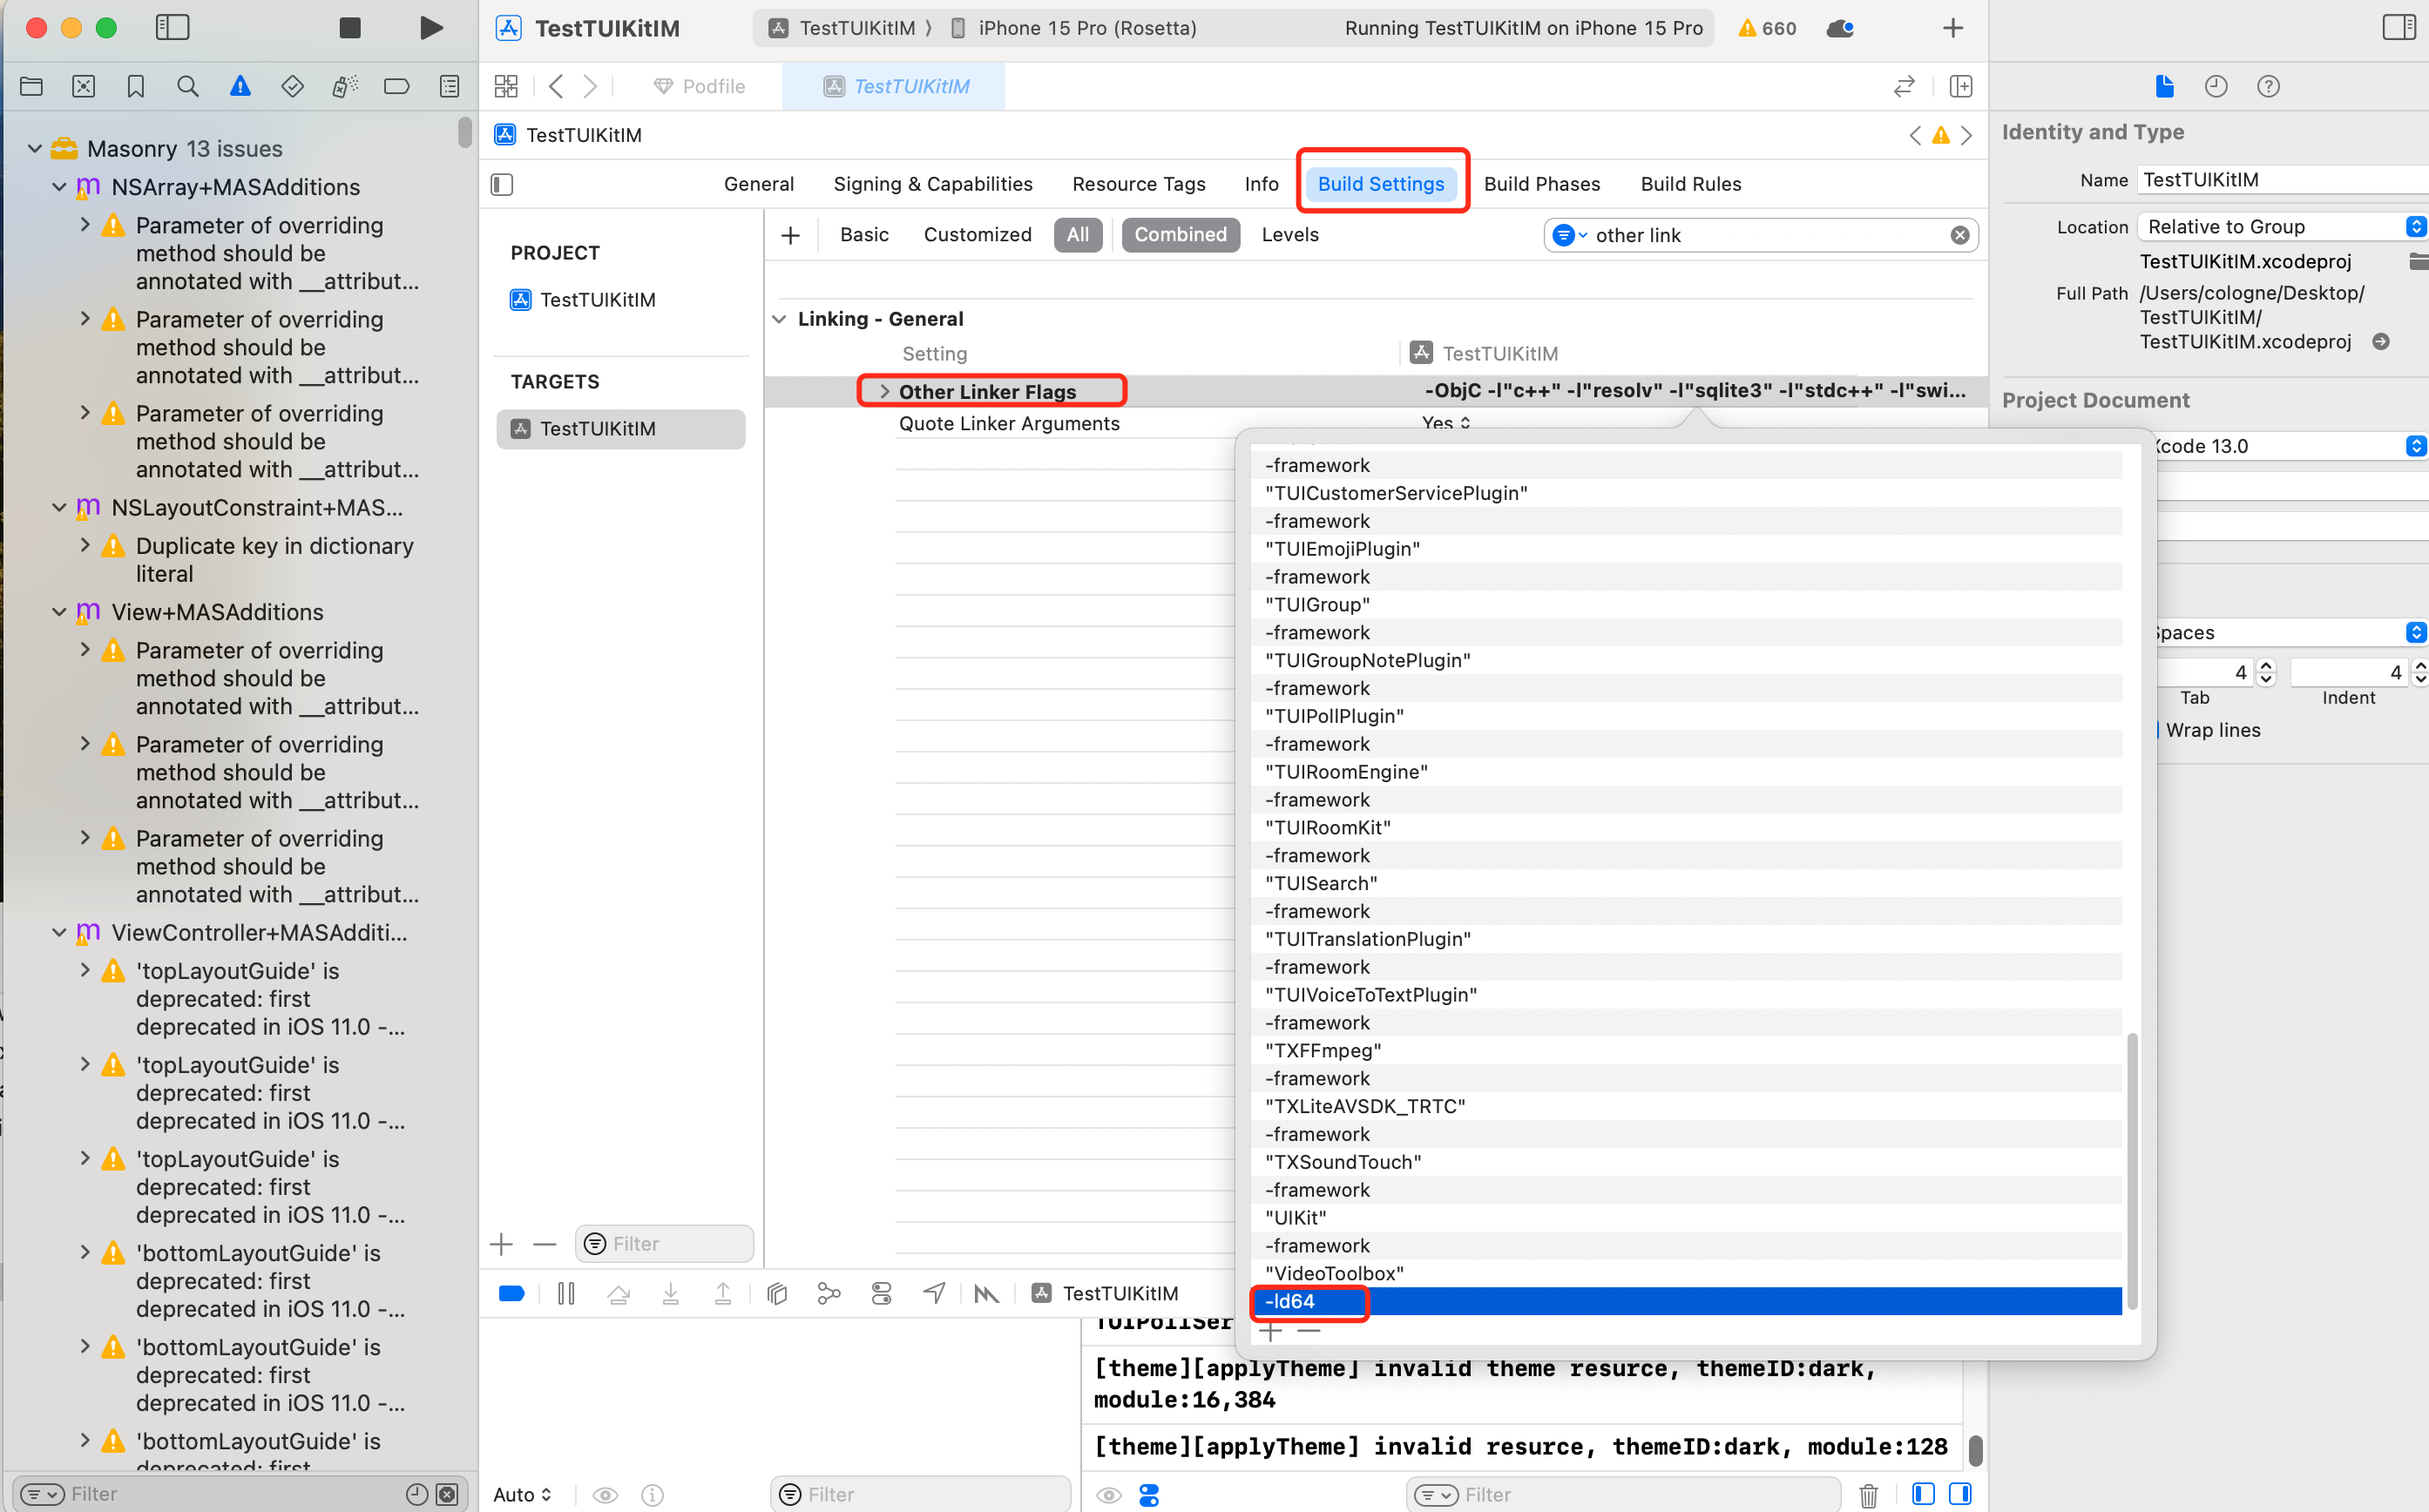
Assertion failed: (false && "compact unwind compressed function offset doesn't fit in 24 bits"), function operator(), file Layout.cpp.
Alternatively, when integrating TUIRoom with Xcode 15, you may encounter symbol conflicts in TUIRoomEngine caused by the latest linker. Both issues have the same root cause.
Solution: Update the linker configuration. Add -ld64 to Other Linker Flags in Build Settings.
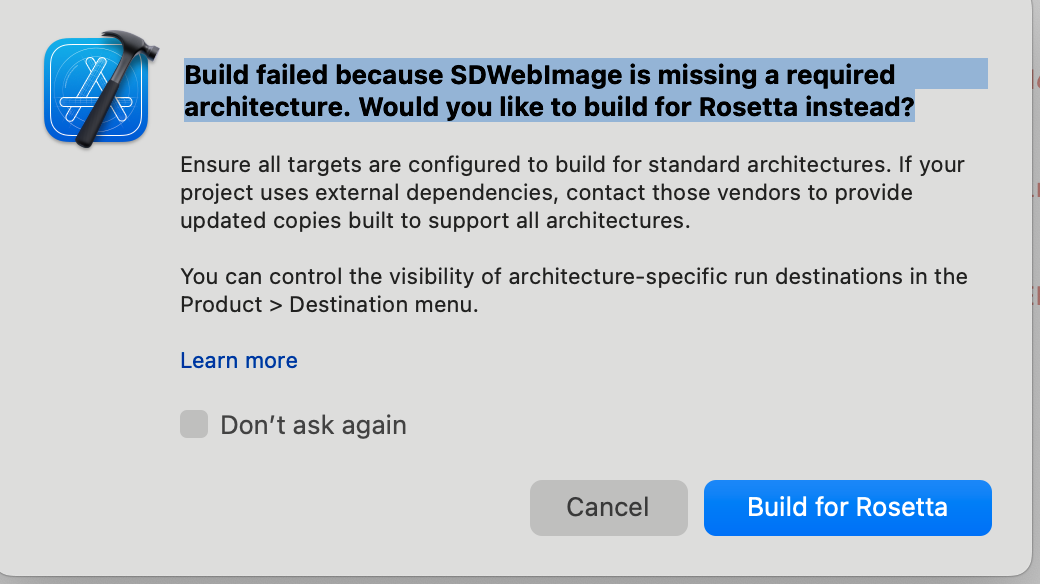
On Apple Silicon chips (M1/M2 series), you may see a popup due to some third-party libraries (such as SDWebImage) not supporting XCFramework. Apple provides a workaround: enable Rosetta on the simulator. The Rosetta option usually appears automatically during compilation.
When creating a new project with Xcode 15, enabling this option may cause build and run failures. We recommend disabling this option.
Xcode 16 Does Not Support Framework Bitcode
Solution 1: Upgrade SDK
If you are using an older SDK version that includes Bitcode (such as TXIMSDK_iOS), upgrade to TXIMSDK_Plus_iOS_XCFramework as described in this documentation.
Solution 2: Modify Podfile Configuration
Add the following configuration to the end of your Podfile and run pod install again.
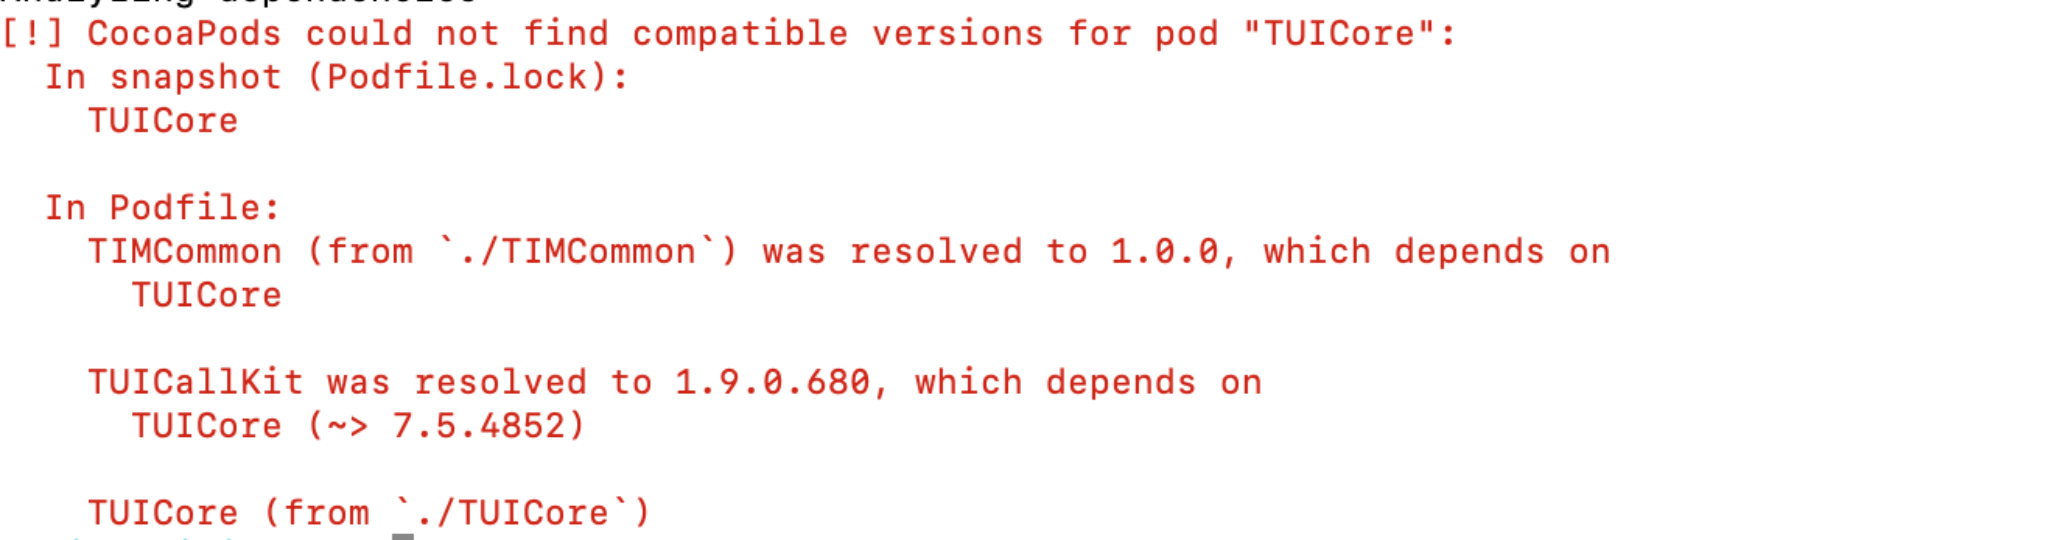
Pod Dependency Version Mismatch When Using Remote Integration
If you encounter a version mismatch between Podfile.lock and the plugin's TUICore dependency when using remote CocoaPods integration:
Delete the Podfile.lock file, run pod repo update to update the local code repository, and then run pod update.
Pod Dependency Version Mismatch When Using Local Integration
When integrating TUI components (such as TUIChat, TUIConversation, TIMCommon, etc.) using local Development Pods, and integrating TUICallKit via remote CocoaPods, you may encounter dependency conflicts caused by inconsistent version numbers. This issue is specifically manifested as follows:
Locally integrated TUI components and their dependency TUICore use a default version number of 1.0.0.
Remotely integrated TUICallKit and its dependency TUICore use a specific remote version (for example, 7.5.4852).
This results in a version conflict for TUICore.
Solution:
To resolve this issue, align the version numbers of your local TUI components and TUICore with the version used by the remote TUICallKit. Follow these steps:
1.1 In Podfile_local, update the version numbers of the relevant local components to match the remote version.
1.2 In the TUICore.podspec file, set the version number to the same remote version (for example, 7.5.4852).By ensuring all components use a consistent version, you can avoid dependency conflicts during integration.
Which third-party libraries does TUIKit depend on? What should I do if there are version conflicts?
TUIKit manages dependencies automatically via CocoaPods, so manual intervention is typically unnecessary. If you encounter version conflicts, ensure your third-party library versions meet the following minimum requirements:
Swift Components
Objective-C Components
- MJExtension (3.4.1)
- MJRefresh (3.7.5)
- SnapKit (5.7.1)
- SSZipArchive (2.4.3)
- SDWebImage (5.18.11)
- Masonry (1.1.0)
- MJExtension (3.4.1)
- MJRefresh (3.7.5)
- ReactiveObjC (3.1.1)
- SDWebImage (5.18.11):
- SDWebImage/Core (= 5.18.11)
- SDWebImage/Core (5.18.11)
- SnapKit (5.6.0)
- SSZipArchive (2.4.3)
App Store Submission
Packaging Fails When Submitting to App Store, Error: Unsupported Architectures
The following error may occur during packaging: ImSDK_Plus.framework contains the x86_64 simulator version, which is not supported by the App Store. This is because the SDK includes the simulator version by default for developer debugging.
Solution:
To remove the simulator version during packaging:
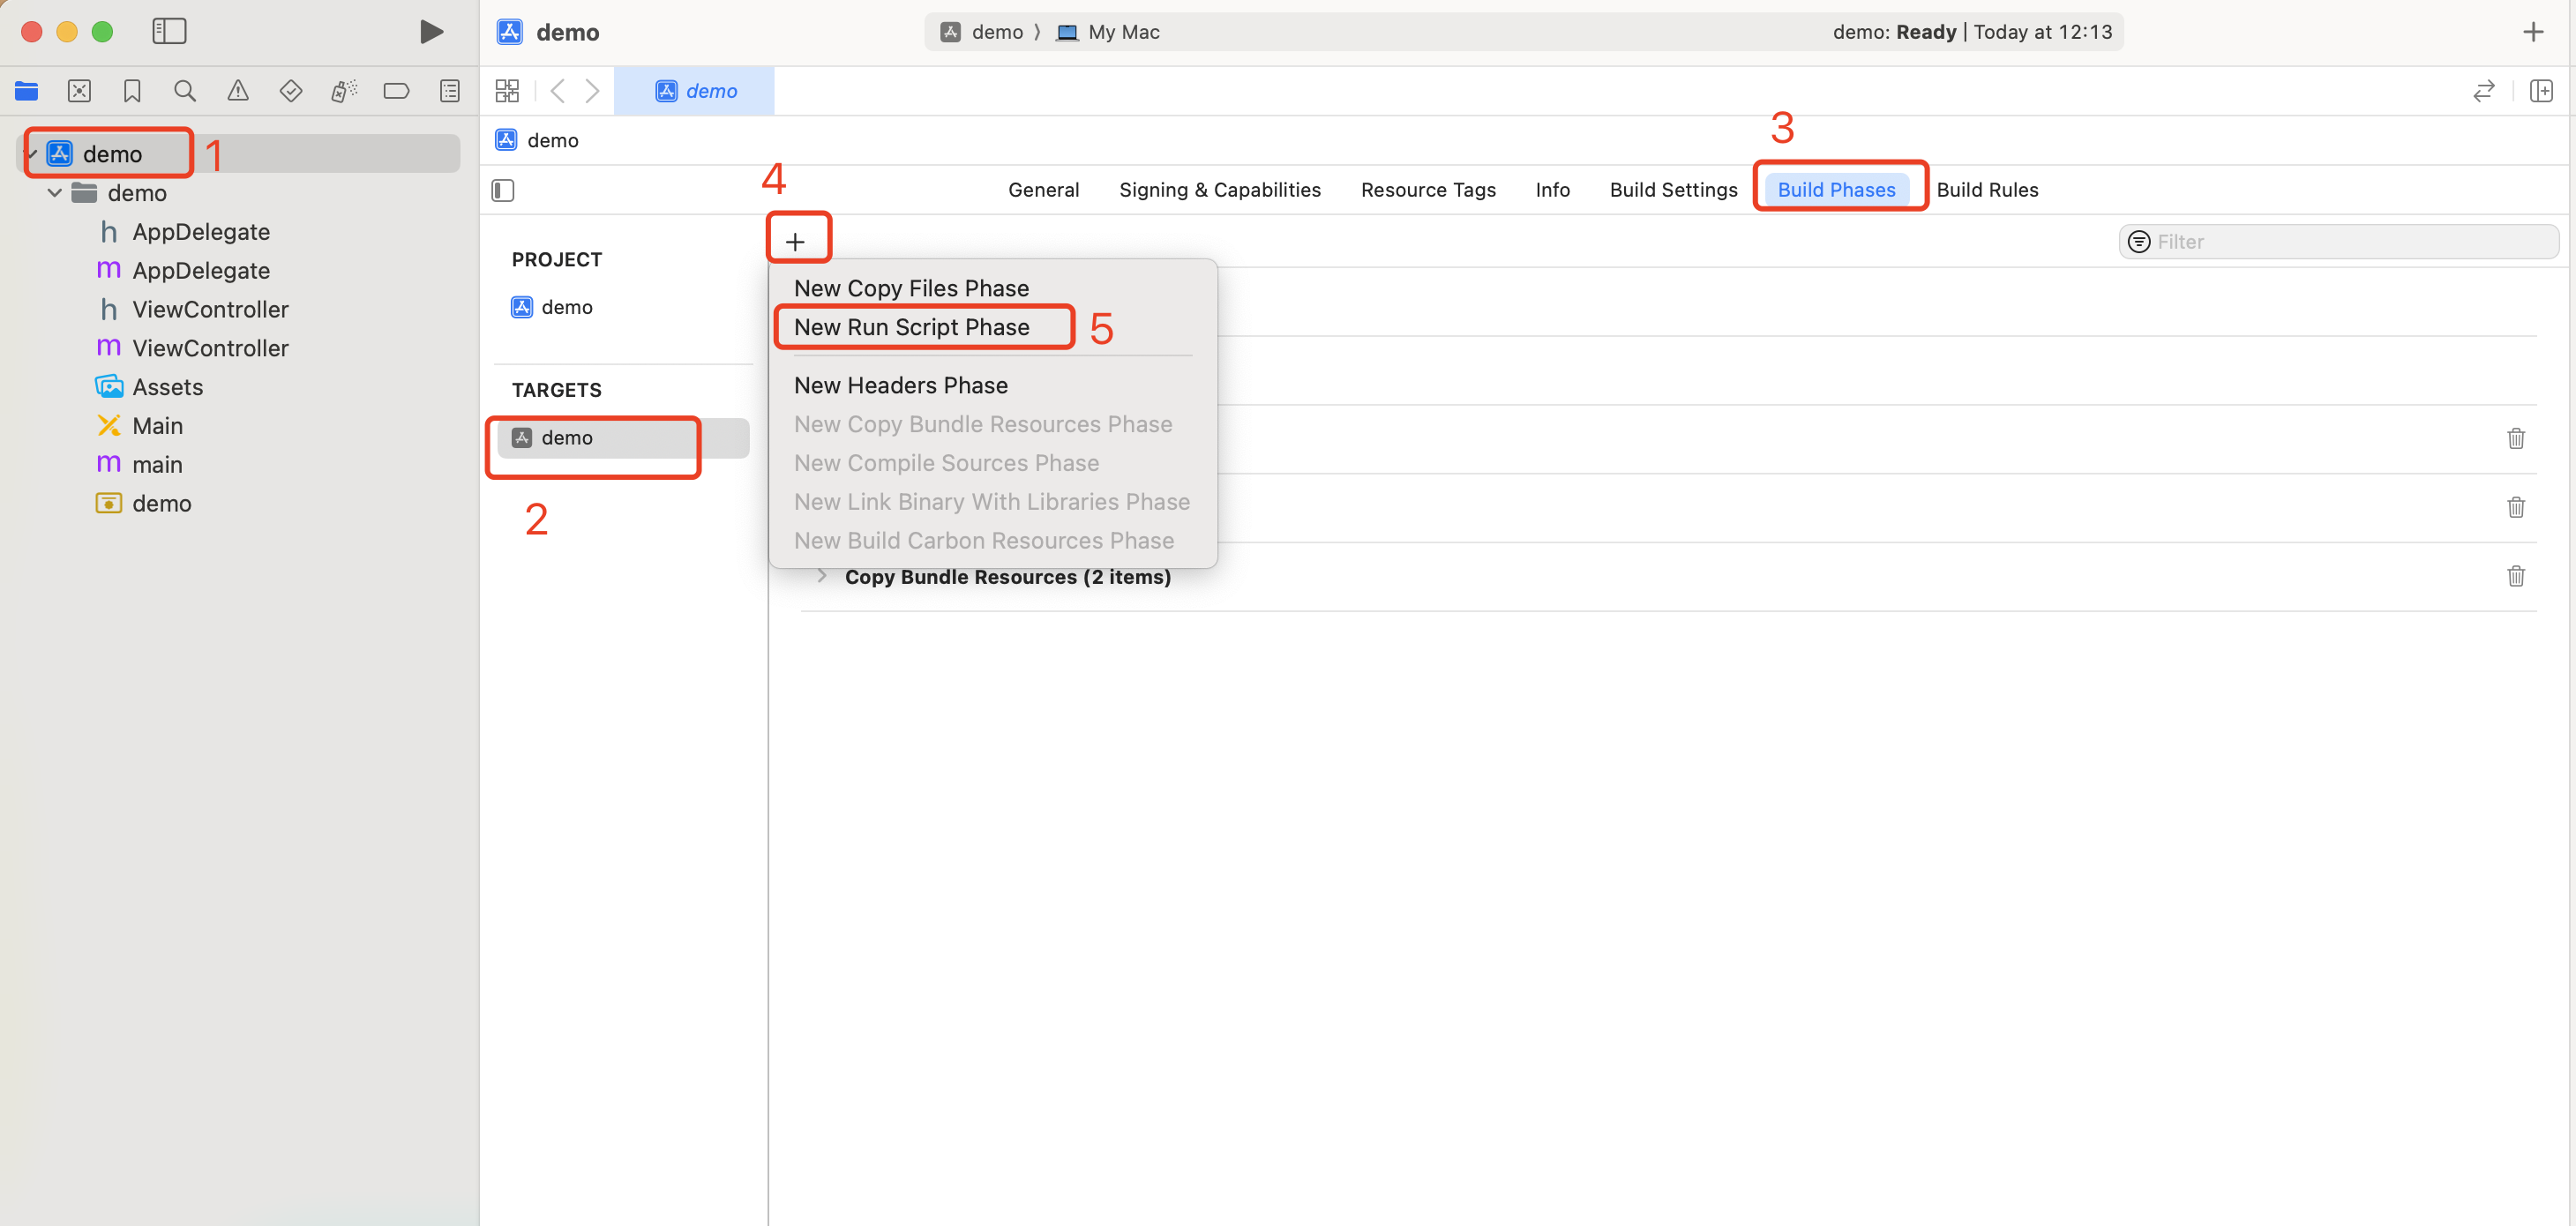
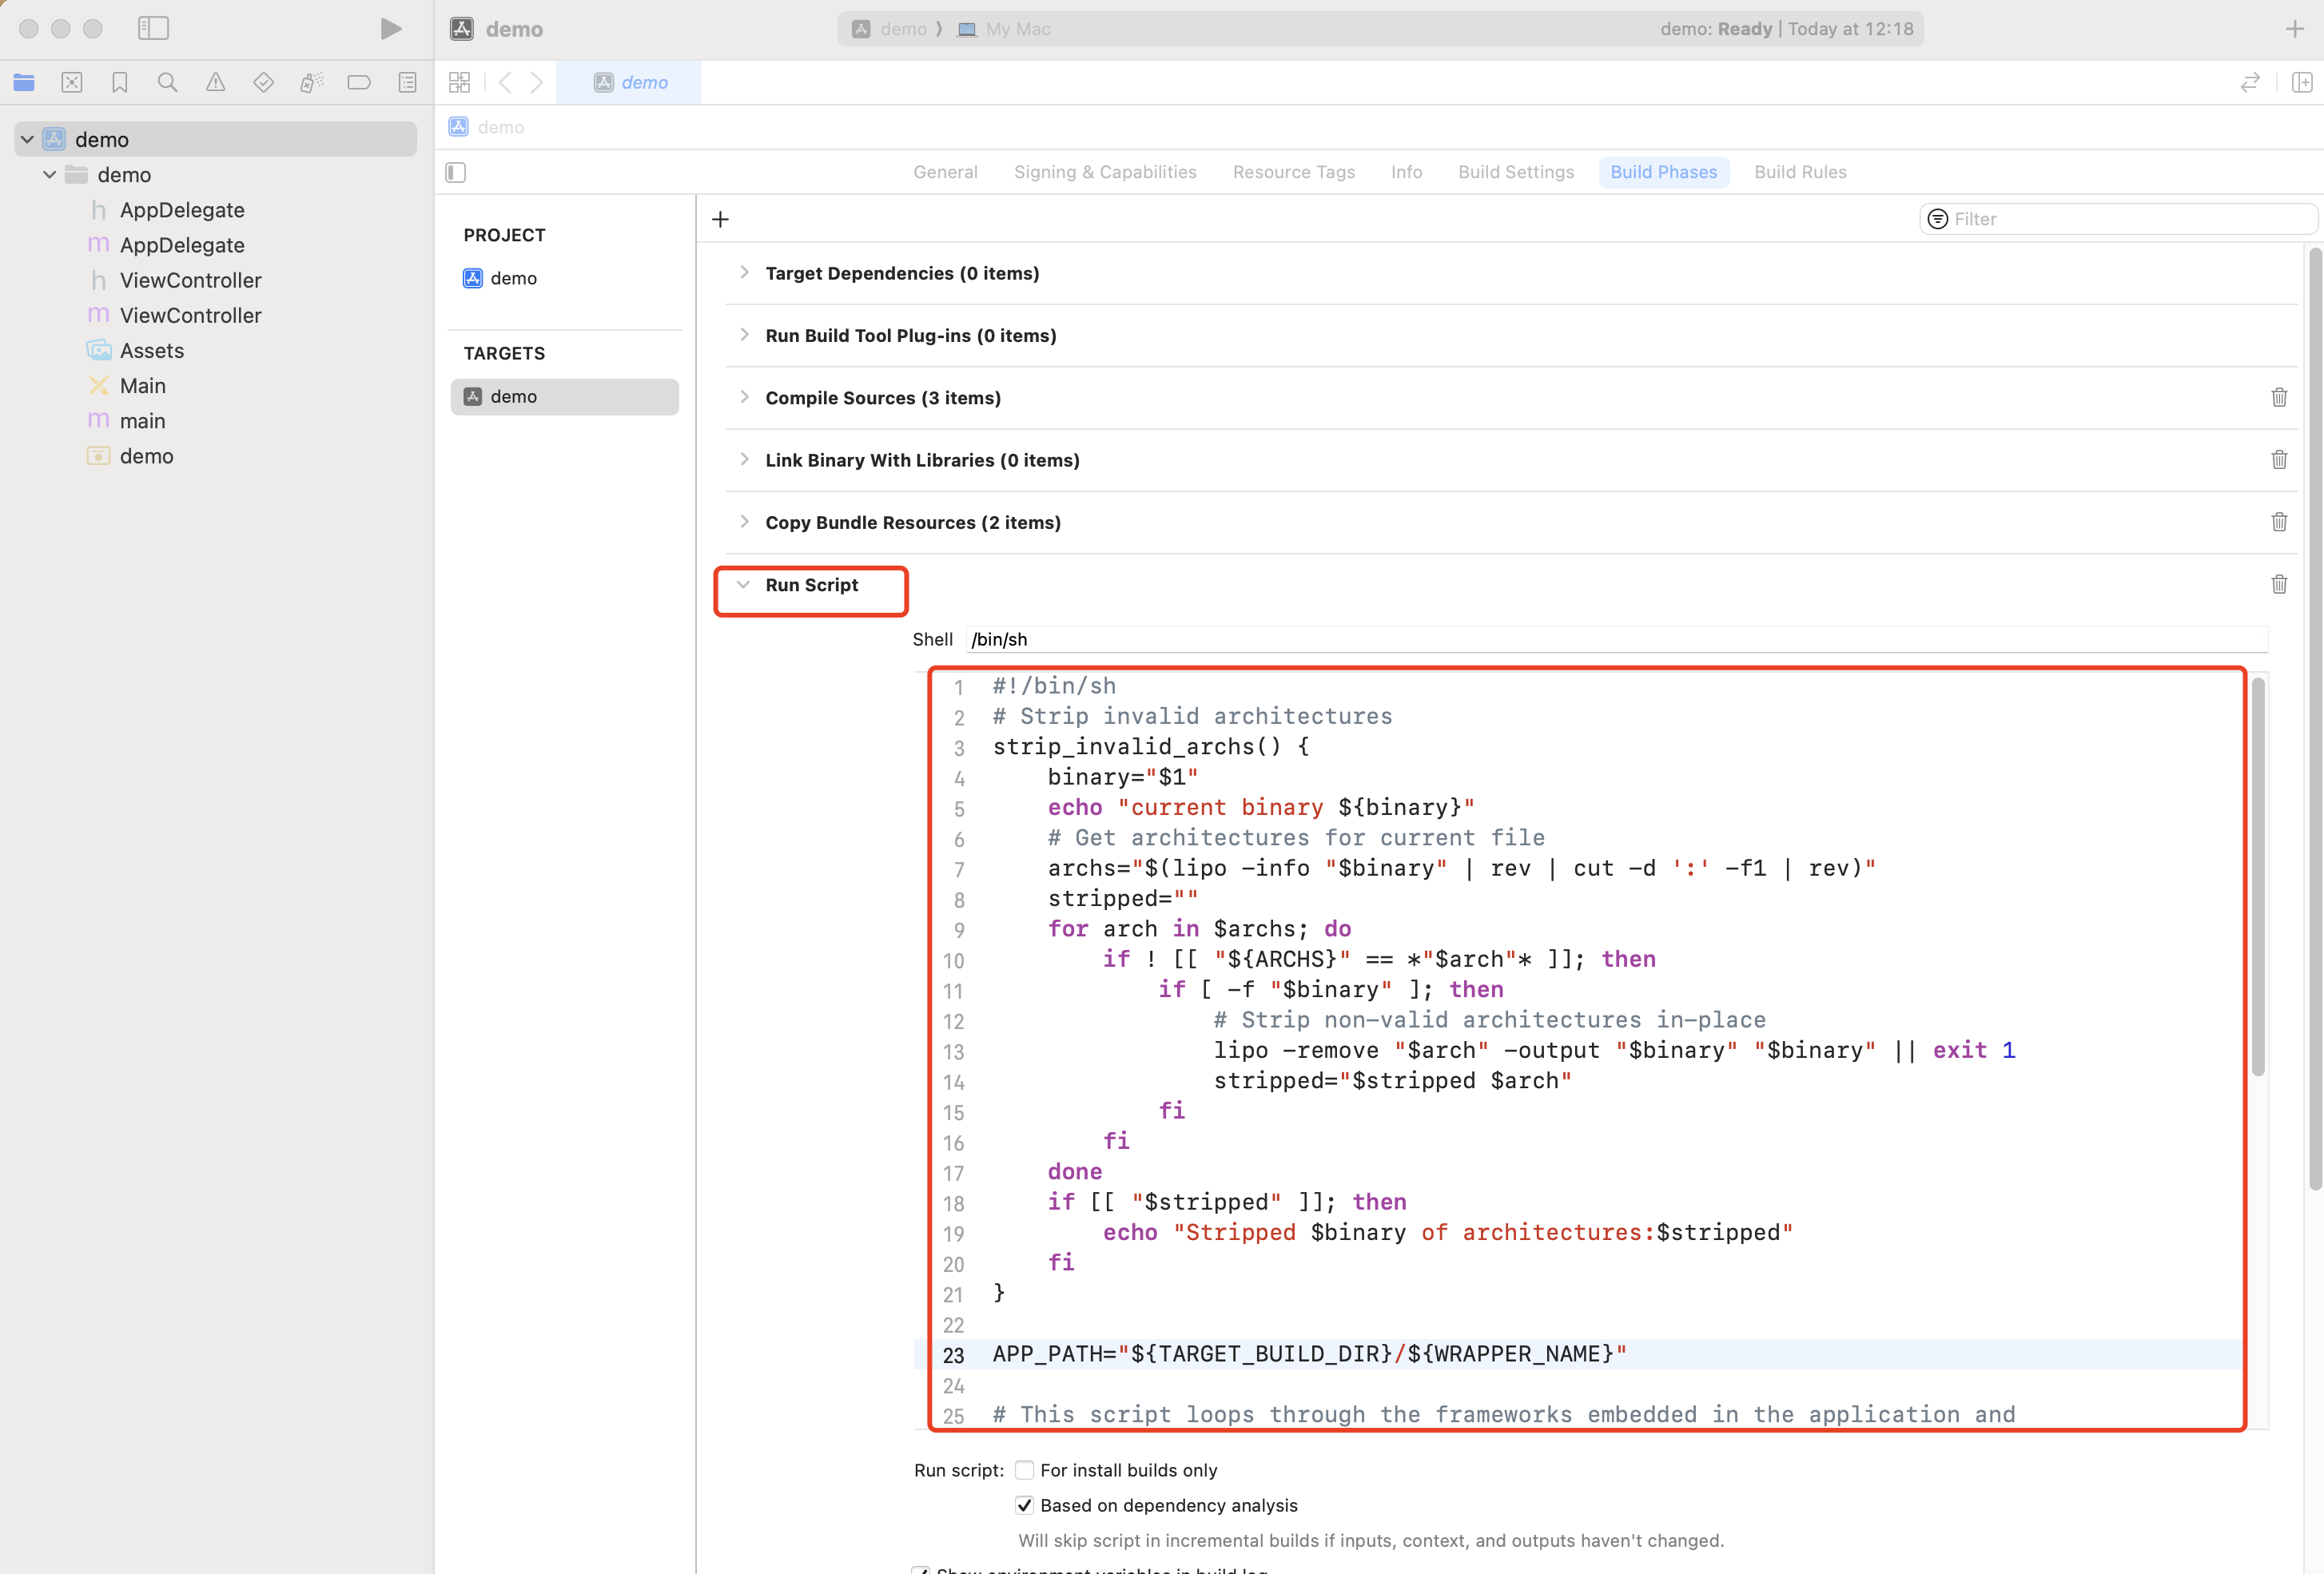
1.1 Select your project's Target, go to the Build Phases tab, and add a Run Script in the current panel.
1.2 In the new Run Script, add the following script:
TUICallKit Conflicts with Your Own Integrated Audio/Video Library?
Tencent Cloud audio/video libraries cannot be integrated together, as symbol conflicts may occur. Handle this according to your scenario:
1.1 If you use the TXLiteAVSDK_TRTC library, no symbol conflicts will occur. Add the dependency in your Podfile:
pod 'TUICallKit_Swift'
1.2 If you use the TXLiteAVSDK_Professional library, symbol conflicts will occur. Add the dependency in your Podfile:
pod 'TUICallKit_Swift/Professional'
1.3 If you use the TXLiteAVSDK_Enterprise library, symbol conflicts will occur. We recommend upgrading to TXLiteAVSDK_Professional and then using TUICallKit_Swift/Professional.
What is the default timeout for call invitations?
The default timeout for call invitations is 30 seconds.
If the invitee goes offline and comes back online within the invitation timeout, can they receive the invitation immediately?
1.1 For one-on-one call invitations, if the invitee goes offline and comes back online, they will receive the call invitation. TUIKit will automatically display the call invitation interface.
1.2 For group call invitations, if the invitee goes offline and comes back online, TUIKit will automatically retrieve invitations from the last 30 seconds and display the group call interface.
Others
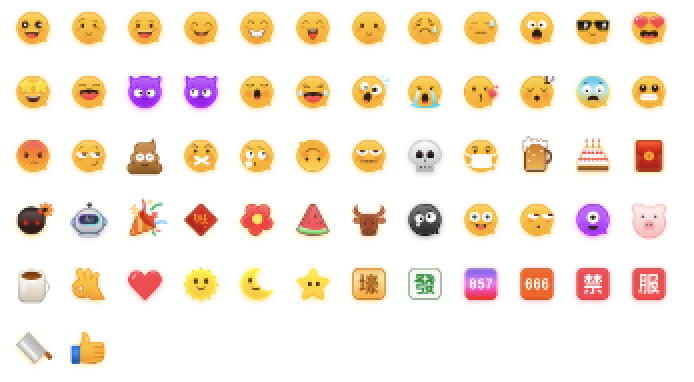
Using Emoji Packs
To respect the copyright of emoji designs, the Chat Demo/TUIKit project does not include cutouts of large emoji elements. Please replace them with your own designs or other emoji packs for which you hold the copyright before officially launching for commercial use. The default smiley face emoji pack shown below is copyrighted by Tencent RTC, you can upgrade to Chat Pro Plus Edition and Enterprise Edition to use it for free.
Contact Us
If you have any questions or suggestions, feel free to join our Telegram or WhatsApp community, or contact us for support.