Avatars are a capability of the Tencent Effect SDK. To use it, you need to integrate the SDK first and then add the avatar materials. For how to integrate the SDK, see Integrating Tencent Effect SDK.
Step 1. Copy the Avatar Materials
1. Integrate the Tencent Effect SDK.
2. Download the demo project from our website and decompress it.
3. Copy BeautyDemo/bundle/avatarMotionRes.bundle in the demo to your project.
Step 2. Integrate the Demo UI
Directions
1. Do the following to use the same avatar UI in your project as that in the demo:
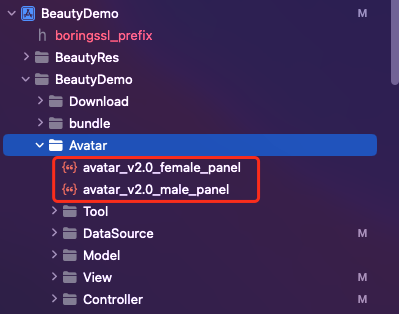
2. Copy all the classes in the BeautyDemo/Avatar folder of the demo to your project and add the following code:
The data of the operation panel is obtained by parsing a
JSON file
. You can find this file in the BeautyDemo/Avatar/ directory of the demo.
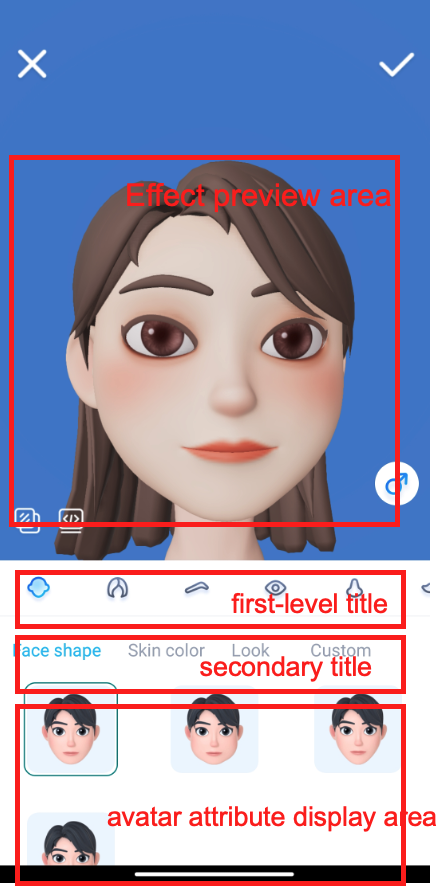
Mappings between the JSON structures and panel elements
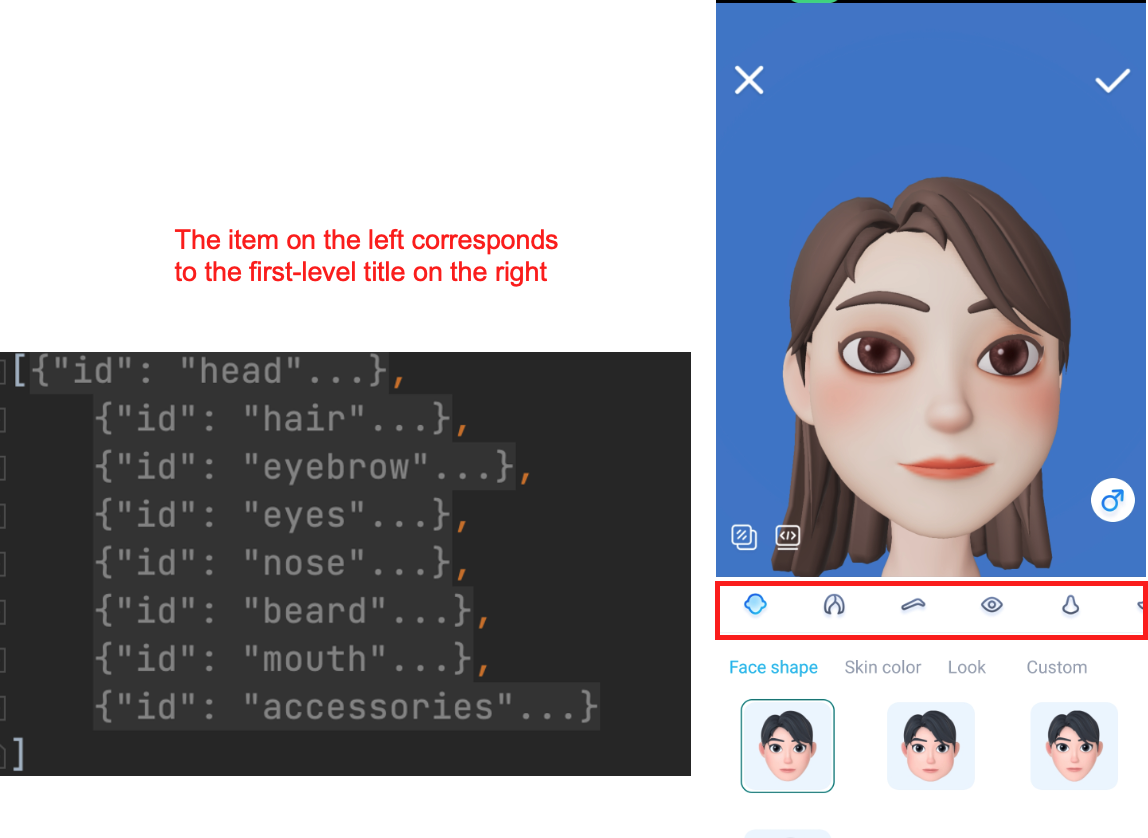
head corresponds to the first icon of the top-level menu:
subTabs corresponds to the second-level menu:
items corresponds to the third-level menu:
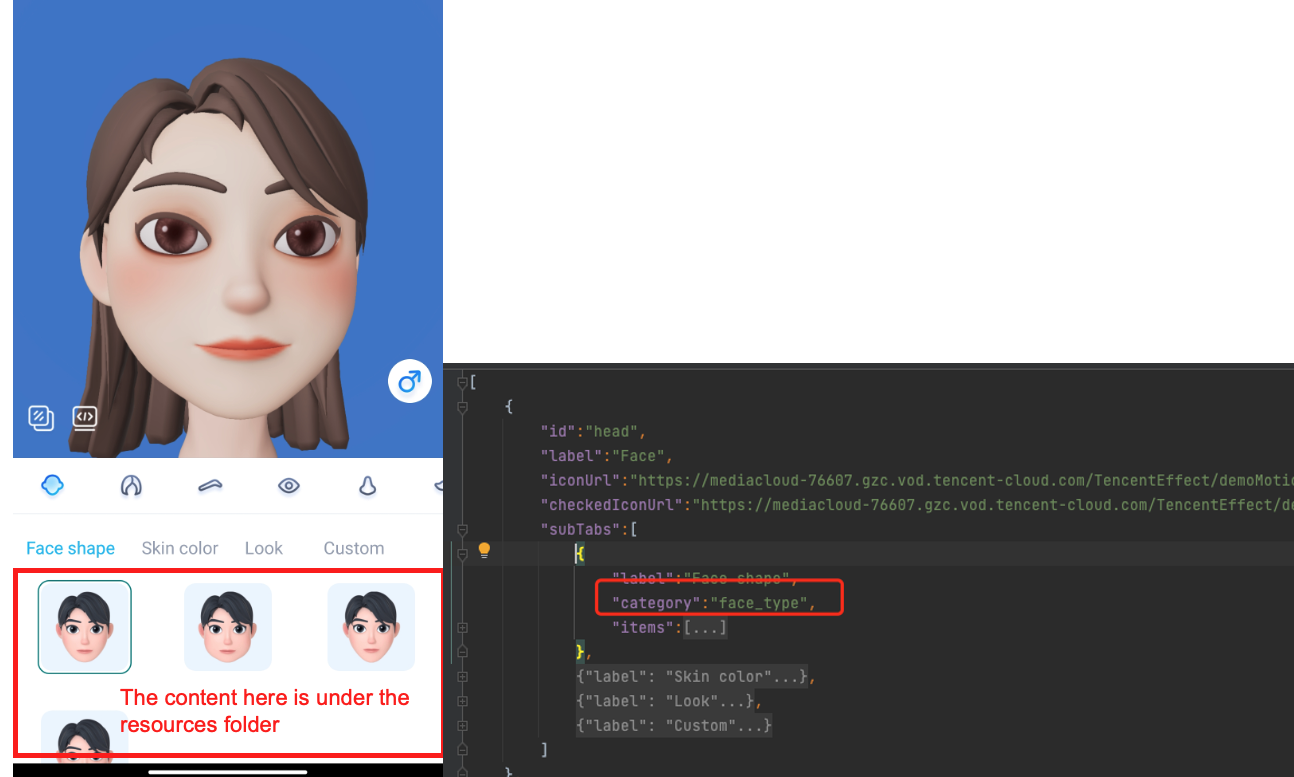
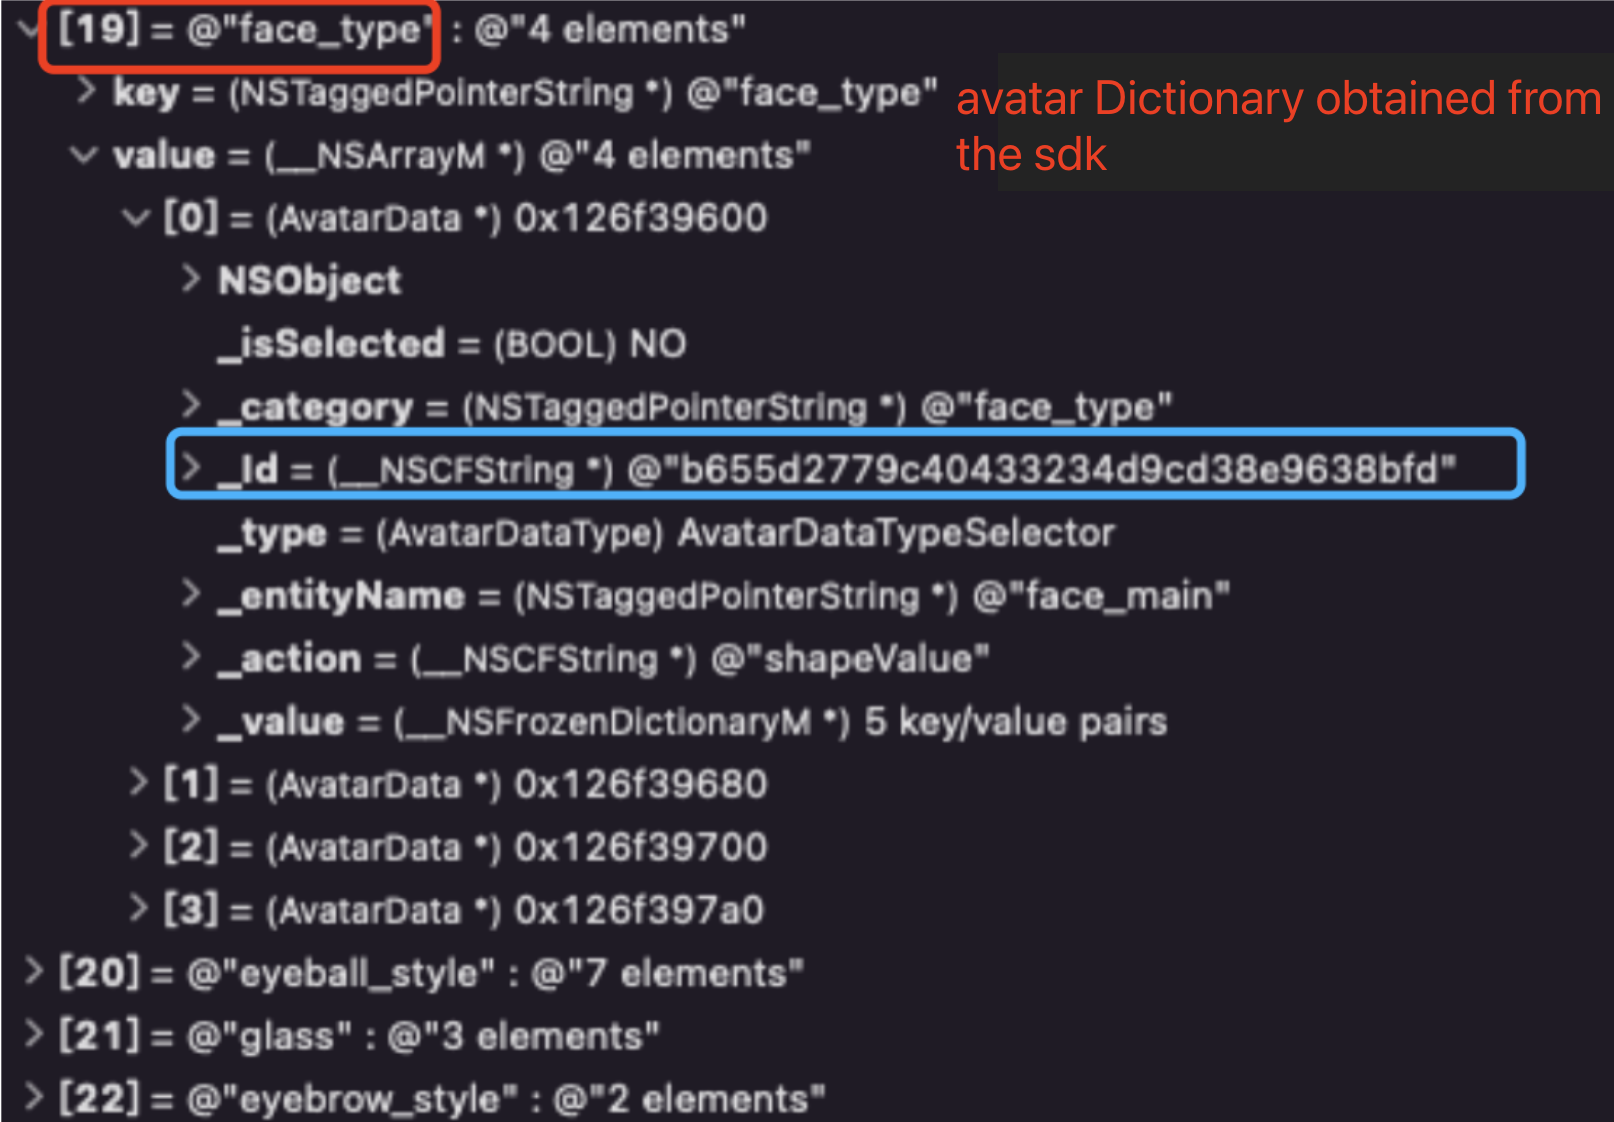
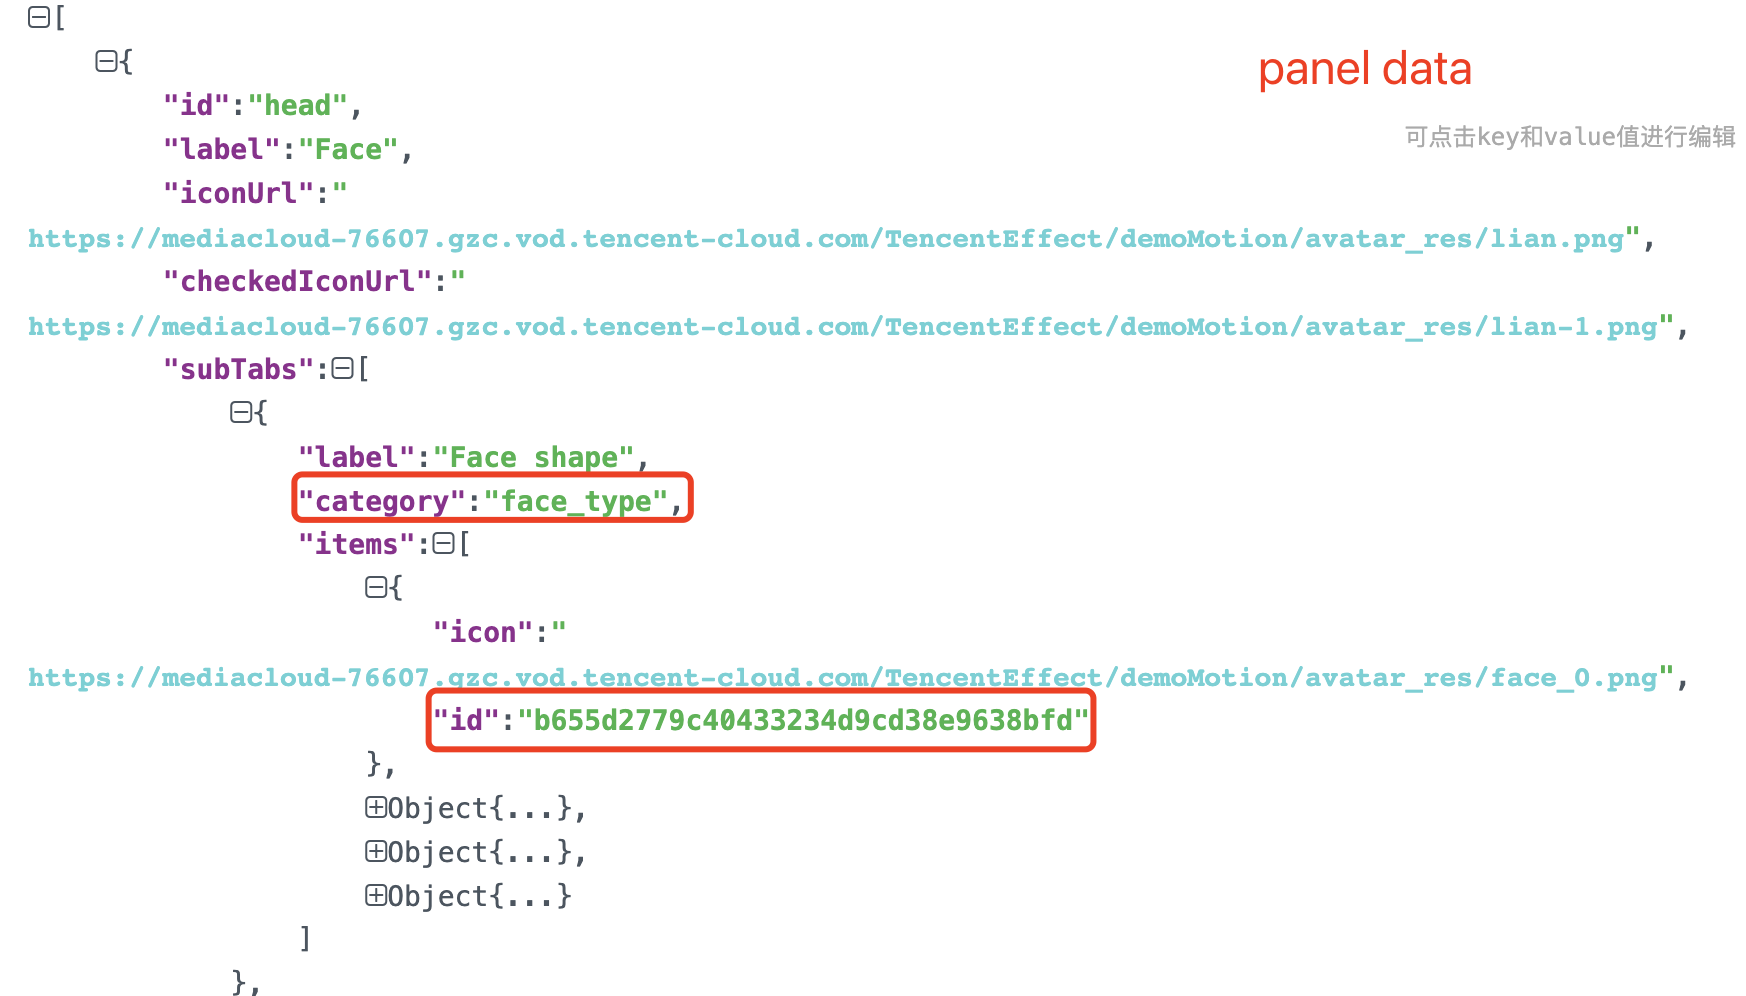
Using the panel data to determine the avatar object data passed in to the SDK API
The first screenshot below is the avatar dictionary obtained by the SDK (key indicates the category and value is an avatar data array). The second screenshot is the panel data. When the user taps an icon on the panel, get the category from the second-level heading (red box), and in the avatar dictionary returned by the SDK, get the avatar data array of the category. Get the ID from the third-level heading (blue box), and then find the avatar object in the avatar data array of the category. Pass the object to the updateAvatar API of the SDK to edit the avatar.
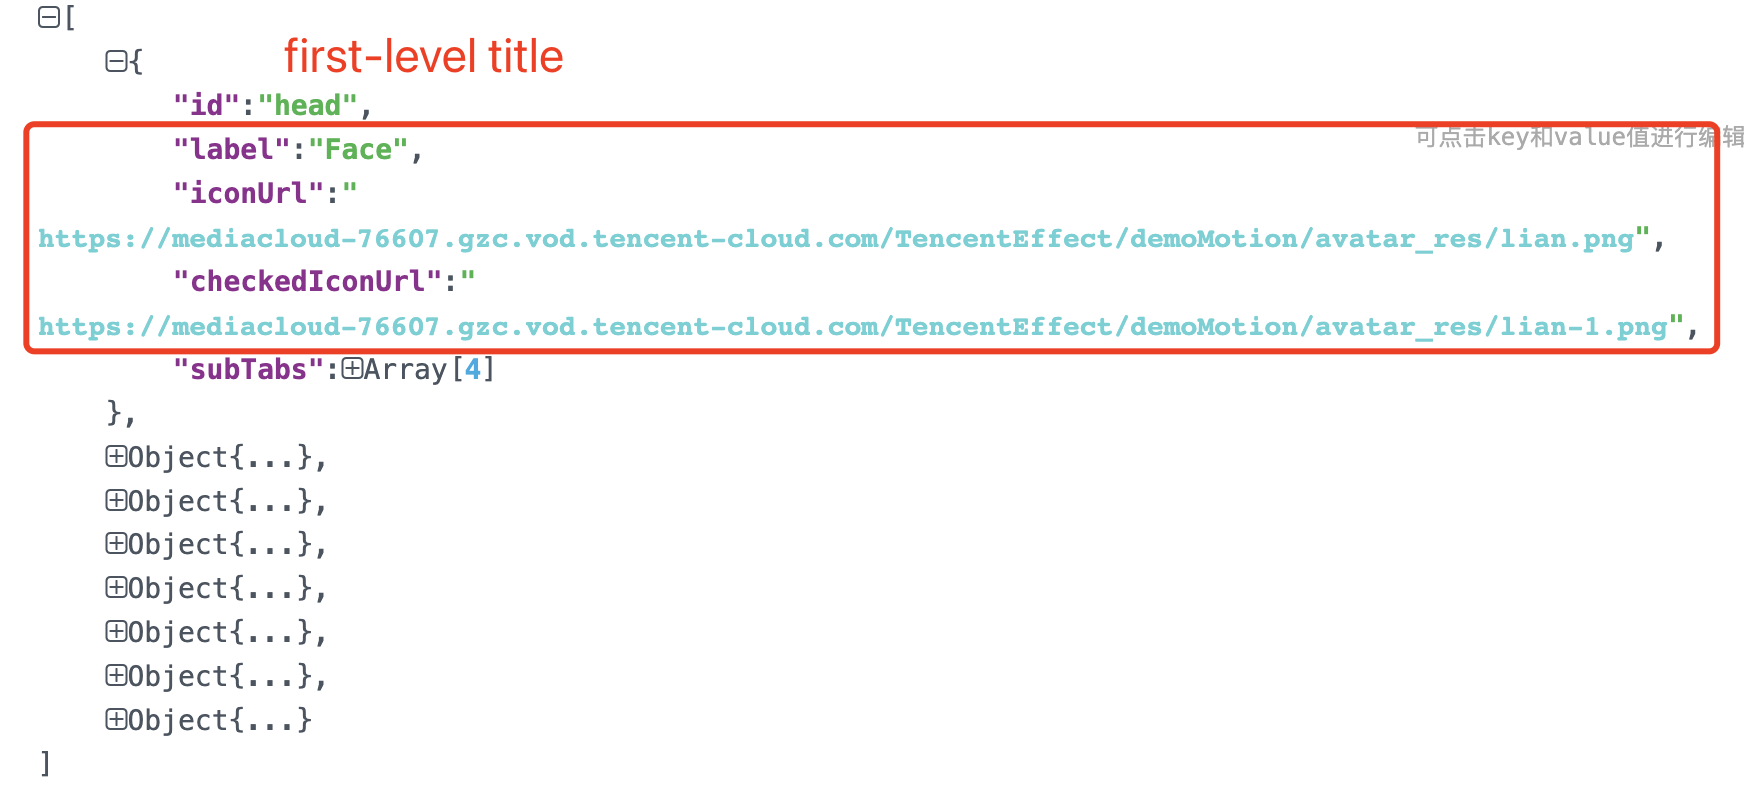
3. Changing icons/headings
You can modify the above JSON file of the demo to change an icon or heading of the UI. For example, to change the head icon in the top-level menu, just modify the value of iconUrl or checkedIconUrl.
Step 3. Customize Avatar Features
You can refer to the AvatarViewController code in BeautyDemo/Avatar/Controller.