Beauty AR Web allows you to implement AR beautification, filters, makeup, stickers, and other features on websites. This document describes how to quickly run a web application that supports real-time beautification locally. Based on this application, you can implement other features as instructed in relevant documents.
Note:
This project is a test project intended for local testing only. To officially launch your project with Beauty AR Web capabilities, you need to purchase an official license and configure the website domain in the product console. For more information, see Upgrade the trial license.
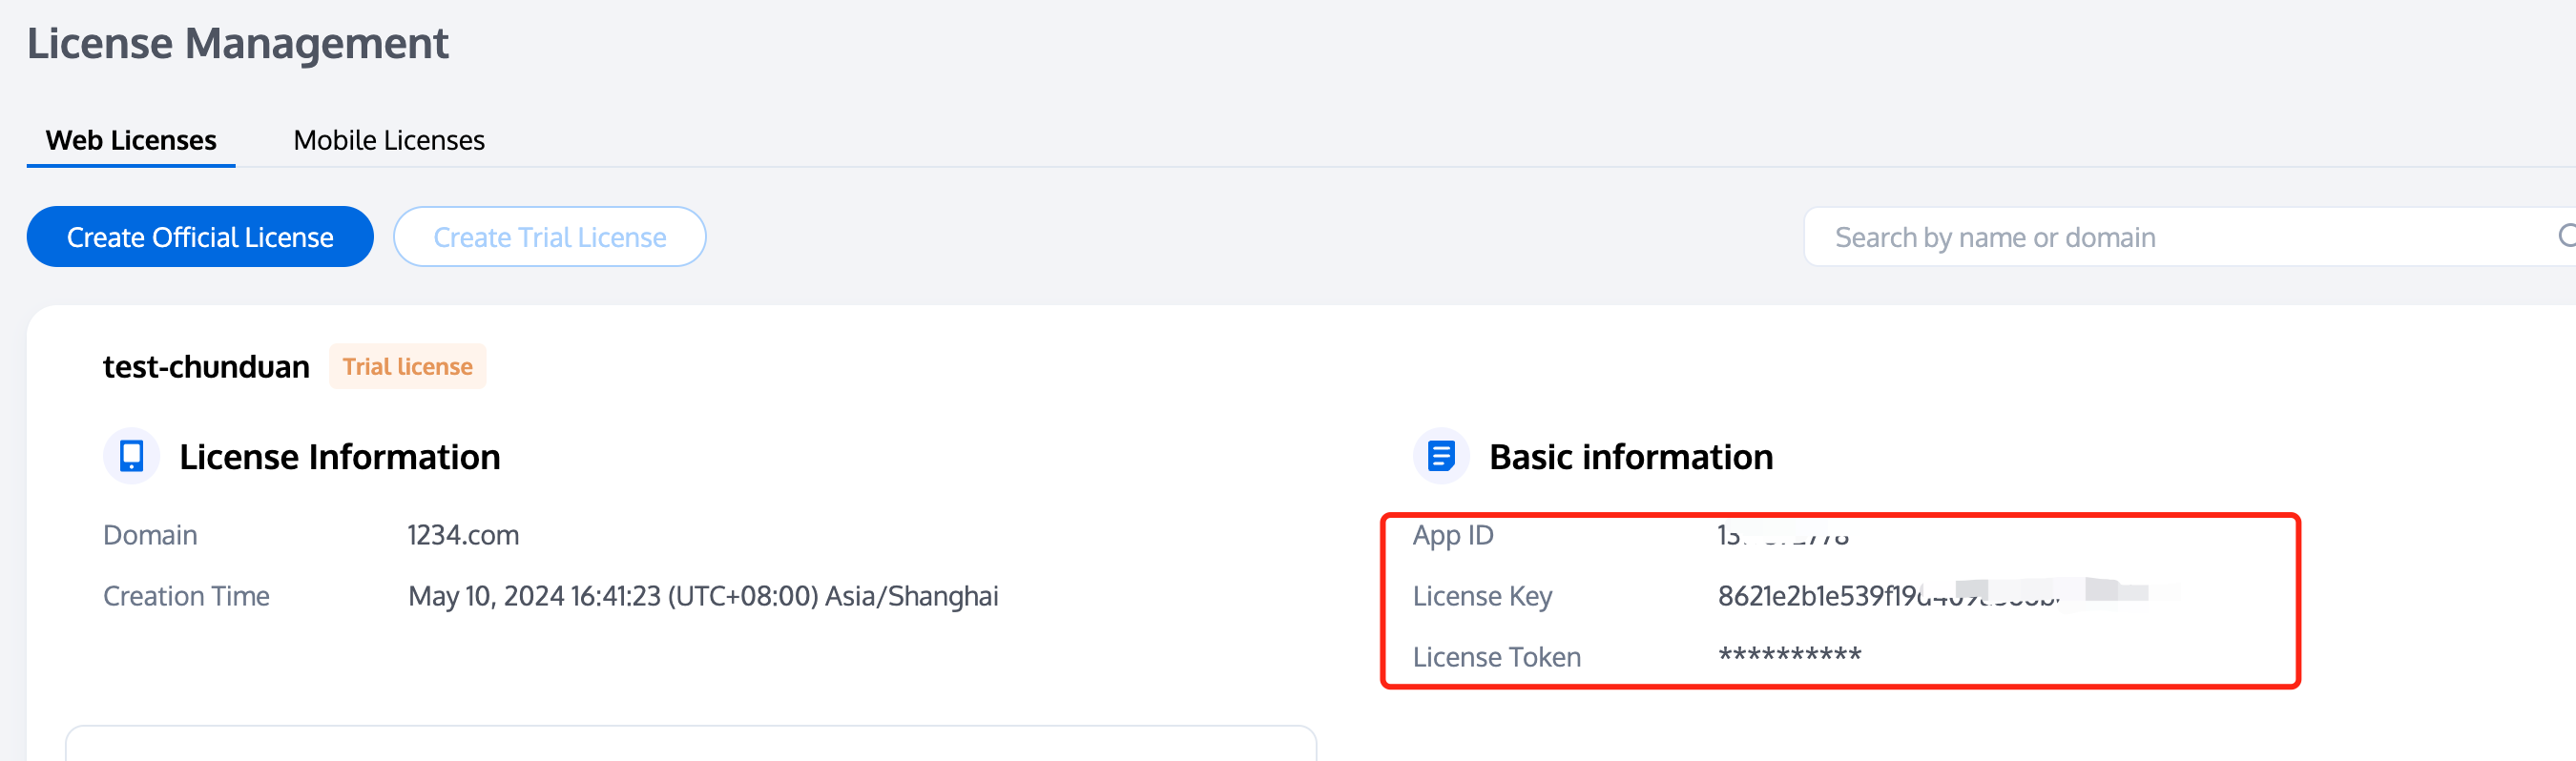
After the creation, you can see the information of the created test project in the project list and get theLicense Token for Beauty AR Web and the License key for the test project. you also can get the App ID.
Note:
The license token is used to calculate the authentication signature, so make sure to keep it secure and confidential. Here, the token is used to calculate the signature on the frontend just to help you run the demo locally. In a real production environment, you need to implement the signature algorithm on the server.
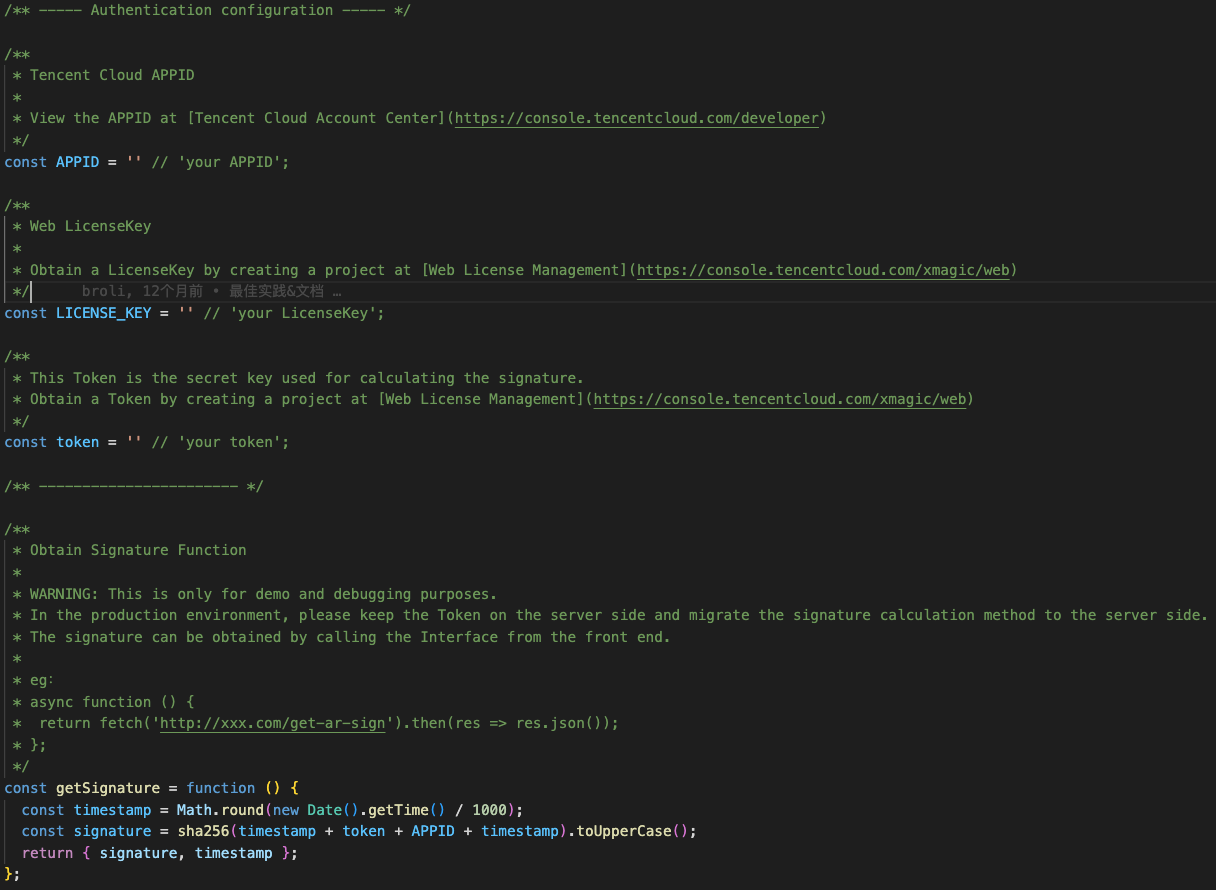
2. replace the specified configuration items in index.js with the license key, token, and APPID obtained in step 1 as shown below:
3. Run the project in the local development environment.
Note:
Before running your project locally, make sure the nodejs environment is already installed on the device.
Run the following commands successively in the project directory and access localhost:8090 in the browser to try out the capabilities of Beauty AR Web.
# Install dependencies
npm i
# Compile and run the code
npm run dev
After following the steps above, you can try out the filters and effects of the SDK for desktop browser. You can use the built-in materials to try out various makeup filters and effects as instructed in Overview, or use more capabilities of Beauty AR Web such as custom stickers, makeup, and filters. For detailed directions on how to customize effect materials, please contact us.