TUIKit is a UI component library based on the Chat SDK. It enables quick implementation of chat, session, search, Relationship Chain, group, and other features through UI components. This article introduces how to rapidly integrate TUIKit and implement core features.
Or, if you prefer a faster and more automated approach, you can refer to Get started with AI integration to streamline the process.
Key Concepts
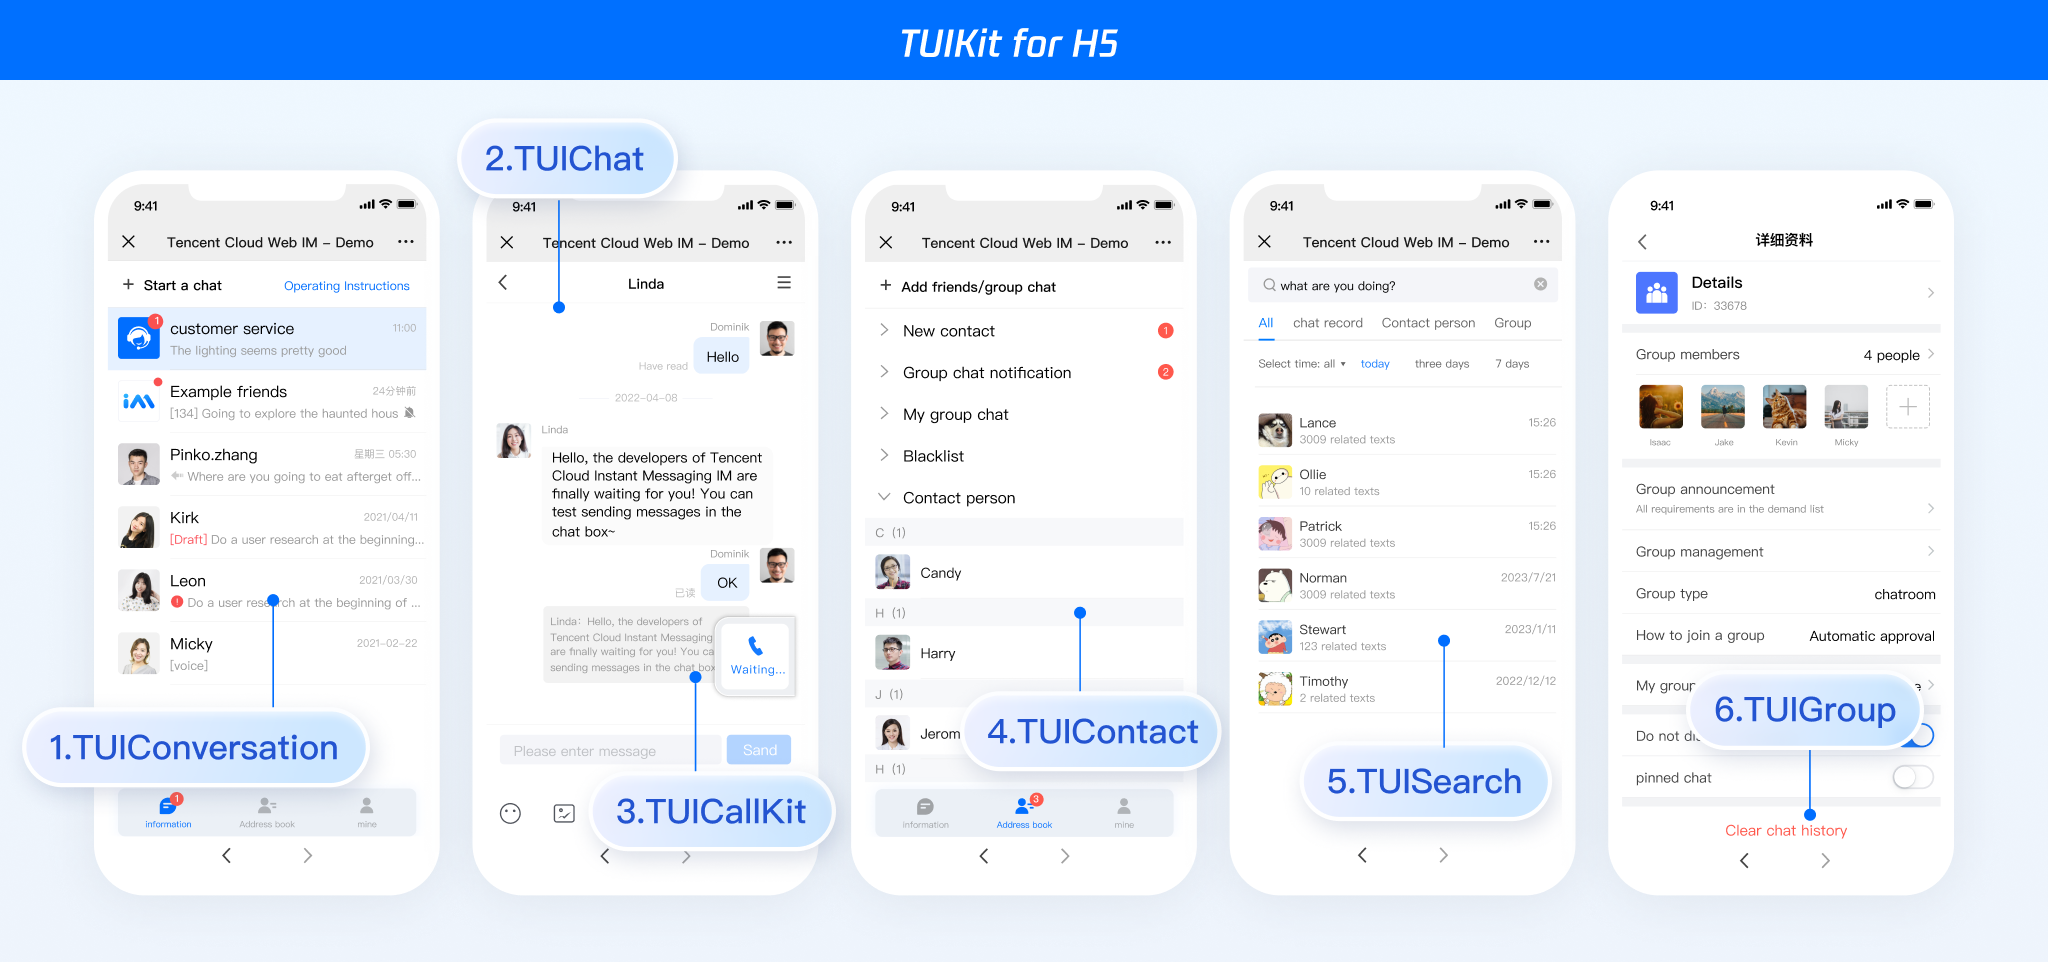
TUIKit is mainly divided into several UI subcomponents: TUIChat, TUIConversation, TUIGroup, TUIContact, and TUISearch. Each UI component is responsible for showing different content.
1. TUIChat provides a session page, including a message list, header, and input box.
2. TUIConversation provides a session list page, including a conversation list, group creation, and C2C Chat.
3. TUIGroup provides a group chat management page, including group chat management and group member management.
4. TUIContact provides a contact page, including a contact list and friend requests.
5. TUISearch provides a cloud search page.
Prerequisites
Vue (fully supports Vue2 & Vue3, please choose when accessing below the matched Vue version access guide for accessing)
TypeScript (Should your project be based on JavaScript, please proceed to JS project integrate to set up a progressive support for TypeScript)
sass (sass version ≤ 1.77.4, sass-loader version ≤ 10.1.1)
node(node.js ≥ 18.0.0)
npm (version should match node version)
Integration Steps
Step 1. Create a project
TUIKit supports the use of vite or vue-cli to create project engineering, configuring Vue3/Vue2 with TypeScript and sass. The following is several project setup examples:
vite
vue-cli
Note:
Vite requires Node.js version 18+ or 20+. When your package manager issues a warning, please note to upgrade your Node Version. For details, refer to vite official website.
Create a project using vite, configure Vue + TypeScript as shown in the figure below.
npm create vite@5
Switch to the project directory, then install the project dependencies:
cd chat-example
npminstall
Install the required sass environment dependency for TUIKit:
npm i -D sass@1.77.0 sass-loader@10.1.1
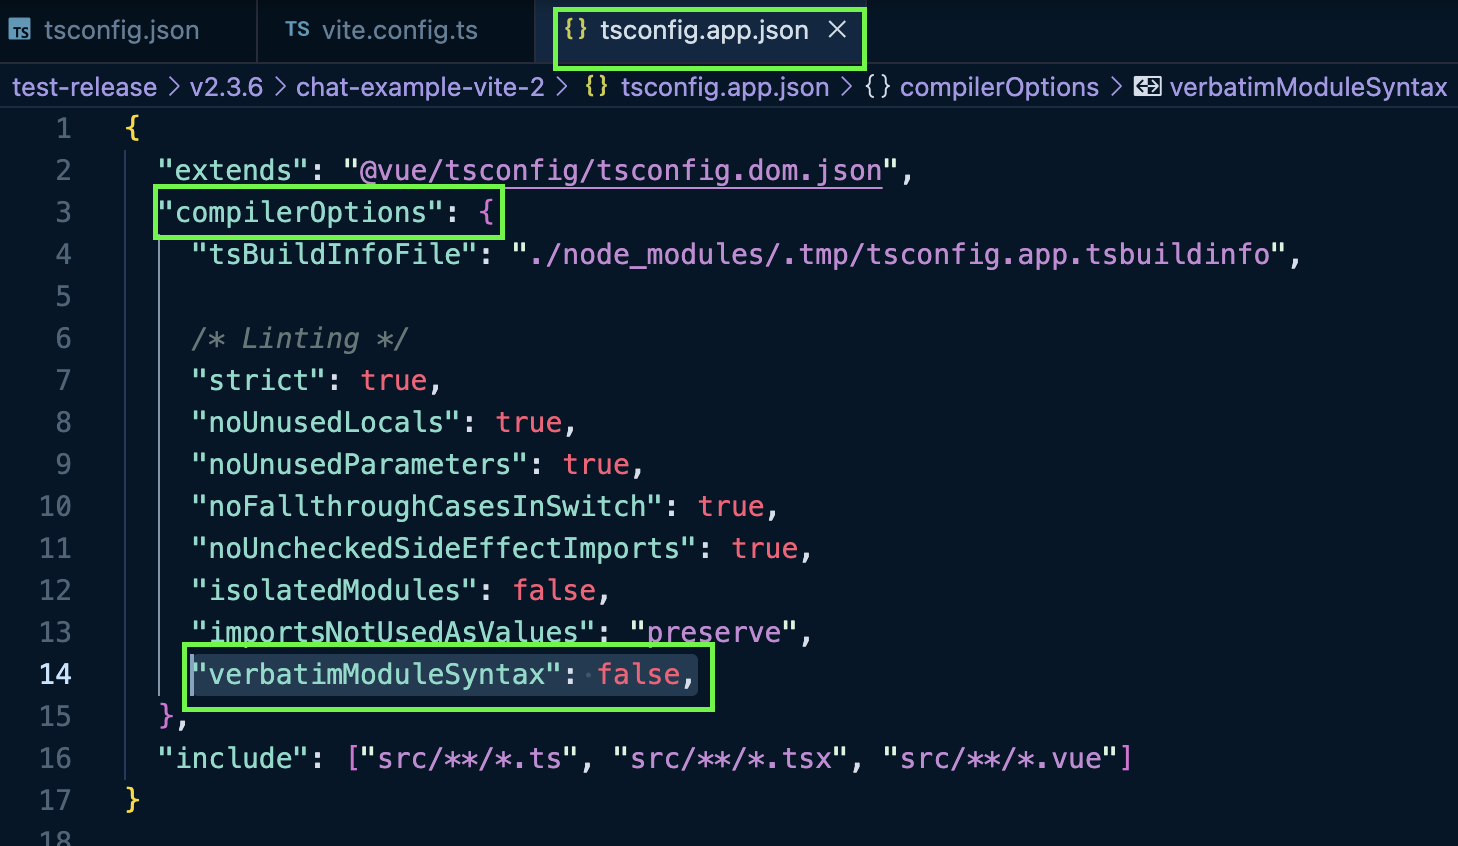
Add the following compilation rule to the root directory file tsconfig.app.json:
typescript ≥ 5.0.0
typescript < 5.0.0
{
...
"compilerOptions":{
...
"verbatimModuleSyntax":false,
}
}
{
...
"compilerOptions":{
...
"importsNotUsedAsValues":"preserve",
}
}
Note:
If your tsconfig.json already has references configuration, such as the official vite auto-configured "./tsconfig.app.json" and "./tsconfig.node.json", due to the characteristics of references, the tsconfig.json itself merely serves as a reference file for rules. At this point, directly configuring the following rules in tsconfig.json is invalid. You need to add the rules to the actual references corresponding file. The following is a specific example:
Error Writing Format
Correct Writing Style
When the tsconfig.json file has existing references configuration, declaring the following rules directly in tsconfig.json is invalid.
When the tsconfig.json file has existing references configuration, the following rules must be declared in the corresponding references internal file. Below is the configuration of the following rules in the root directory tsconfig.app.json file within references
.
Note:
Note: Be sure to ensure your @vue/cli version is 5.0.0 or higher. You can use the following example code to upgrade your @vue/cli version to v5.0.8.
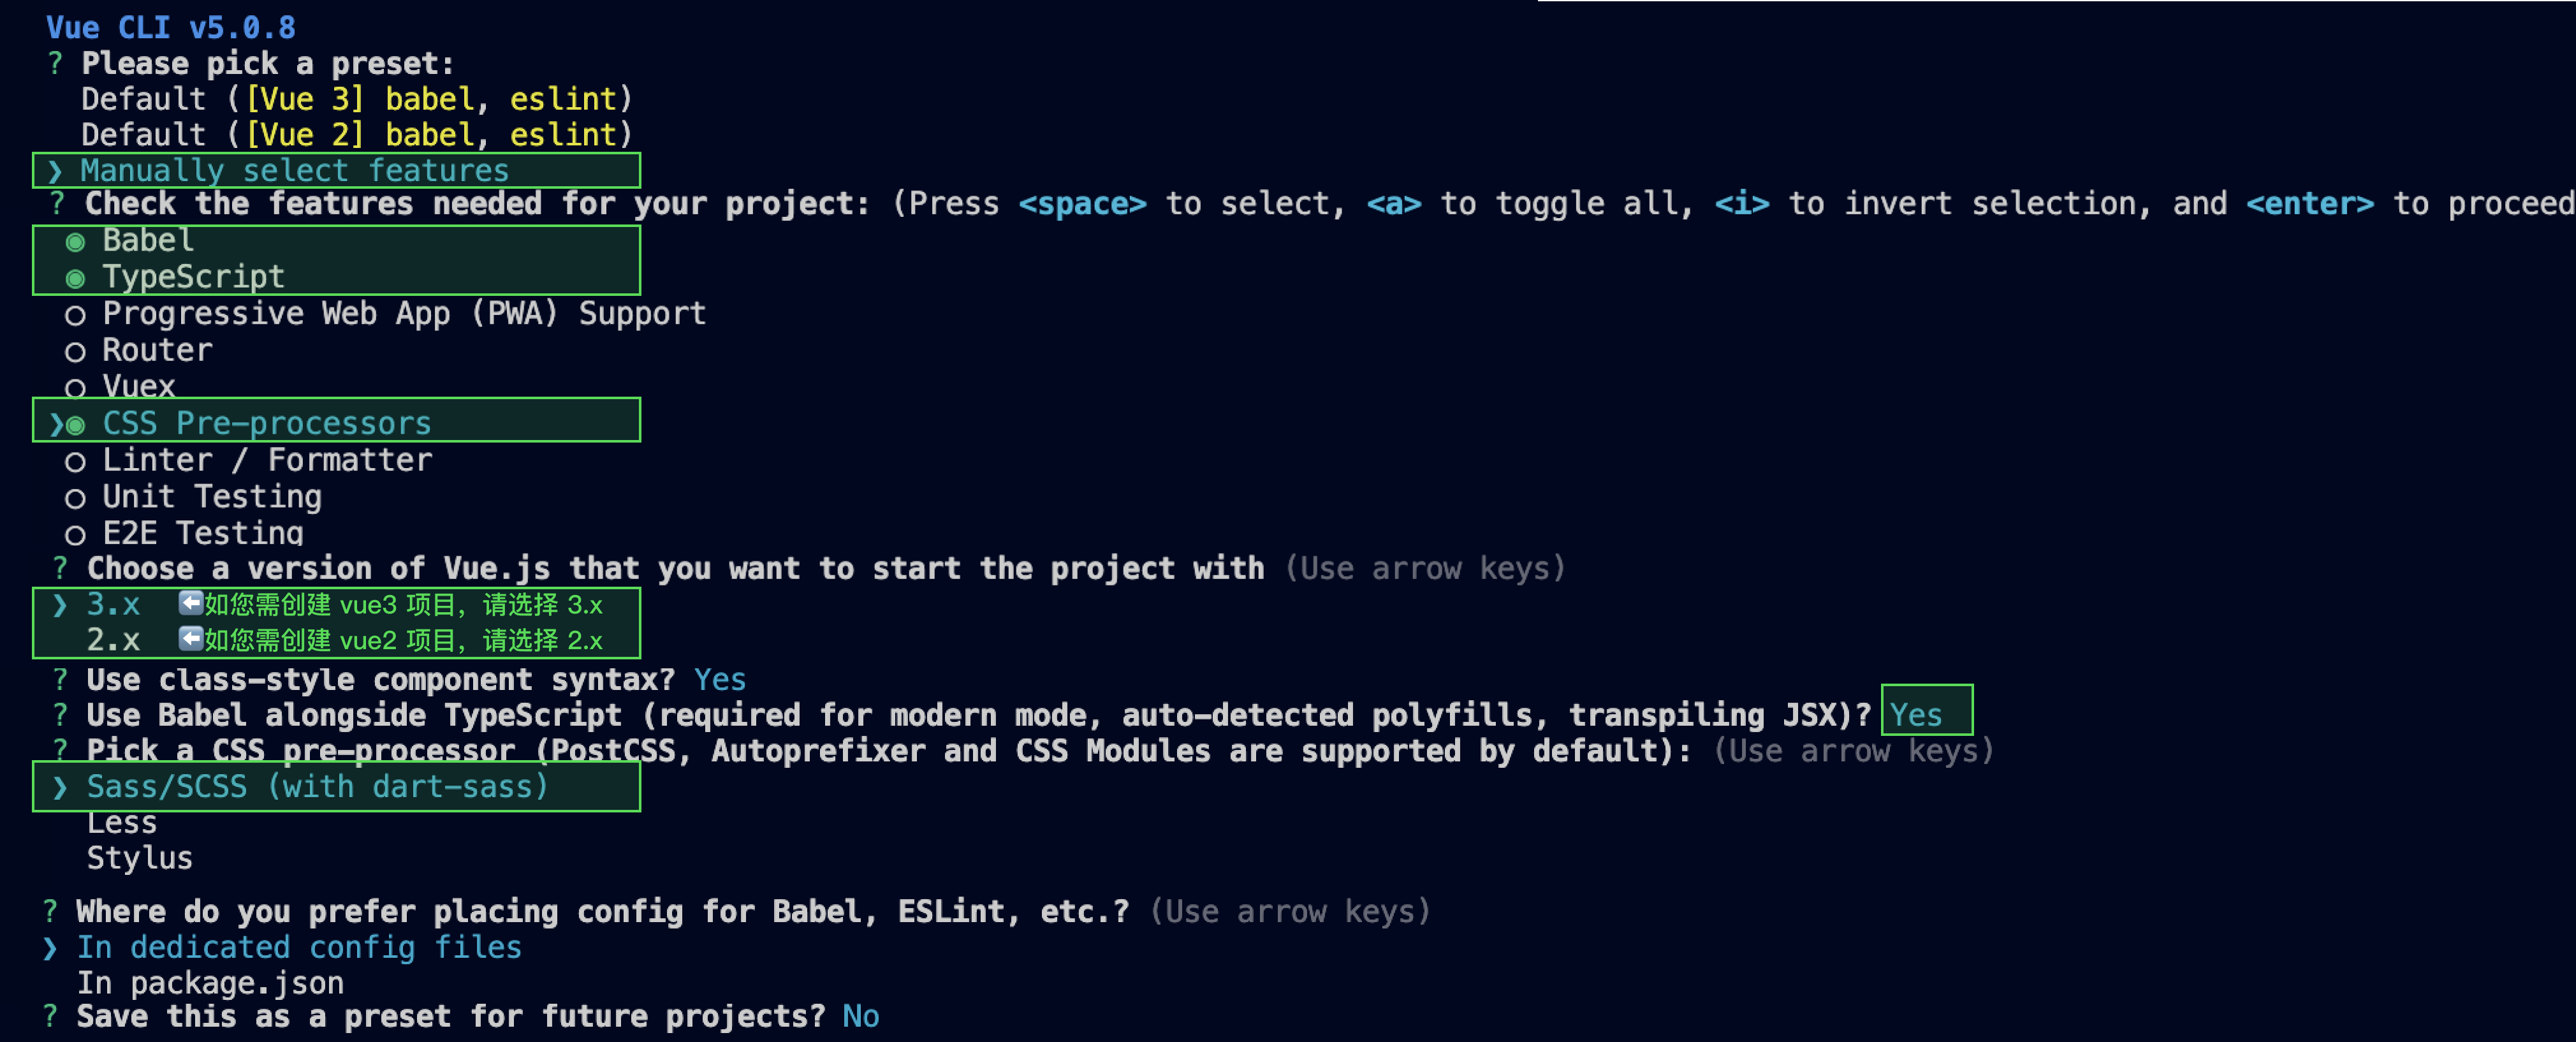
Create a project using vue-cli, configure Vue2 / Vue3 + TypeScript + sass.
If you have not installed vue-cli or the version is lower than 5.0.0, you can install it in terminal or cmd in the following ways:
Create a project using vue-cli and choose the selected configuration in the figure below.
vue create chat-example
Ensure the configuration selection as follows:
After creation, switch to the project directory:
cd chat-example
If you are using vue 2, configure the environment based on your vue version. Ignore it for vue 3 projects.
vue2.7
Vue 2.6 and Below
npm i vue@2.7.9 vue-template-compiler@2.7.9
npm i @vue/composition-api unplugin-vue2-script-setup vue@2.6.14 vue-template-compiler@2.6.14
Step 2. Download the TUIKit component
Download the TUIKit component through npm. To facilitate your subsequent expansion, it is recommended that you copy the TUIKit component to the src directory of your project:
On the page where you want to display it, simply import the TUIKit component to use it.
For example, implementing the following code on the App.vue page allows for a quick setup of the chat interface (the following example code supports both Web and H5):
Note:
The example code below uses the setup syntax. If your project does not use the setup syntax, please register components according to the standard methods of Vue3/Vue2.
Execute the following command to start the project:
vite
vue-cli
npm run dev
Note:
Since vue-cli enables Webpack Global Overlay Error Message Prompt by default, for a better experience, it is recommended to disable the global overlay error prompt.
Webpack4 and Above
webpack3
module.exports =defineConfig({
...
// Add new overlay configuration code to close
devServer:{
client:{
overlay:false,
},
},
});
module.exports ={
...
// Add new overlay configuration code
devServer:{
overlay:false,
},
};
npm run serve
Additional item: Switching languages
The Vue TUIKit comes with default Simplified Chinese, English language packages that serve as the interface display language.
You may switch languages through the following methods, for more methods please see Internationalization.
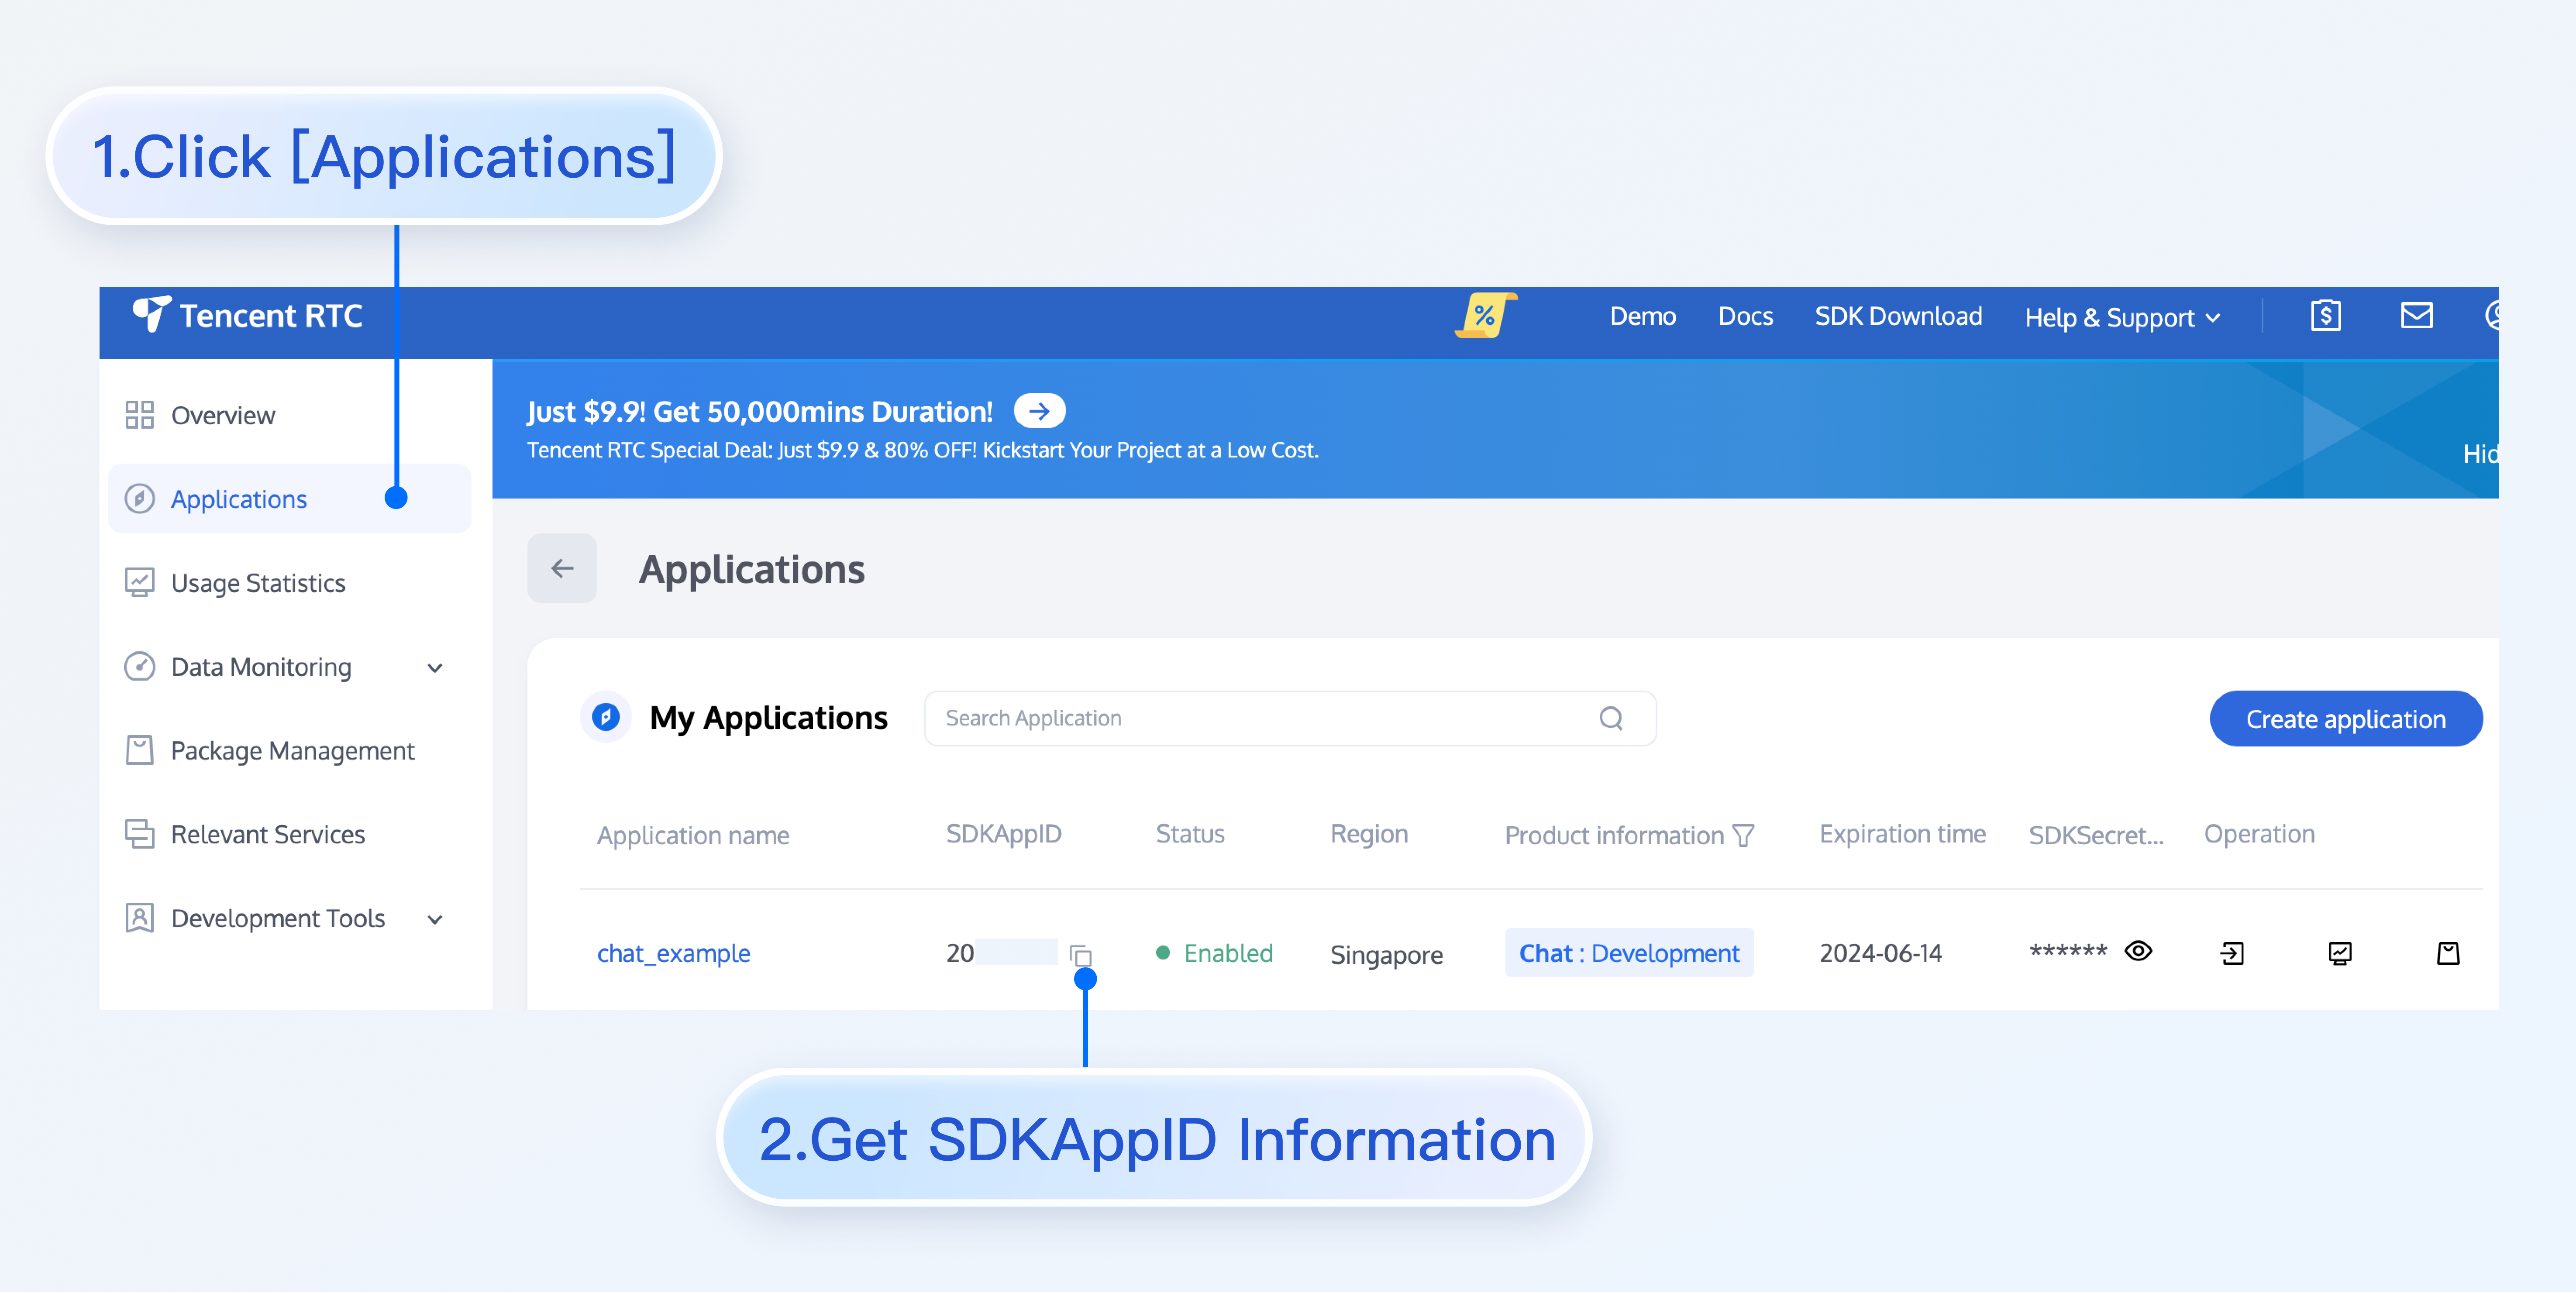
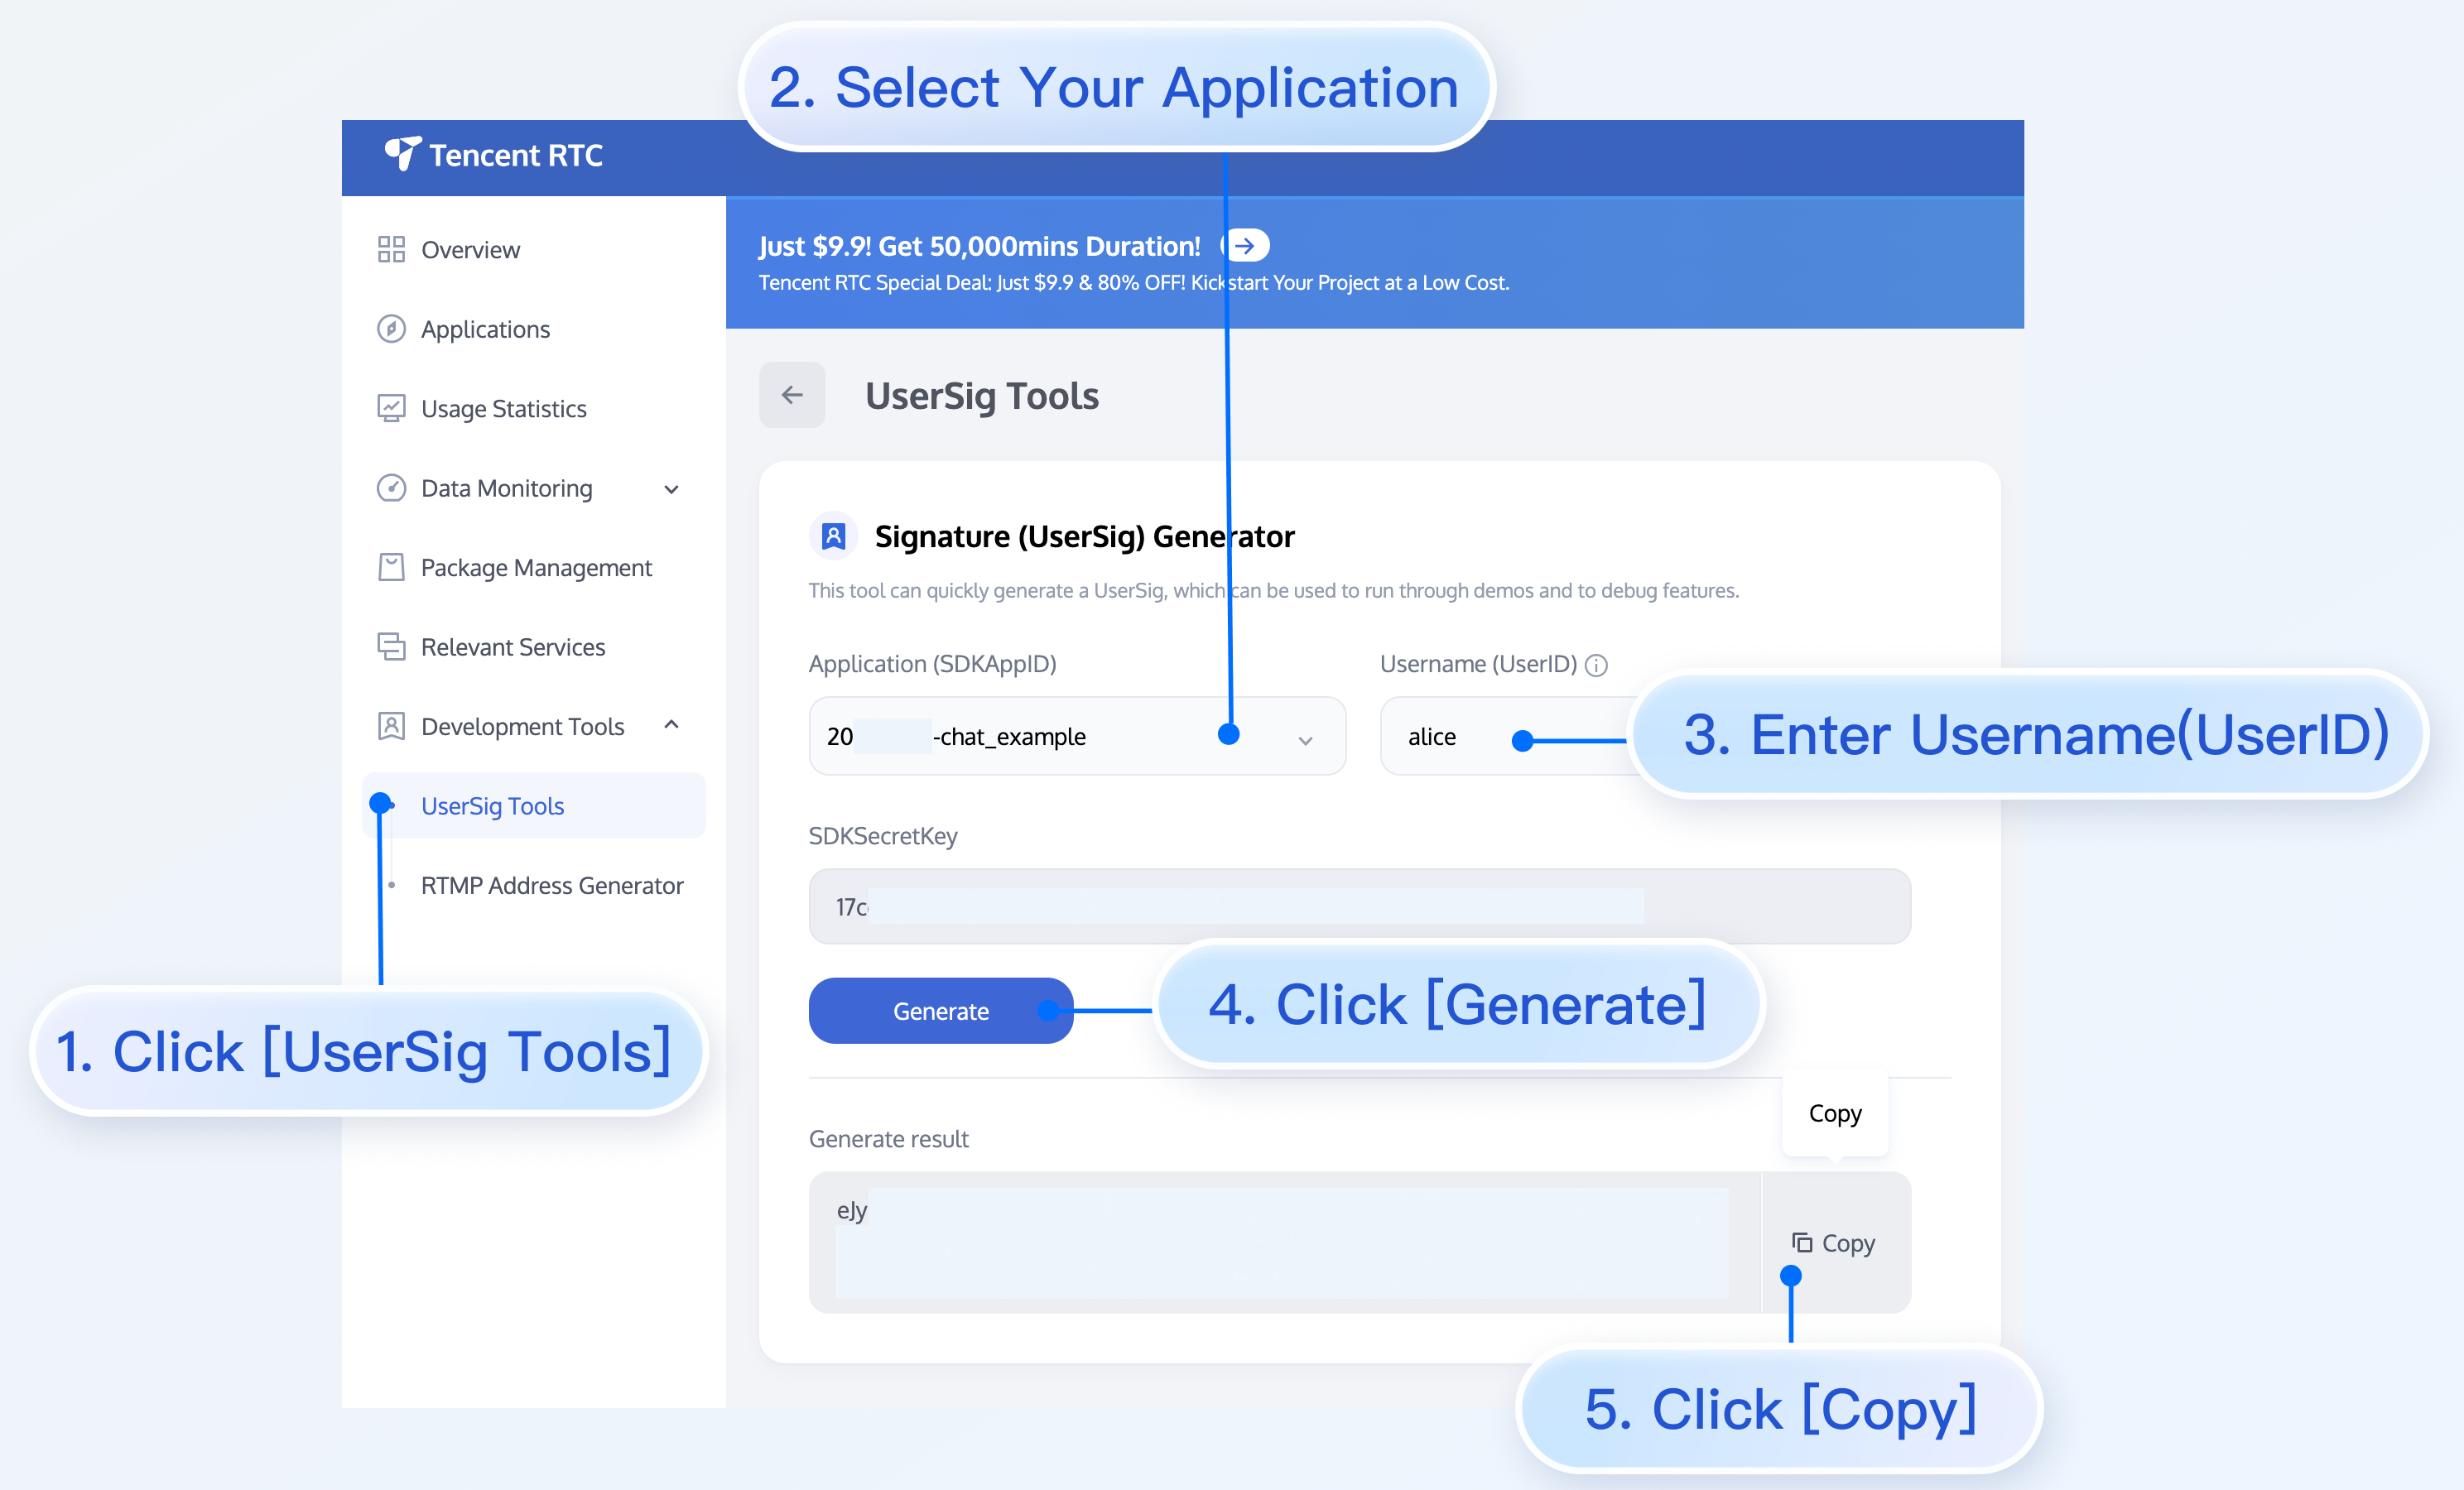
A UserSig is a password with which you can log in to use Chat service. It is the ciphertext generated by encrypting information such as userID.
The issuance of UserSig is achieved by integrating the calculation code for UserSig into your server-side, whilst providing an interface designed for your project. Whenever UserSig is required, your project could request the operational server for a dynamic UserSig. For further information, please refer to Generating UserSig on the server-side.
Caution
The method to obtain UserSig demonstrated in this document utilizes the configuration of a SECRETKEY within the client-side code. Within this procedure, the SECRETKEY is notably vulnerable to decompilation and reverse-engineering. Should your SECRETKEY be leaked, malefactors could potentially exploit your Tencent Cloud traffic. Therefore, this technique is only appropriate for local operation and functional debugging. For the correct method of issuing UserSig, please refer to the earlier text.
3. Using Emoji Packs
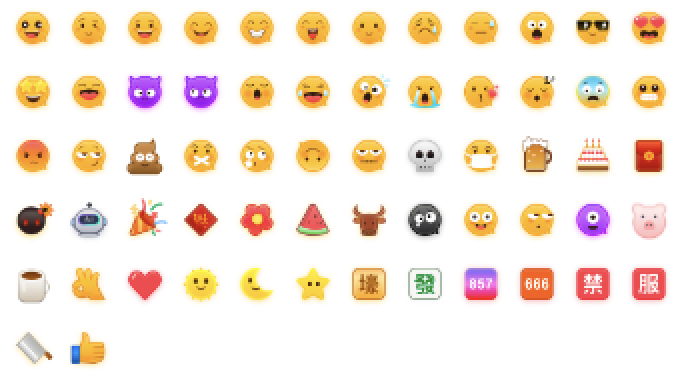
To respect the copyright of emoji designs, the Chat Demo/TUIKit project does not include cutouts of large emoji elements. Please replace them with your own designs or other emoji packs for which you hold the copyright before officially launching for commercial use. The default smiley face emoji pack shown below is copyrighted by Tencent RTC, you can upgrade to Chat Pro Plus Edition and Enterprise Edition to use it for free.
If the following errors occur during runtime after connecting as per the steps outlined above, it is imperative that you delete the node_modules directory under the TUIKit folder to ensure the uniqueness of TUIKit's dependencies, preventing issues caused by multiple copies of dependencies.
2. How does a JS project integrate the TUIKit component?
TUIKit exclusively supports the TS environment for operation. You can enable the coexistence of existing JS code in your project with the TS code in TUIKit through progressive configuration of TypeScript.
vue-cli
vite
Please execute the following in the root directory of your engineering project created by the Vue CLI scaffold:
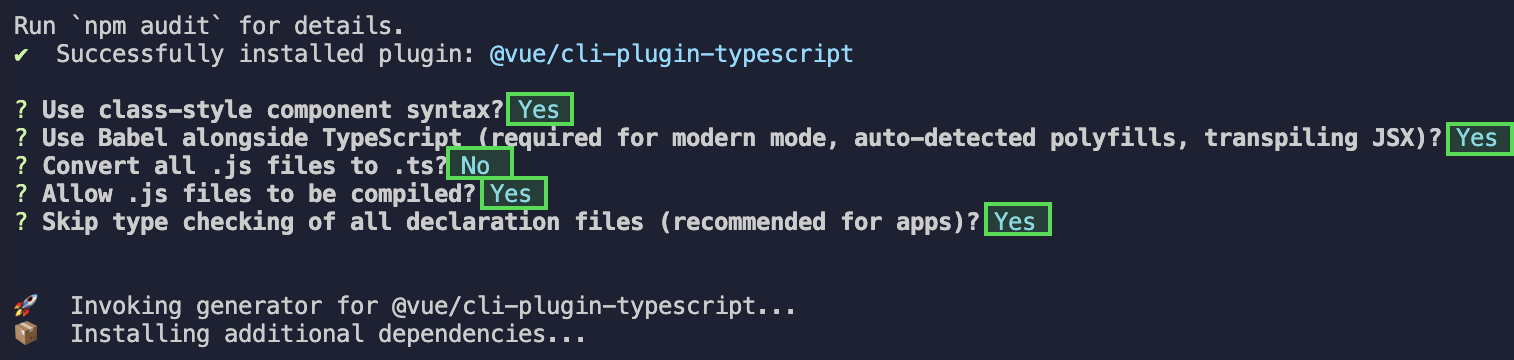
vue add typescript
Subsequently, please make selections in accordance with the following configuration options. To assure that we can support both the existing js code and the ts code within TUIKit, it is imperative that you strictly adhere to the five options presented below.
Once these steps are completed, please rerun the project!
Please execute the following command in your project's root directory created with vite:
The above error message appears because your installed @vue/cli version is too low. You must ensure that your @vue/cli version is 5.0.0 or higher. The upgrade method is as follows:
npm install -g @vue/cli@5.0.8
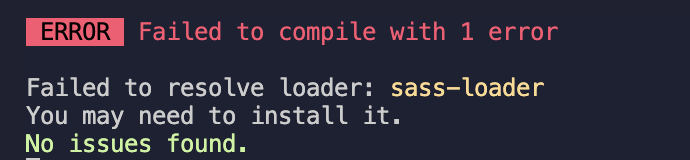
4. Runtime error: Failed to resolve loader: sass-loader
The above error message appears because the sass environment is not installed on your machine, please run the following command to install the sass environment:
npm i -D sass sass-loader@10.1.1
5. Other ESLint errors?
If copying chat-uikit-vue to the src directory results in error due to inconsistency with your local project code style, you may ignore this component directory. This can be achieved by adding .eslintignore file to the project root directory:
# .eslintignore
src/TUIKit
6. How to disable the full screen overlay error message prompt of webpack in dev mode in vue/cli?
You can disable it in the vue.config.js file at the root directory of your project:
webpack4
webpack3
module.exports =defineConfig({
...
devServer:{
client:{
overlay:false,
},
},
});
module.exports ={
...
devServer:{
overlay:false,
},
};
7. What to do when encountering 'Component name "XXXX" should always be multi-word'?
The version of ESLint utilized in Chat TUIKit web is v6.7.2, which does not rigidly verify the camelCase format for module names.
Should you encounter this dilemma, you may configure as follows in the .eslintrc.js file:
module.exports ={
...
rules: {
...
'vue/multi-word-component-names':'warn',
},
};
8. What should I do if I encounter ERESOLVE unable to resolve dependency tree?
If ERESOLVE unable to resolve dependency tree appears when npm install is run, it indicates a conflict in dependency installation. The following method can be adopted for installation:
npminstall --legacy-peer-deps
9. How might one address the error message, 'vue packages version mismatch' occurring during execution?
// If you are using a vue2.7 project, please execute in your project root directory
npm i vue@2.7.9 vue-template-compiler@2.7.9
// If you have a Vue2.6 project, please execute in your project's root directory
npm i vue@2.6.14 vue-template-compiler@2.6.14
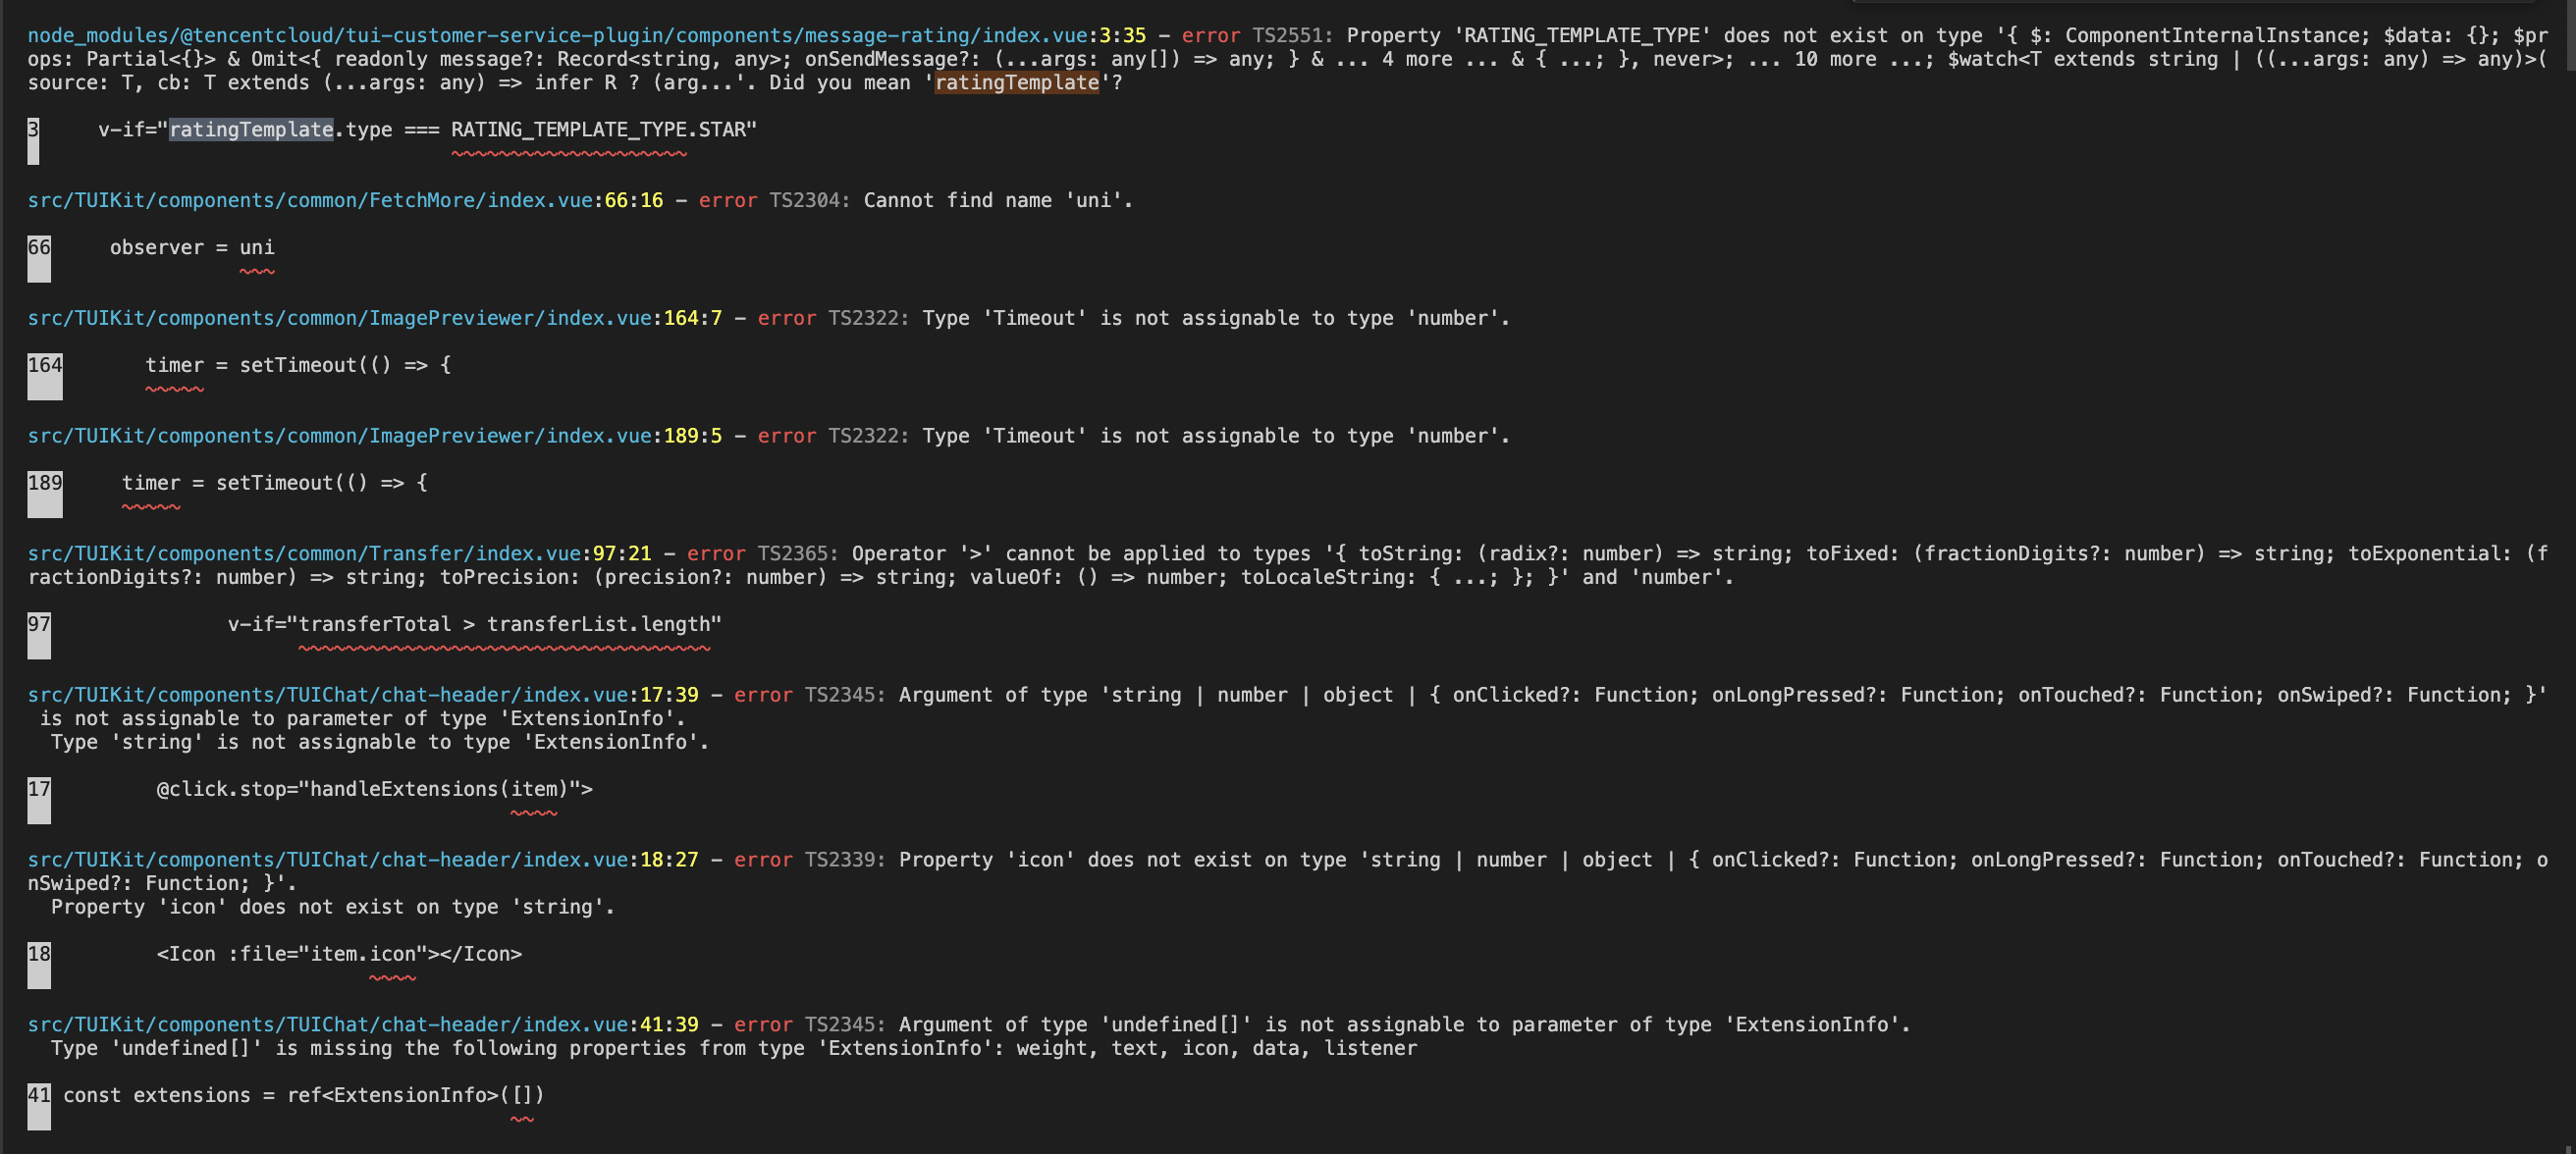
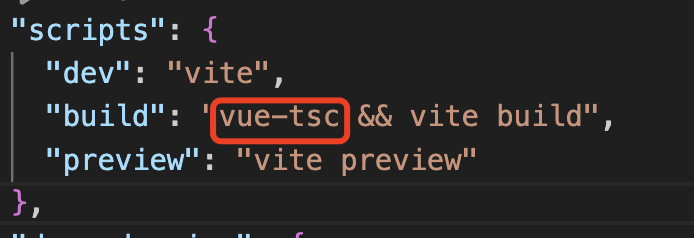
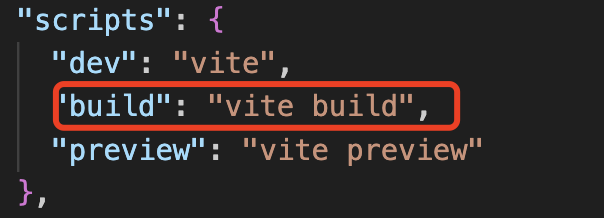
10. Why does TypeScript report an error after npm run build in a Vite project?
Reason: It's led by the vue-tsc command in "build": "vue-tsc && vite build" under package.json script.