This document provides a quick guide to running the TUIRoomKit video conference Demo, allowing you to experience high-quality multi-party video meetings. By following this guide, developers can get the Demo up and running within 10 minutes and ultimately experience a fully-featured UI for multi-party conferencing.
Room Preparation Page
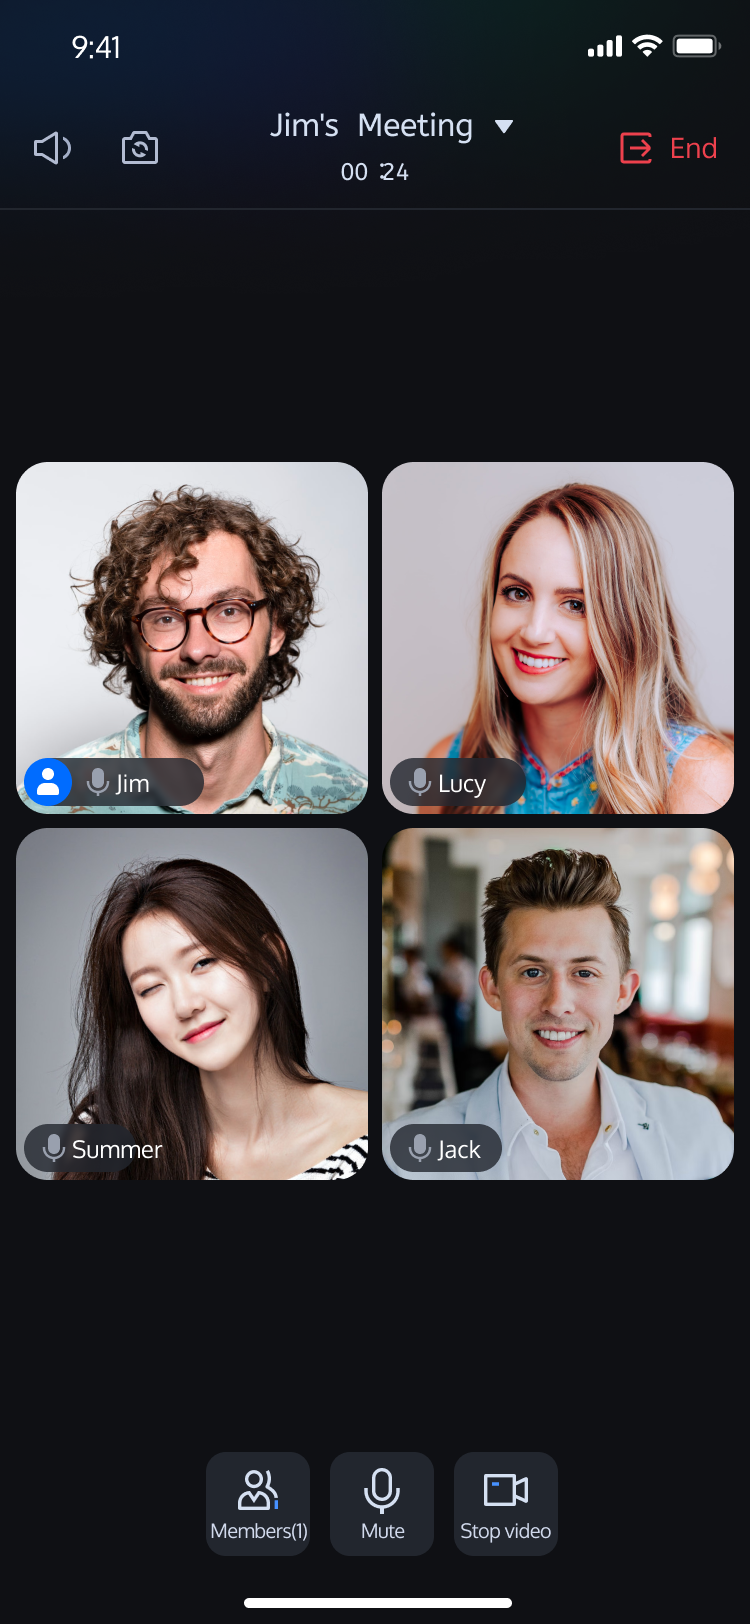
Room Main Page
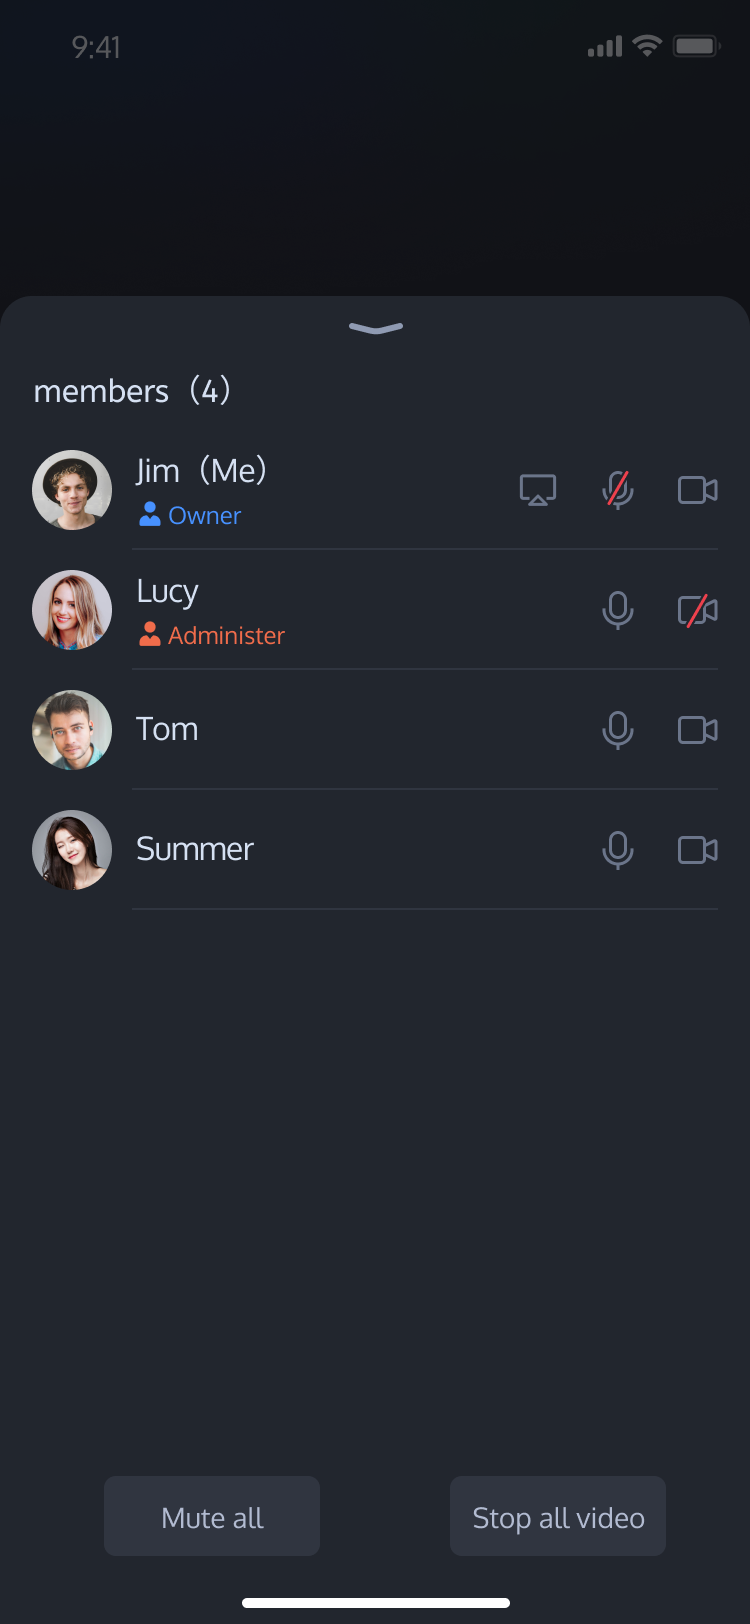
Member Management
Prerequisites
Activate the Service
Follow the instructions in Activate the Service to create a Room application and obtain the following information:
SDKAPPID: The Room application's ID from the Console, which uniquely identifies your application.
SECRETKEY: The application's SecretKey.
Environment Preparation
Before you start, make sure your environment meets these requirements:
Download the TUIKit_iOS Demo and extract the archive.
2.
Navigate to the iOS project directory in your terminal:
cd TUIKit_iOS/application
3.
Install dependencies:
pod install --repo-update
Note:
If you have not installed CocoaPods, see this guide for installation instructions.
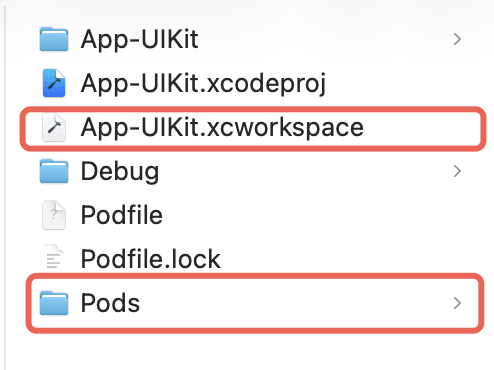
After completing these steps, you will see a Pods directory and an App-UIKit.xcworkspace project file in the project directory. Double-click the App-UIKit.xcworkspace file to open it.
Setup
1.
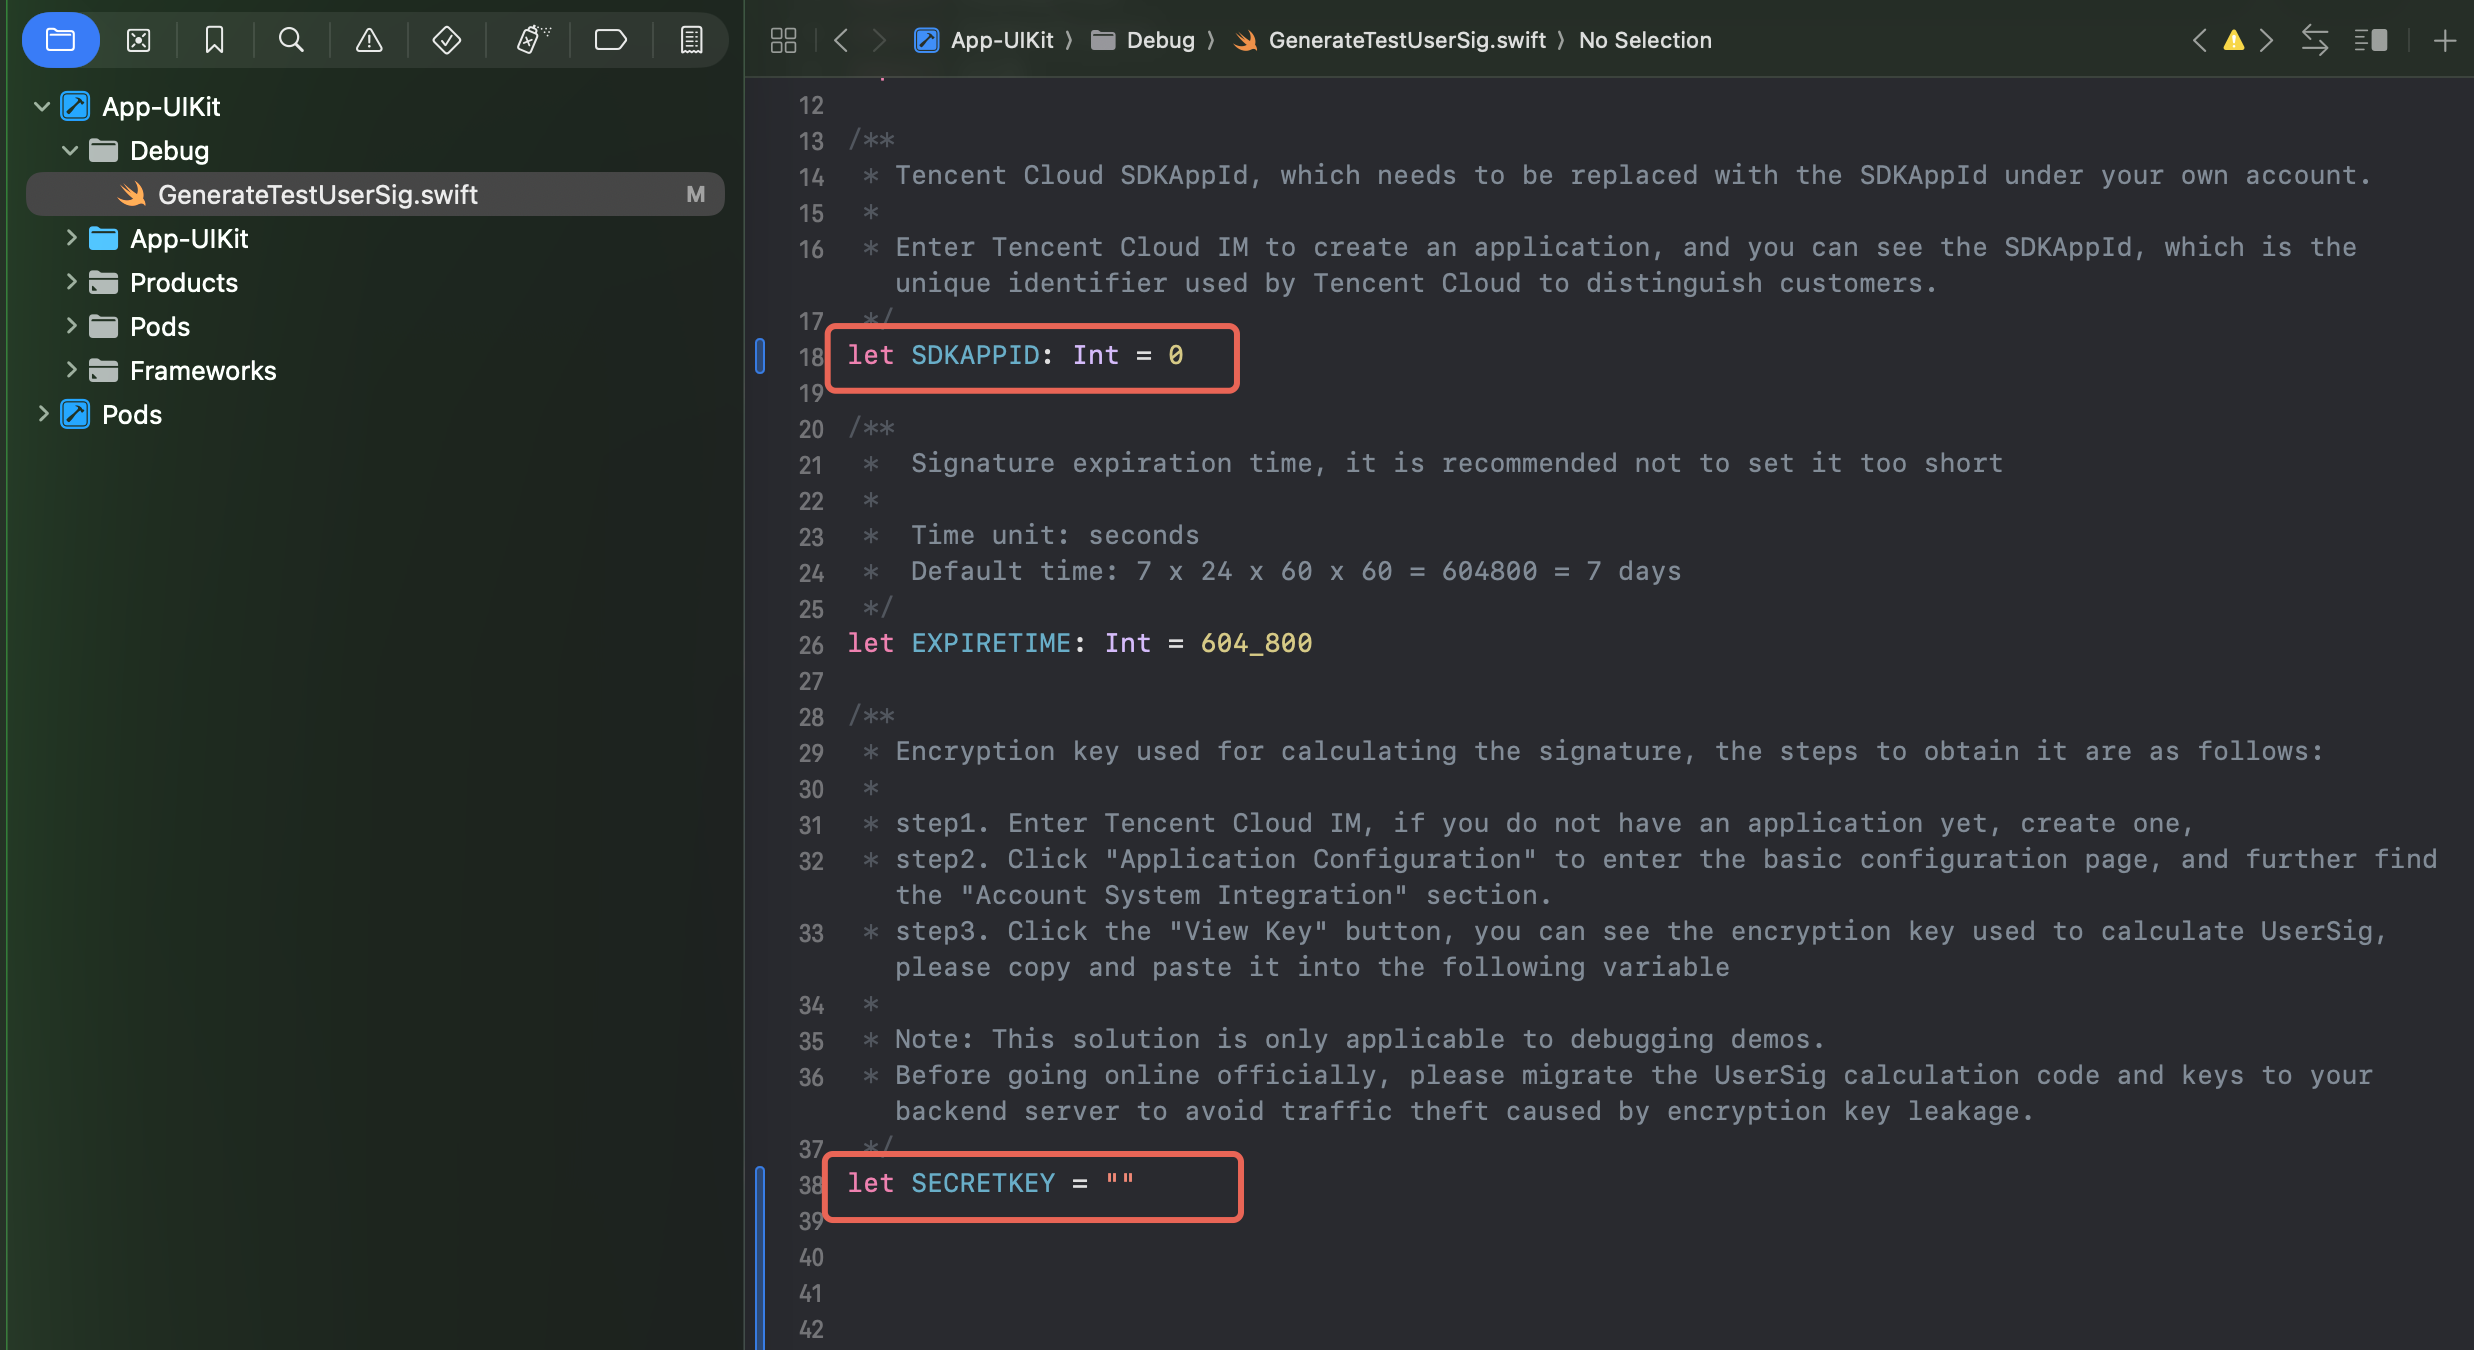
Configure SDKAPPID and SECRETKEY:
After opening the App-UIKit.xcworkspace project in Xcode, enter your SDKAPPID and SECRETKEY in the Debug/GenerateTestUserSig.swift file:
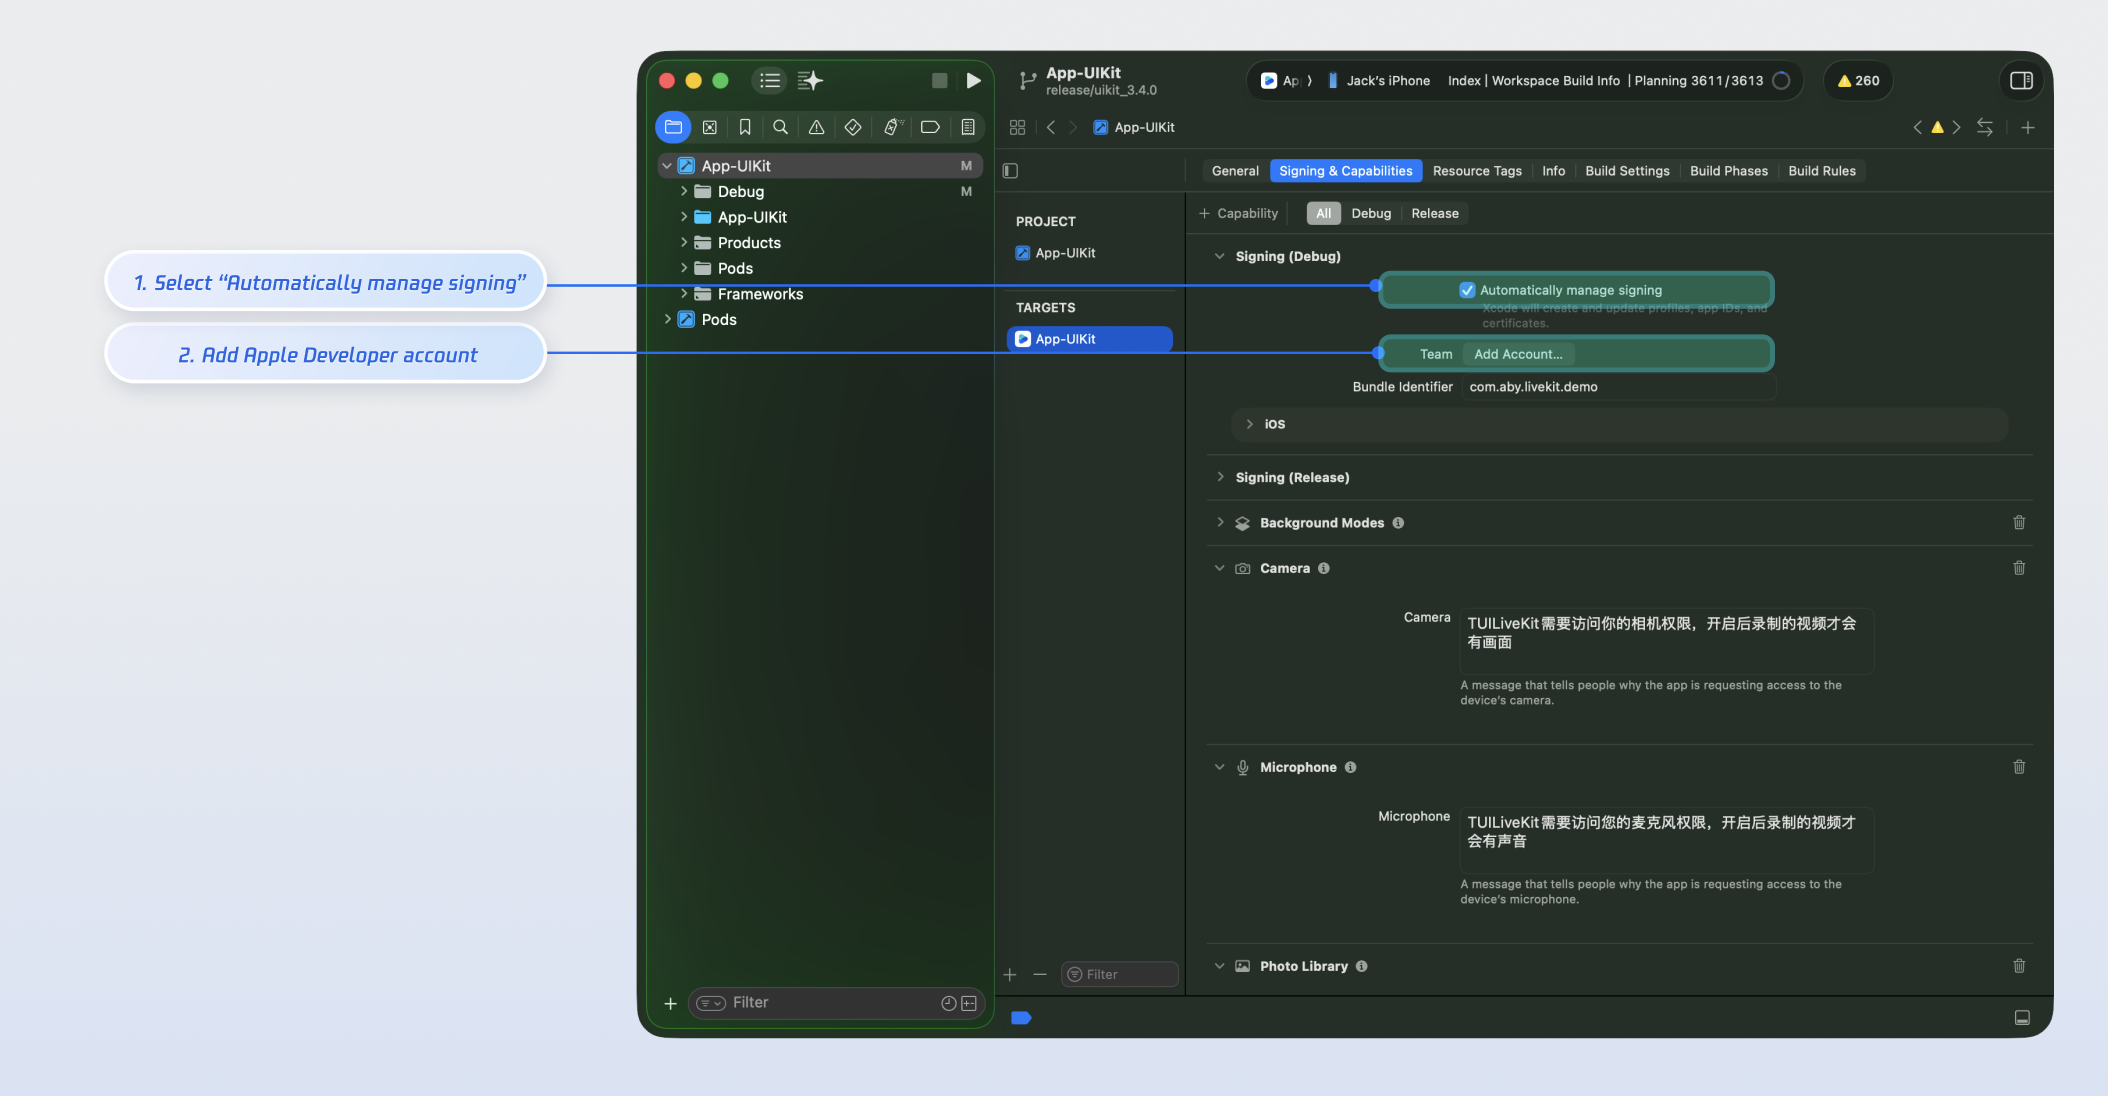
2.
Configure Apple Developer Signing:
In the project's TARGETS under Signing & Capabilities, select Automatically manage signing, and set your Apple Developer account and Bundle Identifier:
Build and Run the Demo
Multi-party conferencing requires camera and microphone access. For best results, debug and run the Demo on a physical device.
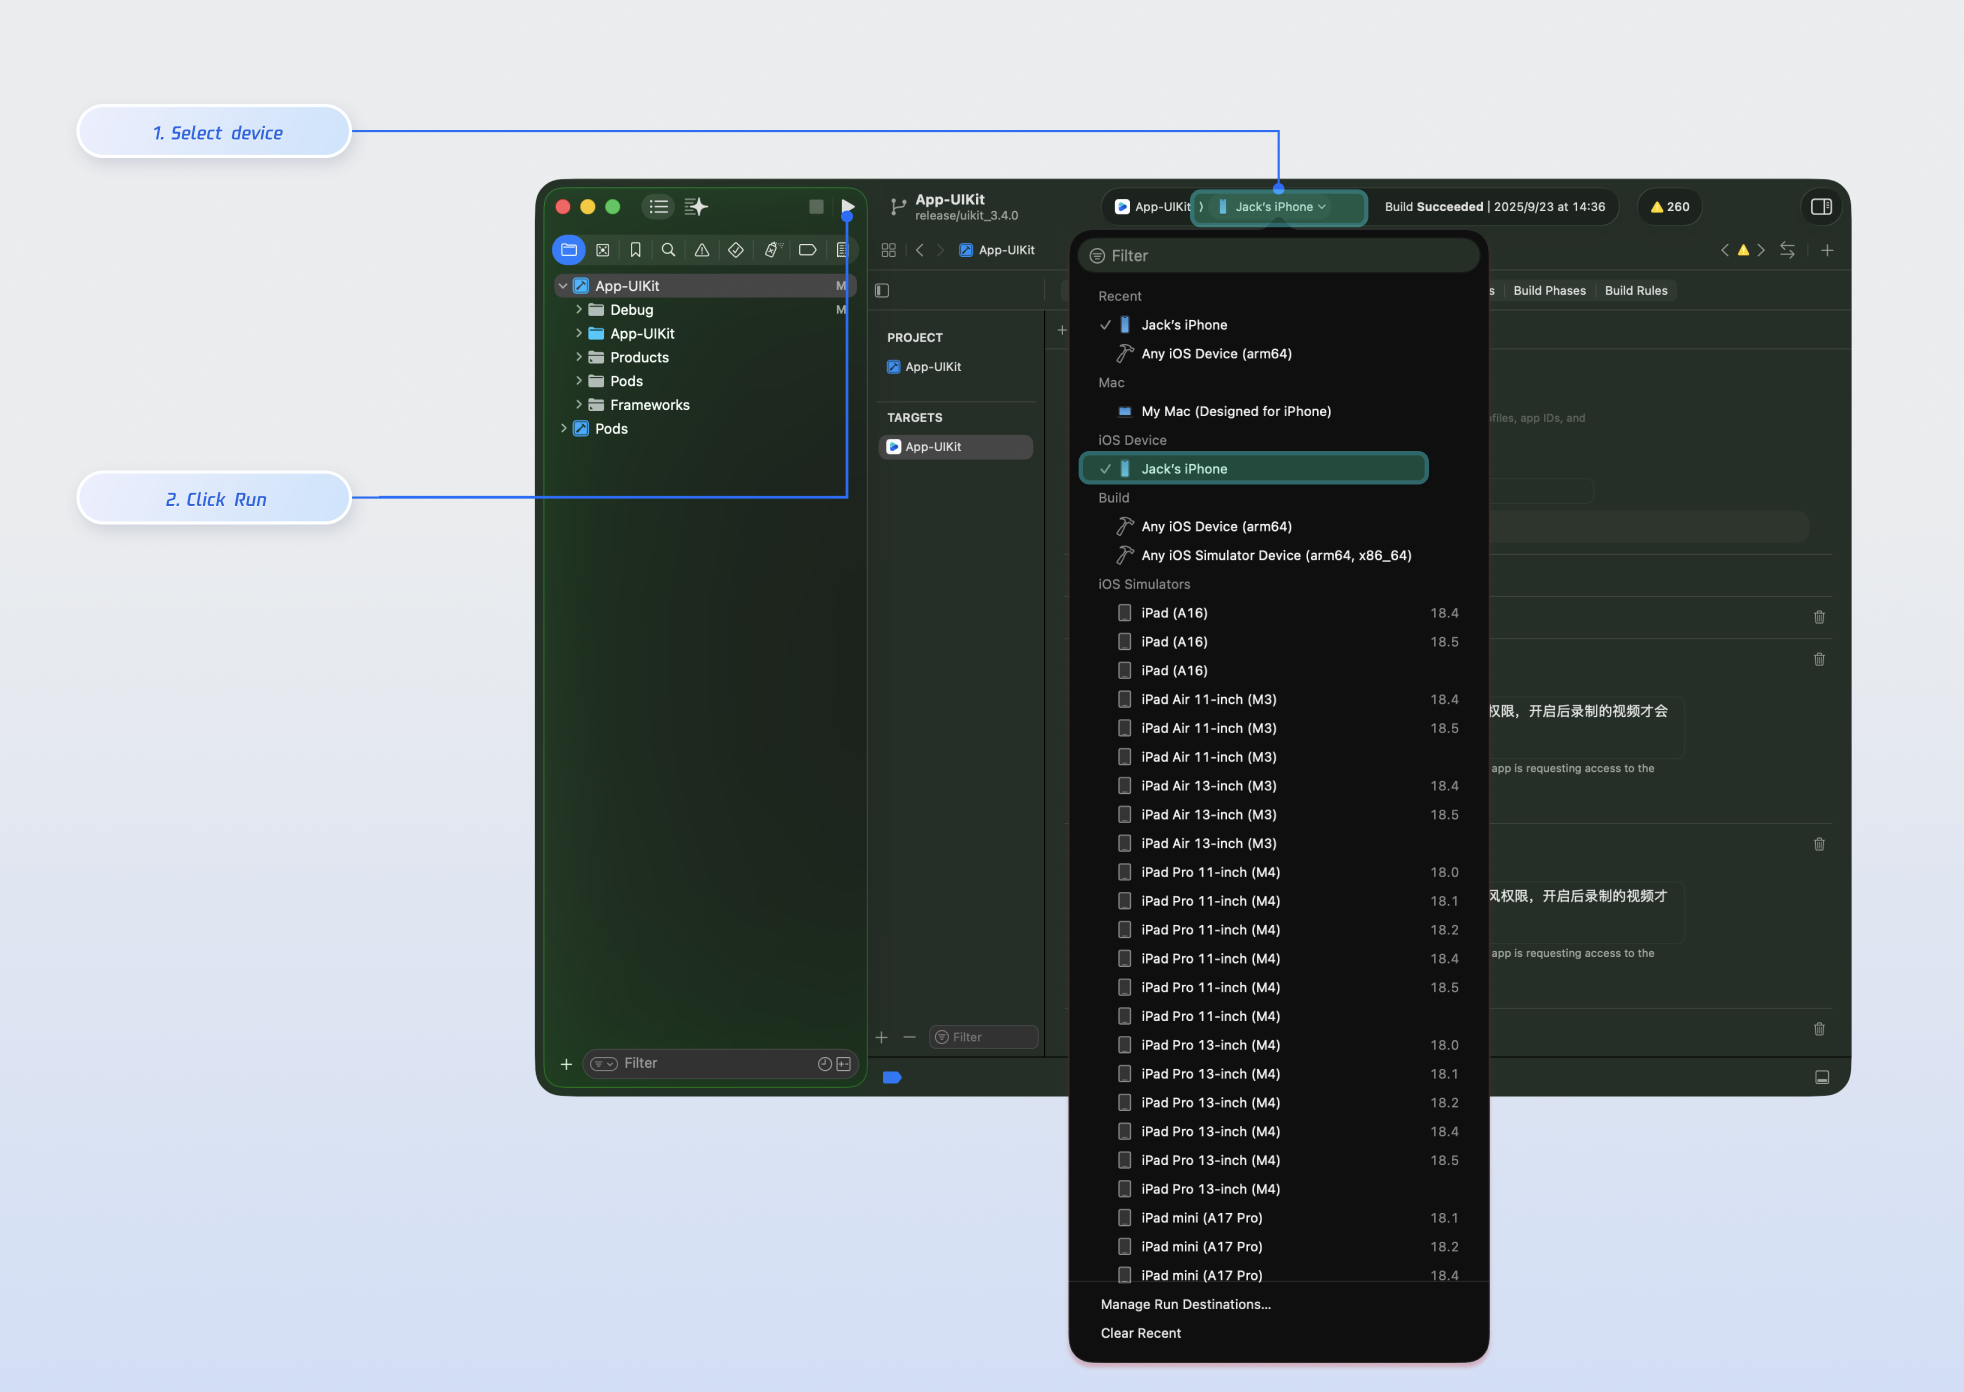
1.
Connect your iOS device to your computer. On your device, go to Settings > Privacy & Security > Developer Mode and enable Developer Mode.
2.
In Xcode's top toolbar, select your iOS device from the iOS Device dropdown menu.
3. Click the run button to deploy the app to your device.
Tip:
To fully experience the conference room workflow, run the Demo on two devices and log in with two different users (for example, one device as the host and one as a participant).
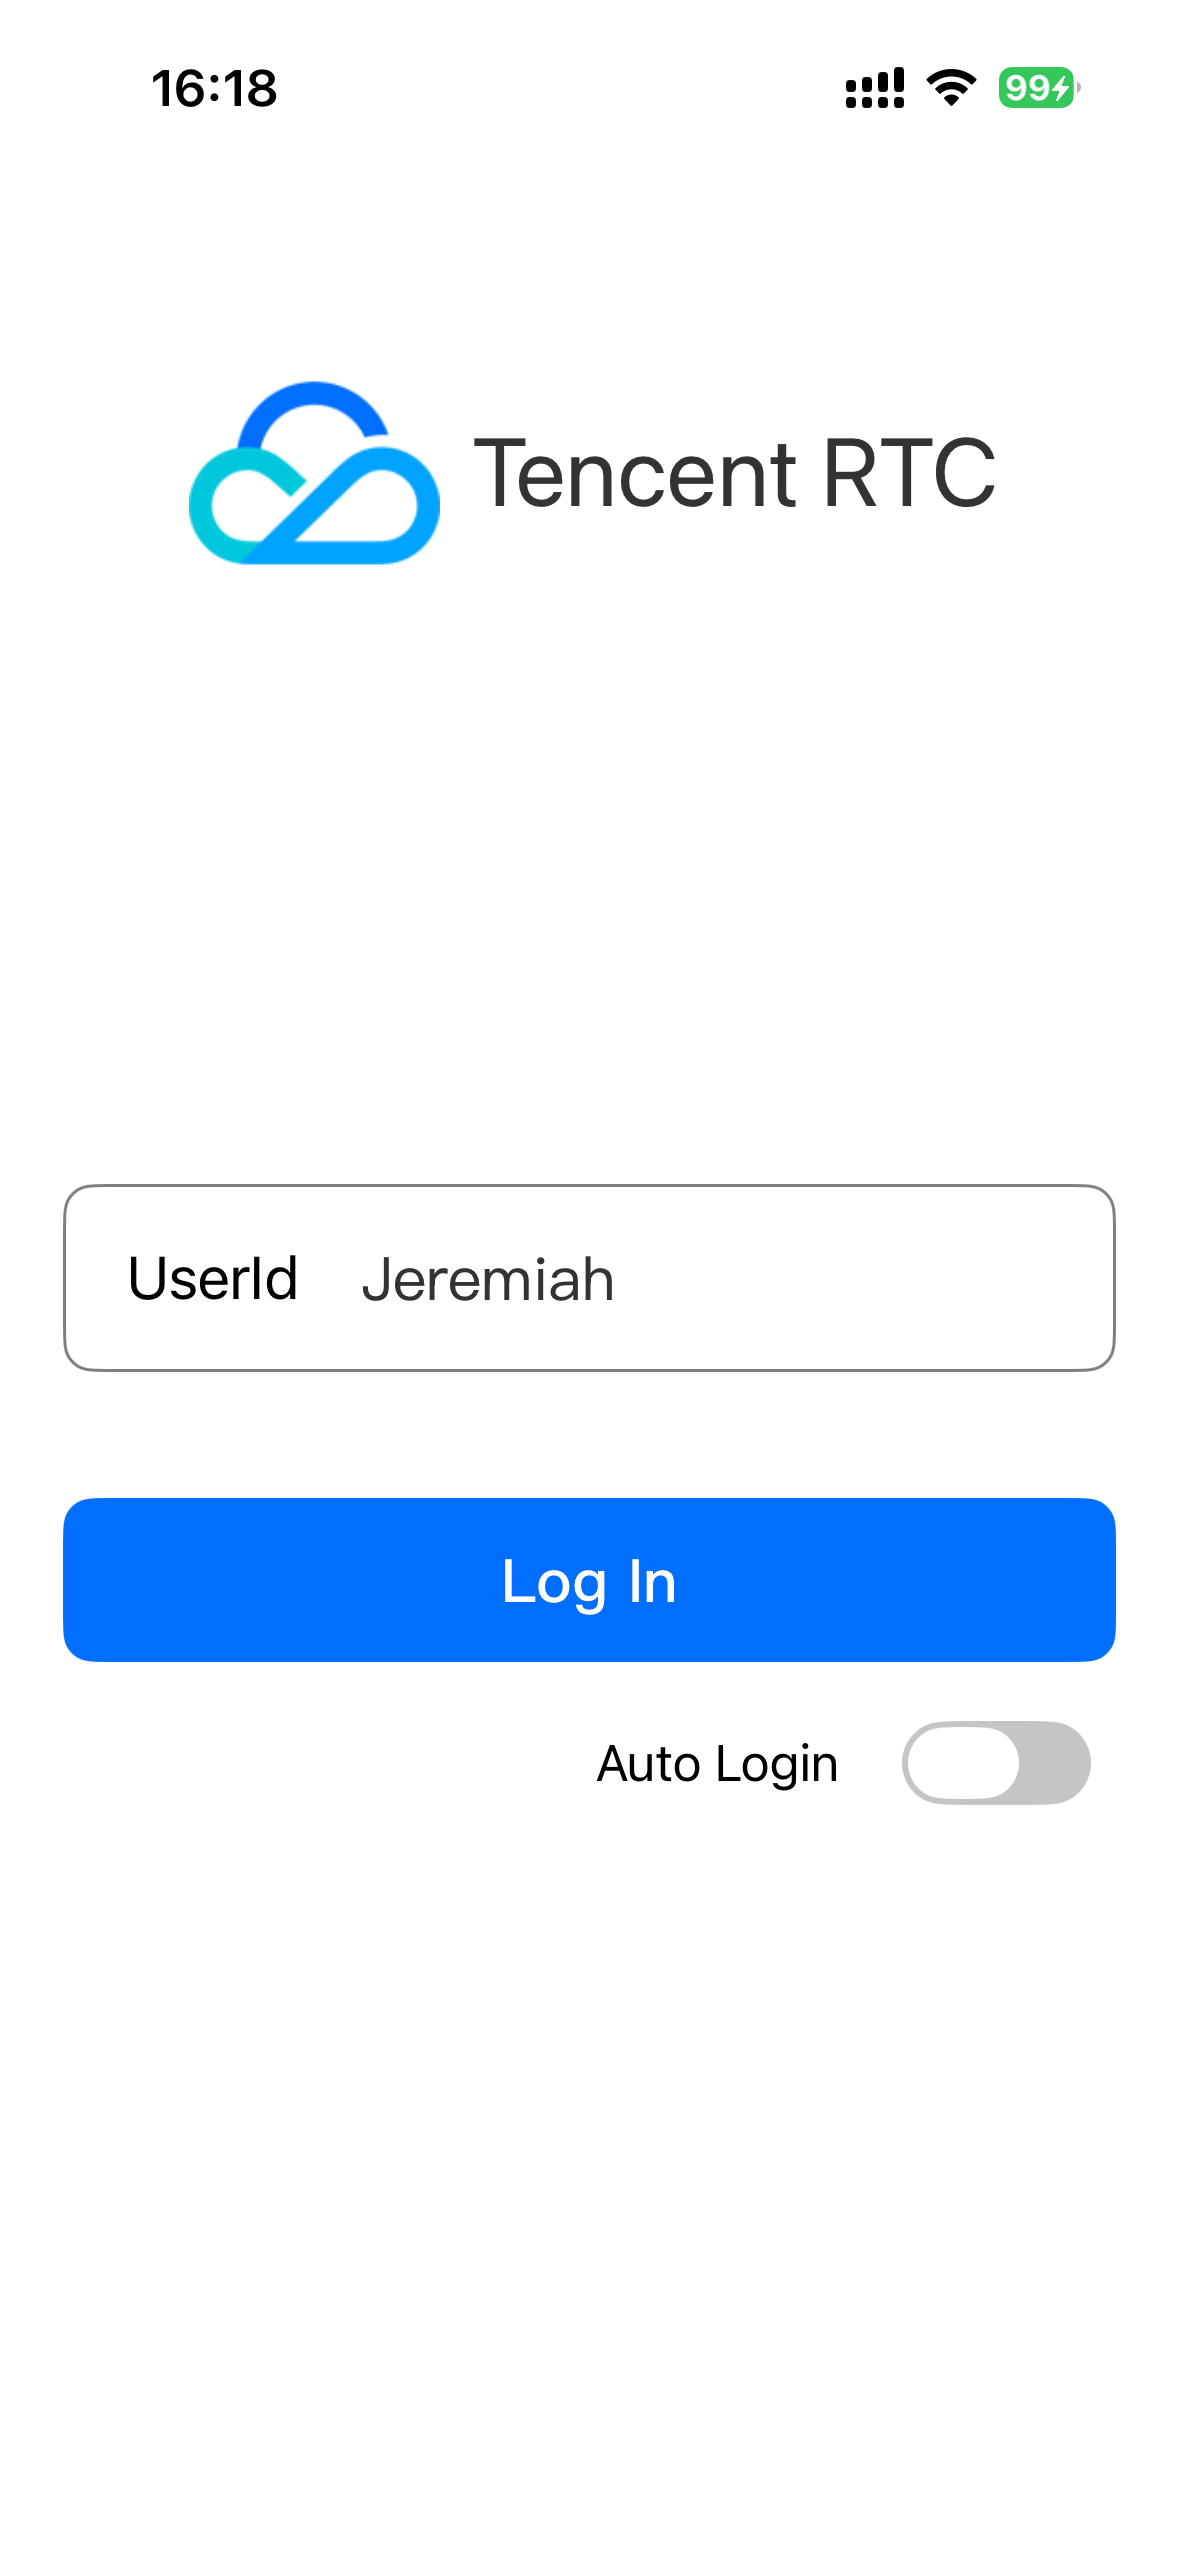
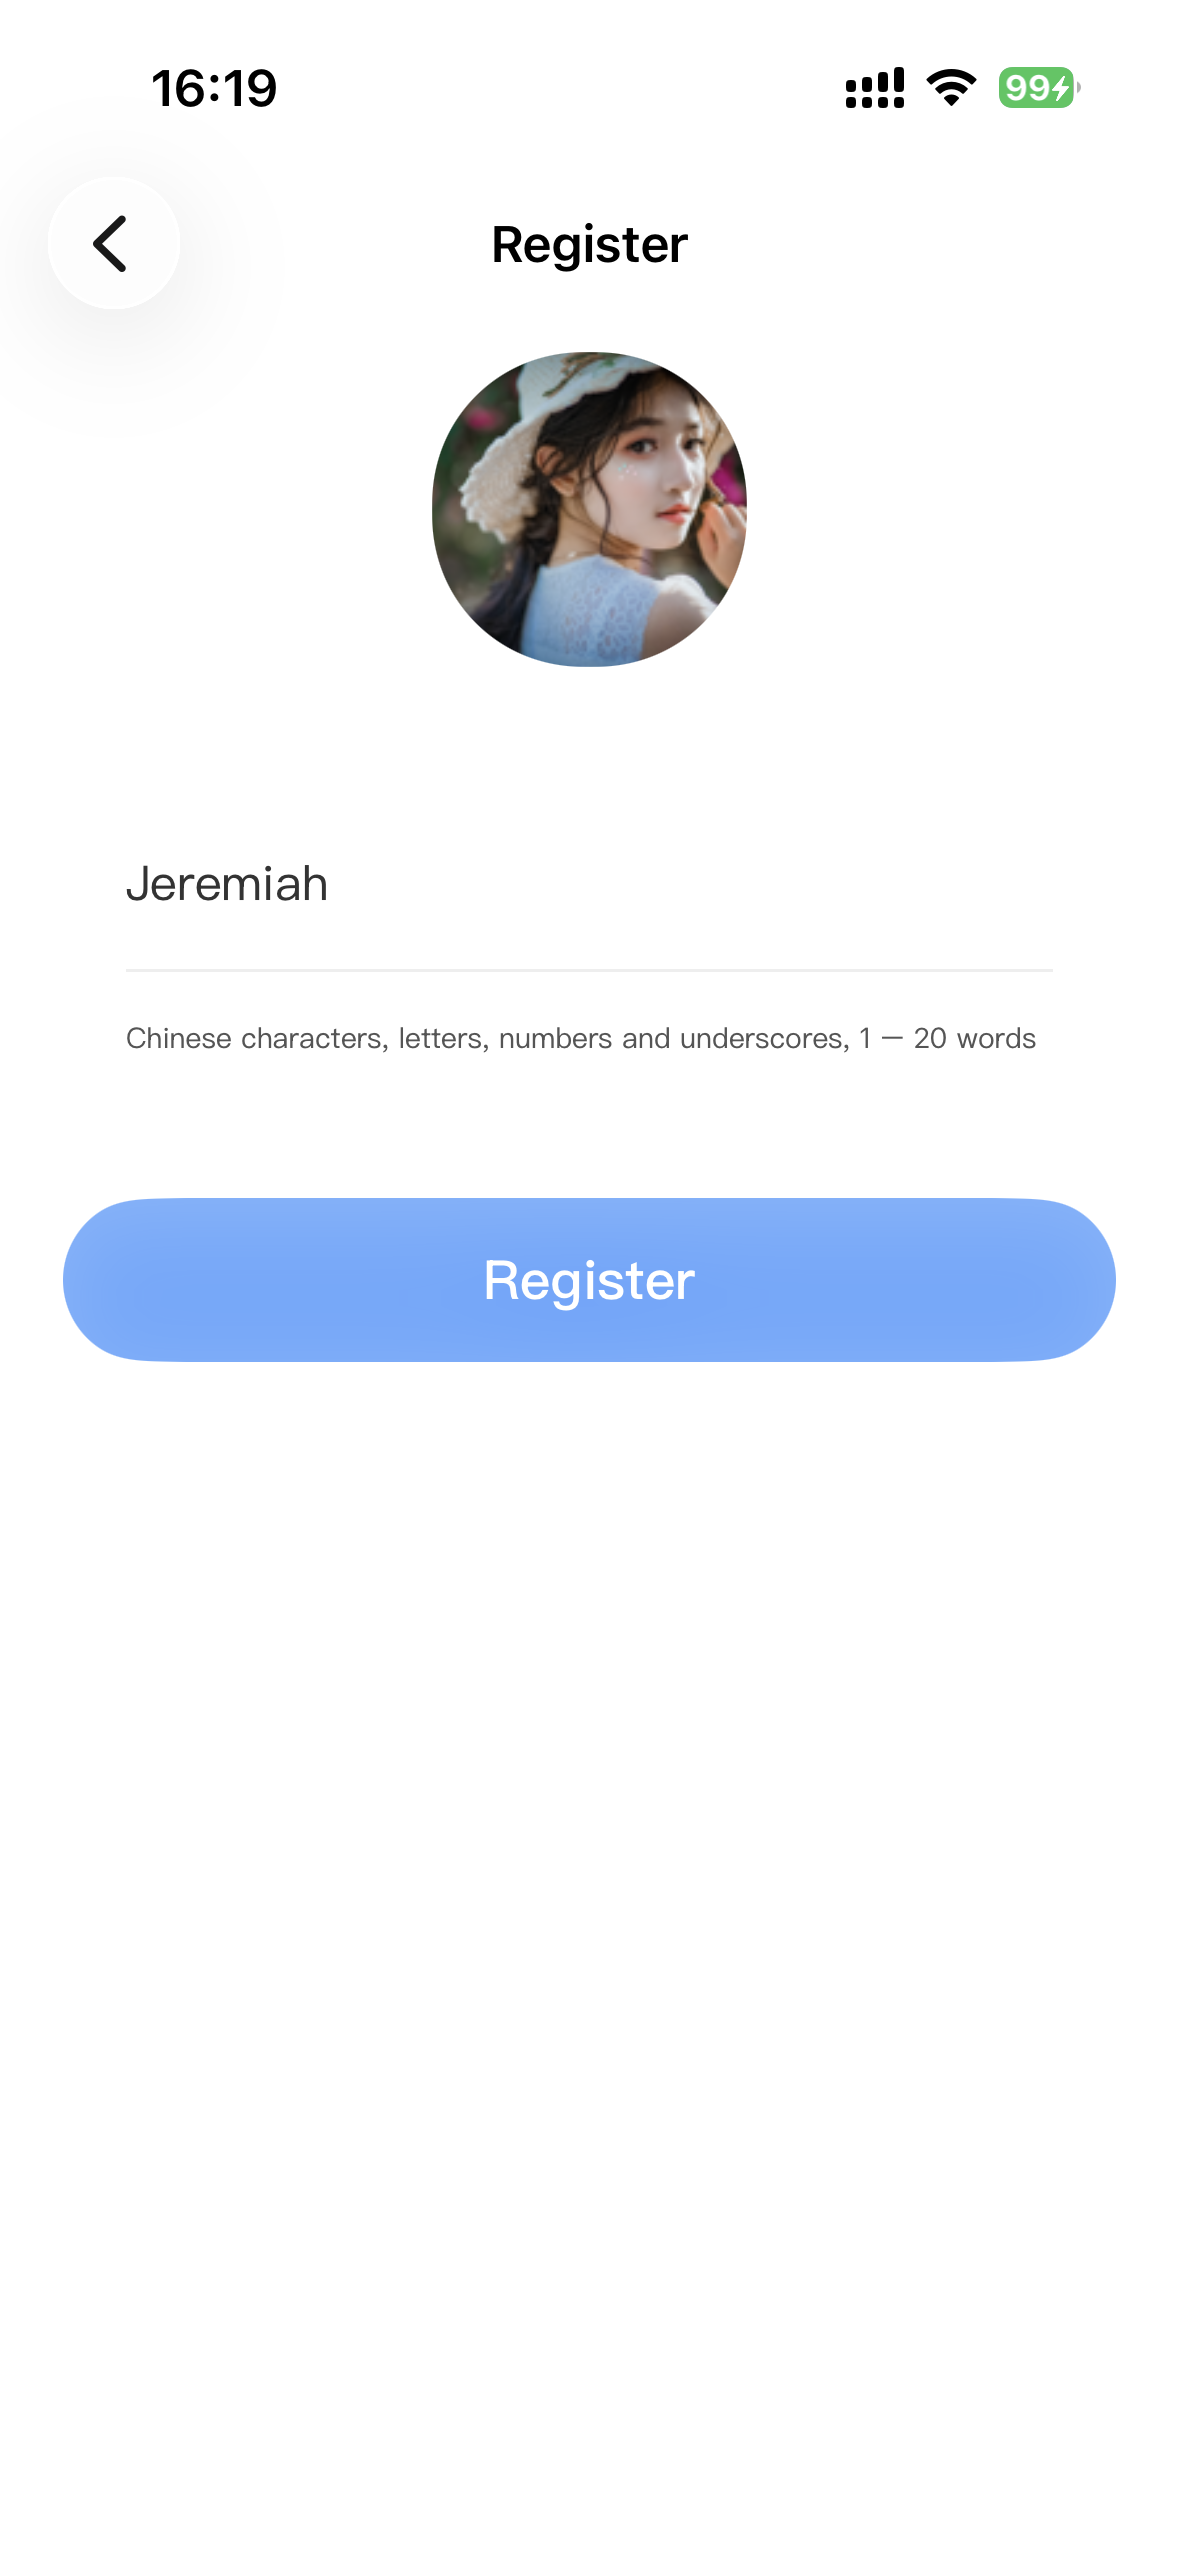
Login and Registration
After launching the Demo, enter your User ID to log in. If the User ID has not been registered, you will be redirected to the registration page to set your nickname.
Login Page
Registration Page
Tip:
Avoid using simple UserIDs like "1", "123", or "111" to prevent login failures caused by duplicate IDs during multi-user testing. For debugging, use a unique UserID.
Room Features
After logging in, access the TUIRoomKit Demo feature page from the conference entry on the main page.
Feature Entry
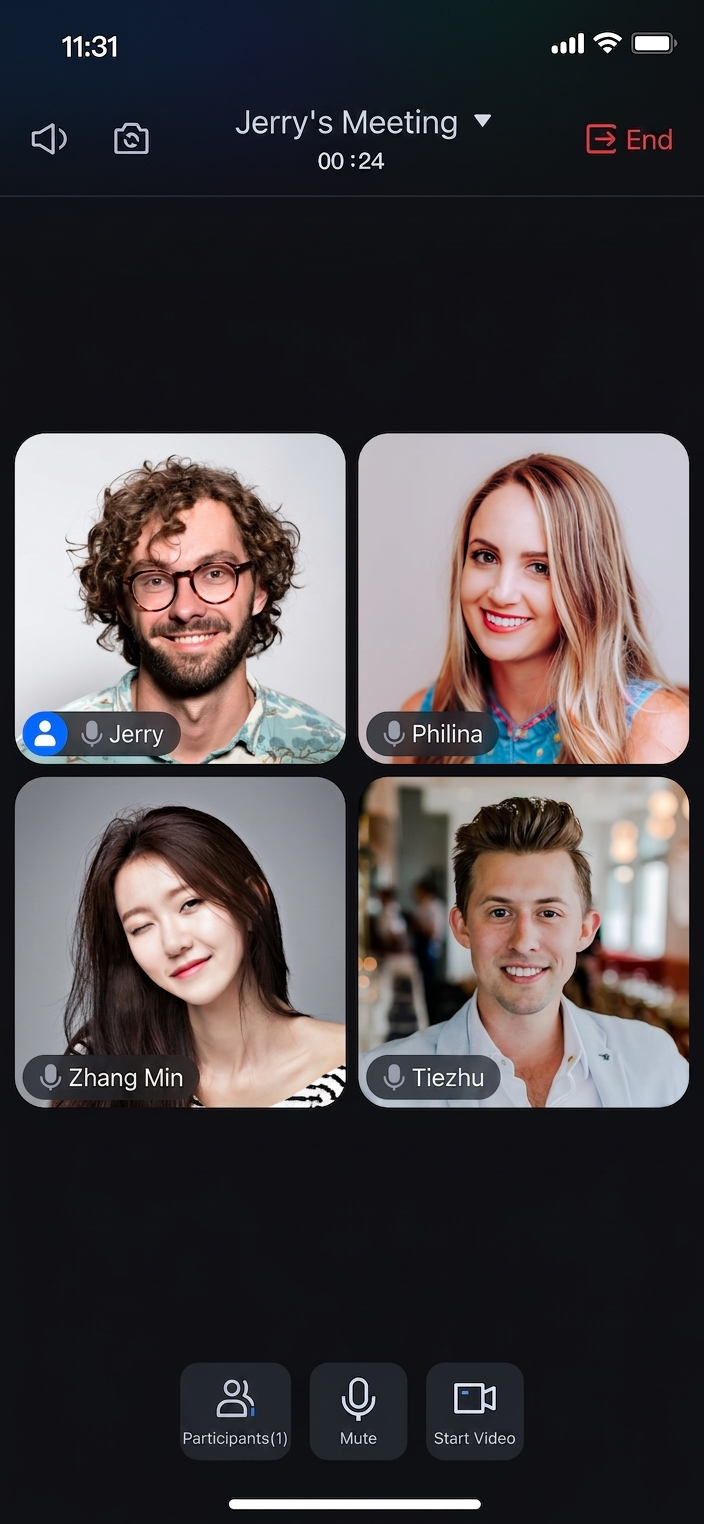
Standard Room Main Page
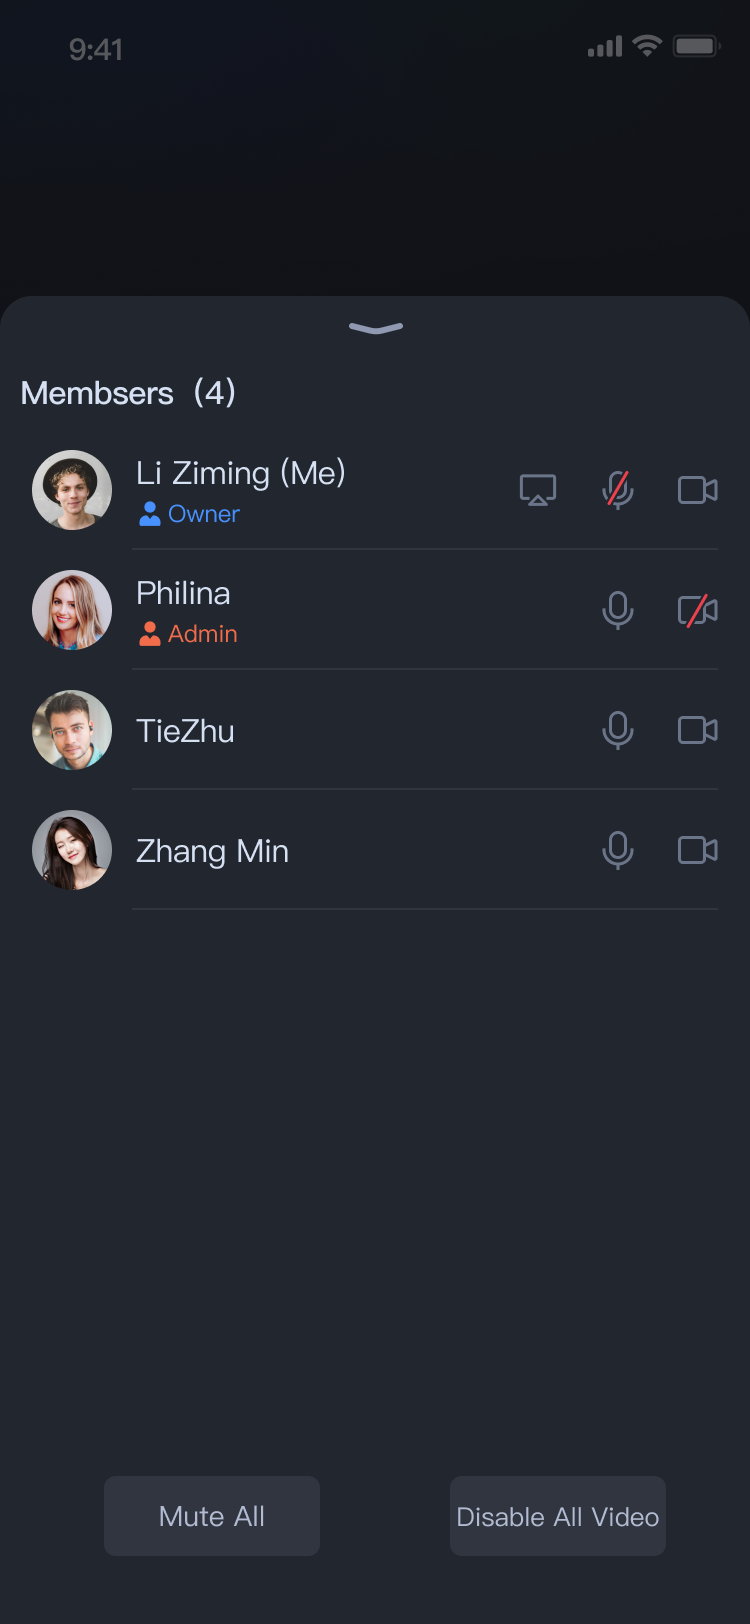
Member Management Panel
Note:
To experience Audio/Video interconnectivity across different devices, make sure the SDKAPPID in the TUIKit_iOS/application/Debug/GenerateTestUserSig.swift file is the same on all devices.
FAQs
Resolving Demo Signing Errors or Login Failures
Verify that the SDKAPPID and SECRETKEY entered in TUIKit_iOS/application/Debug/GenerateTestUserSig.swift match the credentials from the TRTC Console > Application Management.
Removing Call and Live Modules from the Demo
The current Demo is an integrated sample covering three core TRTC Audio/Video scenarios: Call (TUICallKit), Live (TUILiveKit), and Conference (TUIRoomKit). If you only need the conference scenario, remove unnecessary modules to streamline your project:
1.
Remove the TUILiveKit and TUICallKit Pod dependencies from the Podfile, then re-run pod install.
2.
Delete all code related to Call and Live scenarios from the Demo project.
3.
Resolve any compilation errors, then build and run the Demo project.
Contact Us
If you have any questions or suggestions during integration or use, contact info_rtc@tencent.com for support.