please select
Call
  • Web
    • Overview
      • Product Introduction
      • Activate the Service
      • Pricing
        • Free Minutes
        • Call Monthly Packages
        • Billing Explanation for Subscription Package Duration
    • Get Started
      • Run Sample Code
      • Integration (React)
      • Integration (Vue3)
      • Secure authentication with userSig
    • Basic Features
      • UI Customization
      • Configuring Nickname and Avatar
      • GroupCall
      • Floating Window
      • Custom Ringtone
      • Configure Resolution and Fill Mode
      • Monitoring Call Status
      • Language Settings
    • Advanced Features
      • Virtual Background
      • AI Noise Suppression
      • On-Cloud Recording
    • Client APIs
      • UIKit APIs
        • API Overview
        • TUICallKit
      • Engine APIs
        • TUICallEngine
        • TUICallEvent
    • Server APIs
      • Call Status Callback
        • Call Status Callback
        • Call Event Callback
        • Callback Configuration
          • API List for Callback Configuration
          • Establishing Callback Configuration
          • Retrieving Callback Configuration
          • Update Callback Configuration
          • Remove Callback Configuration
      • REST API
        • Introduction to REST API
        • Retrieve records via callId
        • Retrieve Records Based on Conditions
    • FAQs
      • All Platfroms
      • Web
      • ErrorCode
      • Release Notes
  • Android
    • Overview
      • Product Introduction
      • Activate the Service
      • Pricing
        • Free Minutes
        • Call Monthly Packages
        • Billing Explanation for Subscription Package Duration
    • Get Started
      • Run Sample Code
      • Integration
      • Secure authentication with userSig
    • Basic Features
      • UI Customization
      • Offline Call Push
      • Configuring Nicknames and Avatars
      • Group Call
      • Floating Window
      • Custom Ringtone
      • Monitoring Call Status
    • Advanced Features
      • Virtual Background
      • AI Noise Suppression
      • On-Cloud Recording
    • Client APIs
      • UIKit APIs
        • API Overview
        • TUICallKit
        • TUICallObserver
        • Type Definition
      • Engine APIs
        • TUICallEngine
    • Server APIs
      • Call Status Callback
        • Call Status Callback
        • Call Event Callback
        • Callback Configuration
          • API List for Callback Configuration
          • Establishing Callback Configuration
          • Retrieving Callback Configuration
          • Update Callback Configuration
          • Remove Callback Configuration
      • REST API
        • Introduction to REST API
        • Retrieve records via callId
        • Retrieve Records Based on Conditions
    • FAQs
      • All Platforms
      • Android
      • ErrorCode
      • Release Notes
  • iOS
    • Overview
      • Product Introduction
      • Activate the Service
      • Pricing
        • Free Minutes
        • Call Monthly Packages
        • Billing Explanation for Subscription Package Duration
    • Get Started
      • Run Sample Code
      • Integration
      • Secure authentication with userSig
    • Basic Features
      • UI Customization
      • Offline Call Push
        • VoIP
        • APNs
      • Configuring Nicknames and Avatars
      • Group Call
      • Floating Window
      • Custom Ringtone
      • Monitoring Call Status
    • Advanced Features
      • Virtual Background
      • AI Noise Suppression
      • On-Cloud Recording
    • Client APIs
      • UIKit APIs
        • API Overview
        • TUICallKit
        • TUICallObserver
        • Type Definition
      • Engine APIs
        • TUICallEngine
    • Server APIs
      • Call Status Callback
        • Call Status Callback
        • Call Event Callback
        • Callback Configuration
          • API List for Callback Configuration
          • Establishing Callback Configuration
          • Retrieving Callback Configuration
          • Update Callback Configuration
          • Remove Callback Configuration
      • REST API
        • Introduction to REST API
        • Retrieve records via callId
        • Retrieve Records Based on Conditions
    • FQAs
      • All Platform
      • iOS
      • ErrorCode
      • Release Notes
  • Flutter
    • Overview
      • Product Introduction
      • Activate the Service
      • Pricing
        • Free Minutes
        • Call Monthly Packages
        • Billing Explanation for Subscription Package Duration
    • Get Started
      • Run Sample Code
      • Integration
      • Secure authentication with userSig
    • Basic Features
      • UI Customization
      • offline Call Push
        • Notification
        • VoIP (Optional)
      • Configuring Nicknames and Avatars
      • Group Call
      • Floating Window
      • Custom Ringtone
      • Monitoring Call Status
    • Advanced Features
      • Virtual Background
      • AI Noise Suppression
      • On-Cloud Recording
      • Beauty Effects
    • Client APIs
      • API Overview
      • TUICallKit
      • TUICallEngine
      • TUICallObserver
      • Type Definition
    • Server APIs
      • Call Status Callback
        • Call Status Callback
        • Call Event Callback
        • Callback Configuration
          • API List for Callback Configuration
          • Establishing Callback Configuration
          • Retrieving Callback Configuration
          • Update Callback Configuration
          • Remove Callback Configuration
      • REST API
        • Introduction to REST API
        • Retrieve records via callId
        • Retrieve Records Based on Conditions
    • FQAs
      • All Platform
      • Flutter
      • ErrorCode
      • Upgrading
      • Release Notes
Call

VoIP (Optional)

VoIP calls are a technology for transmitting digital voice data over the internet or IP networks. They offer advantages such as low cost, high sound quality, strong flexibility, and the integration of other Communication Services.
Android
iOS


configuration VoIP

iOS

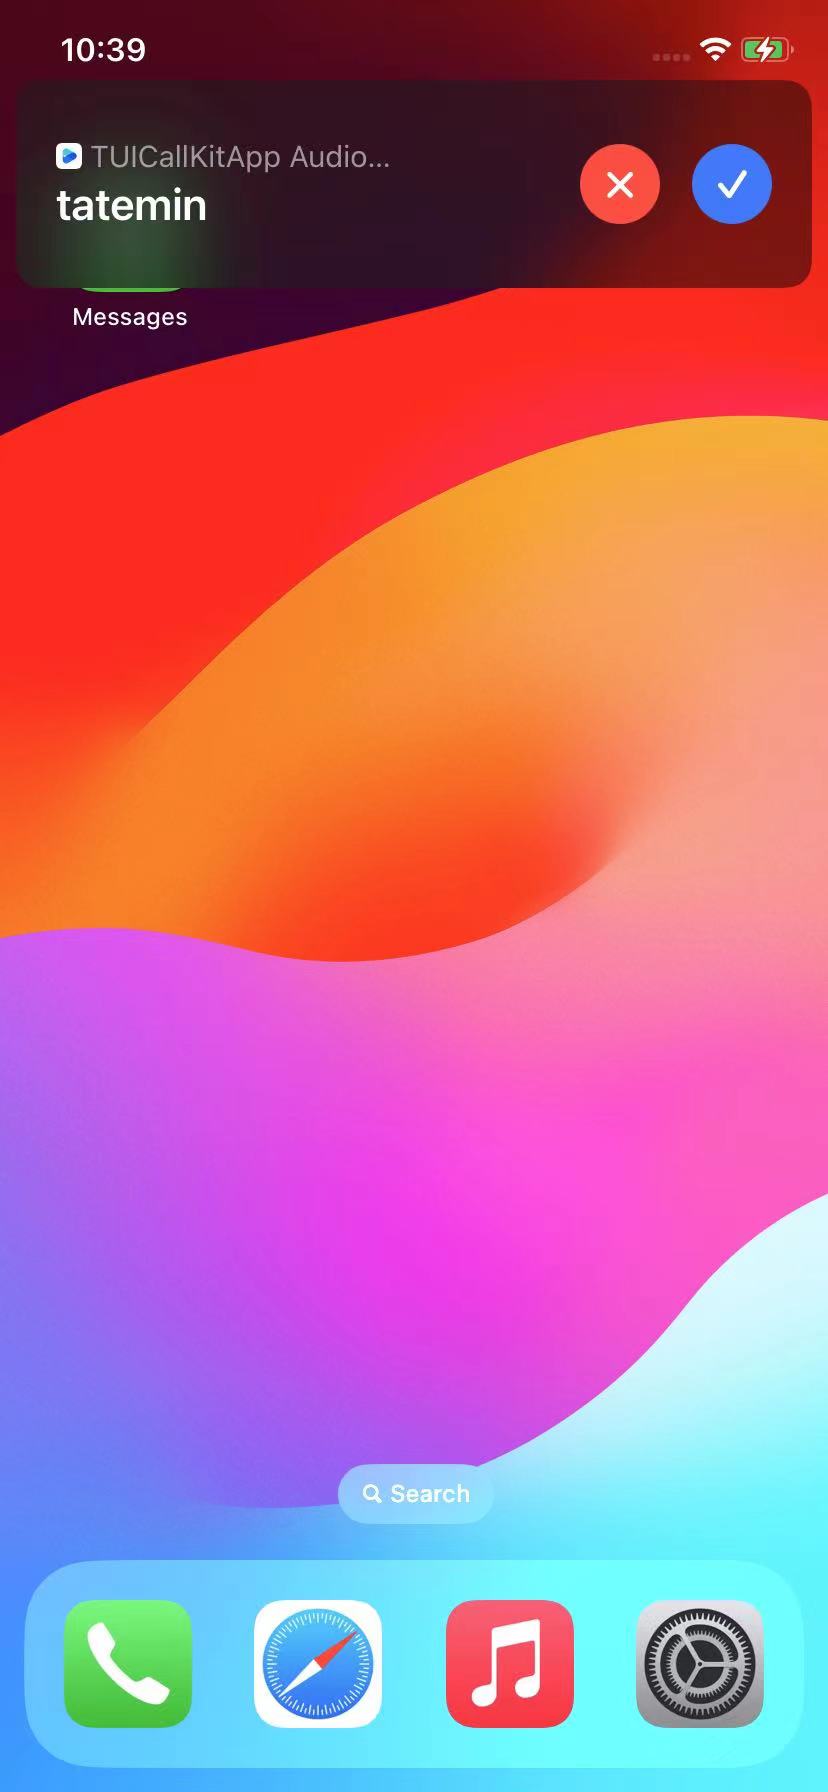
Since TIMPush currently does not support the VoIP push feature on iOS, we provide a free alternative solution to help you implement VoIP push on iOS devices: VoIP Offline Wakeup Configuration Process

Android

You can use our TIMPush plugin (paid) to implement VoIP notifications on Android devices.

Integrated message push plugin

This plugin's package name on pub.dev is: tencent_cloud_chat_push. You can include it in the pubspec.yaml dependencies directory, or execute the following command for automatic installation.
flutter pub add tencent_cloud_chat_push

Preparation Requirements

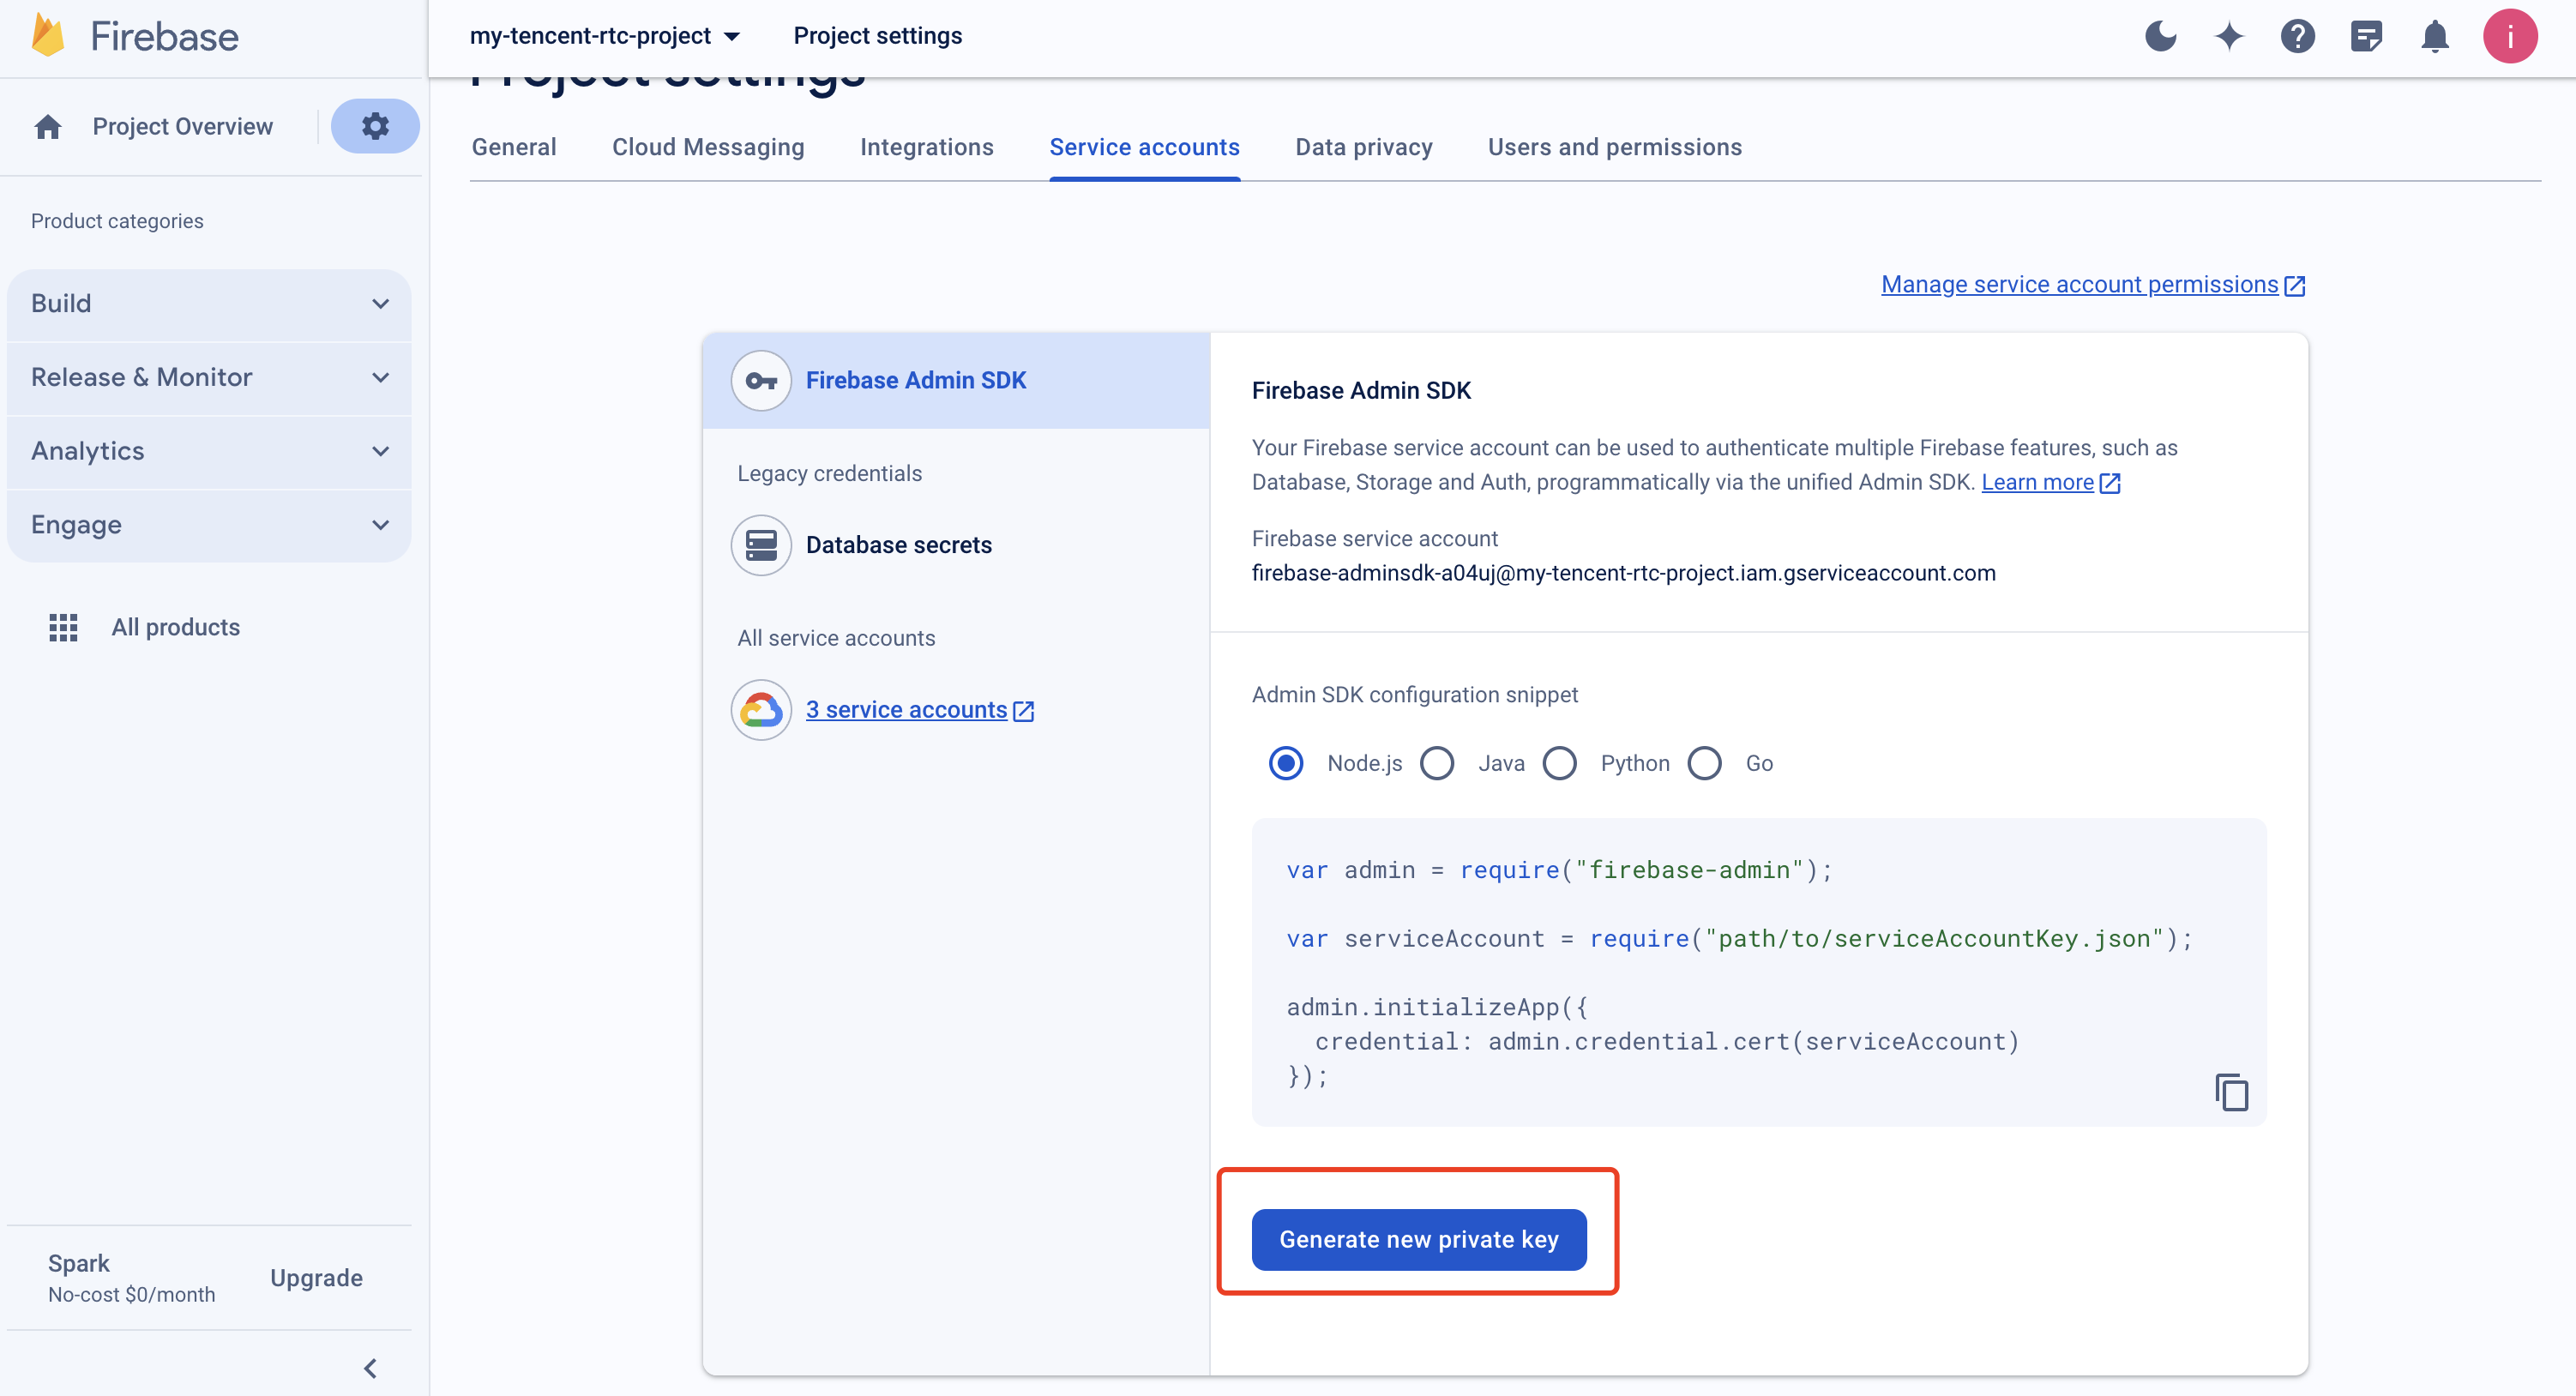
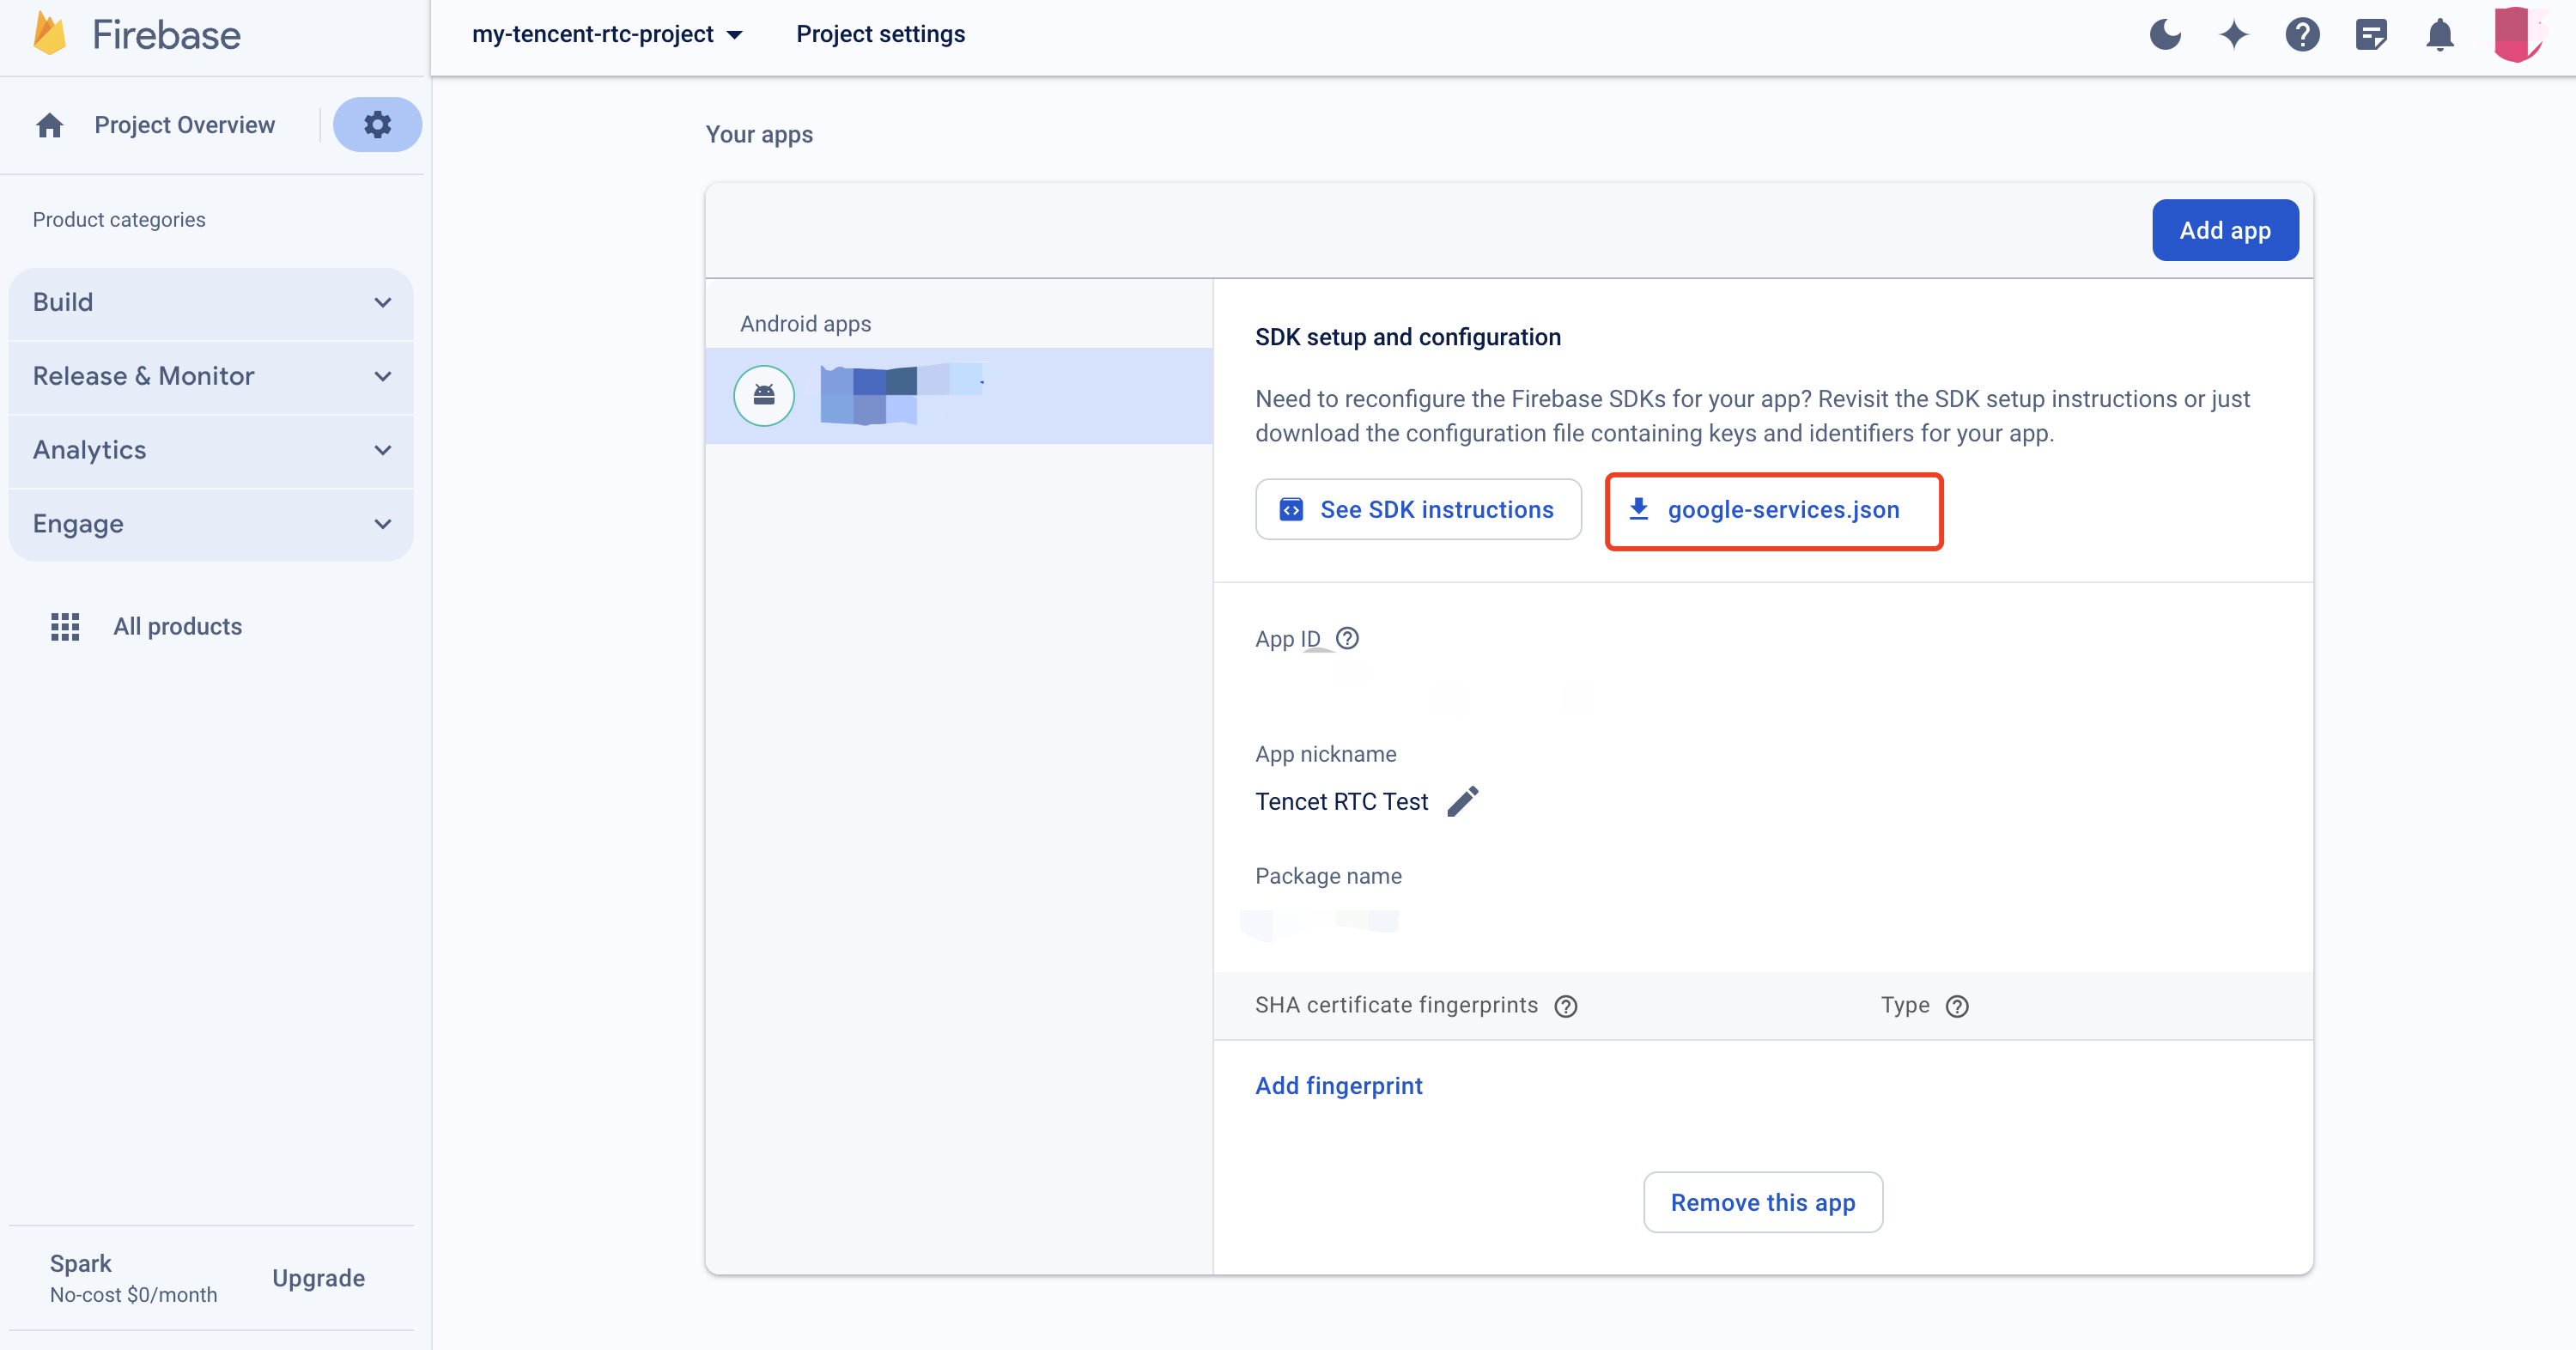
1. Register your application to the FCM Push Platform to obtain parameters such as AppID and AppKey, as well as the google-services.json file, in order to implement the offline push feature.
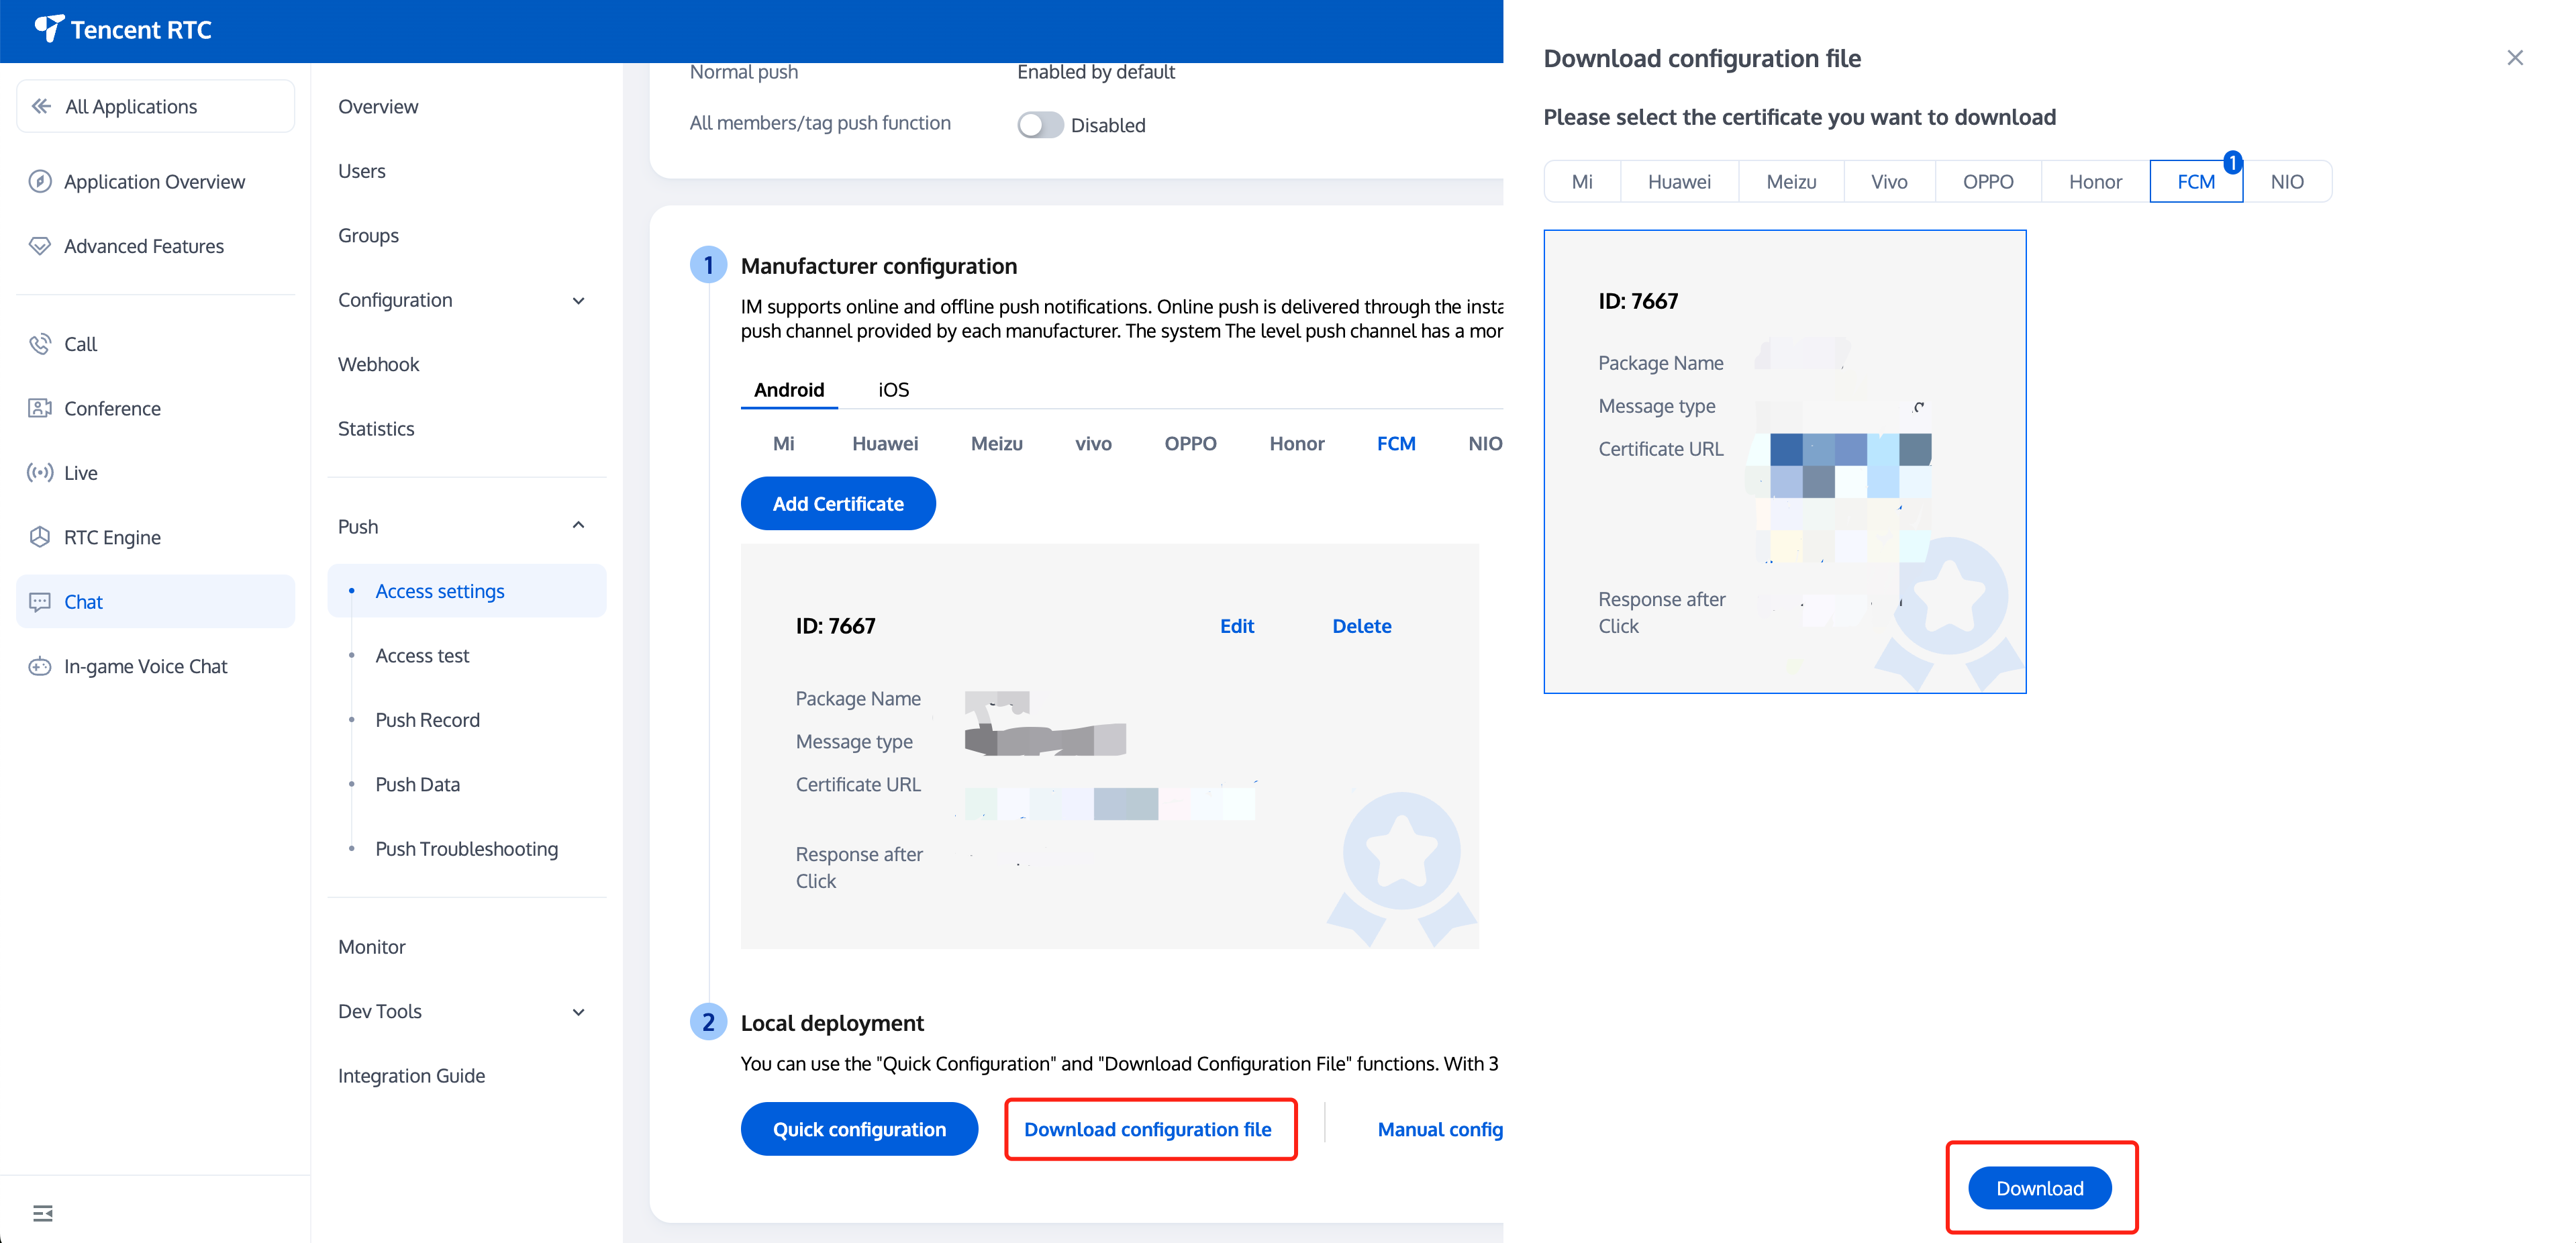
2. Log in to the Tencent RTC Console, select your application, in the Chat > Push > Access settings > Android feature tab, choose FCM, add the FCM certificate, where the message type is selected as Transparent transmission (data) message.
Vendor Push Platform
Configuring in the Chat console


Quick Integration

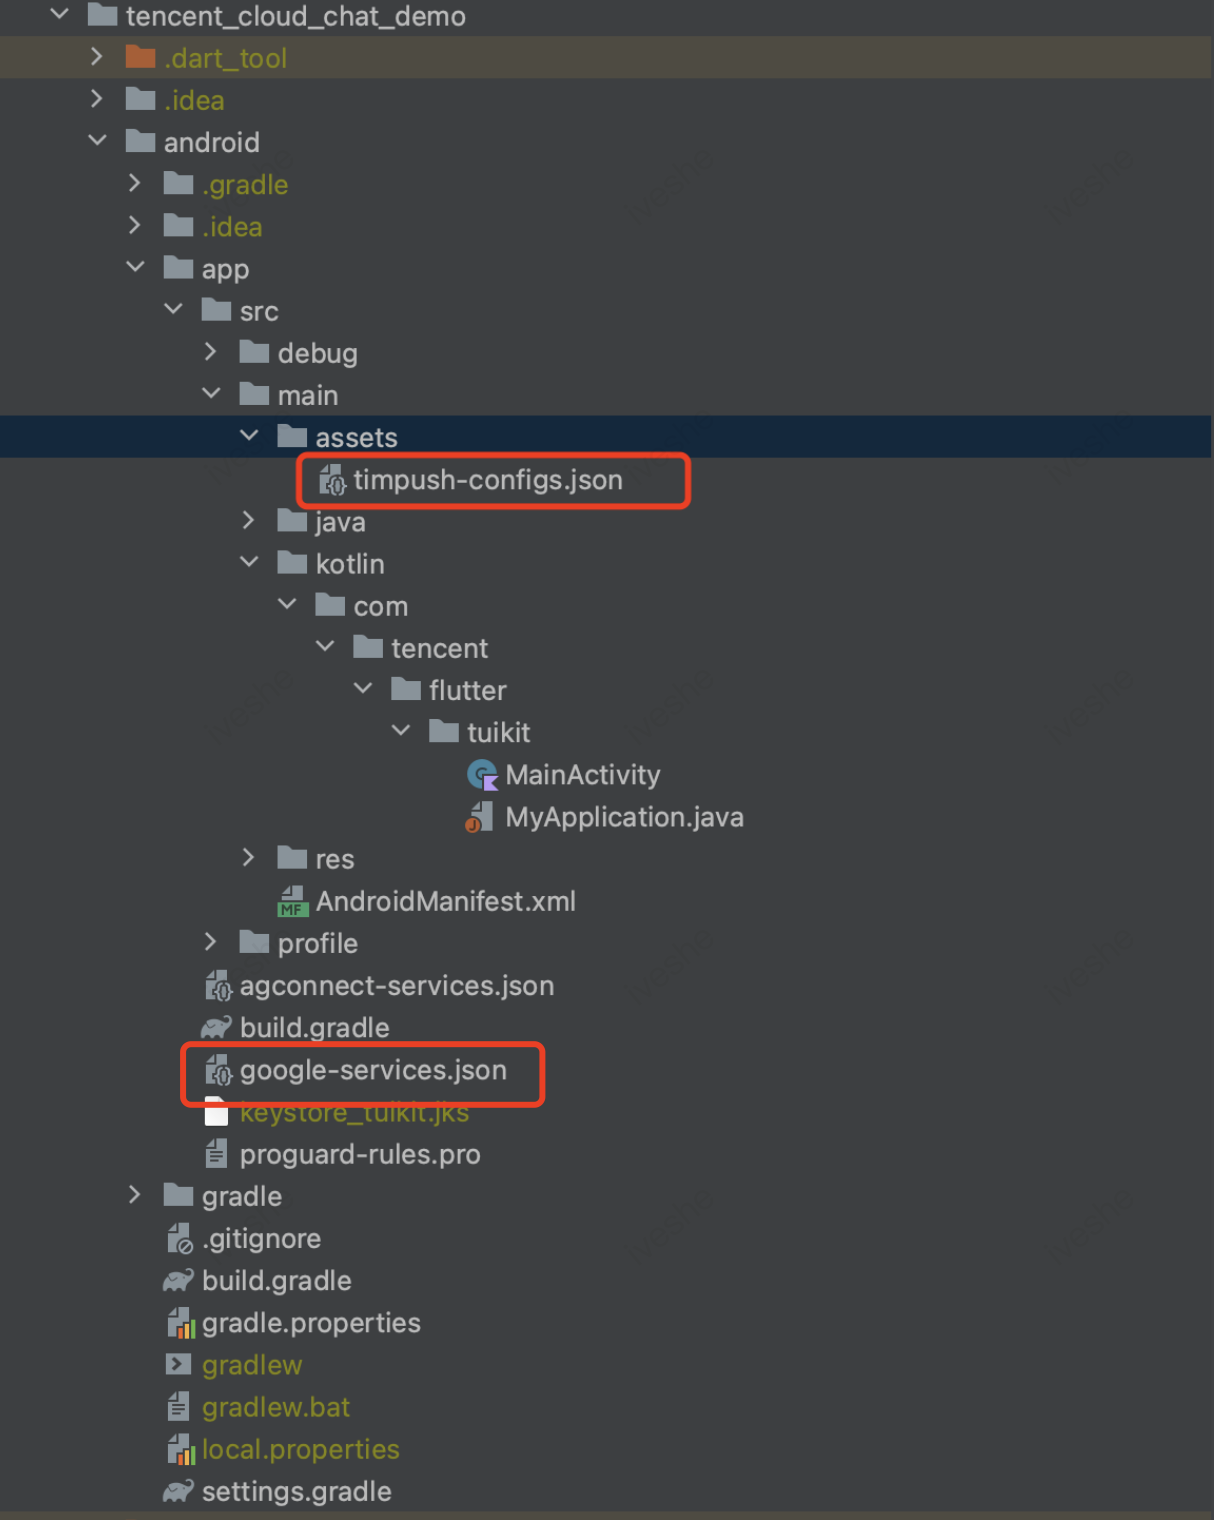
1. Download and add the configuration file
After completing the vendor push information in the console, download and add the configuration file to your project. Add the downloaded timpush-configs.json file to the assets directory of the application module, and add the google-services.json to the project app directory.
Select and download the configuration file timpush-configs.json
Download the file google-services.json
Add to the project


2. Integrate the TIMPush plugin
In the build.gradle file under the project's app directory, add the following dependency:
implementation "com.tencent.timpush:fcm: xxxxxx"
Note:
TIMPush requires integration with the Chat SDK version 7.9.5666 or above.
The version of the dependency added in build.gradle needs to correspond with the tencent_cloud_chat_push version.
3. Client Code Configuration
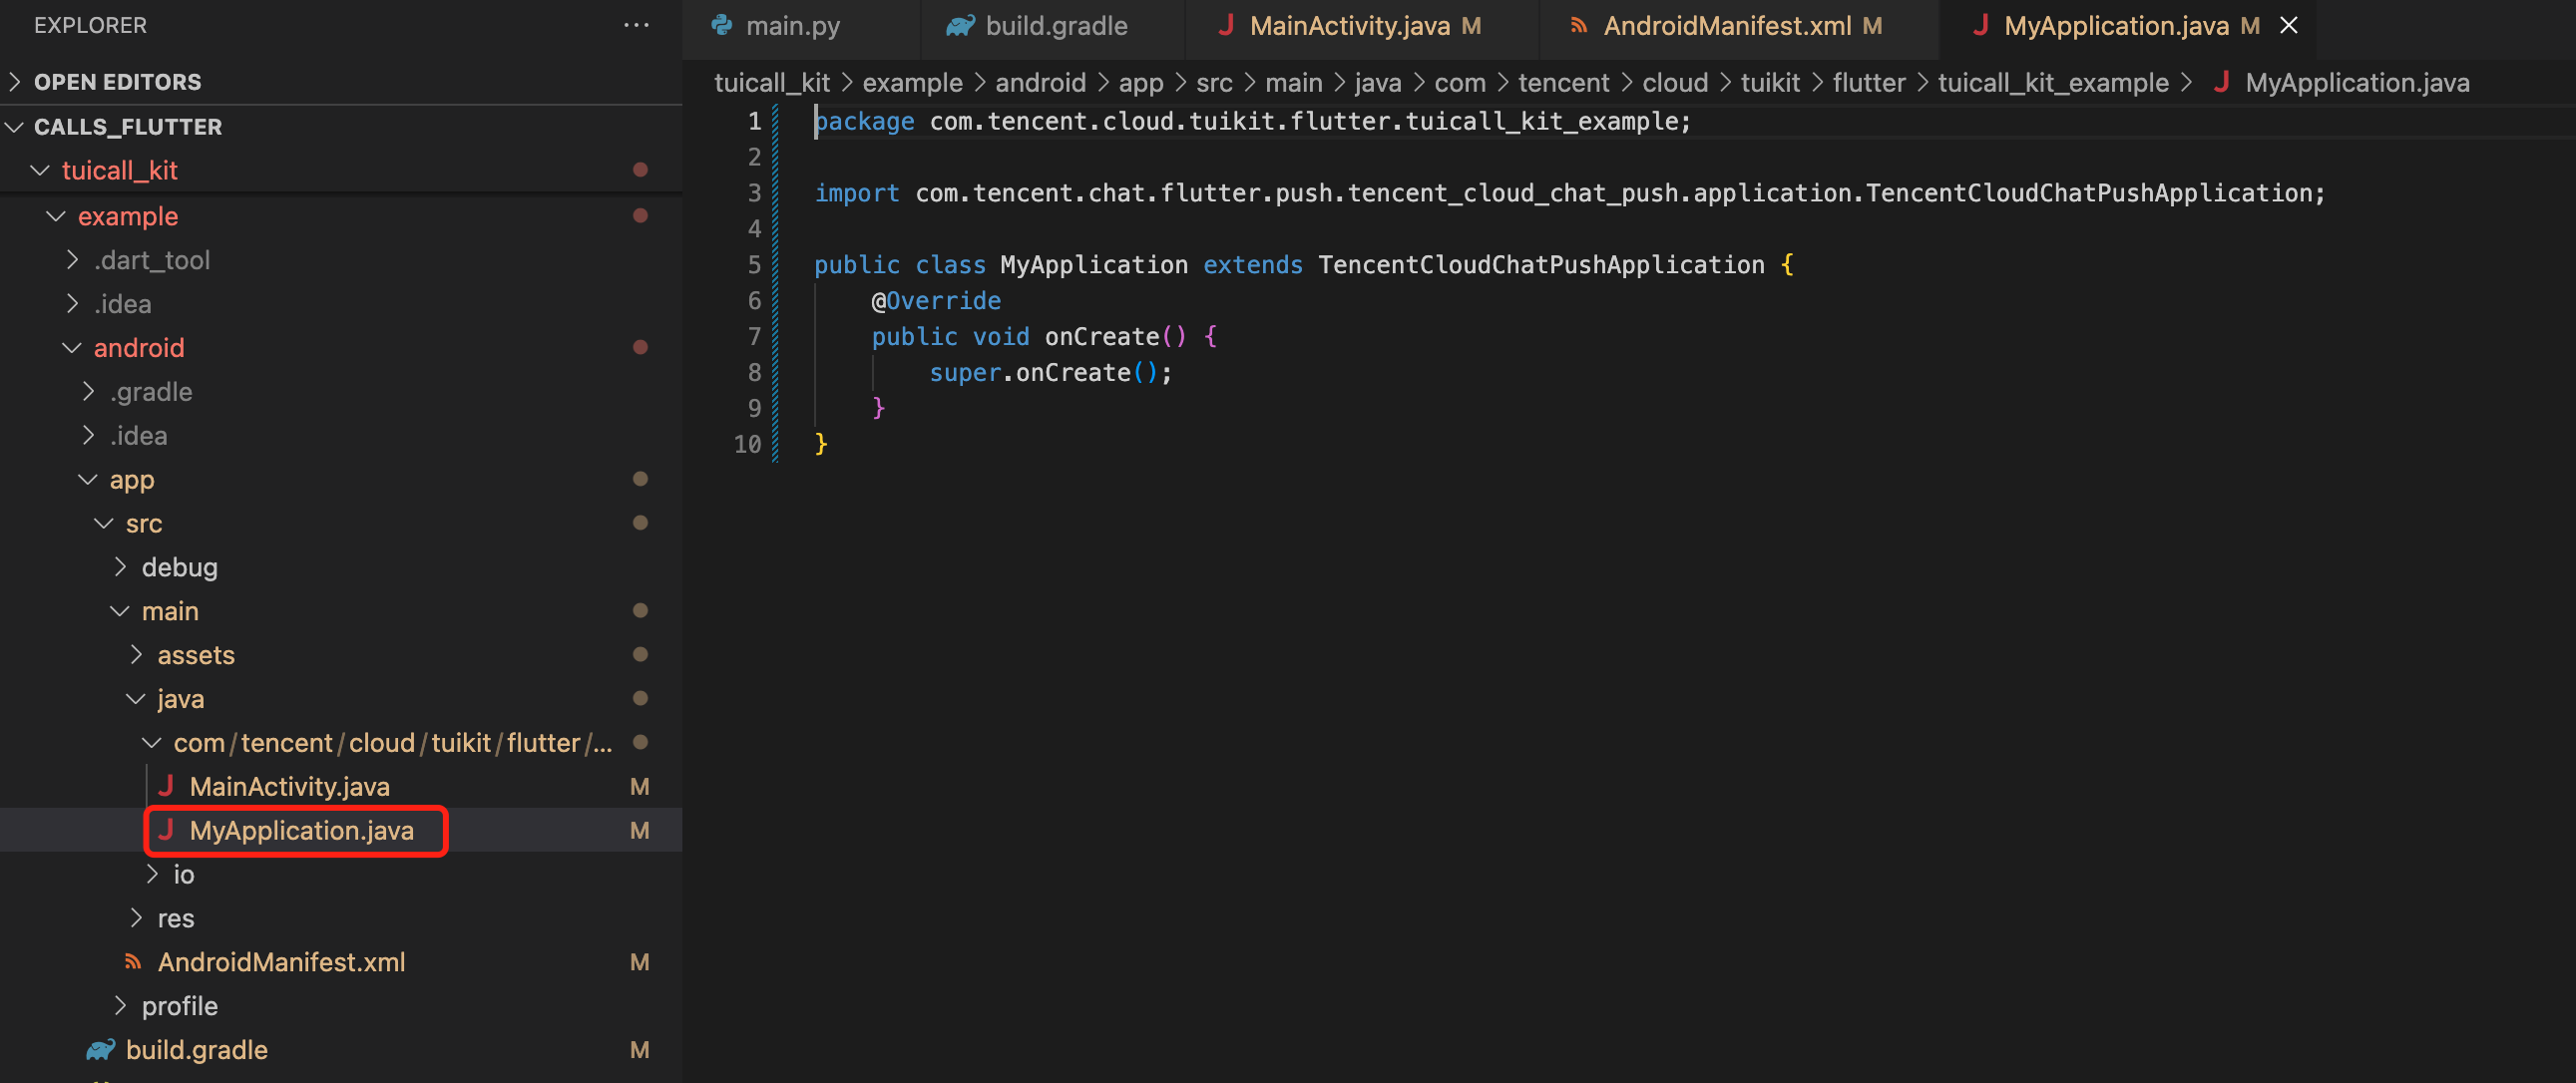
In the same directory as MainActivity under your project's android path, create a new Application file category, which could be named MyApplication.
If you have already defined your own Application class, you can directly reuse it, without the need for recreating.


Embed the following code into the file, as demonstrated above:
package xxxx.xxxx.xx import com.tencent.chat.flutter.push.tencent_cloud_chat_push.application.TencentCloudChatPushApplication; public class MyApplication extends TencentCloudChatPushApplication { @Override public void onCreate() { super.onCreate(); } }
Note:
If you have already created your own Application for other purposes, simply extend TencentCloudChatPushApplication and ensure that onCreate() method is called in super.onCreate();.
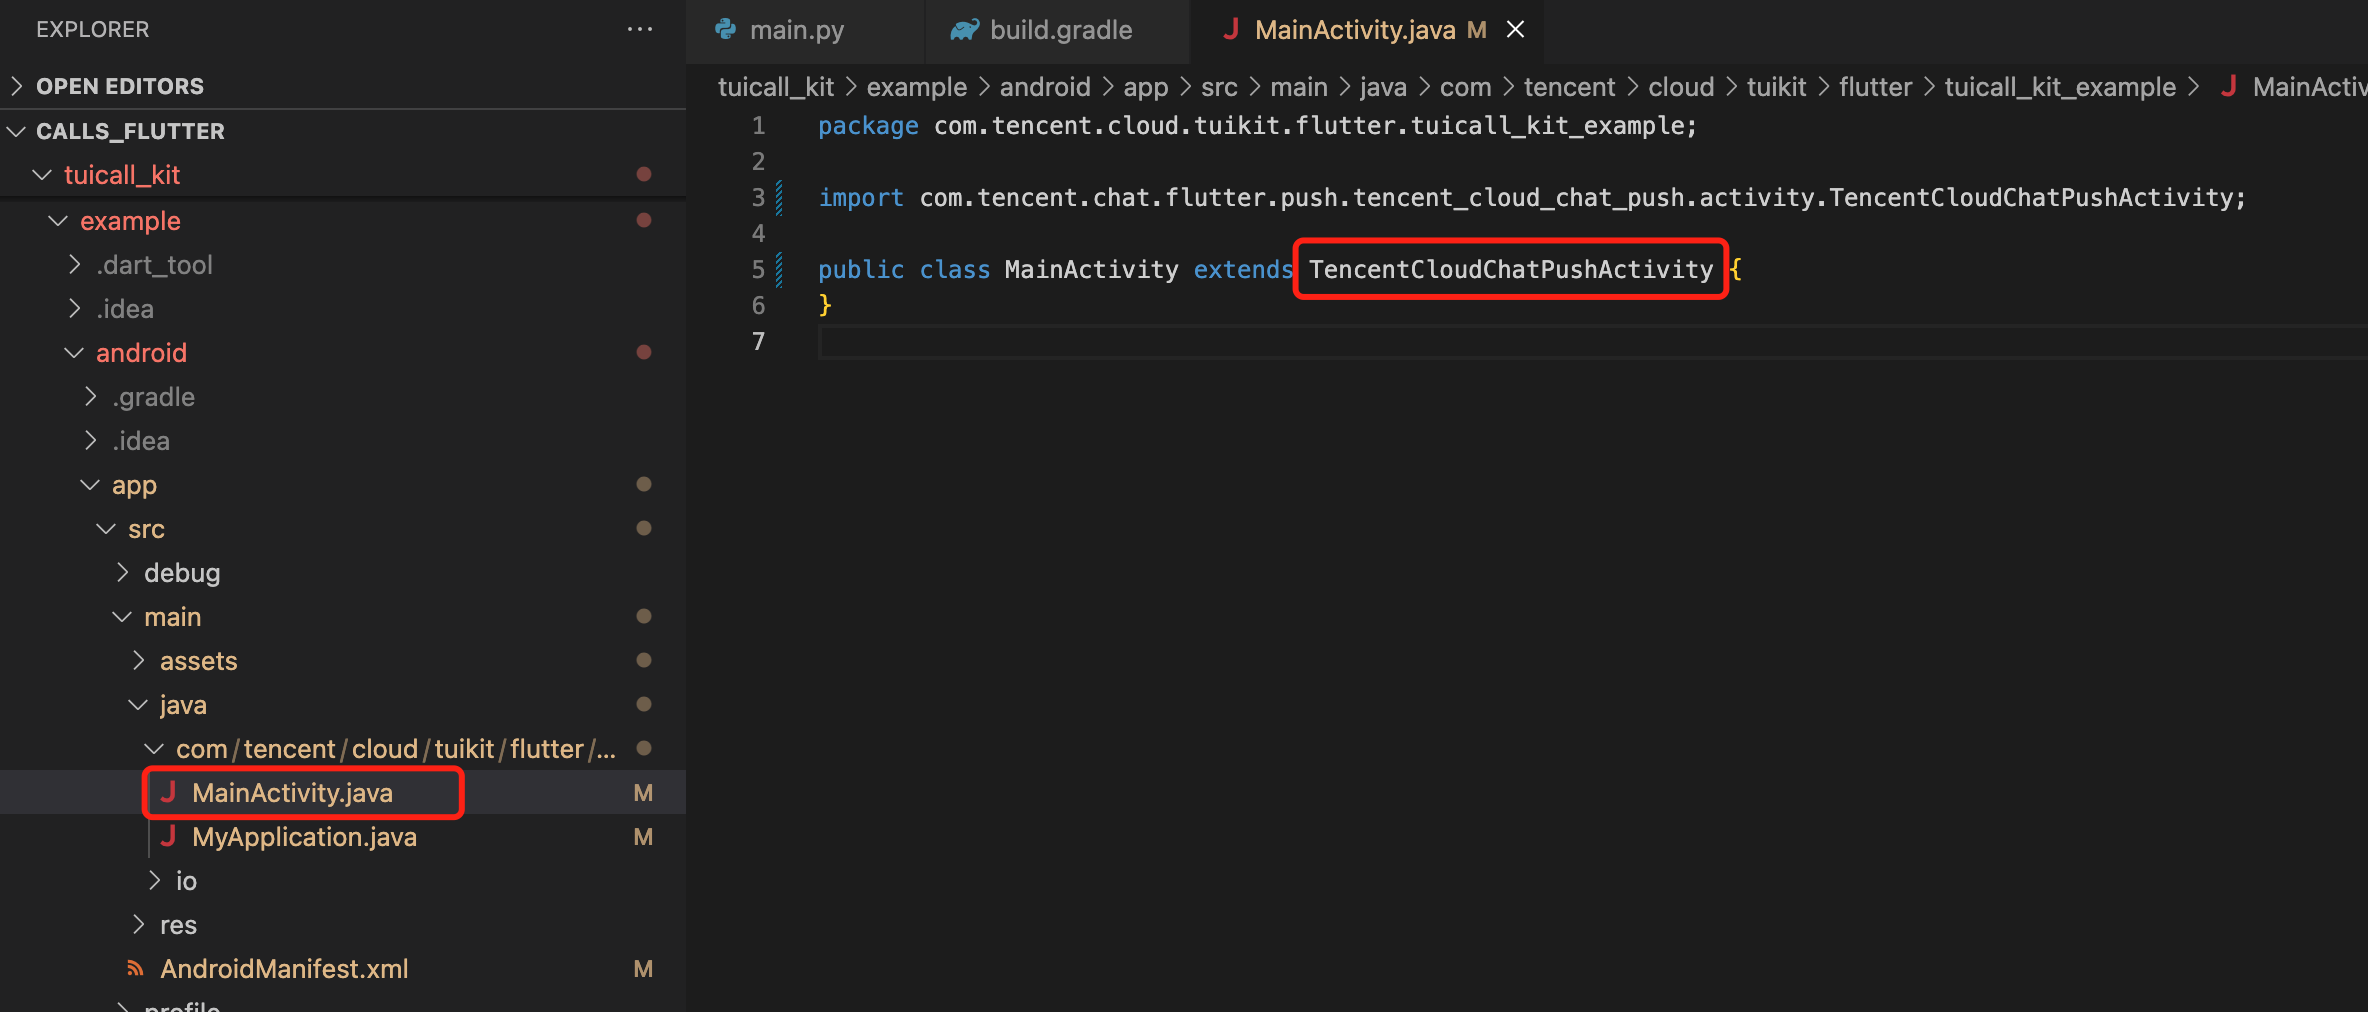
Meanwhile, you also need to modify your MainActivity File:


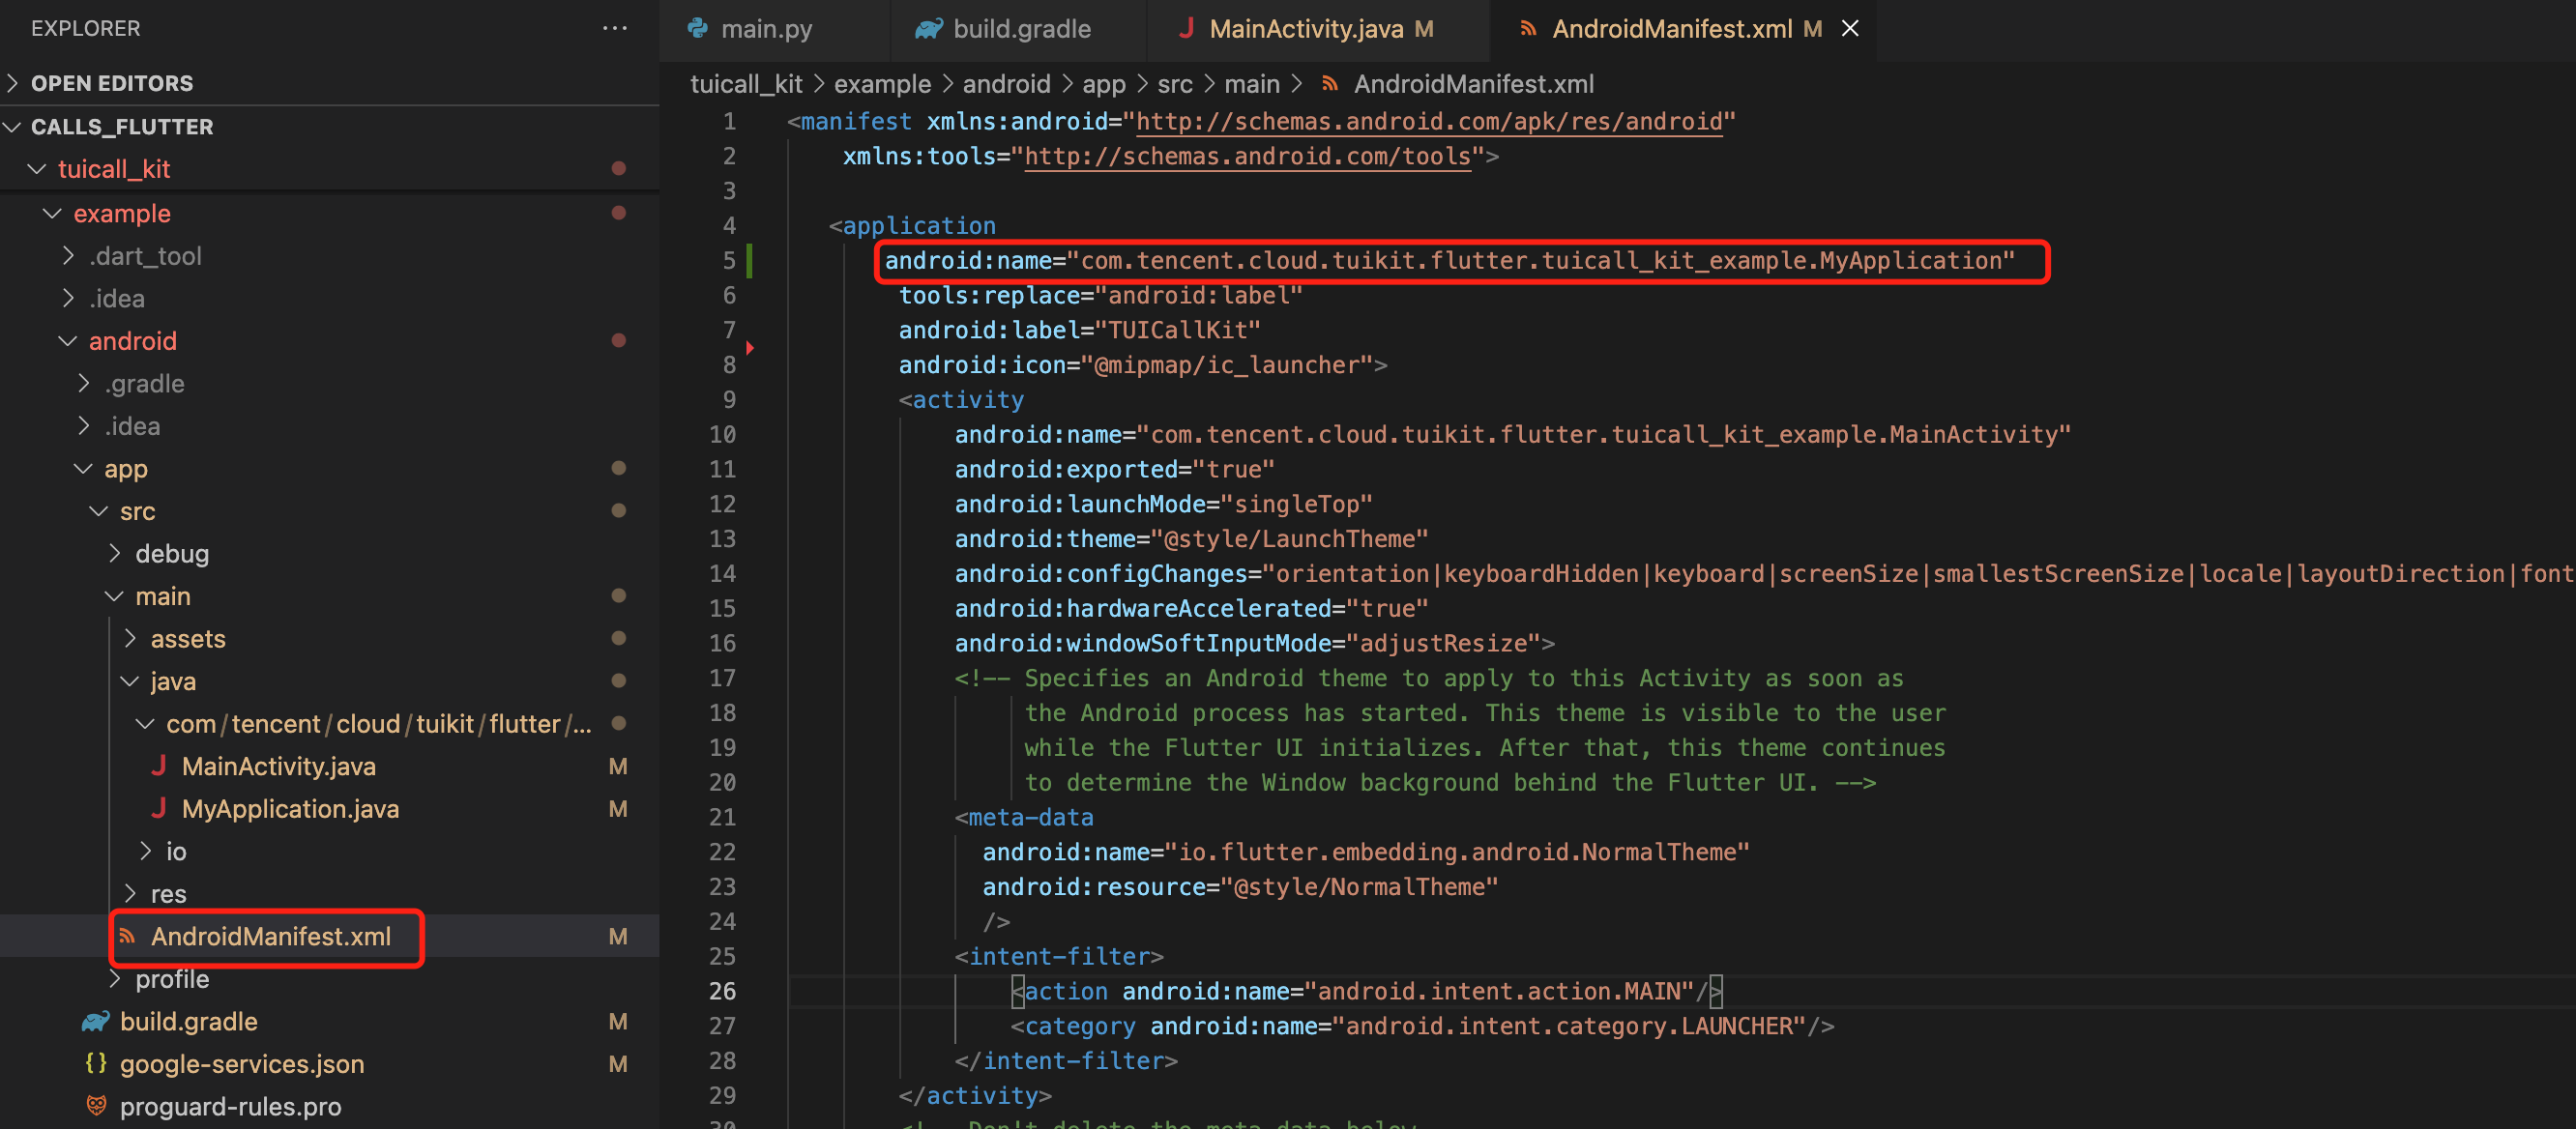
Open the android/app/src/main/AndroidManifest.xml file, then add a specific android:name parameter to the <application> Tag, which is linked to your newly created Definition Application class as shown in the figure:


4. Complete project configuration
In the project-level build.gradle file, under buildscript -> dependencies, add the following configuration:
buildscript {
dependencies {
classpath 'com.google.gms:google-services:4.3.15'
}
}
In the build.gradle file under the project's app directory, add the following configuration:
apply plugin: 'com.google.gms.google-services'
5. Register push plugin
Please register the push plugin immediately after logging in.
Invoke TencentCloudChatPush().registerPush method, it necessitates the transmission of BackDefinition's click callback function.
Moreover, you may also choose to input apnsCertificateID, the iOS push certificate ID, and androidPushOEMConfig, the Android push vendor configuration. These two configurations were previously specified in the initial steps; should there be no need for amendment, there is no requirement to input them again.
TencentCloudChatPush().registerPush(onNotificationClicked: _onNotificationClicked);
6. Implement auto-log in
The data mode of FCM can only wake up the offline app, so you also need to implement login and app launching in the onAppWakeUpEvent.
TencentCloudChatPush().registerOnAppWakeUpEvent(onAppWakeUpEvent: () {
// TODO: log in operation
});
After completing the above steps, you can use the offline push capability of TIMPush in conjunction with TUICallKit.
7. Making an Offline Push Call
If you want to make an offline push call, you need to set OfflinePushInfo when calling call.
TUIOfflinePushInfo offlinePushInfo = TUIOfflinePushInfo();
offlinePushInfo.title = "Flutter TUICallKit";
offlinePushInfo.desc = "This is an incoming call from Flutter TUICallkit";
offlinePushInfo.ignoreIOSBadge = false;
offlinePushInfo.iOSSound = "phone_ringing.mp3";
offlinePushInfo.androidSound = "phone_ringing";
offlinePushInfo.androidFCMChannelID = "fcm_push_channel";
offlinePushInfo.iOSPushType = TUICallIOSOfflinePushType.VoIP;

TUICallParams params = TUICallParams(offlinePushInfo: offlinePushInfo);
TUICallKit.instance.call(callUserId, TUICallMediaType.audio, params);
Note:
If your Android application encounters issues when receiving push notifications or pulling up pages, you can refer to the Called party's call display policy for troubleshooting.

FAQs

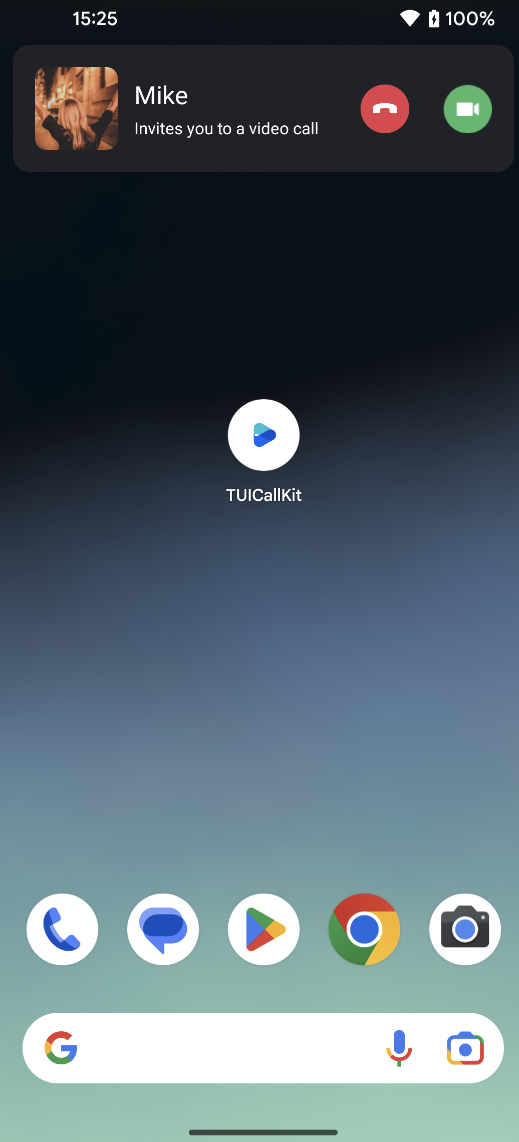
If the application is terminated, the incoming call UI cannot be displayed?

Confirm receipt of push. If push cannot be received, check if the certificates are correctly uploaded to the Chat console. Refer to the first step in the above document Quick Integration to see if it has been added correctly.
Confirm that FCM Data Message was selected in the console, in accordance with the second step of the above Preparation Requirements;
Confirm receipt of data message, filter logs (keyword: TIMPush), check the following logs for printouts (if messages are not received, you can use the Troubleshooting Tool to investigate reasons);


Confirm implementation of auto-log in. It is only after auto-login that call requests are pulled and the incoming call UI is displayed.