Web & H5 platform, integrate independently private chat (1V1) or Group chat. This scenario is applicable for such as real estate consultancy, e-commerce customer service, remote insurance claims assessment.
You can directly experience the chat below. Meanwhile, you can quickly try online code implementation through Experience Sandbox.
Create a new React project named chat-app (select React 18 during project creation and recommend using the Typescript template), and follow the prompt to run the initial project.
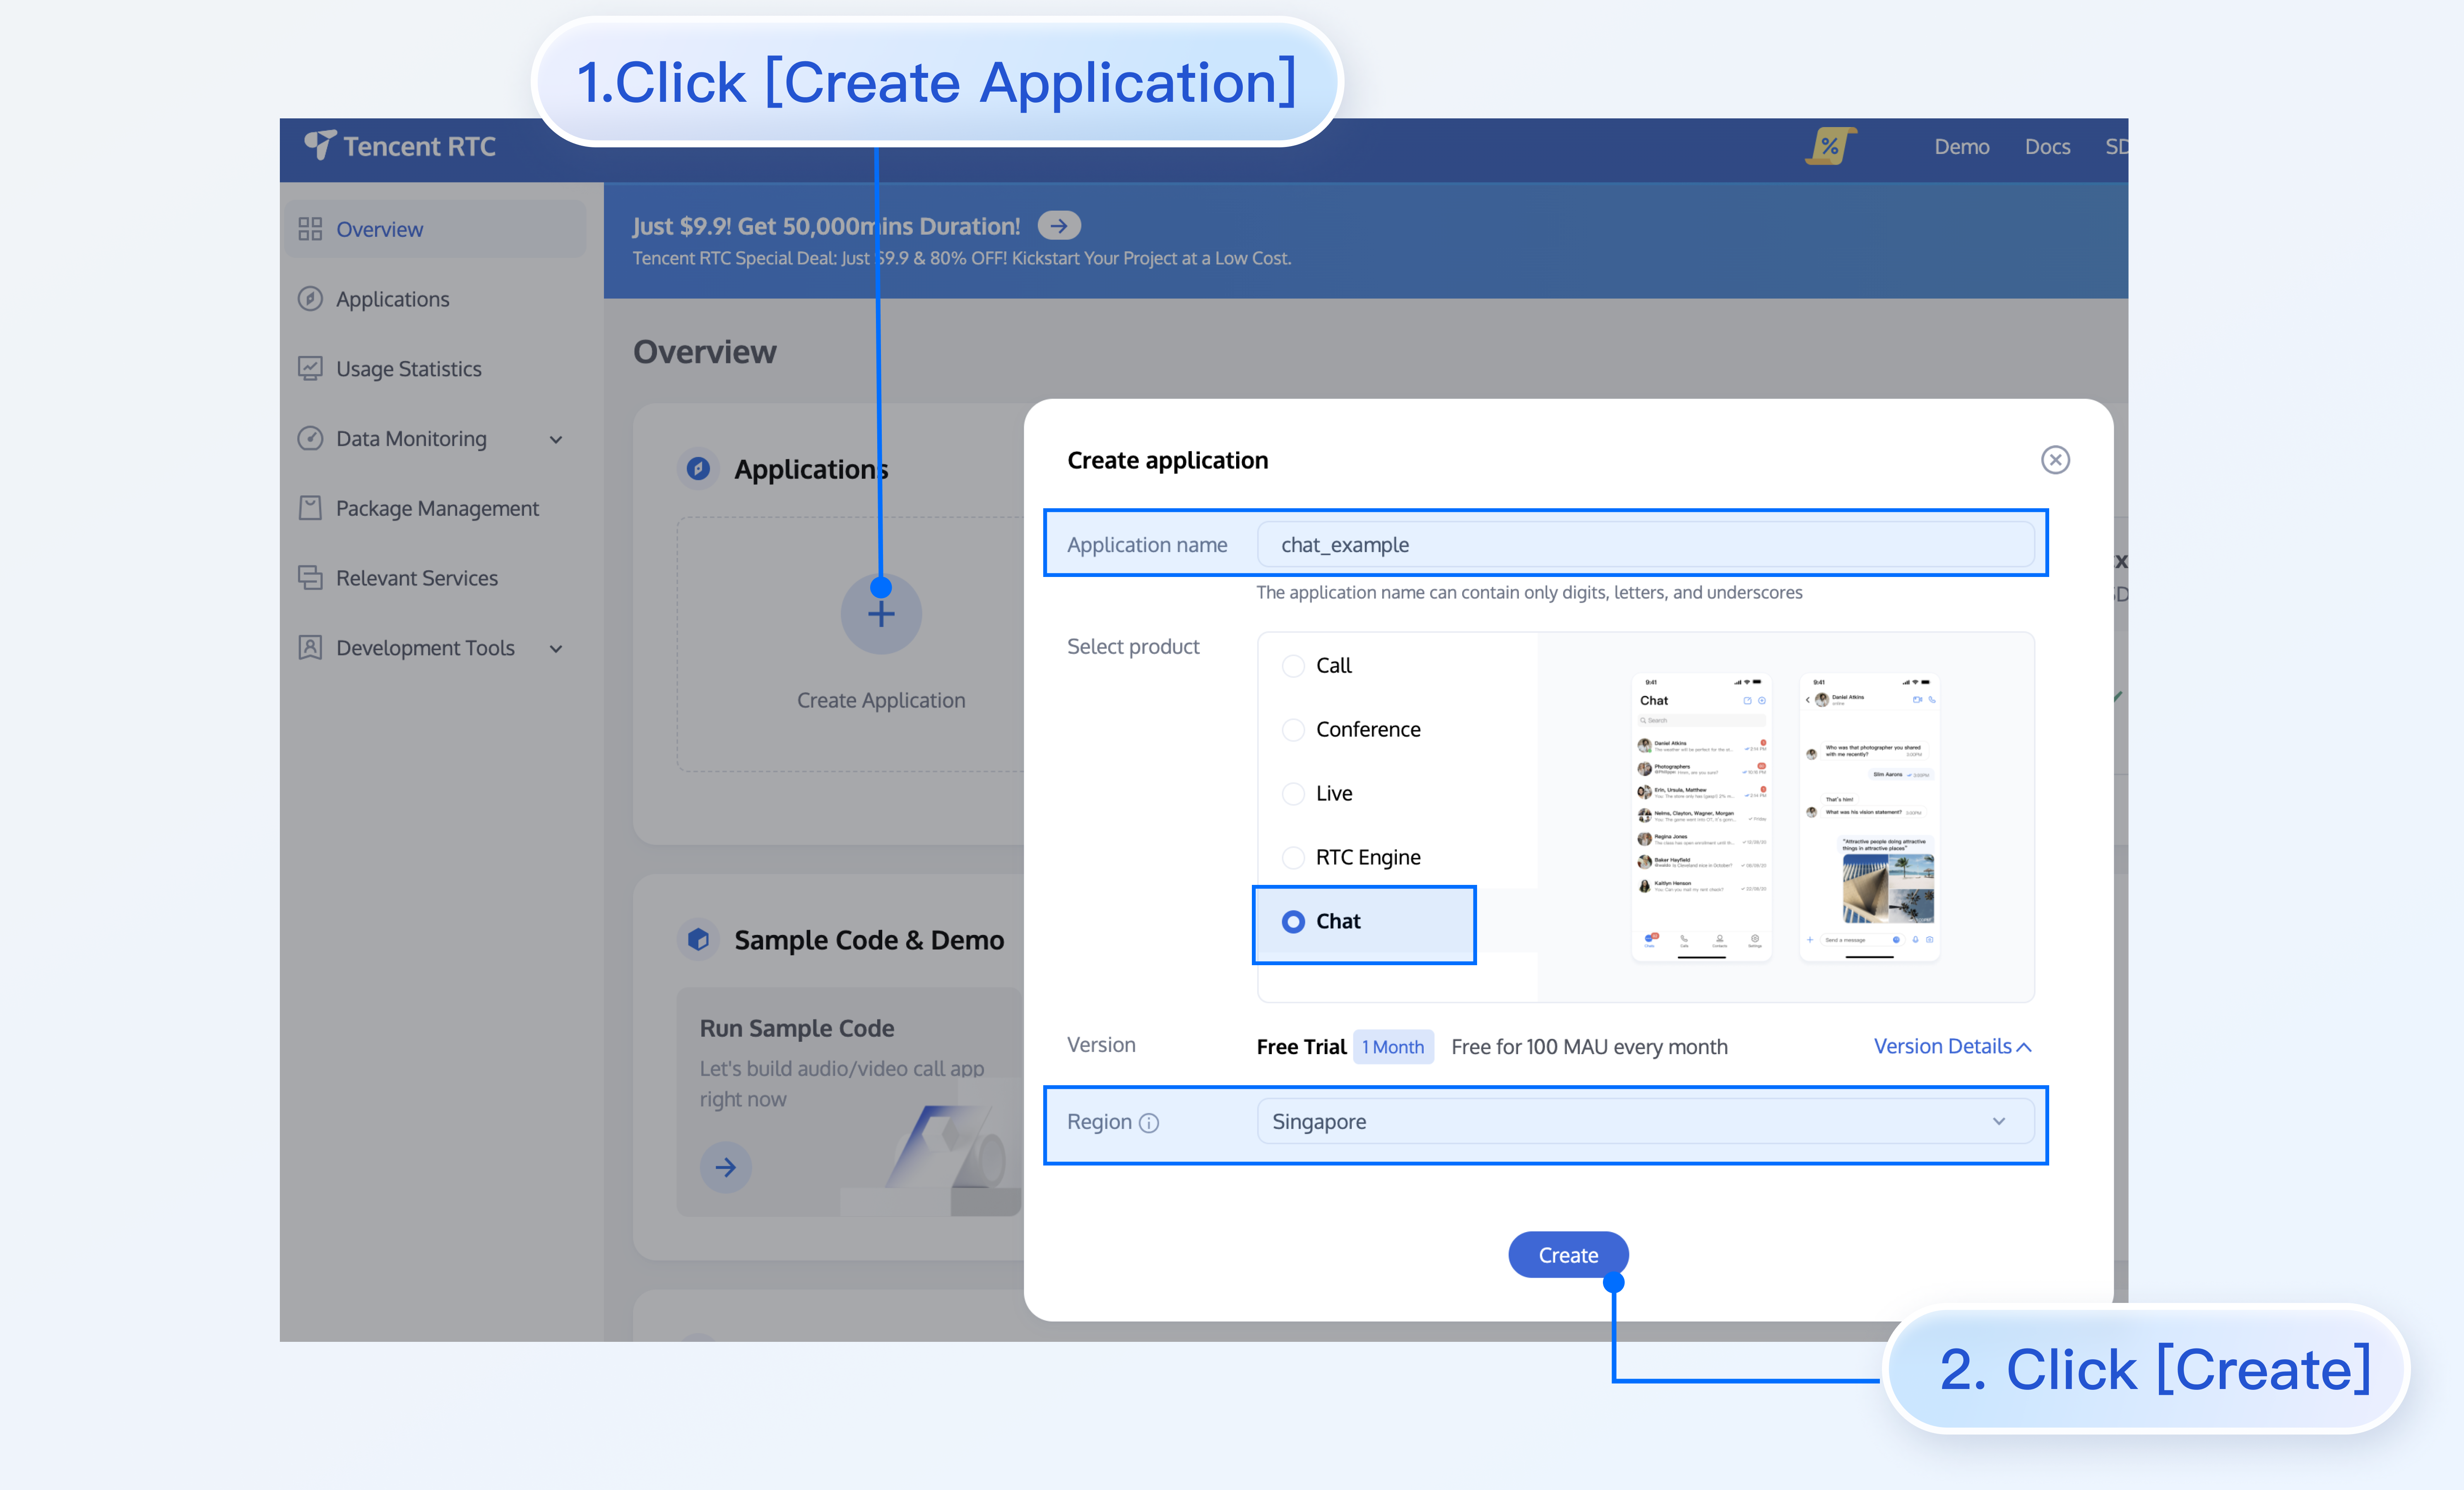
2. Click "Create Application", enter your application name, then click "Create".
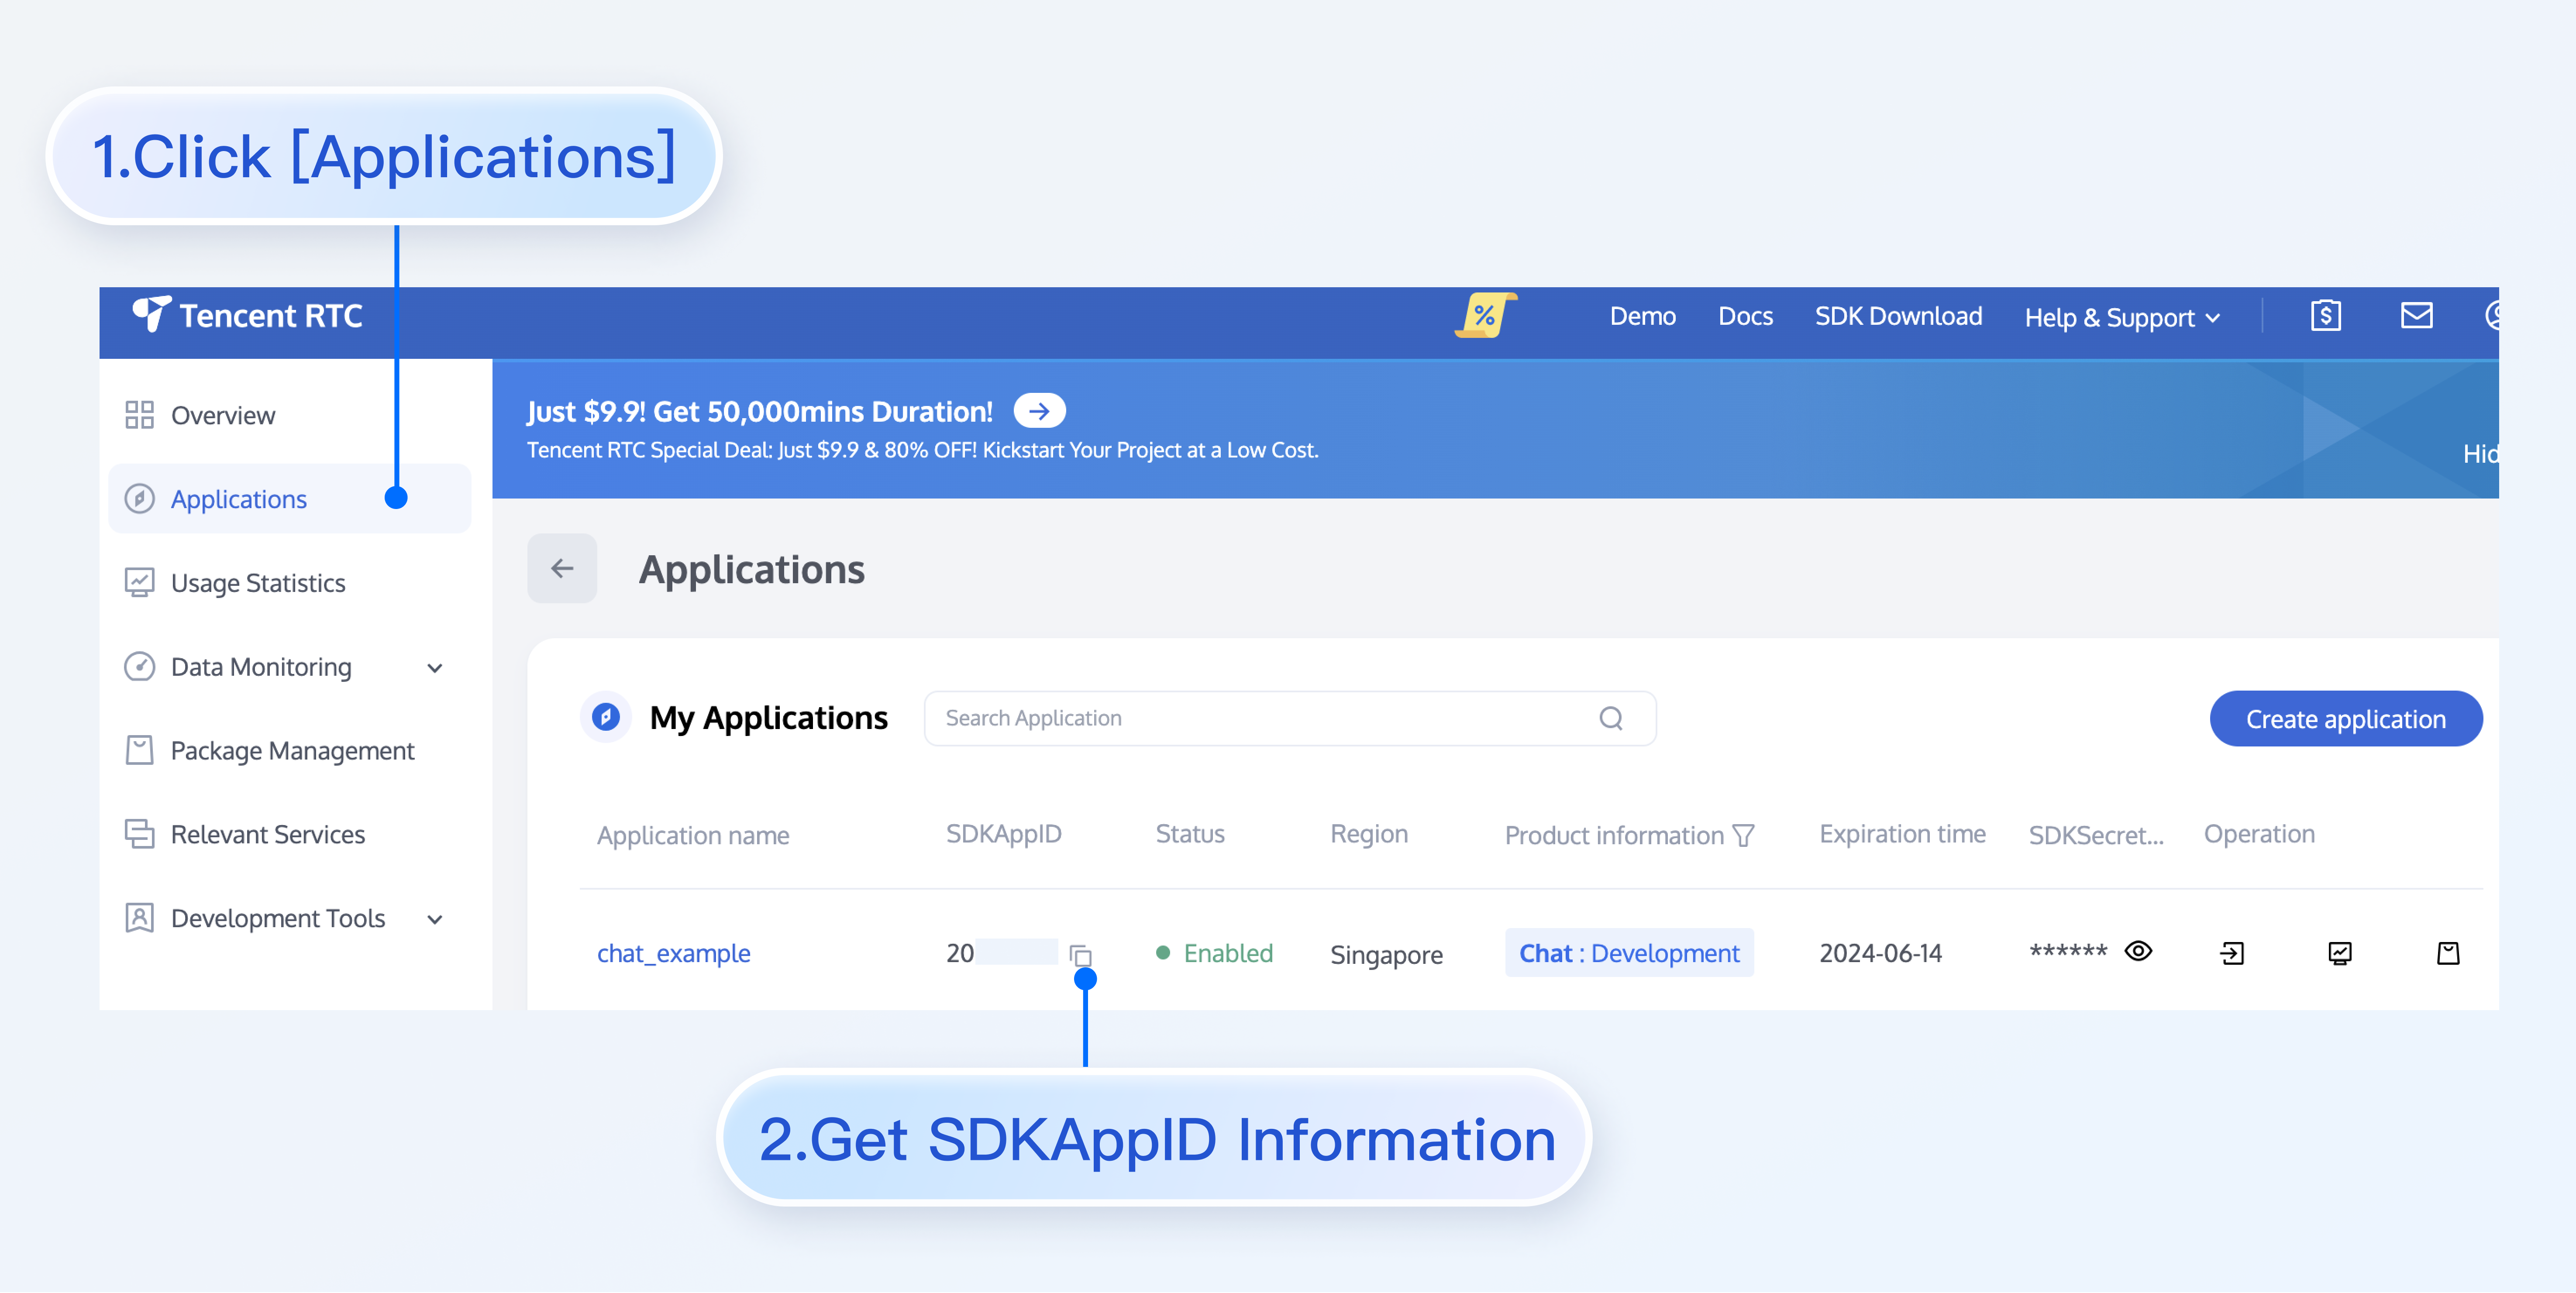
3. After creation, you can see the application status, service version, SDKAppID, createTime, tag, and expiration time on the console overview page.
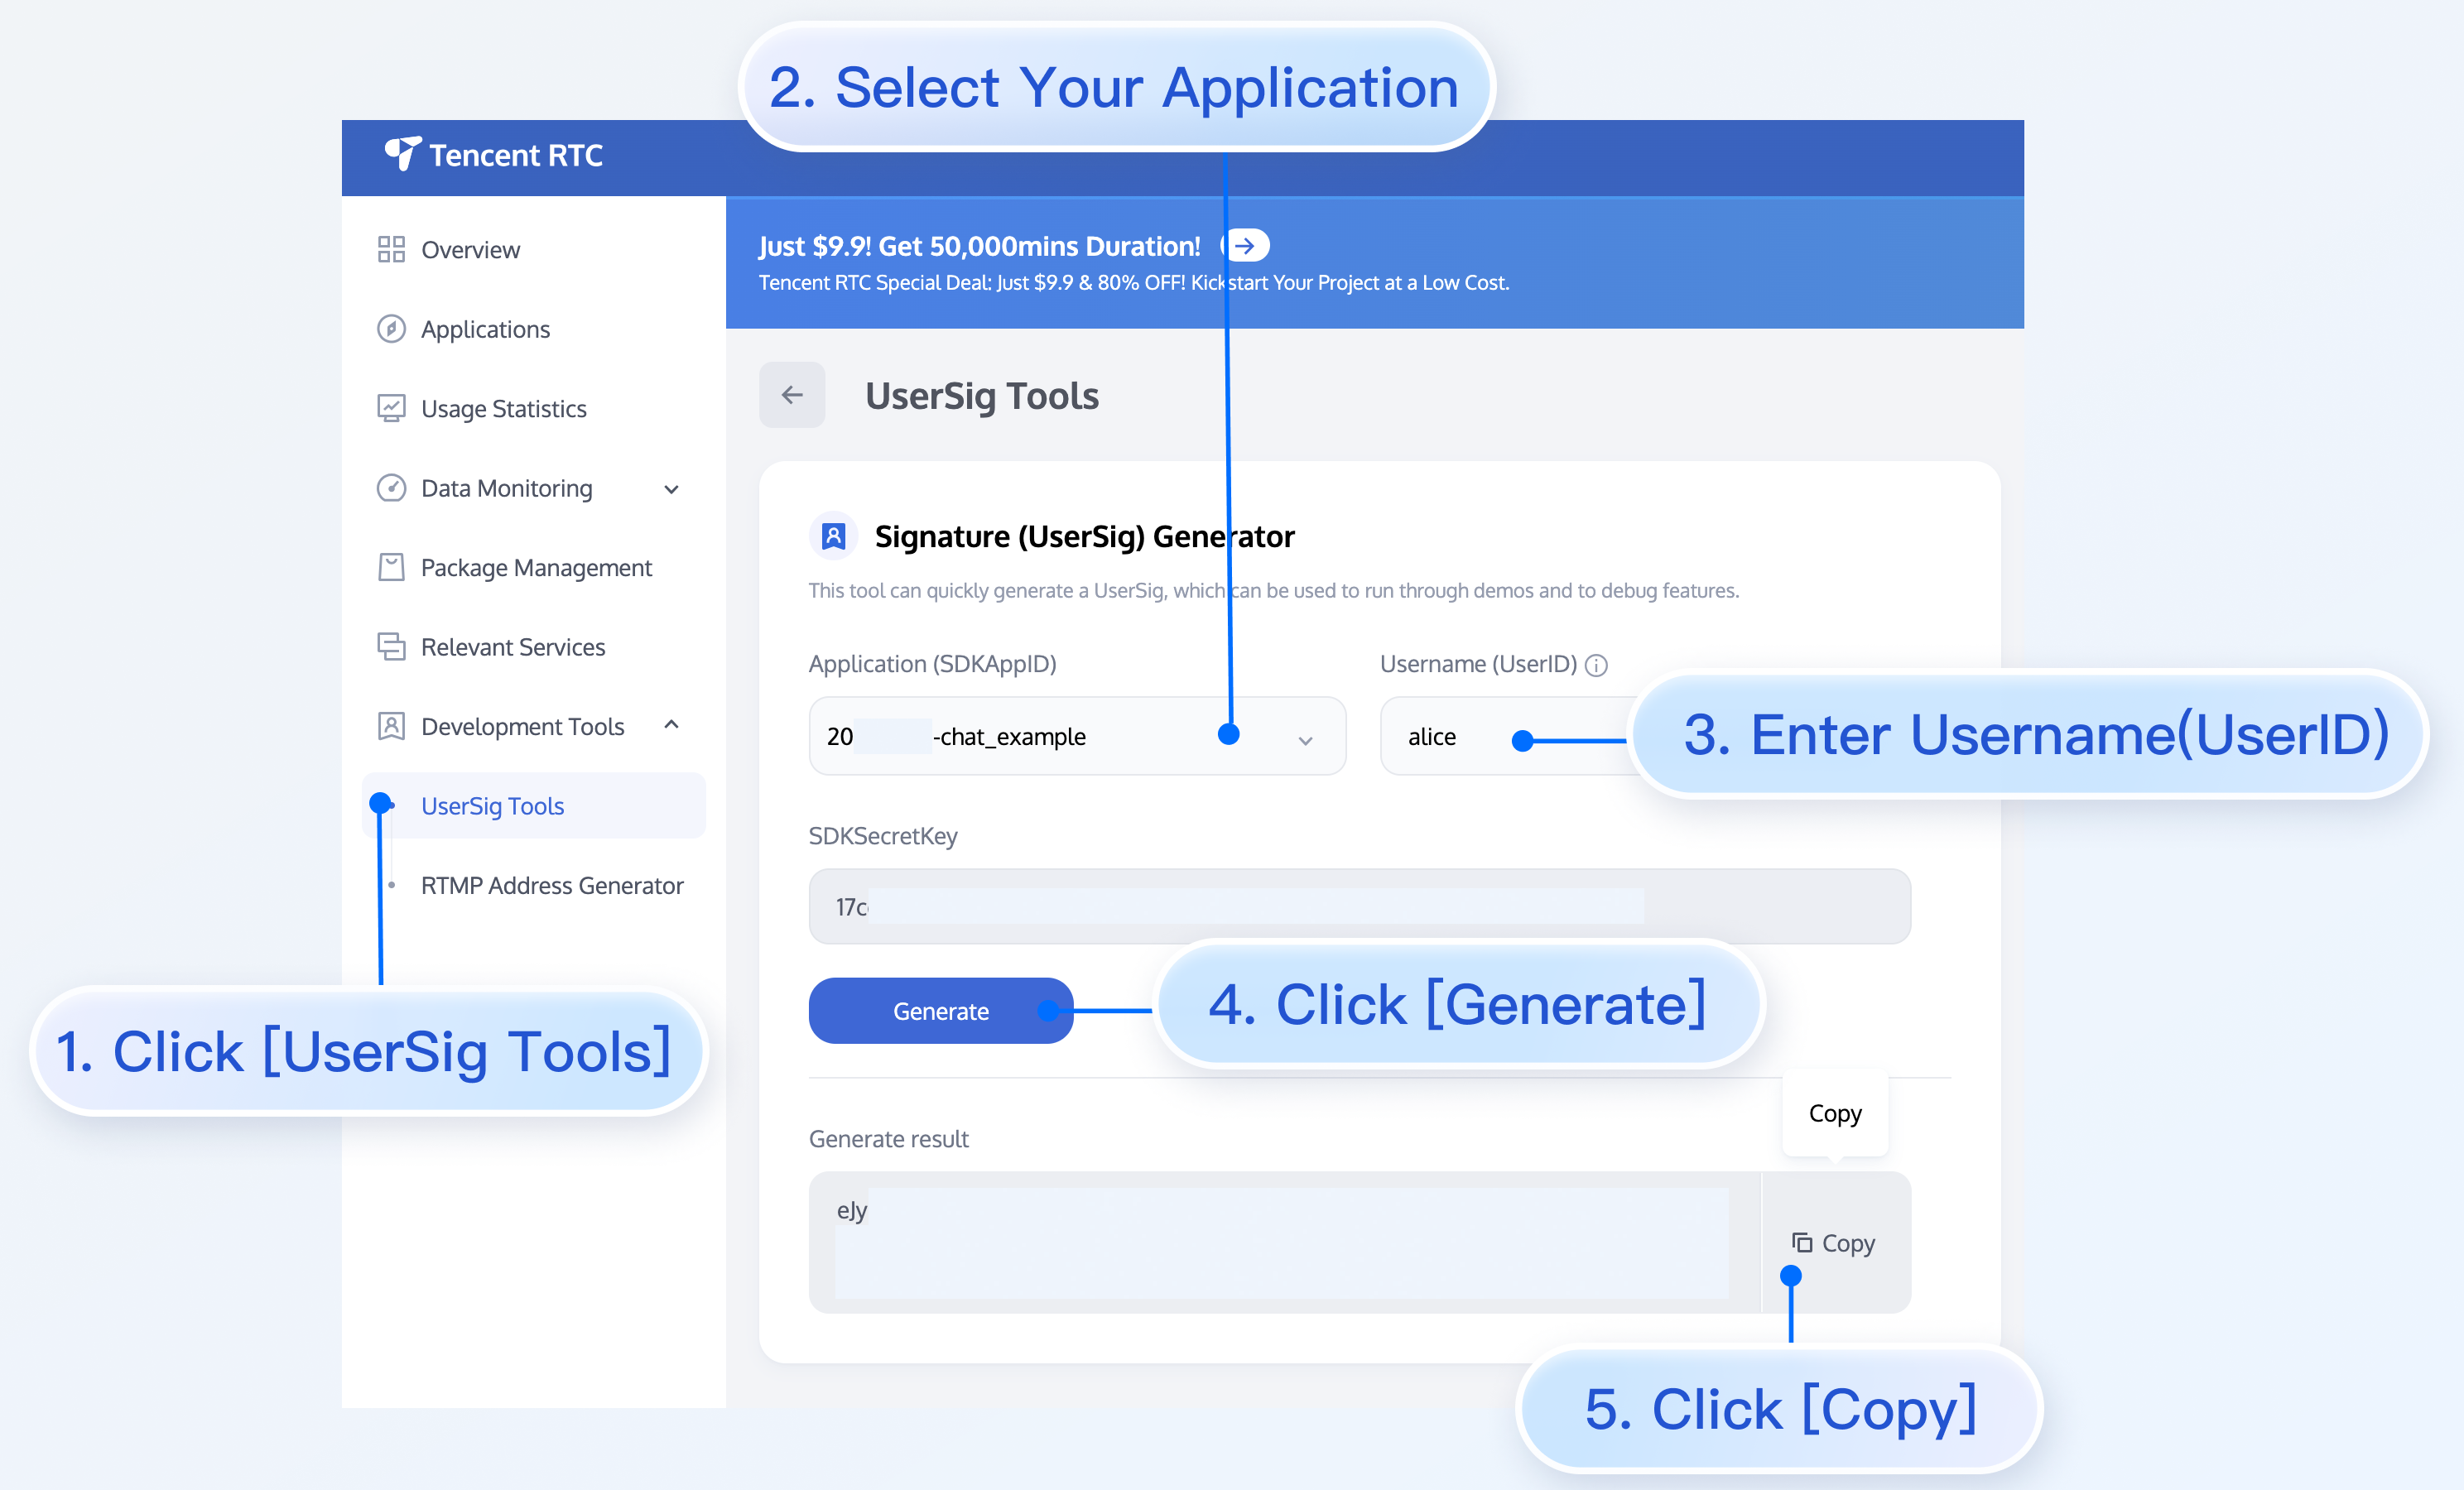
Procedure 5: Obtain UserID and UserSig
userID
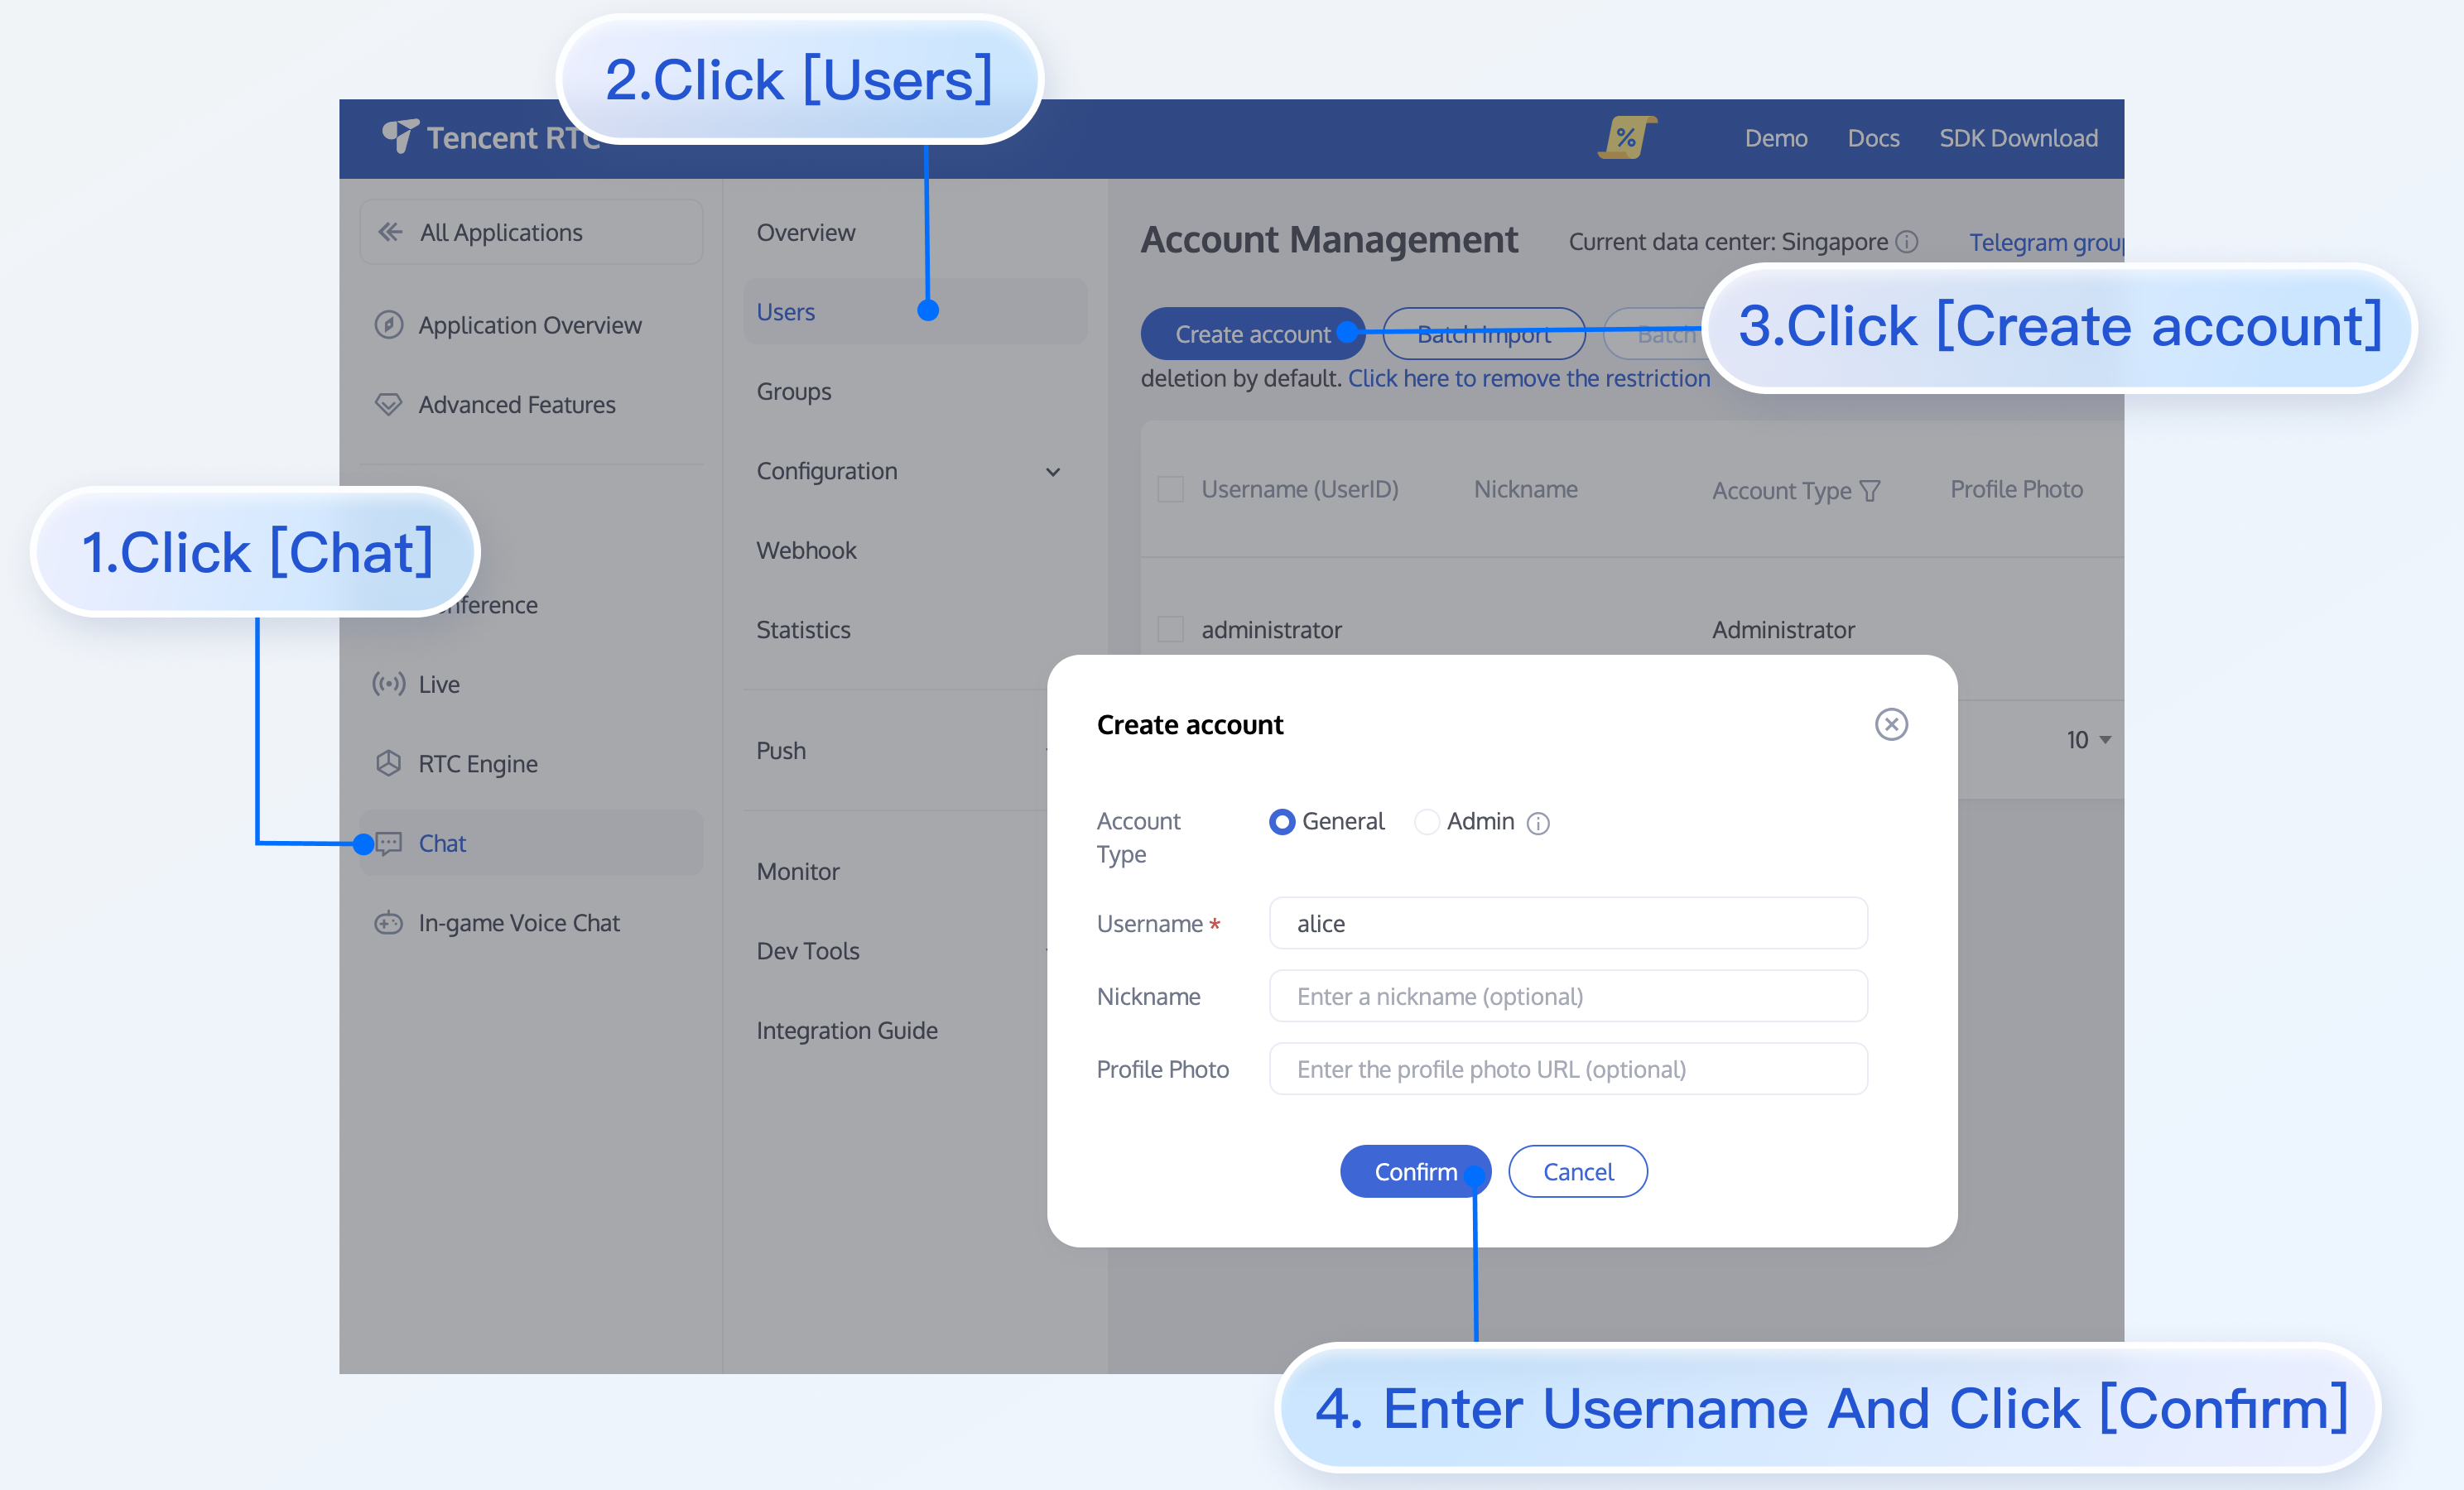
Click to enter the Application you created above. The Chat product entry will be shown in the left sidebar. Click to enter.
After entering the Chat product subpage, click Users to enter the user management page.
Click Create account, and a pop-up input box for account information will appear. If you are merely an ordinary member, we recommend you select the General data type.
For a better experience in message sending and receiving and other features, we recommend creating two userIDs.
Replace the SDKAppID, userID, and userSig in App.tsx, then run the command as follows:
npm run start
Note:
1. Please ensure the procedure 3 code has successfully replaced SDKAppID, userID, and userSig. If not replaced, it will lead to abnormal project performance.
2. userID and userSig have a one-to-one relationship. Refer to generate UserSig.
enter the message in the input box and press enter to send.
FAQs
What Is UserSig
UserSig is the password for user login to Chat, which is essentially the encrypted ciphertext of UserID and other information.
How to Generate UserSig
The UserSig issuance method involves integrating the UserSig calculation code into your server and providing a project-oriented API. When UserSig is required, your project initiates a request to the business server to obtain a dynamic UserSig. For more details, see UserSig generation by the server.
Note:
The example code in this document uses a solution to obtain UserSig by configuring SECRETKEY in client-side code. In this method, SECRETKEY can be easily decompiled and reverse-engineered. Once your key is leaked, attackers can steal your Tencent Cloud traffic. Therefore, this method is only suitable for local debugging. For the correct UserSig issuance method, please refer to the context before.
Does React 17.X Version Support
Currently does not support version 17.x. Only React ≥ v18.0 is supported.