This tutorial mainly introduces how to implement a basic audio and video call with Objective-C.
Prerequisites
Xcode 13.0 or later.
A Mac computer with OS X 10.10 or later.
A valid developer signature for your project.
Integration guideline
Step 1. Import TRTC SDK
Cocoapods Integration
Swift Package Manager Integration
1. Run the following command in a terminal window to install CocoaPods. If you have installed CocoaPods, skip this step.
sudo gem install cocoapods
2. In the terminal window, go to the project root directory and run the following command to create the Podfile for your project.
pod init
3. Edit and save the Podfile as follows.
platform :osx,'10.10'
# Modify the 'Your Target' to the name of your project
target 'Your Target'do
pod 'TXLiteAVSDK_TRTC_Mac',:podspec=>'https://liteav.sdk.qcloud.com/pod/liteavsdkspec/TXLiteAVSDK_TRTC_Mac.podspec'
end
4. In the terminal window, run the following command to update the local library files and download the TRTC SDK.
pod install
Note:
After the pod install executed, a new .xcworkspace project file is generated. Double-click the .xcworkspace file to open it.
1. Using Xcode 26.4.1 as an example, open the File menu and select Add Package Dependencies.... Paste the following URL into the search field, wait for the results to load, and then click Add Package.
// Version 13.3and later
git@github.com:Tencent-RTC/TRTC_Mac_SwiftPM.git
2. At the Choose Package Options step, select the SDK version you wish to integrate. For additional configuration details, refer to Apple's official documentation.
Note:
Swift Package Manager integration is available starting with version 13.3. For earlier versions, use CocoaPods to integrate the SDK.
Step 2. Configure project
1. Once the .xcworkspace file opened, click on the Project Navigator on the left in the Xcode navigation bar, click on your project name, and make sure you select the correct TARGETS in the edit area.
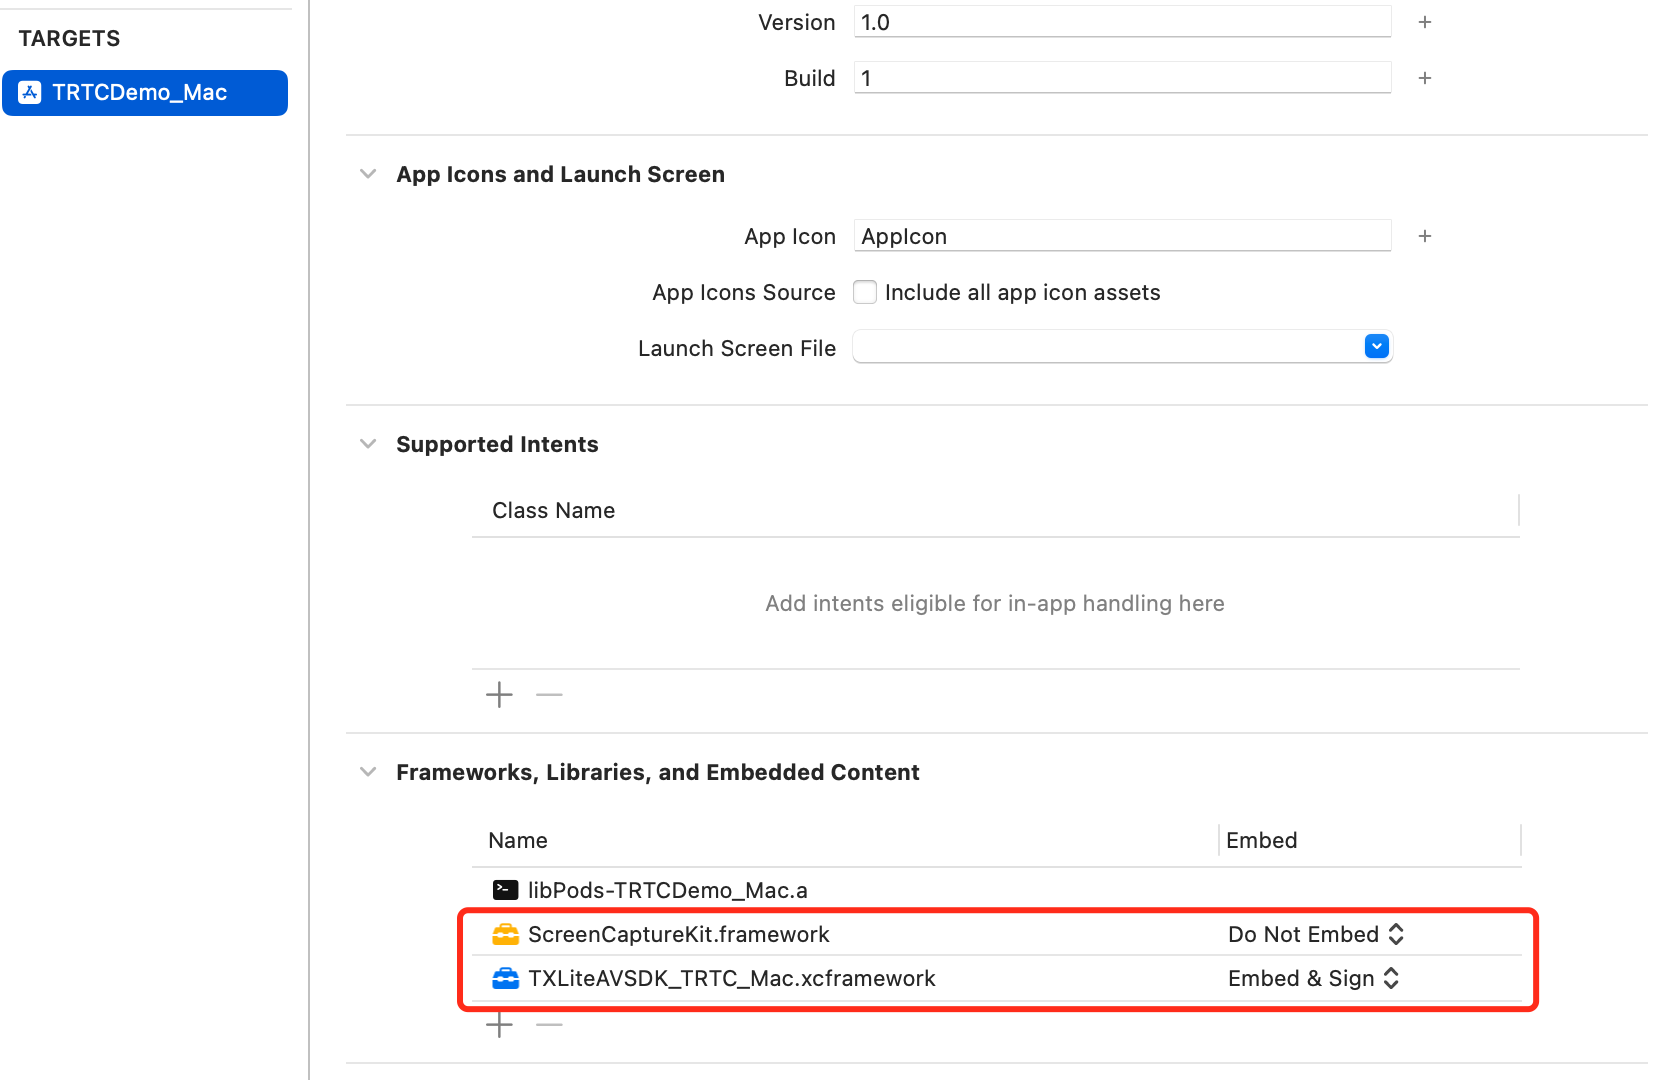
2. In the General TAB, add TXLiteAVSDK_TRTC_Mac.xcframework and ScreenCaptureKit.framework to the Frameworks, Libraries, and Embedded Content section.
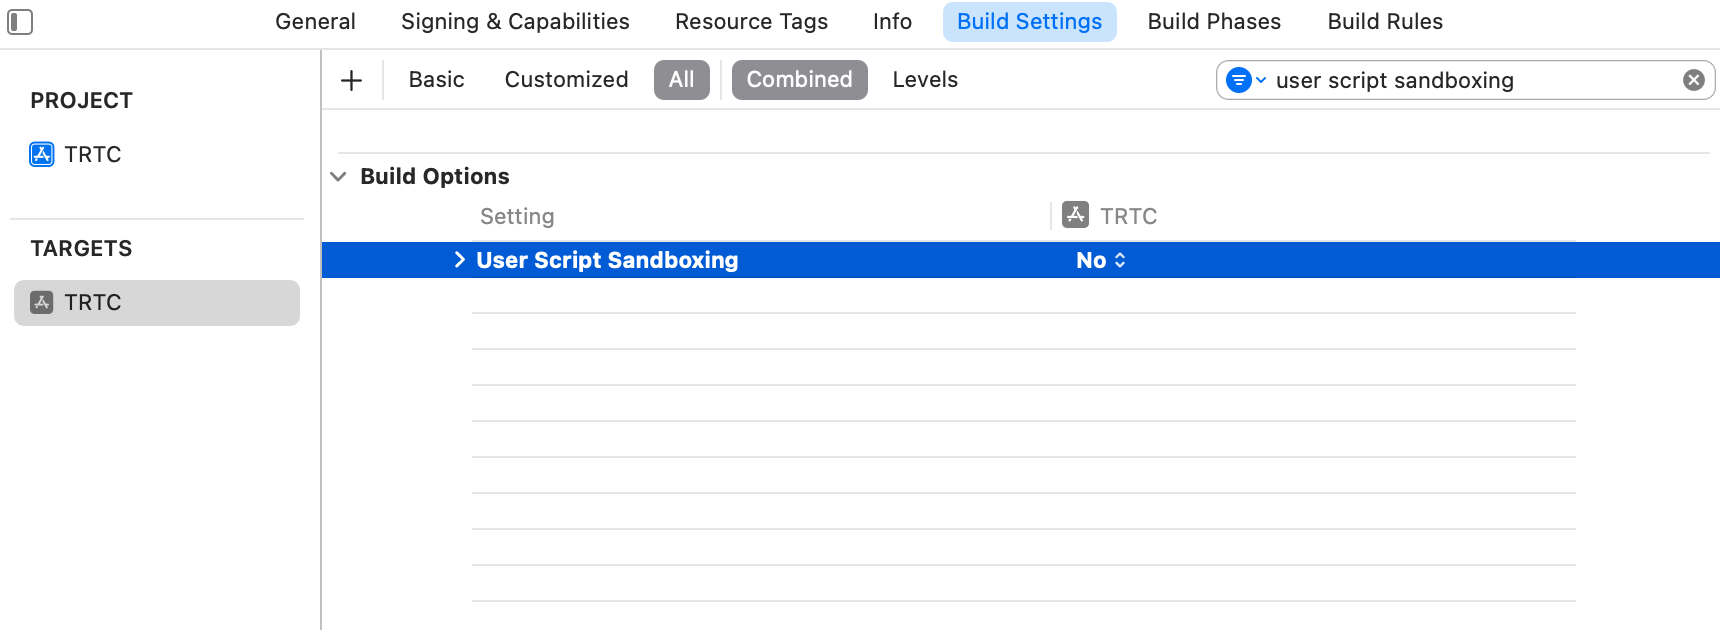
3. In the Build Settings TAB, search for User Script Sandboxing and set its value to No, which could allow the user script access to a wider range of system resources and files.
4. In the Info.plist TAB, add the Privacy-Microphone Usage Description and Privacy-Microphone Usage Description, and fill in the target prompt words used by the Microphone/Camera to obtain the permission to use the microphone and camera.
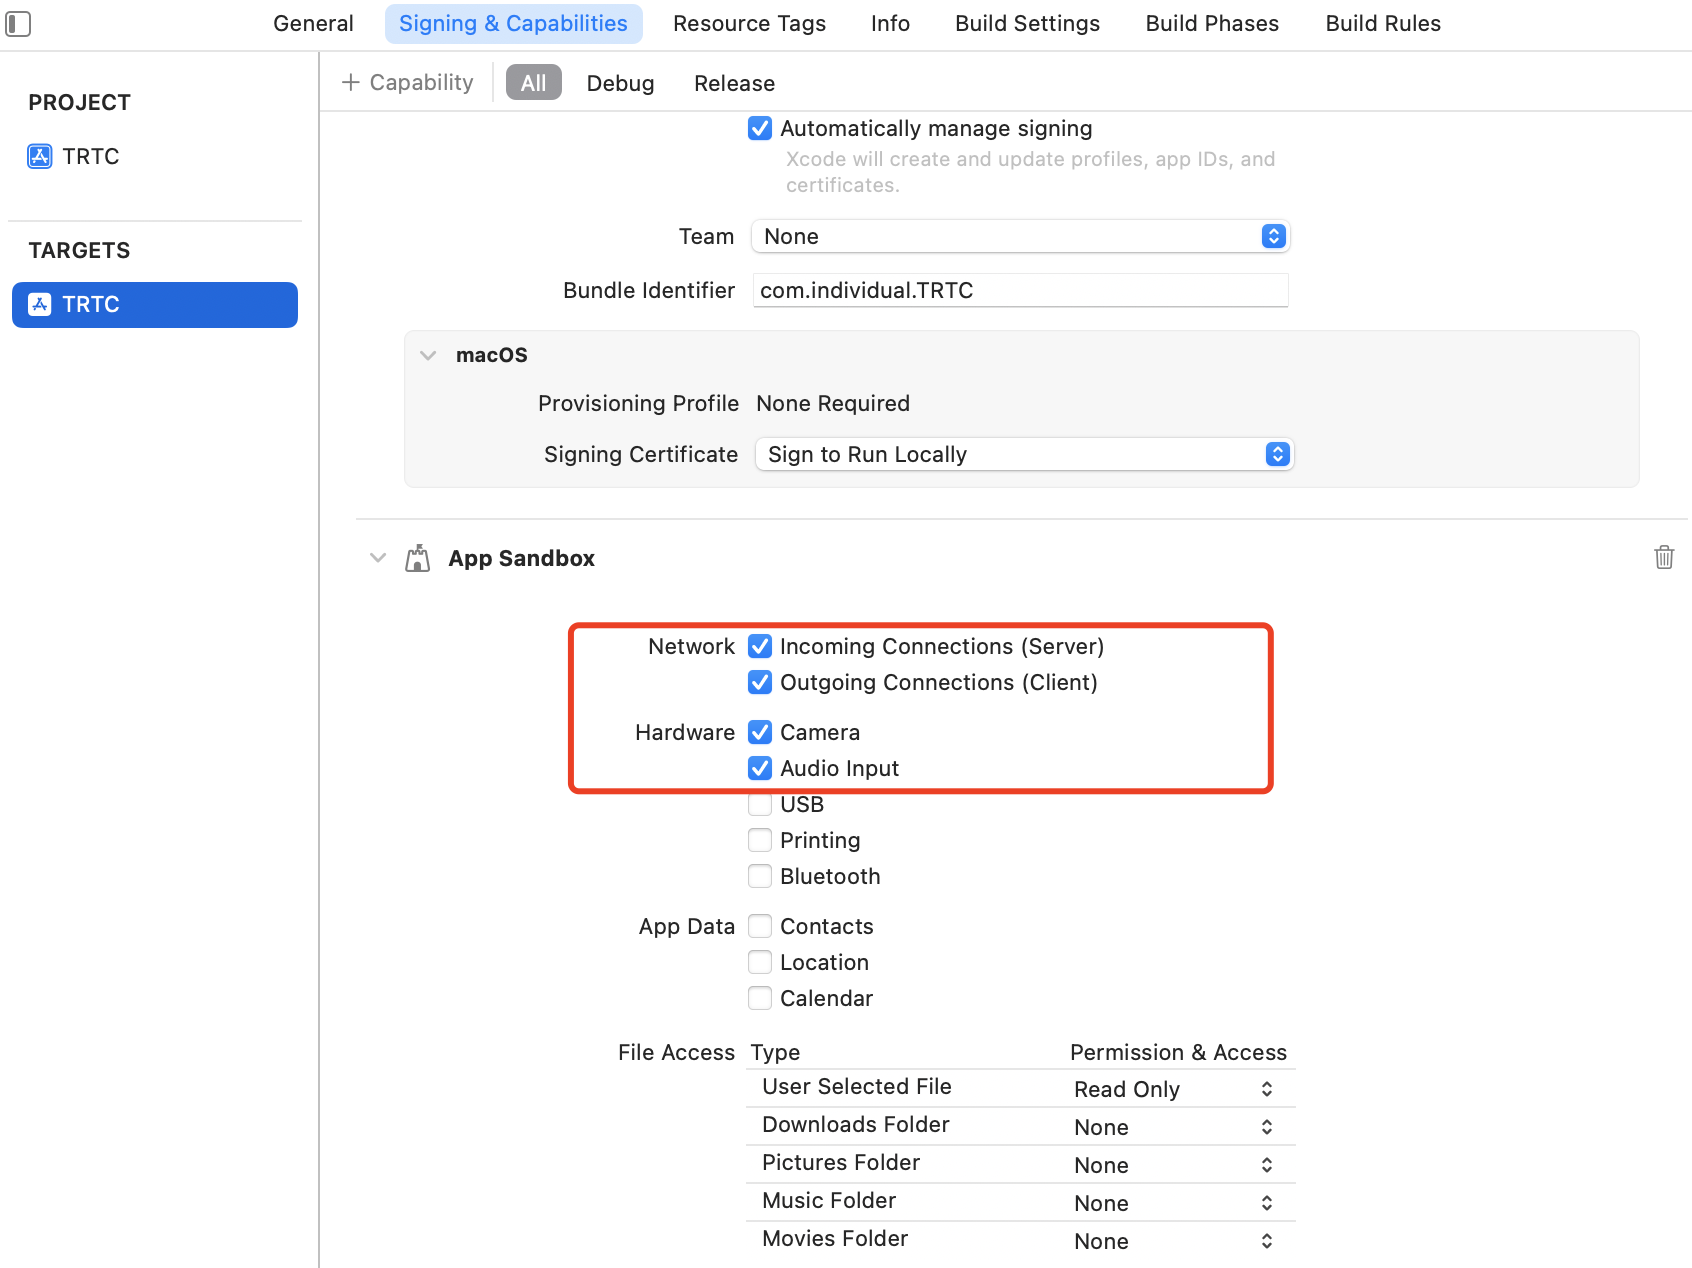
5. In the Signing & Capabilities TAB, check the following in the App Sandbox section.
2. Declare the TRTCCloud property in the AppDelegate.h file.
@property(nonatomic, strong) TRTCCloud *trtcCloud;// Declare the TRTCCloud property
3. After entering the AppDelegate.m file, call sharedInstance to create the TRTC instance in the applicationDidFinishLaunching method and set up the event listener.
#import <UserNotifications/UserNotifications.h> // Import the UserNotifications framework
1. Declare the NSWindow and NSView properties in the ViewController.h file.
@property(nonatomic, strong) NSWindow *window;// Declare the NSWindow property
@property(nonatomic, strong) NSView *localCameraVideoView;// Declare the NSView property
2. Initialize the localCameraVideoView andset the rendering parameter setLocalRenderParams for local preview, then call startLocalPreview for local preview. After successfully calling enterRoom, the stream push will start.
1. Listen to onUserVideoAvailable before entering the room. When you receive the onUserVideoAvailable(userId, true) notification, it means that there are video frames available to play in the road screen.
2. Set the render parameter setRemoteRenderParams and call startRemoteView to play the video content collected by the remote side.