
Integration
This article provides a detailed guide on how to quickly run the Electron Live Streaming Kit. In just a few steps, you can quickly launch a powerful desktop HD video live streaming software. It not only supports efficient mixing of multiple media sources such as cameras, screens, windows, and images, but also provides flexible layout, editing, and image compositing features, giving your live content a more professional look.

Step 1: Environment Preparation
Before running the demo, you need to refer to the preparation to complete the required environment configuration and activate the corresponding services.
Note:
This demo currently only supports Windows 10+ operating systems. Please ensure that your operating system meets these requirements.
Step 2: Download the Demo
1. Download the Streaming Assistant project source code from GitHub, or run the following command directly in the command line:
git clone https://github.com/Tencent-RTC/ultra-live-electron.git
2. Install dependencies
cd ultra-live-electronnpm install
Step 3: Configure Demo
Refer to the preparations in step 1. Open the
ultra-live-electron/src/debug/basic-info-config.js file in the demo and enter the SDKAppID and SDKSecretKey obtained when activating the service in the preparations: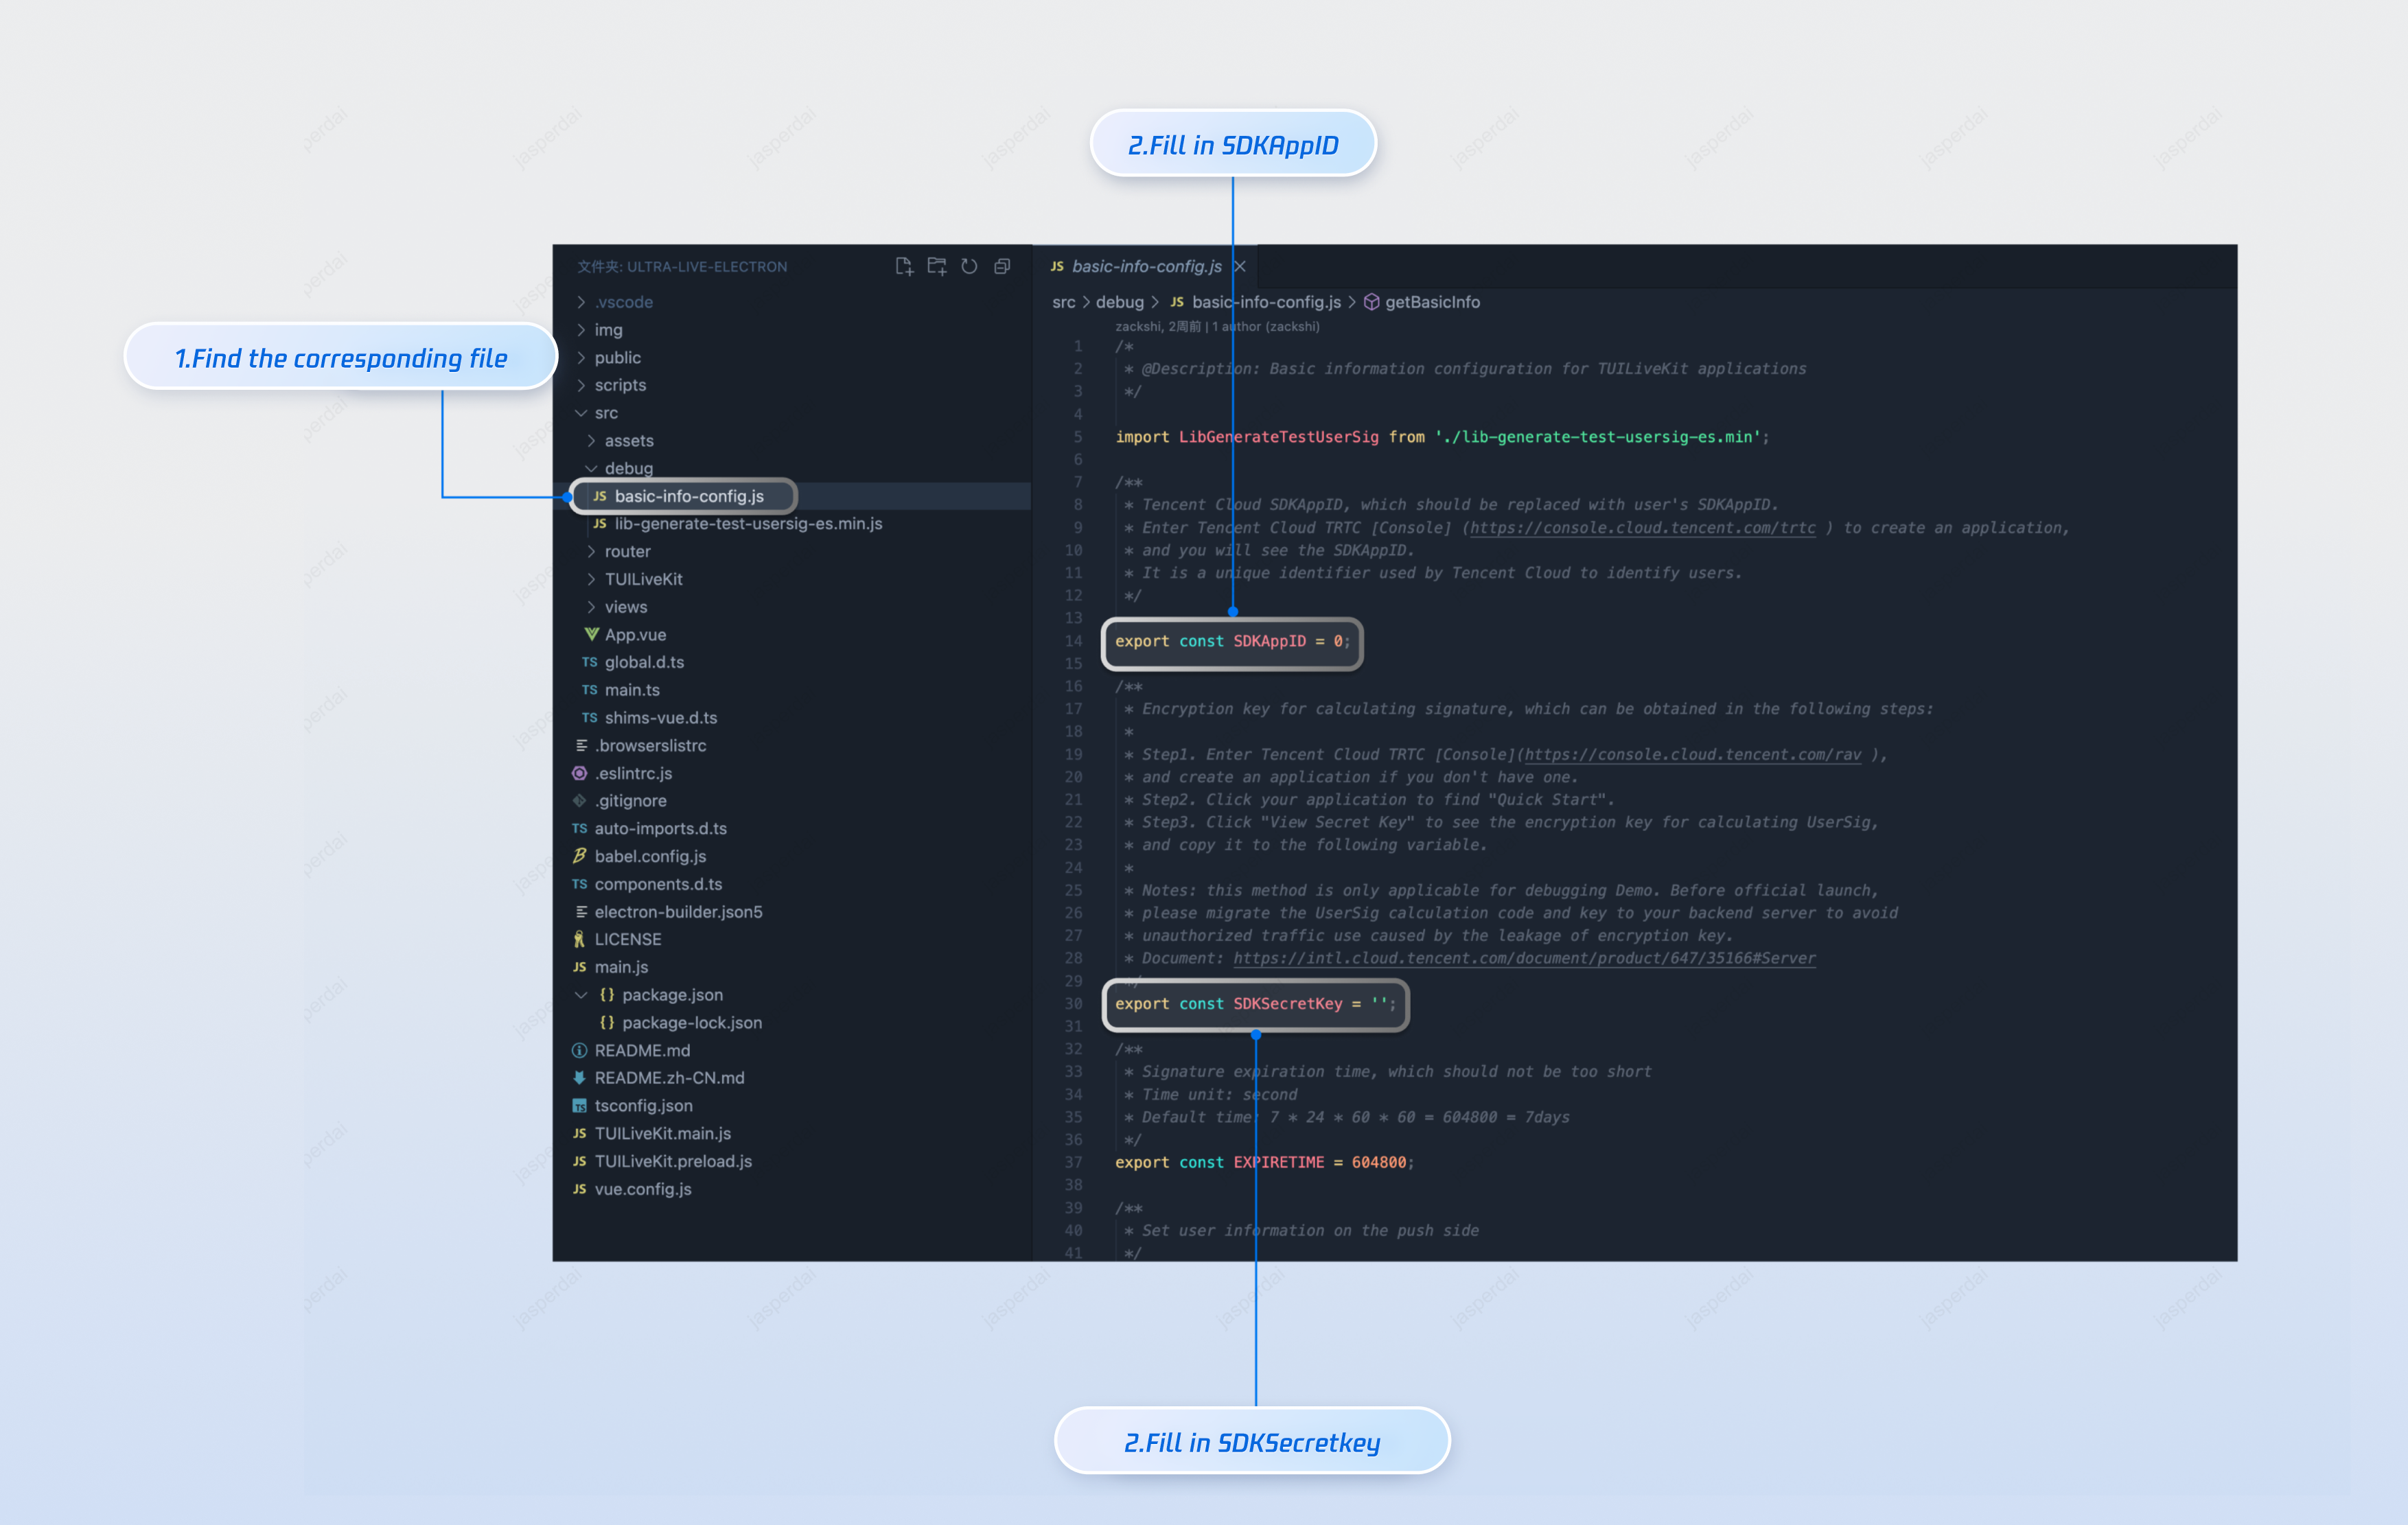
Step 4: Start your first live stream
Run the current project with the following command
npm run start
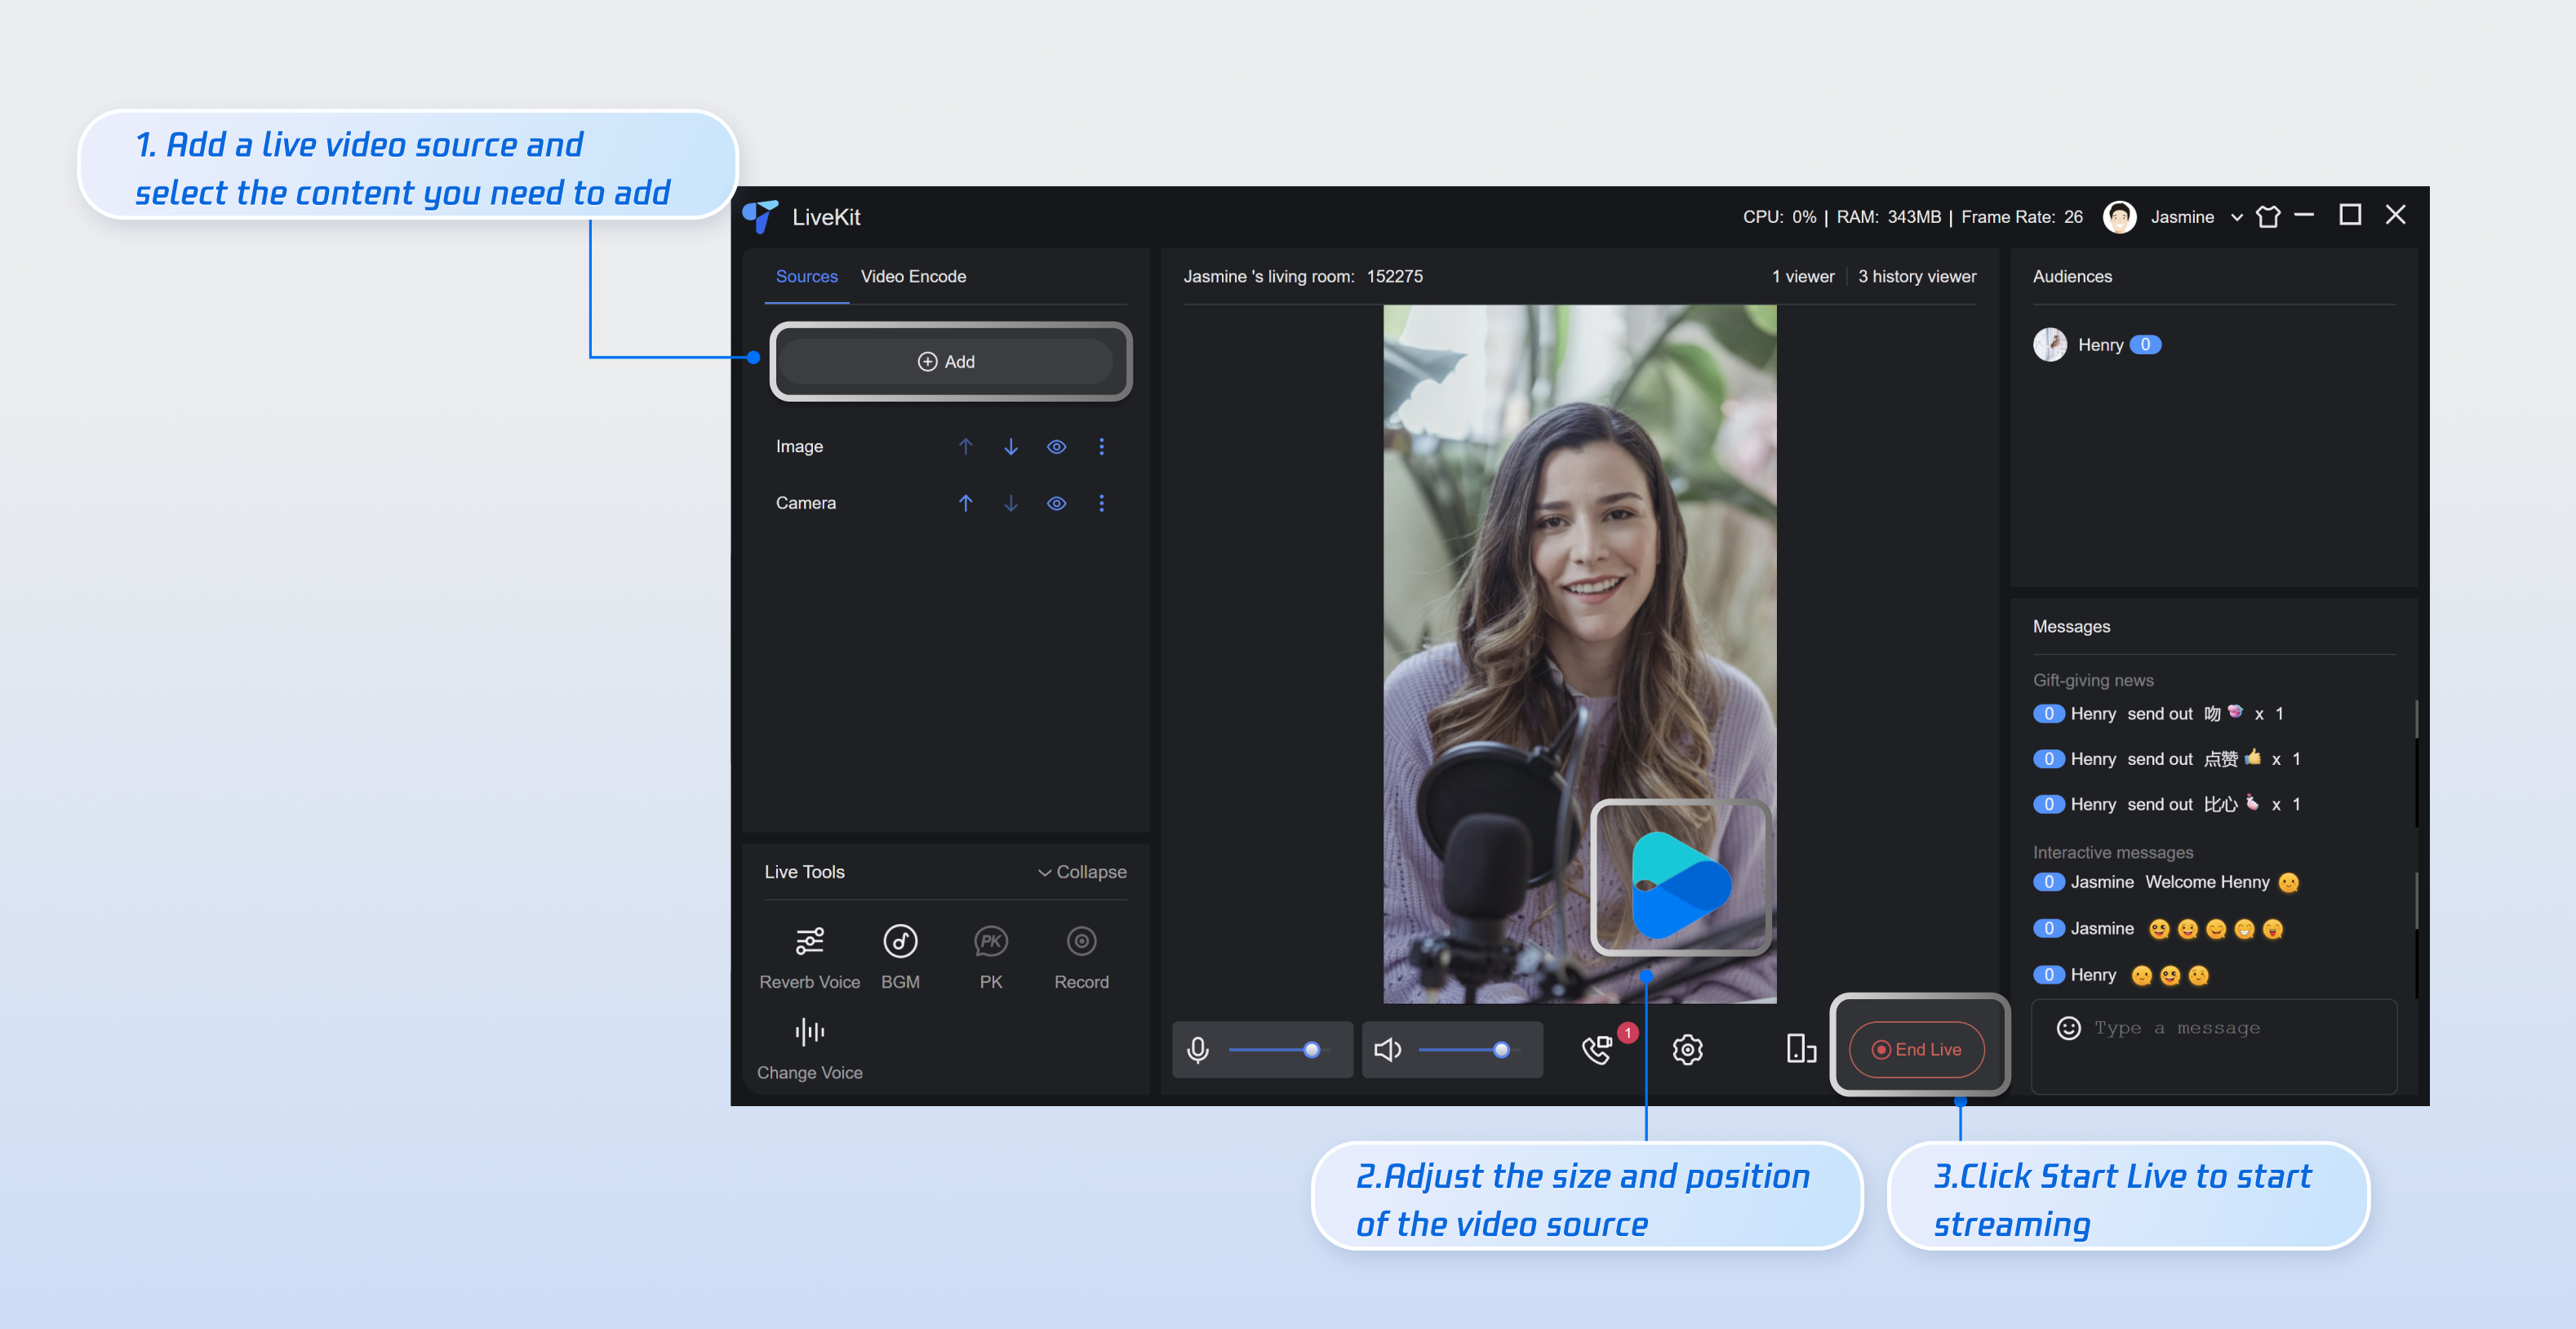
After running the demo, you can enrich your live content and start your first live stream by following the steps below.
1. Add a video source: Before starting a live stream, you need to add a live video source. The app currently supports: camera, screen sharing, window sharing, and image. Click the Add button on the left side of the interface and select the video source you want to add.
2. Adjust the layout: Use your mouse to move and resize the video source. After selecting a video source (a yellow border appears), right-click to pop up a shortcut menu to rotate or adjust the display level.
3. Start streaming: Click the "Start Live" button on the interface. When the button changes to "End Live," live streaming has successfully started.
Note:
At this point, you've completed the entire Live Streaming Kit process and can start your live stream at any time. This desktop software only supports streaming. To watch live streams, please use the mobile app or web browser. You'll need to run TUILiveKit for iOS, Android, or the web. Find and access your created live stream room in the live stream list. You can refer to the following documentation link to access the watch page for integration.
platform | Document Link |
Web |

