Before proceeding, please refer to the Service Activation documentation to either obtain a trial version of the Push service or purchase a paid subscription package.
Step 2: Integrate TIMPush and register for push notifications
Note:
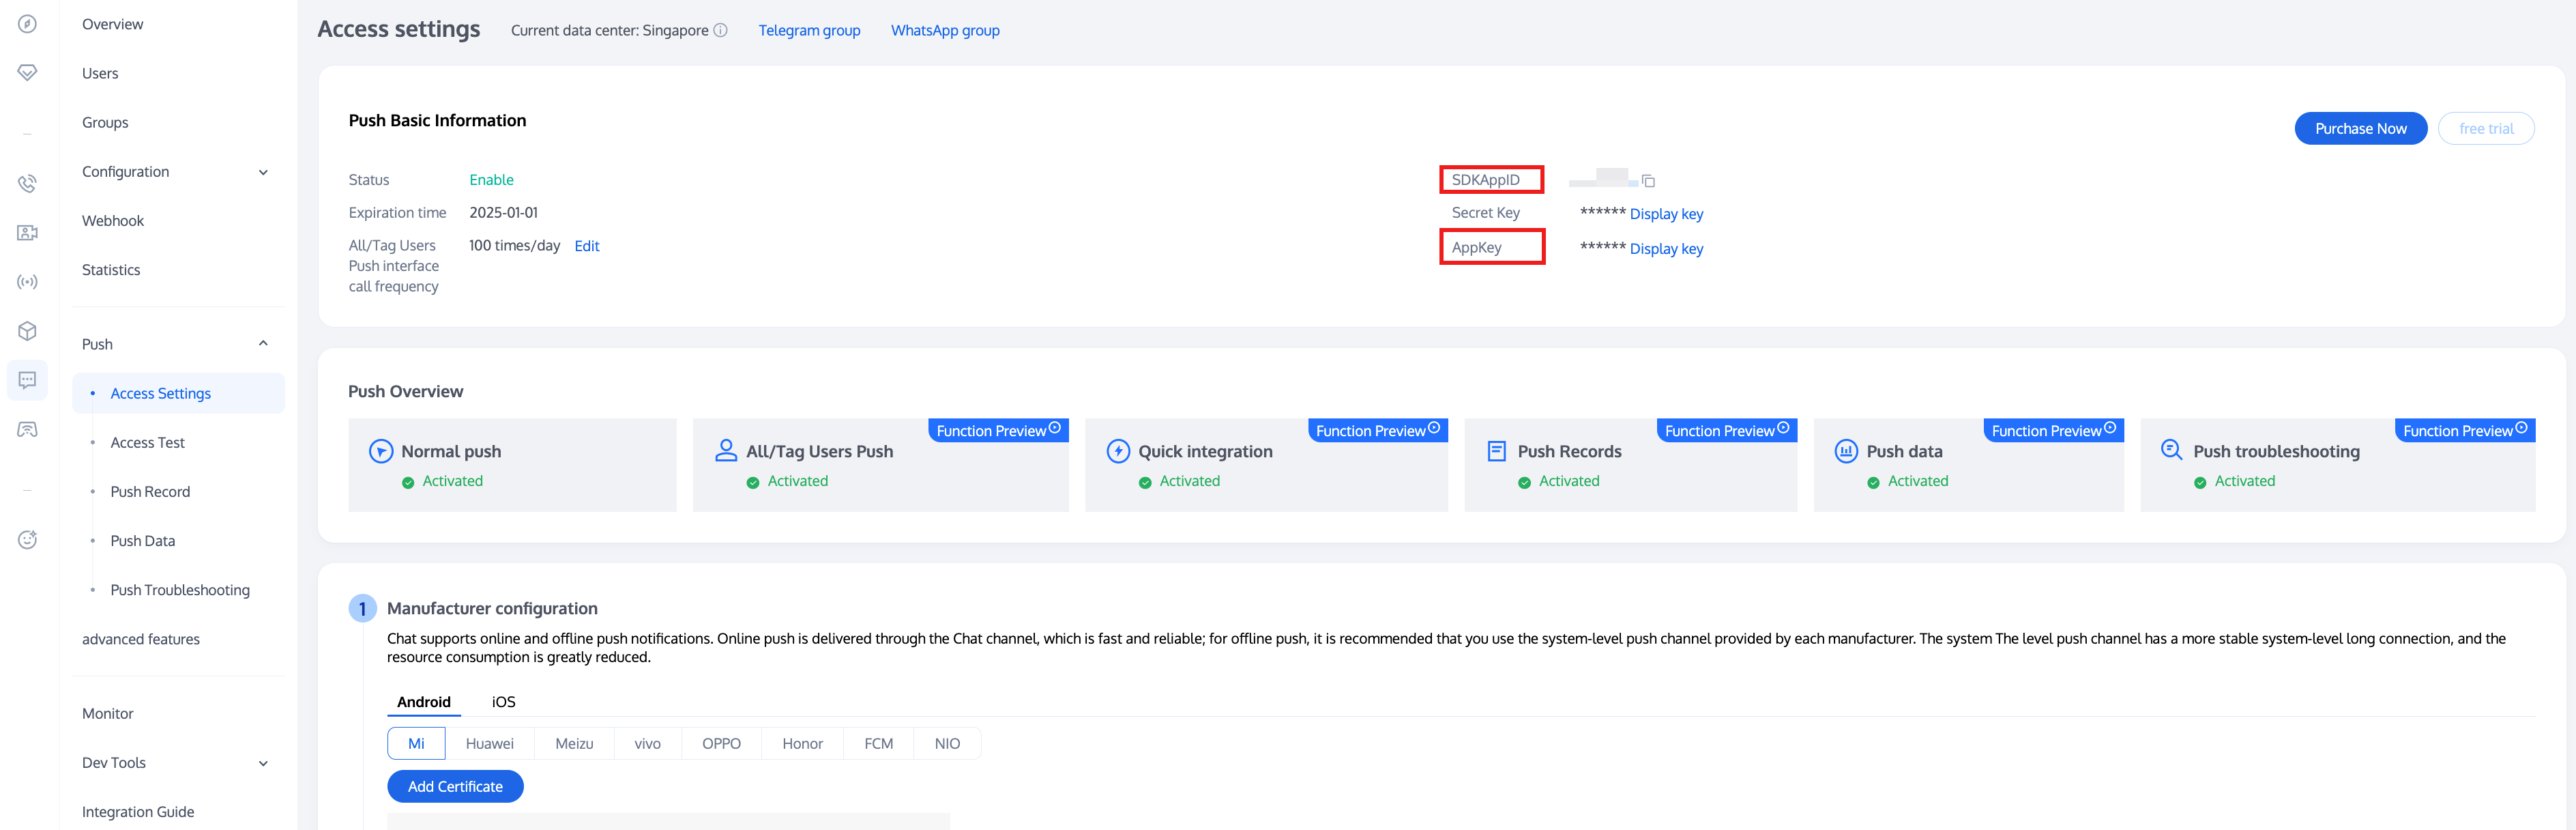
The parameters required for the registration interface, sdkAppId and client key appKey, can be obtained from: Console > Push Basic information, as shown in the screenshot below:
Android
iOS
Flutter
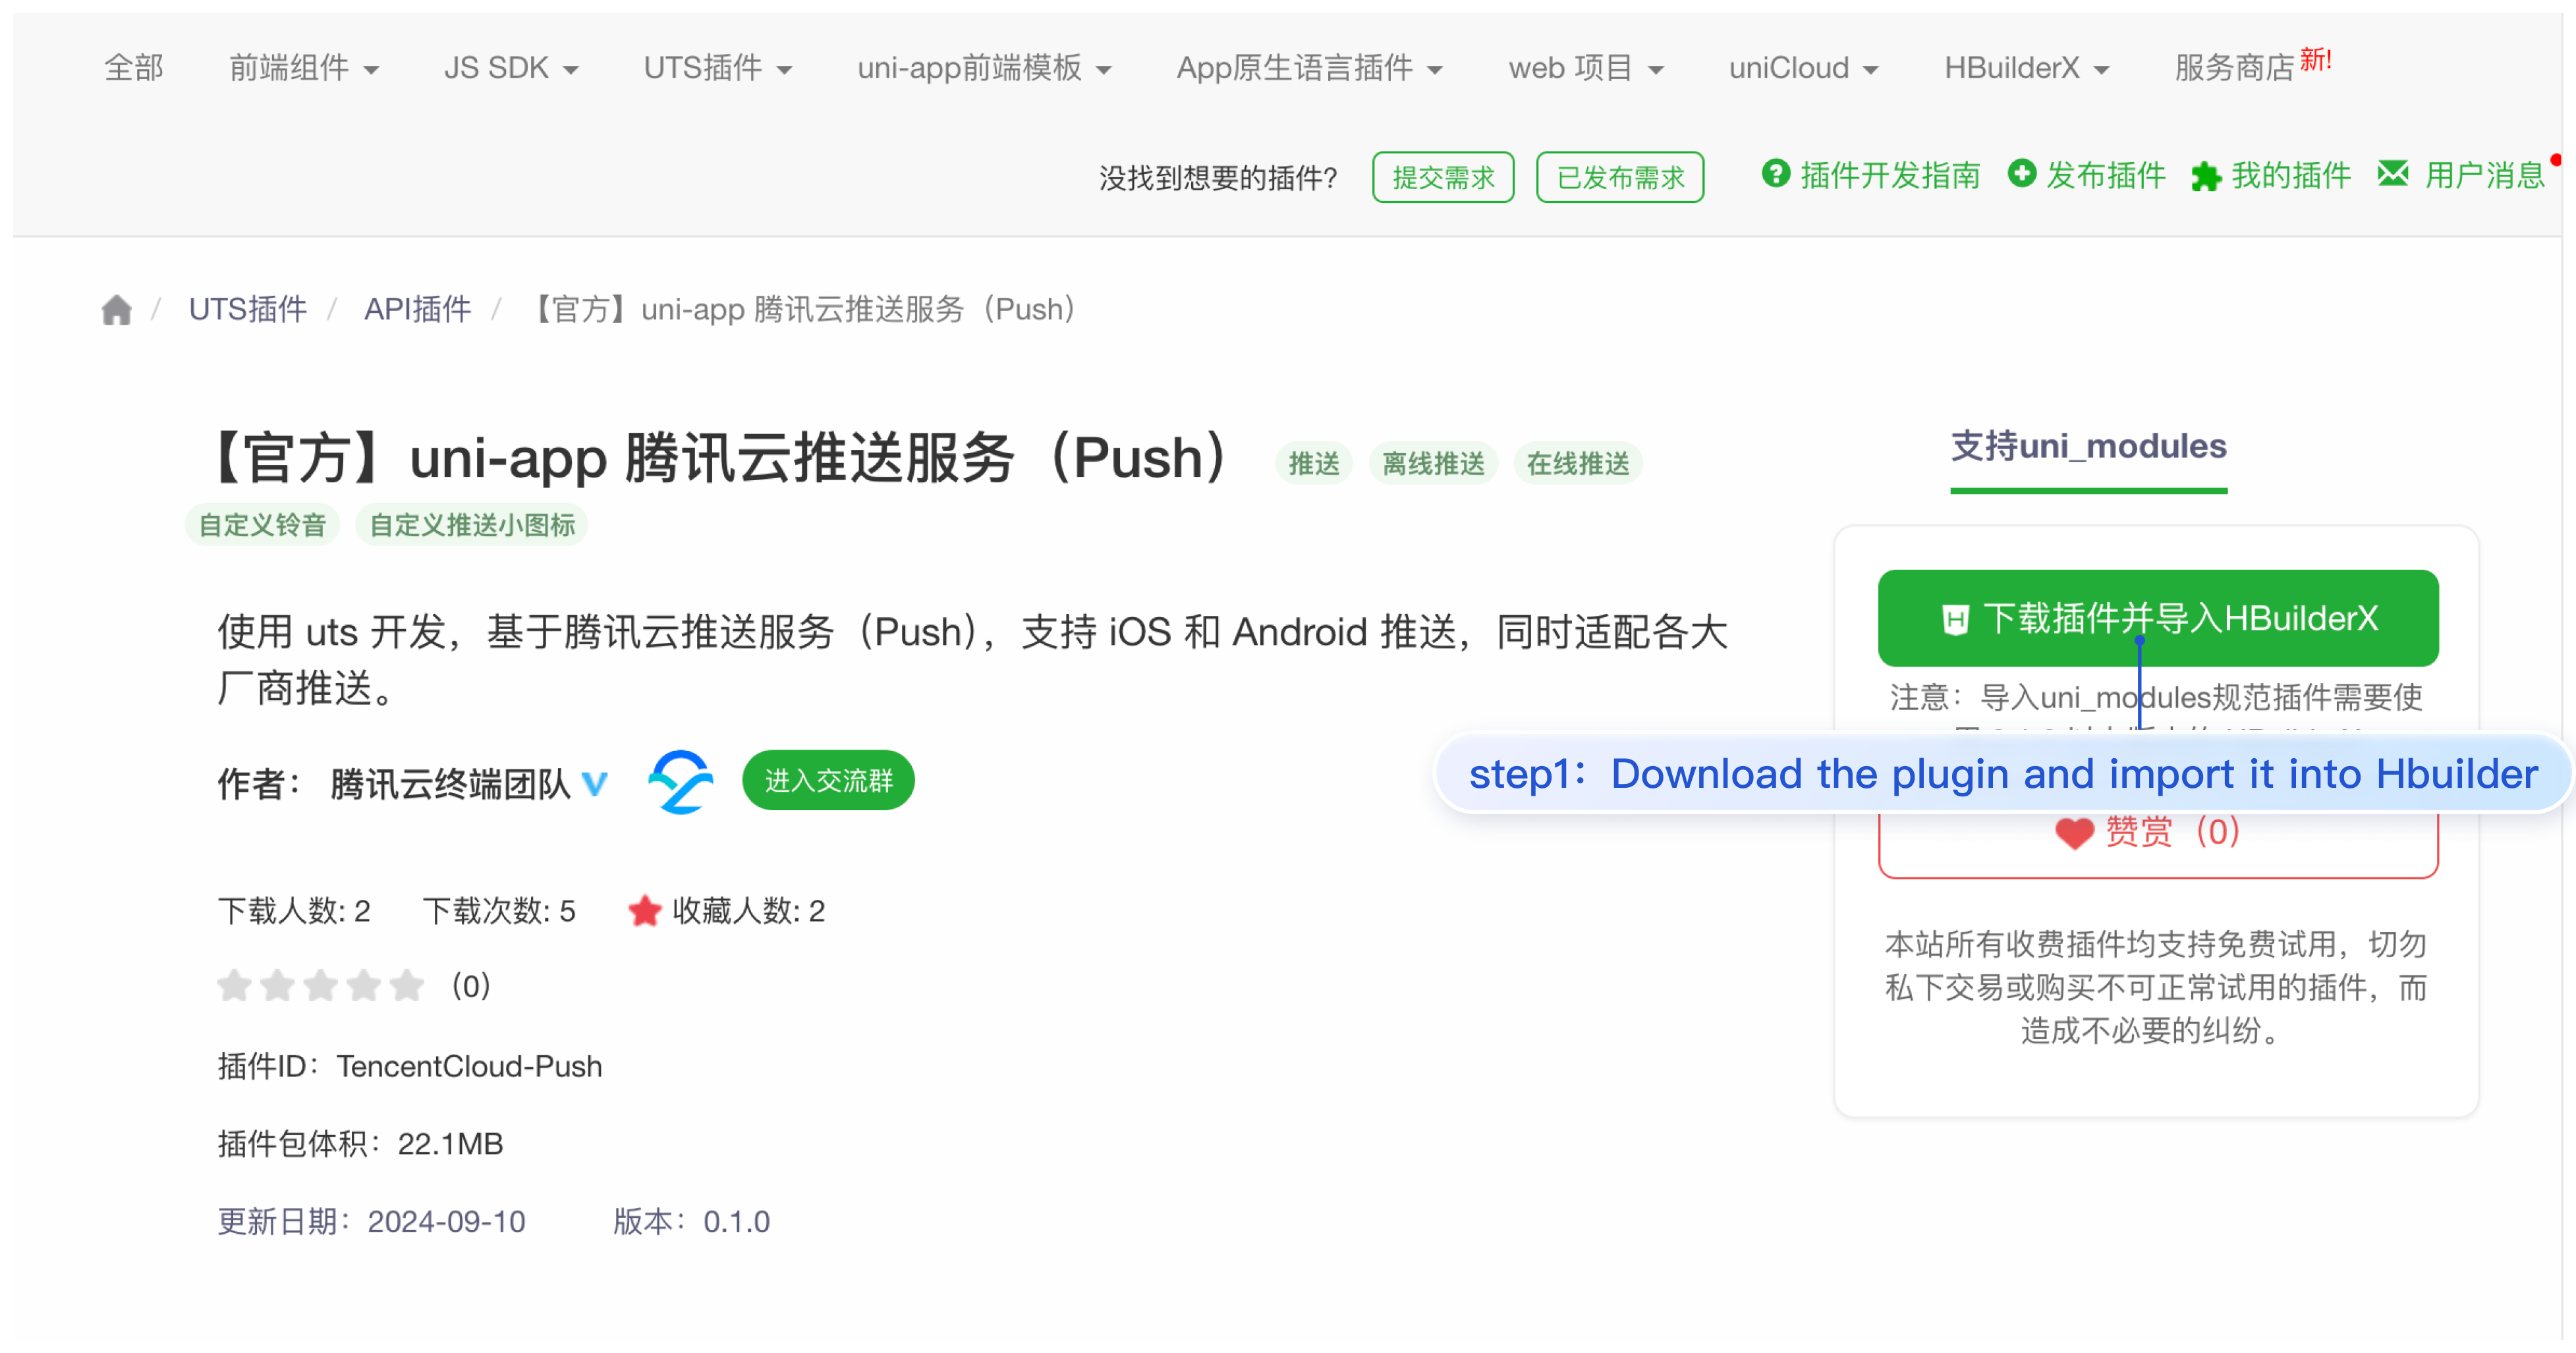
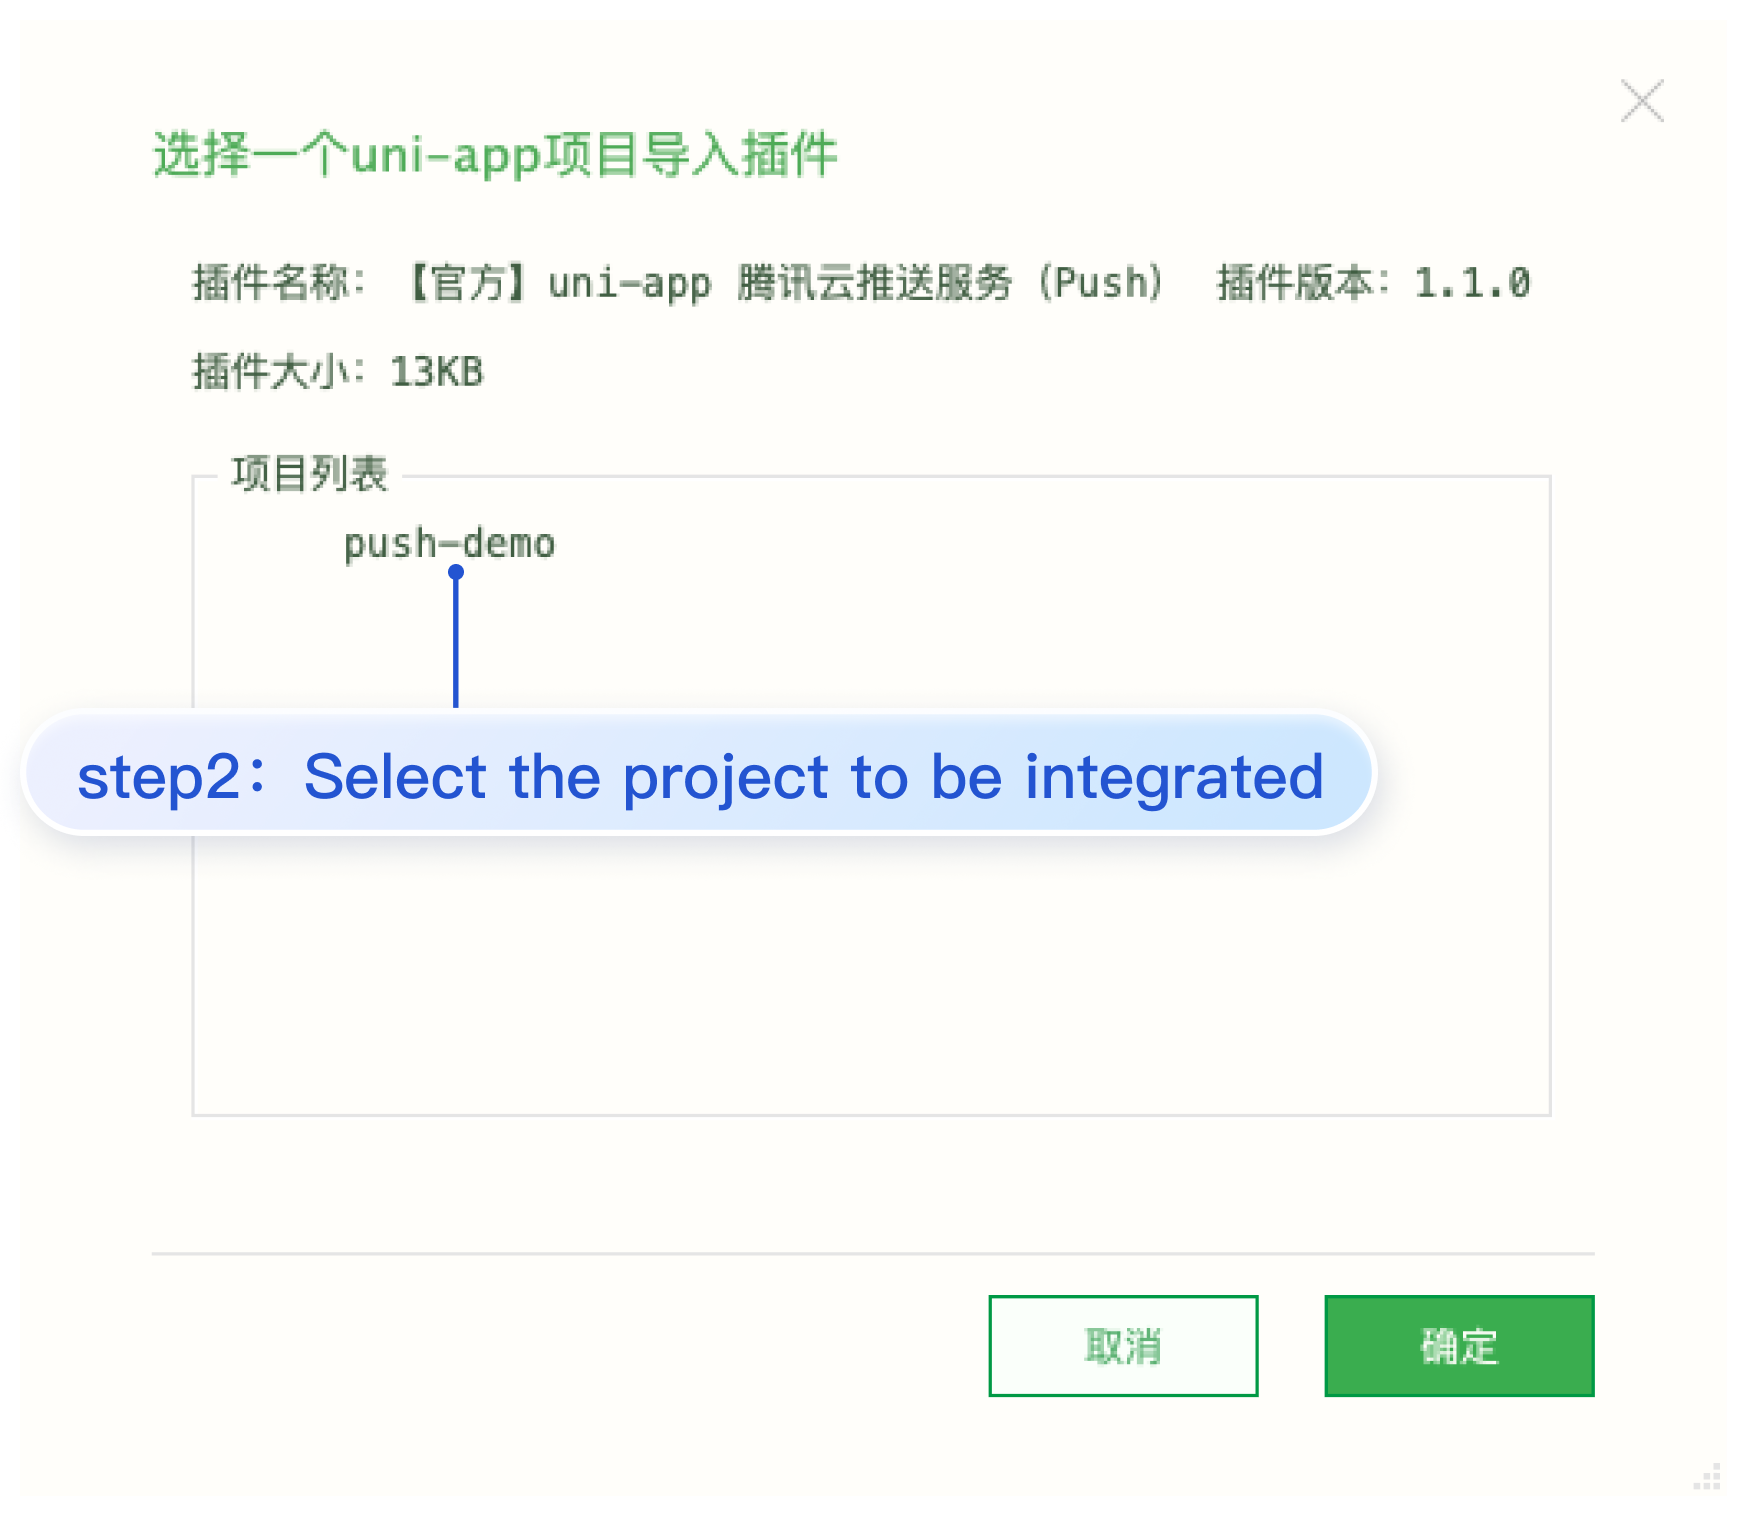
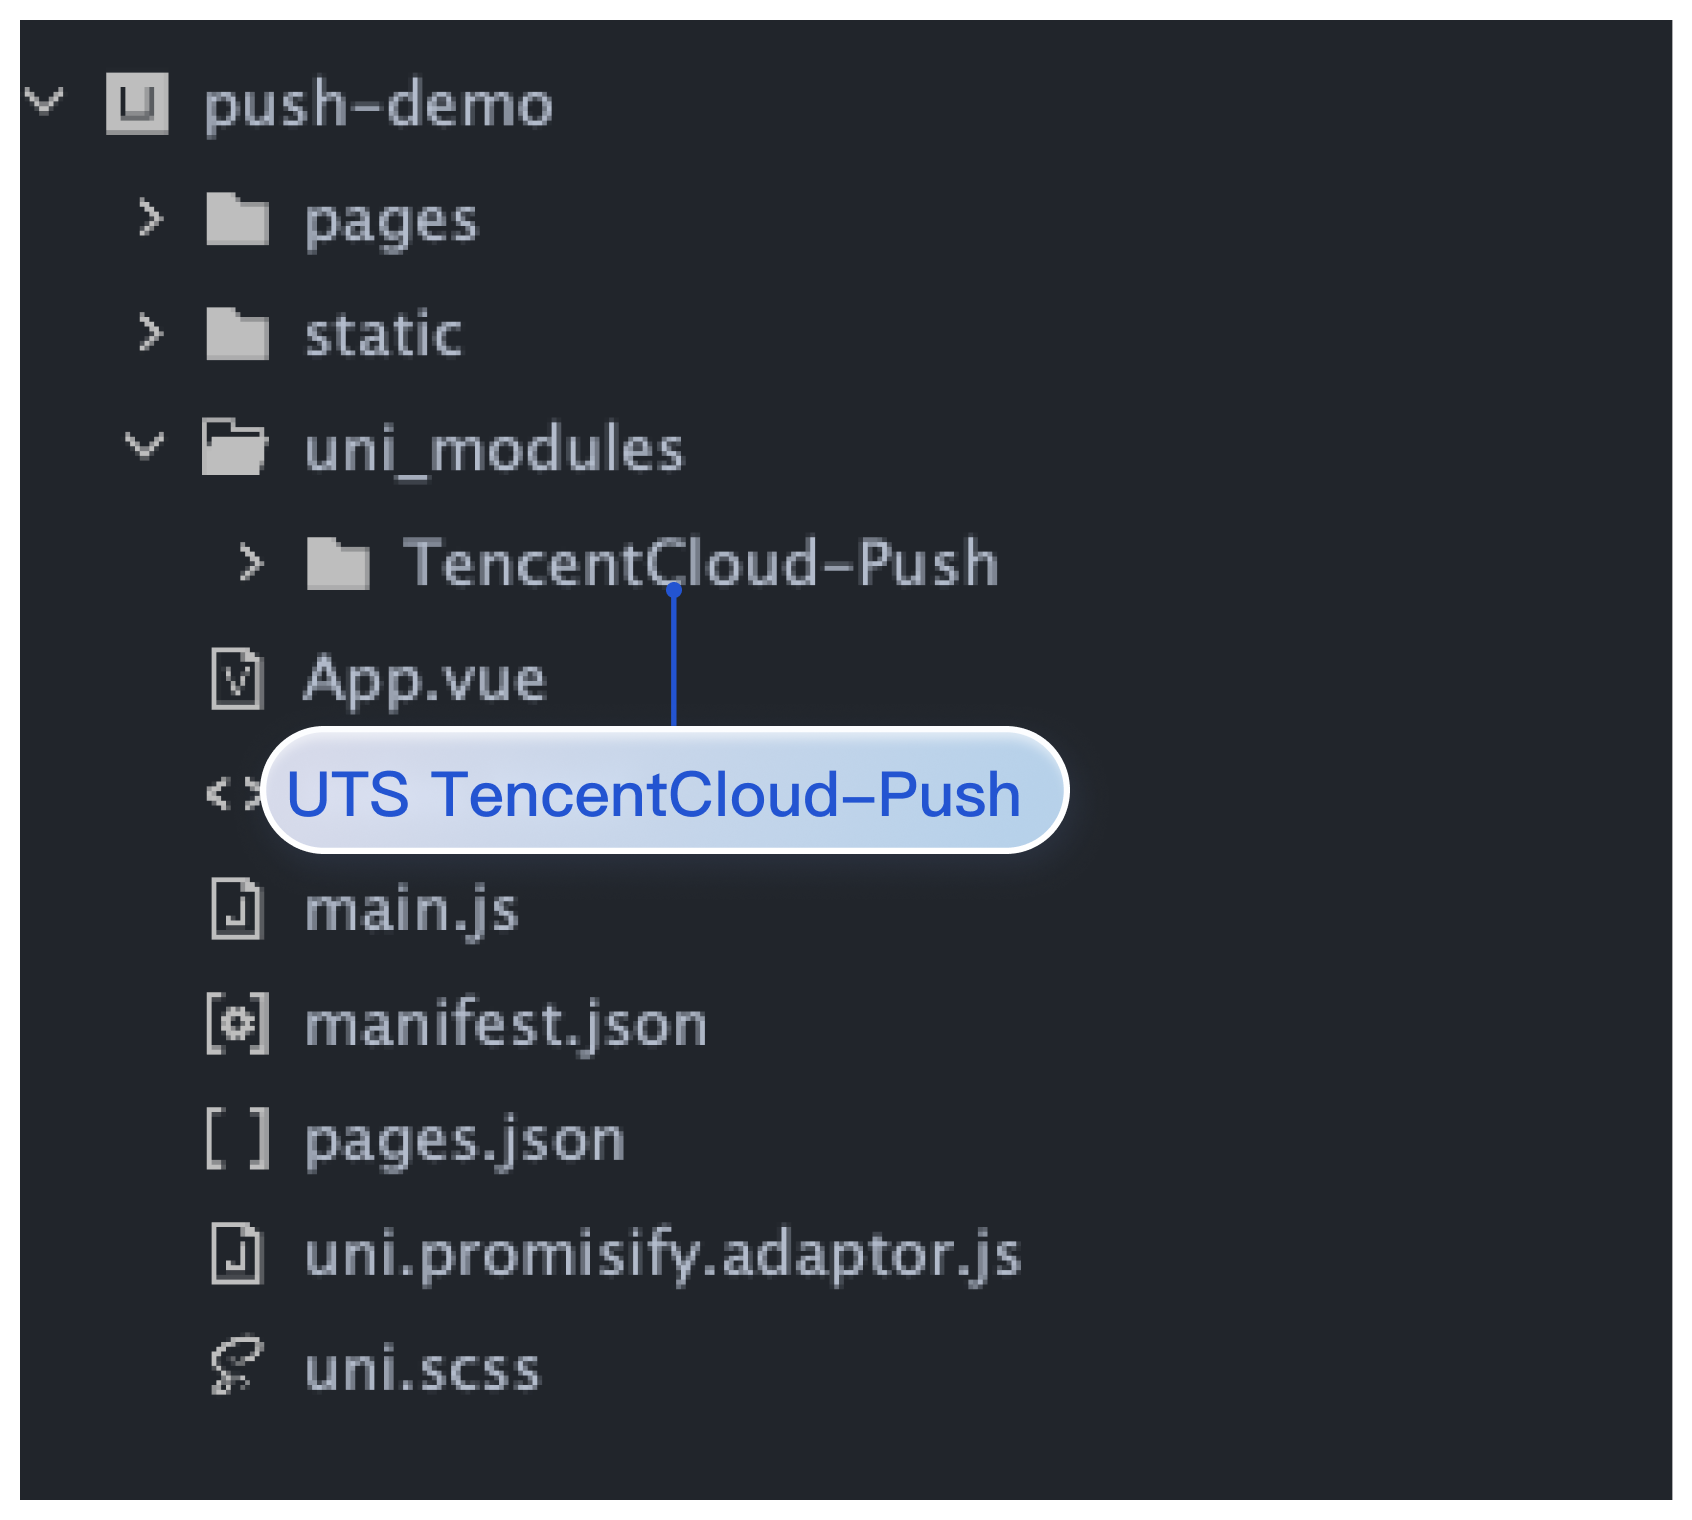
uni-app
React Native
1. Integration of TIMPush
// The version number "VERSION" can be obtained from the Update Log.
1. After successfully registering for offline push service, you can obtain the unique push ID, RegistrationID, through the getRegistrationID interface. Then, you can push messages to the specified device based on the RegistrationID.
2. RegistrationID is the push unique identifier ID of the device. It is automatically generated after the default registration of the push service succeeds. It will change after uninstall.
3. Implement click notification bar callback
After receiving the push message, clicking the notification bar will trigger the component to callback the click event and pass through the offline message.
The component will notify the application in the form of a callback or broadcast, and the application can configure the app's page jump in the callback.
Note:
It is recommended to place the registration callback timing in the onCreate() function of the application.
1. After successfully registering for offline push service, you can obtain the unique push ID, RegistrationID, through the getRegistrationID interface. Then, you can push messages to the specified device based on the RegistrationID.
2. RegistrationID is the push unique identifier ID of the device. It is automatically generated after the default registration of the push service succeeds. It will change after uninstall.
3. Implement click notification bar callback
After receiving the push message, clicking the notification bar will trigger the component to callback the click event and pass through the offline message.
//- If NO is returned, TIMPush will continue to execute the built-in TUIKit offline push parsing logic and continue to callback - navigateToBuiltInChatViewController:groupID: method.
return NO;
}
1. Integration of TIMPush
This plugin is available on pub.dev under the package name: tencent_cloud_chat_push. You can include it in your pubspec.yaml dependency directory, or install it automatically with the following command.
flutter pub addtencent_cloud_chat_push
2. Registration for push notifications (after successful registration, you can receive online push notifications)
You can define a function to receive this callback and use it to navigate to the corresponding Session Page or your Business Page.
1. After successfully registering for offline push service, you can obtain the unique push ID, RegistrationID, through the getRegistrationID interface. Then, you can push messages to the specified device based on the RegistrationID.
2. RegistrationID is the push unique identifier ID of the device. It is automatically generated after the default registration of the push service succeeds. It will change after uninstall.
3. Implement click notification bar callback
Android
iOS
The Application class inherits from TencentCloudChatPushApplication
Replace"package"withyour own packagename(usually auto-generated by AndroidStudio)
If you have already created your own Application for other purposes, directly extend TencentCloudChatPushApplication and ensure that the onCreate() function calls super.onCreate();.
The AppDelegate class inherits from TIMPushDelegate
import UIKit
import Flutter
// Add these two import lines
import TIMPush
import tencent_cloud_chat_push
// Add `, TIMPushDelegate` to the following line
@UIApplicationMain
@objc class AppDelegate: FlutterAppDelegate, TIMPushDelegate {
3. Import and register Tencent Cloud Push Service (Push) in App.vue (after successful registration, you can receive online push notifications)
Note:
After successfully registering for push service with registerPush, you can obtain the push ID identifier, RegistrationID, through getRegistrationID. You can push messages to specified devices based on RegistrationID.
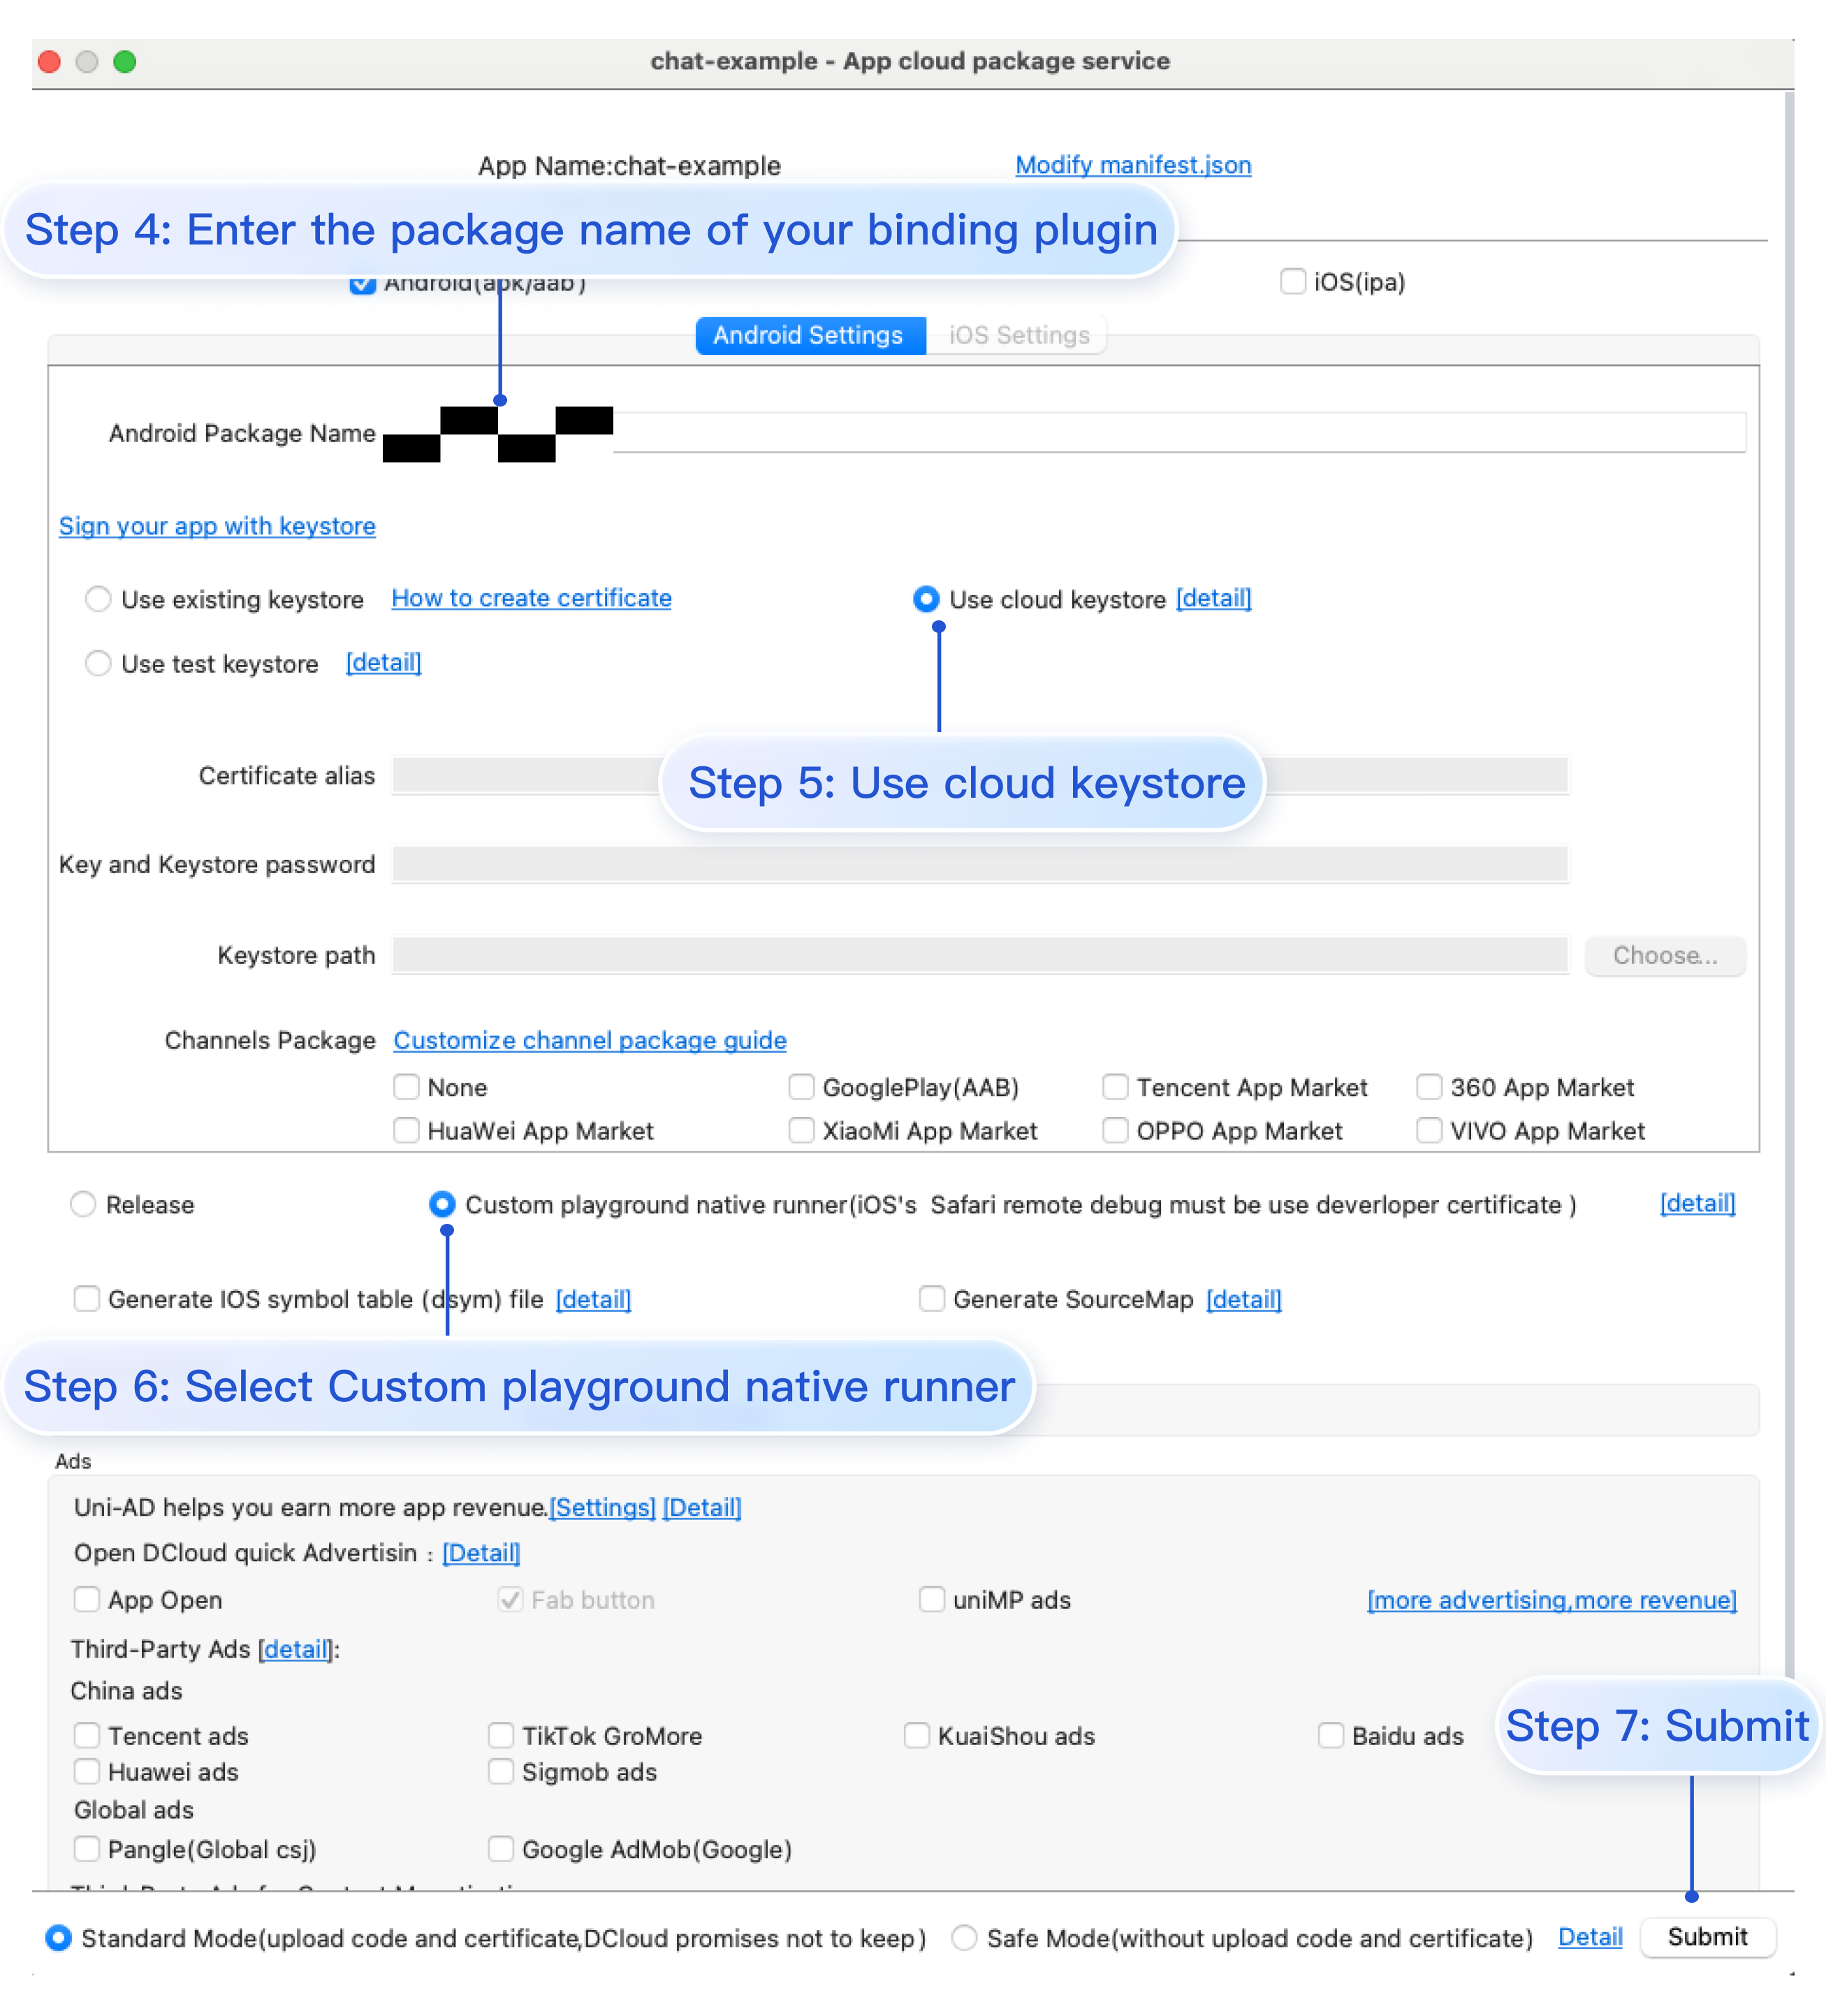
Click HBuilderX's Run > Run on Phone or Emulator > Create Custom Debug Base, and use the cloud certificate to create an Android or iOS custom debug base. As shown in the figure:
1. Create a React Native project (skip this step if you already have a project)
// Packages that cannot be autolinked yet can be added manually here, for example:
// packages.add(new MyReactNativePackage());
return packages;
}
...
}
3. After completing the above steps, select File > Sync Project with Gradle Files.
1. Open MyReactNativeApp/ios/MyReactNativeApp.xcworkspace using XCode.
2. Go to the MyReactNativeApp/ios directory and install TIMPush.
pod install
# If you cannot install the latest version,
# execute the following command to update the local CocoaPods repository list.
pod repo update
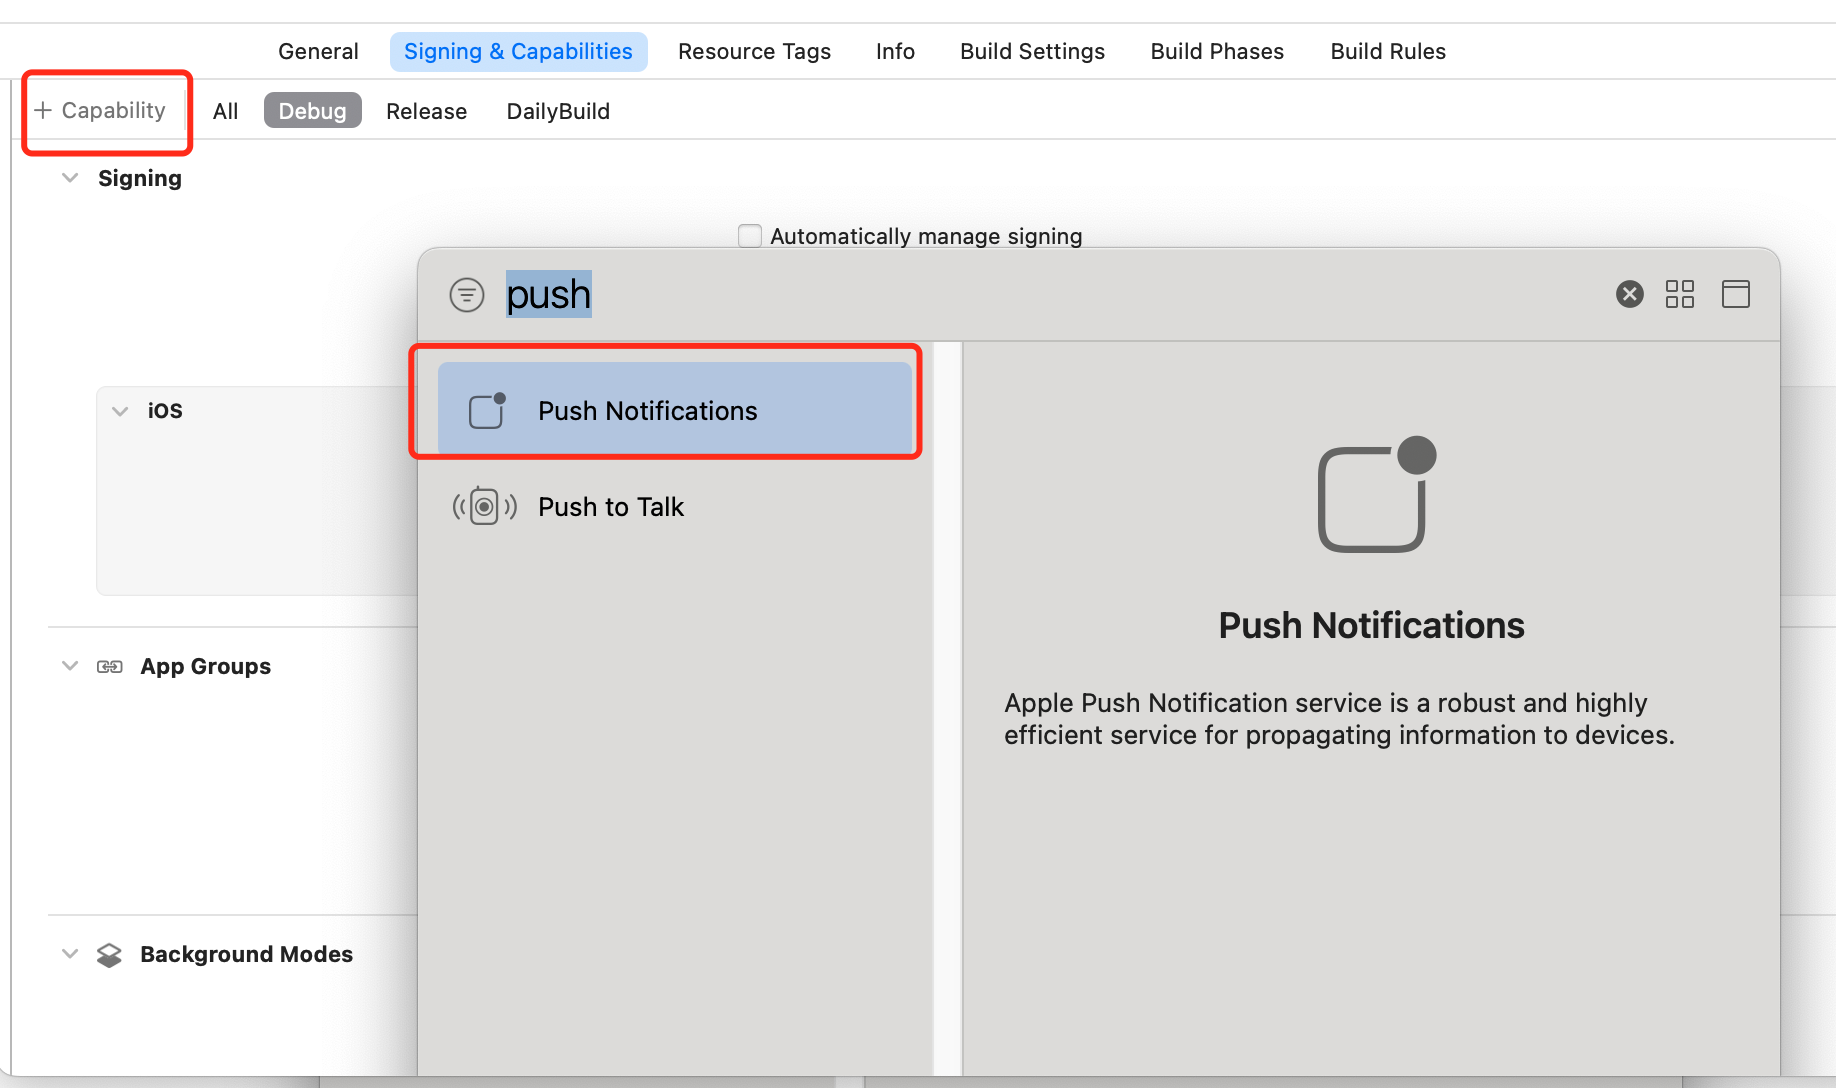
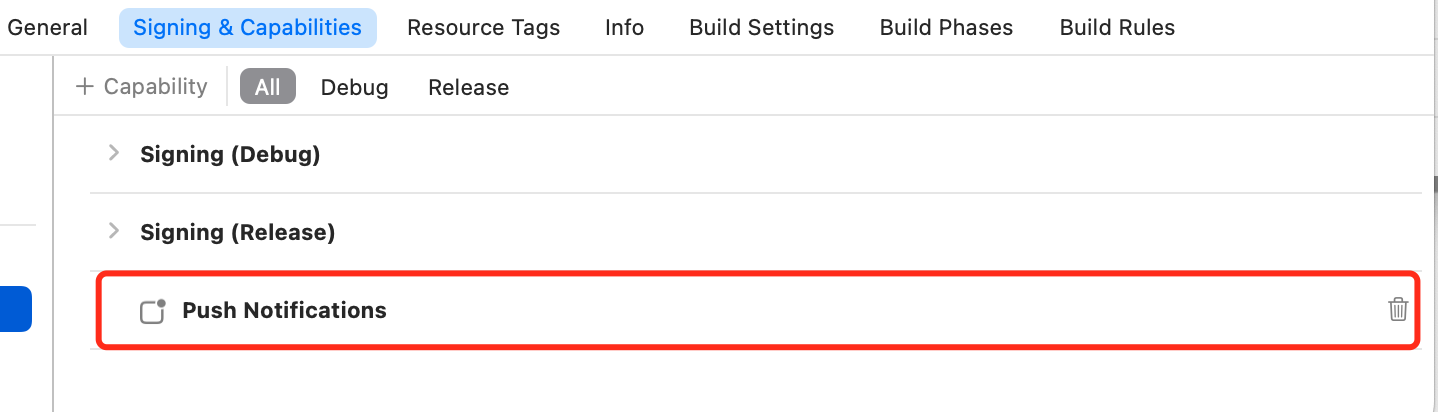
3. Enable push notification feature in the app. Open the Xcode project, and on the Project > Target > Capabilities page, select and add Push Notifications.
5. Run on a real device (make sure to enable phone notification permissions and allow app notifications before testing.)
From the root directory of the project, run the following command in the command prompt to install and launch your application on the device:
Android
iOS
npm run android
npm run ios
Step 3: Specify RegistrationID for push
Finally, you can specify the registrationID in the console for online push testing:
Note:
1. For official use, please refer to the following methods.