
Host Live Streaming
The TUILiveKit Host Live Streaming Page provides an full-featured UI for live streaming scenarios. It supports the rapid deployment of core host capabilities, allowing you to efficiently integrate the live streaming workflow without worrying about complex UI and logic implementation.
Feature Overview
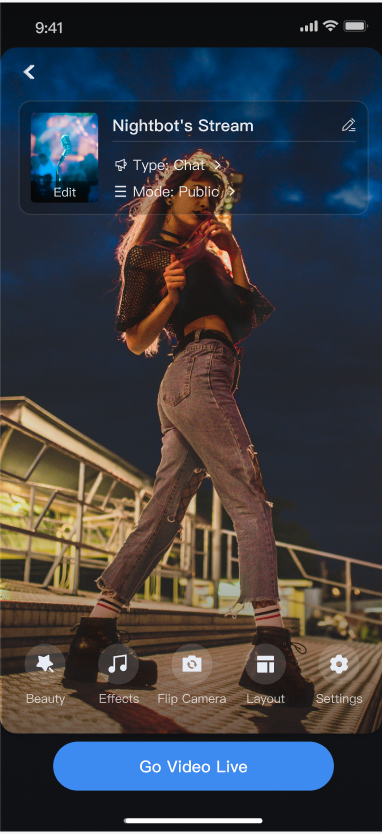
Pre-stream Setup: Supports various personalized configurations before the host goes live, including room name, background, video preview, beauty filters (beauty effects) debugging, audio effects debugging, and layout templates.
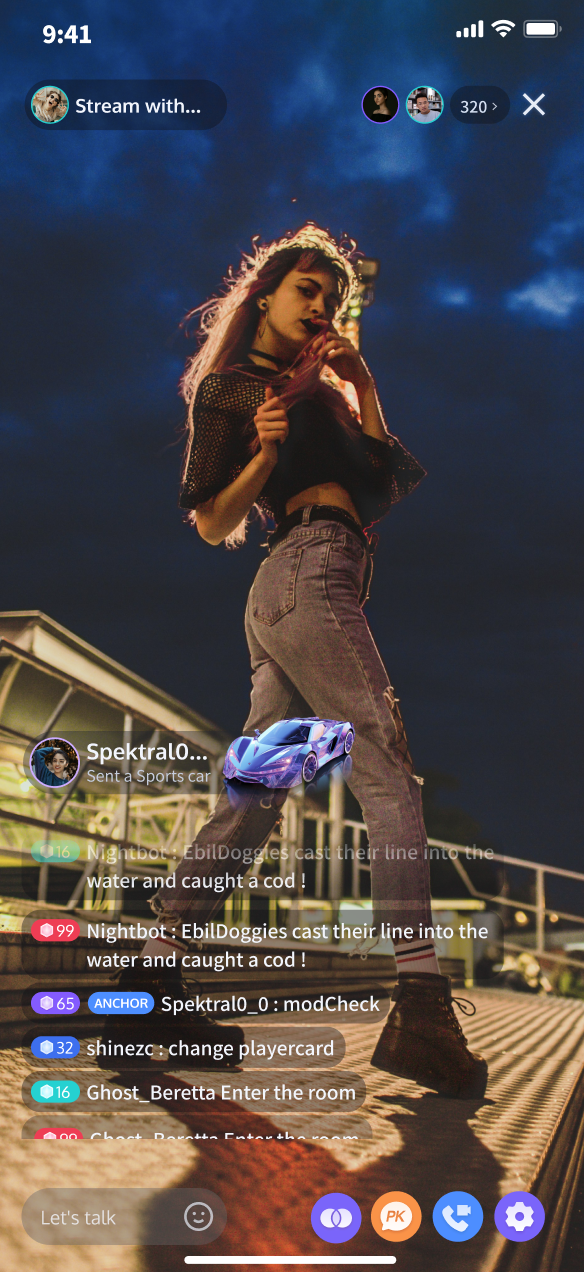
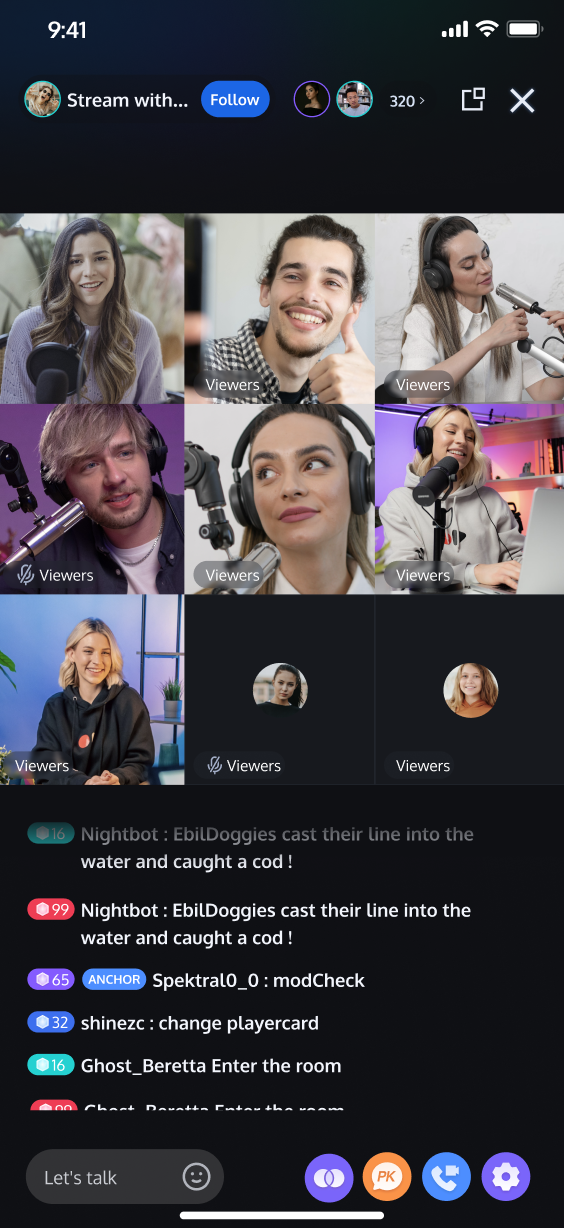
Co-Host Interaction: Supports real-time interaction (co-hosting) with viewers or other hosts during the live stream.
Audience Interaction: Supports rich interaction forms such as barrage (bullet screen) and gifts.
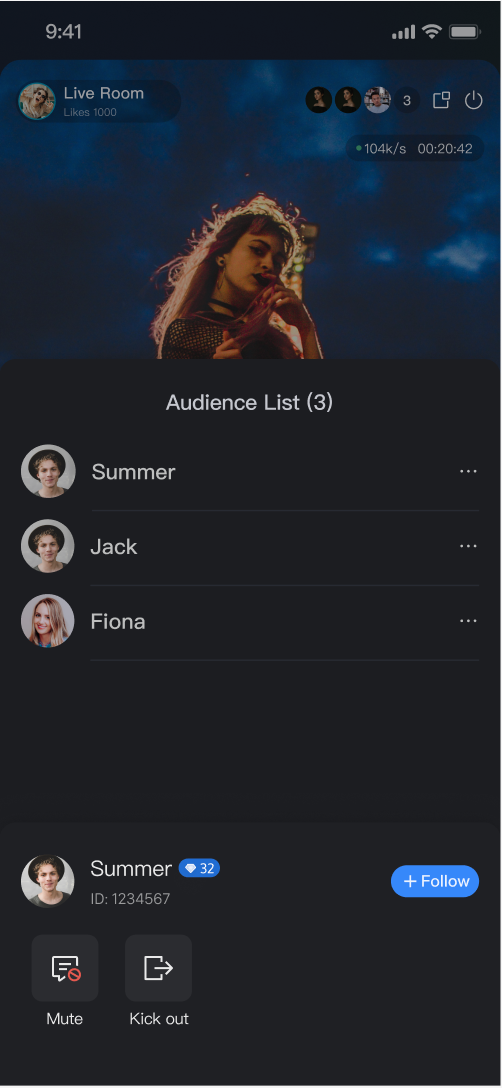
Live Room Management: Supports displaying the online user list and various management operations within the room, such as muting (banning) and kicking users.
Pre-stream Setup | Co-Host Interaction | Audience Interaction | Live Room Management |
 |  |  |  |
Quick Start
Step 1. Activate the Service
Step 2. Code Integration
Step 3. Add the Pre-stream Setup view
The
AnchorPrepareView component already has built-in features for camera preview, audio effects settings, layout settings, and other functional configurations. You need to create and load AnchorPrepareView. The specific example code is as follows:// YourAnchorPrepareViewController represents the view controller for loading the anchor starts live streaming viewclass YourAnchorPrepareViewController: UIViewController {// 1. Declare to create a LiveCoreView instanceprivate let coreView = LiveCoreView()// 2. Lazy load AnchorPrepareViewprivate lazy var prepareView: AnchorPrepareView = {// 3. Import the coreView instance object when initializing AnchorPrepareViewlet view = AnchorPrepareView(coreView: coreView)return view}()public override func viewDidLoad() {super.viewDidLoad()// 4. Add prepareView to viewview.addSubview(prepareView)prepareView.snp.makeConstraints { make inmake.edges.equalToSuperview()}}}
Step 4. Add the Host Streaming view
The
AnchorView component has built-in features for audio/video pushing (streaming), viewer co-hosting, live interaction, and live room management. You only need to create and load AnchorView. The specific example code is as follows:// YourAnchorPrepareViewController represents the view controller for loading the anchor starts live streaming viewclass YourAnchorViewController: UIViewController {// Live room informationprivate let liveInfo: LiveInfo// Core view componentprivate let coreView: LiveCoreView// Room entry action:// RoomBehavior.createRoom: Broadcaster creates a room// RoomBehavior.enterRoom: Audience enters roomprivate let behavior: RoomBehavior// 1. Declare anchorView instanceprivate let anchorView: AnchorView// 2. Add new construct function to complete instance initializationpublic init(liveInfo: LiveInfo, coreView: LiveCoreView? = nil) {self.liveInfo = liveInfoself.behavior = behaviorif let coreView = coreView {self.coreView = coreView} else {self.coreView = LiveCoreView()}// 3. Instantiate the live stream publishing pageself.anchorView = AnchorView(liveInfo: liveInfo, coreView: self.coreView, behavior: .createRoom)super.init(nibName: nil, bundle: nil)}public override func viewDidLoad() {super.viewDidLoad()// 4. Add anchorView to viewview.addSubview(anchorView)anchorView.snp.makeConstraints { make inmake.edges.equalToSuperview()}}}
Step 5. Transition from Pre-stream Setup to Host Streaming
Combine Step 3 to implement the delegate events of the
AnchorPrepareView component, completing the transition to the host streaming page. The specific example code is as follows:// Set proxy during AnchorPrepareView initialization in Step 1class YourAnchorPrepareViewController: UIViewController {private lazy var prepareView: AnchorPrepareView = {let view = AnchorPrepareView(coreView: coreView)// 1. Set callback proxyprepareView.view.delegate = selfreturn view}()}// 2. Implement AnchorPrepareViewDelegate callback proxyextension YourAnchorPrepareViewController : AnchorPrepareViewDelegate {// Respond to the click event of the go live button// - state: PrepareState encapsulates camera, sound effect and other feature settings of the live stream publishing view. Just set it as the following example code.public func onClickStartButton(state: PrepareState) {// 4. Navigate to the live stream publishing page// 4.1. Initialize live informationvar liveInfo = LiveInfo()// you only need to set roomIdliveInfo.roomId = roomIdliveInfo.name = state.roomNameliveInfo.coverUrl = state.coverUrlliveInfo.isPublicVisible = state.privacyMode == .publicliveInfo.seatLayoutTemplateId = state.templateMode.rawValueliveInfo.backgroundUrl = state.coverUrlliveInfo.pkTemplateId = state.pkTemplateMode.rawValue// 4.2. Instantiate your live stream view controllerlet anchorVC = YourAnchorViewController(liveInfo: liveInfo, coreView: coreView)anchorVC.modalPresentationStyle = .fullScreen// 4.3. Navigate to your live stream view controllerpresent(anchorVC, animated: false)}// Respond to the click event of the back buttonpublic func onClickBackButton() {if let nav = navigationController {nav.popViewController(animated: true)} else {dismiss(animated: true)}}}
Customize Your UI Layout
TUILiveKit supports flexible customization of the host setup and live pages, allowing you to adjust the layout and hide/show functional modules based on your business requirements.
Live Layout Template Selection
TUILiveKit provides 4 live layout templates. You can select the appropriate style in the "Layout" UI interaction entry on the host setup page:
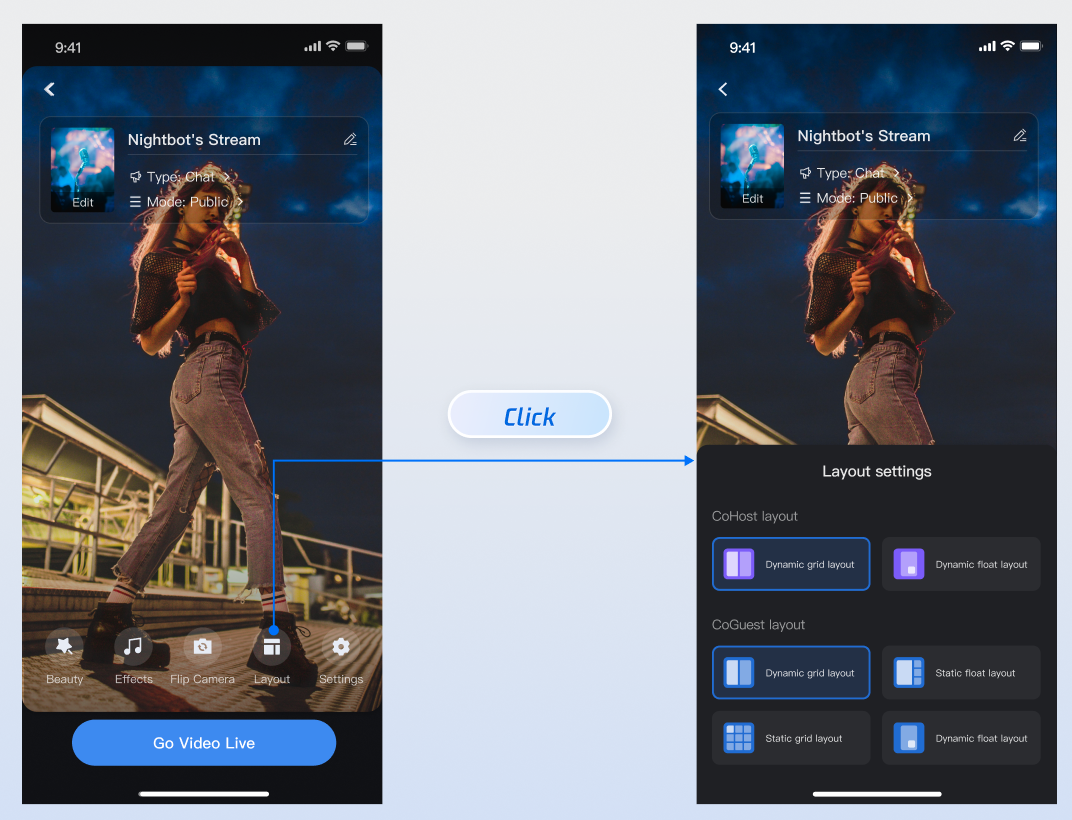
Layout Template Overview
Name | dynamic grid layout | dynamic float layout | static grid layout | static float layout |
Template ID | 600 | 601 | 800 | 801 |
Description | The default layout; grid size adjusts dynamically based on the number of co-hosts. | Co-hosts are displayed in floating small windows. | The number of co-hosts is fixed, and each co-host occupies a fixed grid cell. | The number of co-hosts is fixed, and co-hosts are displayed in fixed small windows. |
Preview |  | 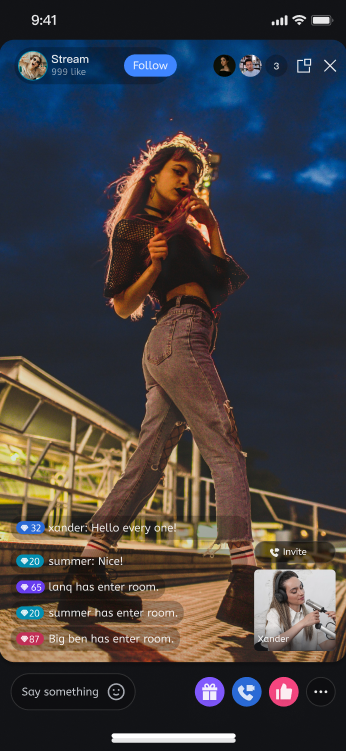 | 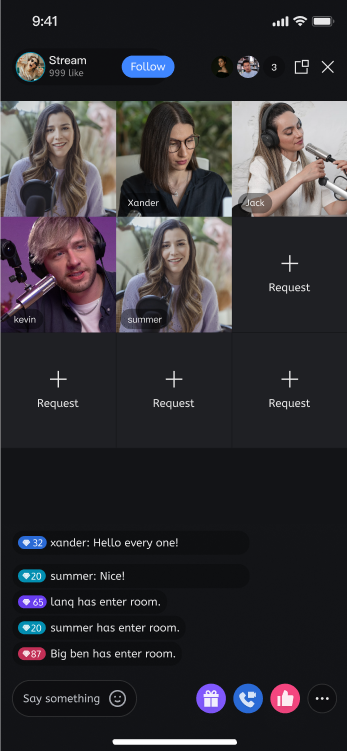 | 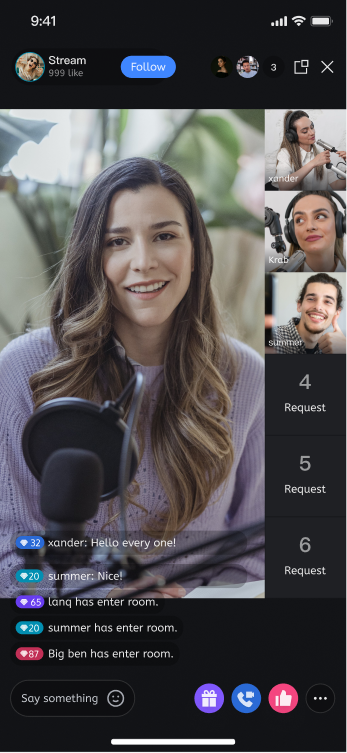 |
Custom AnchorPrepareView Feature Area
By calling the API of
prepareView created in Step 3 , you can customize and hide the operation area or specific features on the host setup page:// YourAnchorPrepareViewController represents the view controller for loading the anchor starts live streaming viewclass YourAnchorPrepareViewController: UIViewController {private let coreView = LiveCoreView()private lazy var prepareView: AnchorPrepareView = {let view = AnchorPrepareView(coreView: coreView)view.delegate = selfreturn view}()public override func viewDidLoad() {super.viewDidLoad()// 1. Add prepareView to viewview.addSubview(prepareView)prepareView.snp.makeConstraints { make inmake.edges.equalToSuperview()}// 2. Custom function area - Example: Hide beauty effect featureprepareView.disableMenuBeautyButton(true)}}
API | Description |
disableFeatureMenu(true) | Hide Entire Feature Area |
disableMenuBeautyButton(true) | Hide Beauty Effect Button |
disableMenuAudioEffectButton(true) | Hide Sound Effect Button |
disableMenuSwitchCameraButton(true) | Hide Camera Toggle Button |
Customize AnchorView Feature Area
By calling the API of Step 4 created
anchorView, you can customize and hide the operation area or specific features on the host live page:// YourAnchorPrepareViewController represents the view controller for loading the anchor starts live streaming viewclass YourAnchorViewController: UIViewController {// Declare anchorView instanceprivate let anchorView: AnchorViewpublic override func viewDidLoad() {super.viewDidLoad()// Add anchorView to viewview.addSubview(anchorView)anchorView.snp.makeConstraints { make inmake.edges.equalToSuperview()}// Hide the anchor connection featureanchorView.disableFooterCoHost(true)}}
API | Description |
disableHeaderVisitorCnt(true) | Hide Top Audience List Feature |
disableFooterCoGuest(true) | Hide Bottom Audience Mic Connection Feature |
disableFooterCoHost(true) | Hide Bottom Anchor Connection Feature |
disableFooterBattle(true) | Hide Bottom Anchor PK Function |
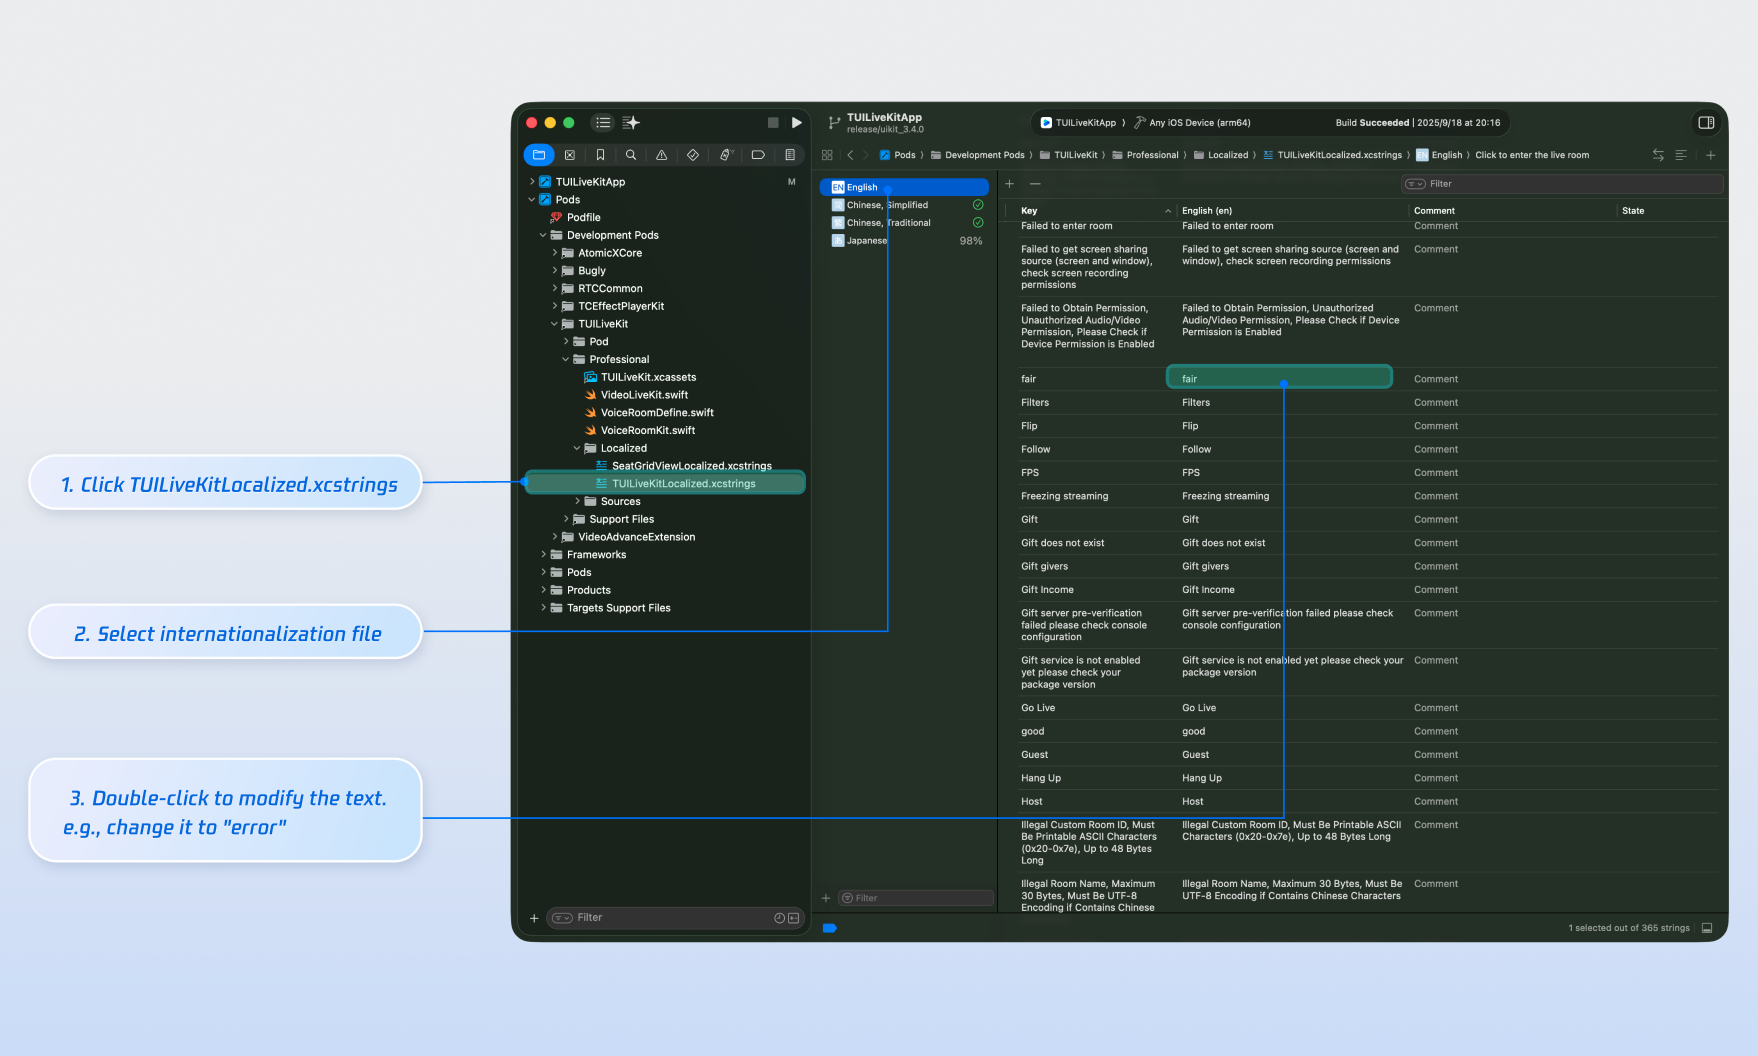
Text Customization (Localization)
TUILiveKit uses the Apple Strings Catalog(
.xcstrings) format, introduced in Xcode 15, to manage the text displayed in the UI. You can modify the string resources using Xcode's graphical interface:Note:
Apple Strings Catalog (.xcstrings) is a localization format introduced in Xcode 15. It enhances how developers manage localized strings, supporting a structured format to handle plurals, device-specific variants, etc. This format is becoming the recommended way to manage localization for iOS and macOS applications.
Icon Customization (Image Assets)
TUILiveKit uses
TUILiveKit.xcassets to manage the image resources for the UI. You can quickly modify the custom icons using Xcode's graphical tools.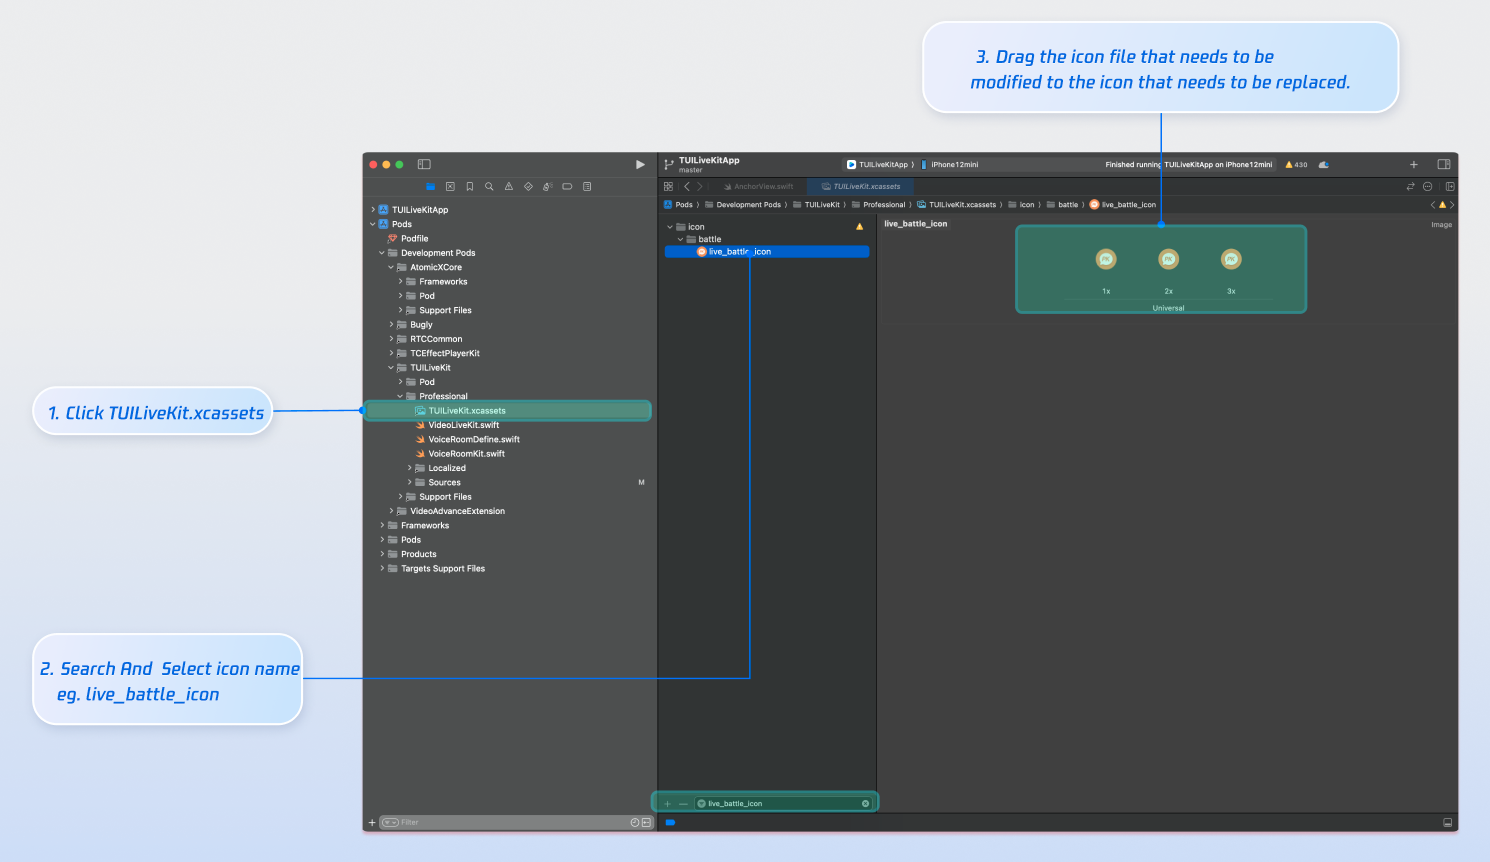
Next Steps
Congratulations! You have successfully integrated the Host Live Streaming component. Next, you can implement features such as viewer watching and the live stream list. Please refer to the table below:
Feature | Description | Integration Guide |
Audience Viewing | Audience can watch live streaming after entering the anchor's live streaming room, with features like audience mic connection, live room information, online audience, and bullet screen display. | |
Live Stream List | Display the live stream list interface and features, including the live stream list and room information display. |
FAQs
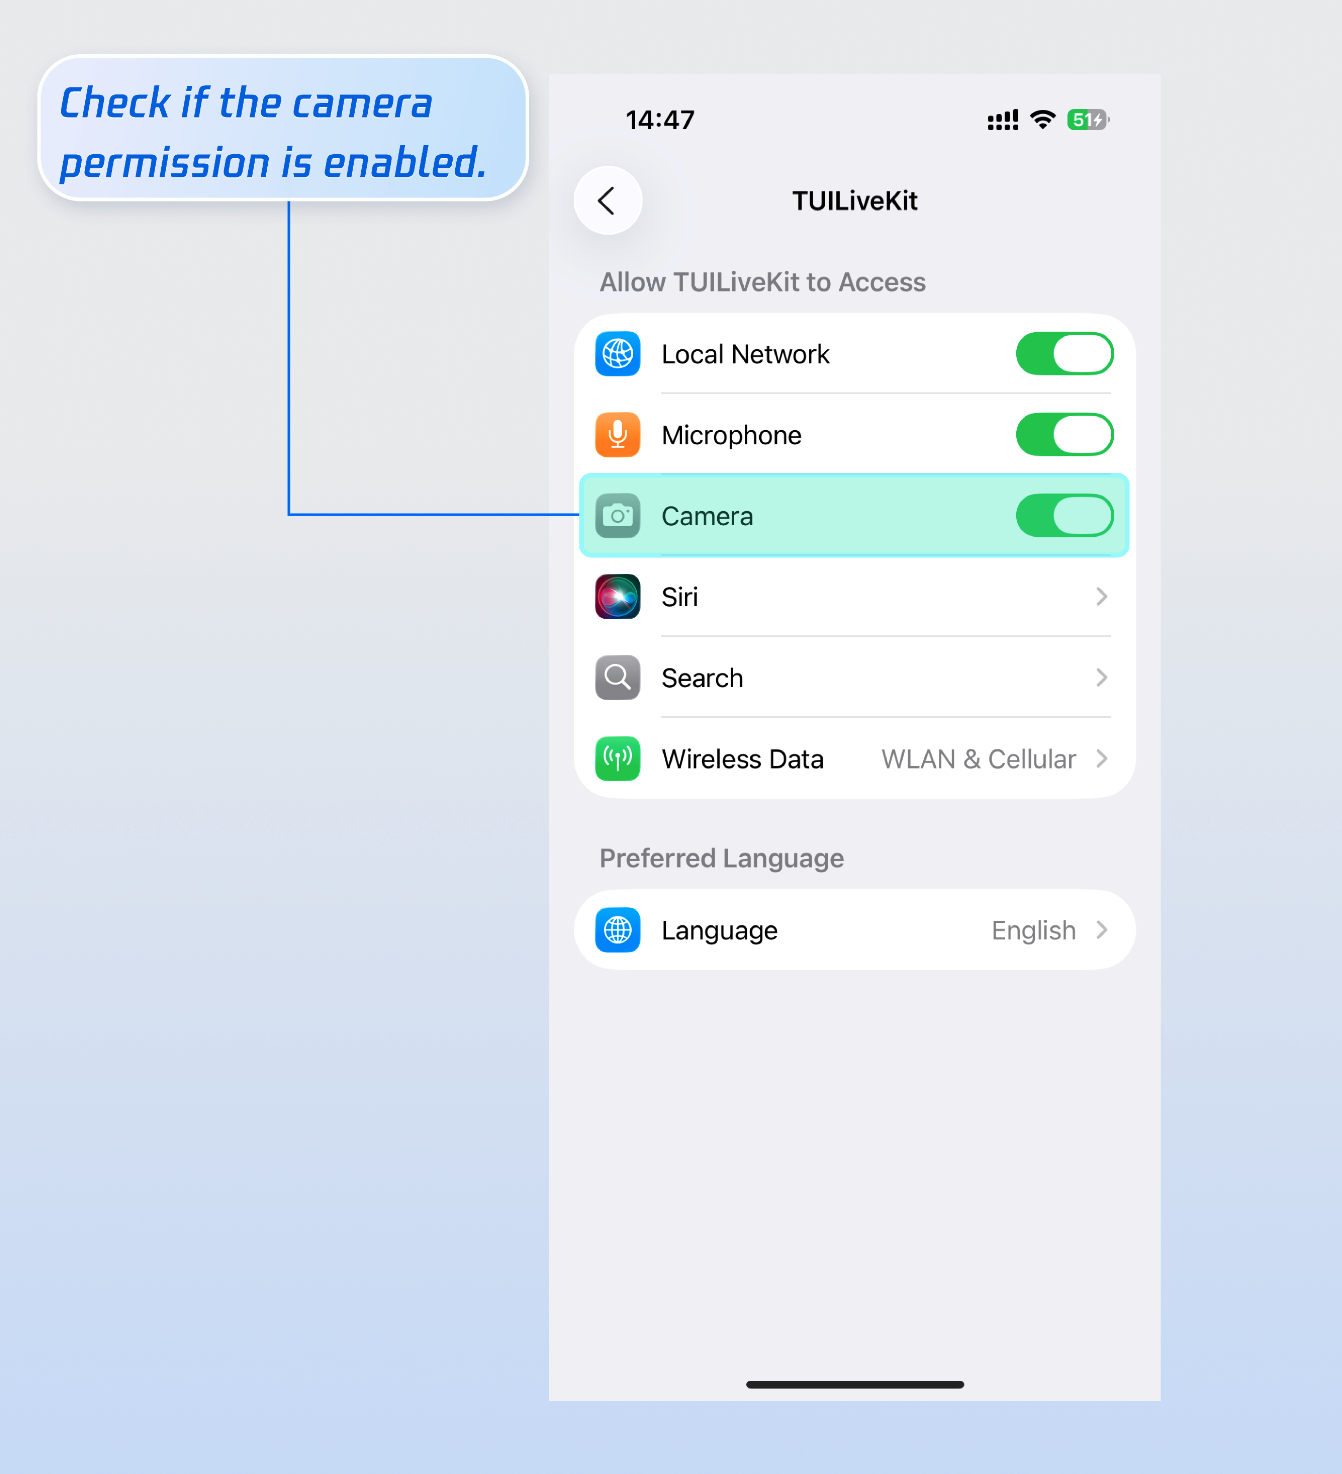
Why is there no video feed after starting the stream?
Please go to Settings > App > Camera and check whether the camera permission is enabled. See the following figure:
Why does clicking the "Start Stream" button fail with a "Not Logged In" prompt?

