
Live Stream List
Overview
This document provides a detailed introduction to the Live Stream List Page in the TUILiveKit Demo. You can directly integrate our pre-developed live stream list page into your existing project as specified in this document, or customize the page style, layout, and feature items according to your needs.
Quick Connection
Step 1: Configuring the Environment and Activating the Service
Before performing quick connection, you need to refer to Preparations to meet the required environment configuration and activate the corresponding service.
Step 2: Dependency Installation
You can choose any method below to install dependencies:
npm install tuikit-atomicx-vue3 @tencentcloud/uikit-base-component-vue3 --save
pnpm add tuikit-atomicx-vue3 @tencentcloud/uikit-base-component-vue3
yarn add tuikit-atomicx-vue3 @tencentcloud/uikit-base-component-vue3
Step 3: Live Stream List Page Integration
Create the live-list.vue file under your project. You can copy the following code directly to your project for seamless integration with the Live Stream List Page.
<template><UIKitProvider language="zh-CN"><div class="container"><header class="header"><h1 class="title">Online Live Streaming</h1></header><main class="main"><LiveList @live-room-click="handleLiveRoomClick" /></main></div></UIKitProvider></template><script setup lang="ts">import { onMounted } from 'vue';import { LiveList, type LiveInfo, useLoginState } from 'tuikit-atomicx-vue3';import { UIKitProvider } from '@tencentcloud/uikit-base-component-vue3';const { login } = useLoginState();async function initLogin() {try {await login({sdkAppId: 0, // SDKAppID, see Step 1 to obtainuserId: '', // UserID, see Step 1 to obtainuserSig: '', // userSig, see Step 1 to obtain});} catch (error) {console.error('login error:', error);}}onMounted(async () => {await initLogin();});</script><style>:global(*),:global(::after),:global(::before){box-sizing:border-box;margin:0}.container{display:flex;flex-direction:column;height:100vh;width:100vw;background:var(--bg-color-default)}.header{display:flex;align-items:center;flex-shrink:0}.title{margin:0;font-size:24px;font-weight:600;color:var(--text-color-primary);letter-spacing:-.5px}.main{flex:1;padding:24px;overflow-y:auto;min-height:0}</style>
Step 4: Starting a Project
Run the command to generate the live stream list page. You can select the corresponding live streaming room to watch.
npm run dev
Tailor-Made
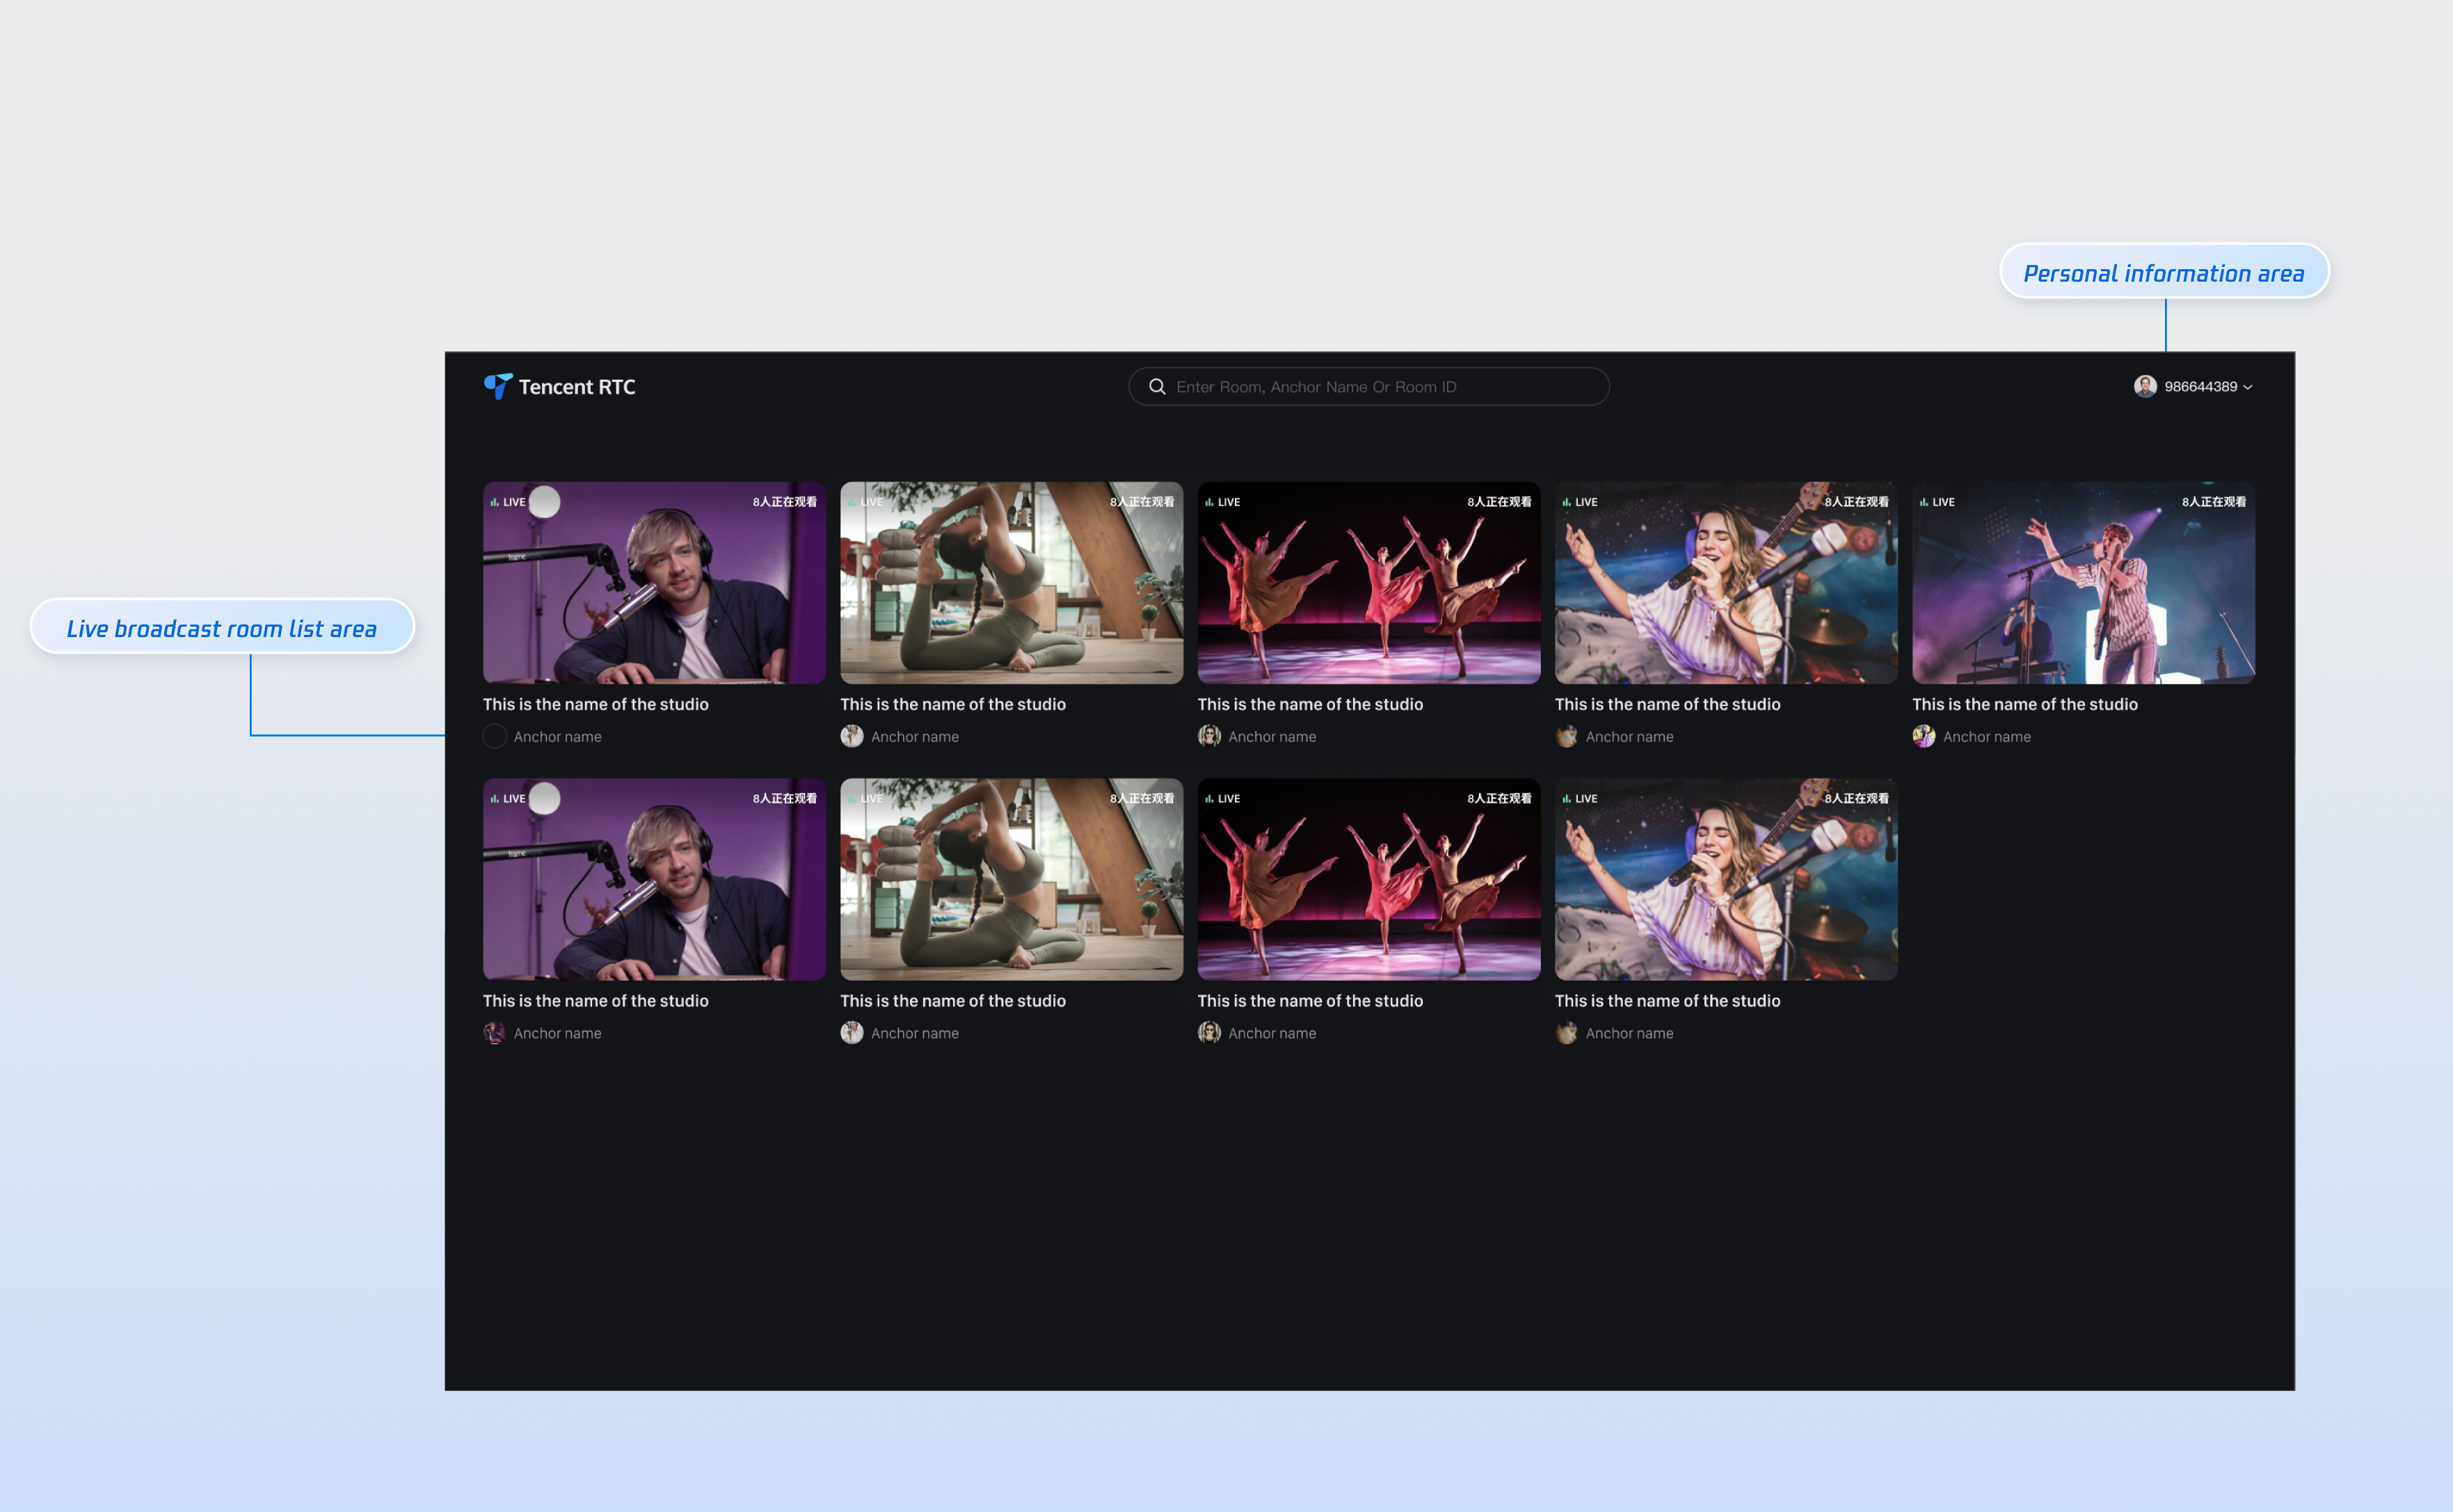
As shown in the above feature diagram, we also support you to customize the live list webpage UI based on project requirements. The main customization options are as listed in the table below.
Category | Function | Description |
Live Room List | Custom live room list display | Supported: Live room information text display/hide, UI customization Custom fixed quantity display per line/column in live room |
Personal information | Custom personal information display | Supported: Show/Hide personal info Personal info font, color UI customization |
Designate a Live Streaming Room
To handle the redirect logic from the live list (or homepage) to the live streaming room, you need to configure Vue Router. In the
src directory of your project, create a new router folder and create the index.ts file. Then, in your main file (such as main.ts or index.ts), import and use the router. See the GitHub sample code. If you need the live list, see the documentation for the Live Stream List Page.// live-list.vue can be incrementally added to your code<template><UIKitProvider>// .....abbreviated part see quick integration procedure 3 part<LiveList @live-room-click="handleLiveRoomClick" /></UIKitProvider></template><script setup lang="ts">import { useRouter, useRoute } from 'vue-router';const router = useRouter();const route = useRoute();function handleLiveRoomClick(liveInfo: LiveInfo) {if (liveInfo?.liveId) {router.push({ path: '/live-player', query: { ...route.query, liveId: liveInfo.liveId } });}}<script>//src/router/index.tsimport { createRouter, createWebHistory } from 'vue-router';const routes = [{// Route jumping to the viewing pagepath: '/live-player',component: () => import('../views/live-player.vue'),},];const router = createRouter({history: createWebHistory(),routes,});export default router;// src/main.tsimport { createApp } from 'vue';import App from './App.vue';import router from './router';const app = createApp(App);app.use(router);app.mount('#app');
Next Steps
Congratulations! You have successfully integrated the live broadcast list page. Next, you can implement the anchor start page, audience viewing page, and other content. Please refer to the table below:
Function | Description | Experience Link |
Host Streaming | The live streamer's entire live streaming process is supported, including pre-streaming preparation and post-streaming interactions. | |
Audience Viewing | Viewers can enter the live streamer's room to watch the live stream, connect to the microphone, view live stream room information, view online viewers, and display comments. |

