
Live Gift Component
This document provides step-by-step instructions for integrating TUILiveKit's live gifting components into your Android application.
Component Overview
The gifting feature in TUILiveKit consists of the following two main view components:
Component Name | Class Name | Description |
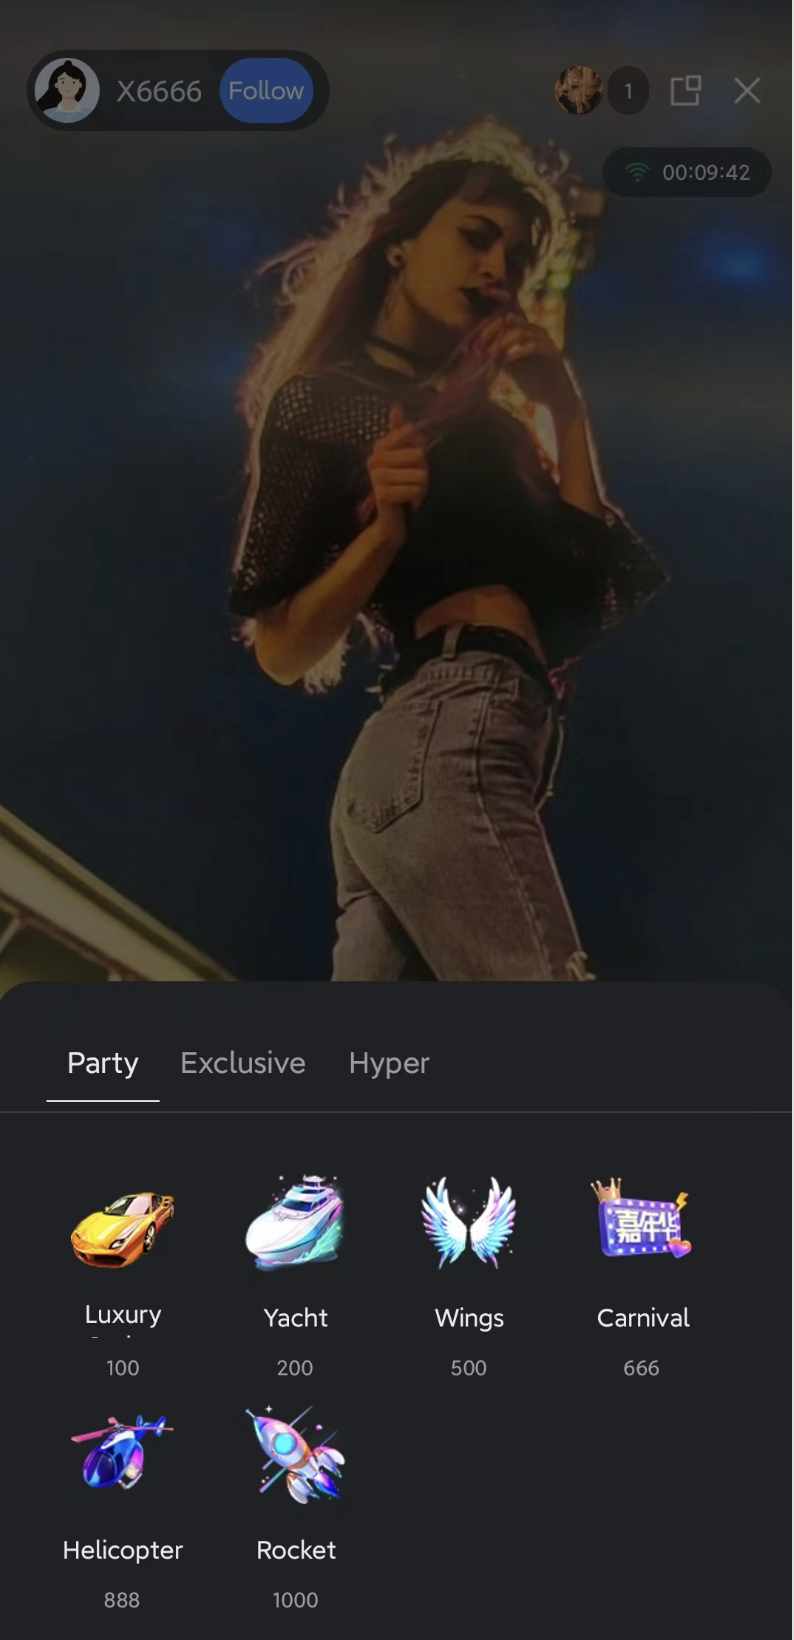
Gift Selection Panel | GiftListView | Displays a list of gifts, handles user selection, and manages gift sending events. |
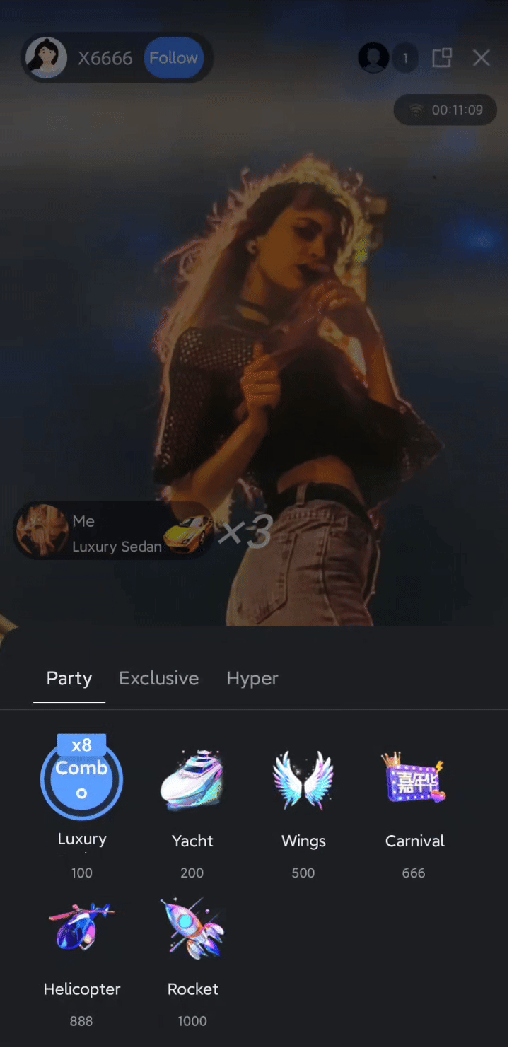
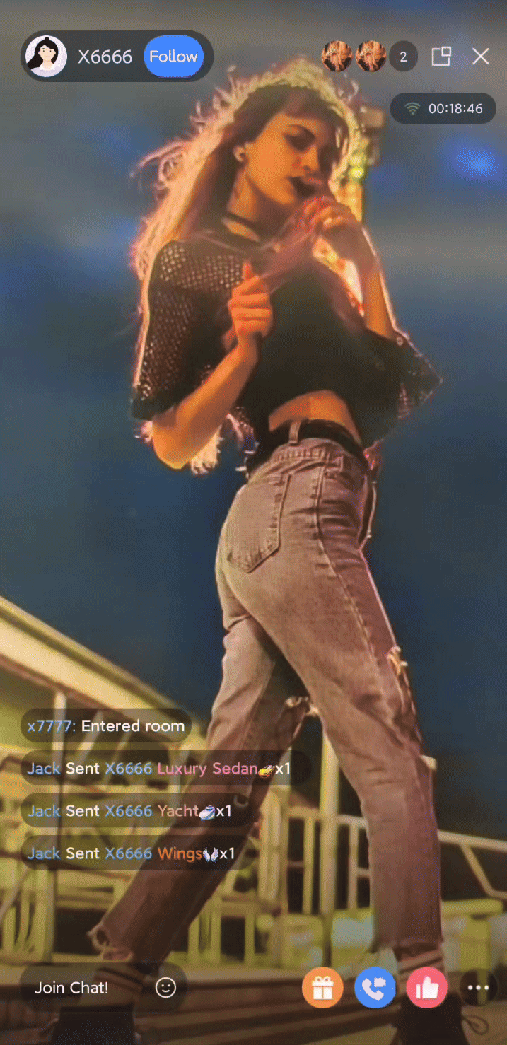
Gift Playback Component | GiftPlayView | Receives gift messages and renders corresponding animation effects (such as SVGA animations) on screen. |
Demo Effects
Gift Panel | Live Comment Gifts | Full-Screen Gifts |
 |  |  |
Quick Start
Step 1: Activate the Service
Note:
To use the gifting system, you must activate either the TUILiveKit trial or professional edition. The number of gifts you can configure depends on your package. For details, see the Gift System section in Feature and Billing Description and choose the package that fits your needs.
Step 2: Integrate TUILiveKit
Step 3: Integrate the Gift Selection Panel
The
GiftListView component is typically displayed as a popup or bottom panel. Add it to the layout of your Activity or Fragment.import android.os.Bundleimport android.widget.FrameLayoutimport androidx.appcompat.app.AppCompatActivityimport com.trtc.uikit.livekit.Rimport com.trtc.uikit.livekit.component.gift.GiftListViewclass YourLiveActivity : AppCompatActivity() {override fun onCreate(savedInstanceState: Bundle?) {super.onCreate(savedInstanceState)setContentView(R.layout.activity_live_room)// Get the root layout container for the pageval rootView = findViewById<FrameLayout>(R.id.root_view)// 1. Create an instance of the gift list componentval giftListView = GiftListView(this)// 2. Initialize the component with the current Room ID// Note: Ensure you have a valid roomId before initializinggiftListView.init("your_room_id")// 3. Add the component to the view hierarchyrootView.addView(giftListView)}}
Step 4: Integrate the Gift Playback Component
GiftPlayView is a transparent overlay that displays gift animations. It should be positioned above the video layer and below the interactive controls.import android.os.Bundleimport android.widget.FrameLayoutimport androidx.appcompat.app.AppCompatActivityimport com.trtc.uikit.livekit.Rimport com.trtc.uikit.livekit.component.gift.GiftPlayViewclass YourLiveActivity : AppCompatActivity() {override fun onCreate(savedInstanceState: Bundle?) {super.onCreate(savedInstanceState)setContentView(R.layout.activity_live_room)val rootView = findViewById<FrameLayout>(R.id.root_view)// 1. Create an instance of the gift playback componentval giftPlayView = GiftPlayView(this)// 2. Initialize the component with the current Room ID// The component automatically listens for gift messages in this room and triggers playbackgiftPlayView.init("your_room_id")// 3. Add the component to the view hierarchy// We recommend adding this View above the video layer and below the UI controlsrootView.addView(giftPlayView)}}
Step 5: Import Default Gifts
Your newly applied application does not have any gifts configured in the gift backend by default. Therefore, your gift sending panel will be empty by default after integration. To allow you to quickly experience our gift sending and receiving effects, you can use the server-side API to import the gift materials we have pre-configured for you with one click.
Next Steps
Once you have completed the UI integration above, your application will support client-side gift display. To implement a fully featured commercial gifting experience, refer to the Gift System Backend Integration and Advanced Features documentation for guidance on the following business logic:
Custom Gift Configuration: Upload custom gift icons and animation files using server APIs, and set pricing.
Gift Billing Callback: Set up a callback URL to relay gifting requests to your billing backend for balance verification and deduction.
PK Score Synchronization: In host PK scenarios, convert gift value to PK scores in real time.
Data Statistics: Access gift sending records, total value, and other operational data.
Upgrade Gift Effect SDK: If SVGA does not meet your requirements, integrate advanced players to support MP4/PAG or other high-definition transparent animations.

