
Live Gift Component
This document guides you through the rapid integration of the TUILiveKit Gift feature in your iOS project.
Component Overview
The gift feature in TUILiveKit consists of two primary view components:
Component Name | Class Name | Function Description |
Gift Selection Panel | GiftListView | Displays the available gifts and manages user selection and send actions. |
Gift Playback Component | GiftPlayView | Receives gift messages and renders corresponding animation effects on screen (such as SVGA animations). |
Demo Effects
Gift Panel | Live Comment Gifts | Full-Screen Gifts |
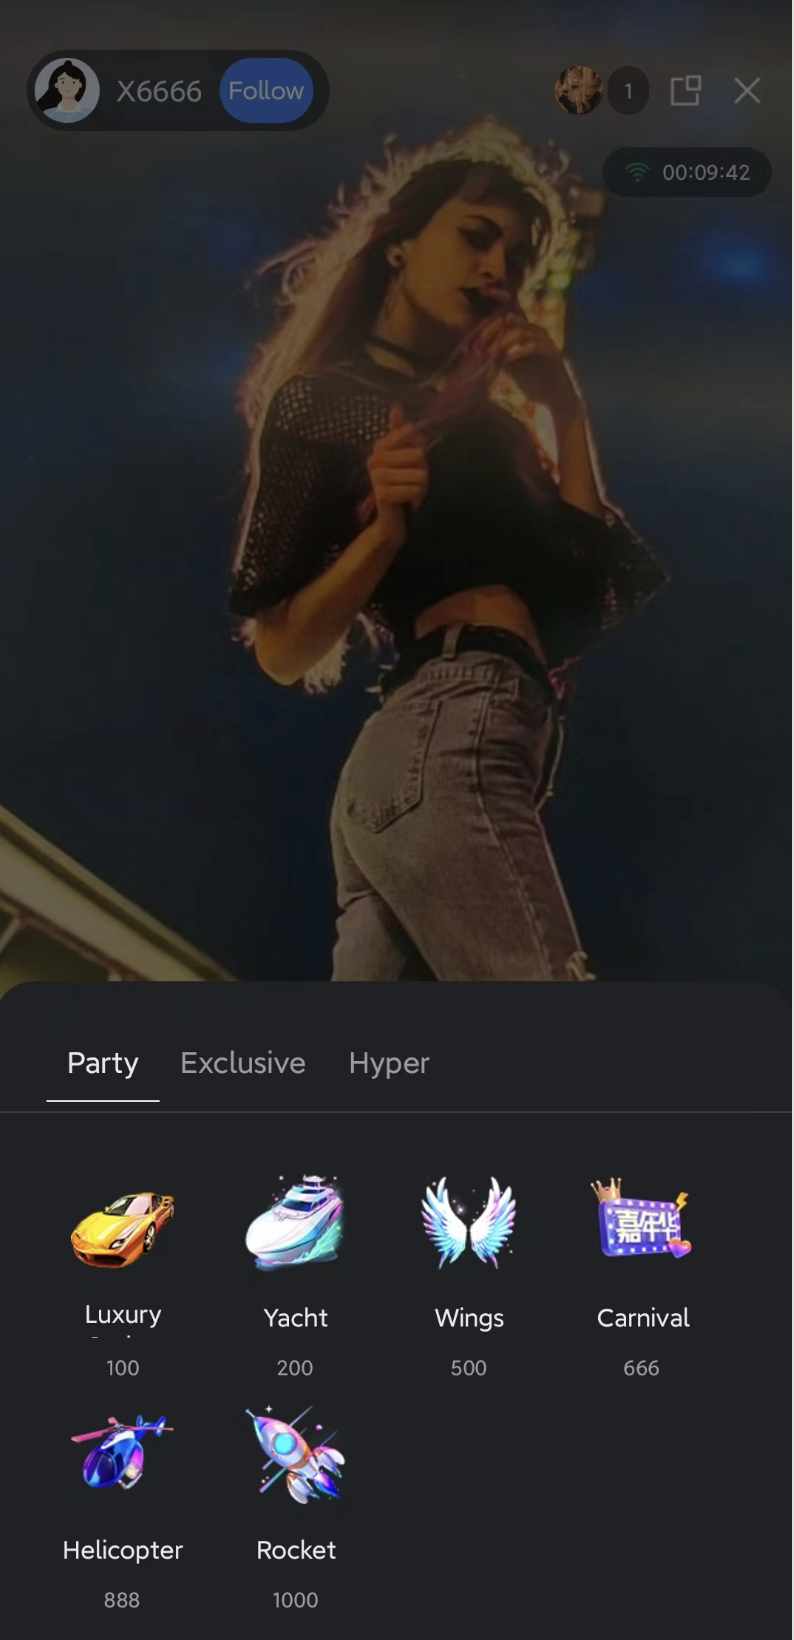 |  |  |
Quick Start
Step 1. Activate the Service
Note:
To use the gifting system, you must activate either the TUILiveKit trial or professional edition. The number of gifts you can configure depends on your package. For details, see the Gift System section in Feature and Billing Description and choose the package that fits your needs.
Step 2. Code Integration
Step 3: Integrate Gift List Display Page
Add the gift list display page to your app to allow the audience to view available gifts in the live room. Use the sample code below to create a
GiftListView and add it to your view:import TUILiveKitclass YourGiftViewController: UIViewController {// 1. Create GiftListView object// - roomId: Must match the roomId of the current live room joined by the audiencelazy var giftListView = {let view = GiftListView(roomId: liveId)return view}()private let liveId: Stringinit(liveId: String) {self.liveId = liveIdsuper.init(nibName: nil, bundle: nil)}required init?(coder: NSCoder) {fatalError("init(coder:) has not been implemented")}// ... other code ...public override func viewDidLoad() {super.viewDidLoad()// 2. Add the component to the view and set up layoutview.addSubview(giftListView)giftListView.snp.remakeConstraints { make inmake.leading.trailing.equalToSuperview()make.height.equalTo(256)make.bottom.equalToSuperview()}}}
Step 4: Integrate Gift Effect Playback Page
Add the gift effect playback page to your app.
The
GiftPlayView component includes built-in functionality for receiving gift messages and playing gift effects. Use the sample code below to create a GiftPlayView and add it to your view:import TUILiveKit// YourAnchorViewController represents the host's view controller. Audience-side can refer to the following example:class YourAnchorViewController: UIViewController {// 1. Create and initialize GiftPlayView object// - roomId: Must match the roomId of the current live room joined by the audiencelazy var giftPlayView = {let view = GiftPlayView(roomId: liveId)return view}()private let liveId: Stringinit(liveId: String) {self.liveId = liveIdsuper.init(nibName: nil, bundle: nil)}required init?(coder: NSCoder) {fatalError("init(coder:) has not been implemented")}// ... other code ...public override func viewDidLoad() {super.viewDidLoad()// 2. Add the component to the view and set up layoutview.addSubview(giftPlayView)giftPlayView.snp.remakeConstraints { make inmake.edges.equalToSuperview()}}}
Step 5: Import Default Gifts
Your newly applied application does not have any gifts configured in the gift backend by default. Therefore, your gift sending panel will be empty by default after integration. To allow you to quickly experience our gift sending and receiving effects, you can use the server-side API to import the gift materials we have pre-configured for you with one click.
Next Steps
Once UI integration is complete, your app will support client-side gift display. To implement a fully commercial gift feature, refer to the Gift System Backend Integration and Advanced Features documentation and integrate the following core business logic:
Custom Gift Configuration: Upload custom gift icons, animation files, and set prices using server APIs.
Gift Billing Callback: Configure a callback URL to forward gift send requests to your billing backend for balance verification and transaction processing.
PK Score Synchronization: In host PK scenarios, convert gift value to PK scores in real time.
Data Statistics: Retrieve records of gift transactions, total value, and other operational metrics.
Upgrade Gift Effect SDK: If SVGA does not meet your animation requirements, integrate advanced players to support high-definition MP4/PAG transparent animations.

