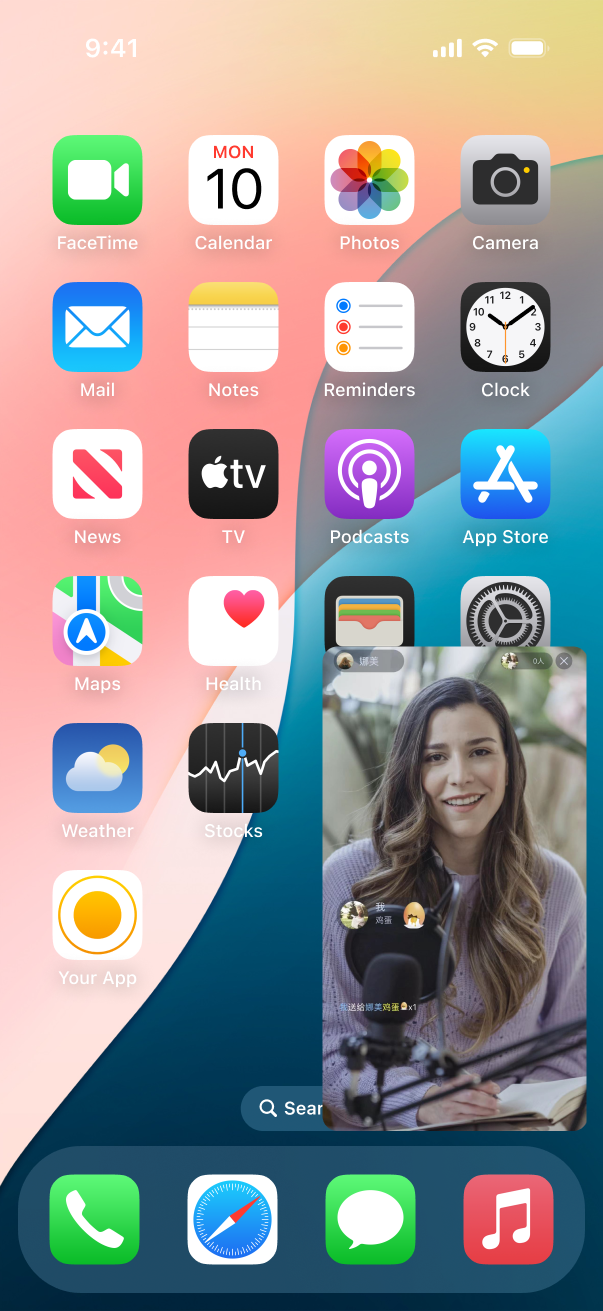
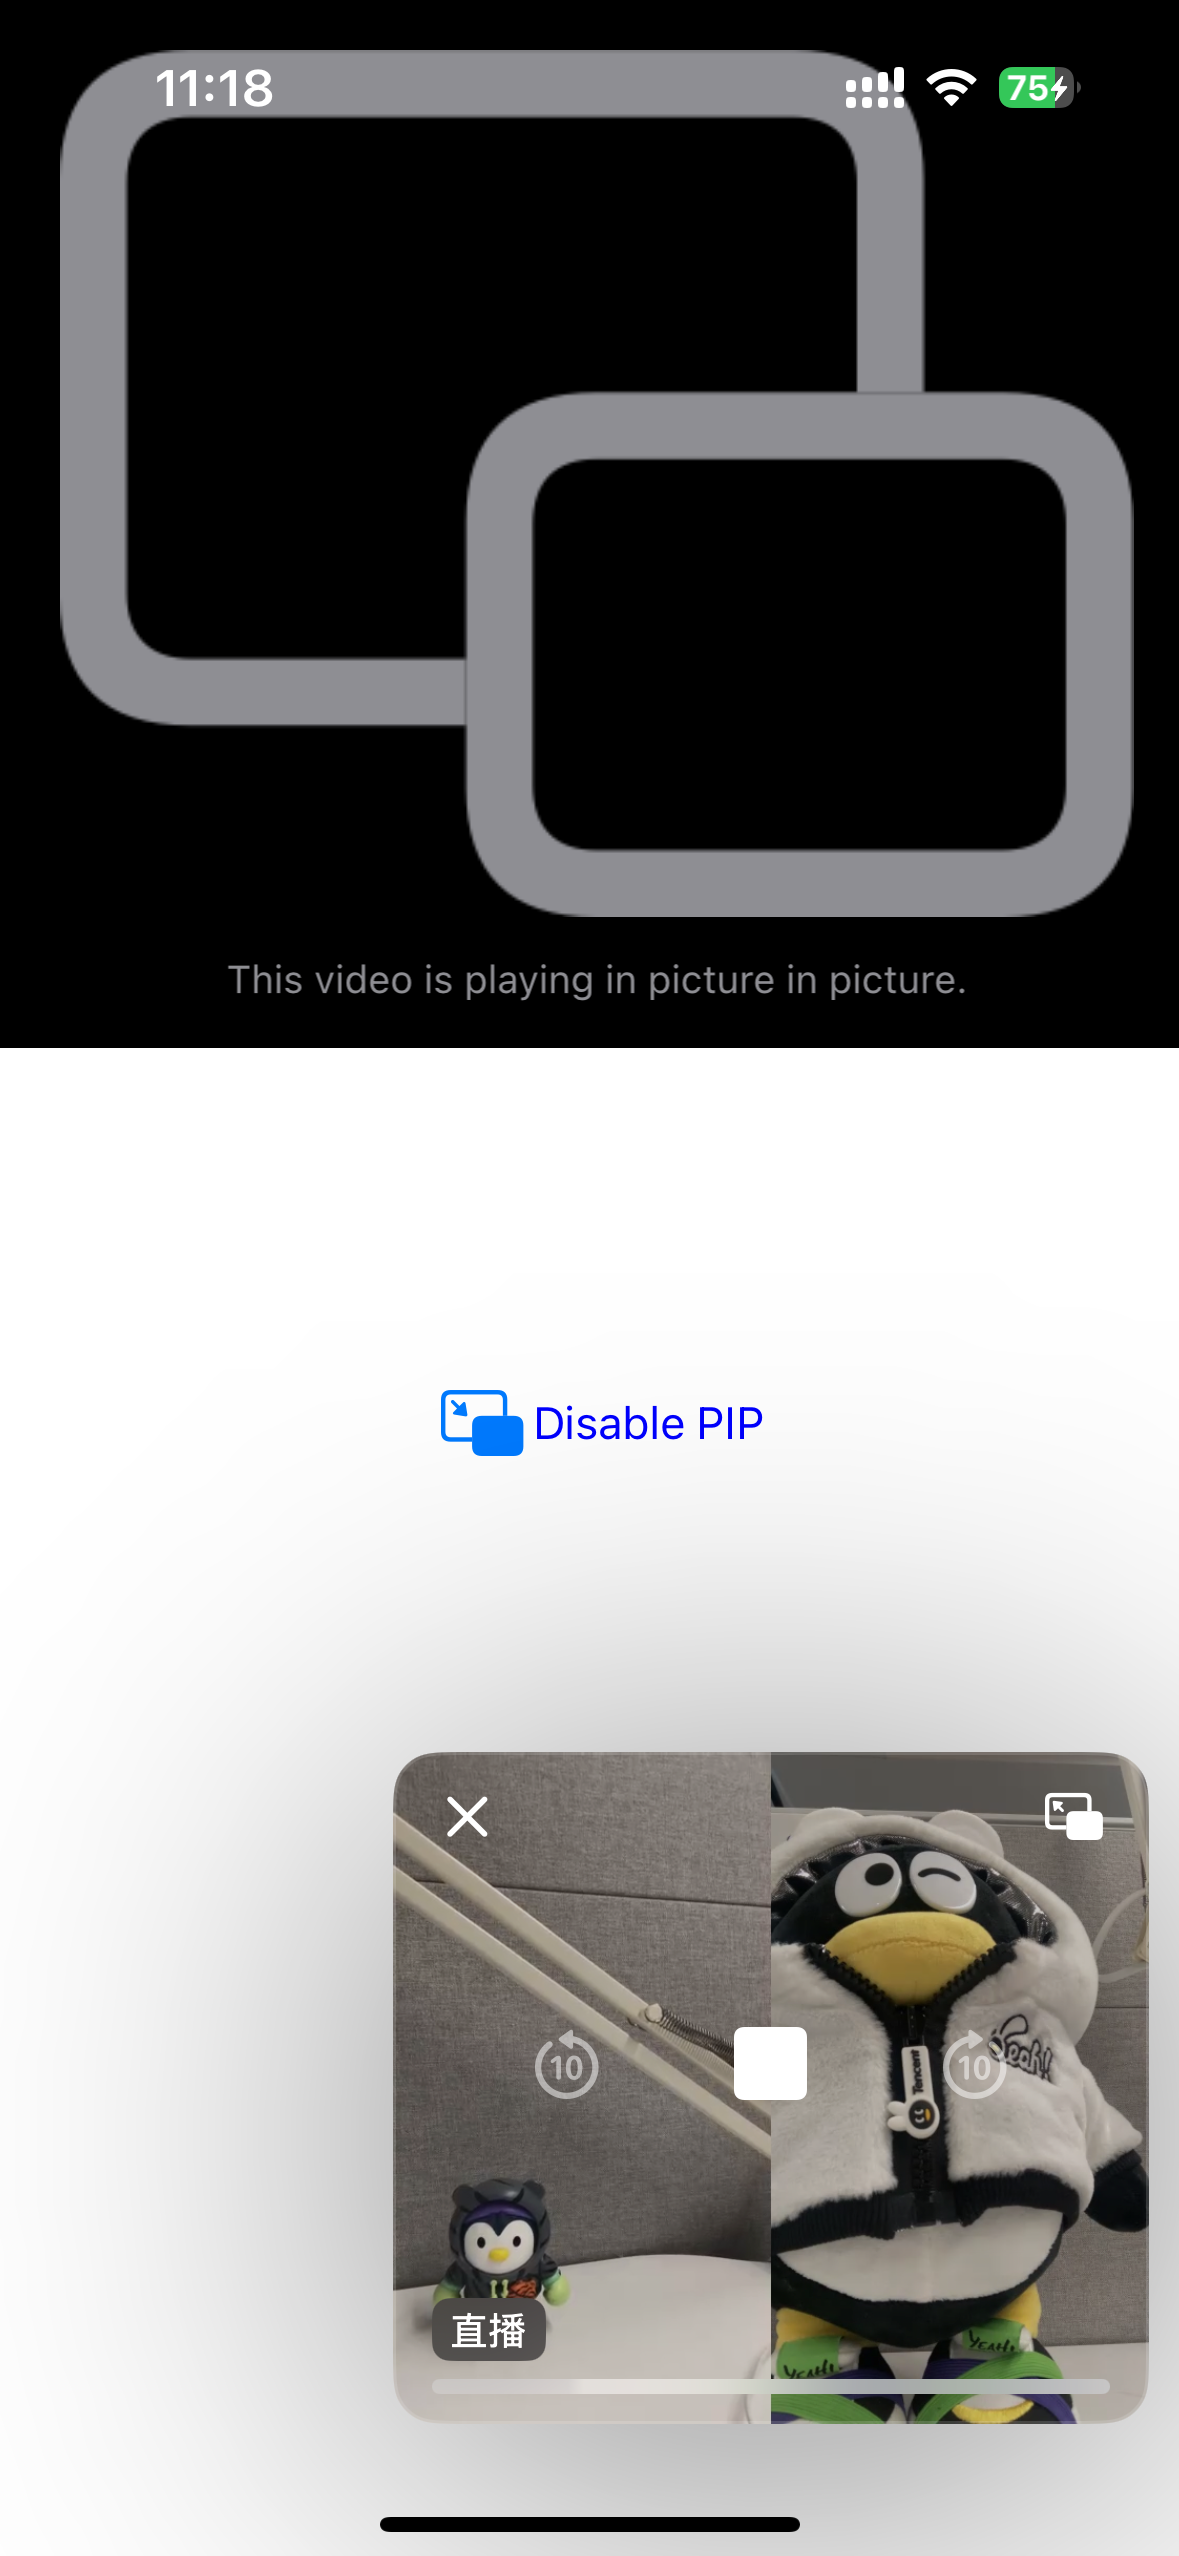
In interactive live streaming and other video scenarios, audiences on mobile devices may need to temporarily operate other apps while watching a live stream of an anchor for an extended period. Enabling the live stream to continue playing without interruption while the audiences use other apps can enhance the viewing experience. Picture-in-Picture (PIP) is a solution designed for such scenarios. The implementation effect is shown in the figure below. This document introduces how to implement PIP on iOS, Android, and Flutter.
PIP relies on system capabilities provided by iOS and Android. It can be divided into the anchor end (which requires the collection of camera and upstream data) and the audience end (which only requires downstream data). Due to stricter permission controls on iOS, PIP is supported only for the audience end on iOS, while Android supports PIP for both the anchor end and the audience end. For video playback, two modes are generally available, that is, Real-Time Communication Engine (RTC Engine) playback and live streaming playback. The PIP solution covers both modes.
Implementing PIP for Audiences on iOS
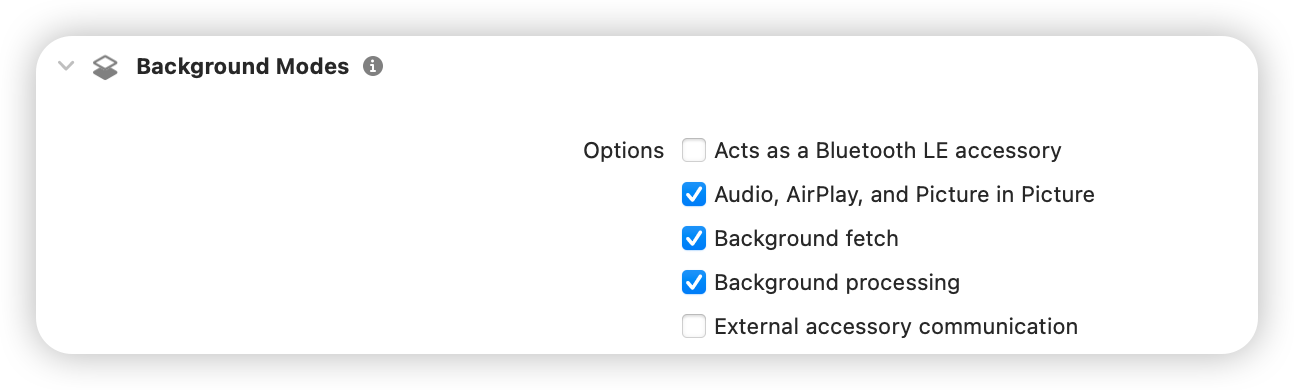
Enabling Corresponding Permissions
You need to enable the following permissions in the Signing & Capabilities section of the iOS project:
Calling the SDK for Implementation
The iOS SDK provides APIs for implementing PIP. By calling these APIs, you can easily enable PIP (for relevant APIs, see the example code below). However, the SDK only supports viewing the video of a single anchor in PIP mode. If you want to view the PK videos of multiple anchors in PIP mode, you need to call system APIs. For details, see Calling System APIs for Implementation.
RTC Engine Playback
Note:
The RTC Engine SDK should be version 12.1 or later.
Call the following API on the audience end to enable PIP.
let paramJsonString =String.init(data: jsonData, encoding:.utf8)??""
trtcCloud.callExperimentalAPI(paramJsonString)
}
To disable PIP, pass false in the corresponding parameter.
Calling System APIs for Implementation
PIP is a capability provided by the iOS system. By calling system APIs, you can implement PIP in complex scenarios. The iOS system supports PIP, but with considerable limitations. You cannot directly use a video rendering UIView to implement PIP. Instead, you need to use custom rendering to render the video to be displayed in PIP mode onto a component that meets the necessary requirements. The following example introduces how to implement PIP by calling system APIs in a 2-anchor PK scenario.
Note:
For scenarios with 1 or more than 2 anchors, PIP can still be implemented as follows. Here, only the 2-anchor PK scenario is described.
1. Define the components required for PIP.
Since the iOS system only allows specific components for PIP rendering, AVSampleBufferDisplayLayer is used here. This component should directly render the corresponding video. Therefore, a combinedPixelBuffer is defined for merging the video data of two anchors.
importUIKit
importAVKit
importCoreFoundation
importTXLiteAVSDK_Professional
classPipVC:UIViewController{
let trtcCloud =TRTCCloud()
var pipController:AVPictureInPictureController?
var combinedPixelBuffer:CVPixelBuffer?
let pixelBufferLock =DispatchQueue(label:"com.demo.pip")
When you enable custom rendering, the specified format ._NV12 is related to the method used in Step 6: Concatenate left and right frames. Different formats require different concatenation methods. This example code only shows left-right concatenation in the ._NV12 format.
When you concatenate the video data of two anchors, the SDK callbacks for video data may arrive asynchronously. Therefore, each time the video data from an anchor is received, you need to update the corresponding data and lock access. For multiple anchors, use a similar approach. The following code demonstrates a layout where the two anchors are arranged side by side, each occupying half of the screen. For other layouts, arrange the videos according to your business requirements. The layout logic here is independent of the SDK.
8. Obtain the video data from the remote user, concatenate the data, and render the concatenated data onto the specified component.
The example code uses left to identify the anchor ID to be displayed on the left. In actual business scenarios, modify this setting according to your business needs.
Here, only the implementation solution is described. In actual business scenarios, you also need to handle various possible exceptions.
Handling the PIP overlay control buttons is a system-level capability provided by iOS and is not managed by the SDK. No explanation is provided here. Business personnel should implement the buttons based on actual needs.
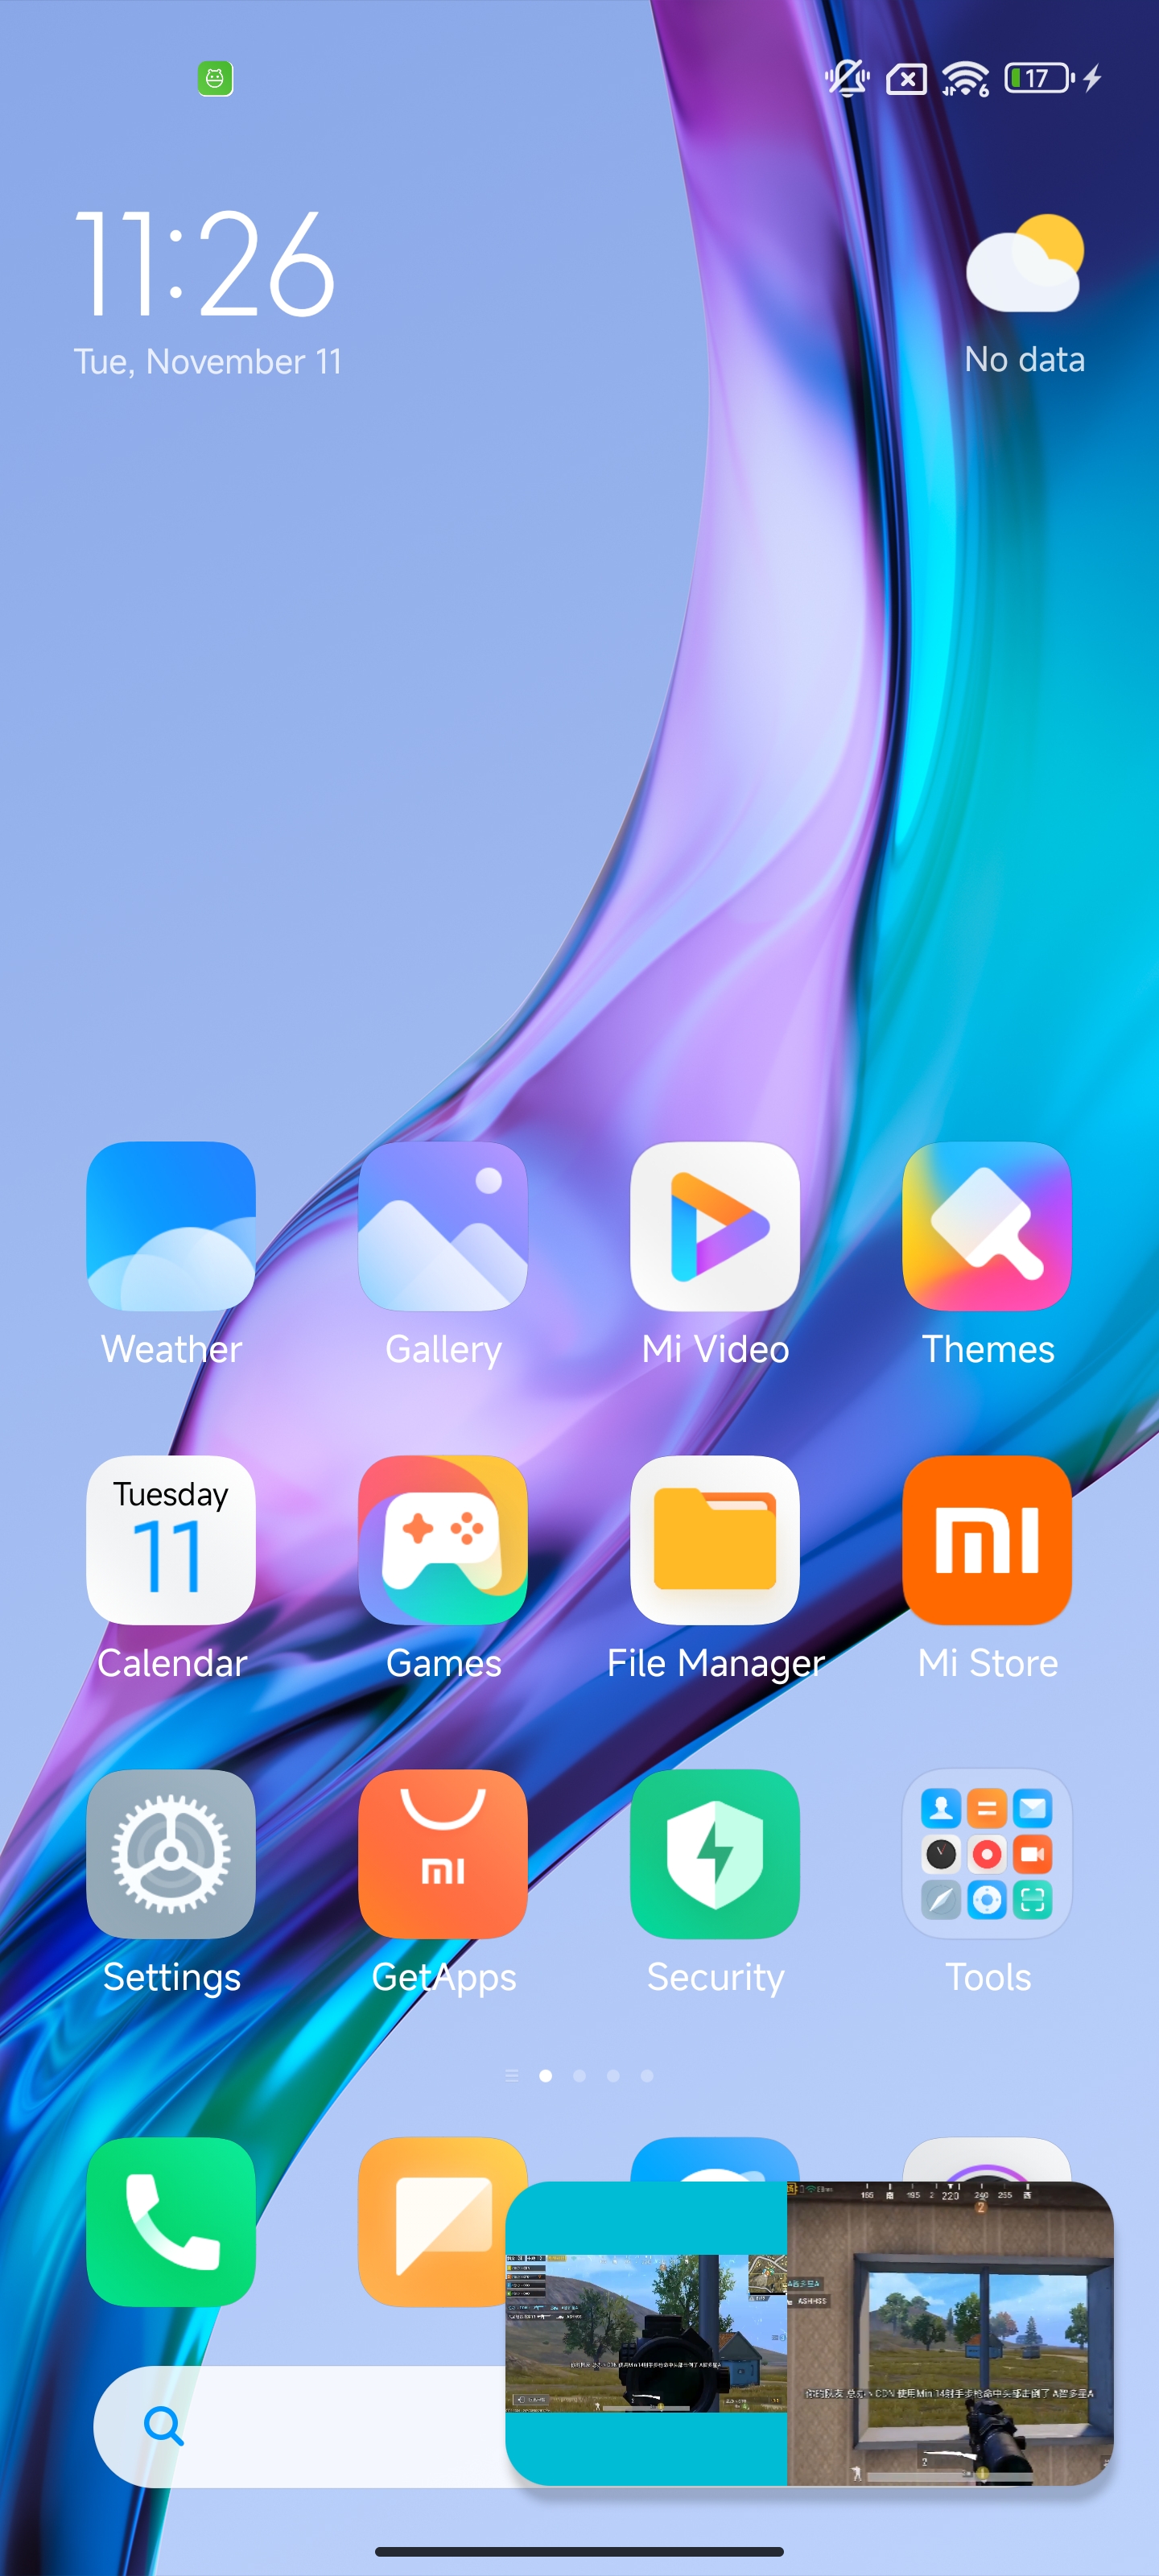
Implementing PIP on Android
Starting from Android 8.0 (API level 26), Android allows activities to launch in PIP mode. PIP is a special type of multi-window mode that is mostly used for video playback. In this mode, users can watch a video in a small window pinned to a corner of the screen while navigating between apps or browsing content on the home screen. The RTC Engine SDK does not further encapsulate the Android PIP API. The PIP feature is implemented by directly calling the Android API. For details, see the Android documentation Add videos using picture-in-picture (PiP).
On Android, when you enter the PIP mode, the system performs re-measurement and re-layout based on the PIP window size according to the XML layout rules. Therefore, both the anchor end and audience end can implement PIP following these rules.
android:supportsPictureInPicture="true" declares that the activity supports PIP.
If layout changes occur during PIP mode transitions and you do not want the activity to restart, you need to configure the corresponding values in the android:configChanges attribute.
pictureInPictureBuilder.setAspectRatio(aspectRatio); sets the aspect ratio of the PIP window. Here, set the value to the aspect ratio of the video playback view.
enterPictureInPictureMode(pictureInPictureBuilder.build()); enters the PIP mode.
3. Obtain callbacks for entering and exiting the PIP mode.
To display multiple video views, you can set a fixed width and height for View A when entering the PIP mode. The other views will be displayed according to the layout rules or a percentage-based layout.
Note:
Displaying multiple video views in PIP mode is not an officially supported Android behavior. This implementation currently works on Android 12, but may change with future Android system updates. You need to test system compatibility across different versions before release.
Effect Display
// mTRTCCloud corresponds to the left video view (TXCloudVideoView), and TRTC_VIDEO_RENDER_MODE_FIT is set.
After entering the PIP mode, you can calculate and manually set the width and height of TXCloudVideoView or configure the filling mode to ensure the complete display of the video view. Call the setRemoteRenderParams method of mTRTCCloud (TRTCCloud object) to set the filling mode for the video view.
The left TXCloudVideoView in PIP is set up with the TRTC_VIDEO_RENDER_MODE_FIT effect.
The right TXCloudVideoView in PIP is set up with the TRTC_VIDEO_RENDER_MODE_FILL effect.
In this example, only 2 video views (TXCloudVideoView) are involved. Set the width and height for the left TXCloudVideoView, and the right TXCloudVideoView will be displayed according to the layout rules. If you have multiple TXCloudVideoView instances, you can properly adjust the layout to achieve the desired effect.
Implementation Steps
1. Add 2 TXCloudVideoView instances to display them side by side in activity_picture_in_picture.xml.
<com.tencent.rtmp.ui.TXCloudVideoView    android:id="@+id/video_view"    android:layout_width="192dp"    android:layout_height="108dp"    android:layout_alignParentStart="true"    android:background="#00BCD4"/>
<com.tencent.rtmp.ui.TXCloudVideoView    android:id="@+id/video_view2"    android:layout_width="192dp"    android:layout_height="108dp"    android:layout_alignTop="@+id/video_view"    android:layout_toEndOf="@+id/video_view"    android:background="#3F51B5"/>
2. Set the width and height of video_view when entering and exiting the PIP mode.
Enabling PIP in Flutter varies across different platforms. The following describes the implementations for iOS and Android, separately.
Releasing to iOS Devices
Calling the SDK for Implementation
In Flutter, you can also easily enable PIP by calling the APIs provided by the SDK. As with the native iOS implementation, the SDK only supports PIP for viewing the video of a single anchor. To display the videos of multiple anchors in PIP mode, see Calling System APIs for Implementation.
Note:
Likewise, you need to enable the corresponding permissions in the iOS project generated by Flutter. See the Enabling Corresponding Permissions section in this document.
RTC Engine Playback
The Flutter SDK should be version 2.9.1 or later. Call the following API on the audience end to enable PIP.
trtcCloud.callExperimentalAPI(jsonEncode({
"api":"enablePictureInPictureFloatingWindow",
"params":{"enable":true}
}));
To disable PIP, pass false in the corresponding parameter.
Live Streaming Playback
Call the following API on the audience end to enable PIP.
var pipCode =await _livePlayer!.enablePictureInPicture(true);
if(pipCode != V2TXLIVE_OK){
print("error: $pipCode");
}
To disable PIP, pass false in the corresponding parameter.
1. Flutter uses MethodChannel to send messages to the native iOS end.
final channel =MethodChannel('flutter_ios_pip_demo');
await channel.invokeMethod('enablePip',{
'marginTop': appBarHeight + topSafeAreaHeight,
'pkLeft': pkLeftUserId,
'pkRight': pkRightUserId,
});
2. The messages are received and processed accordingly in the iOS project packaged by Flutter.
When calling system APIs to enable PIP in a multi-anchor PK scenario, Flutter actually calls the iOS system API. The iOS native code uses custom capture to redraw the PK frames of 2 anchors and displays the resulting frame above the Flutter layer. Therefore, the window size and position drawn by the iOS system API should match those in Flutter. Flutter passes the corresponding layout parameters and anchor IDs through MethodChannel.
// In this method, the PIP display position needs to be adjusted according to business needs to ensure that the position is the same as the display position in Flutter.
funcsetupPipController(){
let screenWidth =UIScreen.main.bounds.width
let videoHeight = screenWidth /2/9*16
pipDisplayLayer =AVSampleBufferDisplayLayer()
// Adjust the PIP display position here based on your actual needs.
5. When destroying the current page in Flutter, you need to stop PIP.
Enabling PIP actually calls the iOS system API to redraw a view above the Flutter view. Therefore, when destroying the current page, you need to stop PIP to remove the corresponding view from the root view.
@override
dispose(){
channel.invokeMethod('disablePip');
super.dispose();
}
Implementing PIP on Android via Flutter
Implementing PIP in Flutter requires calling the Android PIP API. After PIP is enabled, the Flutter UI is displayed according to existing widget layout rules. You can hide certain widgets and reasonably set the width and height of the video widget based on your own business rules.
Use Platform Channels to Call Android Code. A channel consists of the client end (Flutter) and the host end (Android). The following shows the detailed implementation of PIP:
1. Code on the Flutter client end: Use the channel name "samples.flutter.dev" to call the channel method "pictureInPicture". The detailed implementation of this method is handled on the Android host end.