
iOS (SwiftUI)
This guide provides step-by-step instructions for integrating TUIKit SwiftUI and sending your first message.
Development Environment Requirements
Xcode 15 or later
iOS 15.0 or later
CocoaPods 1.7.5 or later
Prerequisites
Enable the Service
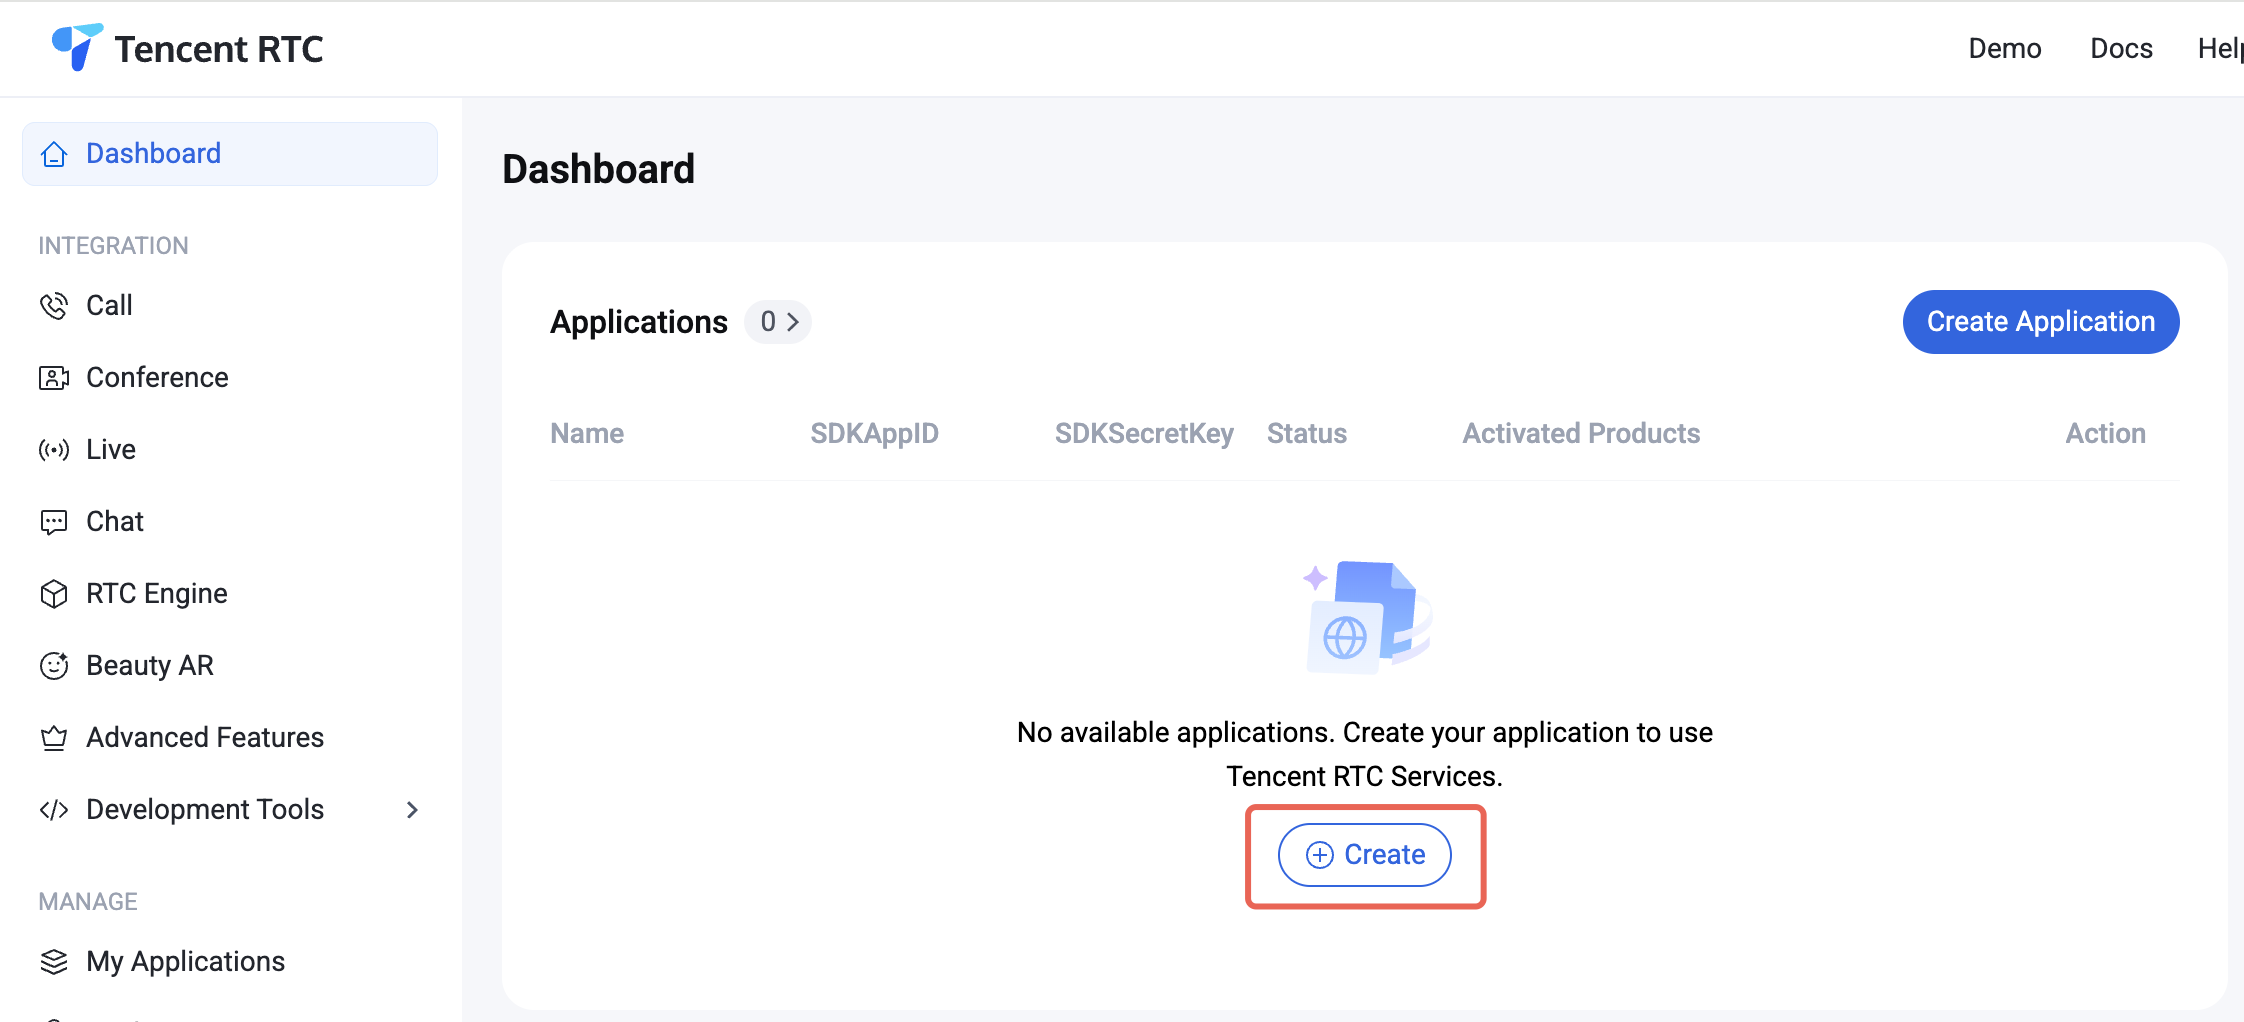
1. Log in to the Console. If you already have an application, note down its
SDKAppID and SDKSecretKey, then proceed to the next section.2. Click Create in the overview panel to start a new application.
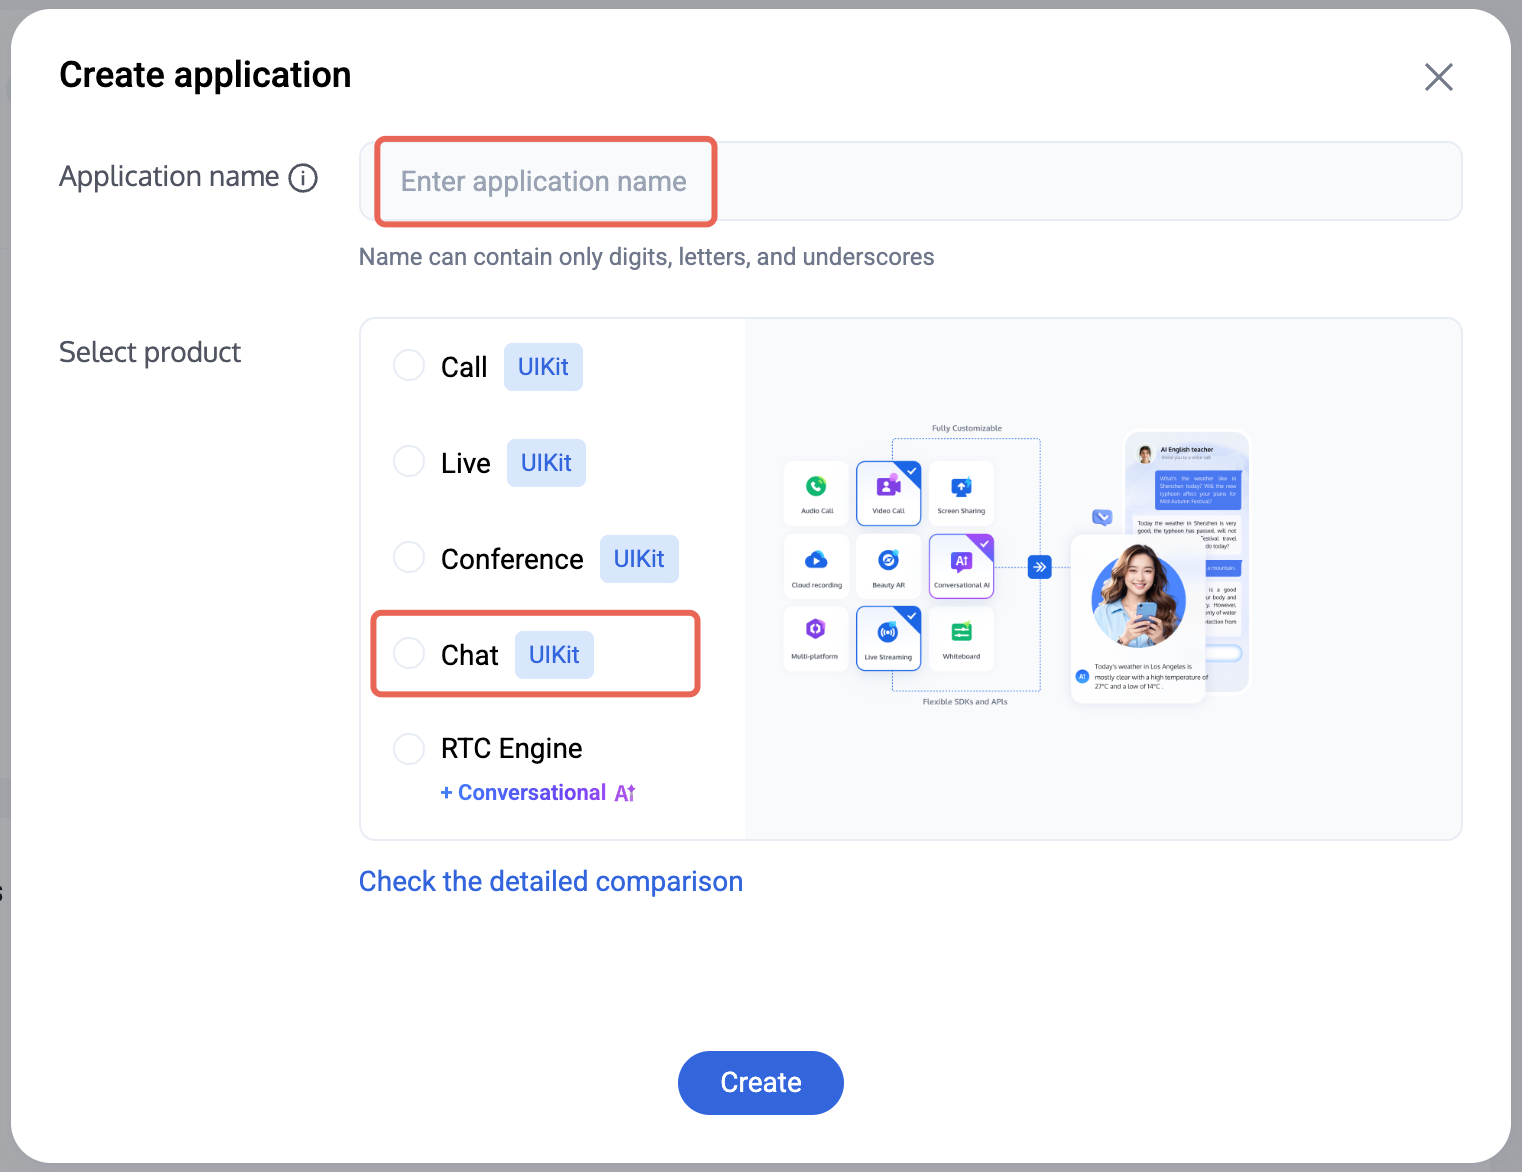
3. In the application creation dialog, enter the Application Name and select Chat as the product.
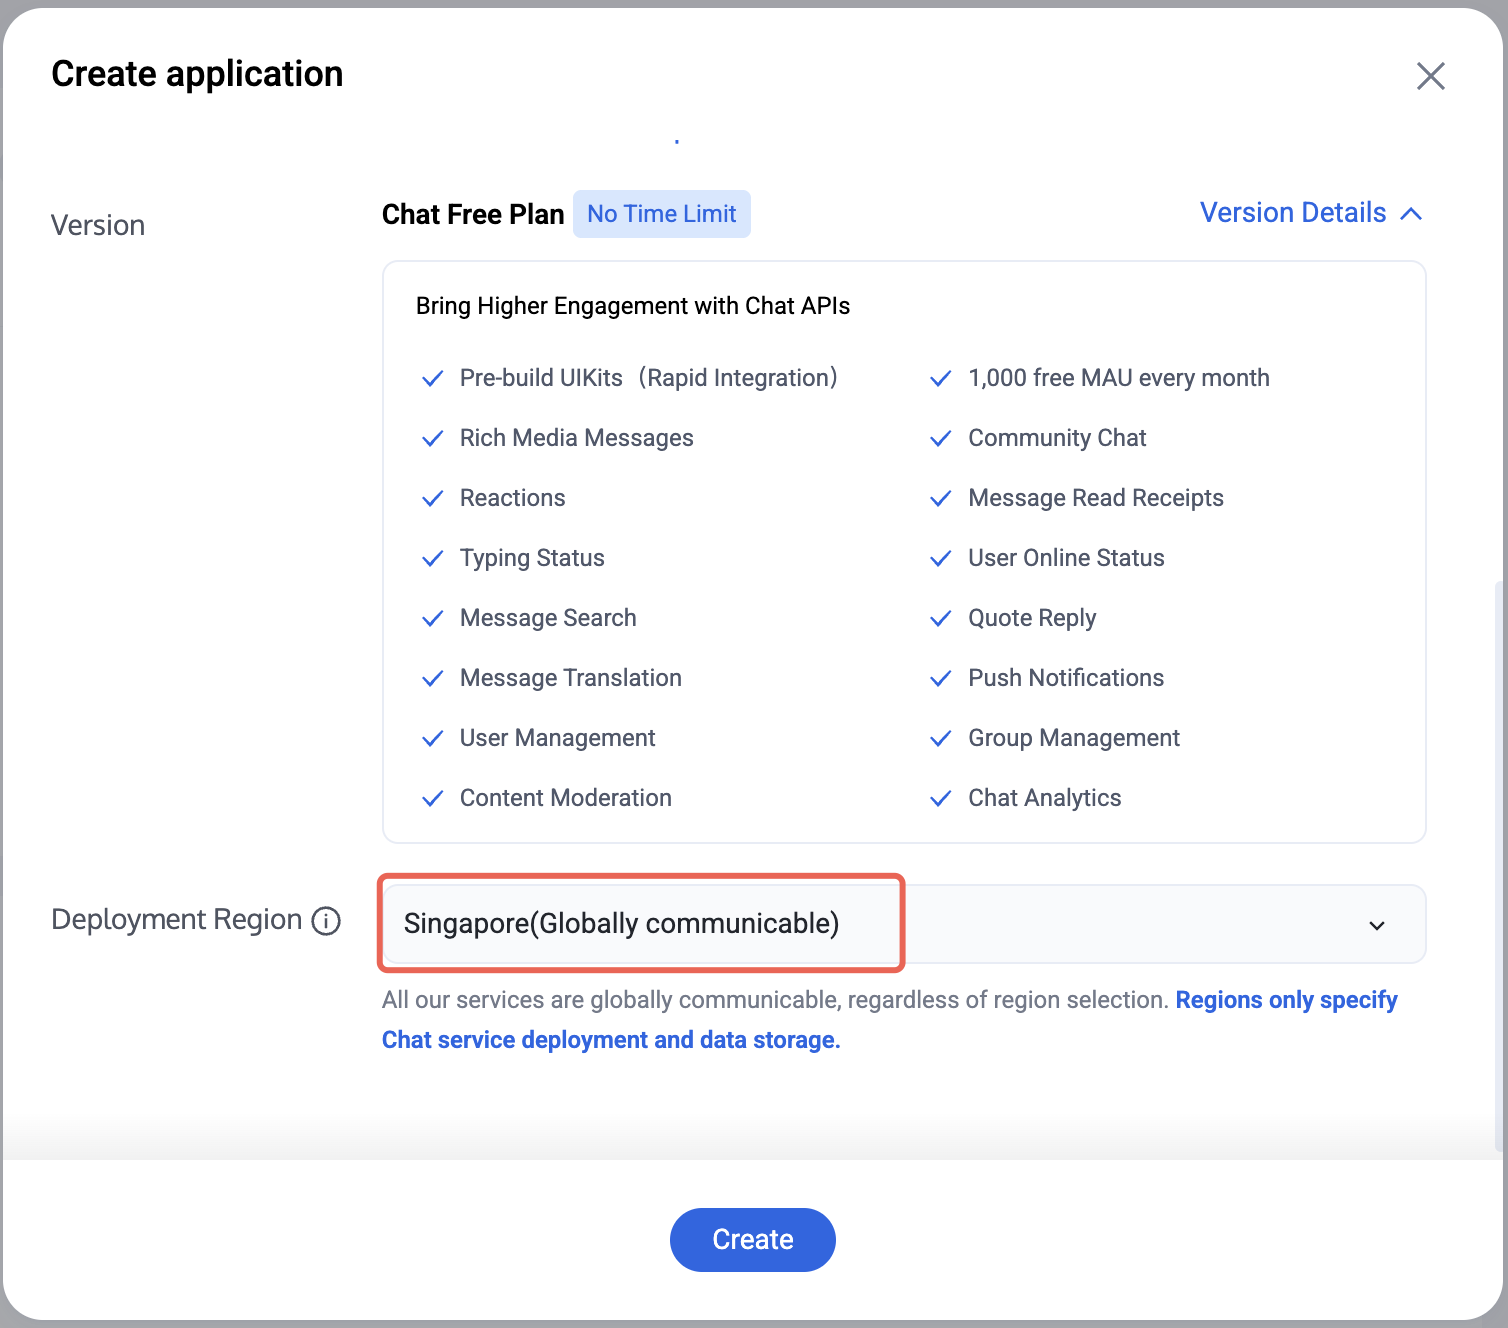
4. After choosing the product, select the Deployment Region as needed.
5. After the application is created, locate the
SDKAppID and SDKSecretKey in the console overview panel. You will need both to run the Demo.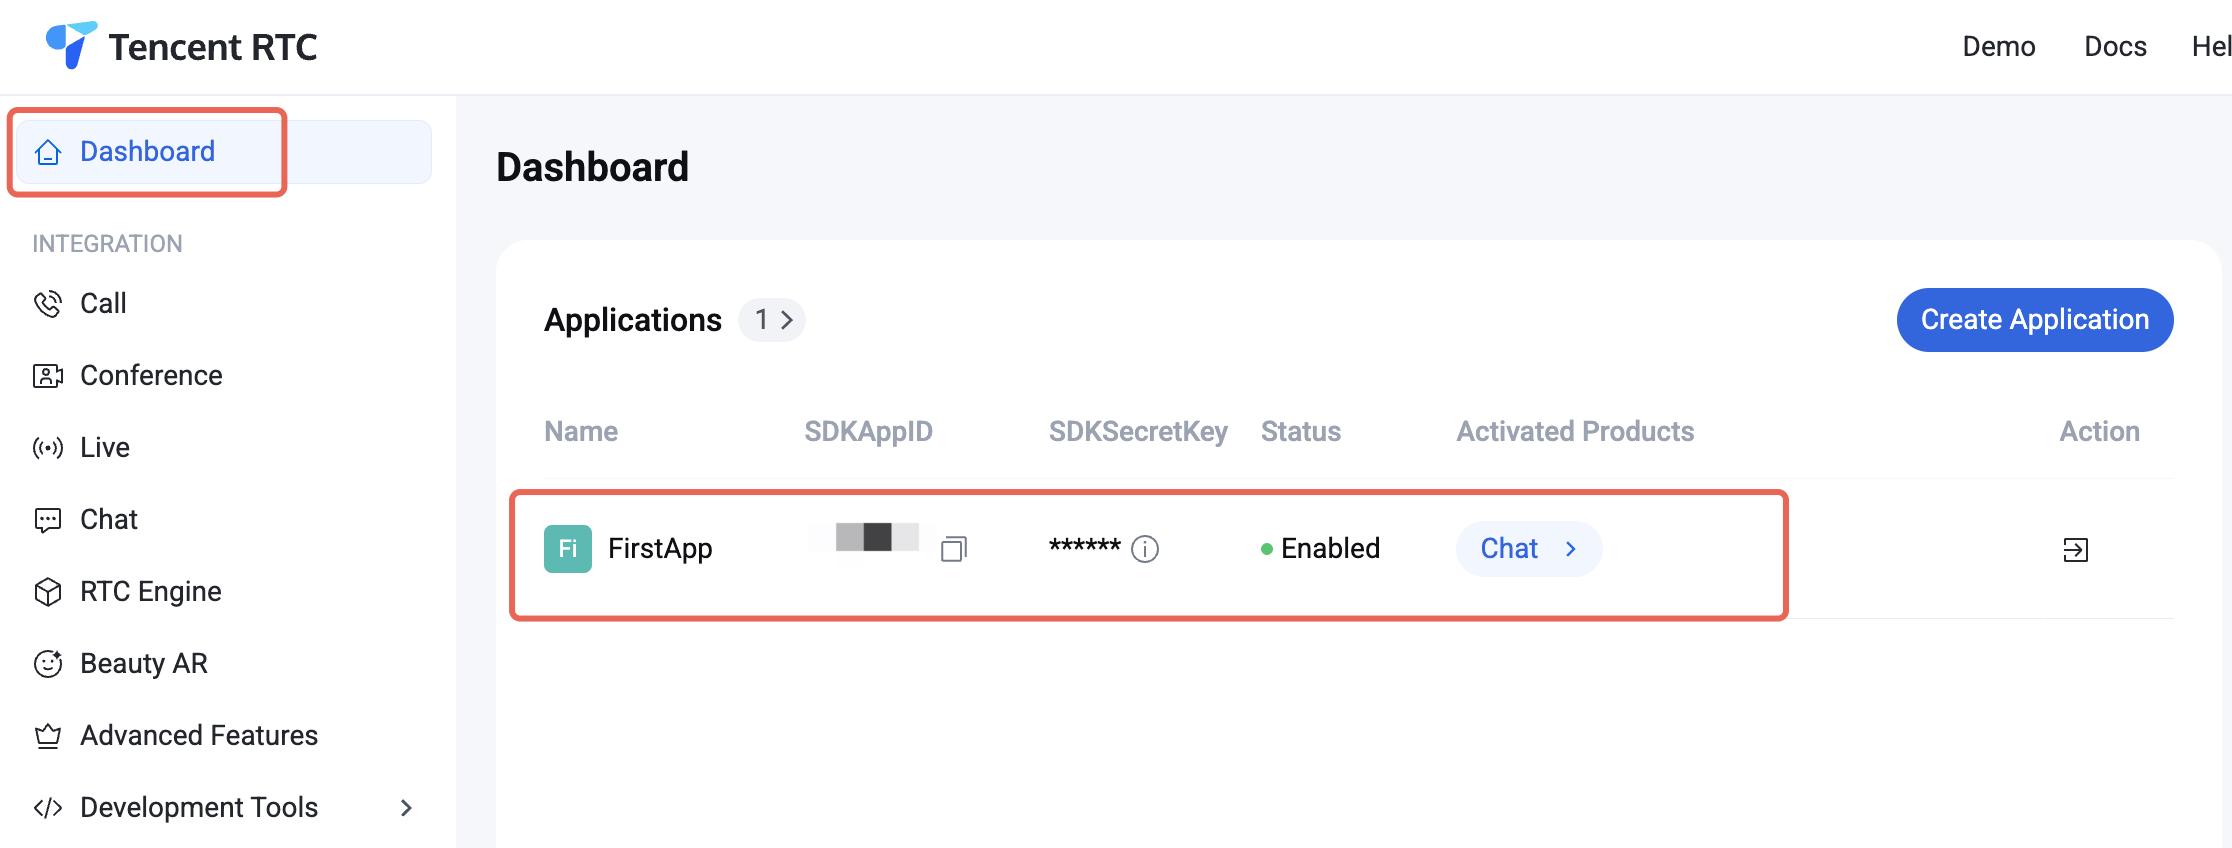
Prohibited:
Keep your
SDKSecretKey secure, do not disclose it!Create Accounts
You can create accounts using either of the following methods:
When logging in to TUIKit, provide a new UserID. TUIKit automatically registers the UserID for you.
Steps:
1. Navigate to the Chat > Account Management page.
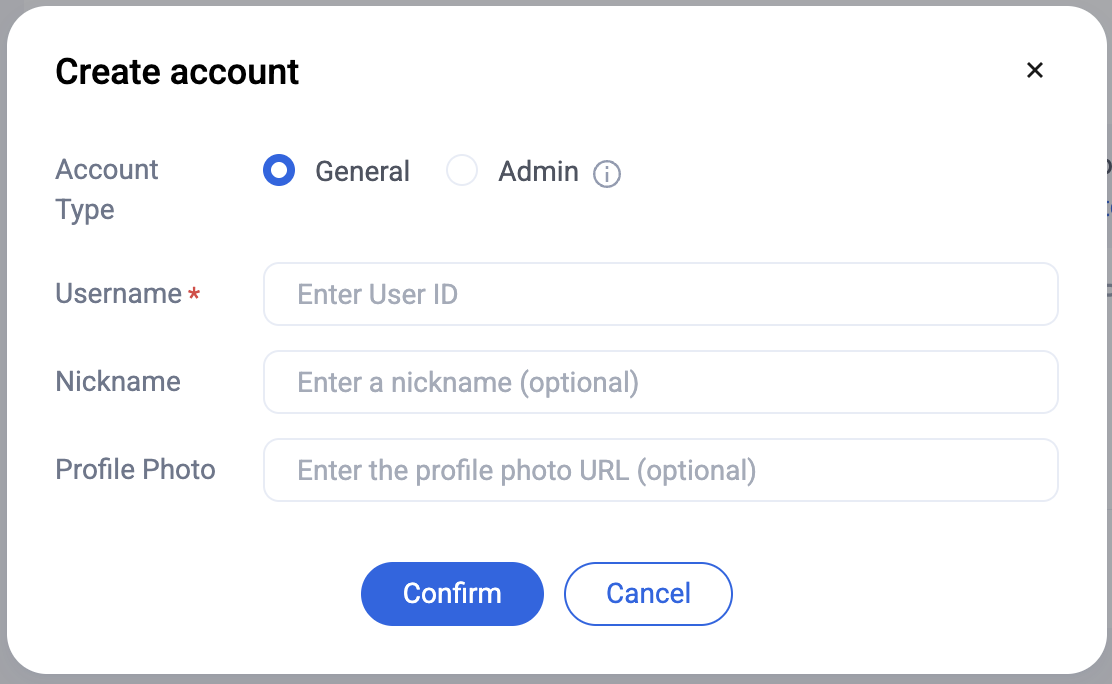
2. Click "Create Account" to open the account creation dialog.
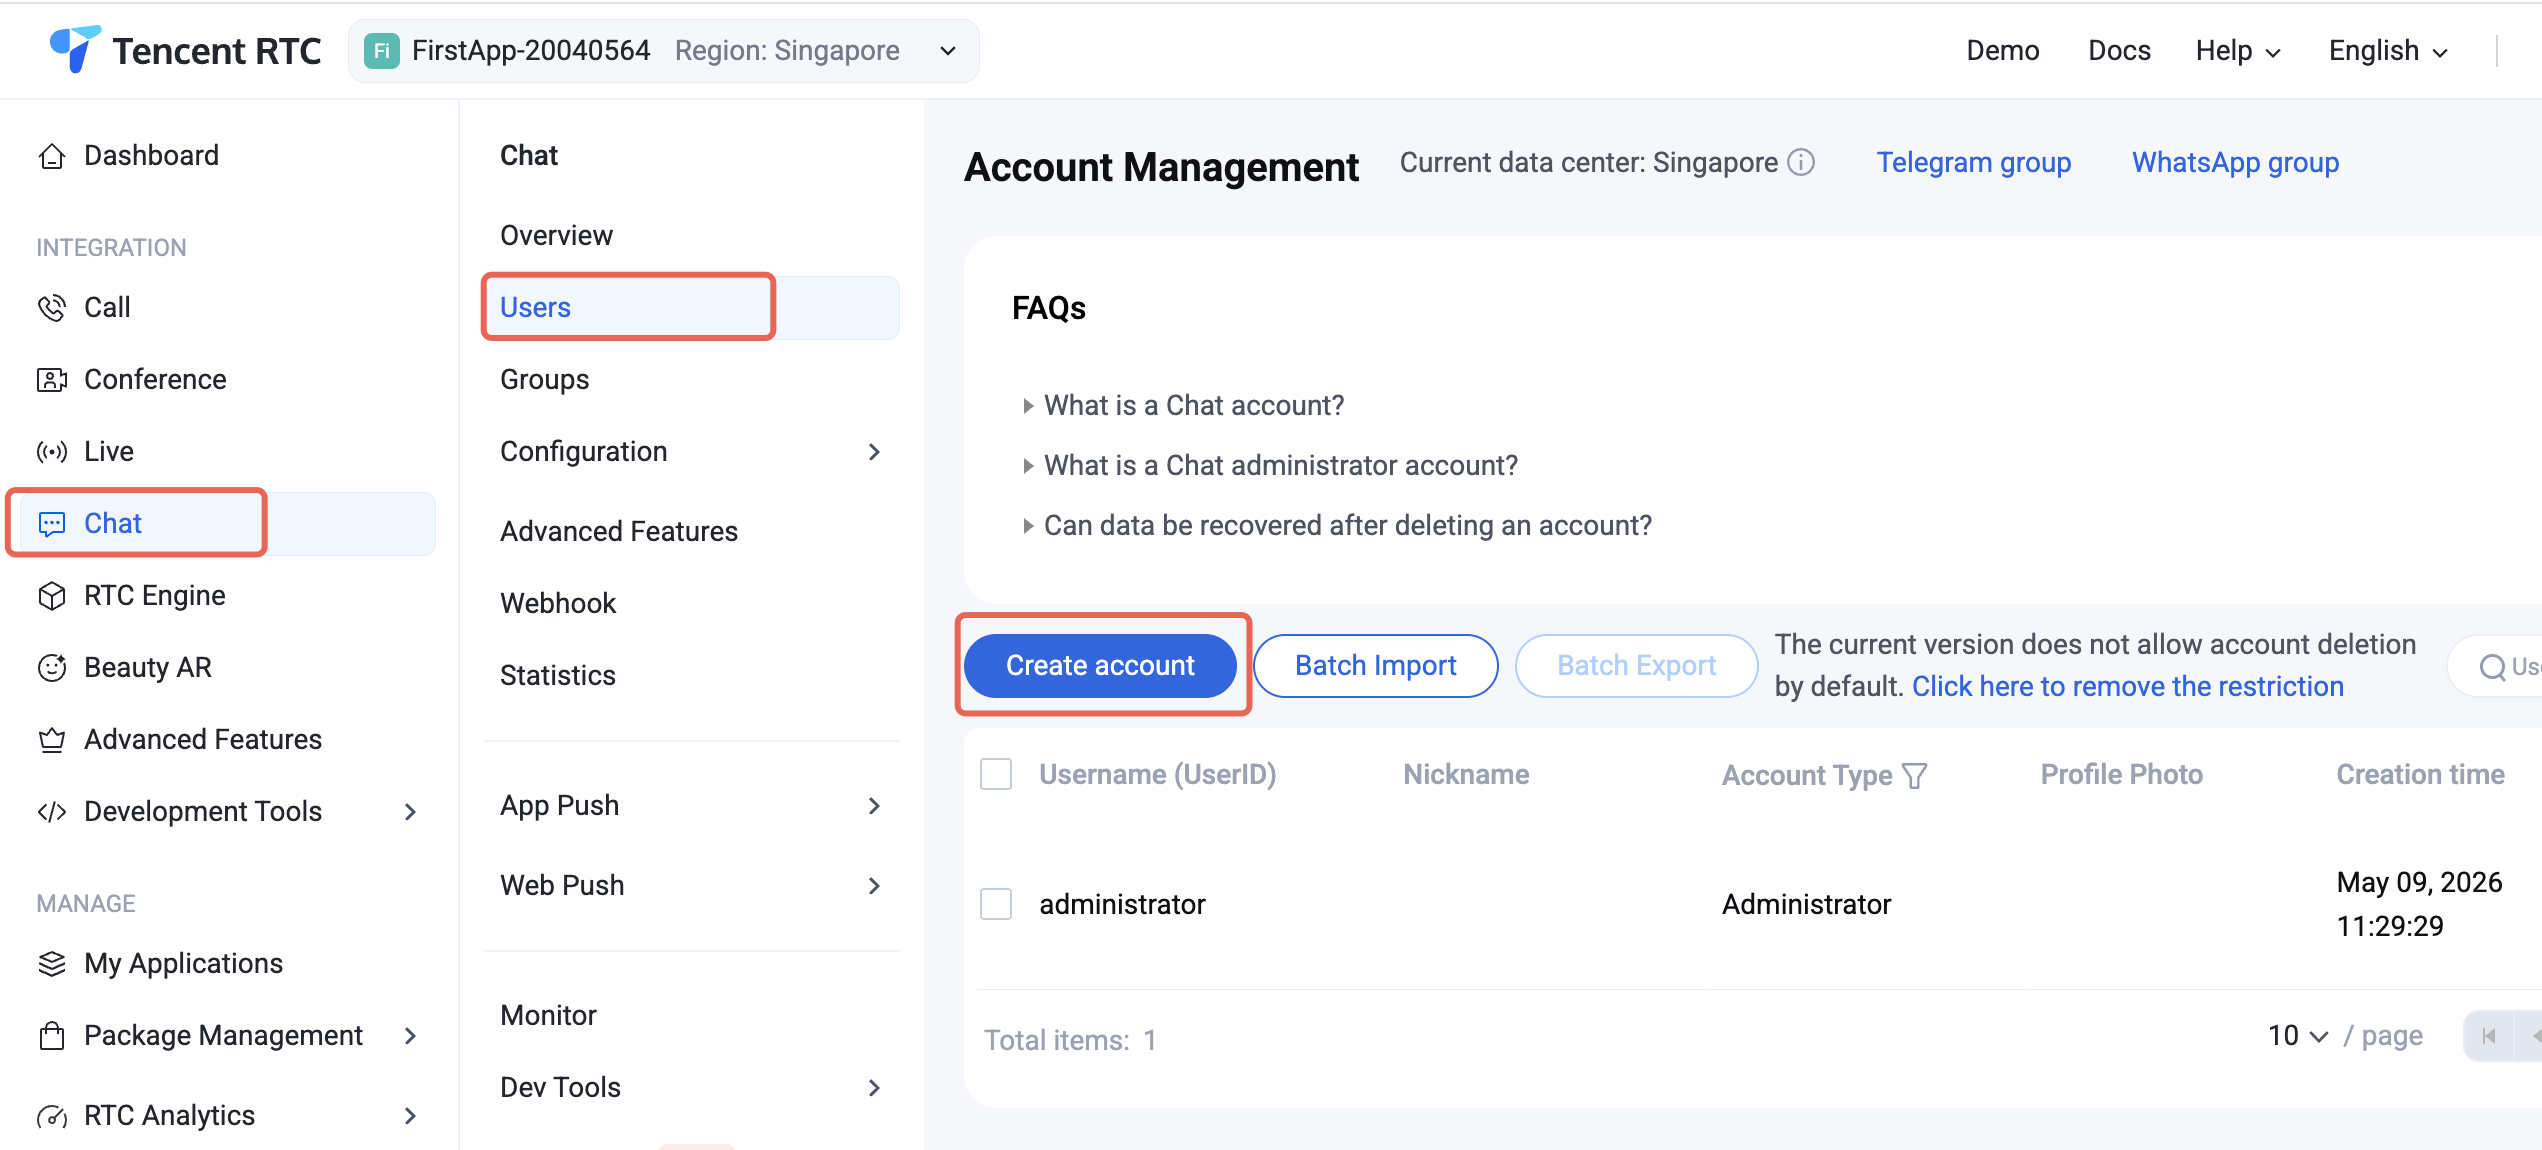
3. For regular users, select "Regular Account". We recommend setting a nickname to help display users distinctly in the UI.
Note:
You need at least two users to send messages. Create at least two accounts at this step, and record their userIDs for use in later steps.
Generate a UserSig
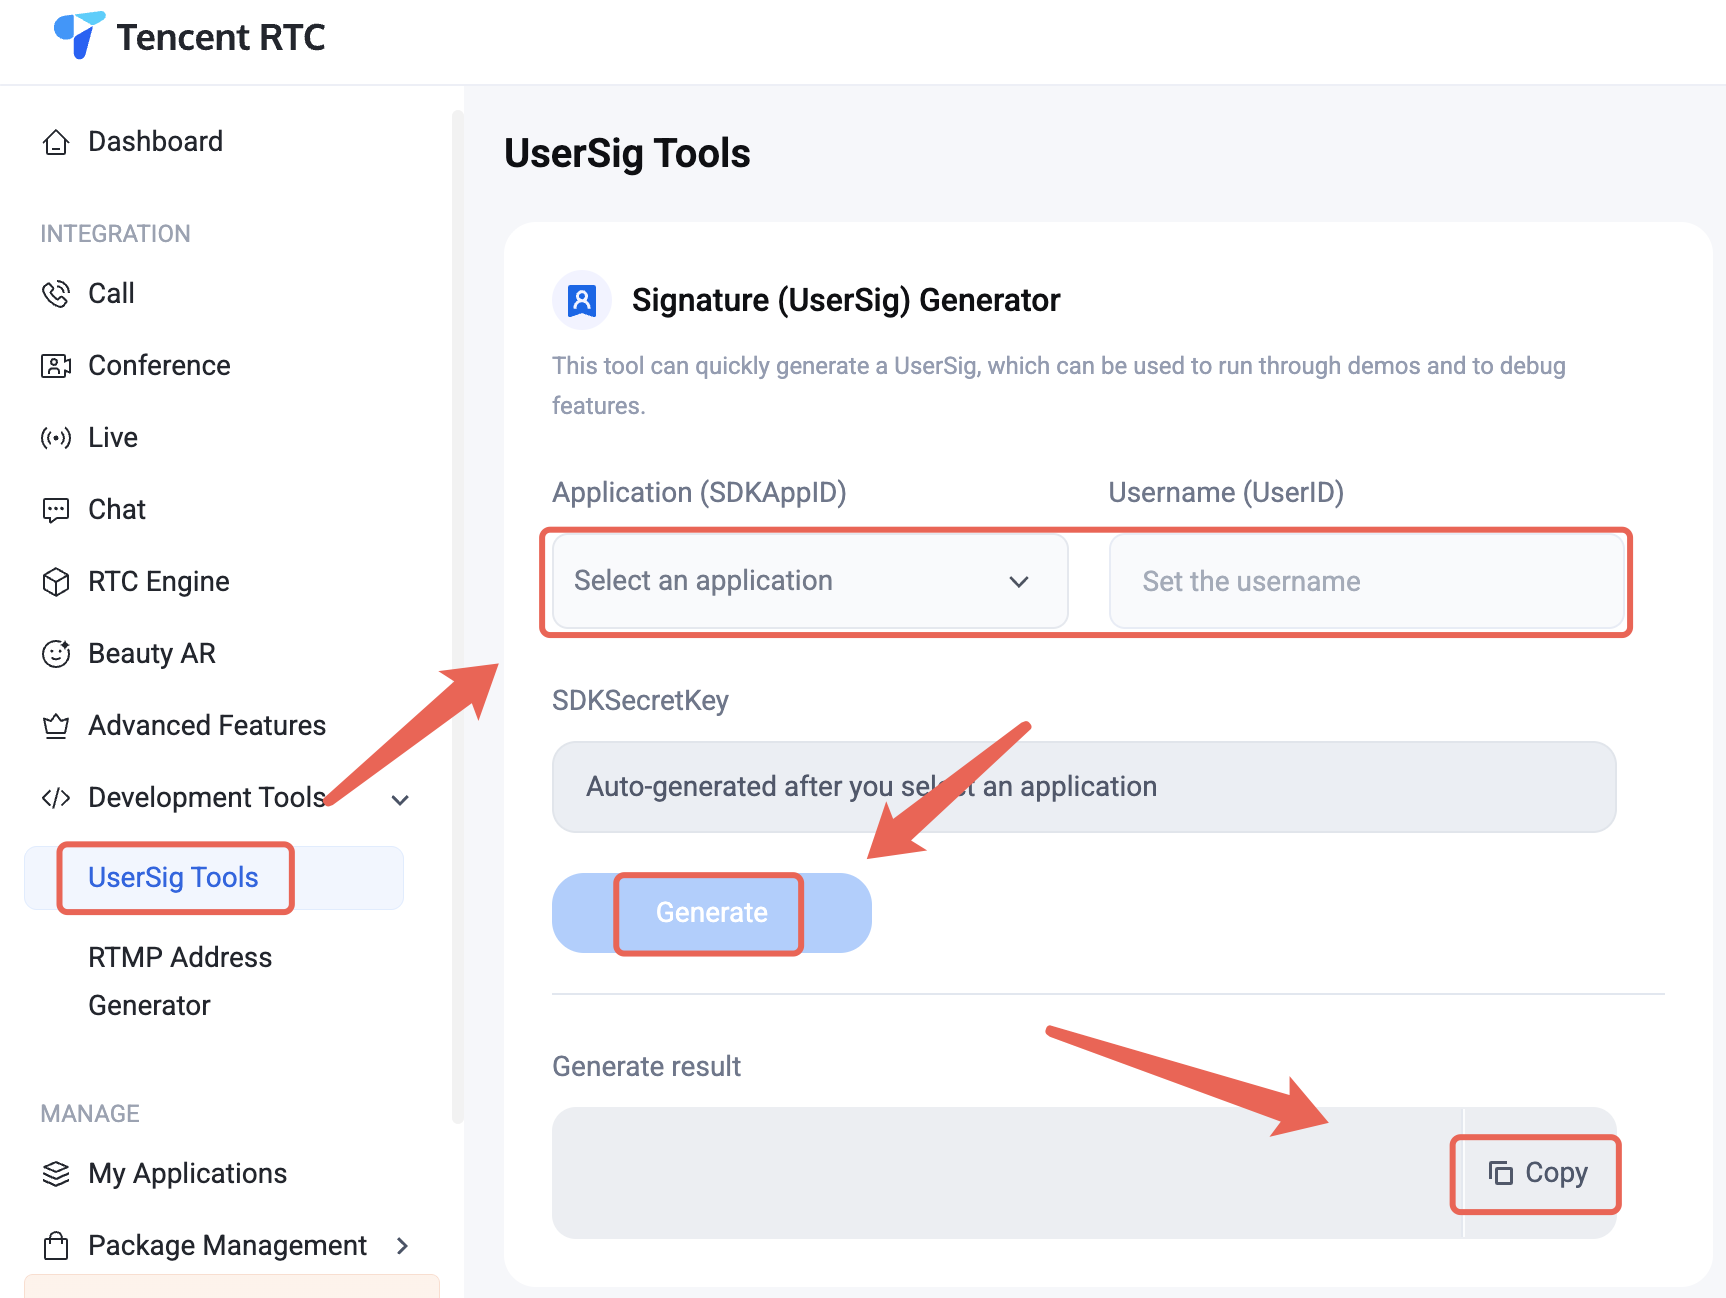
1. Log in to Console > Developer Tools > UserSig Tool.
2. In the UserSig generation tool, select your application, input the UserID, and click "Generate". The signature is valid for 180 days by default. Click "Copy" to save the signature.
Note:
Integrate the TUIKit
Notice:
1. If you are integrating TUIKit SwiftUI into a new, empty SwiftUI project, follow the steps below to send your first message.
2. If you are integrating TUIKit SwiftUI into an existing project, keep your original UI code and refer only to the login and message page assembly logic described below.
Log in to the TUIKit
To use TUIKit SwiftUI features, log in using the LoginStore login API. There are two scenarios:
If you have not created user accounts in the console, log in to user1 and user2 sequentially using LoginStore. Make sure user1 remains online.
If you have already created user1 and user2 in the console, log in only as user1.
Note:
1. Once logged in as user1, you can send messages to user2. user2 does not need to be logged in; Chat supports sending C2C Messages between users, friends, and strangers by default.
2. To have user1 and user2 interact in chat, log in as user2 on another device and enter the chat page with user1.
The login API is defined as follows:
// API location: AtomicXCore/LoginStore/// Login////// - Parameter sdkAppID: SDK application ID./// - Parameter userID: User ID./// - Parameter userSig: User signature./// - Parameter completion: Completion callback.public func login(sdkAppID: Int32, userID: String, userSig: String, completion: AtomicXCore.CompletionClosure?)
Example API call:
LoginStore.shared.login(sdkAppID: sdkAppID, userID: userID, userSig: userSig) { result inswitch result {case .success:print("Login success, userID: \(userID)")case .failure(let error):print("Login failed: \(error.code), \(error.message)")}}
Load the Chat Interface
As an example, ChatPage encapsulates the entire chat interface and is loaded in ContentView when the app starts.
If you are using the sample code, pre-fill the following parameters:
sdkAppID: the SDKAppID you obtained abovesenderUserID: the userID of the sender (user1)senderUserSig: the UserSig generated for the senderreceiverUserID: the userID of the recipientSample code:
// ContentView.swiftimport SwiftUIstruct ContentView: View {var body: some View {// Load ChatPage in ContentViewChatPage()}}// ChatPage.swiftimport AtomicXimport AtomicXCoreimport SwiftUIpublic struct ChatPage: View {@StateObject private var themeState = ThemeState.shared@State private var isLoggedIn = false@State private var isLoggingIn = true@State private var loginError: String? = nilprivate let sdkAppID: Int32 = 1234567890 // TODO: Enter your sdkAppID here.private let senderUserID = "" // TODO: Enter your userID here (sender).private let senderUserSig = "" // TODO: Enter your UserSig here.private let receiverUserID = "" // TODO: Enter the receiver's userID here.private var conversationID: String {// C2C conversationID: "c2c_\(userID)", Group conversationID: "group_\(groupID)""c2c_\(receiverUserID)"}public var body: some View {Group {if isLoggedIn {chatContentView} else if isLoggingIn {ProgressView("Logging in...")} else {VStack(spacing: 12) {Image(systemName: "exclamationmark.triangle").font(.system(size: 40)).foregroundColor(.orange)Text(loginError ?? "Login failed").foregroundColor(.secondary)}}}.environmentObject(themeState).onAppear {login()}}// MARK: - Chat Contentprivate var chatContentView: some View {VStack(spacing: 0) {navigationBarViewDivider().background(.gray)VStack(spacing: 0) {// Add MessageList to this page.MessageList(conversationID: conversationID,onUserClick: { userID inprint("onUserClick: \(userID)")})// Add MessageInput to this page.MessageInput(conversationID: conversationID)}.ignoresSafeArea(.keyboard)}}// MARK: - Navigation Barprivate var navigationBarView: some View {HStack {Image(systemName: "person.circle.fill").font(.system(size: 32)).foregroundColor(.gray)Text(conversationID).font(.system(size: 17, weight: .semibold)).foregroundColor(themeState.colors.textColorPrimary)Spacer()}.padding(.horizontal, 16).frame(height: 44)}// MARK: - Loginprivate func login() {guard !senderUserSig.isEmpty else {isLoggingIn = falseloginError = "UserSig is empty. Please provide a valid UserSig."return}// Login when ChatPage appears.LoginStore.shared.login(sdkAppID: sdkAppID, userID: senderUserID, userSig: senderUserSig) { result inswitch result {case .success:print("Login success, userID: \(senderUserID)")isLoggedIn = trueisLoggingIn = falsecase .failure(let error):print("Login failed: \(error.code), \(error.message)")loginError = "Login failed: \(error.code), \(error.message)"isLoggingIn = false}}}}
Send Your First Message
Once the steps above are completed, launch the app. It will log in automatically and load ChatPage. Click the input box to send your first message:


