This article will introduce how to integrate the TUIChat chat component.
Note:
Starting from version 5.7.1435, TUIChat supports the classic version of UI components.
Starting from version 6.9.3557, TUIChat introduced a brand new minimalist version of UI components.
You can freely choose between the classic and minimalist version of UI components according to your needs.
Display Effect
TUIChat offers both private chat (1V1) and group chat (Group) features, supporting multiple operations on messages, such as sending different types of messages, long pressing a message to like/reply/quote, and querying message read receipt details.
You can integrate TUIChat into your app on its own. The chat interface has a wide range of usage scenarios, such as real estate agency consultation, online medical consultation, e-commerce online customer service, and remote loss assessment for insurance. You can refer to the TUIChat Component documentation for interface effects.
Environment Requirements
Xcode 10 or later
iOS 9.0 or later
CocoaPods Integration
1. Install CocoaPods
Enter the following command in a terminal (you need to install Ruby on your Mac first):
sudo gem install cocoapods
2. Create a Podfile
Go to the path where the project is located and run the following command. Then, a Podfile will appear in the project directory.
pod init
3. Add the corresponding TUIChat components to your Podfile according to your needs. You can choose different Podfile integration methods as needed:
Remote CocoaPods Integration
Local Integration of DevelopmentPods
The pros and cons of the above two integration methods are shown in the following table:
Integration methods
Suitable Scenarios
Advantage
Disadvantage
Remote CocoaPods Integration
Suitable for integration without source code modifications.
When there is a version update of TUIChat, you only need to Pod update again to complete the update.
When you have modifications to the source code, using Pod update to update will overwrite your modifications with the new version of TUIChat.
Local DevelopmentPods Integration
Suitable for customers who have custom modifications to the source code
When you have your own git repository, you can track changes. After modifying the source code, using Pod update to update other remote Pod libraries will not overwrite your modifications.
You need to manually update your local TUIChat folder with the latest TUIChat source code to update.
Remote CocoaPods Integration
You can add the TUIChat library in the Podfile:
Minimalist version
Classic version
Swift
Objective-C
# Uncomment the next line to define a global platform for your project.
source'https://github.com/CocoaPods/Specs.git'
platform :ios, '13.0'
# Prevent `*.xcassets` in TUIChat components from conflicting with your project.
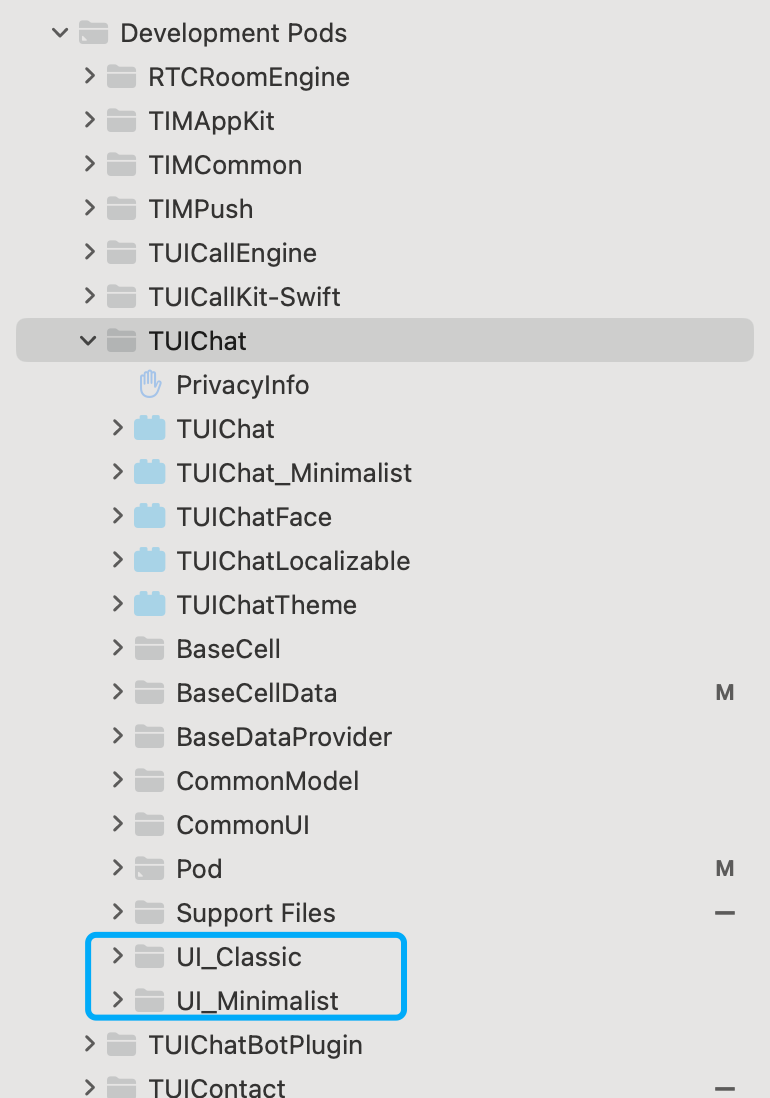
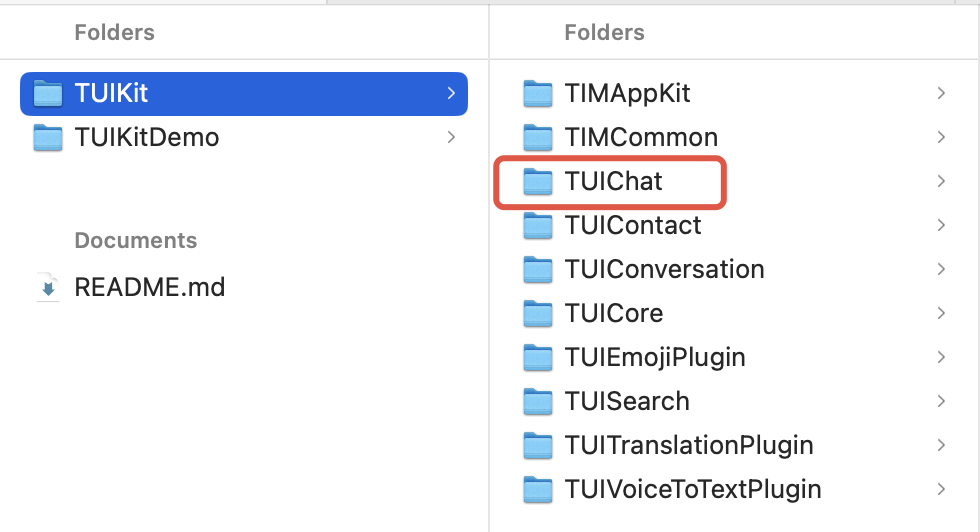
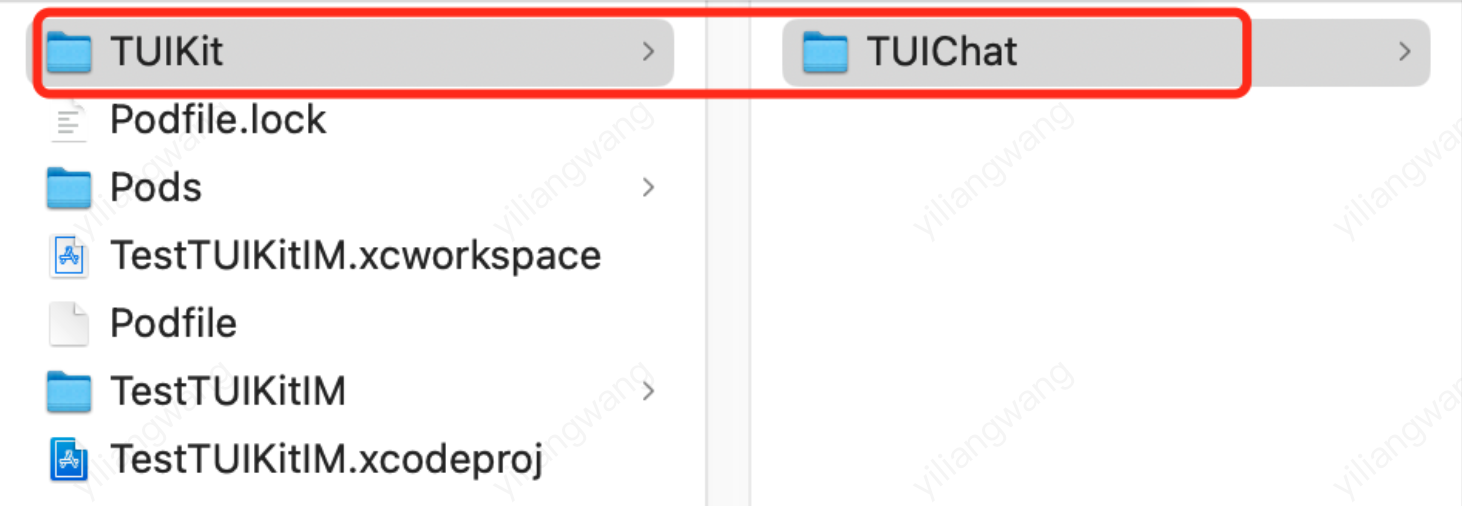
2. Modify the local path of each component in your Podfile. The path is the location of the TUIChat folder relative to your project's Podfile file. Common ones include:
If the TUIChat folder is in the parent directory of your project's Podfile: pod 'TUIChat', :path => "../TUIKit/TUIChat"
If the TUIChat folder is in the current directory of your project's Podfile: pod 'TUIChat', :path => "/TUIKit/TUIChat"
If the TUIChat folder is in a subdirectory of your project's Podfile: pod 'TUIChat', :path => "./TUIKit/TUIChat"
Taking the TUIChat folder located in the parent directory of your project's Podfile as an example:
Development Podfile
Swift
Objective-C
# Uncomment the next line to define a global platform for your project.
# Replace `your_project_name` with your actual project name.
target 'your_project_name'do
# Uncomment the next line if you're using Swift or would like to use dynamic frameworks.
use_frameworks!
use_modular_headers!
# Note: When using the local integration solution, upgrade by downloading the latest component code from https://github.com/TencentCloud/TIMSDK/tree/master/iOS/TUIKit/TUIChat
# and placing it in the designated local directory, such as /TIMSDK/ios/TUIKit/TUIChat
# Note: When private modifications conflict with remote changes, manual merging is required to resolve conflicts.
# Integrate the basic library (required).
pod 'TUICore', :path =>"../TUIKit/TUICore"
pod 'TIMCommon_Swift', :path =>"../TUIKit/TIMCommon"
# Replace `your_project_name` with your actual project name.
target 'your_project_name'do
# Uncomment the next line if you're using Swift or would like to use dynamic frameworks.
use_frameworks!
use_modular_headers!
# Note: When using the local integration solution, upgrade by downloading the latest component code from https://github.com/TencentCloud/TIMSDK/tree/master/iOS/TUIKit/TUIChat
# and placing it in the designated local directory, such as /TIMSDK/ios/TUIKit/TUIChat
# Note: When private modifications conflict with remote changes, manual merging is required to resolve conflicts.
3. After modifying the Podfile, run the following command to install the local TUIChat component. Example:
pod install
Note:
When using the local integration scheme, if you need to upgrade, update TUIChat from GitHub to your local environment.
Get the latest component code and overwrite the local directory, such as: TIMSDK/iOS/TUIKit/TUIChat.
When private modifications conflict with the remote version, manual merging is required to resolve conflicts.
The TUIChat plugin requires a specific version of TUICore. Make sure the plugin version matches the spec.version in "../TUIKit/TUICore/TUICore.spec".
If you encounter any errors in the process, you can refer to the FAQs at the end of the document.
Build Chat Interface
After integrating TUIChat, if you want to continue building the chat interface, please refer to the document: Build Chat Interface.
FAQs
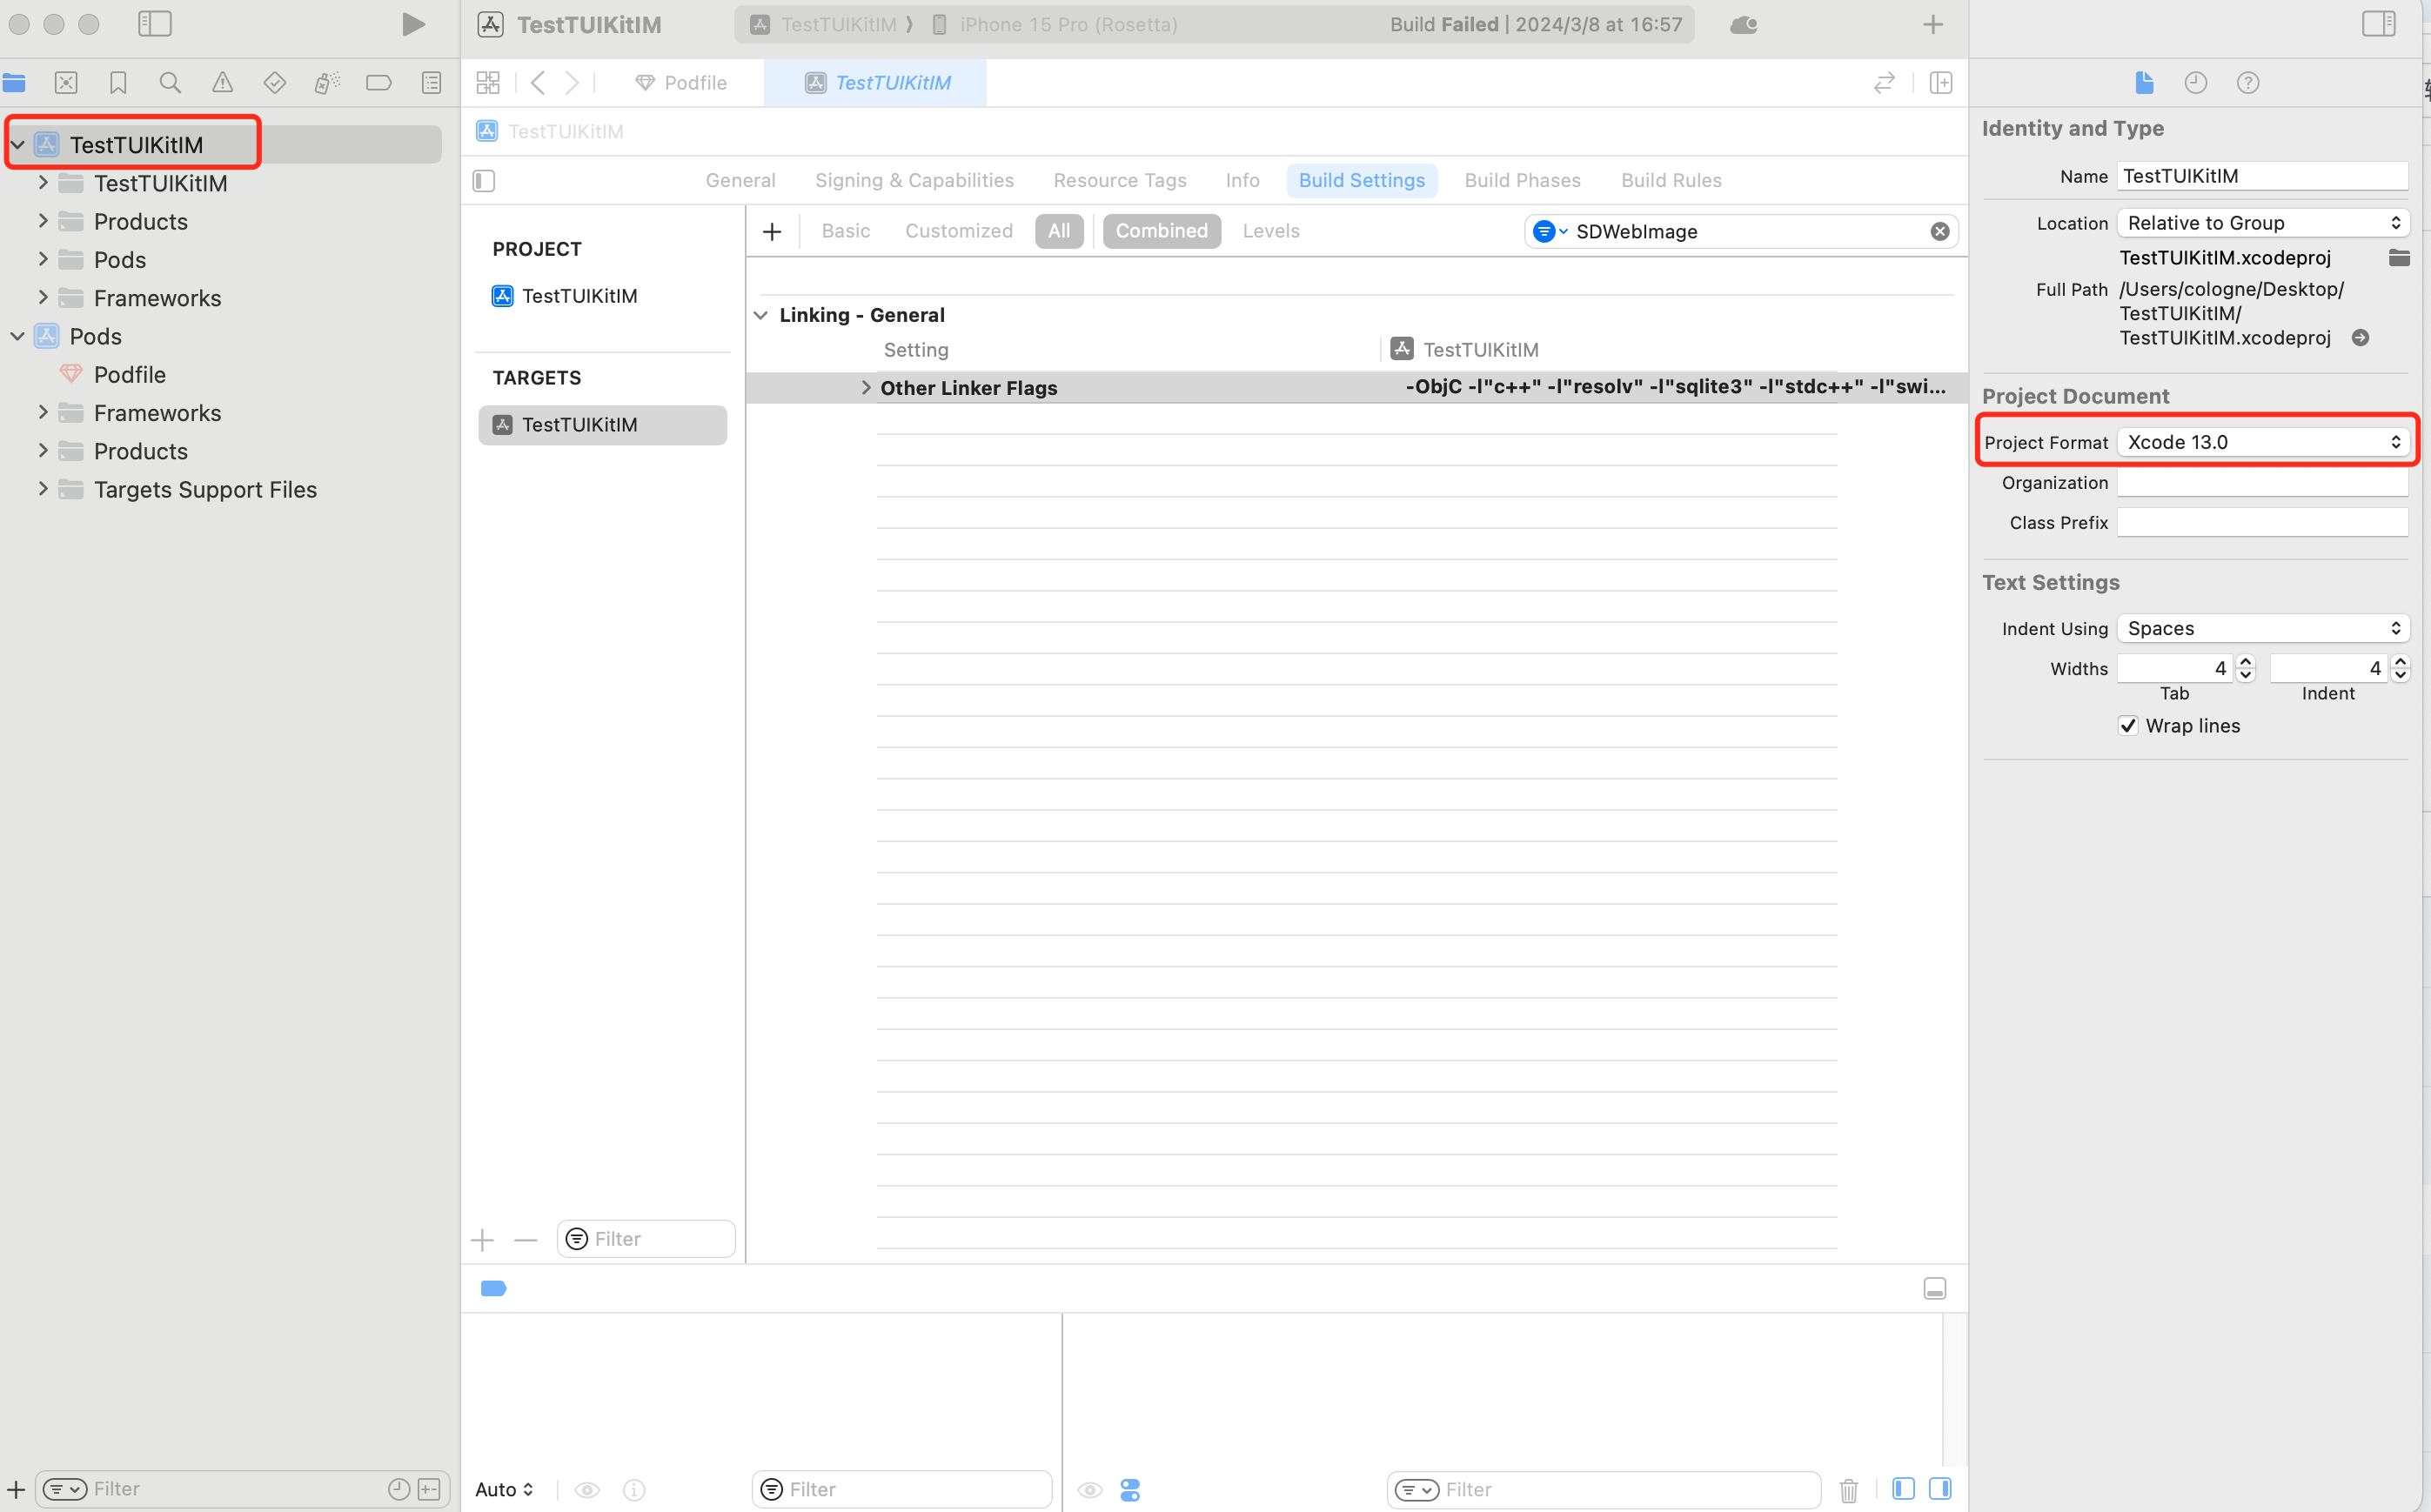
Xcode15 FAQs
Integration error: [Xcodeproj] Unknown object version (60). (RuntimeError)
When creating a new project in Xcode15 to integrate TUIChat and entering pod install, you may encounter this problem due to using an older version of CocoaPods. There are two solutions:
Solution 1: Change the Xcode project's Project Format version to Xcode13.0.
Solution 2: Upgrade your local version of CocoaPods. The upgrade method will not be elaborated here.
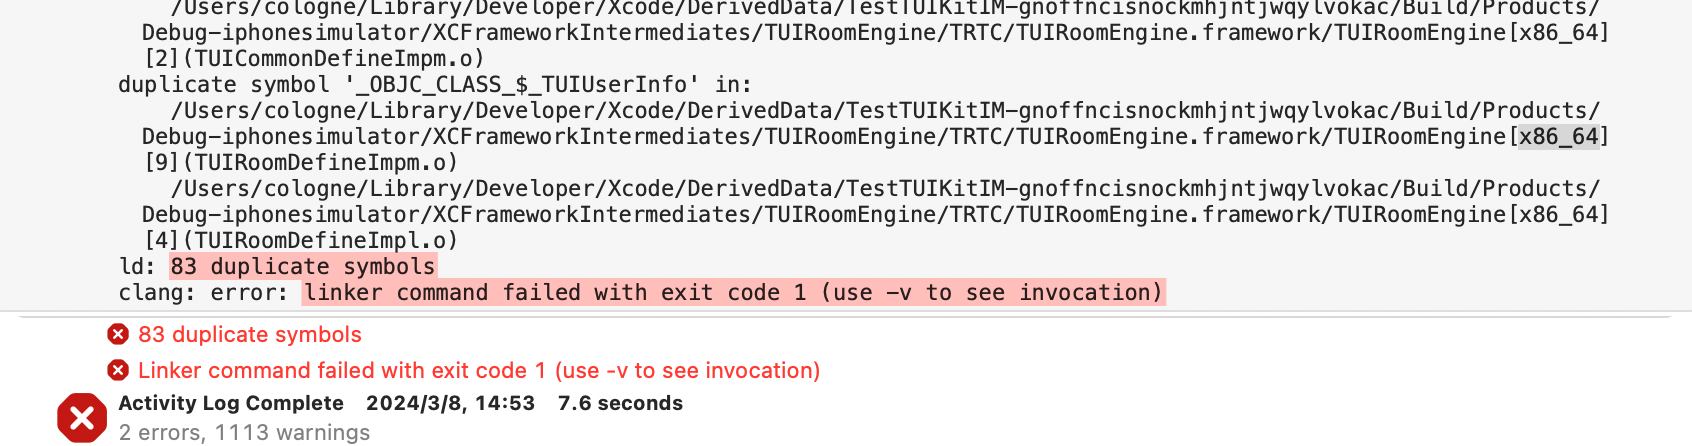
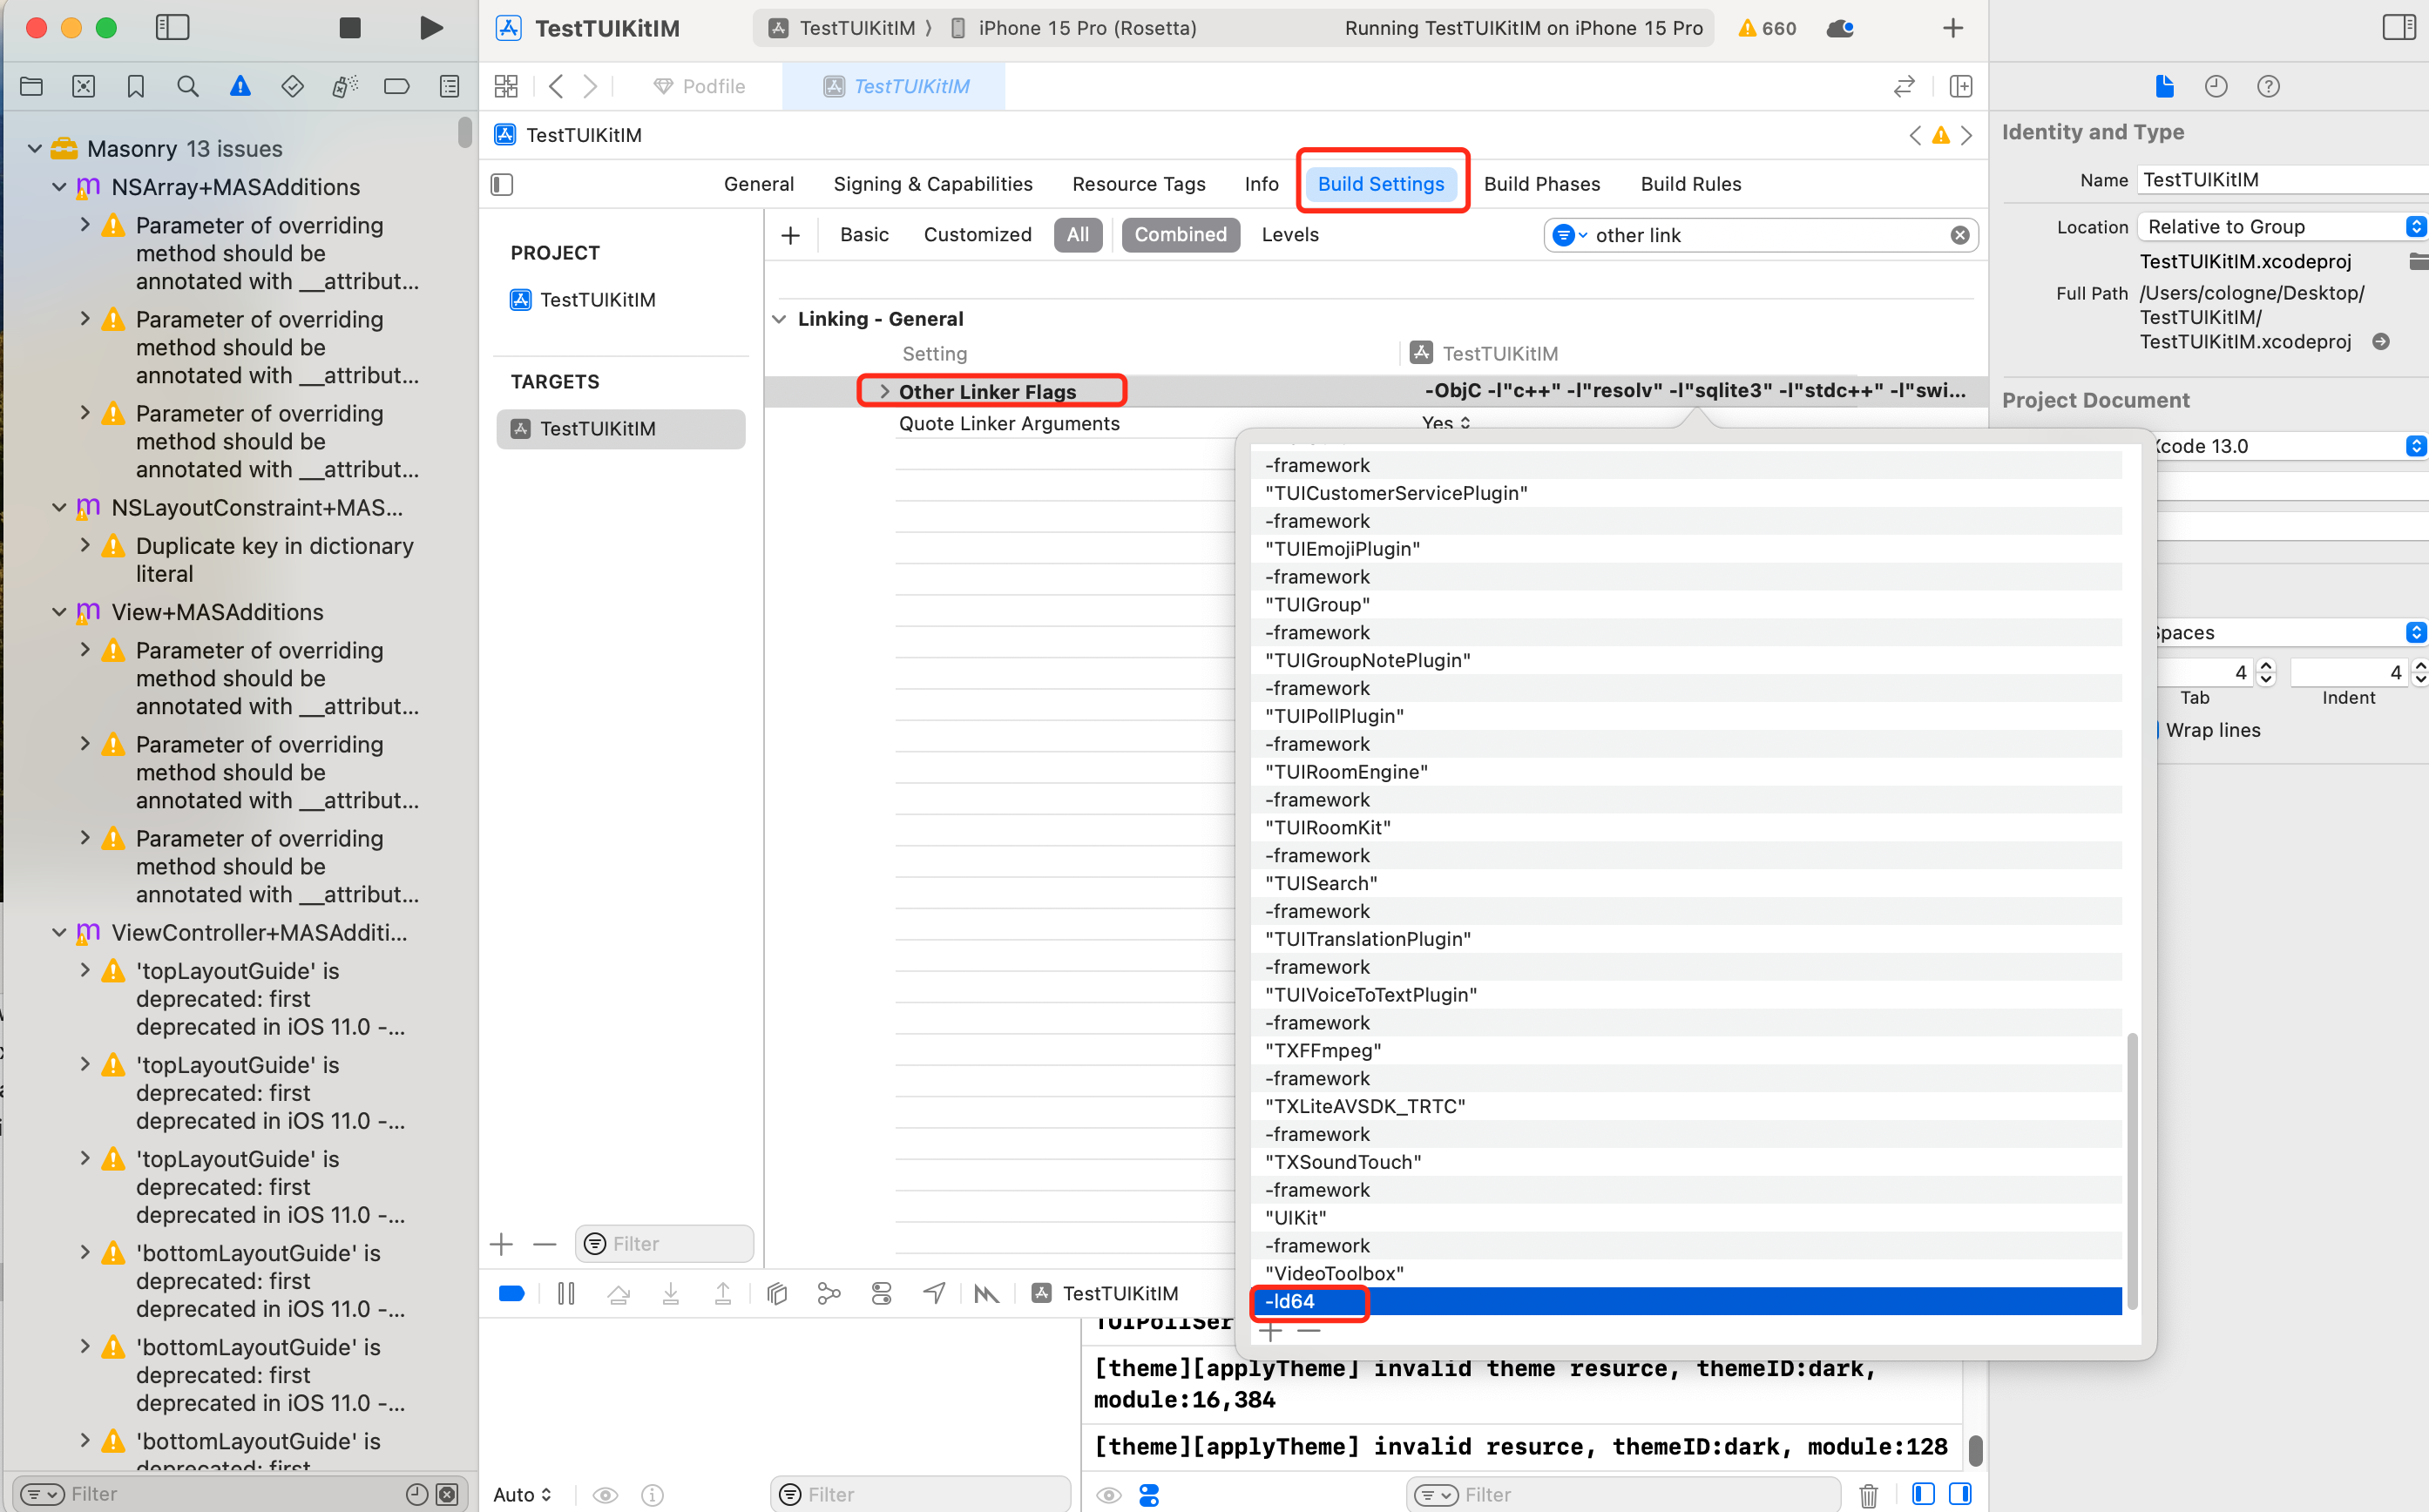
Assertion failed: (false && "compact unwind compressed function offset doesn't fit in 24 bits"), function operator(), file Layout.cpp.
Or, when integrating TUIRoom with Xcode 15, the latest linker causes symbol conflicts in TUIRoomEngine, these are part of the same issue.
Solution: Modify the linker configuration. In Build Settings, add -ld64 to Other Linker Flags.
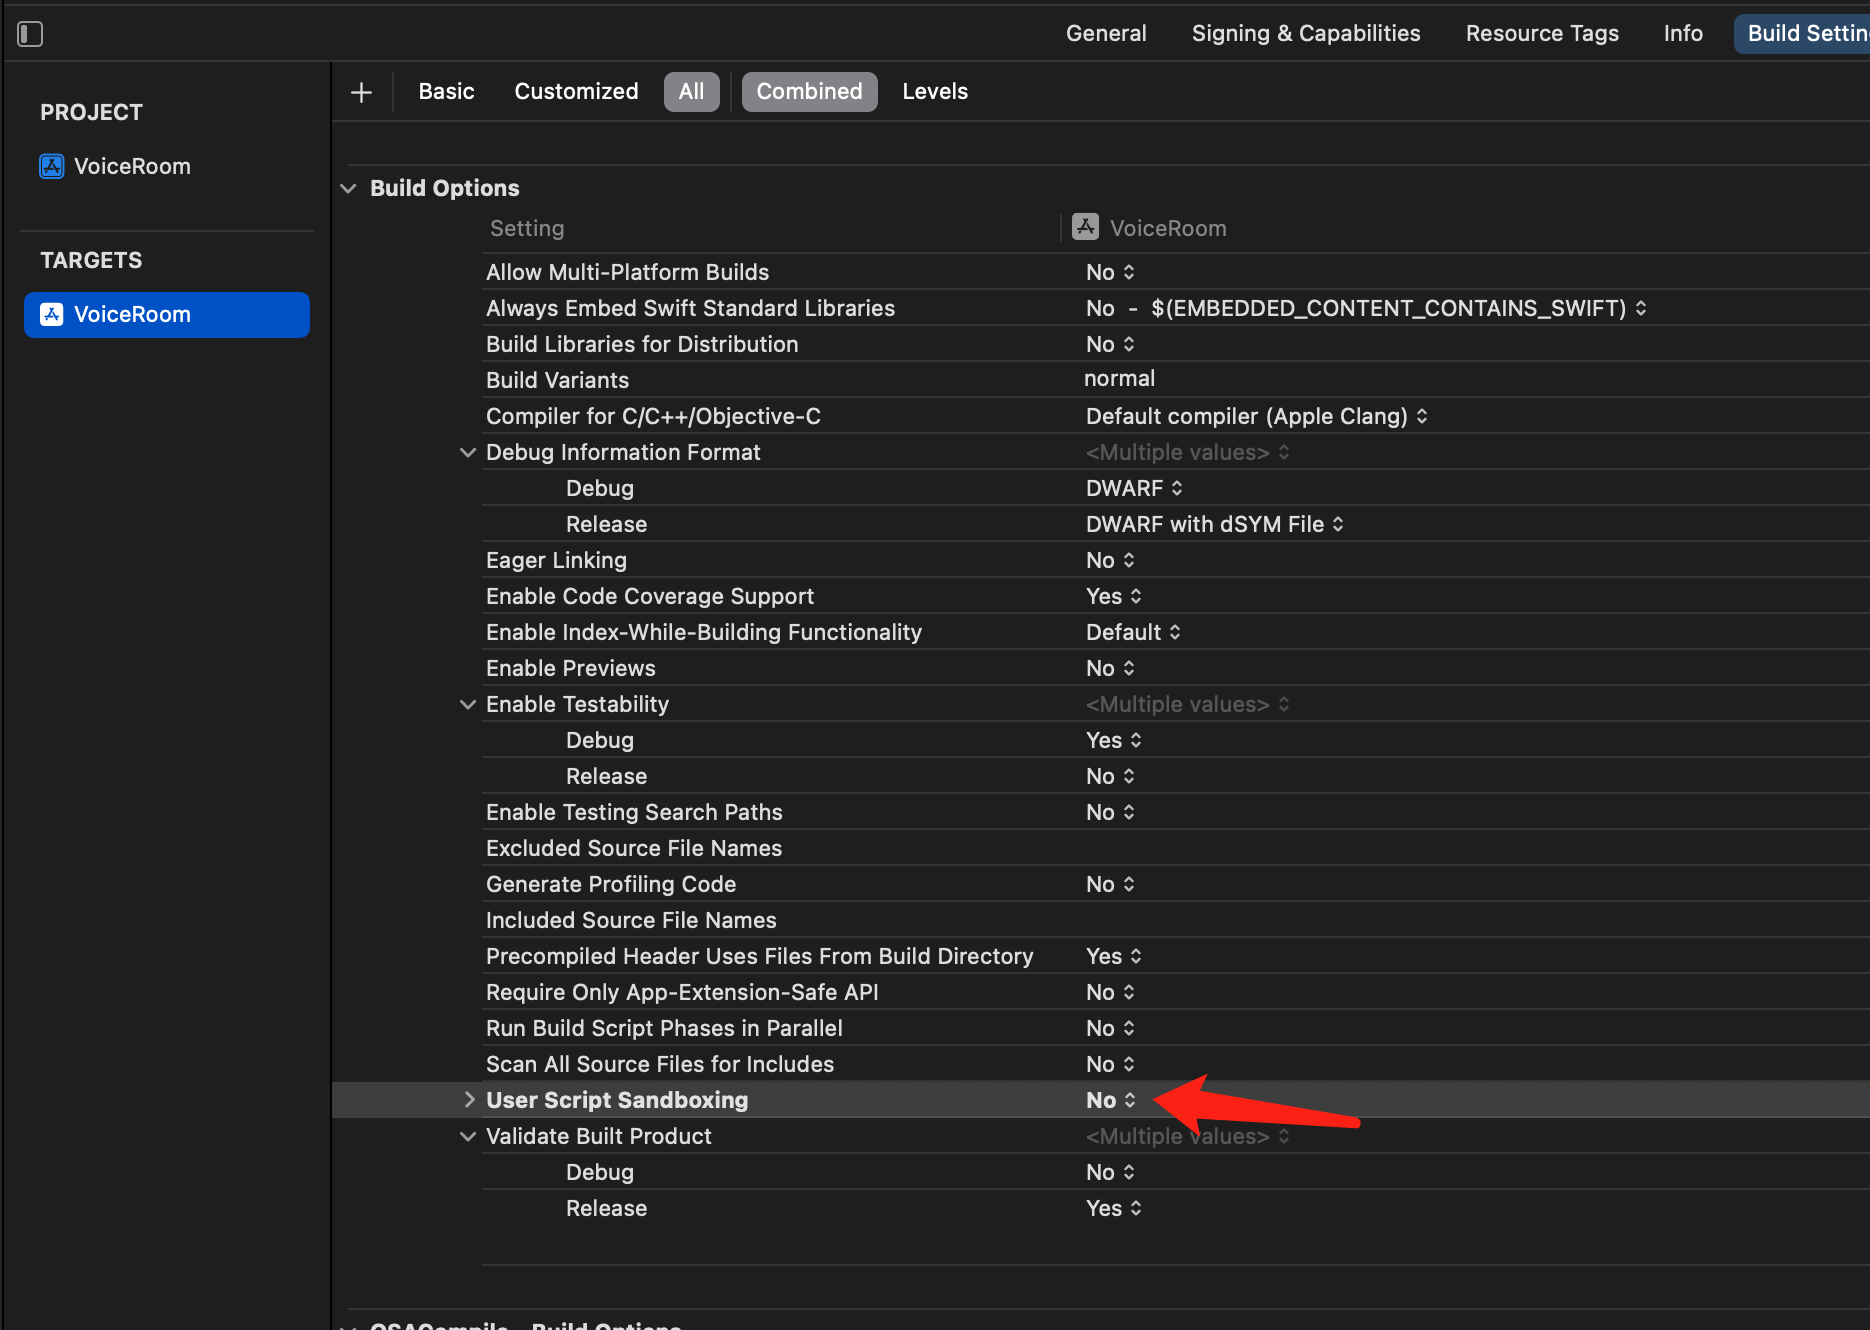
When using Apple Silicon (M1, M2, etc. series chips), you'll encounter this type of popup. The reason is that some third-party libraries, including SDWebImage, do not support xcframework. However, Apple has still provided an adaptation method, which is to enable Rosetta settings on the simulator. Generally, the Rosetta option will automatically pop up during compilation.
When you create a new project using Xcode 15, this option may cause compilation and execution failure. It is recommended that you turn off this option.
CocoaPods Common Issues
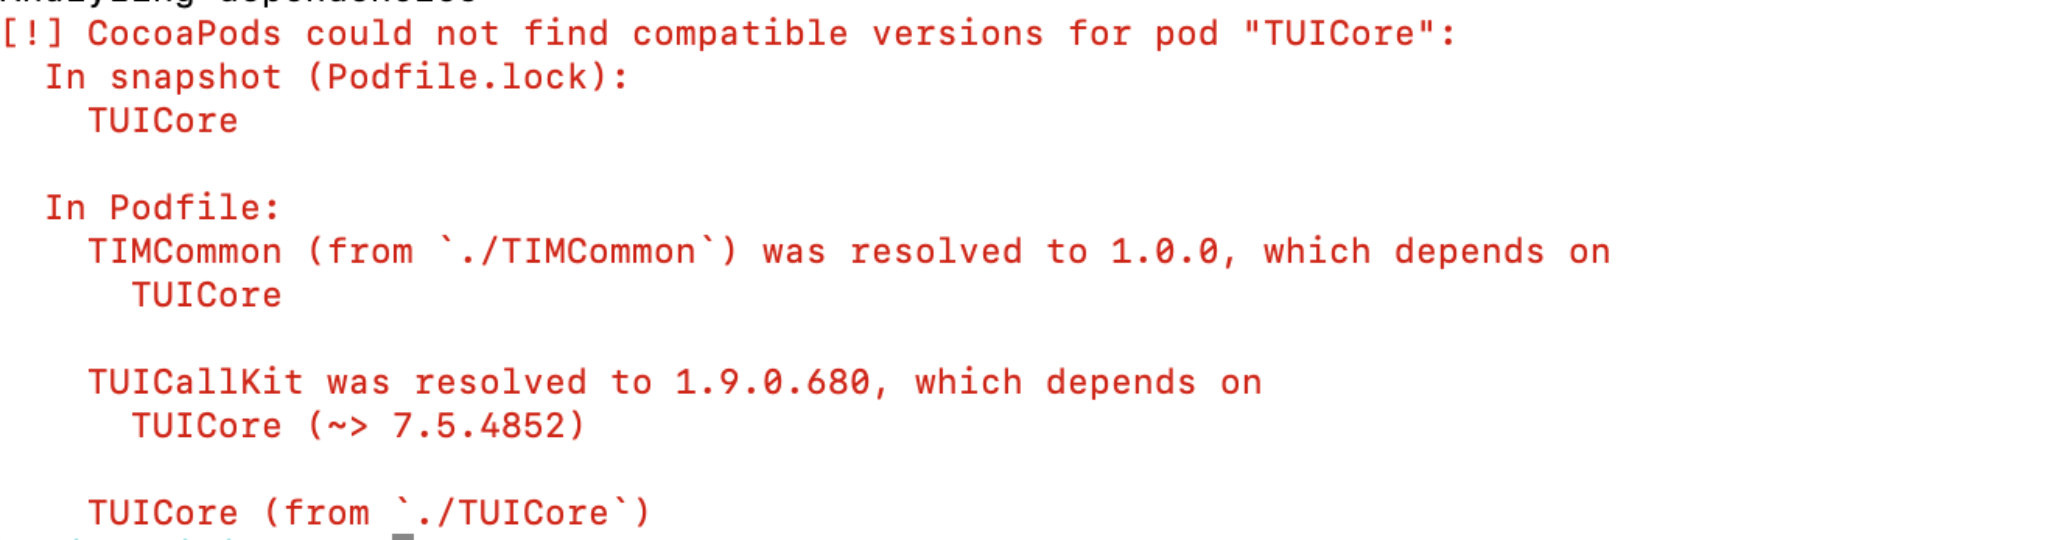
When using remote integration, issues with mismatched Pod dependency versions
If you encounter a mismatch between the Podfile.lock and the plugin dependency version of TUICore while using remote CocoaPods integration, please delete the Podfile.lock file and run pod repo updateto update your local repository, then use pod update to update the dependencies.
When using local integration, issues with mismatched Pod dependency versions
When integrating local DevelopmentPods and the plugin dependency on TUICoreis newer, but the local Pod dependency version is 1.0.0,
Please refer to Podfile_local and TUICore.spec for modifications. The plugin needs to follow the version and match the one in TUICore.spec.
When using local integration for the first time, we recommend you download our sample Demo project, replace the content of the Podfile with Podfile_local, and execute Pod updatefor cross-reference.
Submission Issues
Packaging failure when submitting to the App Store, with an 'Unsupported Architectures' error message.
The issue is illustrated below, where packaging indicates the ImSDK_Plus.framework includes an x86_64 simulator version not supported by the App Store. This is because the SDK, to facilitate developer debugging, defaults to including the simulator version upon release.
You can follow the steps below to remove the simulator version during packaging:
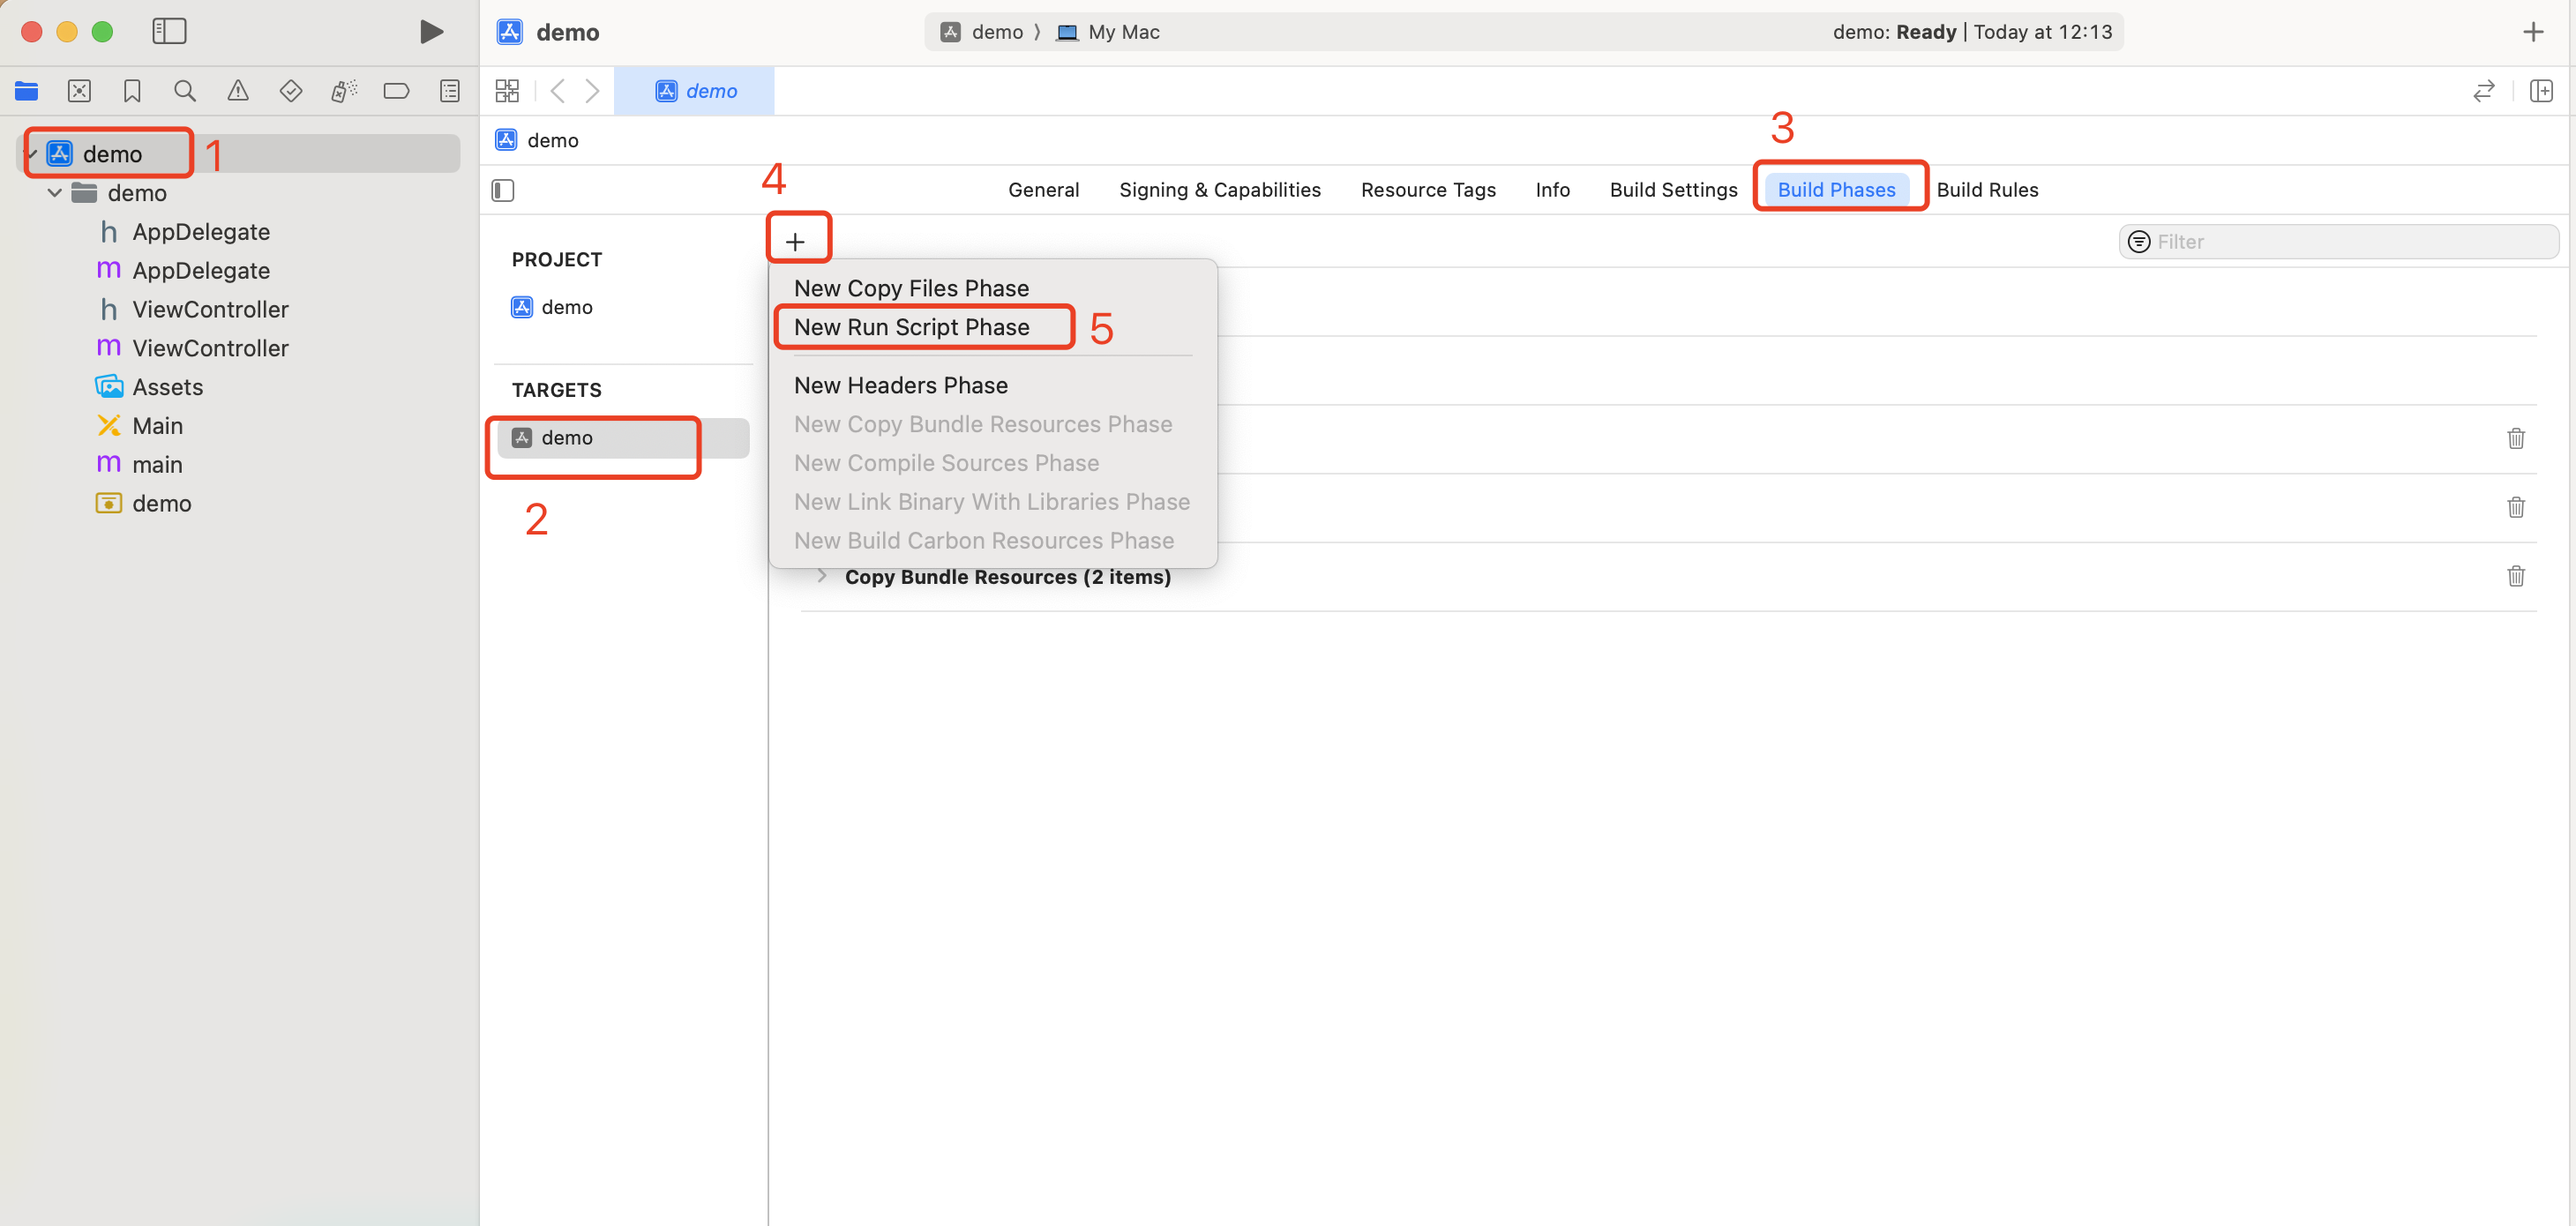
1.1 Select your project's Target and click on the Build Phases option, then add a Run Script to the current panel;
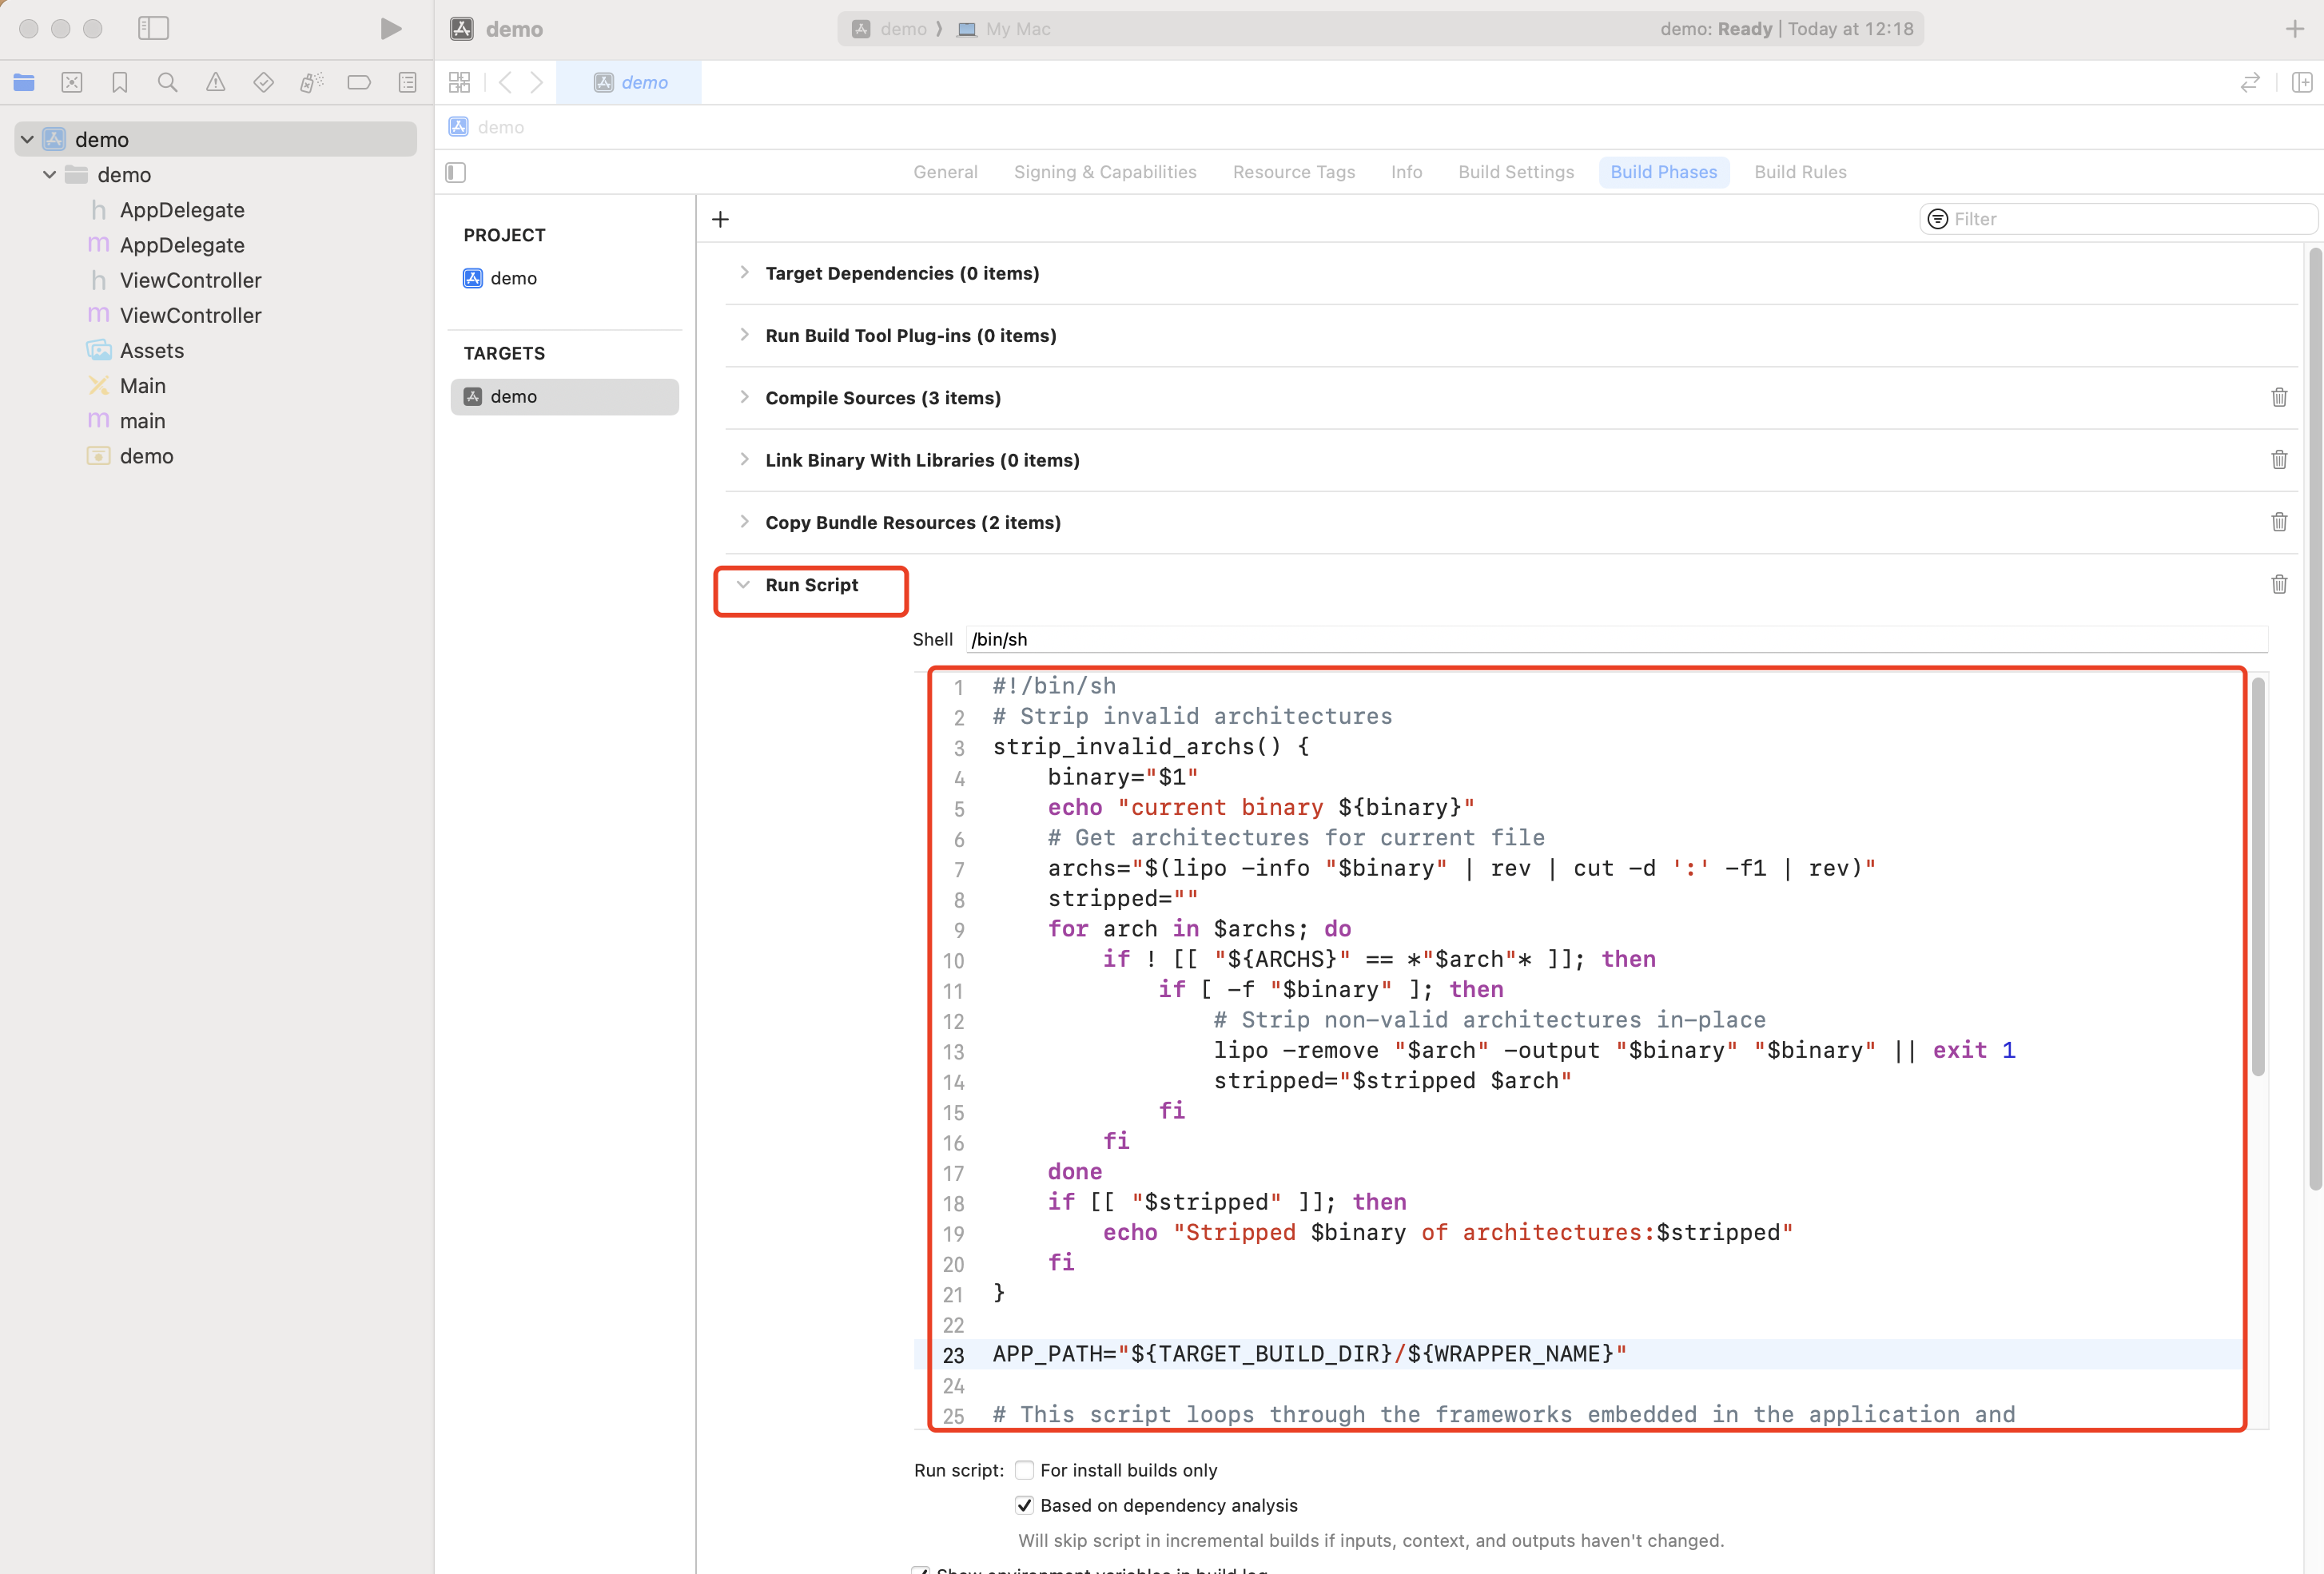
1.2 In the newly added Run Script, insert the following script: