
Live Comment View
Feature Overview
The
TUILiveKit live comment system delivers a robust interactive solution for live streaming, designed to boost engagement and entertainment for both hosts and audiences. This guide helps you quickly implement live comment features in your streaming rooms, with extensive customization options to fit your business needs.Live Comment Sending Component (BarrageInputView) | Live Comment Display Component (BarrageStreamView) |
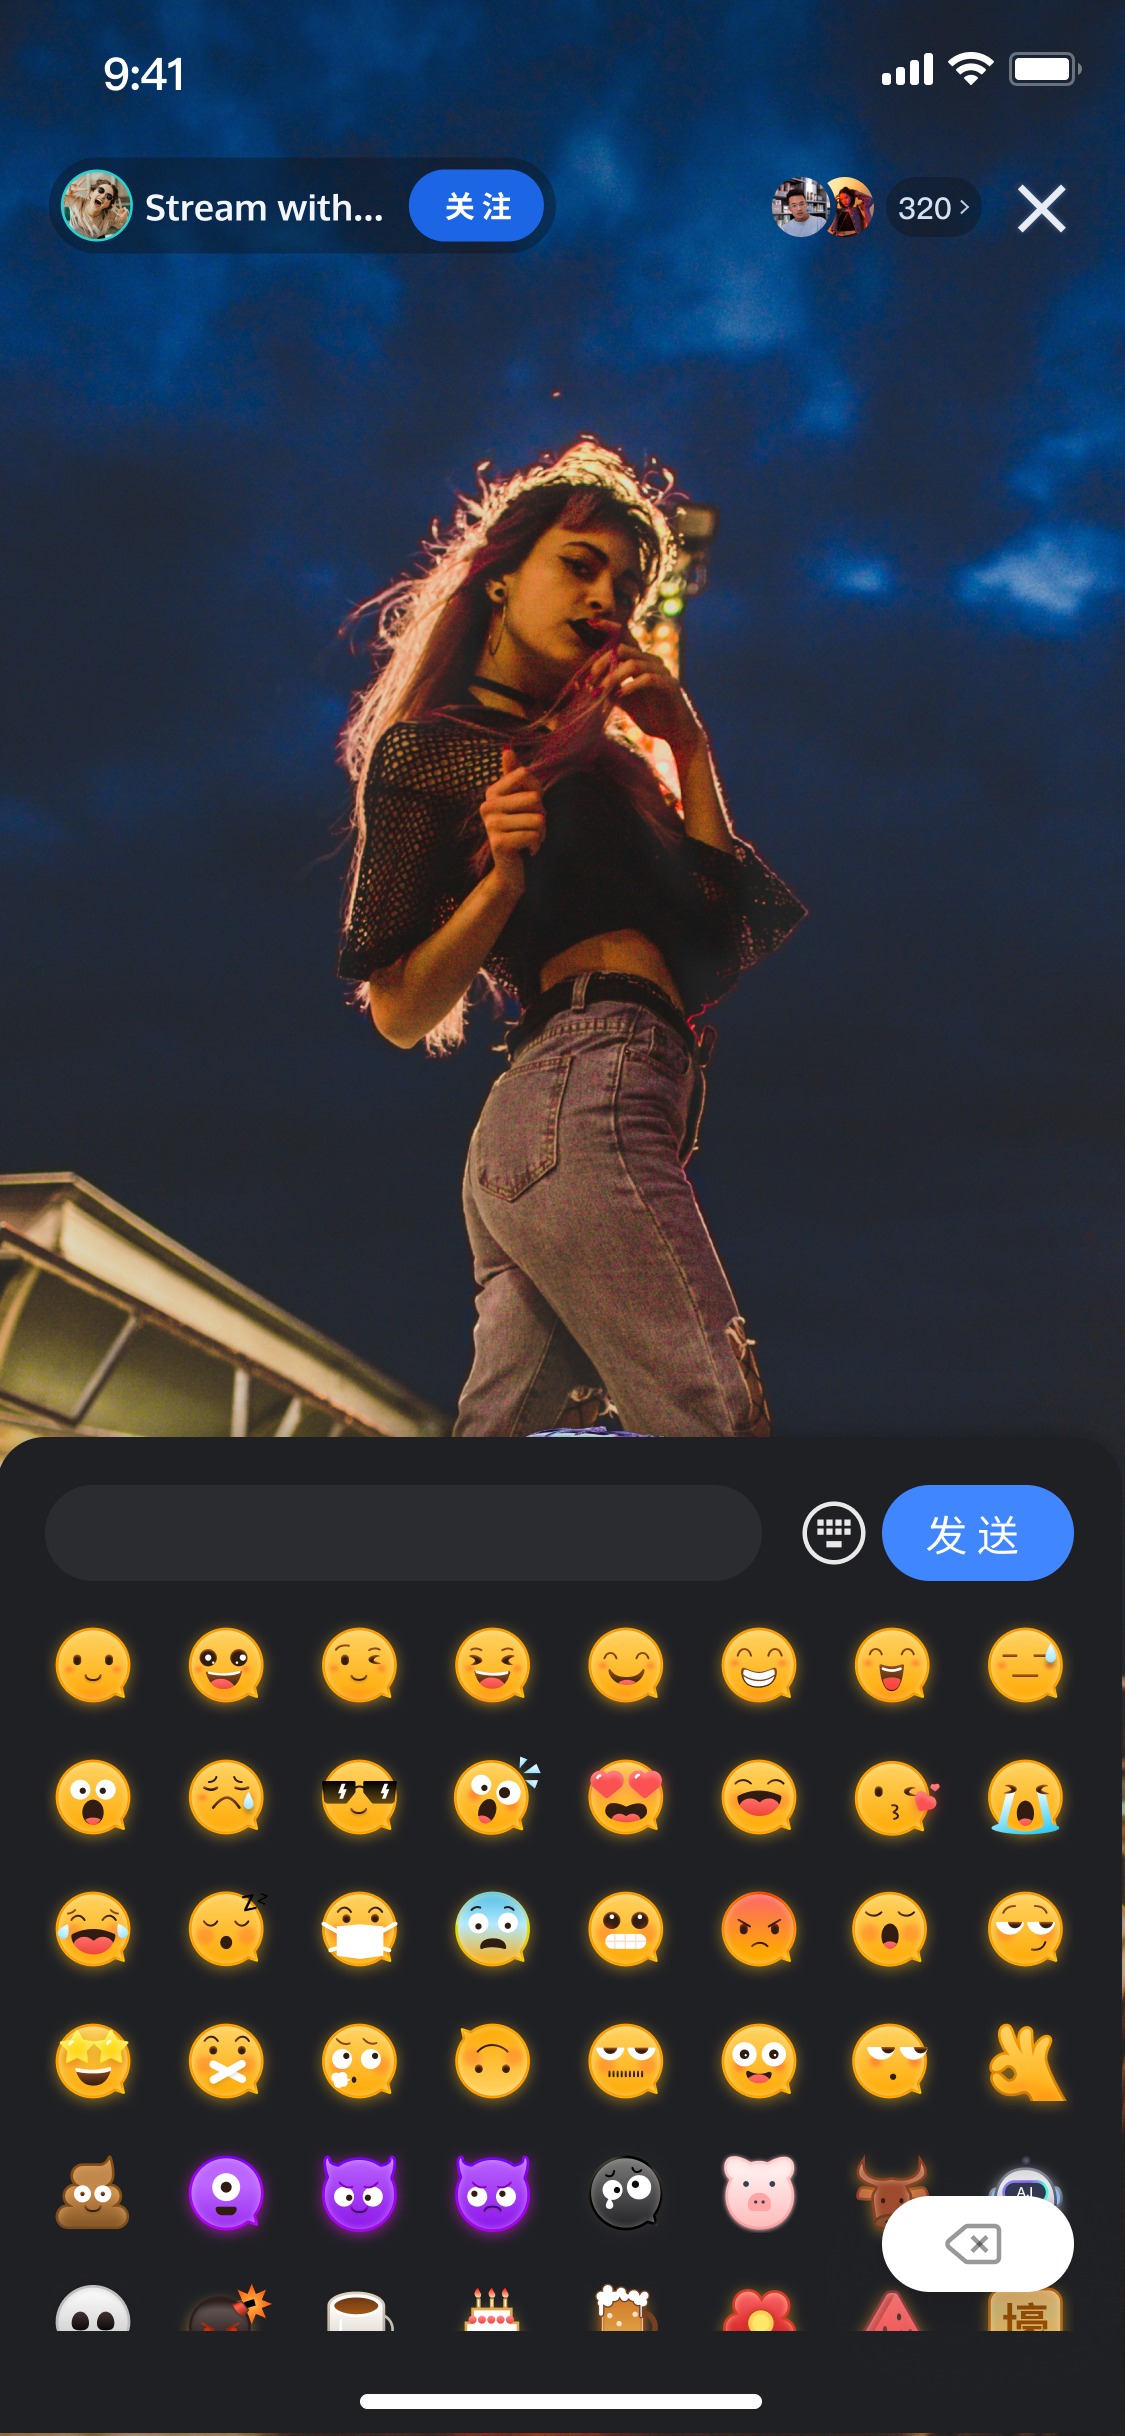 | 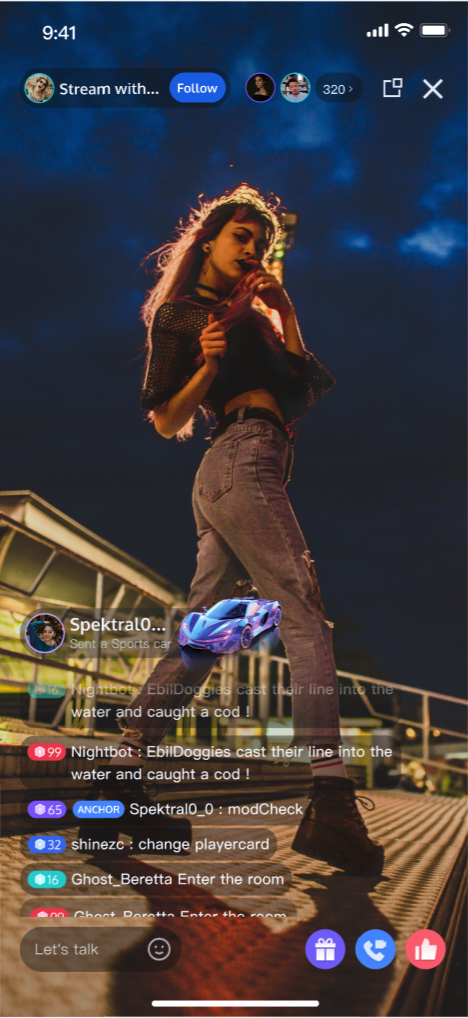 |
Component Structure
Component Name | Description |
Live Comment Display Component (BarrageStreamView) | Handles real-time rendering and management of live comments, offering comprehensive support for message list rendering, time aggregation, user interaction, and adaptive layouts. |
Live Comment Sending Component (BarrageInputView) | Provides an input interface with rich text editing and message sending features, including emoji picker, character limit, and state management for a seamless input experience. |
Quick Start
Step 1. Activate the Service
Step 2. Code Integration
Step 3: Integrate the Live Comment Sending Component
Add the live comment sending component to your application so hosts and audiences can send live comments. Use the example below to create a
BarrageInputView and add it to your view:// 1. Create BarrageInputView objectval barrageInputView = BarrageInputView(context)// 2. Initialize BarrageInputView; liveId is the room ID of the current live streambarrageInputView.init("your liveId")// 3. Add BarrageInputView to your viewyourBarrageInputContainerView.addView(barrageInputView)
Note:
1. The live comment sending component allows switching between the system keyboard and an emoji keyboard.
2. To comply with emoji design copyrights,
TUILiveKit does not include full emoji asset packs. Before launching commercially, replace the default emojis with your own designs or packs you have rights to use. The default yellow face emoji pack shown below is owned by TRTC and available for commercial licensing. For authorization, submit a ticket to contact us.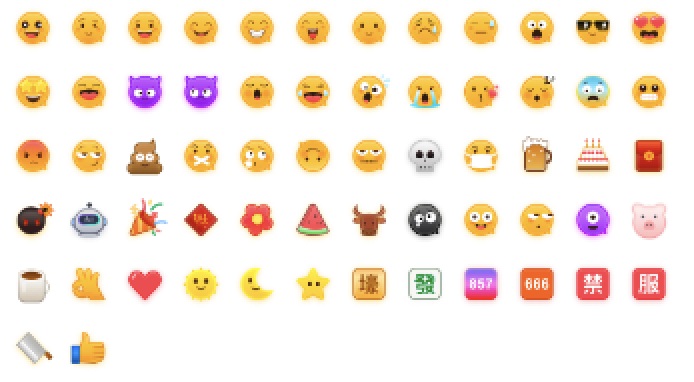
Step 4: Integrate the Live Comment Display Component
Add the live comment display component to your application so hosts and audiences can view the list of sent comments. Use the sample code below to create a
BarrageStreamView and add it to your view:// 1. Create BarrageStreamView objectval barrageStreamView = BarrageStreamView(context)// 2. Initialize BarrageStreamView; liveId is the current live stream's room ID, ownerId is the host's userId, used to distinguish display effects between host and audiencebarrageStreamView.init("your liveId", "your ownerId")// 3. Add BarrageStreamView to your viewyourBarrageContainerView.addView(barrageStreamView)
Step 5:Inserting Local Live Comment Messages
BarrageStreamView supports inserting messages that are visible only on the local client, typically for system notifications, welcome messages, or operation feedback. Use the following code to insert and display a text message locally:Note:
This must be done after successfully entering the room.
import io.trtc.tuikit.atomicxcore.api.barrage.Barrage// 1. Create Barrage objectval barrage = Barrage()// 2. Set Barrage message content; customize your message as neededbarrage.textContent = "your barrage context"barrage.sender.userID = "your sender userId"barrage.sender.userName = "your sender userName"barrage.sender.avatarURL = "your sender avatarURL"// 3. Insert the created live comment message into the local display componentbarrageStreamView.insertBarrages(barrage)
Customizing Live Comment Message Styles
The
TUILiveKit live comment system offers flexible style customization. You can control display effects based on business tags attached to each message. This section covers two scenarios: modifying default live comment styles and customizing styles for locally inserted messages.Scenario 1: Modifying Default Live Comment Styles
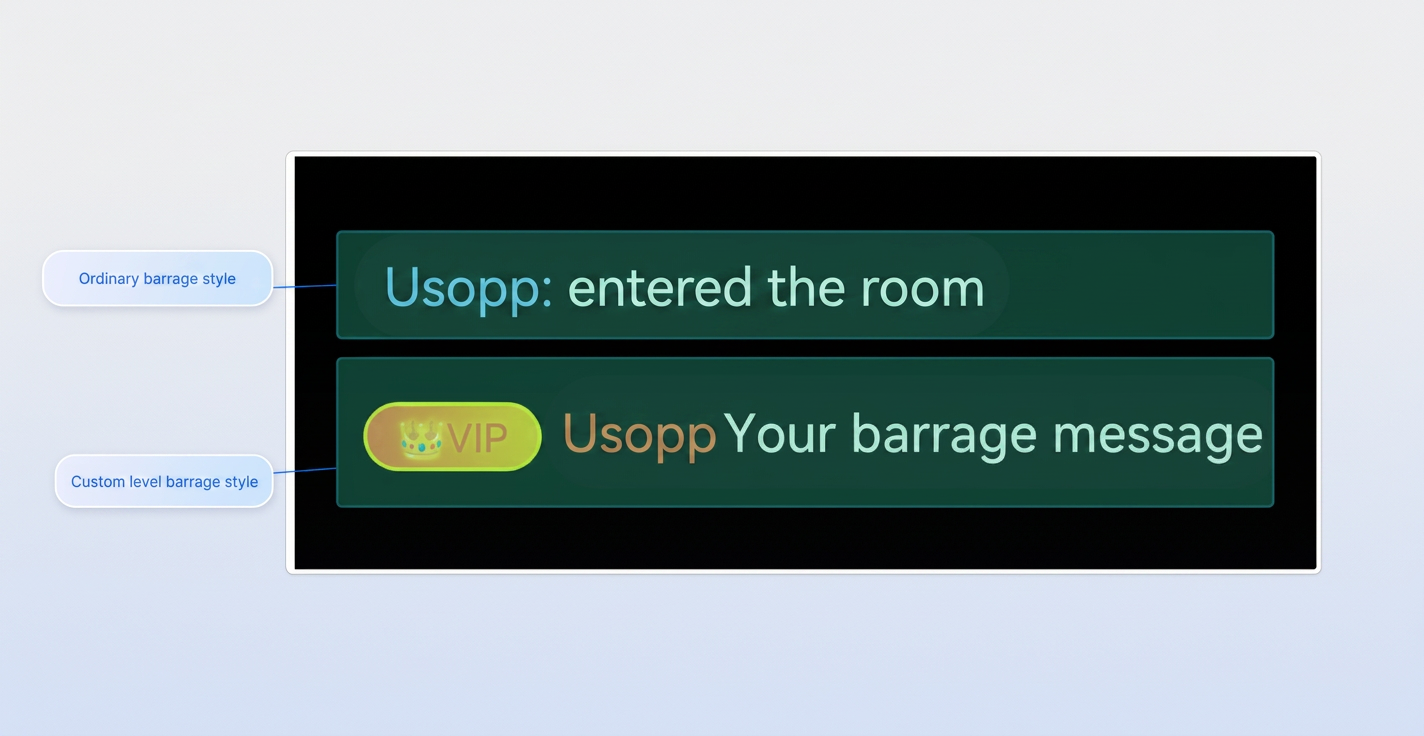
To change the default UI for text or gift live comments, override the built-in adapters directly.
Sample Effect
Implementation Steps
1. Implement a UI Adapter
Create a class implementing
BarrageItemAdapter and define your custom layout and data binding logic.class YourBarrageAdapter(private val context: Context) : BarrageItemAdapter {override fun onCreateViewHolder(parent: ViewGroup): RecyclerView.ViewHolder {// Customize UI view for your business requirementsval view = LayoutInflater.from(parent.context).inflate(R.layout.item_barrage_your_custom, parent, false)return YourViewHolder(view)}override fun onBindViewHolder(holder: RecyclerView.ViewHolder, position: Int, barrage: Barrage) {(holder as? YourViewHolder)?.bind(barrage)}private inner class YourViewHolder(view: View) :RecyclerView.ViewHolder(view) {fun bind(barrage: Barrage) {// Bind data}}}
2. Register and Override Default Styles
Register adapters after initializing
BarrageStreamView. TUILiveKit defines built-in types: type 0 for regular text messages, type 1 for gift messages.// Override default text live comment (type 0)barrageStreamView.setItemAdapter(0, YourBarrageAdapter())// Override default gift live comment (type 1)barrageStreamView.setItemAdapter(1, YourGiftBarrageAdapter())
Scenario 2: Customizing Styles for Locally Inserted Live Comment Messages
For live comments triggered by your business logic (e.g., system welcome messages, operation feedback) and displayed only locally, style customization is achieved by defining and recognizing tags.
Implementation Steps
1. Define Live Comment Identifier
Before inserting a message, add a custom business identifier to the live comment object (for example,
type = "system_notice").import io.trtc.tuikit.atomicxcore.api.barrage.Barrageprivate fun insertSystemWelcome() {val barrage = Barrage()barrage.textContent = "Welcome to the live room. Please communicate respectfully."// Set a business identifier for UI recognitionval extInfo = HashMap<String, String>()extInfo["type"] = "system_notice"barrage.extensionInfo = extInfo// Insert directly via UI component interface; no remote sending involvedbarrageStreamView.insertBarrages(barrage)}
2. Define Live Comment Recognition Logic
Implement the
BarrageItemTypeDelegate interface to return a custom style ID based on the tag (e.g., type 100 as your custom style ID).class YourBarrageTypeDelegate : BarrageItemTypeDelegate {override fun getItemType(position: Int, barrage: Barrage): Int {val type = barrage.extensionInfo?.get("type")return when (type) {"system_notice" -> 100 // Custom style IDelse -> 0 // Default to regular text live comment}}}
3. Implement and Register Custom Adapter
Create
YourSystemNoticeAdapter to render messages with ItemType 100.// 1. Define adapterclass YourSystemNoticeAdapter : BarrageItemAdapter {override fun onCreateViewHolder(parent: ViewGroup): RecyclerView.ViewHolder {val view = LayoutInflater.from(parent.context).inflate(R.layout.item_barrage_system_notice, parent, false)return SystemNoticeViewHolder(view)}override fun onBindViewHolder(holder: RecyclerView.ViewHolder, position: Int, barrage: Barrage) {(holder as? SystemNoticeViewHolder)?.bind(barrage)}private inner class SystemNoticeViewHolder(itemView: View) : RecyclerView.ViewHolder(itemView) {fun bind(barrage: Barrage) {// Render custom view logic}}}// 2. Bind to componentbarrageStreamView.setItemTypeDelegate(YourBarrageTypeDelegate())barrageStreamView.setItemAdapter(100, YourSystemNoticeAdapter())
FAQs
How do I distinguish between host and audience in custom live comment messages?
To customize live comment styles based on the sender, use the
sender.userID field in the Barrage message to check whether the sender is the host. Adjust your display logic accordingly.Why is my custom style live comment not displaying?
If your custom style is not appearing as expected, troubleshoot as follows:
Step 1: Registration check. Make sure you've called both
setItemTypeDelegate and setItemAdapter after initializing BarrageStreamView.Step 2: Type ID match. Confirm that the integer returned by
getItemType matches the ID registered with the adapter.Step 3: Data source check. Ensure the sender includes the identifier for type recognition in
extensionInfo.
