
Green Screen Keying V2 Instructions
Feature Overview
Green Screen Keying V2 supports users to adjust similarity, smoothness, edge elimination strength, grayscale ratio, and shadow removal—five parameters in total. The parameter meanings are as follows:
Similarity: Controls the strength of green screen keying (default value 30, adjustable range 0-100).
Smoothness: Controls the smoothness of the transition area between the foreground and background in green screen scenarios (default value 20, adjustable range 1-100).
Edge elimination strength: Used to optimize potential jagged edges or green edges in the edge region after keying (default value 1, adjustable range [0,1,2,3]).
Grayscale ratio: Used to optimize potential green edges or green overflow in certain regions after keying (default value 30, adjustable range 0-100).
Shadow removal: Used to optimize the cutout effect caused by shadow areas in the curtain (default value 1, adjustable range [0,1,2,3,4,5]).
Parameter Adjustment Effect Comparison
Similarity: The larger the similarity, the stronger the green screen keying. If the green screen area is not cleanly removed, increase appropriately. If obvious miskeying occurs in the foreground, decrease appropriately.
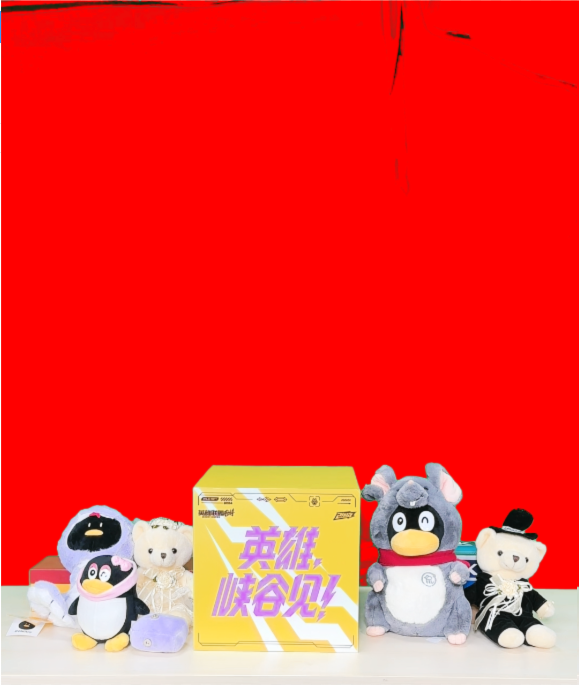
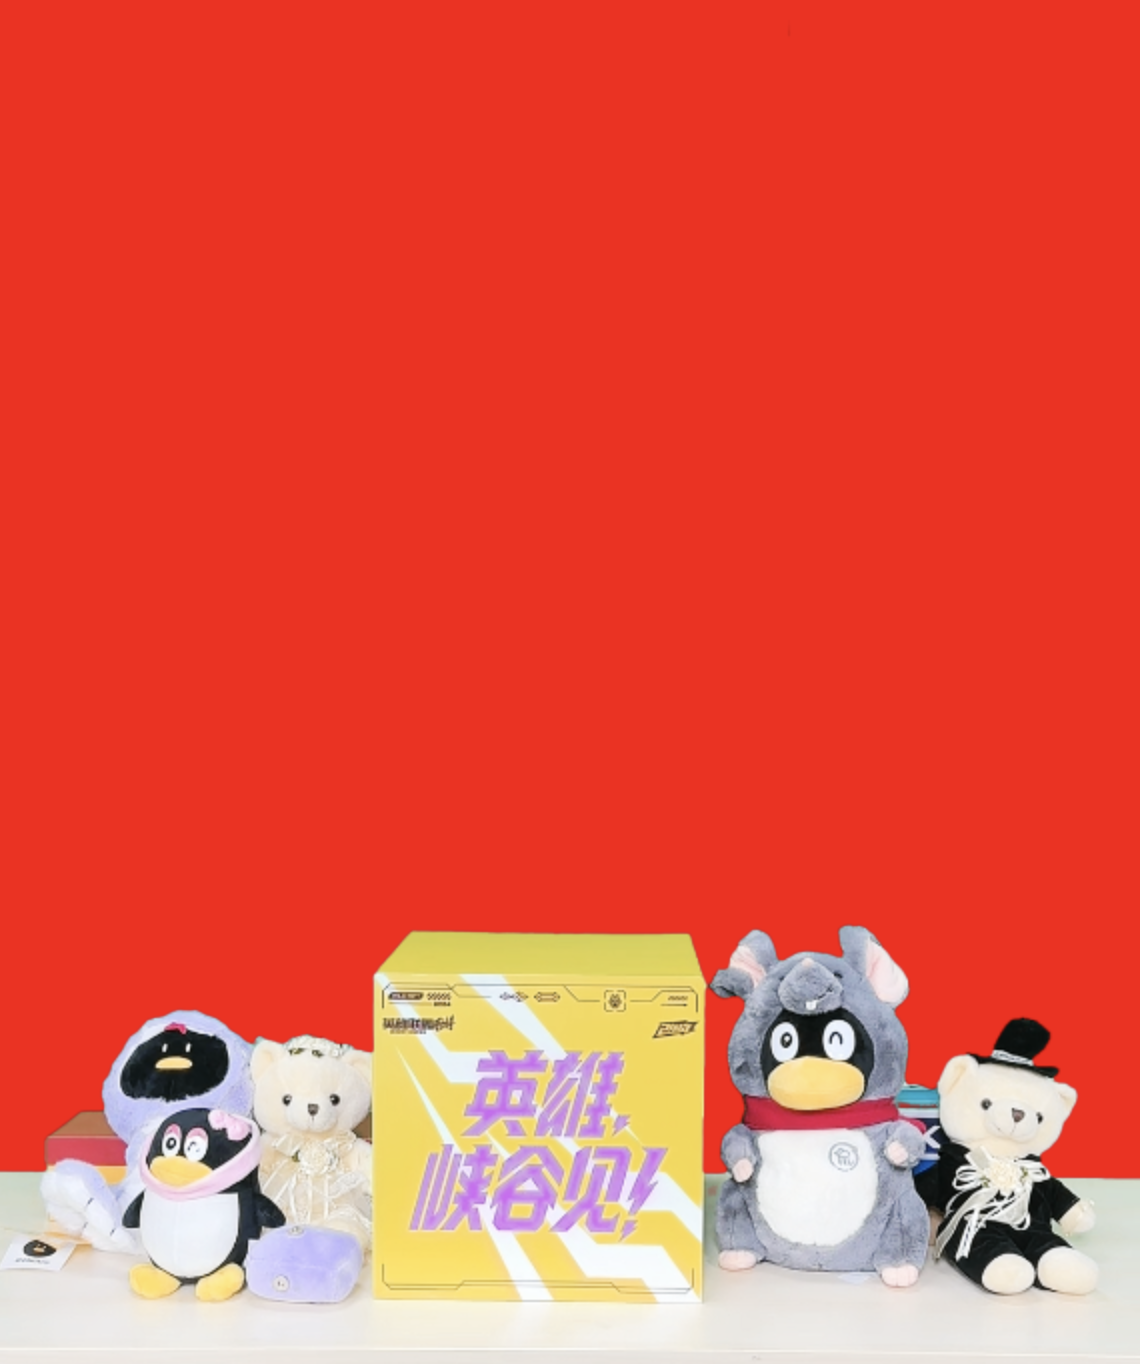
Input Image | Similarity: 10 | Similarity: 30 (Default Value) | Similarity 50 |
 |  |  |  |
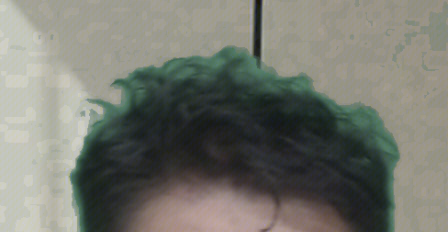
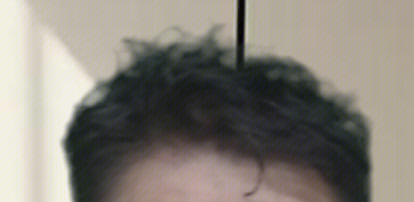
Smoothness: Lower smoothness makes the transition area between the foreground and background more obvious. Higher smoothness makes the transition area smoother.
Note:
The figure below shows the edge region of hair as the transition area between the foreground and background. When smoothness is low, segmentation traces are distinct, with green hair showing clearly. When smoothness is increased, the transition area becomes smoother, segmentation traces weaken, and green showing is reduced.
Smoothness: 5 | Smoothness: 20 (Default Value) | Smoothness: 40 |
 |  |  |
Edge elimination strength: The larger the edge elimination strength, the more the edge region is removed. When black borders, green edges, jagged edges, or other issues appear around portraits or items, try increasing it.
Edge Elimination Strength: 1 (Default Value) | Edge Elimination Strength: 2 | Edge Elimination Strength: 3 |
 |  |  |
Grayscale ratio: When green overflow occurs in certain regions or green edges appear at the edges, try increasing it.
Grayscale Ratio: 10 | Grayscale Ratio: 30 (Default Value) | Grayscale Ratio: 50 |
 |  |  |
Shadow Removal: Try increasing when shadow areas exist on the green screen and the cutout effect is poor.
Input Image | Shadow Removal: 0 | Shadow Removal: 1 (Default Value) | Shadow Removal: 3 |
 |  |  |  |
FAQ
How to address the issue of incomplete removal in the curtain area?
If there are areas on the curtain that remain unremoved after matting, it indicates that the current algorithm's matting is not sufficiently strong. You can achieve better results by appropriately increasing the similarity.
Example: When the similarity is increased from 15 to 30, you can see that the areas on the green screen that were not fully removed have been completely matted. As shown below:
Input Image | similarity:15 | similarity:30 |
 |  |  |
How to handle the issue of incorrect matting in the foreground area?
If the foreground area shows incorrect matting, such as the foreground appearing faded or the background image showing through the foreground area, it indicates that the current algorithm's matting is too strong. You can achieve better results by appropriately reducing the similarity.
Example: When the similarity is reduced from 50 to 30, the issue of incorrect matting is significantly alleviated. As shown below:
Input Image | similarity:50 | similarity: 30 |
 |  |  |
How to improve edge details?
If the edge details of the original image (such as hair) are not well preserved after matting and you wish to reveal more details, you can achieve better results by first lowering the similarity and then increasing the smoothness.
Example: With the parameters set at a similarity of 30 and a smoothness level of 10, few hair details of the portrait are revealed, resulting in poor effect. You can:
Step 1: Lower the similarity from 30 to 15, which allows more hair details to show through, but will also reveal areas of the green screen.
Step 2: Increase the smoothness from 10 to 35, which retains the hair details while removing the excess green screen areas.
Input Image | similarity:30 Smoothness::10 (poor edge details) | similarity:15 Smoothness::10 (Step 1: Lower the similarity to reveal more details) | similarity:15 Smoothness::35 (Step 2: Increase the smoothness to achieve a better matting effect) |
 |  |  |  |
How to deal with color spill?
When there is color spill around areas such as the desktop or the edges of a person, you can achieve better results by increasing the grayscale ratio. Example: As the grayscale ratio is gradually increased from 10 to 50, the green spill on the desktop is significantly reduced. As shown below:
Grayscale Ratio: 10 | Grayscale Ratio:30 | Grayscale Ratio:50 |
 |  |  |
How to handle issues like jagged edges and black borders?
When there are problems such as jagged edges or black borders in the edge areas after matting, you can achieve better results by increasing the edge elimination strength.
Example: After increasing the edge elimination strength from 1 to 3, the black border on the foreground object's edge is completely eliminated. As shown below:
Edge Elimination Strength:1 | Edge Elimination Strength:2 | Edge Elimination Strength:3 |
 |  |  |

