TUILiveKit is a comprehensive live-streaming component. Once integrated, it allows you to quickly implement the following key functional modules for your Android application:
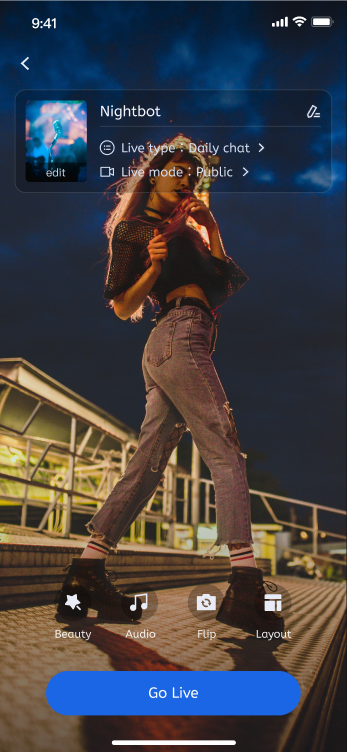
Host Prepare Page
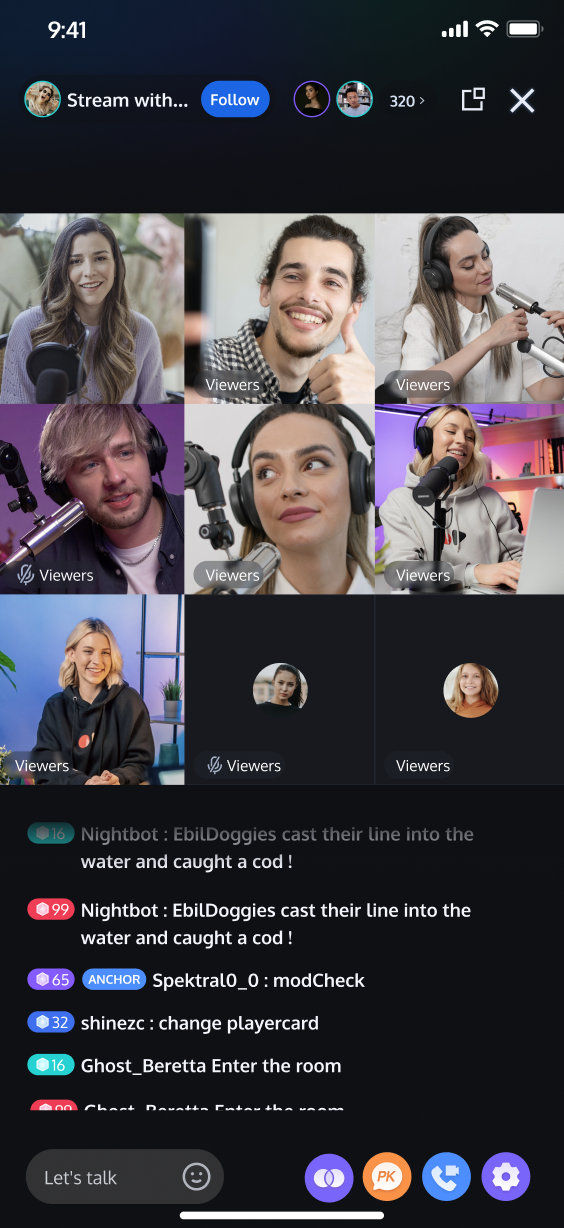
Host Streaming Page
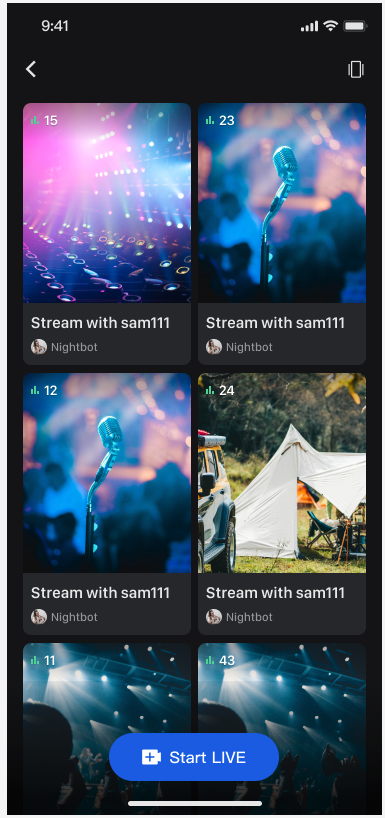
Live Stream List
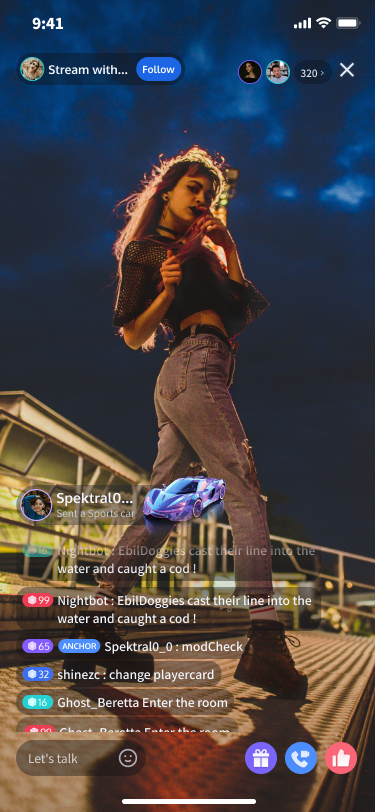
Audience Viewing Page
Preparations
Activate Service
Before using TUILiveKit, please refer to Activate Service to get the TUILiveKit trial version or activate the paid version.
Environment Requirements
AndroidStudio Arctic Fox (2020.3.1) or a later version.
Gradle 7.0 or a later version.
Android5.0 or a later version.
Code Integration
Step 1. Download the TUILiveKit Component
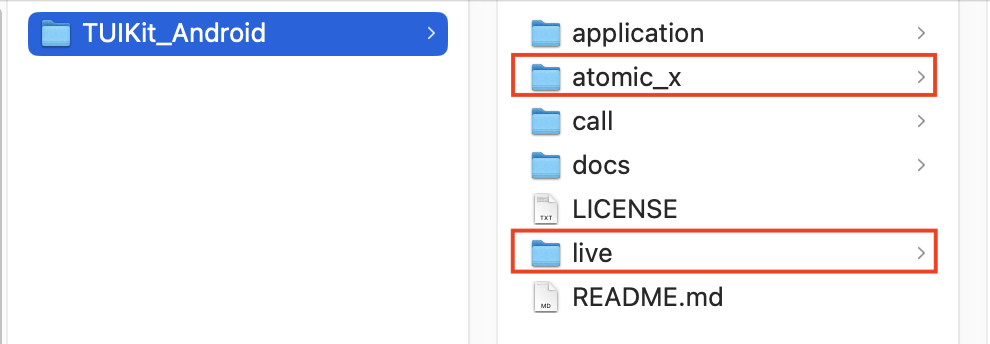
Clone or download the code from GitHub. Then, copy the live and atomic_x subdirectory into the same directory as your current Android project's app folder.
Step 2. Project Configuration
1. Configure the JitPack Repository
In your project's root directory, open the settings.gradle.kts or settings.gradle file and add the JitPack repository address. The third-party library for playing gift SVG animations is hosted on JitPack, so you must include this repository to resolve dependencies.
In your project's root directory, add the following line to the settings.gradle.kts or settings.gradle file to import the TUILiveKit component (as a module).
Navigate to the app directory and find the build.gradle.kts or build.gradle file. Add the following dependency to declare that your app module relies on the newly added TUILiveKit component module.
build.gradle.kts
build.gradle
dependencies {
// Add tuilivekit dependency
api(project(":tuilivekit"))
}
dependencies {
// Add tuilivekit dependency
api project(':tuilivekit')
}
Note:
TUILiveKit has default dependencies on public libraries like the TRTC SDK and IM SDK, so you do not need to configure them separately.
4. Configure Proguard Rules
Since the SDK uses Java reflection internally, you must add the following rules to the proguard-rules.pro file. This prevents the relevant classes from being obfuscated, ensuring proper function.
-keep class com.tencent.**{*;}
-keep class com.tencent.beacon.**{*;}
-keep class com.tencent.cloud.iai.lib.**{*;}
-keep class com.tencent.qimei.**{*;}
-keep class com.tencent.xmagic.**{*;}
-keep class com.trtc.uikit.livekit.component.gift.store.model.**{*;}
-keep class com.trtc.uikit.livekit.livestreamcore.**{*;}
# Obfuscation rules for playing gifts SVG animation
-keep class com.opensource.svgaplayer.proto.**{*;}
-keep class com.squareup.wire.**{*;}
5. Modify AndroidManifest.xml
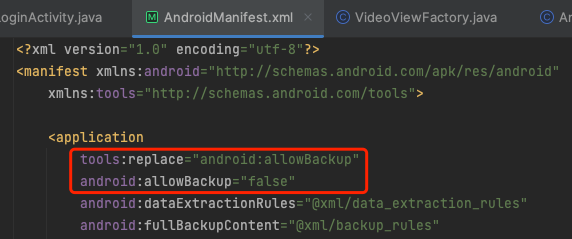
To prevent conflicts during the AndroidManifest merge process, you must add tools:replace="android:allowBackup" and android:allowBackup="false" to the <application> node in your app/src/main/AndroidManifest.xml file. This overrides the settings within the component and disables the backup feature.
<application
...
// Add the following configuration to override the settings in the dependent SDK
android:allowBackup="false"
tools:replace="android:allowBackup">
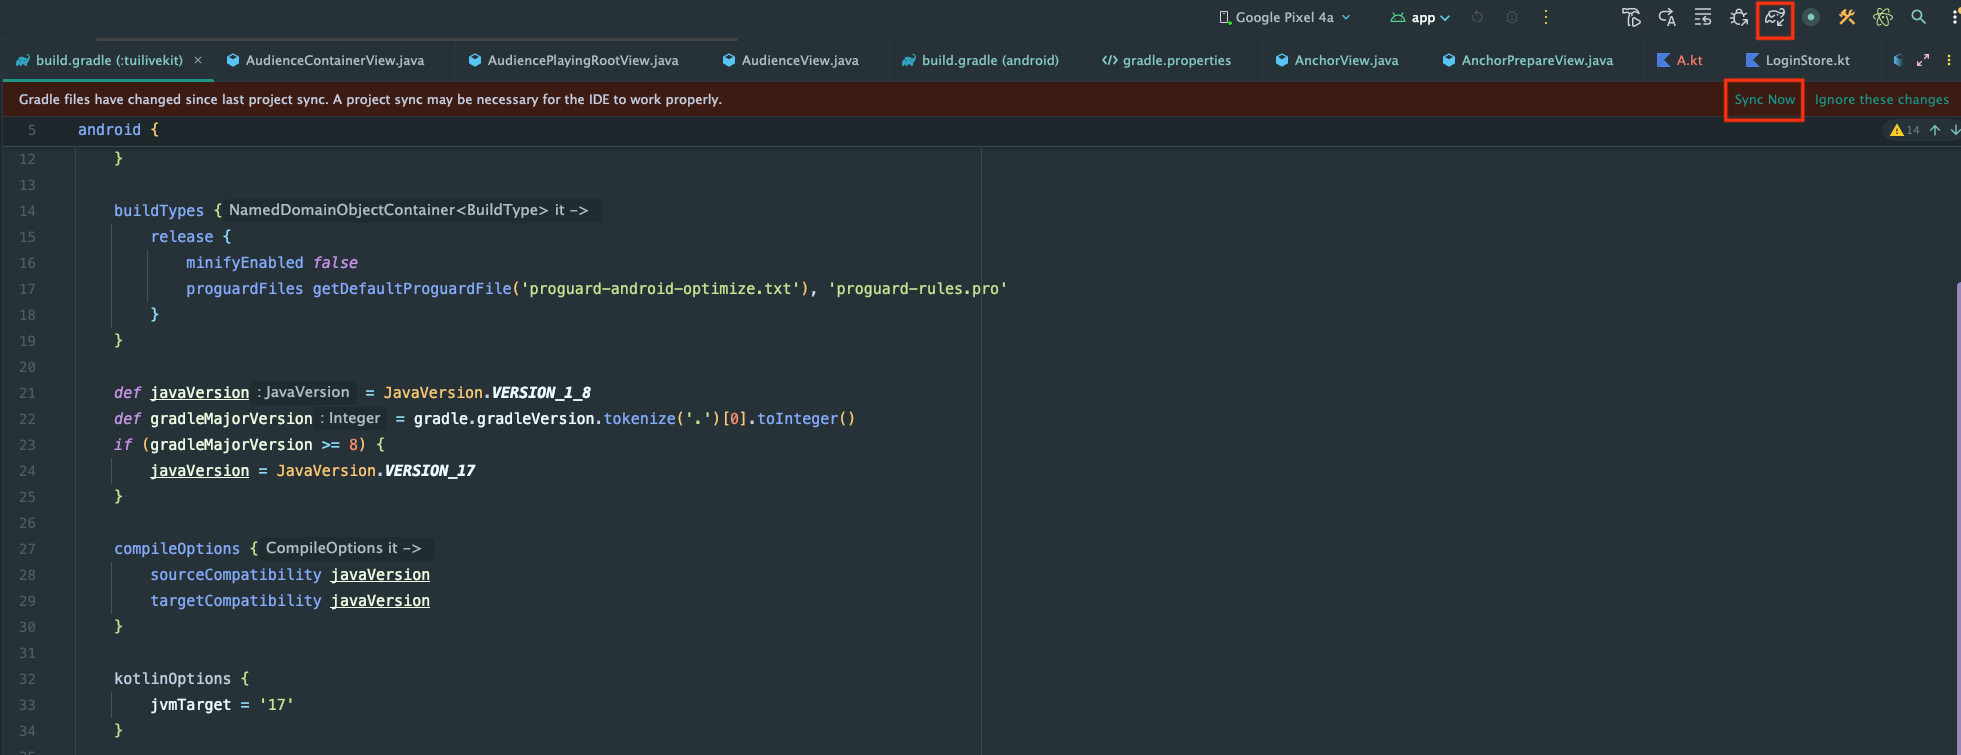
6. Complete Project Sync
After completing the steps above, Android Studio will typically prompt you with a Sync Now button. Click this button to complete the project synchronization. If the IDE doesn't prompt you automatically, manually click the sync button in the toolbar. Once synchronized, the IDE will finish project configuration and indexing, allowing you to use the TUILiveKit component in your project.
Complete Login
After code integration, the next step is to complete the login. All TUILiveKit features require a successful login to function properly, so ensure your parameters are configured correctly.
Note:
In the example code, the login API is called directly. However, in a real-world application, it is highly recommended that you call the TUILiveKit login service only after your own user authentication and other internal login processes are complete. This prevents potential business logic confusion or data inconsistency caused by calling the login service too early, and it better aligns with your existing user management system.
The unique ID for the current user. Must contain only English letters, numbers, hyphens, and underscores.
userSig
String
A ticket for Tencent Cloud authentication. Please note:
Development Environment: You can use the local GenerateTestUserSig.genTestSig function to generate a UserSig or generate a temporary UserSig via the UserSig Generation Tool.
Production Environment: To prevent key leakage, you must use a server-side method to generate UserSig. For details, see Generating UserSig on the Server.
TUILogin provides a login status callback mechanism to help you handle possible login exceptions, mainly including "kicked offline" and "signature expired" callbacks:
Kicked Offline: If a user is kicked offline while online, the SDK will notify you via the onKickedOffline callback. At this point, you can display a UI prompt to the user and call TUILogin.login to login again.
Signature Expired: If a user receives the onUserSigExpired callback while online, it means the userSig previously issued for that user has expired. If the user's login session on your backend is still valid, you can have your app request a new userSig from your backend and call TUILogin.login to renew the login session.
Congratulations! You have successfully integrated the TUILiveKit component and completed the login. You can now implement features such as host streaming, viewer watching, and the live stream list. Please refer to the table below for integration guides:
Feature
Description
Integration Guide
Video Live Streaming
Includes a full suite of features such as host broadcasting, audience viewing, interactive co-hosting, beauty filters, gifts, and bullet chat.
Do I need to call the login API every time I enter a room?
No. You typically only need to call TUILogin.login once. We recommend associating TUILogin.login and TUILogin.logout with your app's own user login and logout business logic.
How do I handle the allowBackup compilation error shown in the figure below after code integration?
Reason: The allowBackup attribute is configured in the AndroidManifest.xml of multiple modules, which causes a conflict during the manifest merge process.
Solution: In your project's AndroidManifest.xml file, you can either delete the allowBackup attribute or change it to false to disable backup and restore functionality. Crucially, add tools:replace="android:allowBackup" to the <application> node to override the settings of other modules with your own configuration. See the example fix:
After code integration, do I still need to explicitly declare camera and microphone permissions?
No, TUILiveKit already has built-in declarations for permissions like the camera and microphone in its manifest file. You do not need to worry about declaring these permissions separately during the integration process.