The package name of this plugin on pub.dev is: tencent_cloud_chat_push. You can add it to the pubspec.yaml dependency directory or execute the following command to install it automatically.
flutter pub addtencent_cloud_chat_push
Step 2: Push Parameter Configuration
iOS
Android
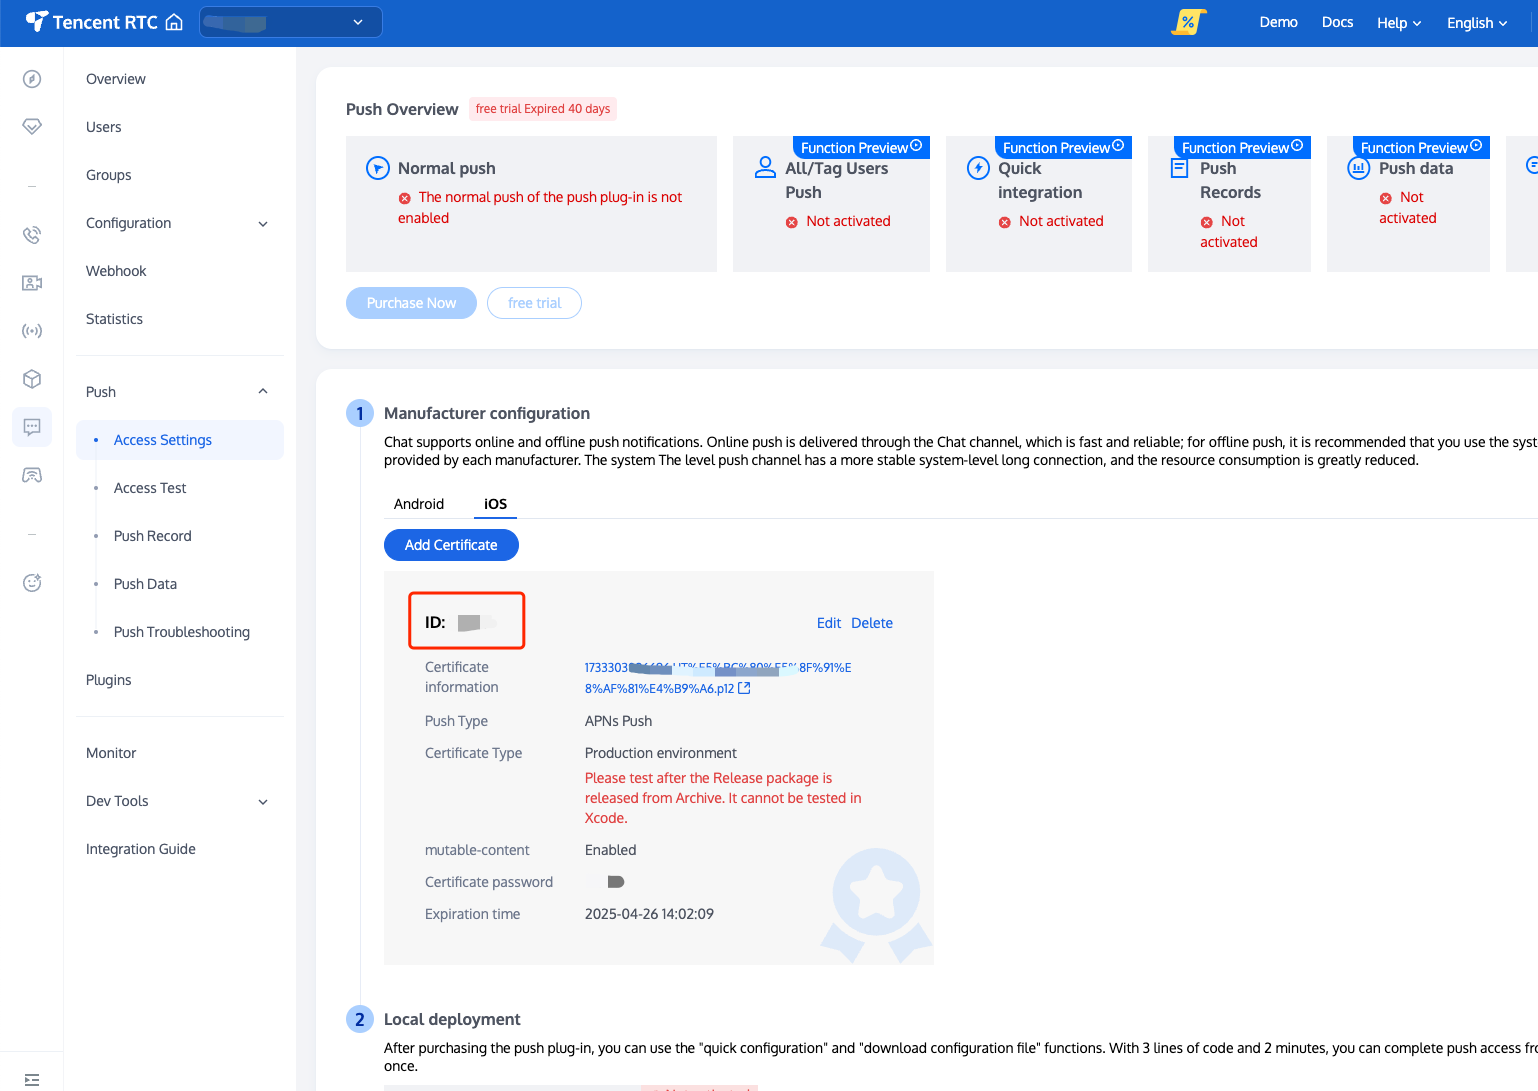
Please upload the iOS APNs Push Certificate obtained in the Manufacturer Configuration step to the Chat Console.
The Chat console will allocate a Certificate ID for you, see the image below:
To register for push notifications, you need to pass in this Certificate ID (apnsCertificateID):
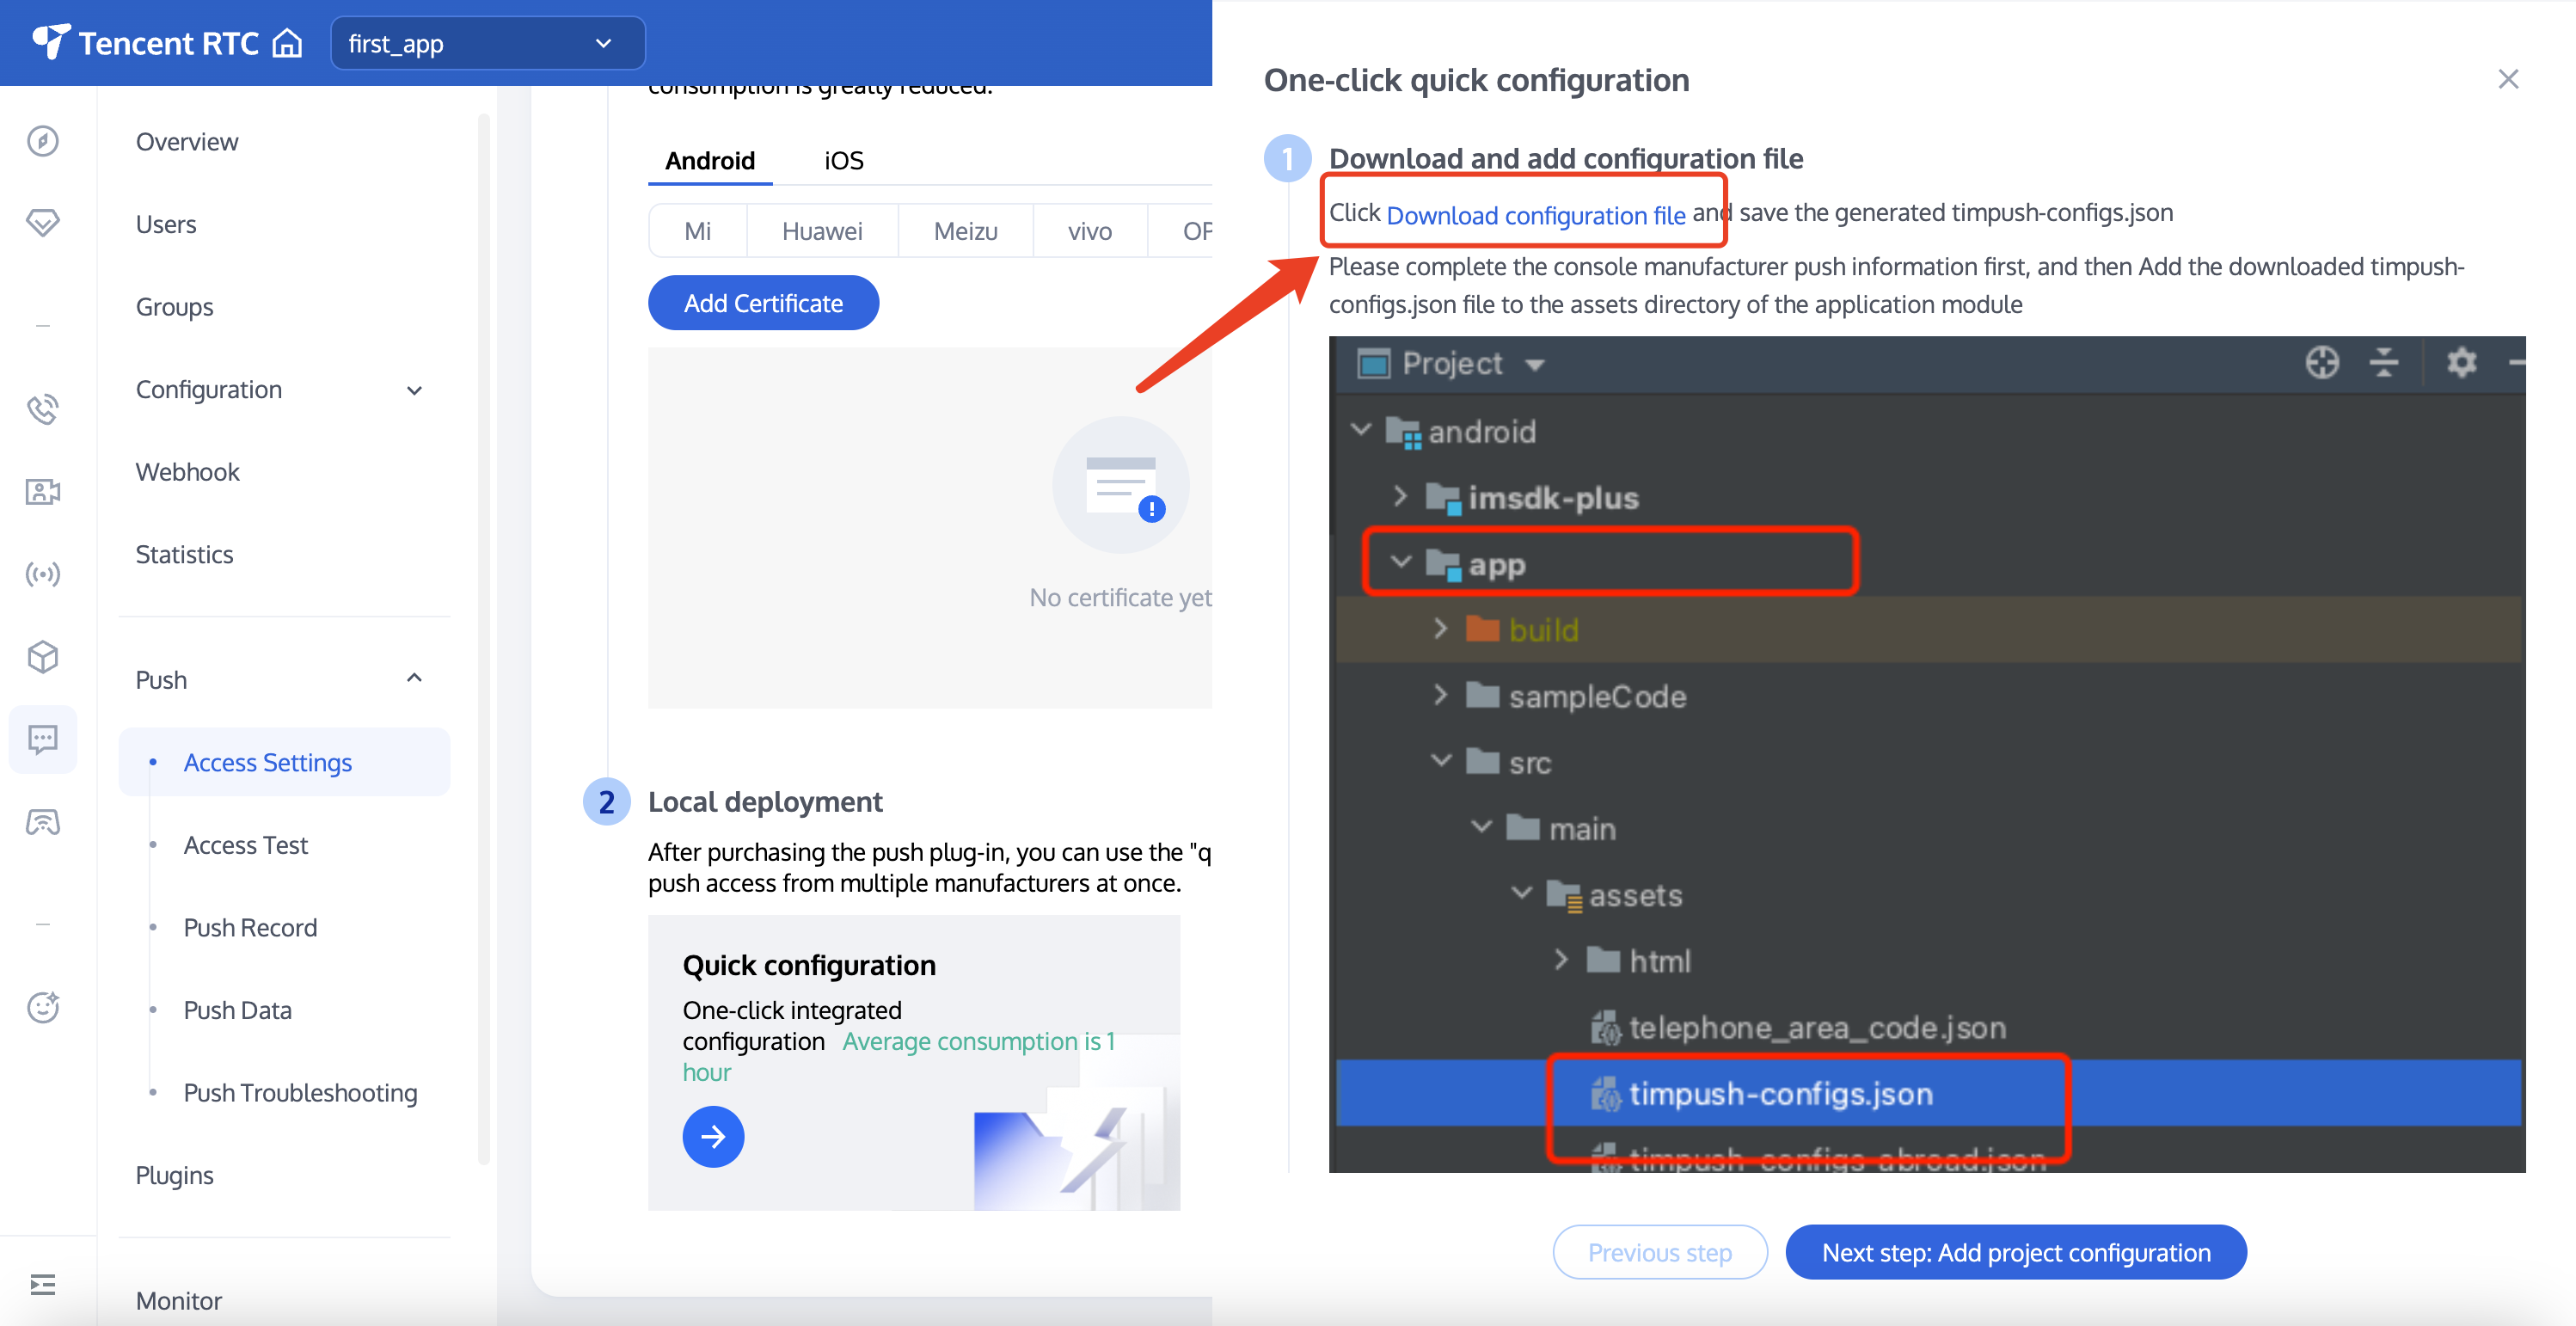
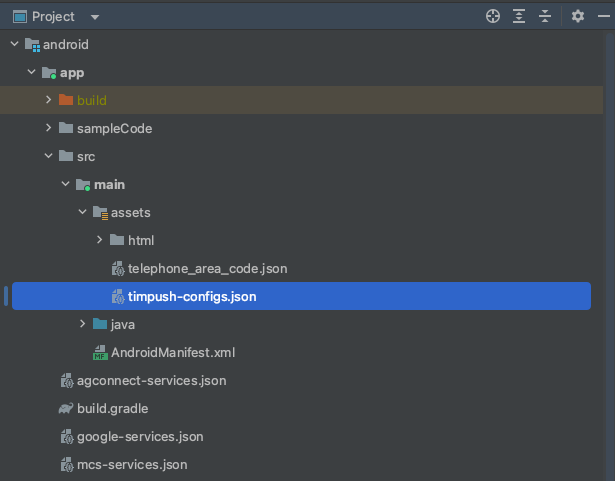
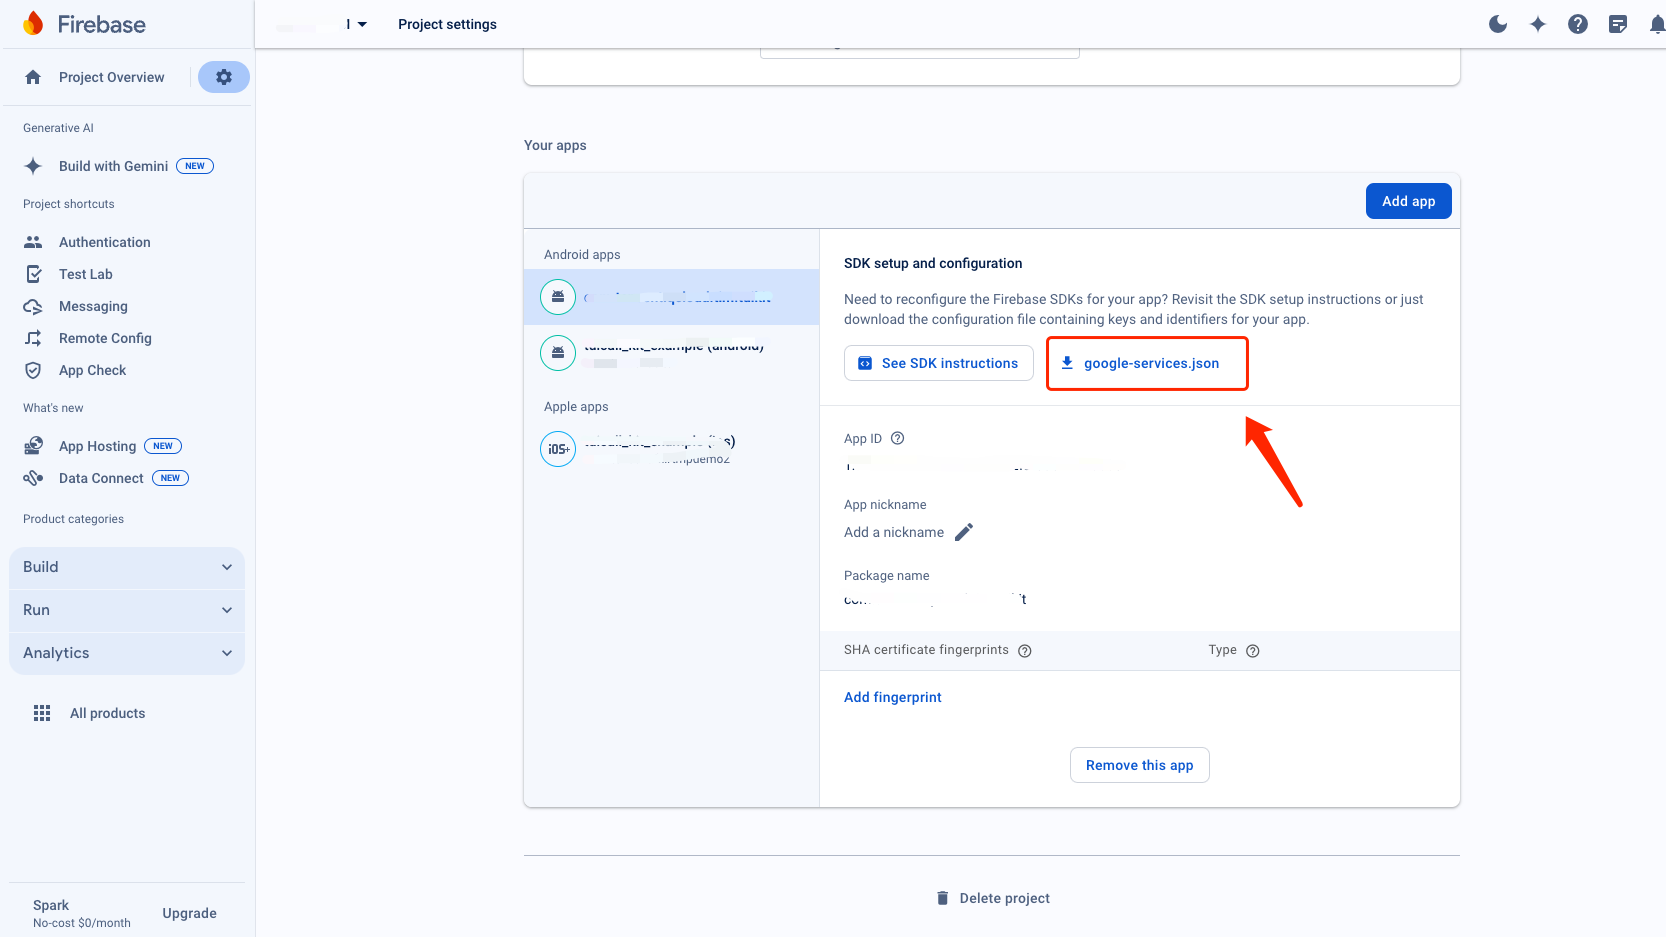
After completing the console manufacturer push information, download and add the configuration file to the project. Add the downloaded timpush-configs.json file to the android/app/src/main/assets directory of the project. If the directory does not exist, please create it manually.
1.Choose to download the configuration file timpush-configs.json
2.Add to the project
Step 3: Client Code Configuration
This step requires writing some native code, such as Swift, Java, XML, etc.
Do not worry, you can directly copy our provided code into the specified file according to the instructions.
iOS
Android
You can edit using Xcode, or directly in Visual Studio Code or Android Studio.
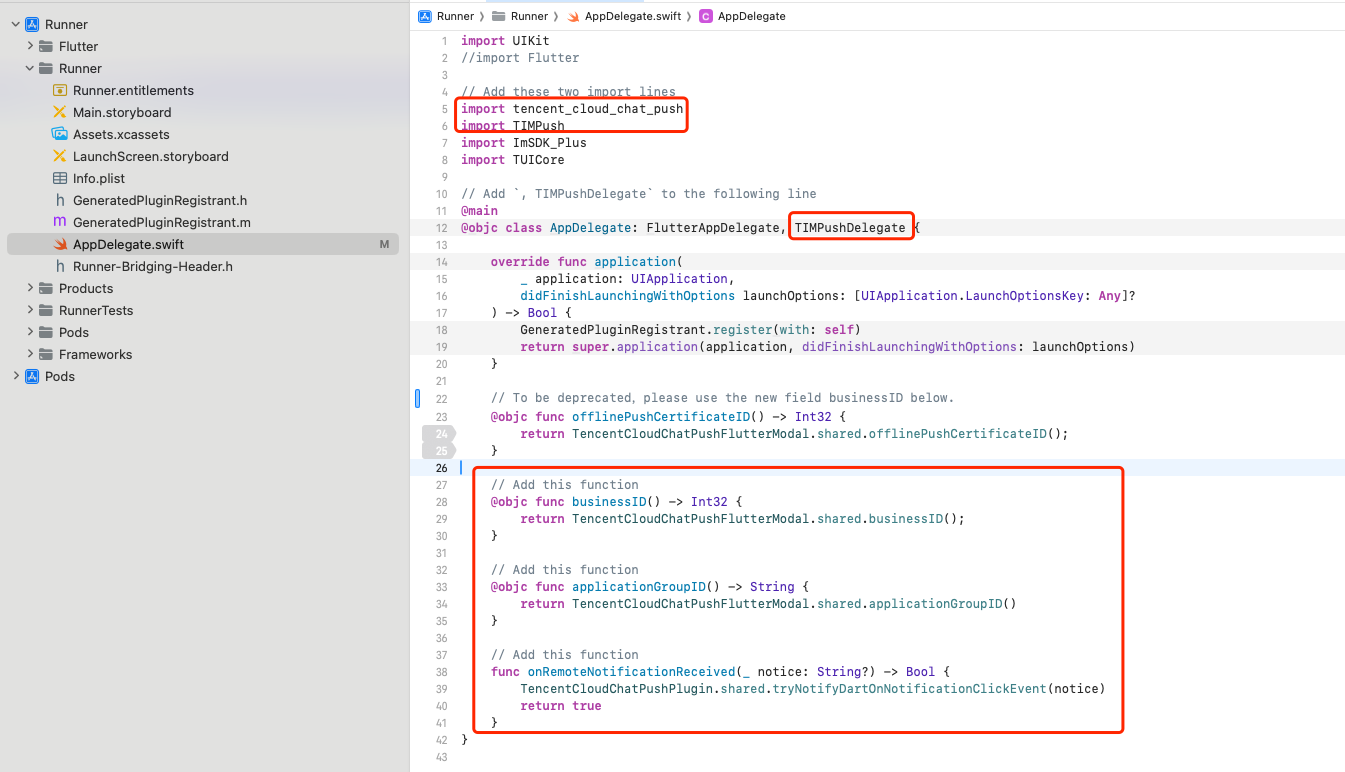
Open the ios/Runner/AppDelegate.swift file and paste the circled code below into it. The effect is shown in the picture. The code is attached after the picture.
It is recommended to use Android Studio to complete this part of the editing.
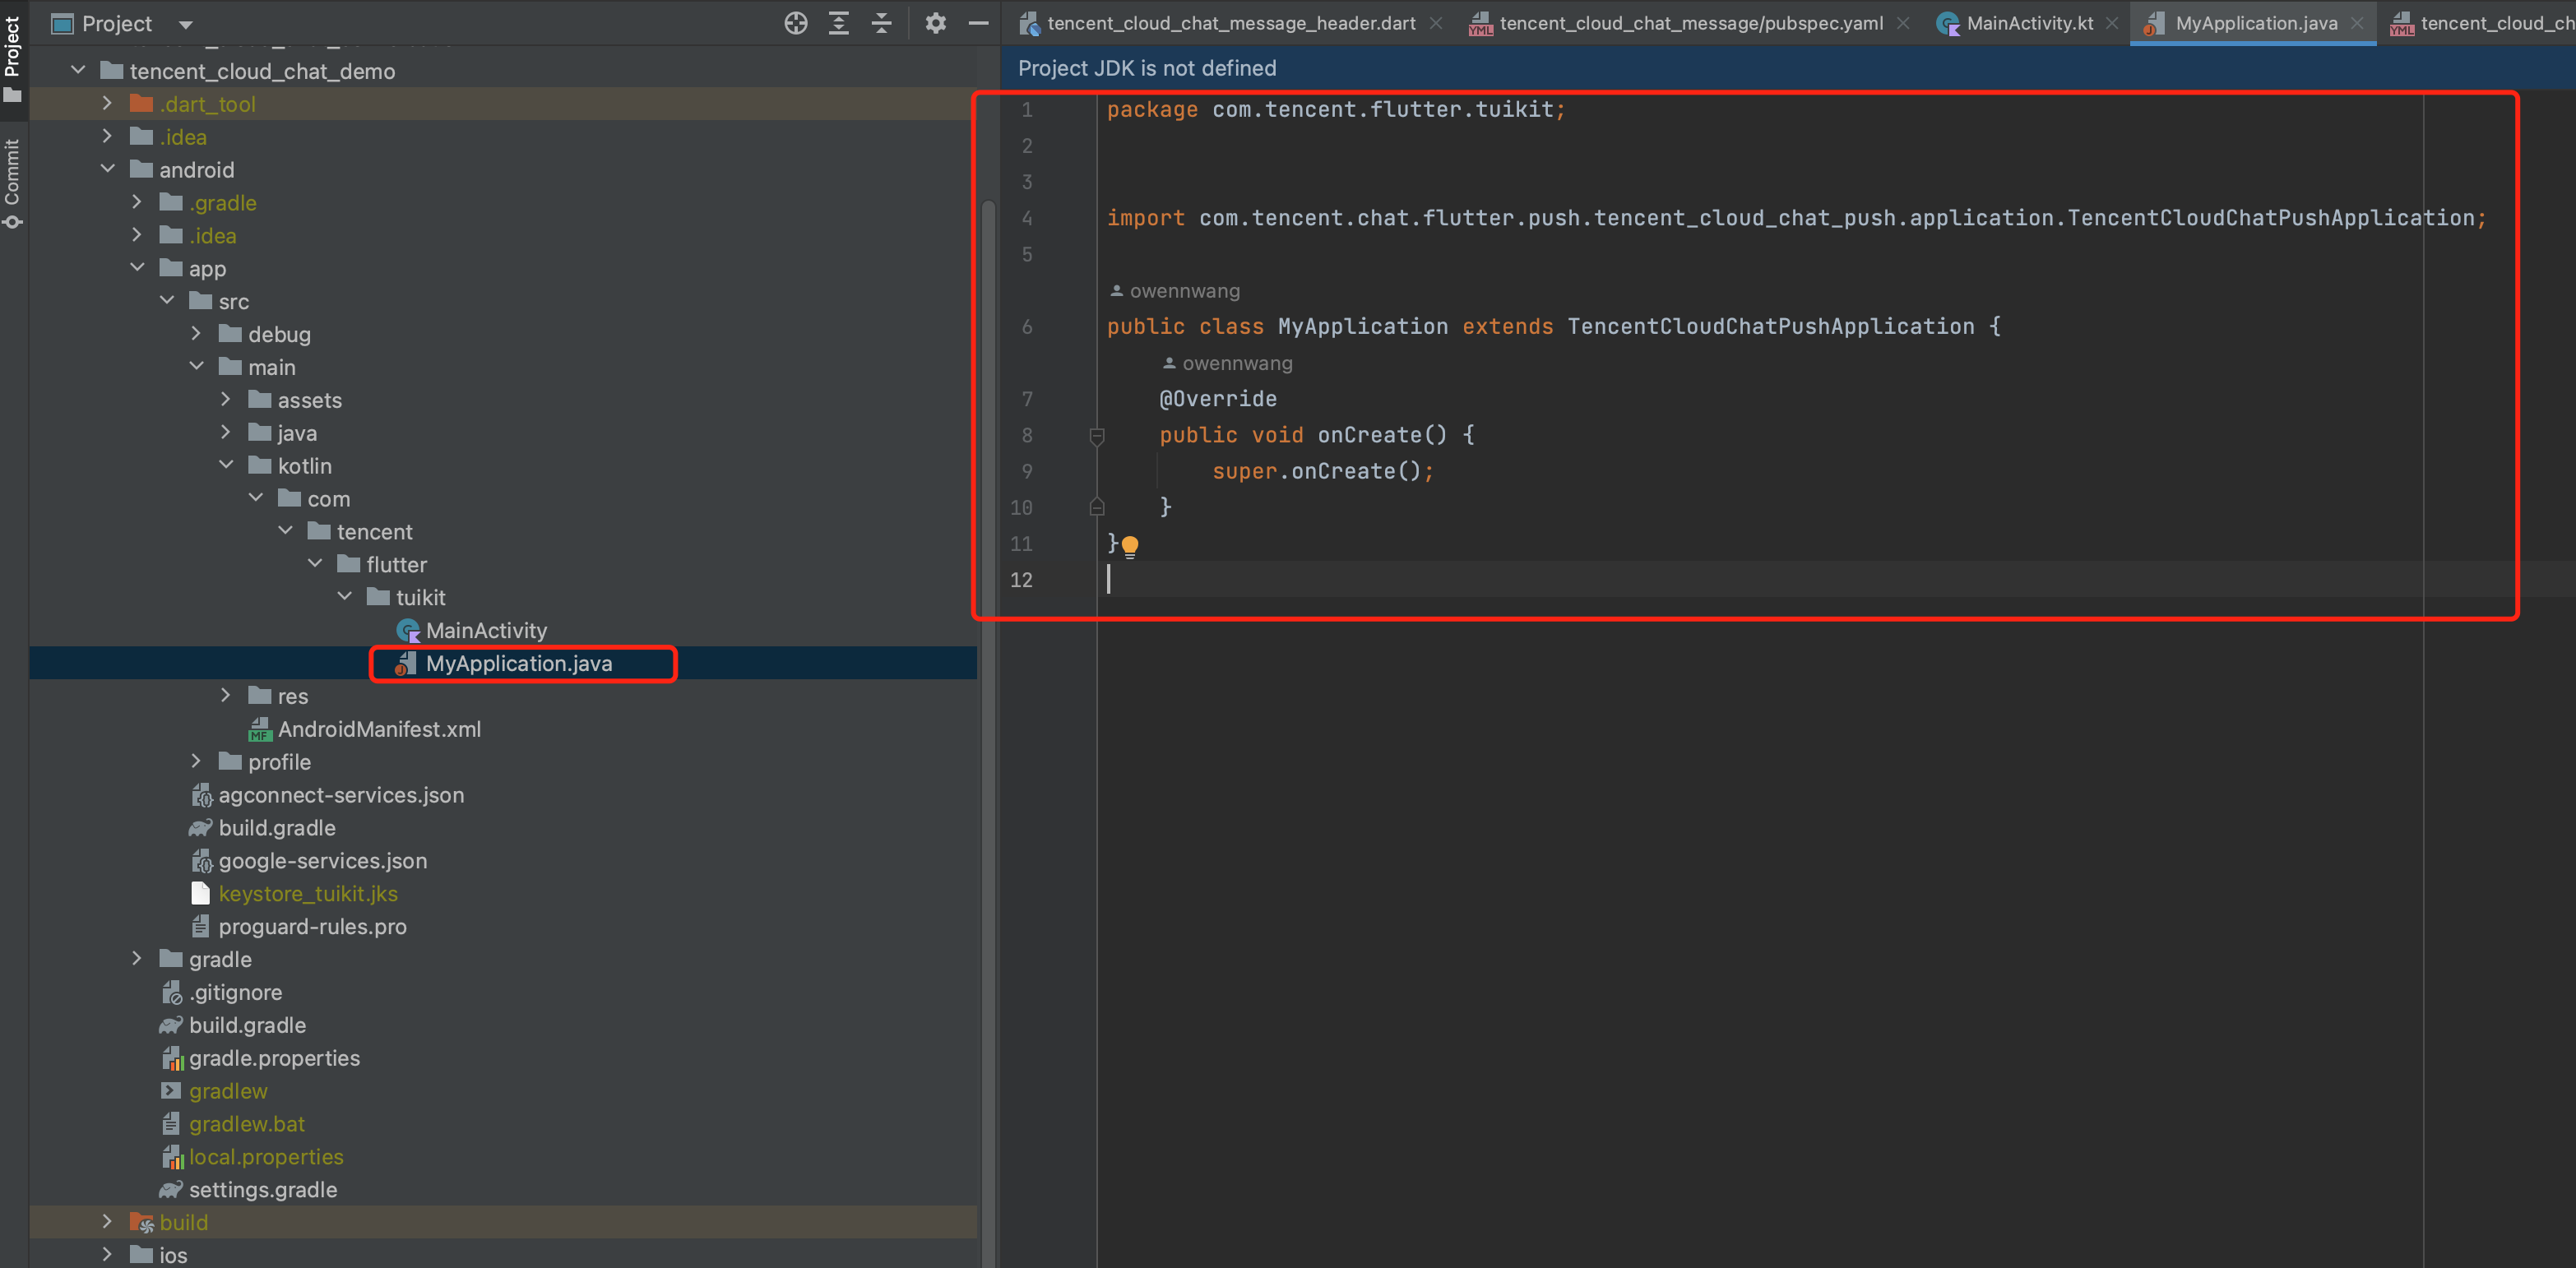
In your project android path, create a new Application file class in the same directory as MainActivity, for example, you can name it MyApplication.java.
If you have already customized an Application class, you can directly reuse it without creating a new one.
Paste the following code into that file as shown above:
Replace the packagewithyourown. Generally,AndroidStudio will generate it automatically;
If you have already created your own Application for other purposes, directly extend TencentCloudChatPushApplication and ensure that the onCreate() function calls super.onCreate();.
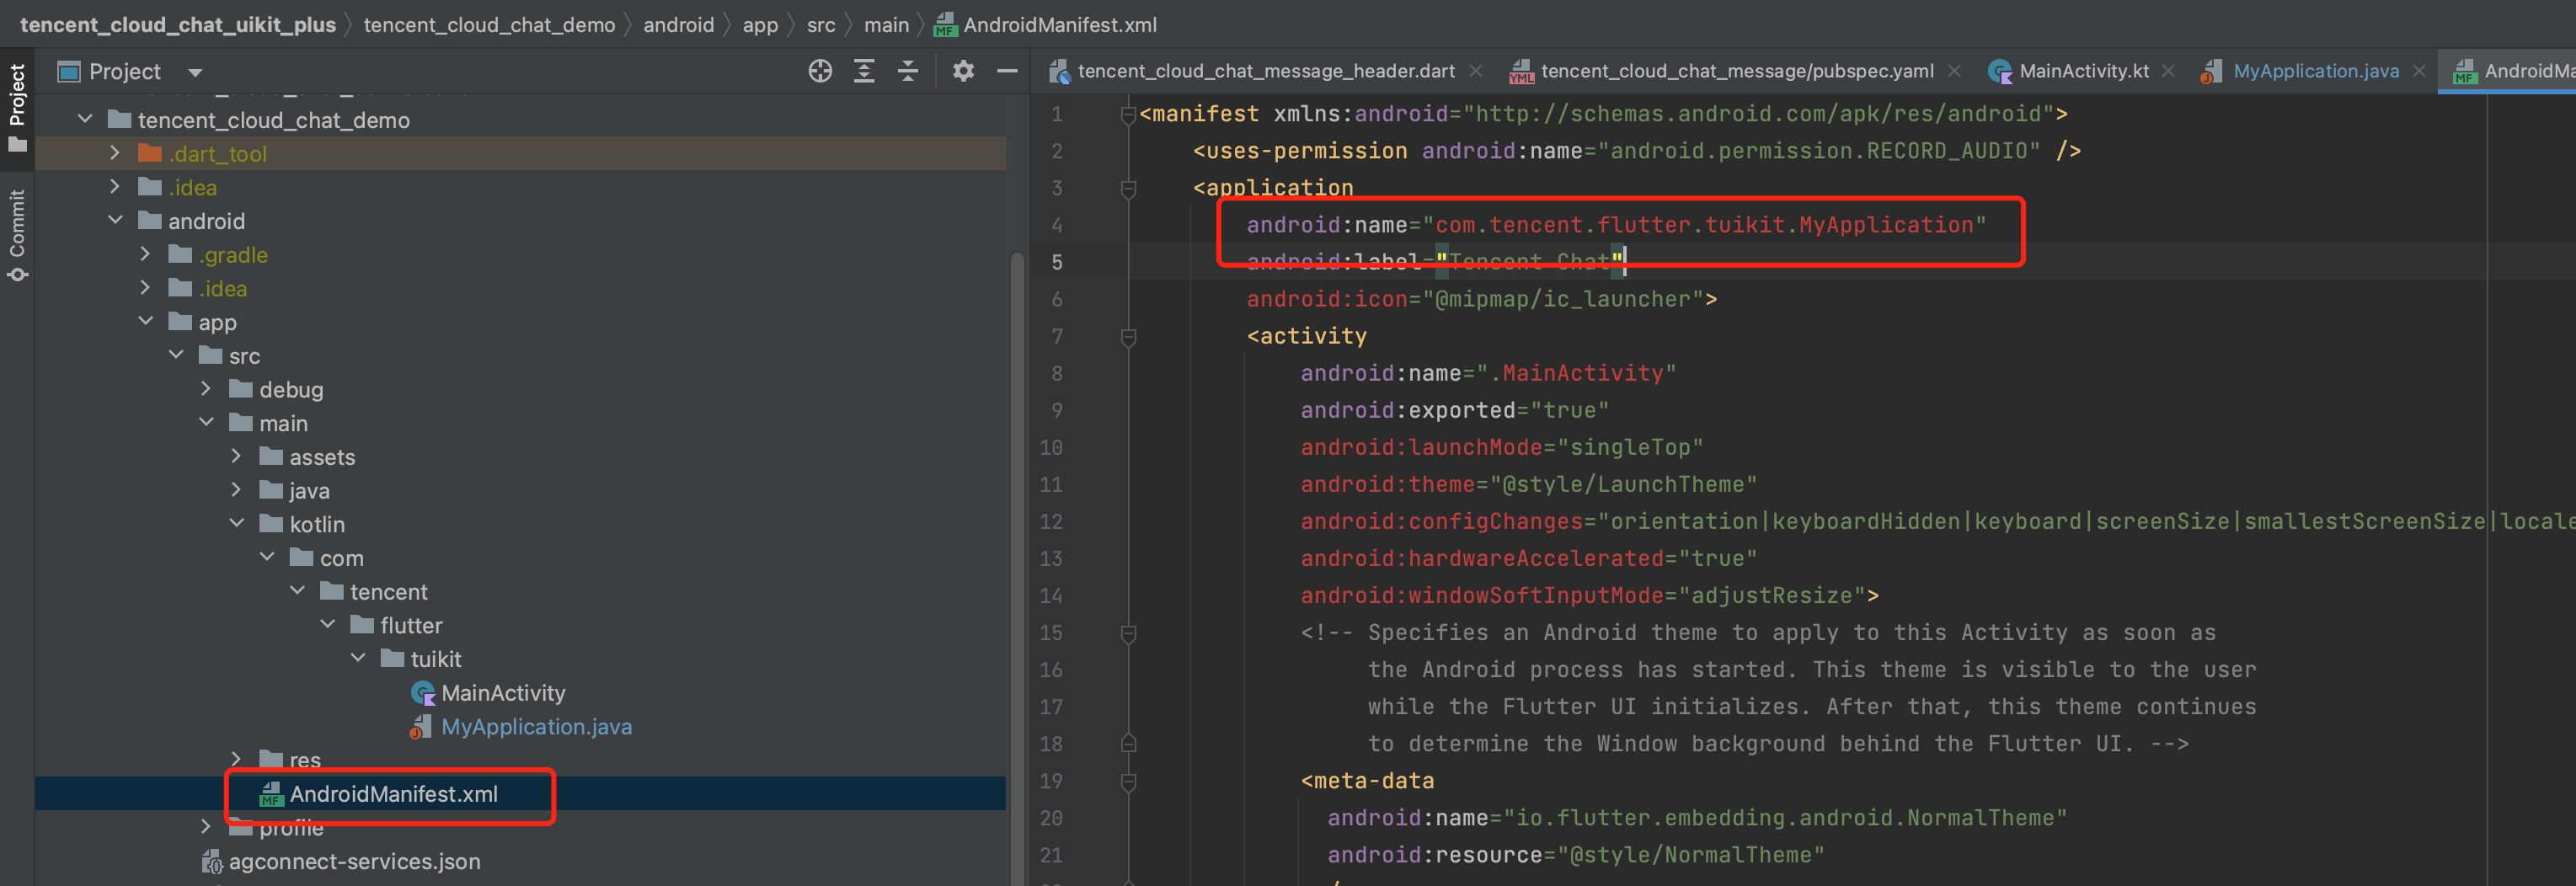
Open the android/app/src/main/AndroidManifest.xml file and add an <application> tag to specify an android:name parameter, pointing to the custom Application class you just created. As shown in the figure:
Step 4: Client Manufacturer Configuration
iOS
Android
This step is not required for iOS.
Open the android/app/build.gradle file and add the dependencies configuration at the end. According to your needs, introduce all or some of the following manufacturer push packages. The native push capability of a manufacturer is enabled only after the corresponding manufacturer’s push package is introduced.
dependencies {
// The version number "VERSION" can be obtained from the Update Log.
According to Vivo and Honor manufacturer access guidelines, the APPID and APPKEY need to be added to the manifest file.
Method 1
Method 2
// android/app/build.gradle
android {
...
defaultConfig {
...
manifestPlaceholders =[
"VIVO_APPKEY":"`APPKEY` of the certificate assigned to your application",
"VIVO_APPID":"`APPID` of the certificate assigned to your application",
"HONOR_APPID":"`APPID` of the certificate assigned to your application"
]
}
}
// android/app/src/main/AndroidManifest.xml
// Vivo begin
<meta-data tools:replace="android:value"
android:name="com.vivo.push.api_key"
android:value="`APPKEY` of the certificate assigned to your application"/>
<meta-data tools:replace="android:value"
android:name="com.vivo.push.app_id"
android:value="`APPID` of the certificate assigned to your application"/>
// Vivo end
// Honor begin
<meta-data tools:replace="android:value"
android:name="com.hihonor.push.app_id"
android:value="`APPID` of the certificate assigned to your application"/>
// Honor end
Huawei, HONOR, and Google FCM Adaptation
Follow the vendor method to integrate the corresponding plugin and JSON configuration file.
Note:
The following adaptation for HONOR only requires configuration for version 7.7.5283 and above.
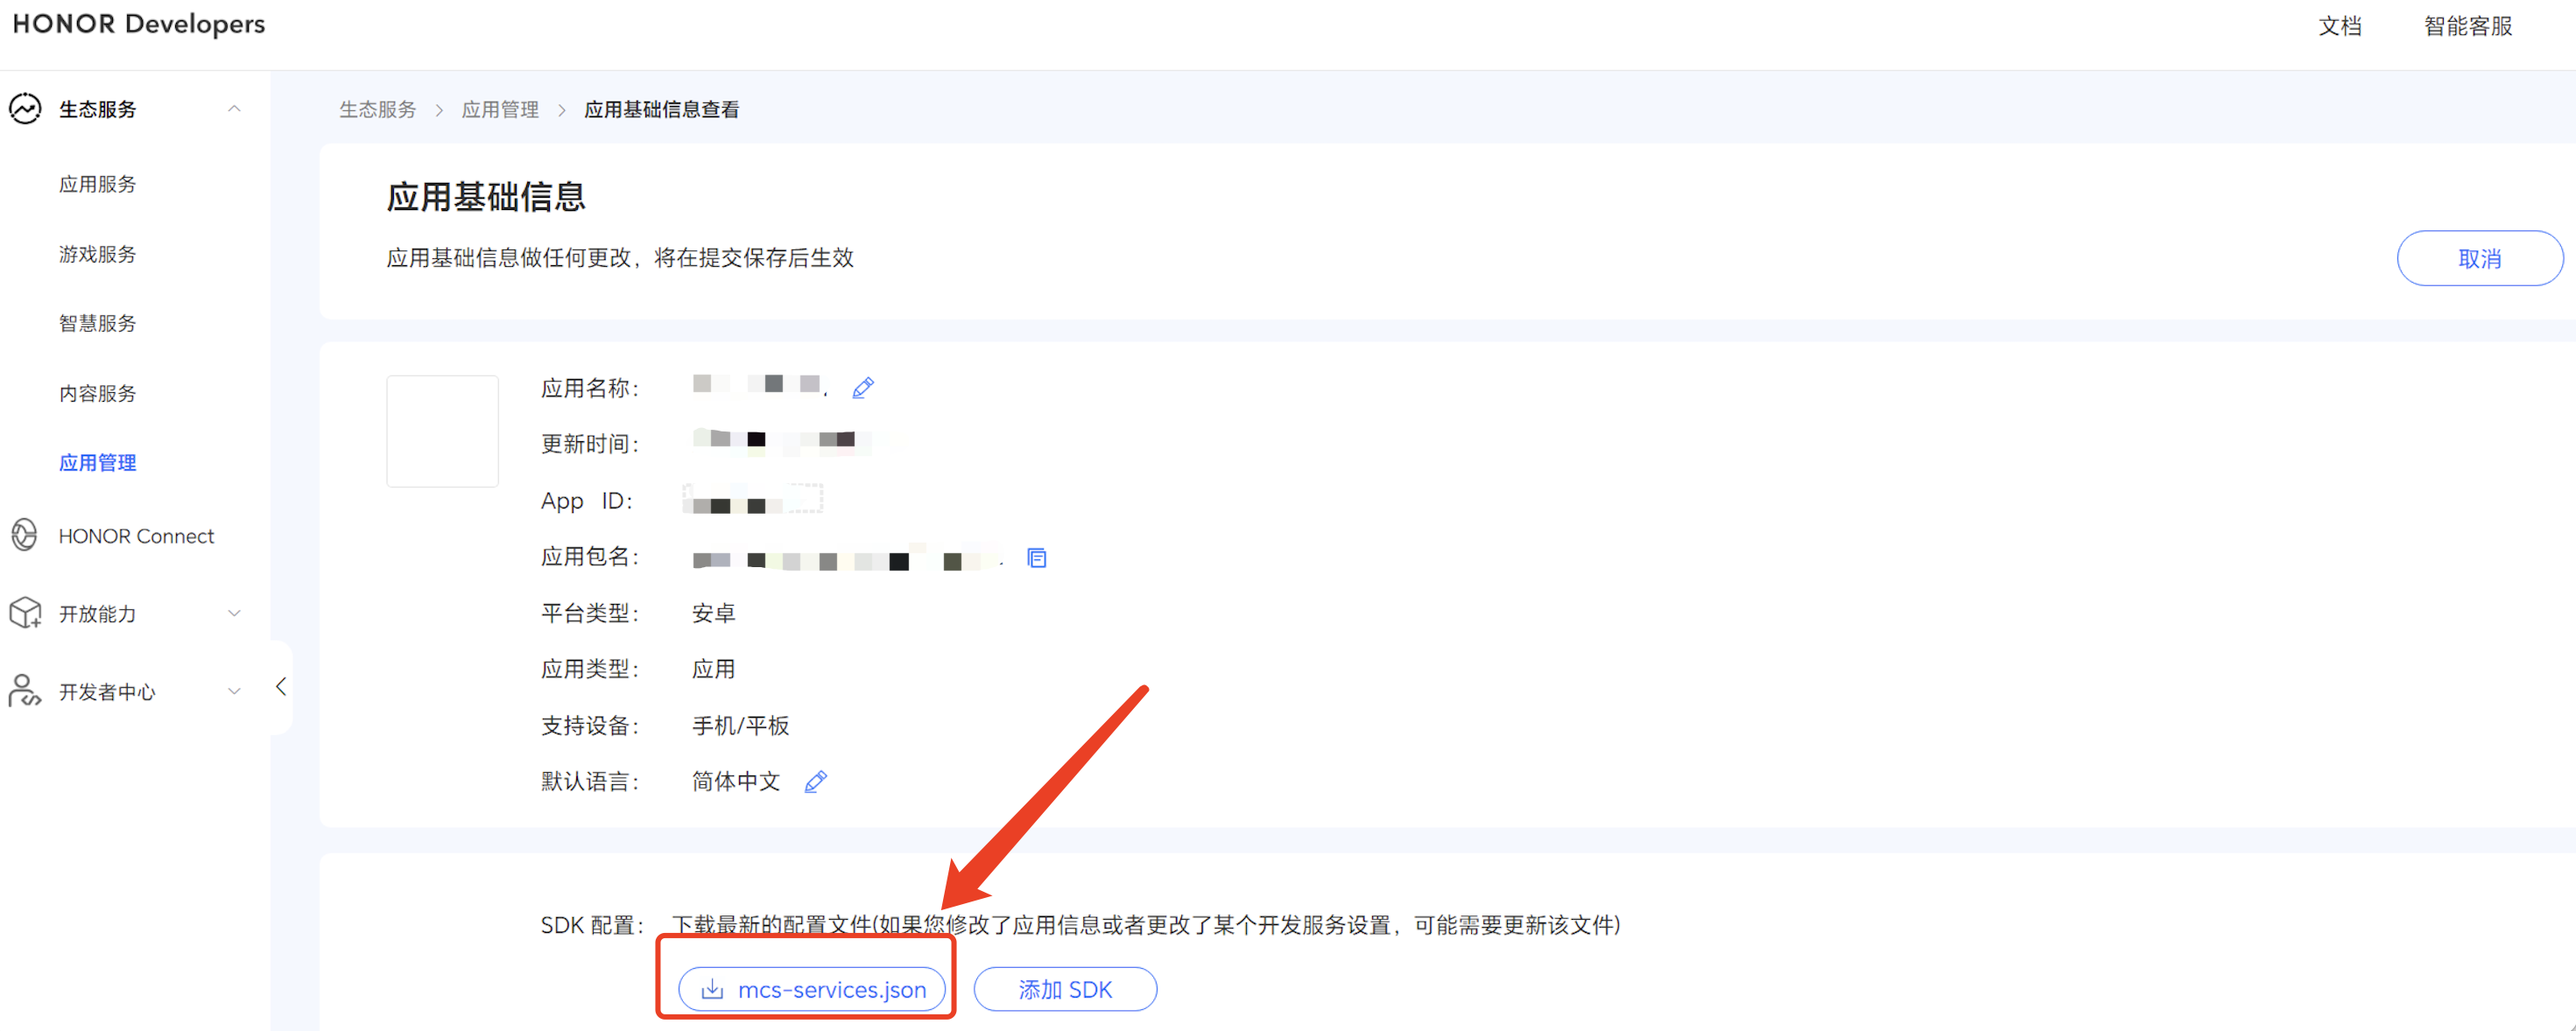
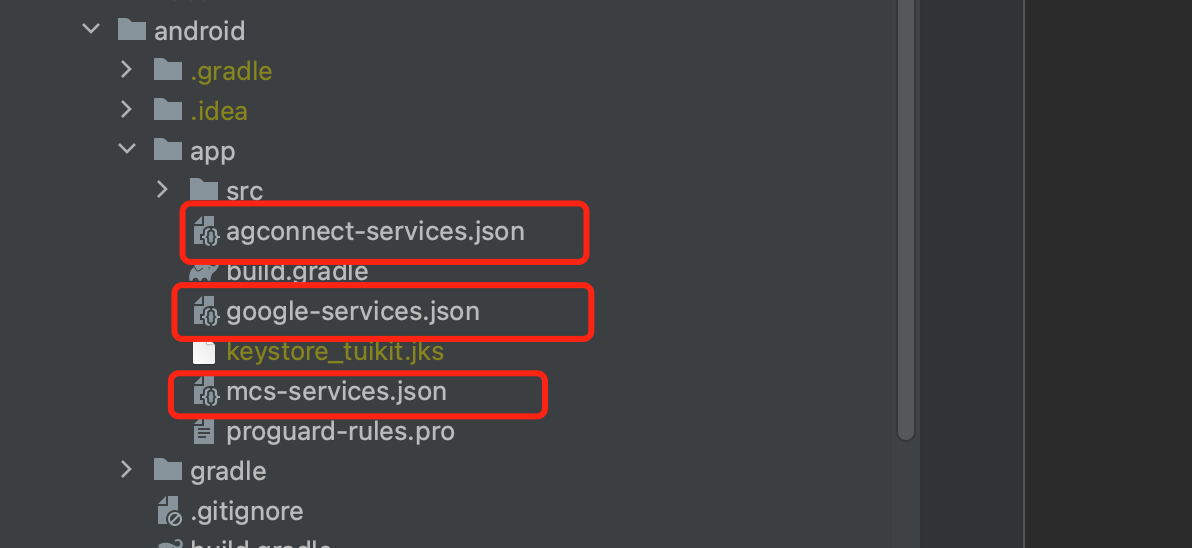
1.1 Download the configuration file and place it under the root directory/Android/app of the project.
Huawei
HONOR
Google FCM
Operation Path
1.2 Add the following configuration under buildscript -> dependencies in your project-level build.gradle file:
For Gradle version 7.1 and above
Gradle version 7.0
Versions Below Gradle 7.0
Add the following configuration under buildscript -> dependencies in your project-level build.gradle file:
buildscript {
dependencies {
...
classpath 'com.huawei.agconnect:agcp:1.6.0.300'
classpath 'com.hihonor.mcs:asplugin:2.0.1.300'
classpath 'com.google.gms:google-services:4.4.0'
}
}
Add the following repository configuration under buildscript -> repositories and allprojects -> repositories in your project-level settings.gradle file:
1. It is recommended to register the callback in the main() function at the program entry.
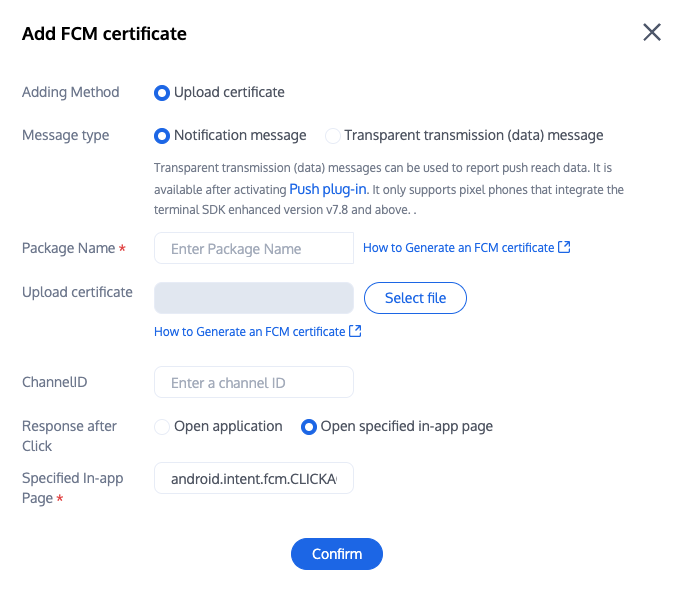
2. For console configuration, click on 'Subsequent Actions' and configure as follows, choose Open the specified interface within the app, and the plugin users will by default fill in the jump parameters.
Please define a function to receive the push message click callback event.
Define the function with the parameter format {required String ext, String? userID, String? groupID}.
Among them, the ext field carries the complete ext information specified by the sender. If not specified, there is a default value. You can parse this field to navigate to the corresponding page.
The userID and groupID fields are automatically parsed by the plugin from the ext Json String to get the single chat userID and group chat groupID information. If you do not customize the ext field, the ext field is specified by the SDK or UIKit by default, and you can use this default parsing. If parsing fails, it will be null.
You can define a function to receive this callback and use it to navigate to the corresponding Session Page or your Business Page.
// Redirect to the corresponding Message page based on userID or groupID.
}else{
// Based on the ext field, write your own parsing method to redirect to the corresponding page.
}
}
Step 6: Register the Push Plugin
Please register the push plugin immediately after IM login is completed and before using other plugins (e.g., CallKit). Note, do not call in the main method of the Flutter program entry.
After successfully calling the TencentCloudChatPush().registerPush method, you can receive offline push notifications.
Huawei Push Certificate ID <= 11344, using Huawei Push v2 version interface, does not support reach and click receipt. Please regenerate and update the Certificate ID.
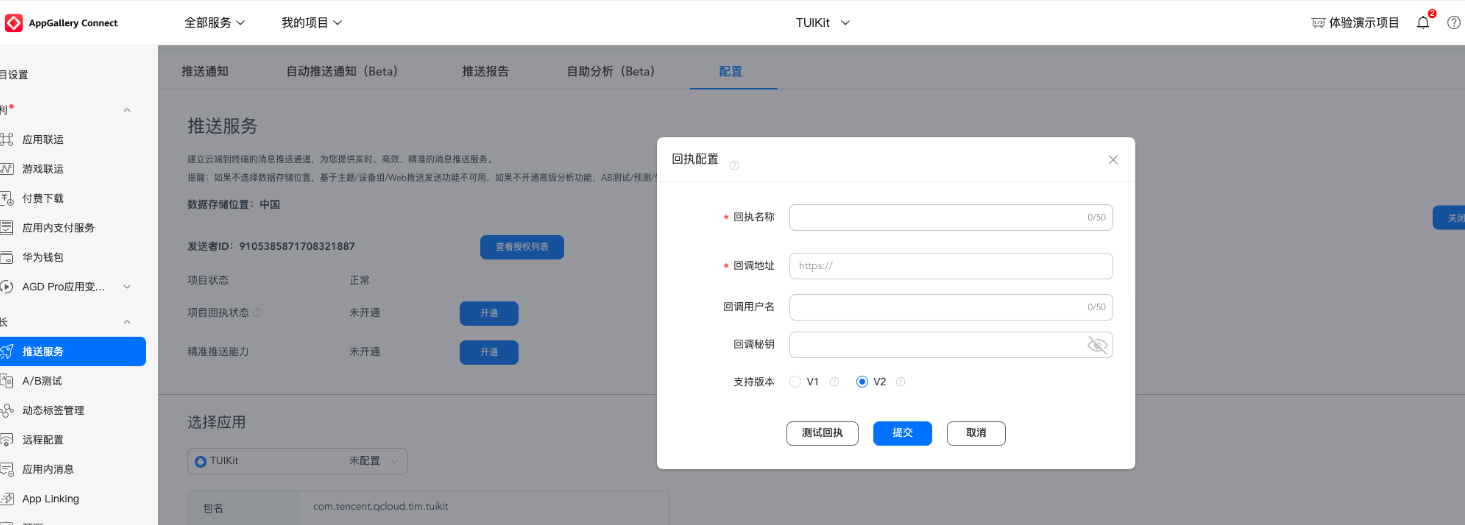
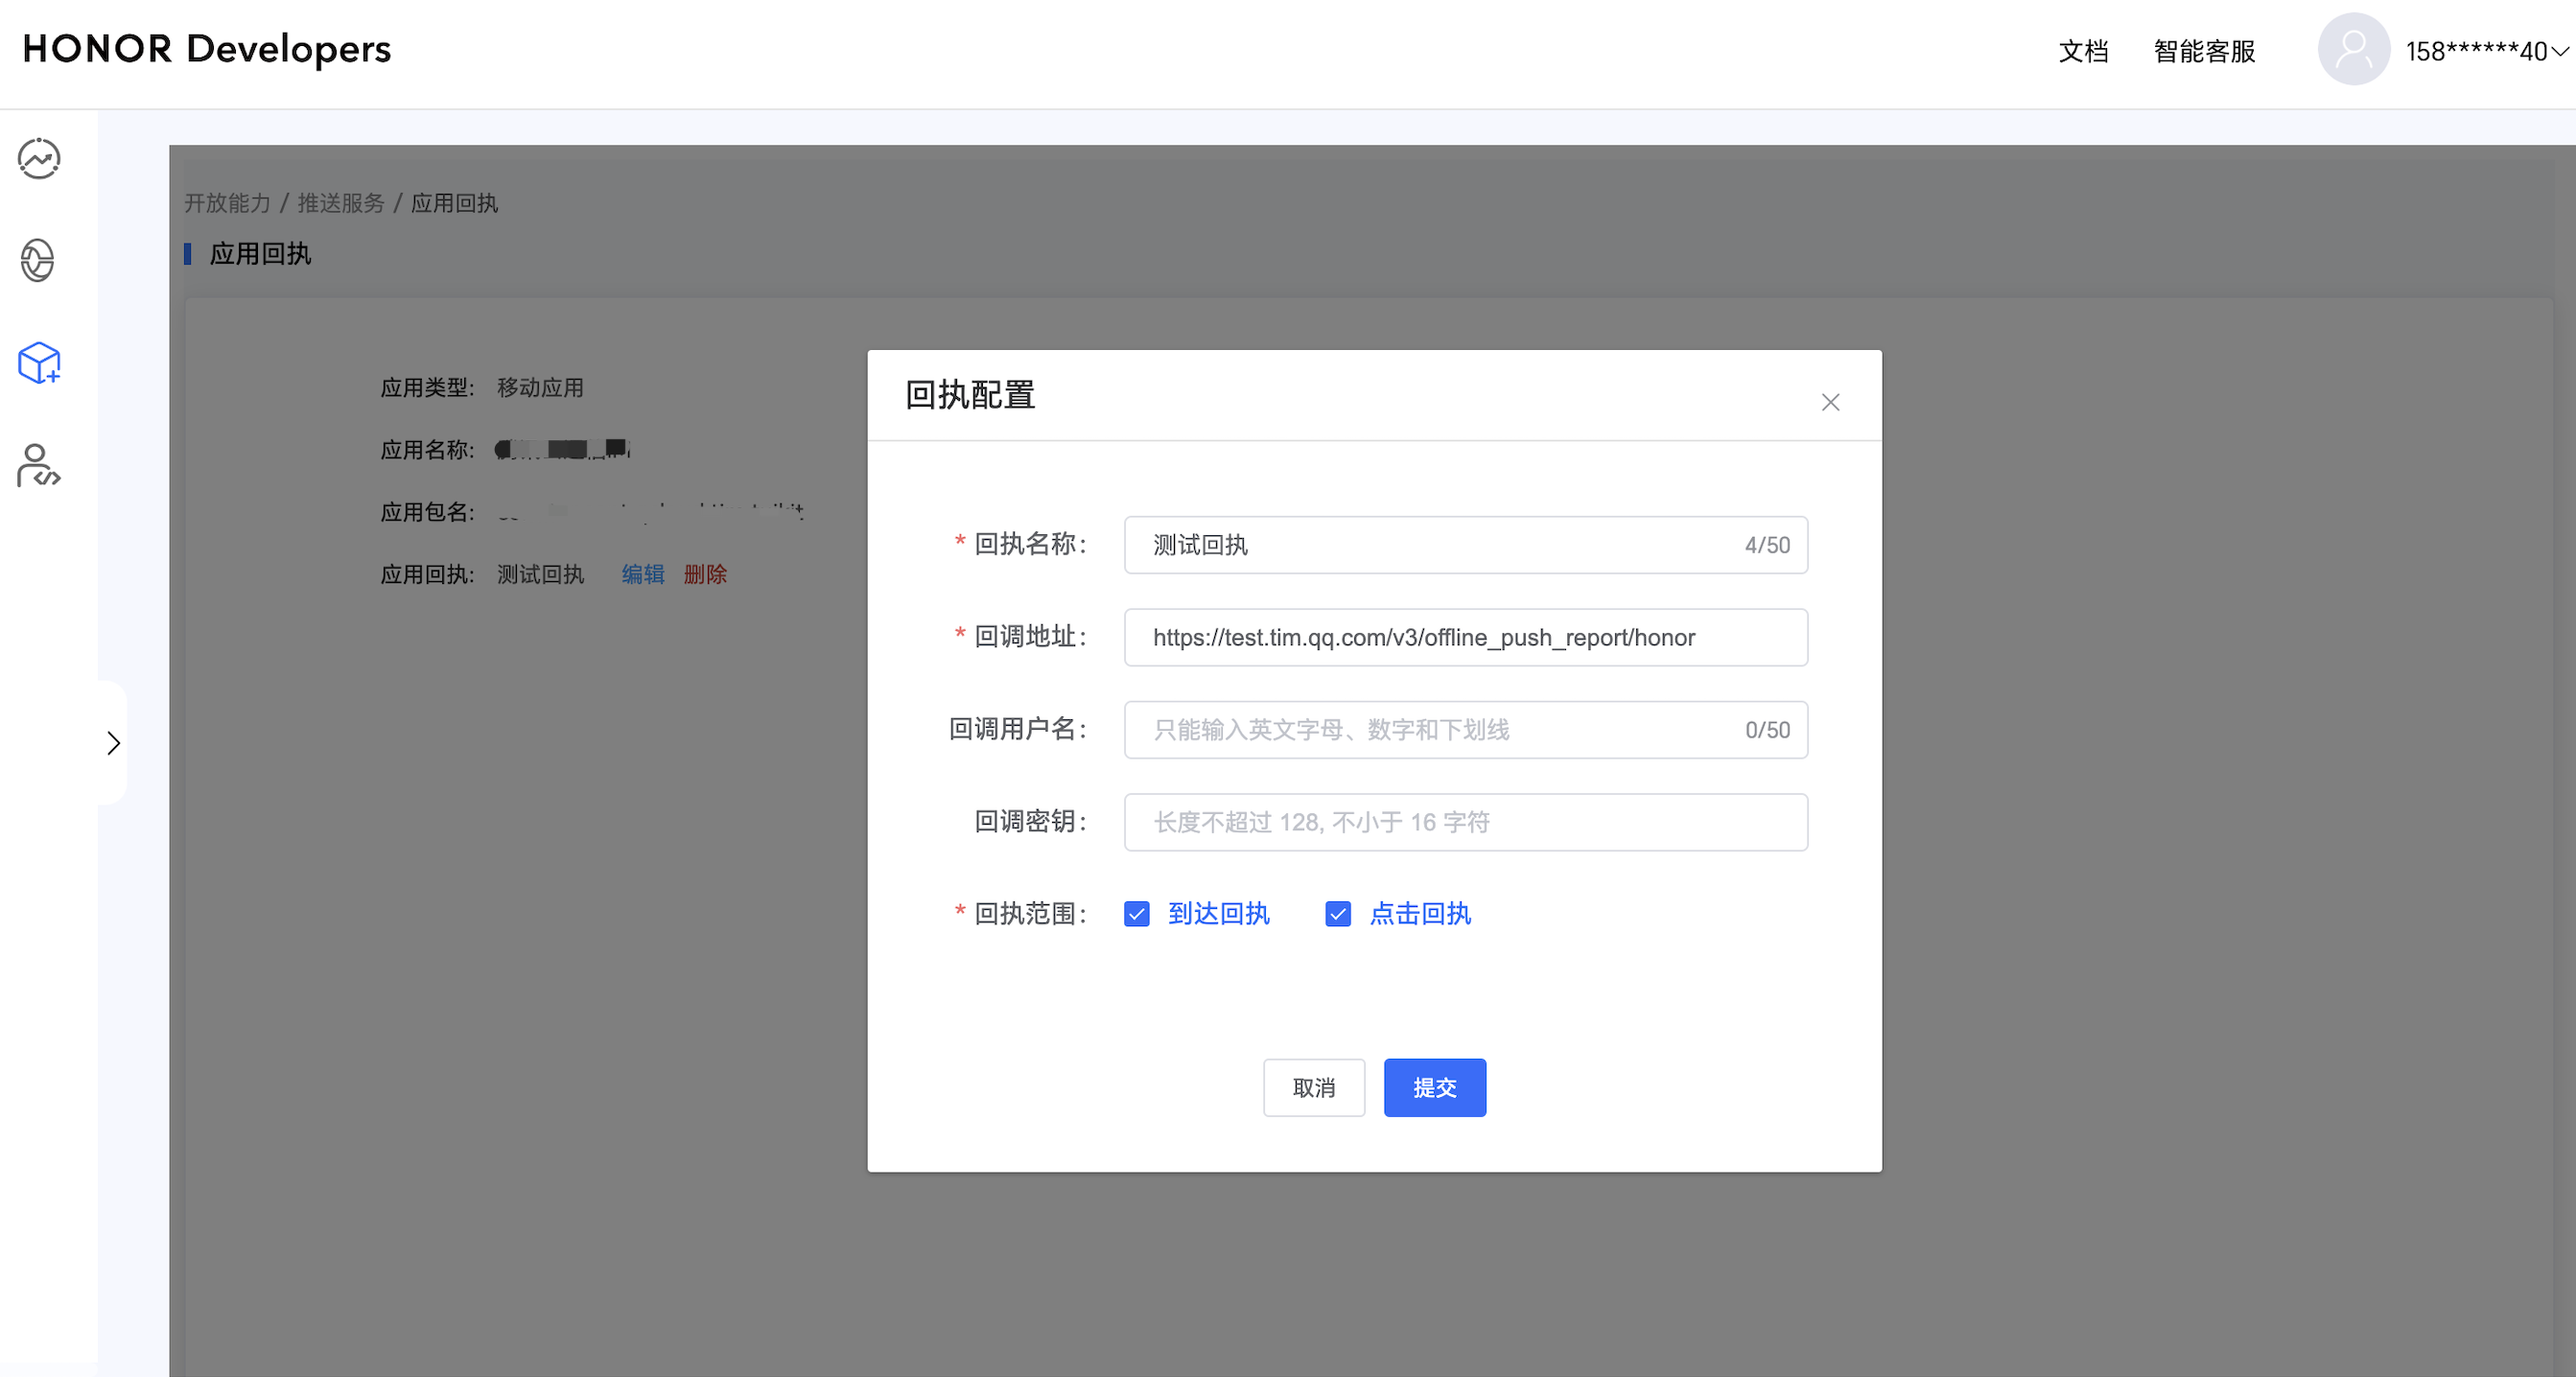
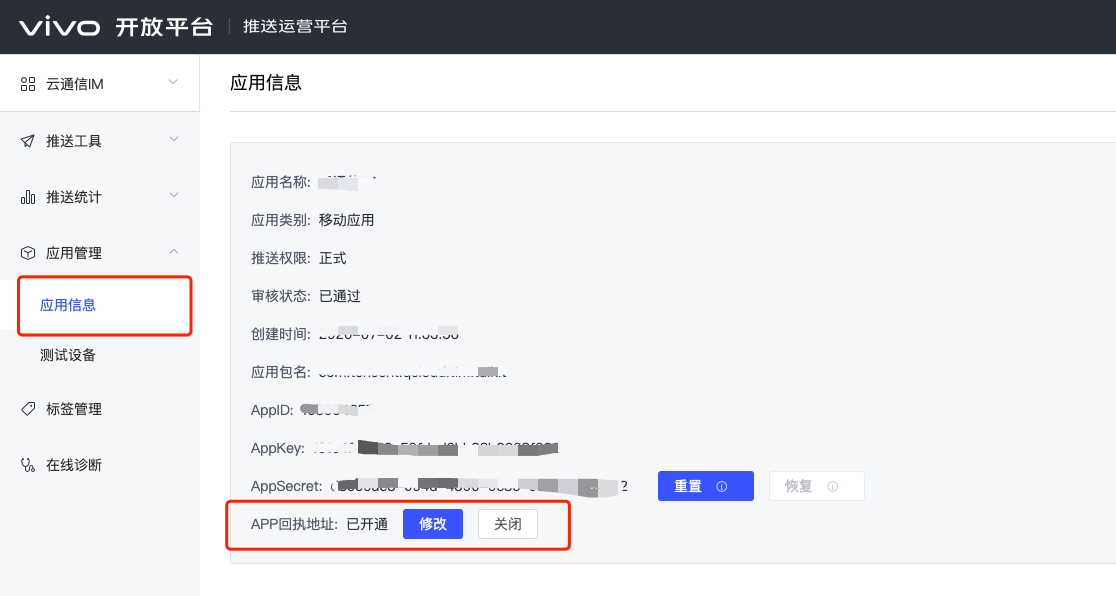
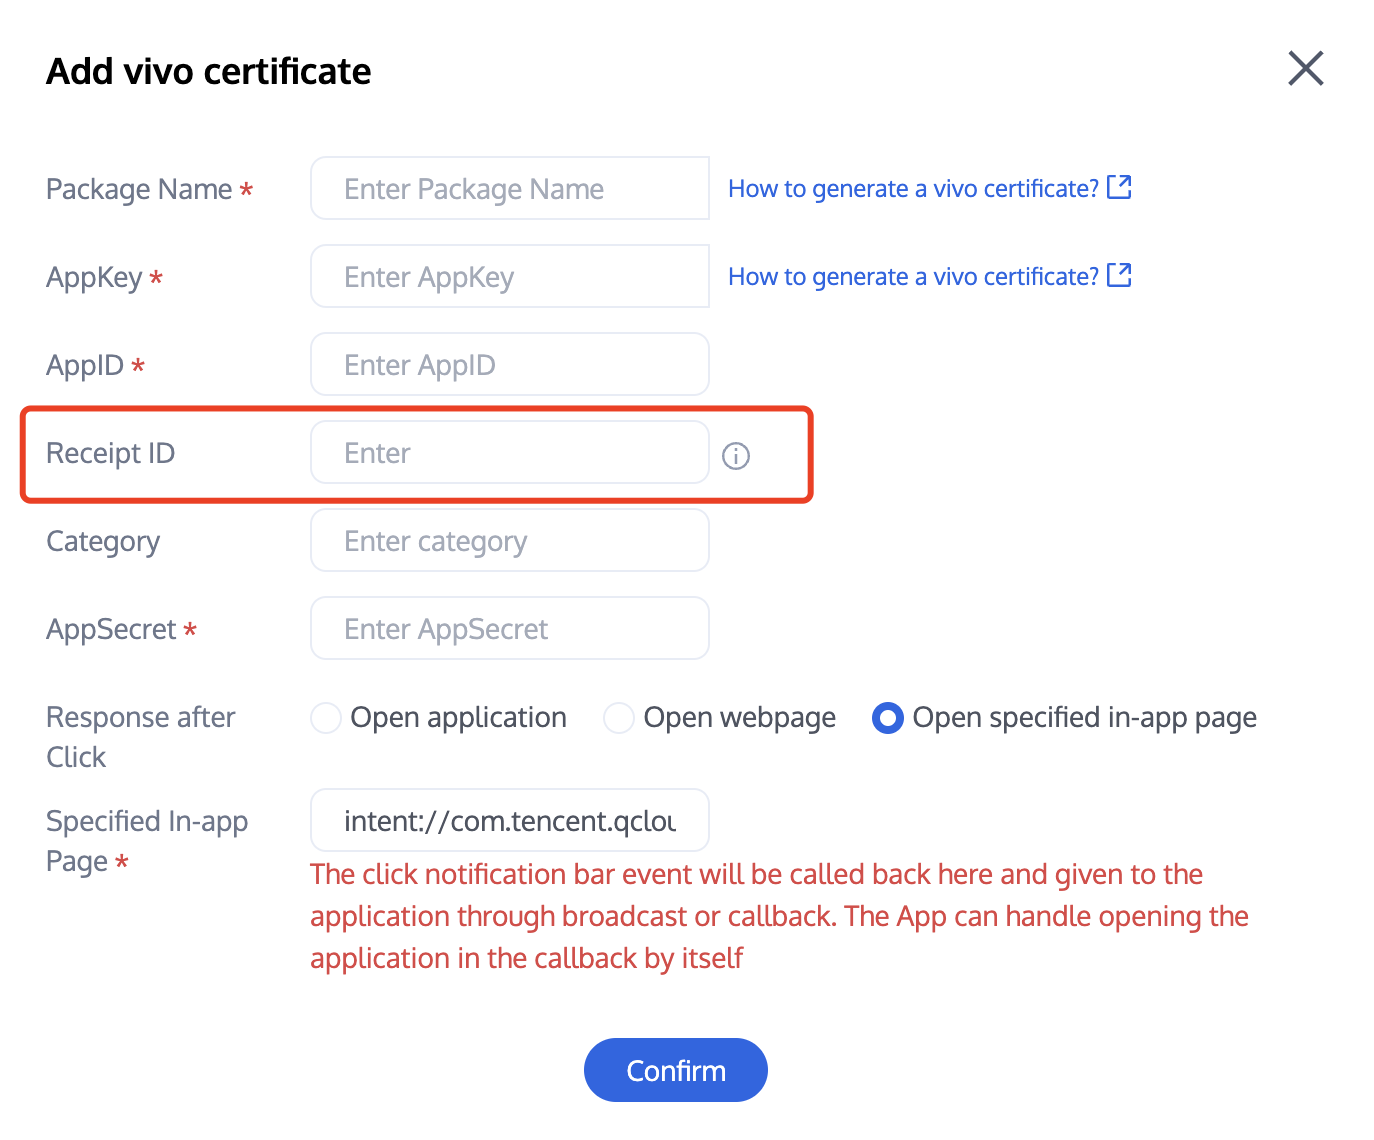
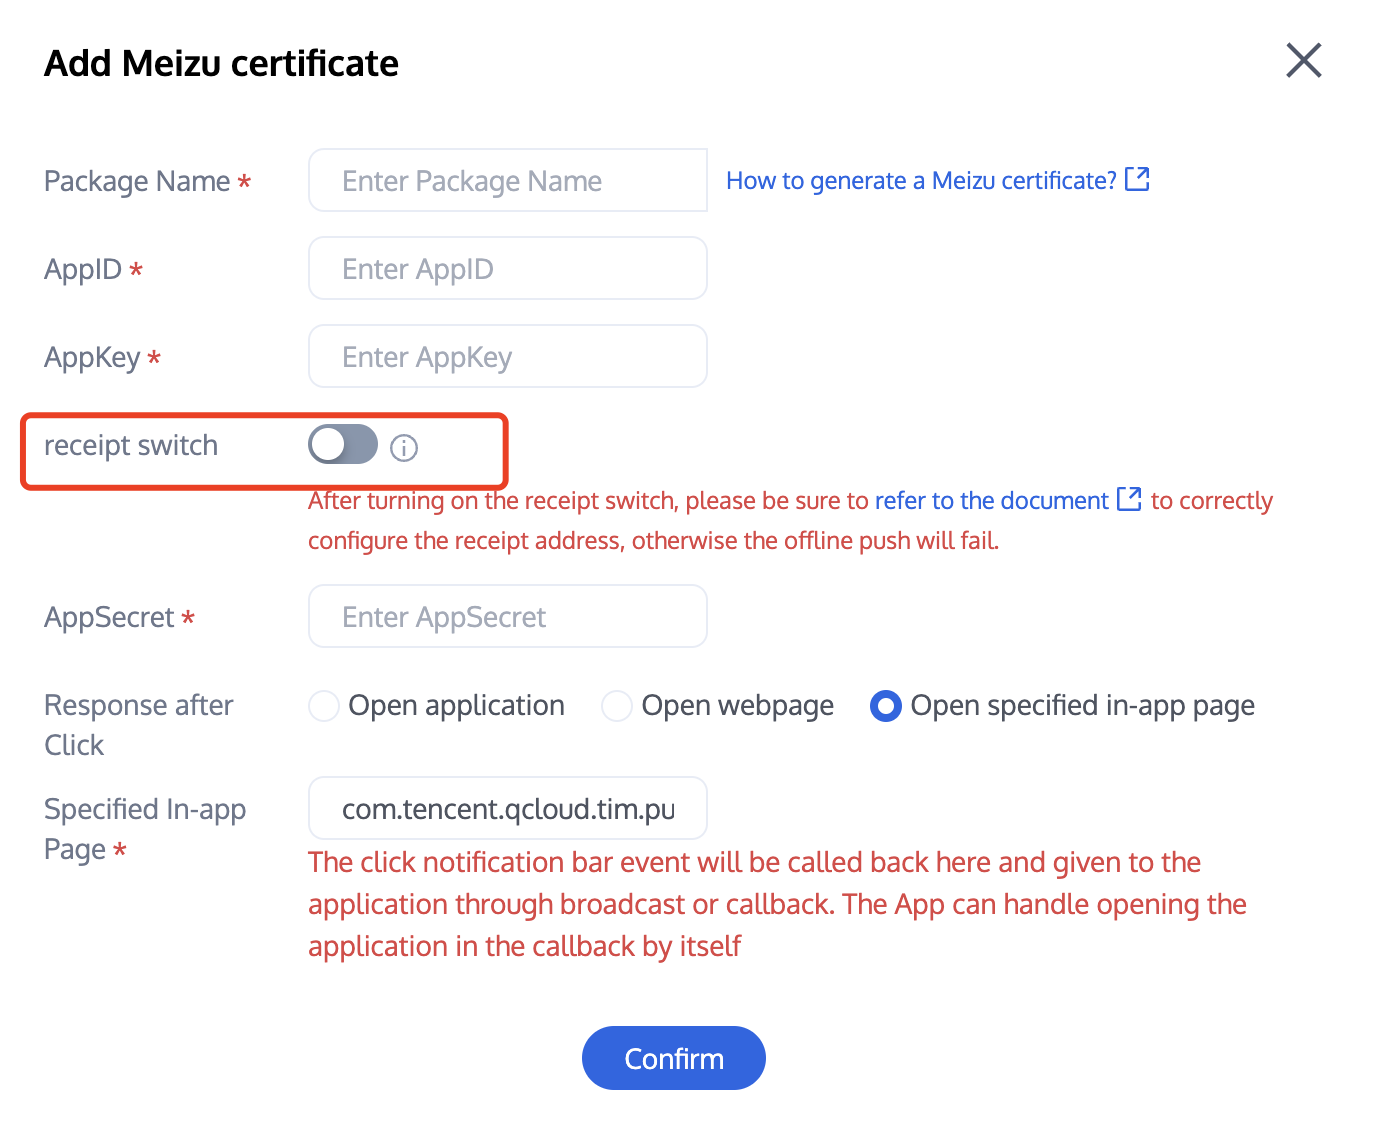
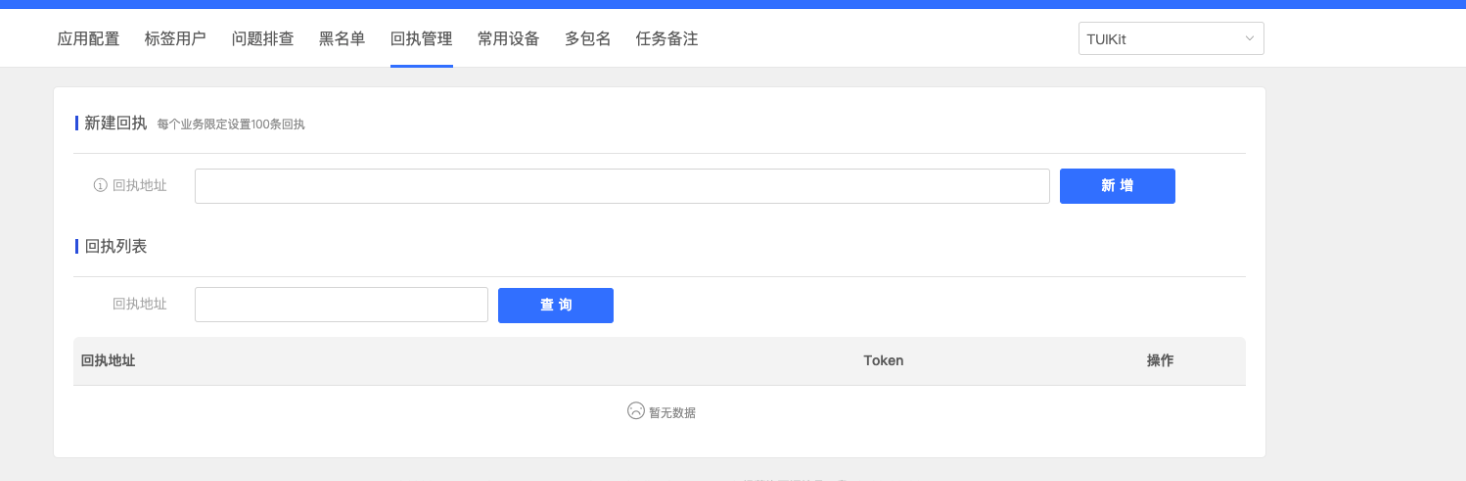
After turning on the receipt toggle, please make sure the receipt address is correctly configured. Not configuring it or configuring the wrong address will affect the push notification feature.
No configuration needed for other supported manufacturers. FCM currently does not support push notification statistics feature.
Congratulations! You have completed the integration of the push plugin. Please be reminded: After the trial period or subscription expires, the push service (including regular message offline push, all-staff/Tag push, etc.) will automatically cease. To avoid affecting the normal use of your services, please make sure to purchase/renew in advance.