Step 2: Entering the MyReactNativeApp Directory, Integrating @tencentcloud/react-native-push
npm
yarn
npminstall @tencentcloud/react-native-push --save
yarnadd @tencentcloud/react-native-push
Step 3:Register for Push Notifications
Copy the following code to App.tsx and replace SDKAppID and appKey with your application's information.
Note:
After successfully registering the push service with registerPush, you can obtain the push ID, namely RegistrationID, through getRegistrationID. You can push messages to the specified RegistrationID.
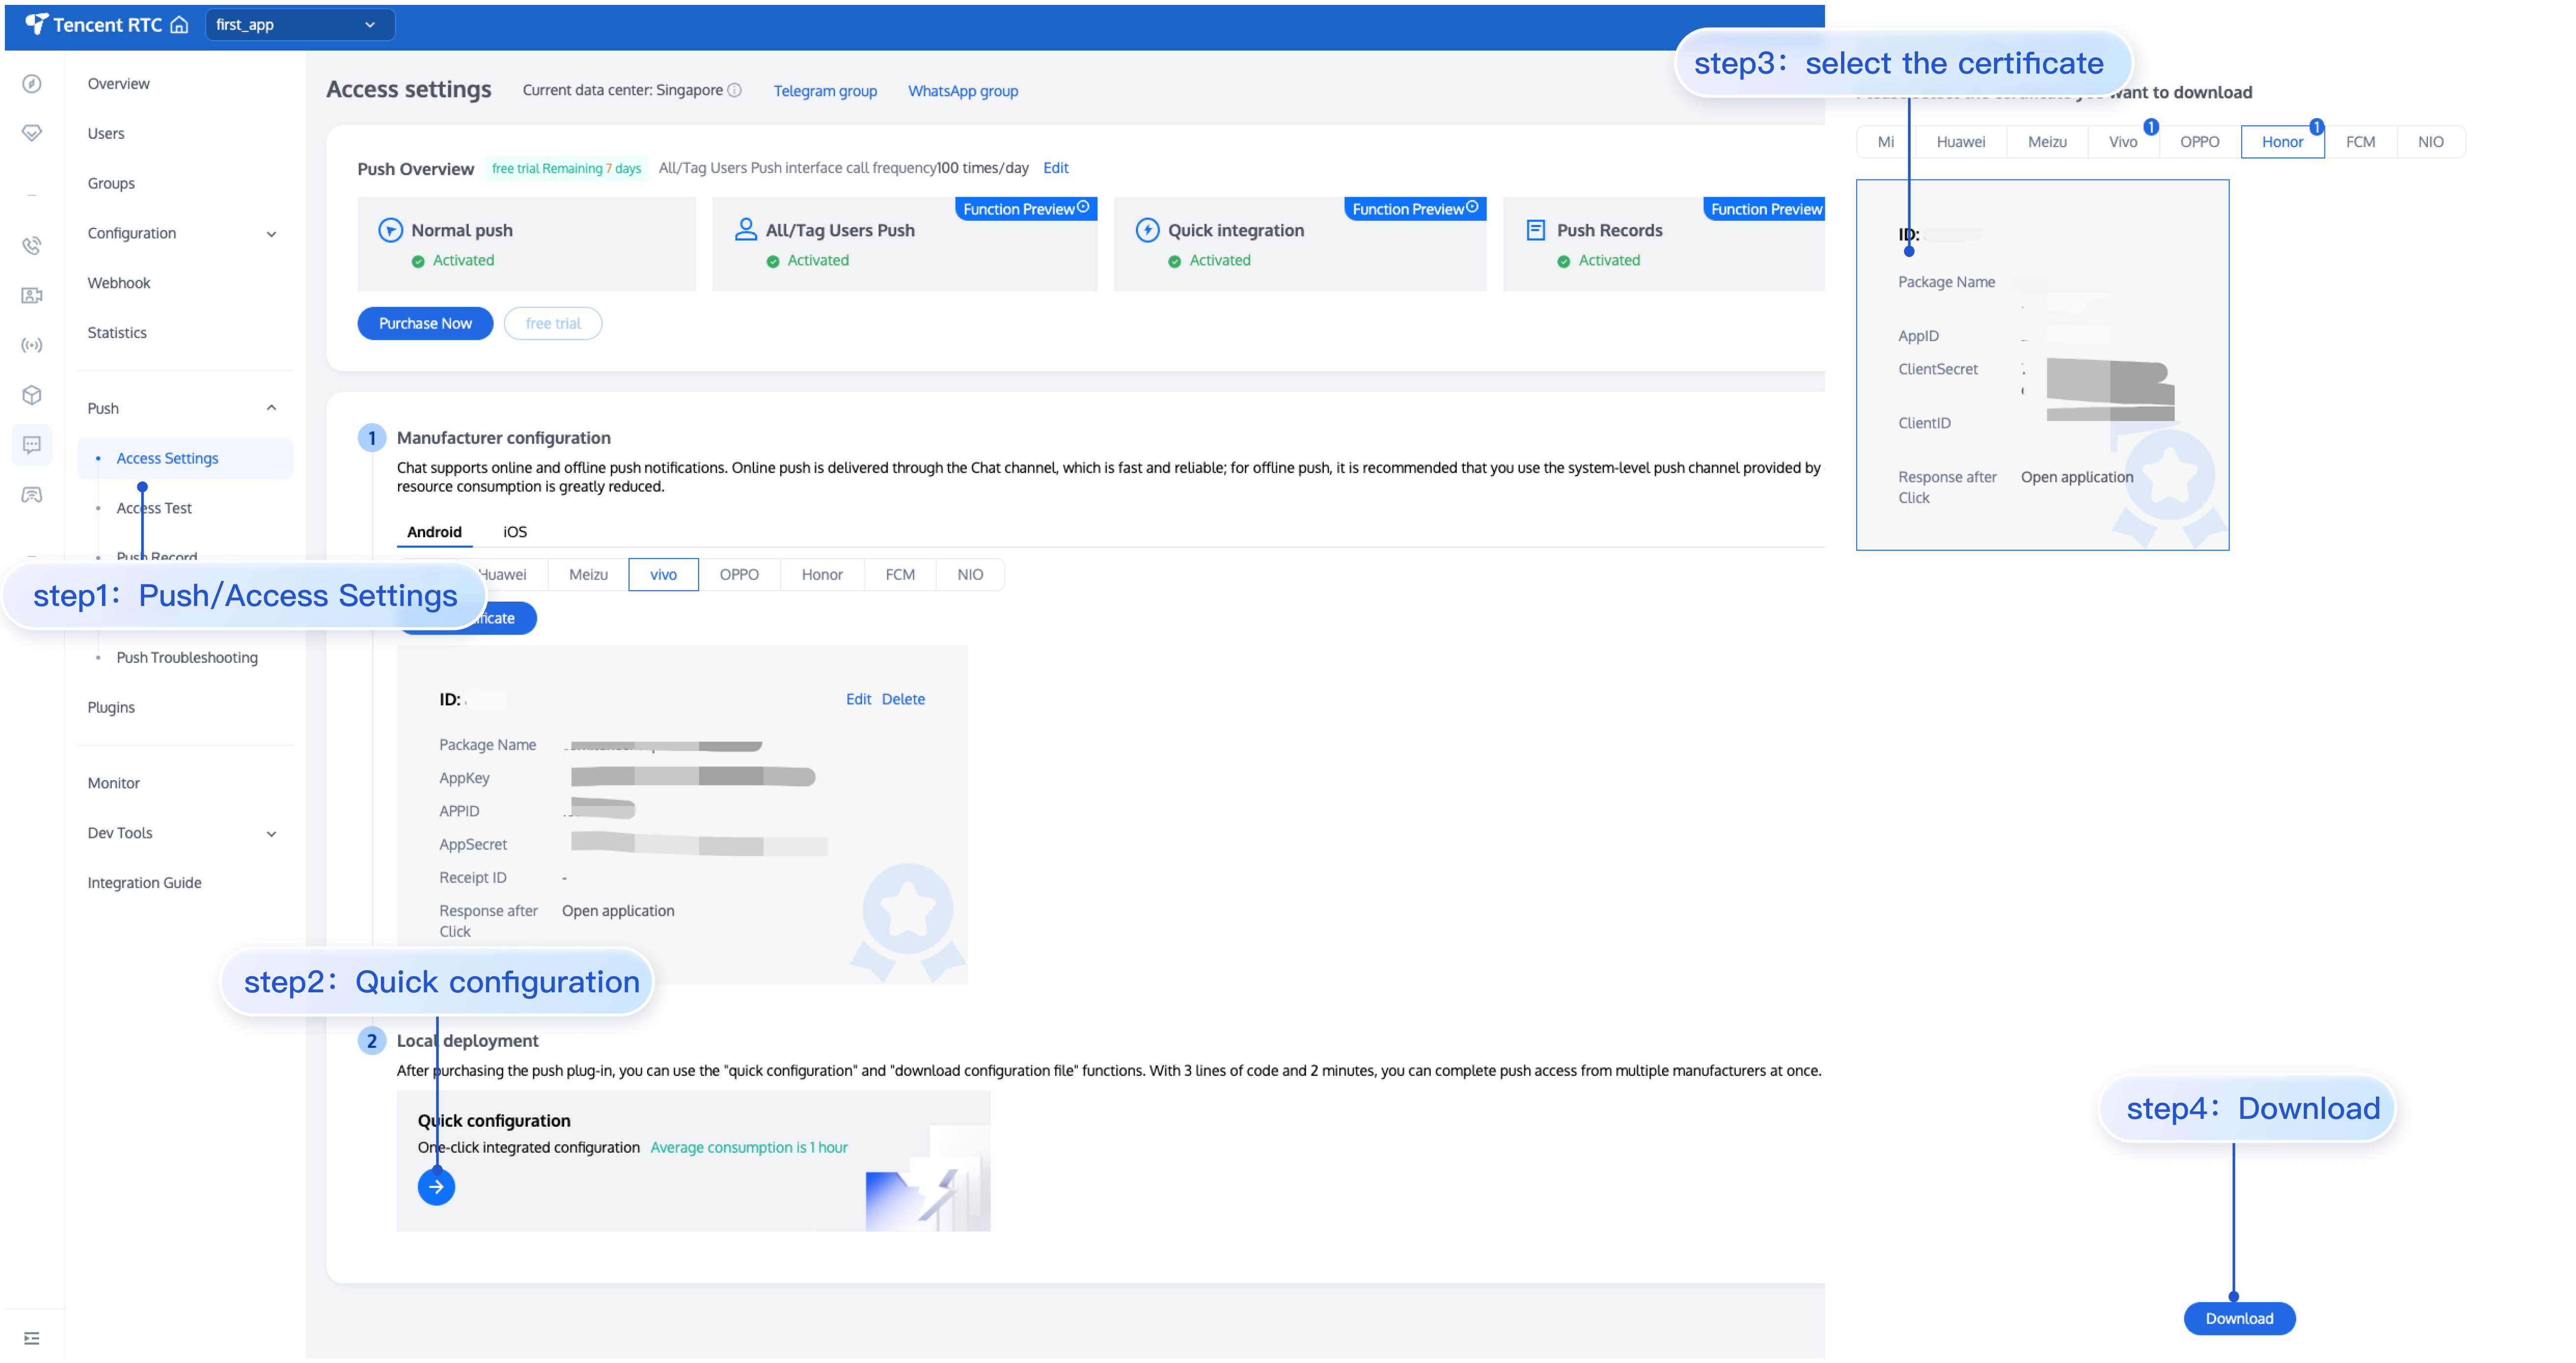
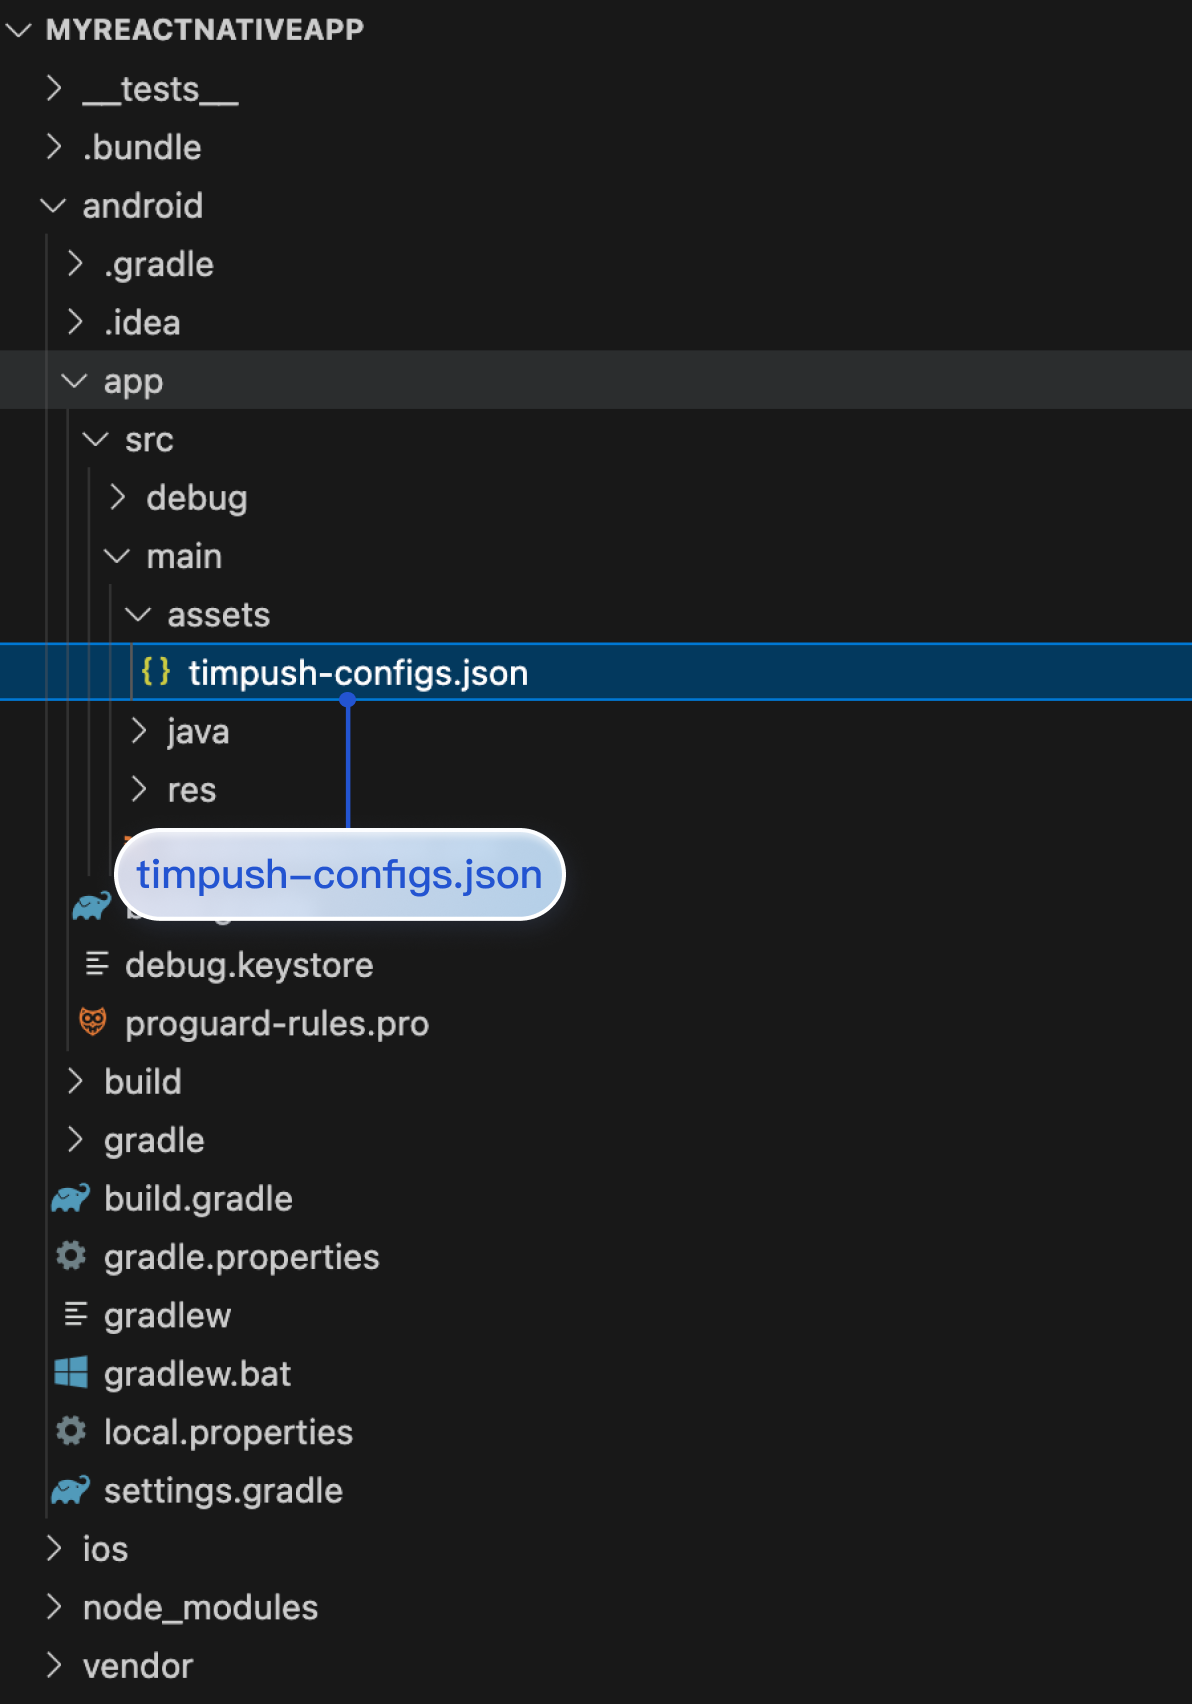
1. After completing the vendor push information in the console, download the timpush-configs.json file from the console and add it to the MyReactNativeApp/android/app/src/main/assets directory of the project. If this directory does not exist, please create it manually. As shown in the figure:
2. Huawei, HONOR, vivo, FCM.
FCM
Huawei
HONOR
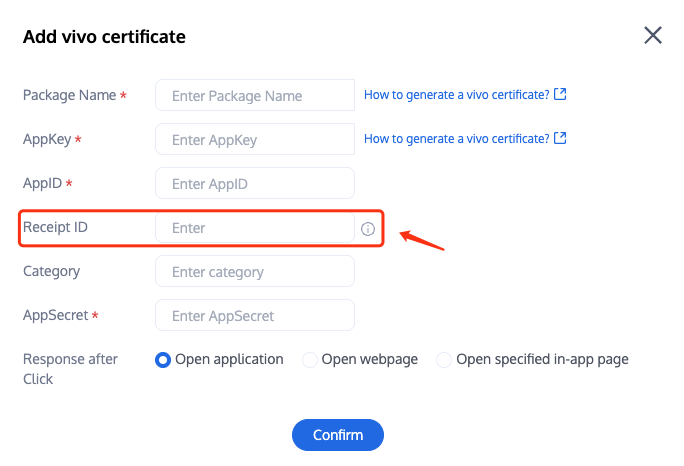
vivo
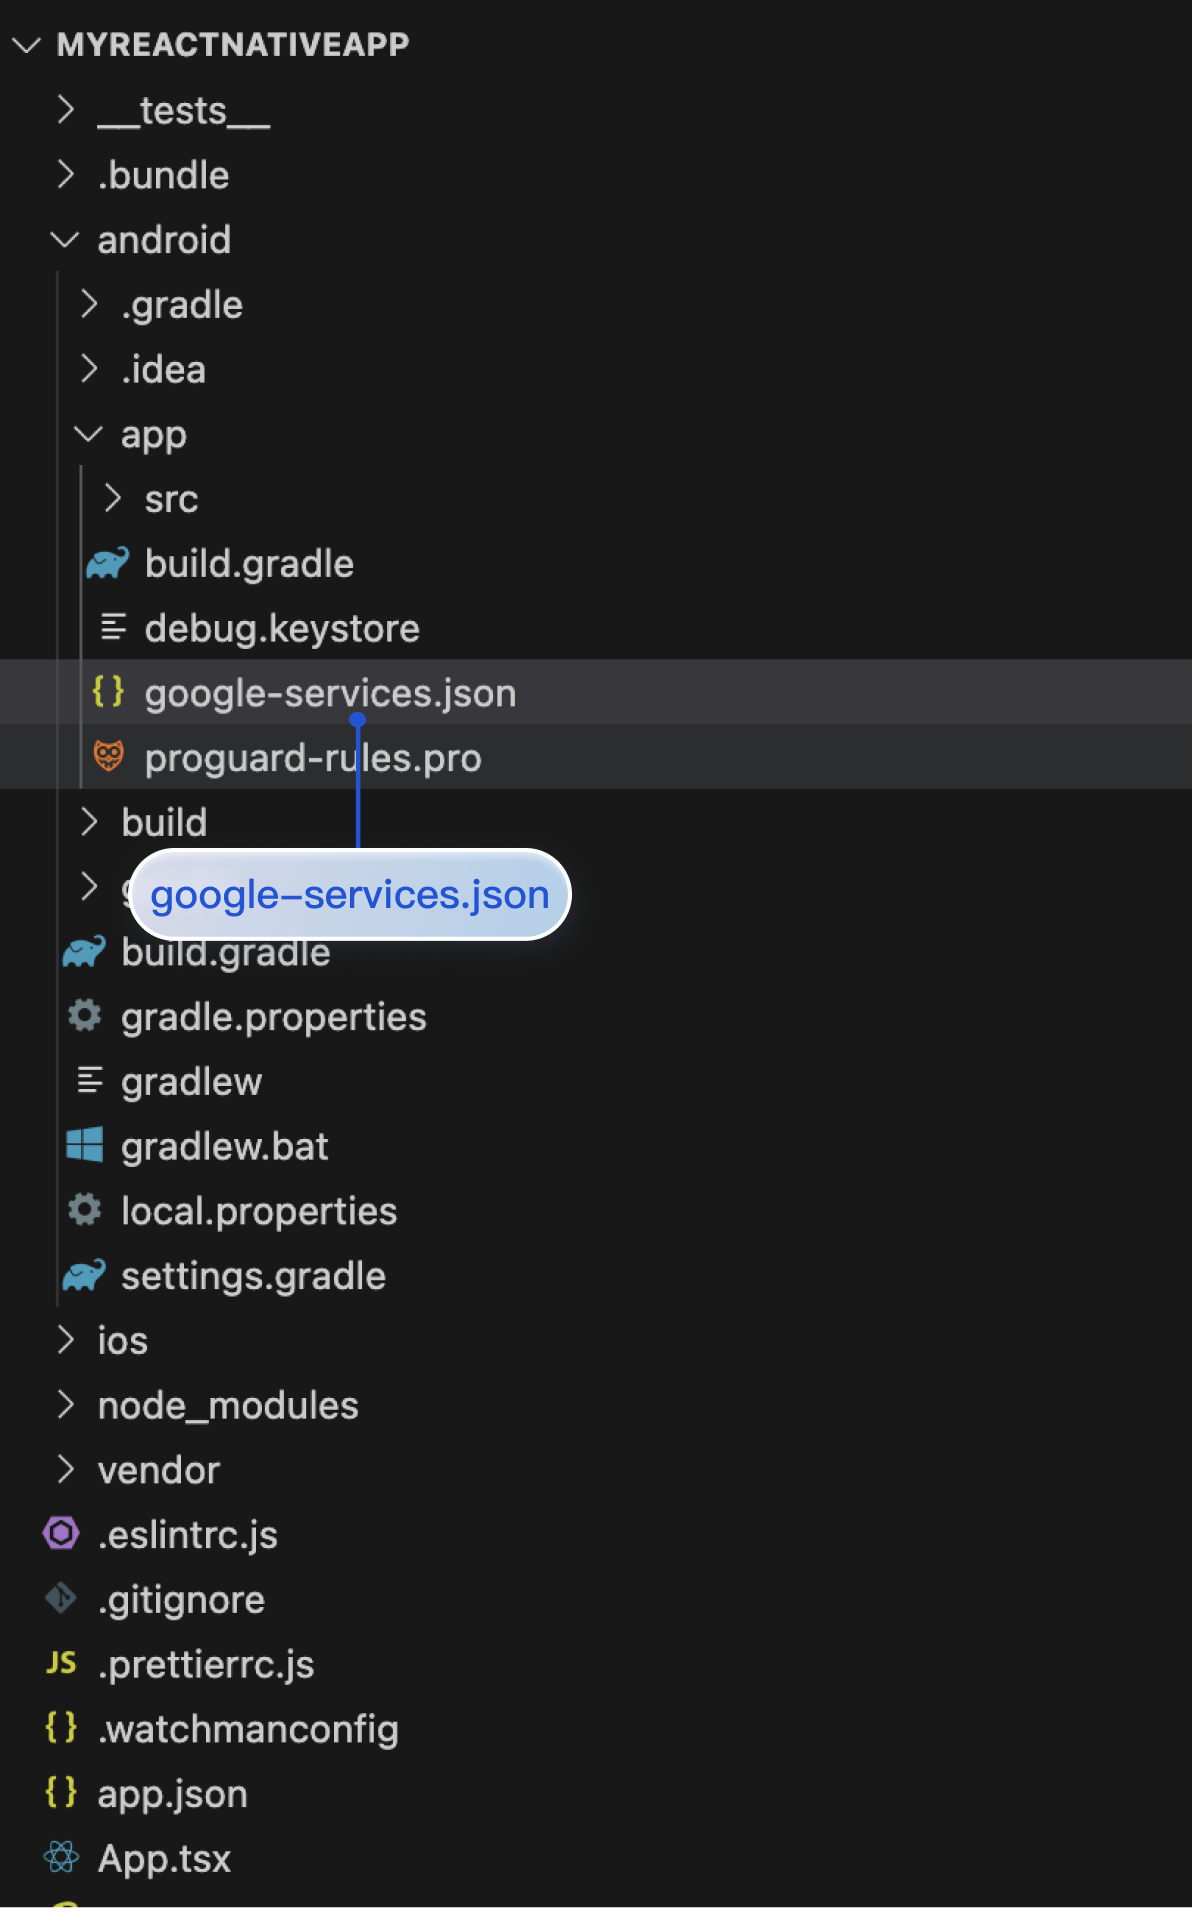
When you need to support FCM push, you must configure the google-services.json file in the MyReactNativeApp/android/app directory (Please note! Not in the MyReactNativeApp/android/app/src/main/assets directory). As shown in the picture:
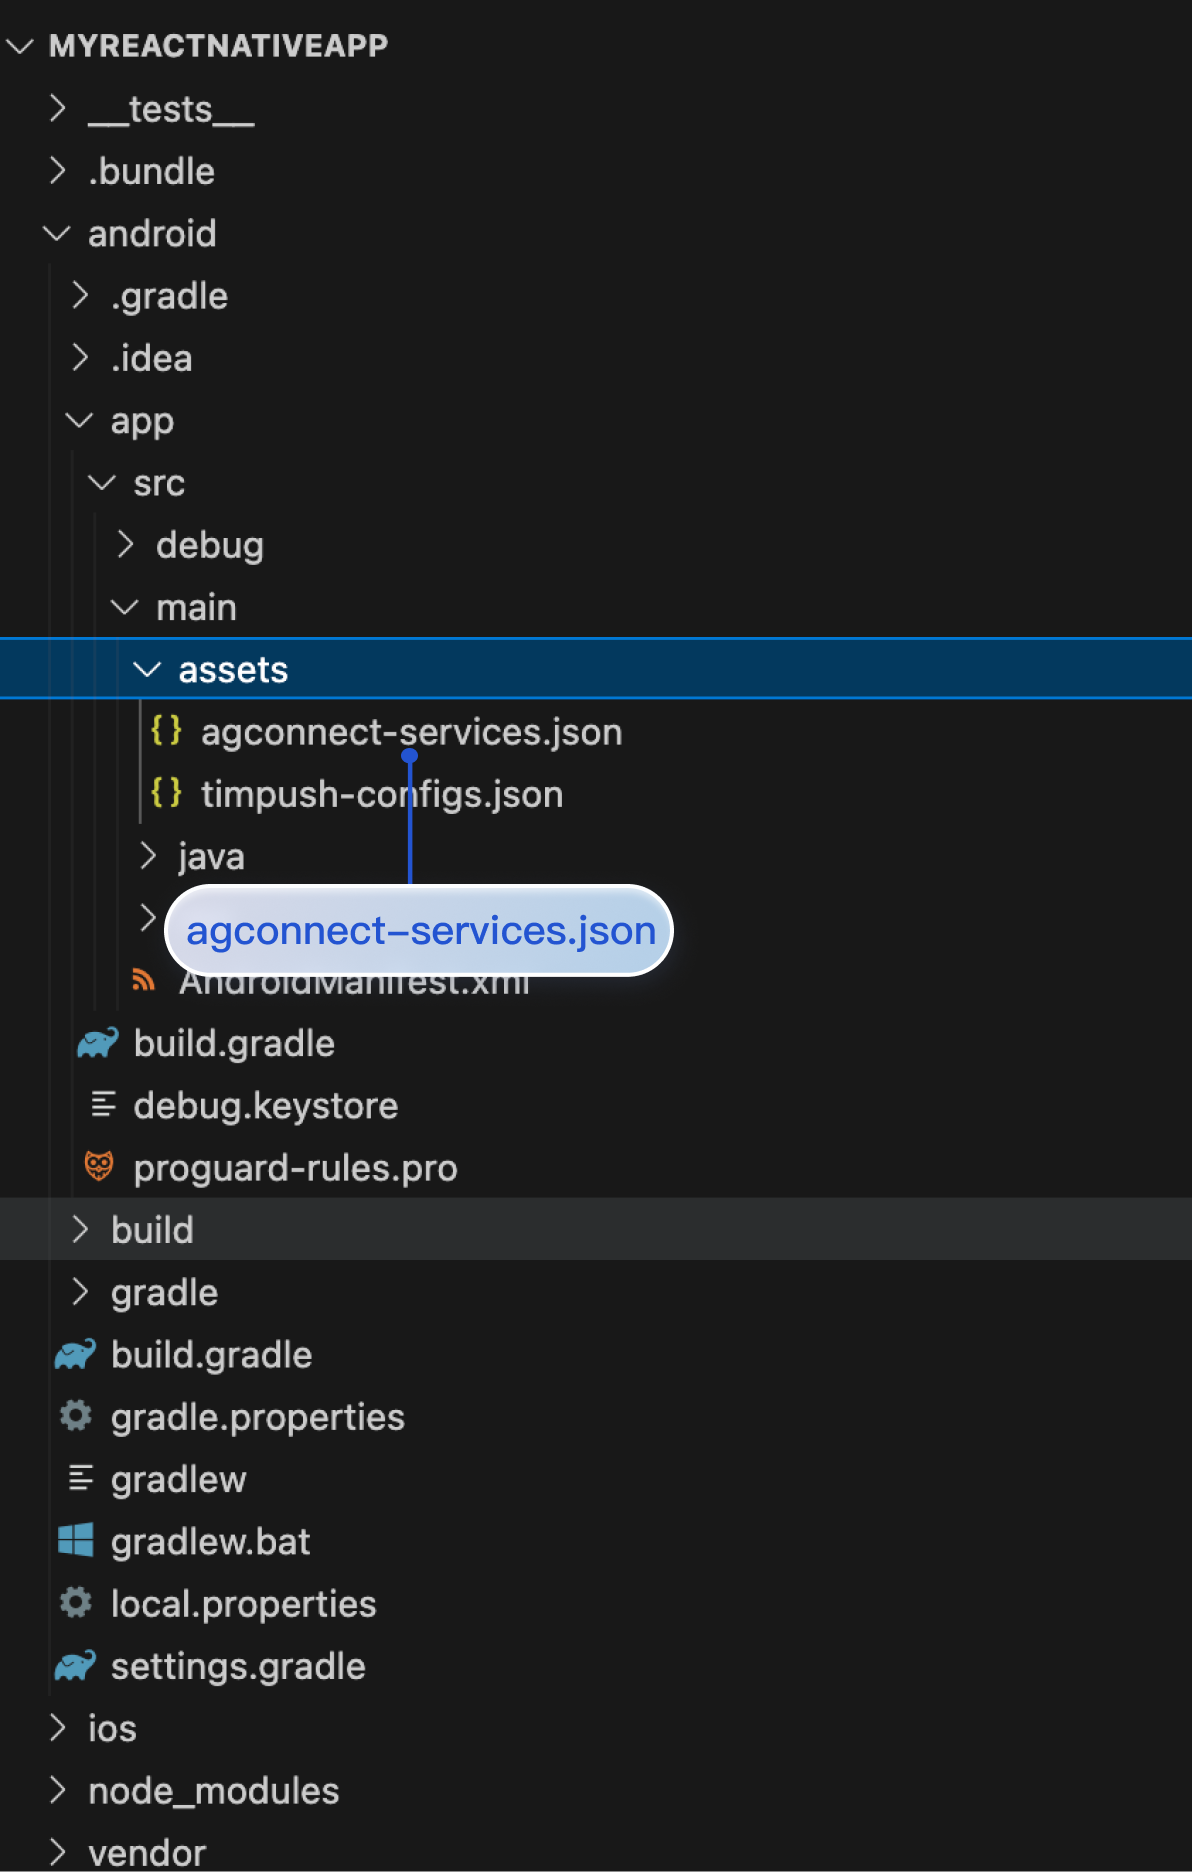
To support Huawei push, you need to configure the agconnect-services.json file in the MyReactNativeApp/android/app/src/main/assets/ directory. As shown in the figure:
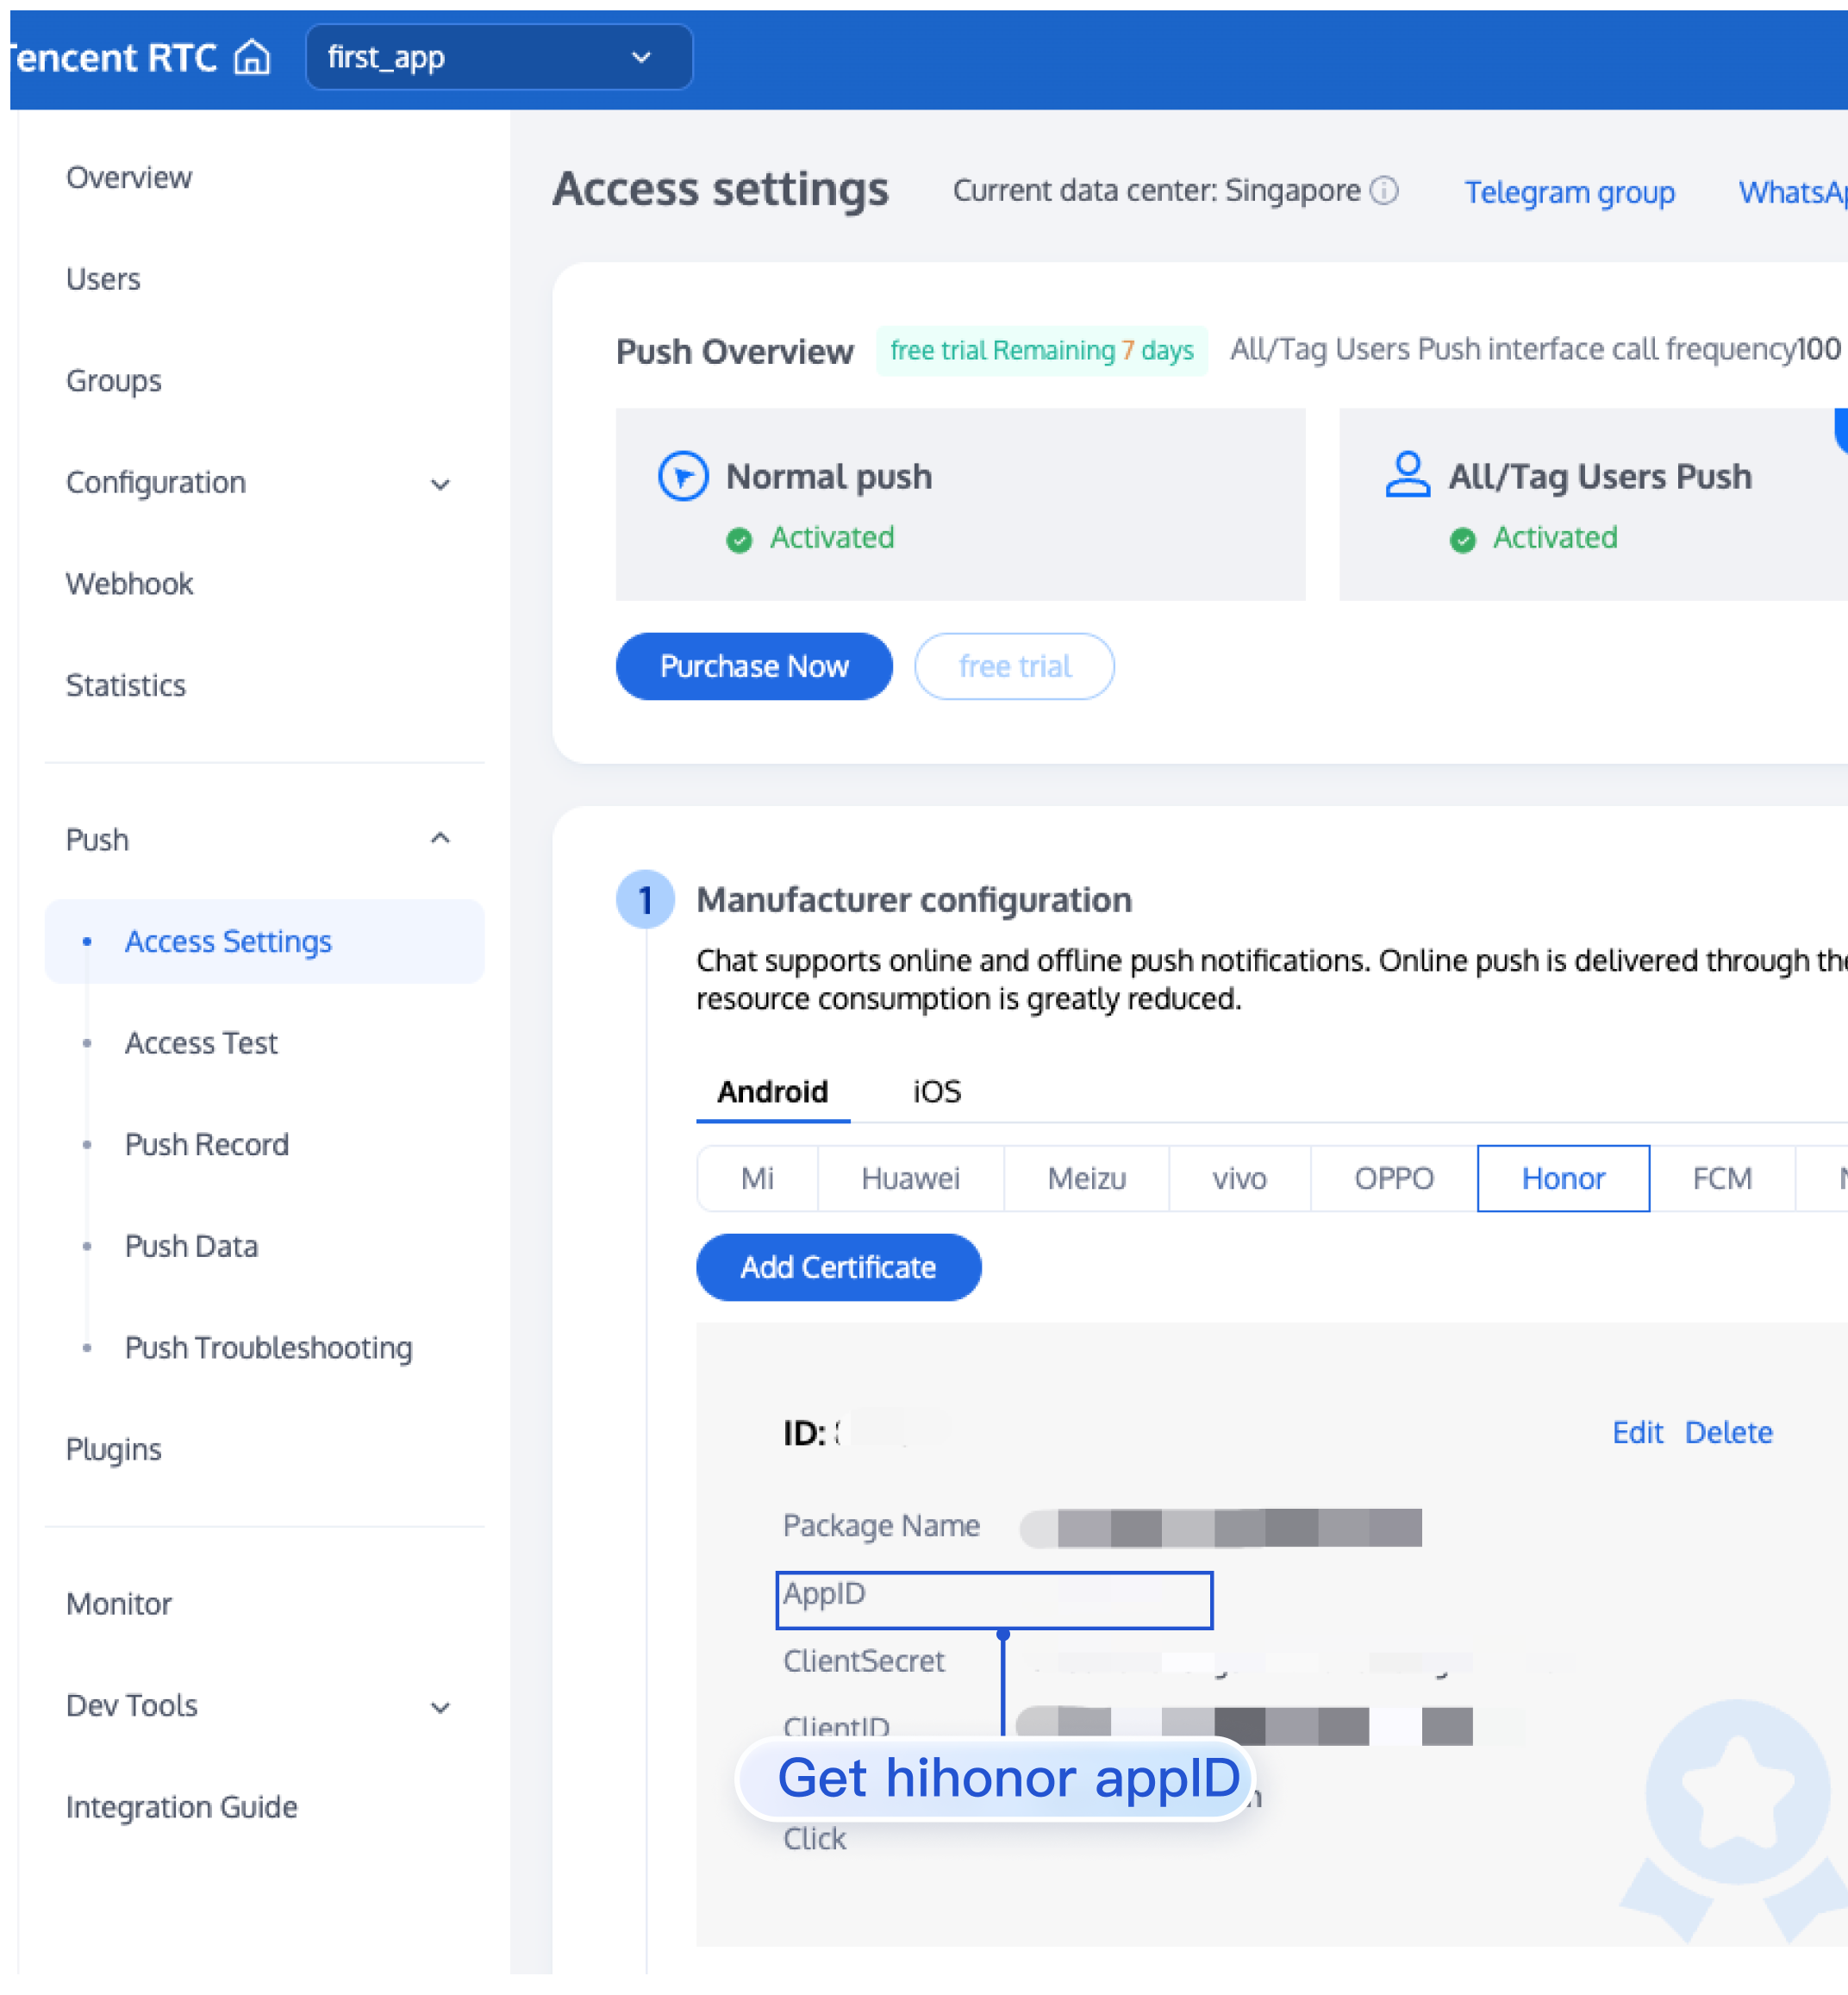
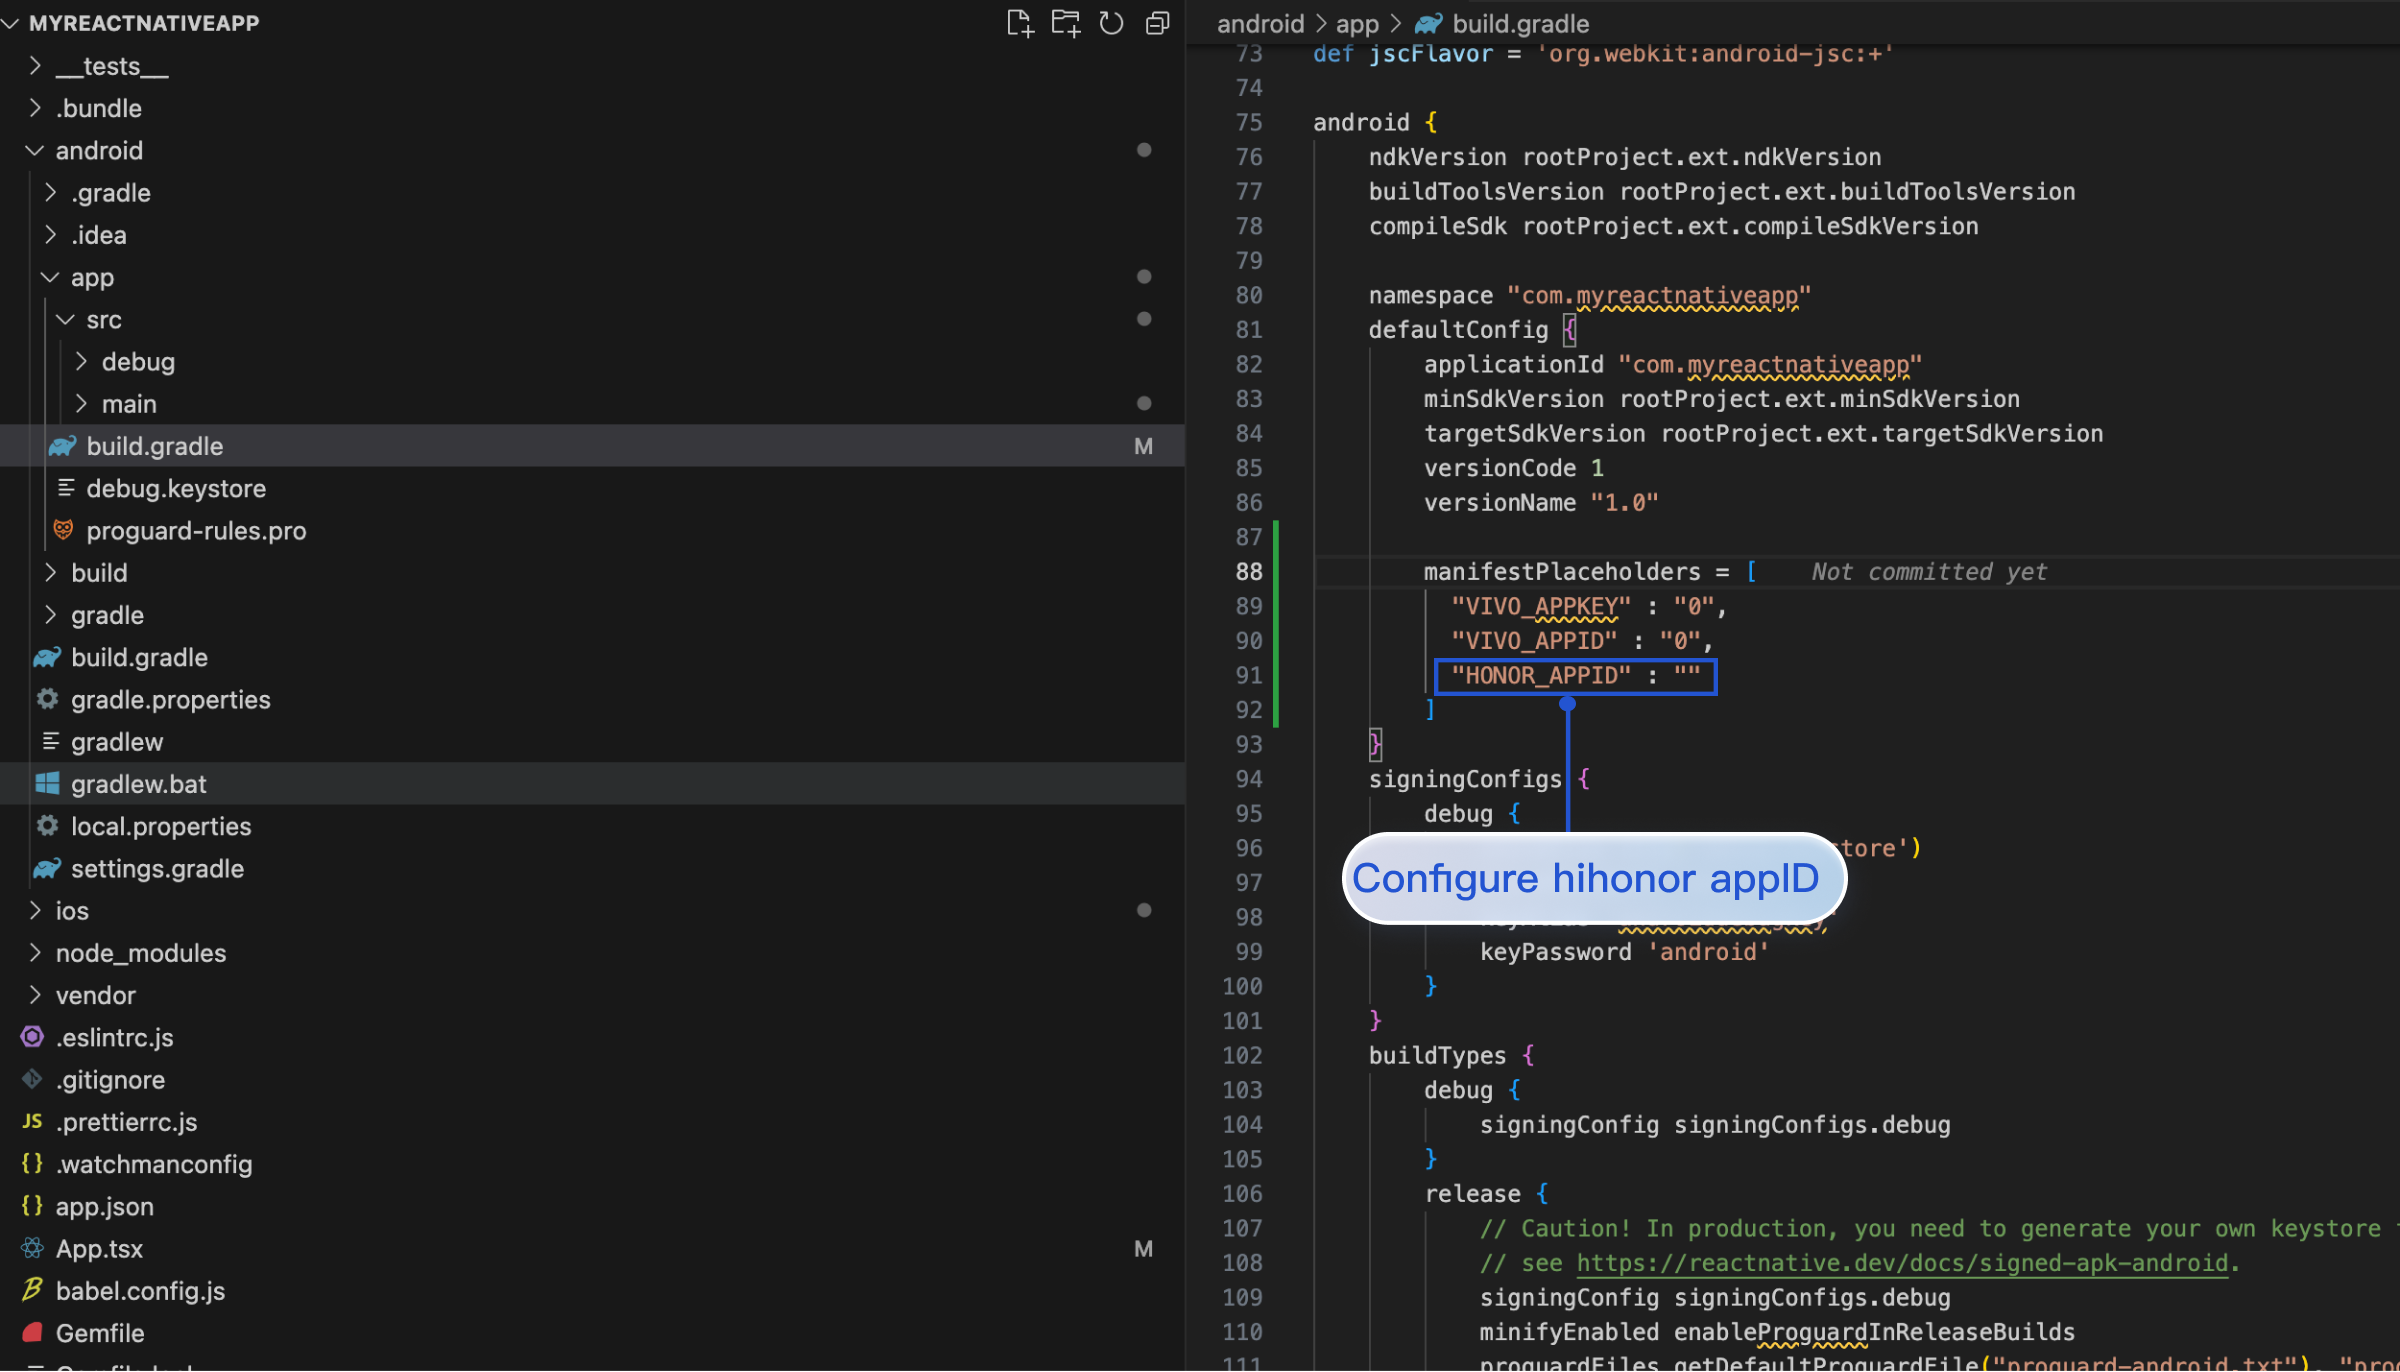
1. To support HONOR Push, you need to configure appID in the MyReactNativeApp/android/app/build.gradle file. As shown in the figure:
......
android {
......
defaultConfig {
......
manifestPlaceholders =[
"HONOR_APPID":""
]
}
}
Obtain HONOR appID
Configure HONOR appID
2. Download the mcs-services.json file from the Honor Developer Management Center, and configure it in the MyReactNativeApp/android/app directory (Please note! Not in the MyReactNativeApp/android/app/src/main/assets directory directory).
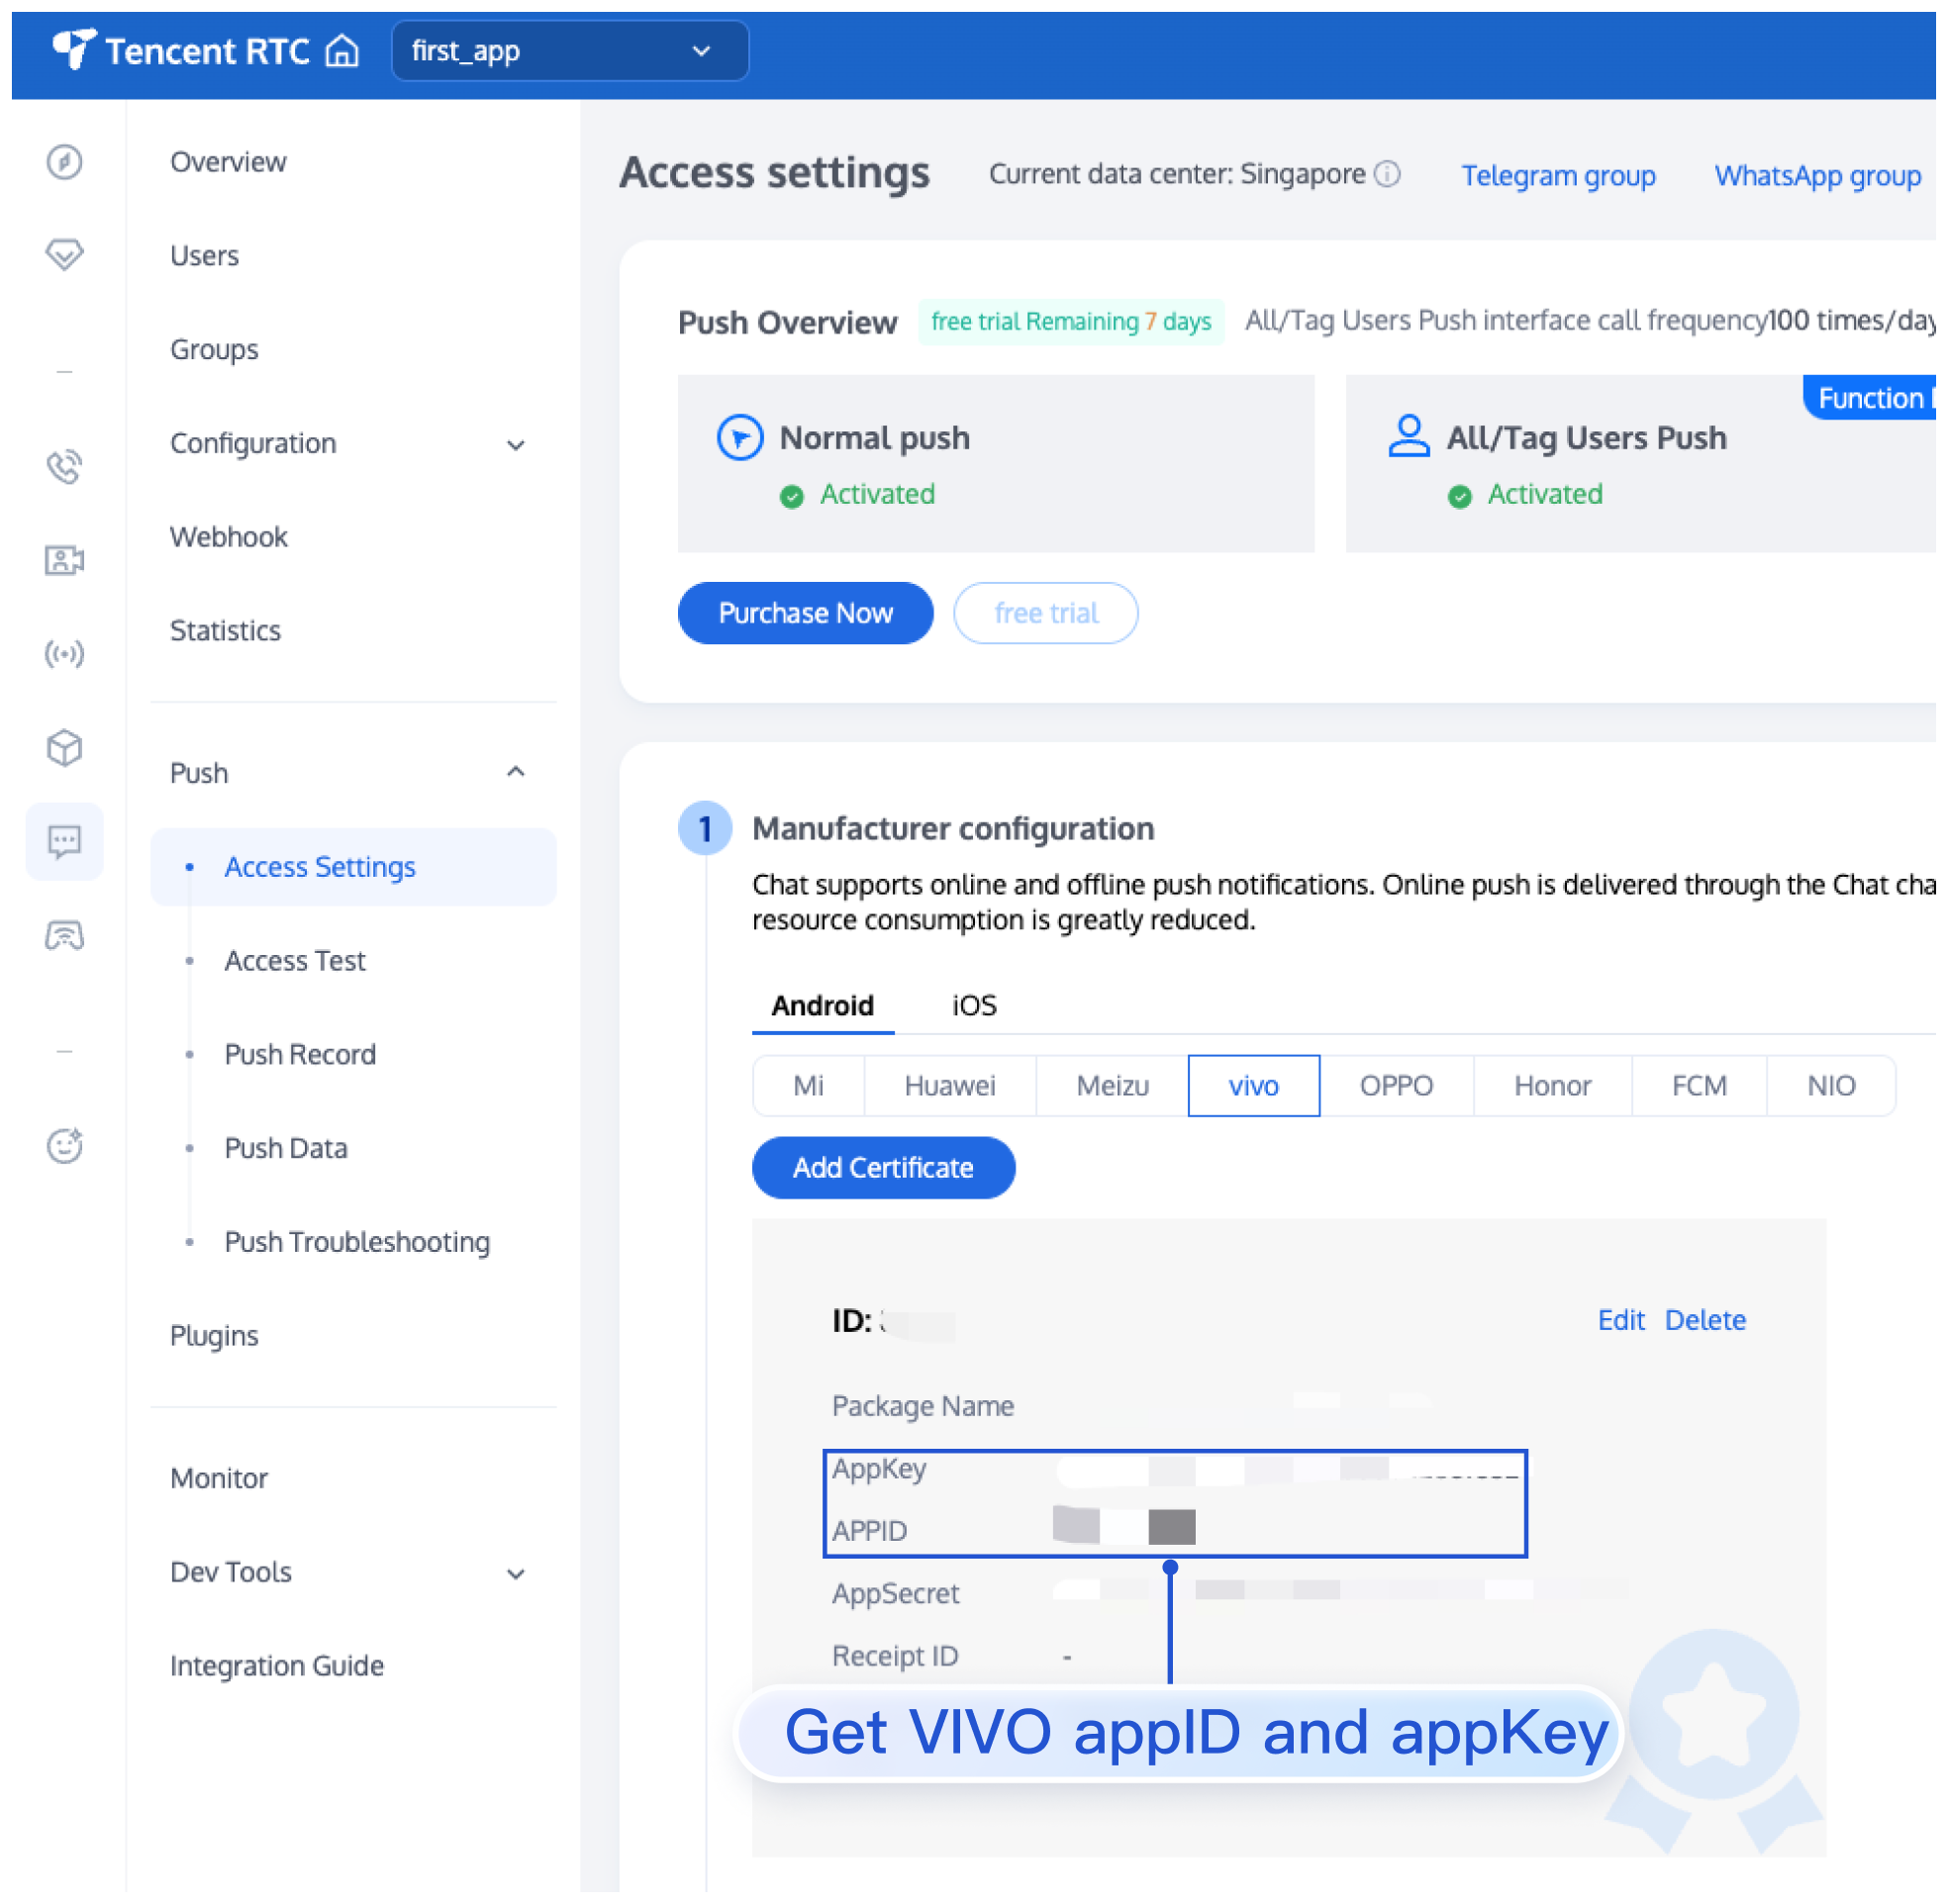
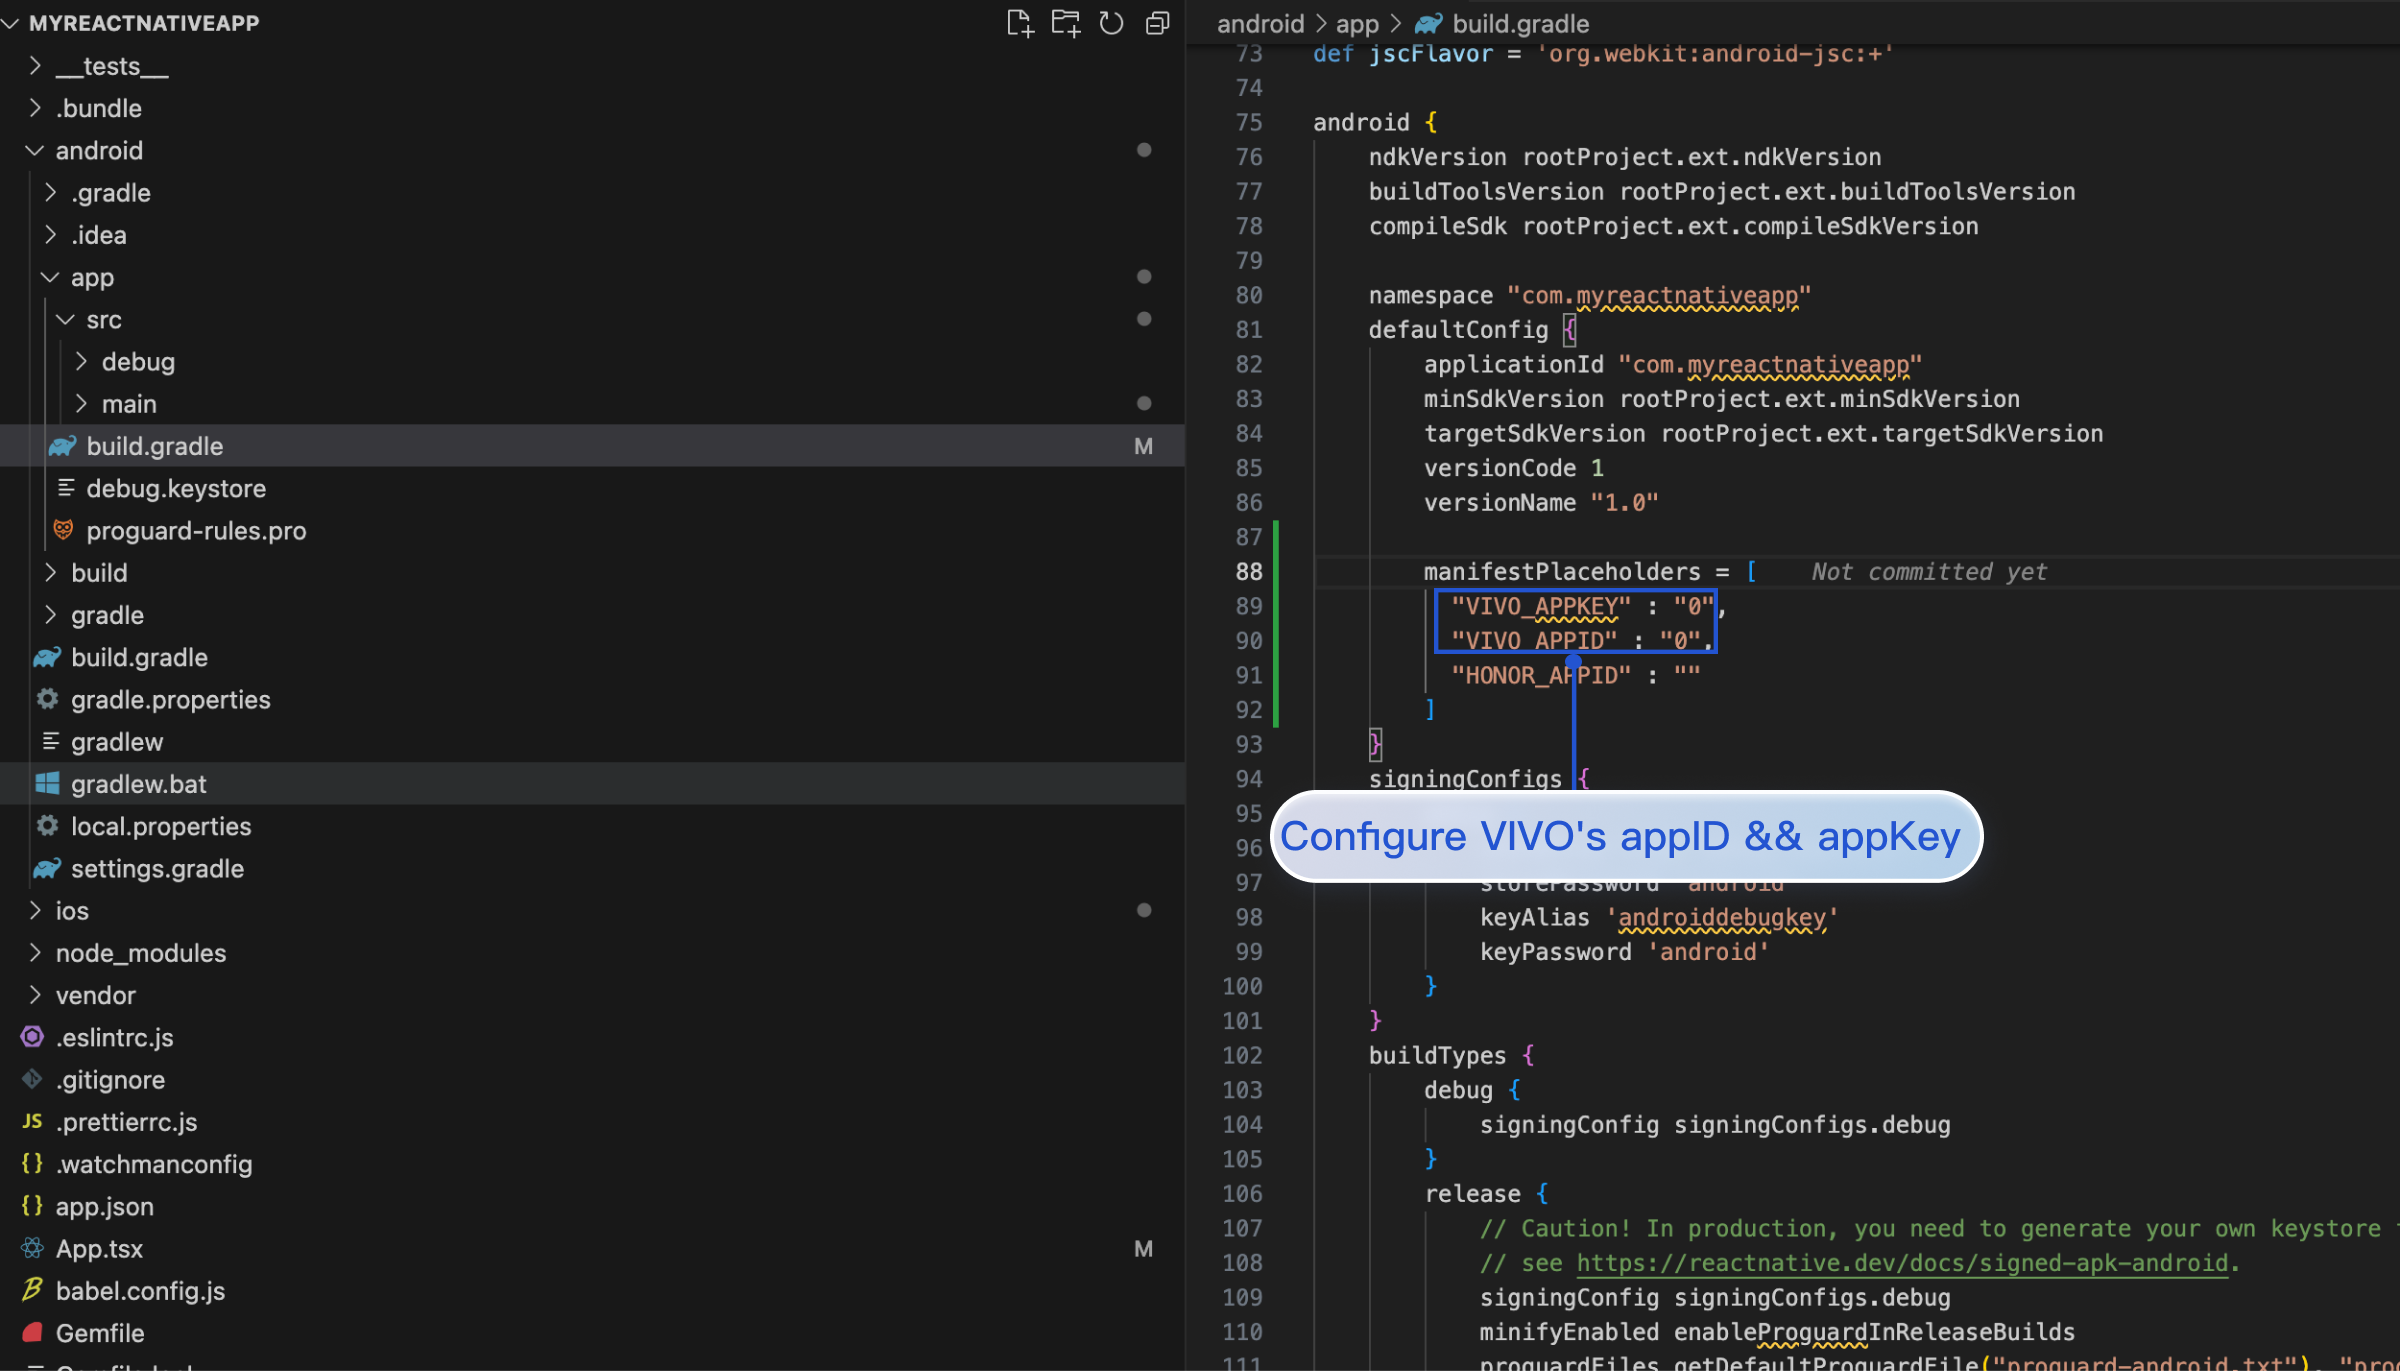
To support vivo Push, you need to configure appID and appKey in the MyReactNativeApp/android/app/build.gradle file. As shown in the figure:
......
android {
......
defaultConfig {
......
manifestPlaceholders =[
"VIVO_APPKEY":"0",
"VIVO_APPID":"0",
]
}
}
Obtain vivo appID && appKey
Configure vivo appID && appKey
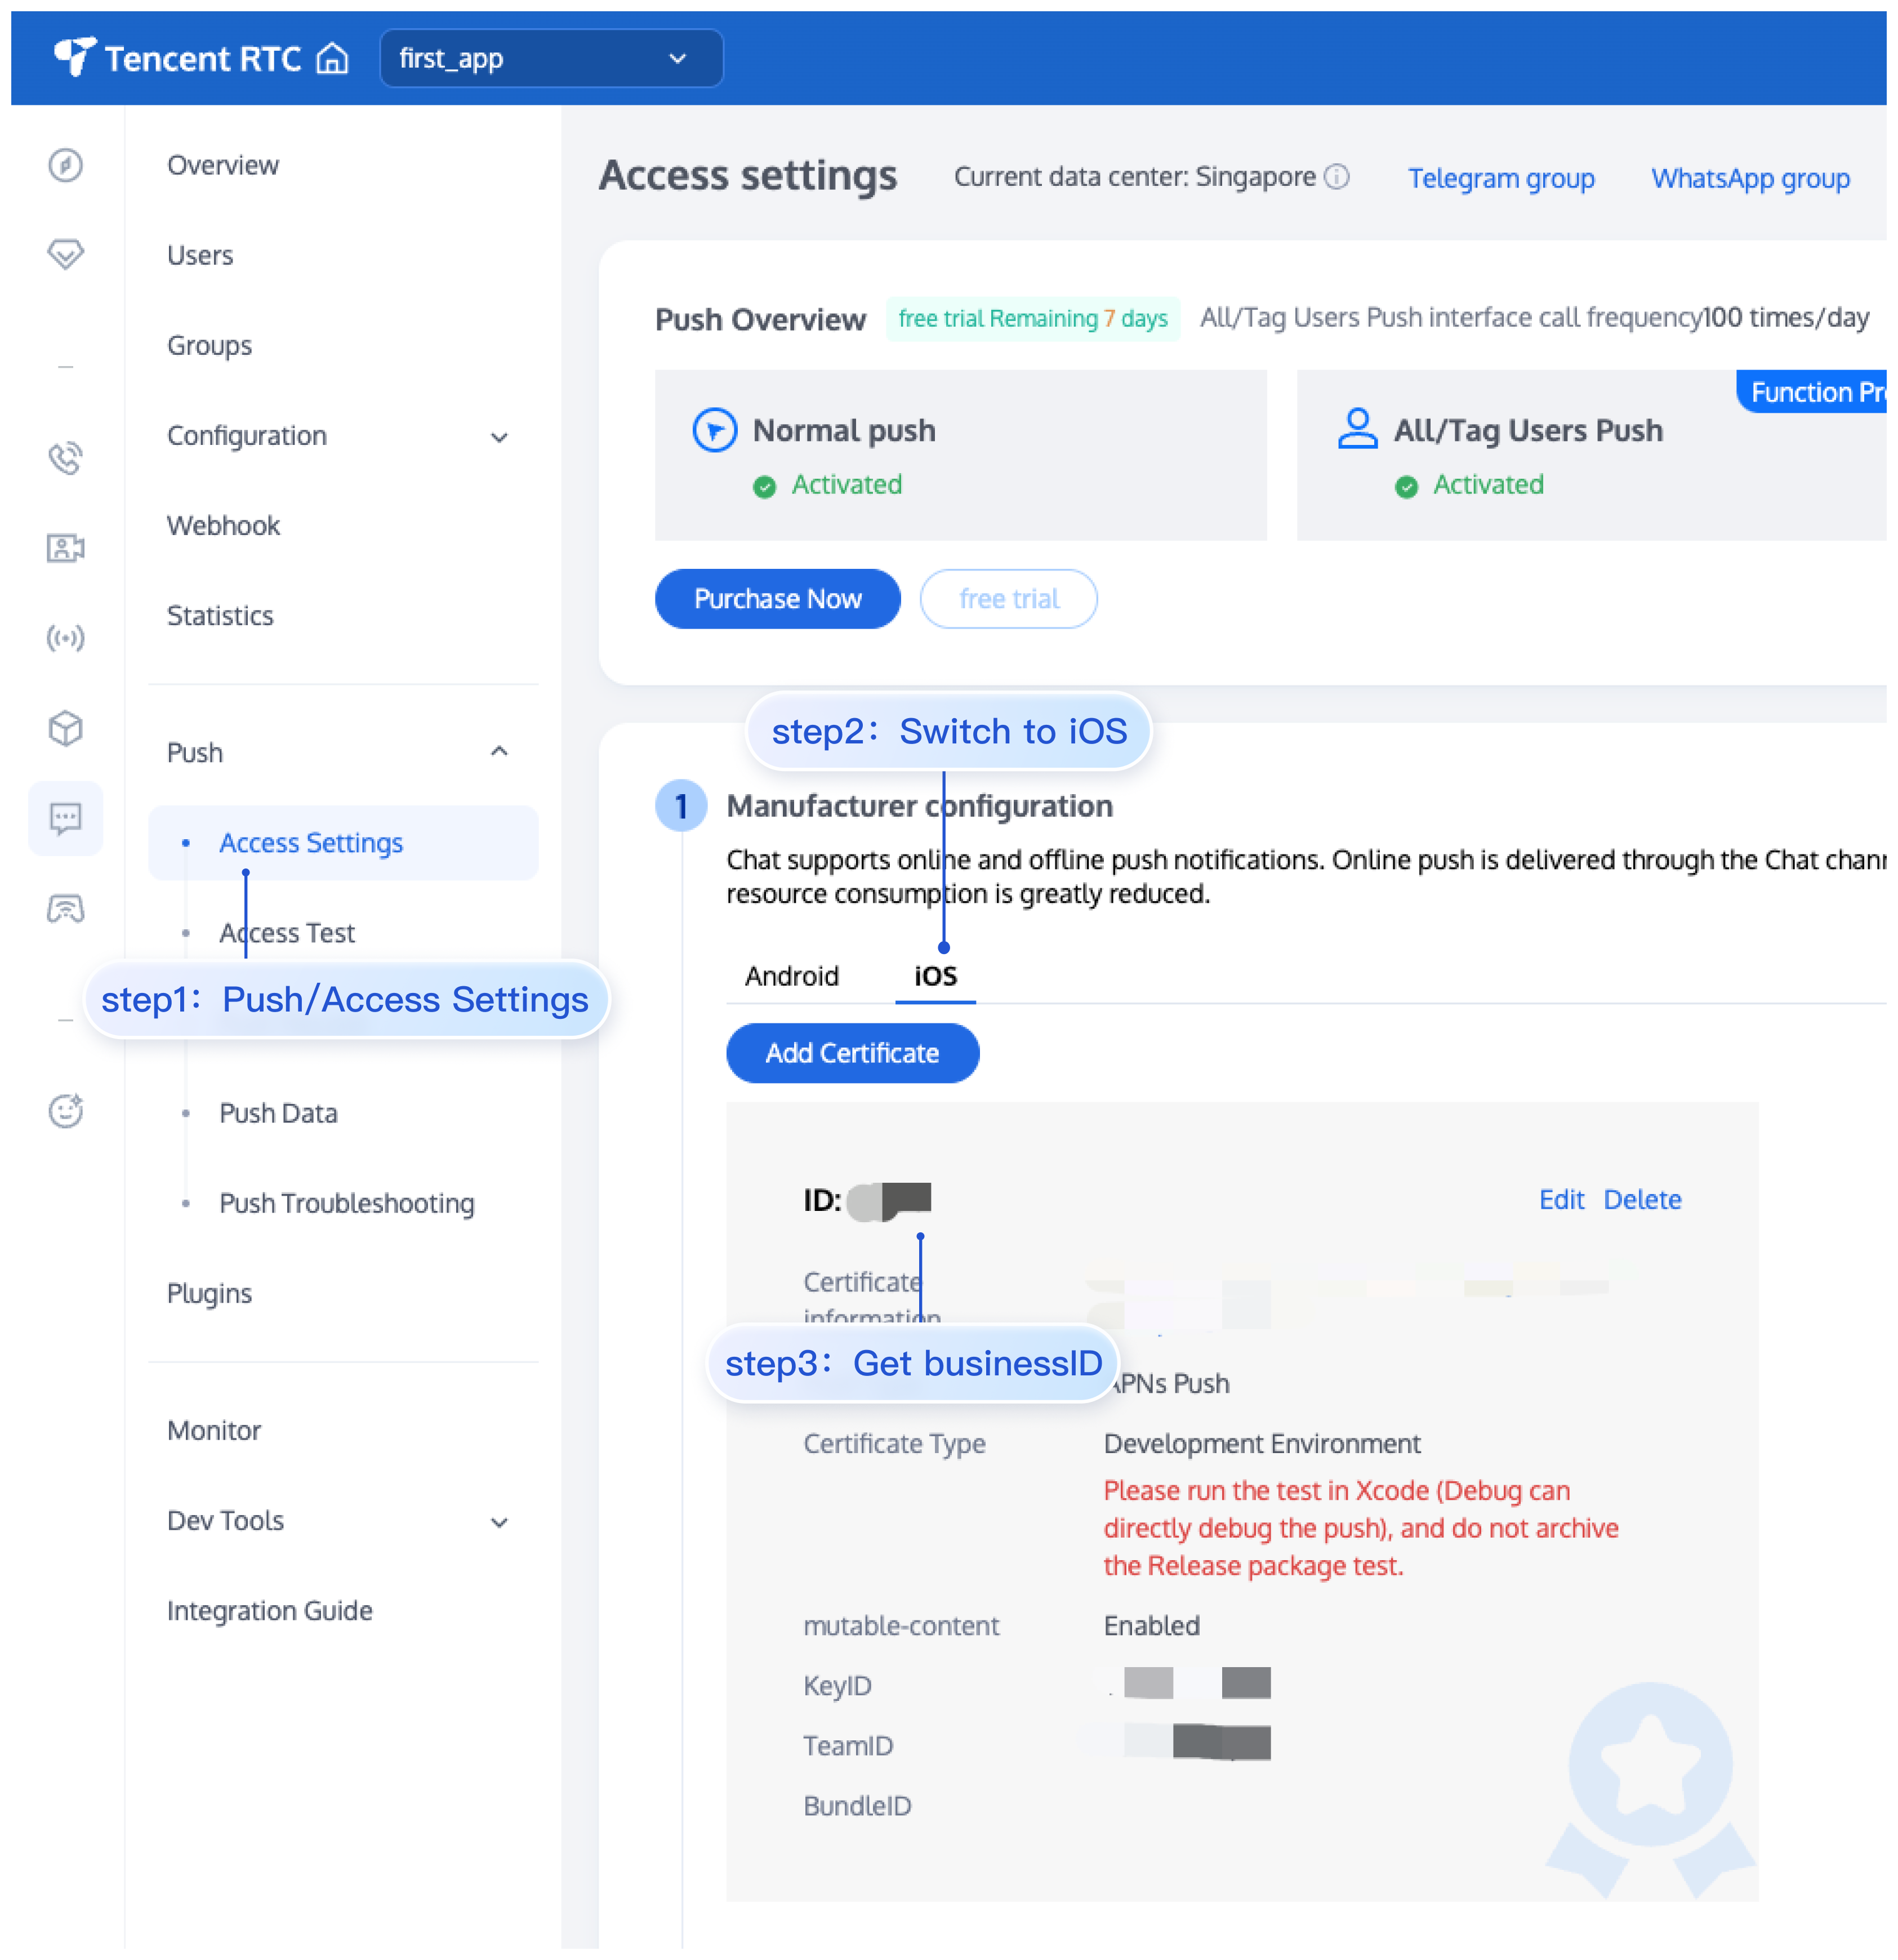
1. Please upload the iOS APNs Push Certificate obtained in the manufacturer configuration step to the Chat Console. The Chat Console will assign a Certificate ID to you, as shown in the figure:
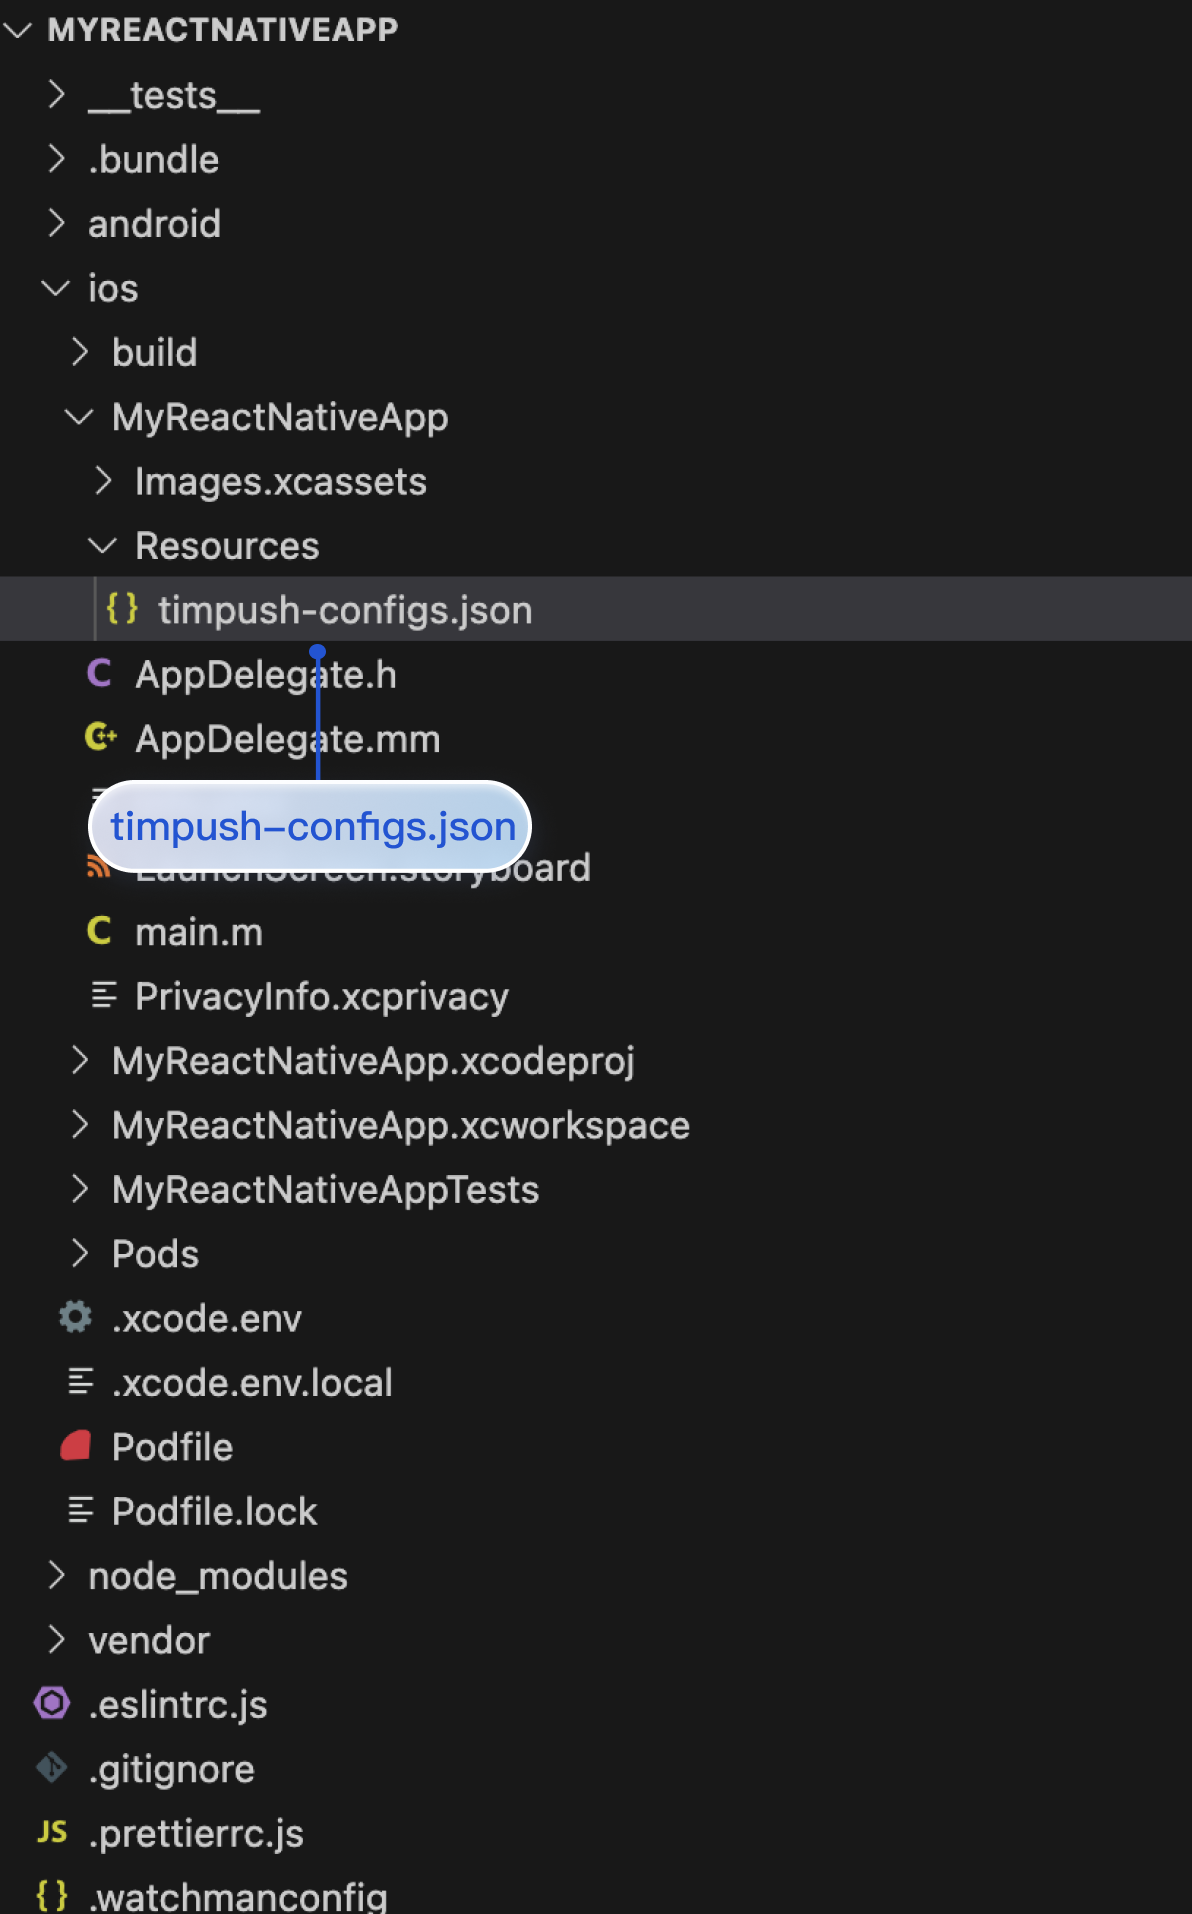
2. In the MyReactNativeApp/ios/MyReactNativeApp directory, create a new Resources folder and a new timpush-configs.json file. Edit timpush-configs.json and enter the certificate ID obtained from the console, as shown below:
{
"businessID":"Your Certificate ID"
}
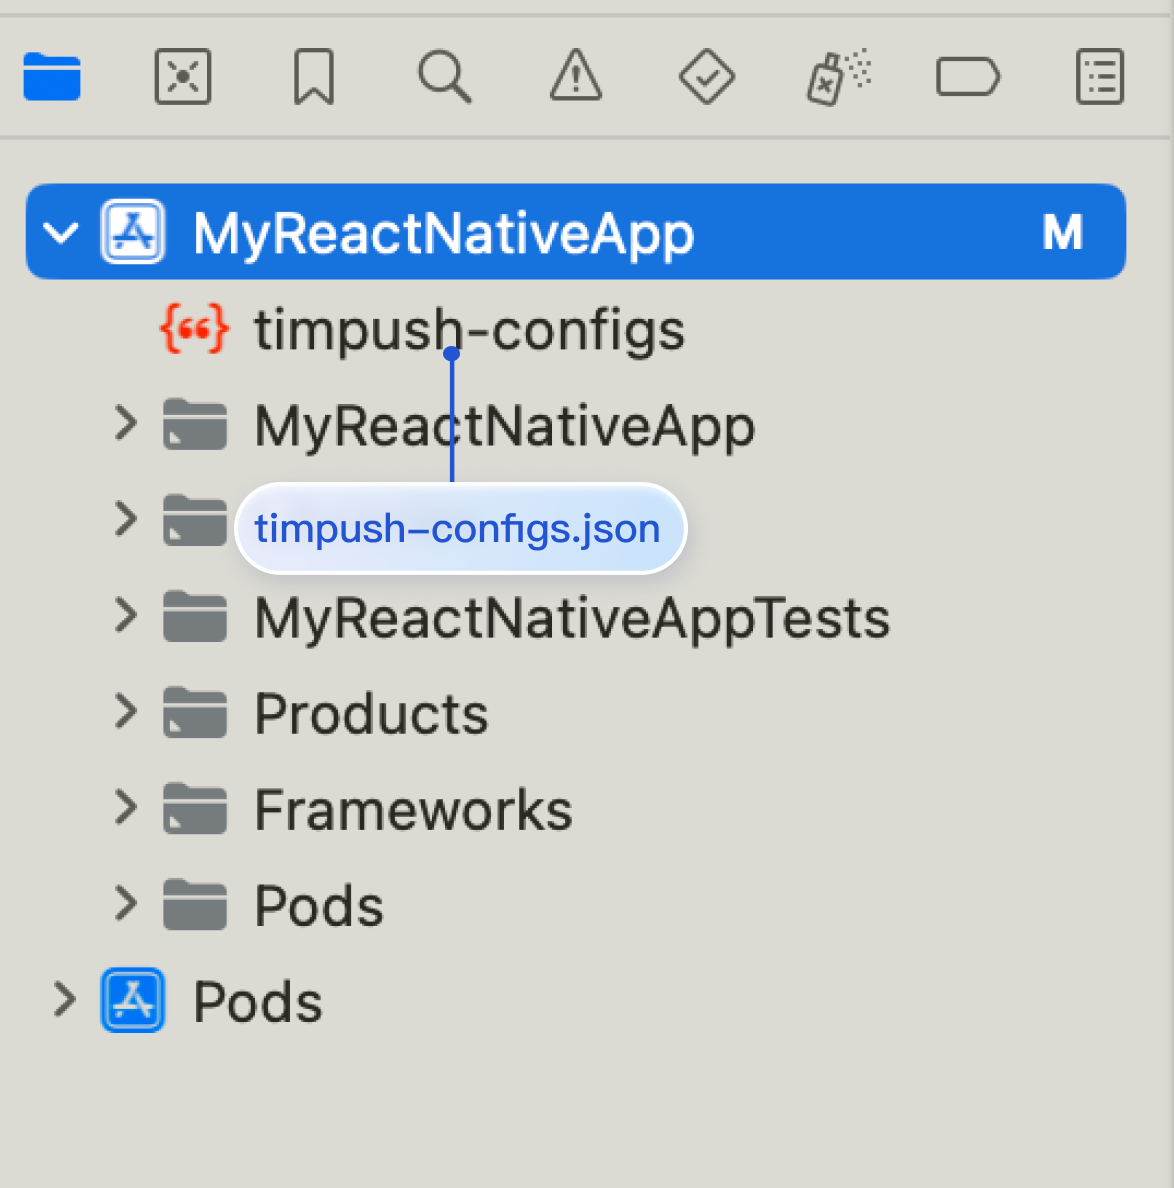
3. Open the MyReactNativeApp project in XCode, right-click the project > Add Files to "MyReactNativeApp", and add the timpush-configs.json directory to the project. As shown in the figure:
Step 5: Configuring Native Modules and Dependencies
Android
iOS
Note:
Please ensure the package name in timpush-configs.json matches the applicationId value in MyReactNativeApp/android/app/build.gradle. Inconsistency will result in offline push notifications being unavailable.
1. Open the MyReactNativeApp/android directory with Android Studio.
5. After completing the above steps, select File > Sync Project with Gradle Files.
1. Open MyReactNativeApp/ios/MyReactNativeApp.xcworkspace with XCode.
2. Go to the MyReactNativeApp/ios directory and install TIMPush.
pod install
# If you cannot install the latest version, run the following command to update your local CocoaPods repository list
pod repo update
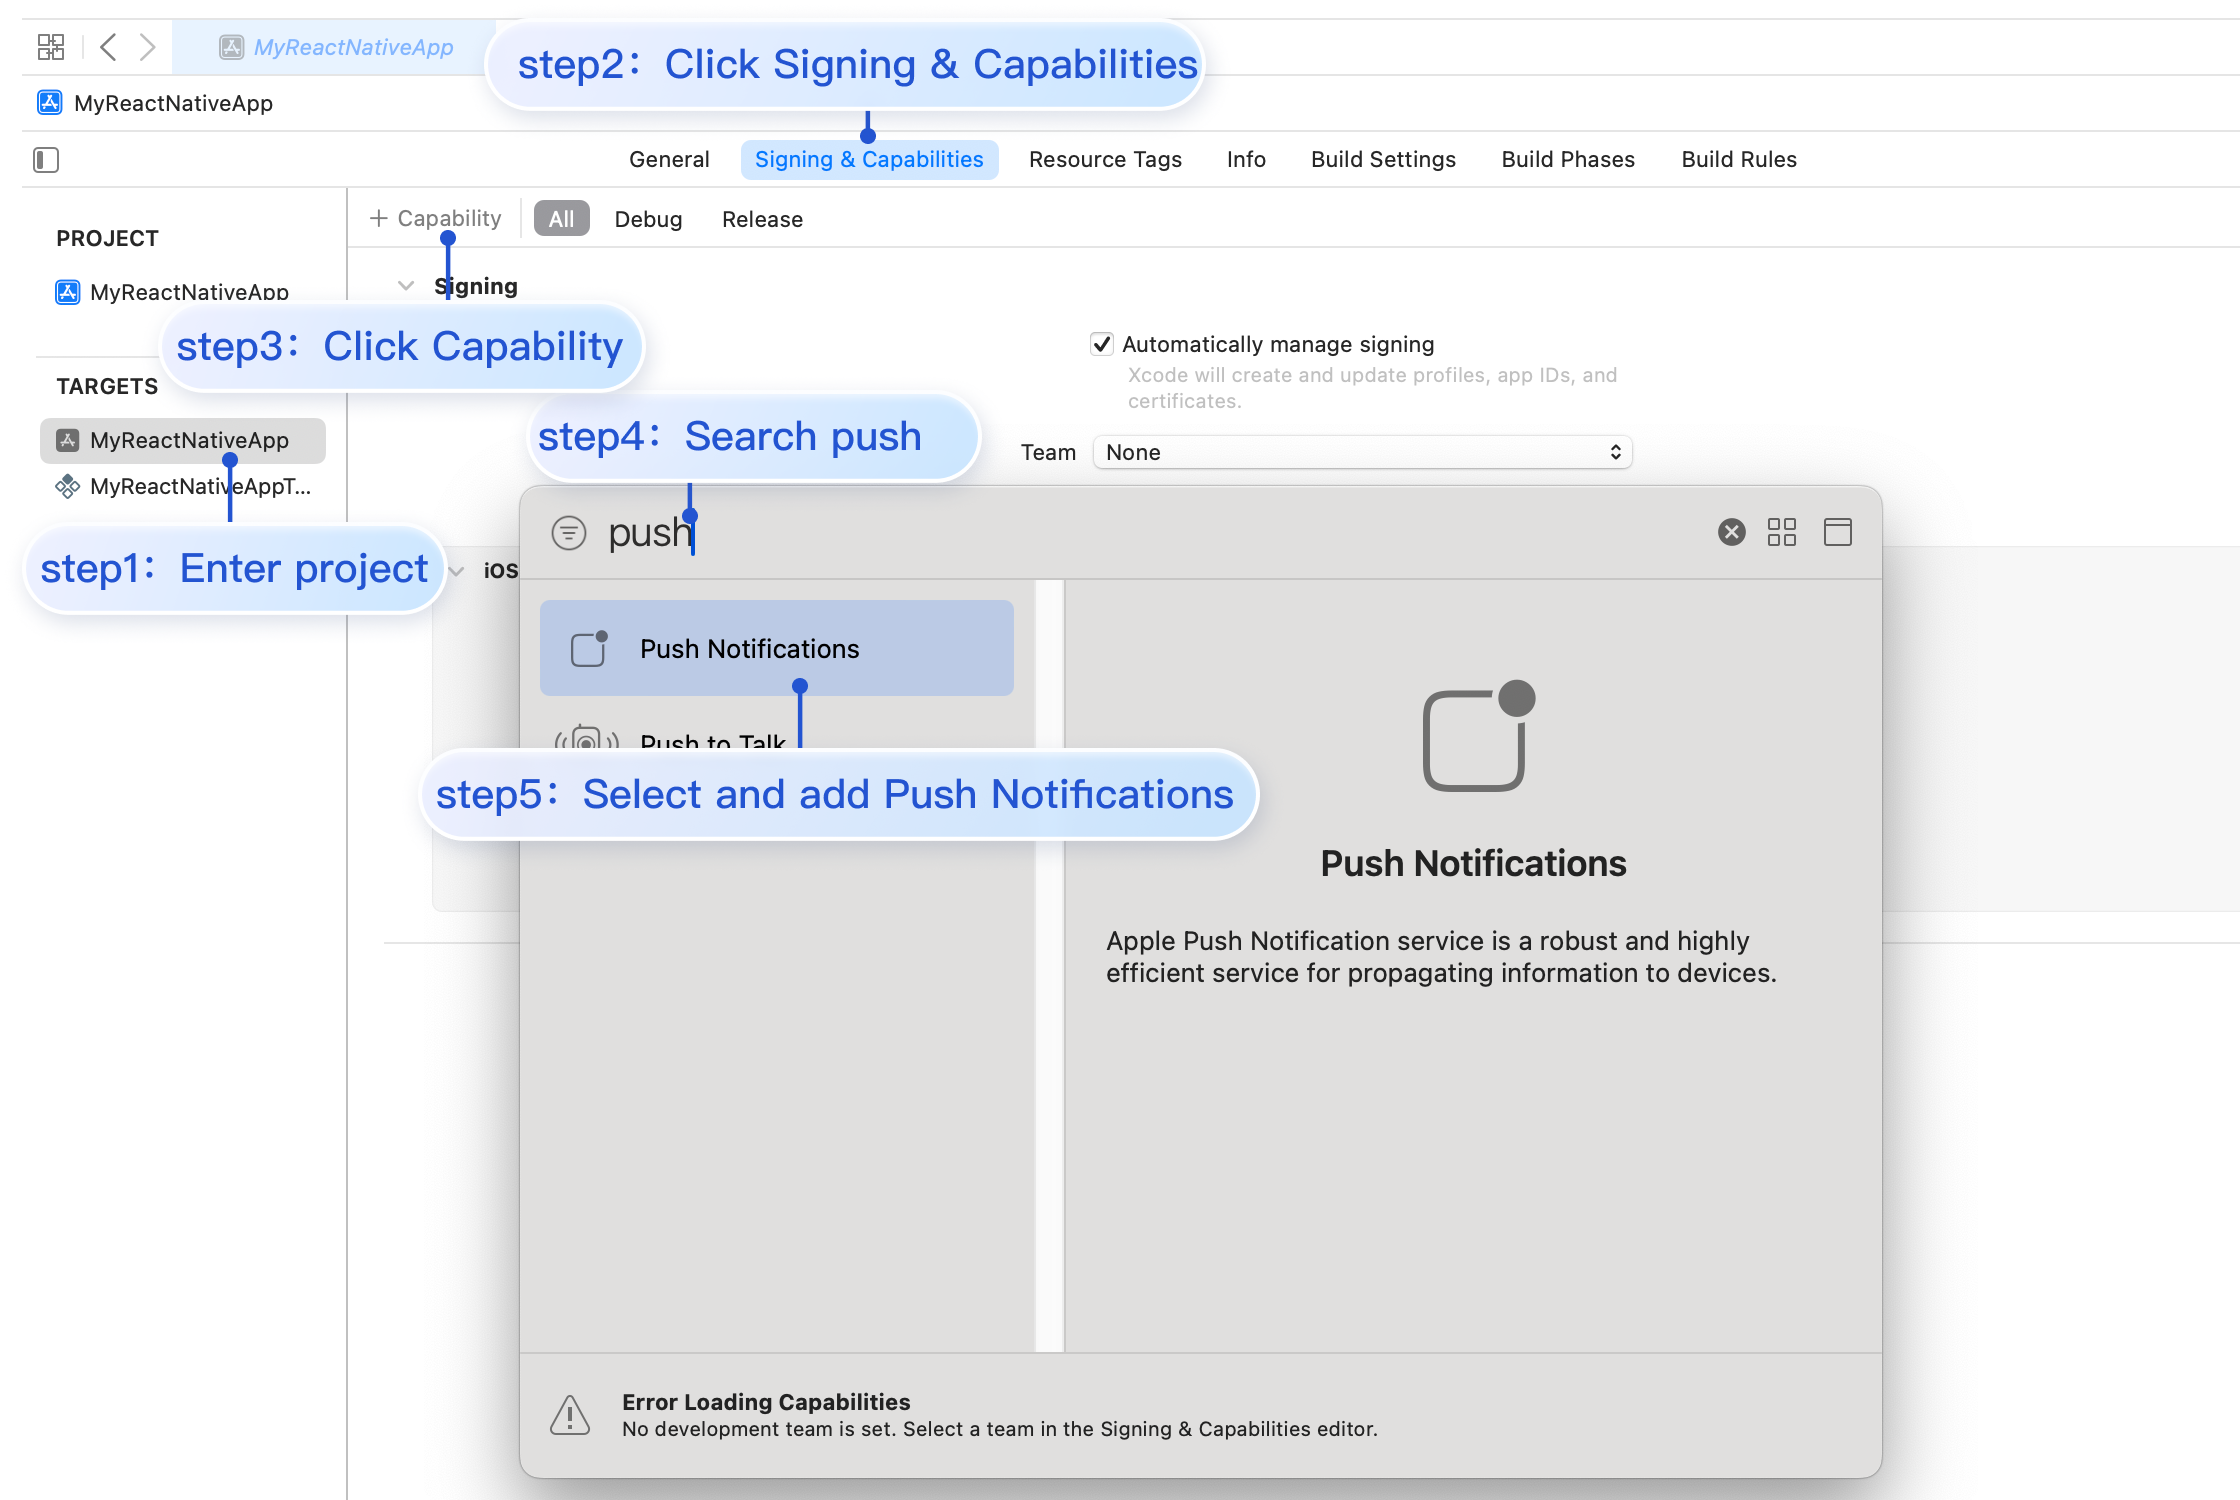
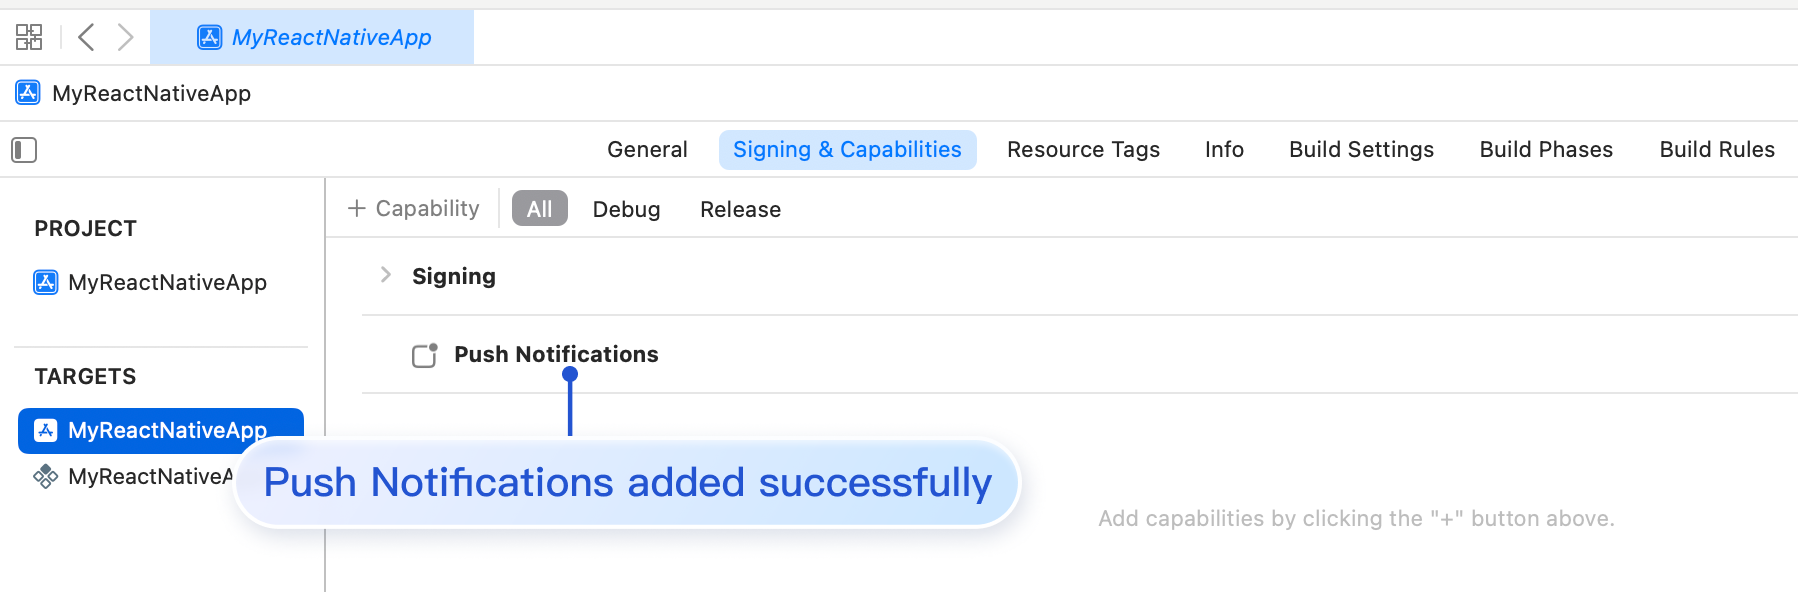
3. Enable push notification feature in the app. Open the Xcode project, and select and add Push Notifications on the Project > Target > Capabilities page.
Step 6: Running on a Real Device (Make sure to enable notification permissions on your phone before testing, allowing the app to send notifications.)
Starting from the project's root directory, run the following command in the command prompt to install and launch your app on the device:
Android
iOS
npm run android
npm run ios
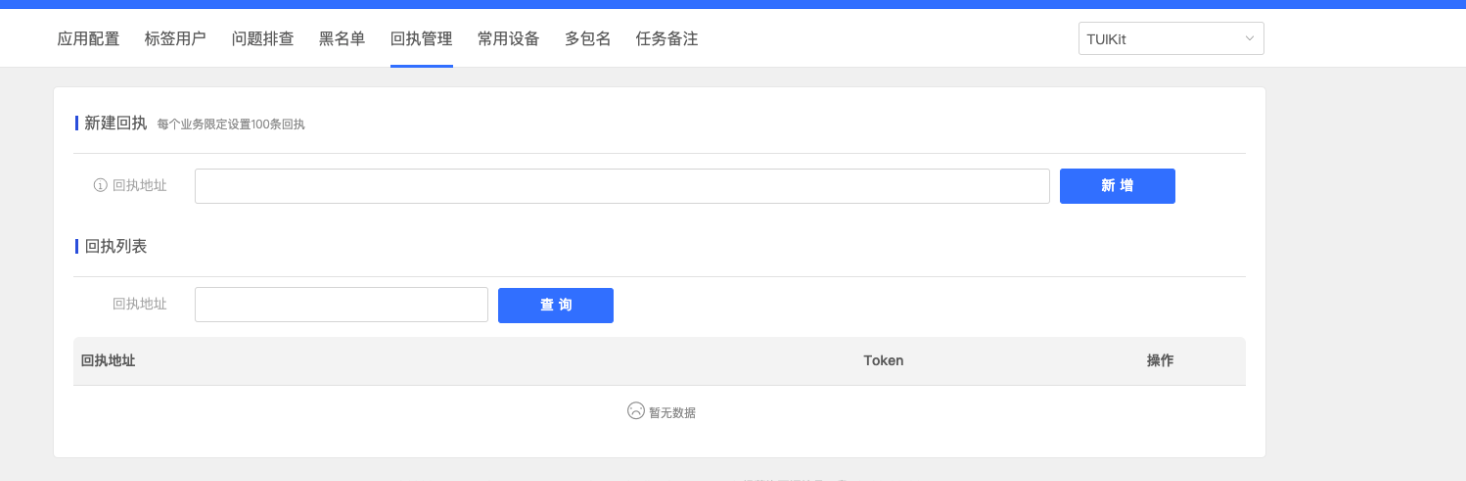
Step 7: Message Push Reach Statistics
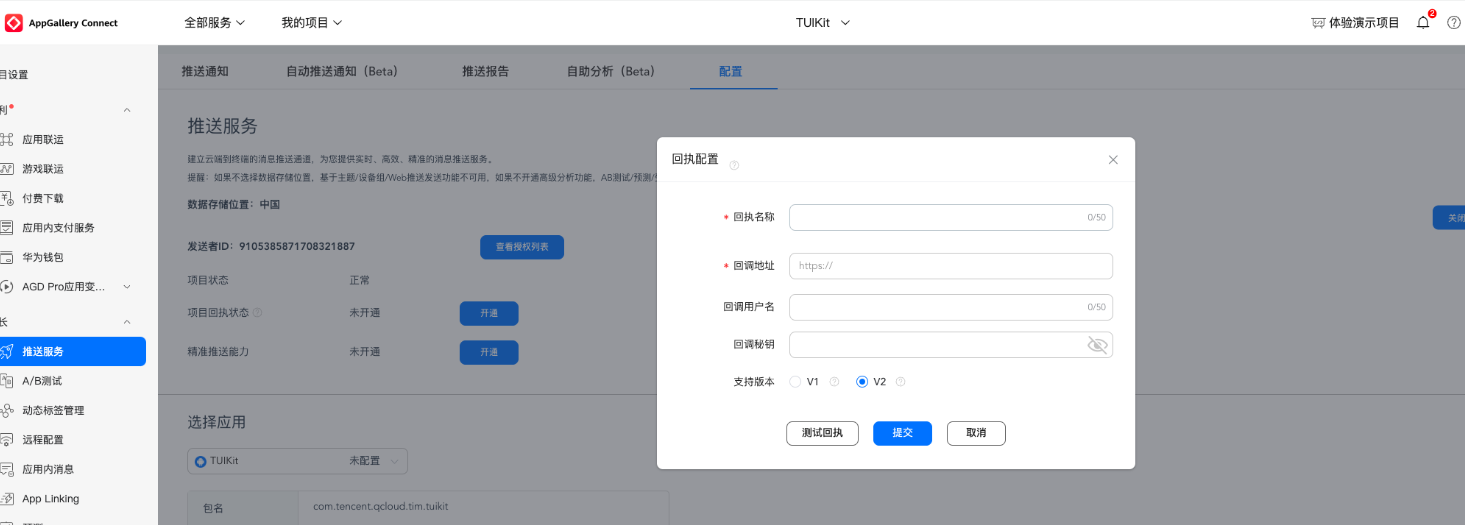
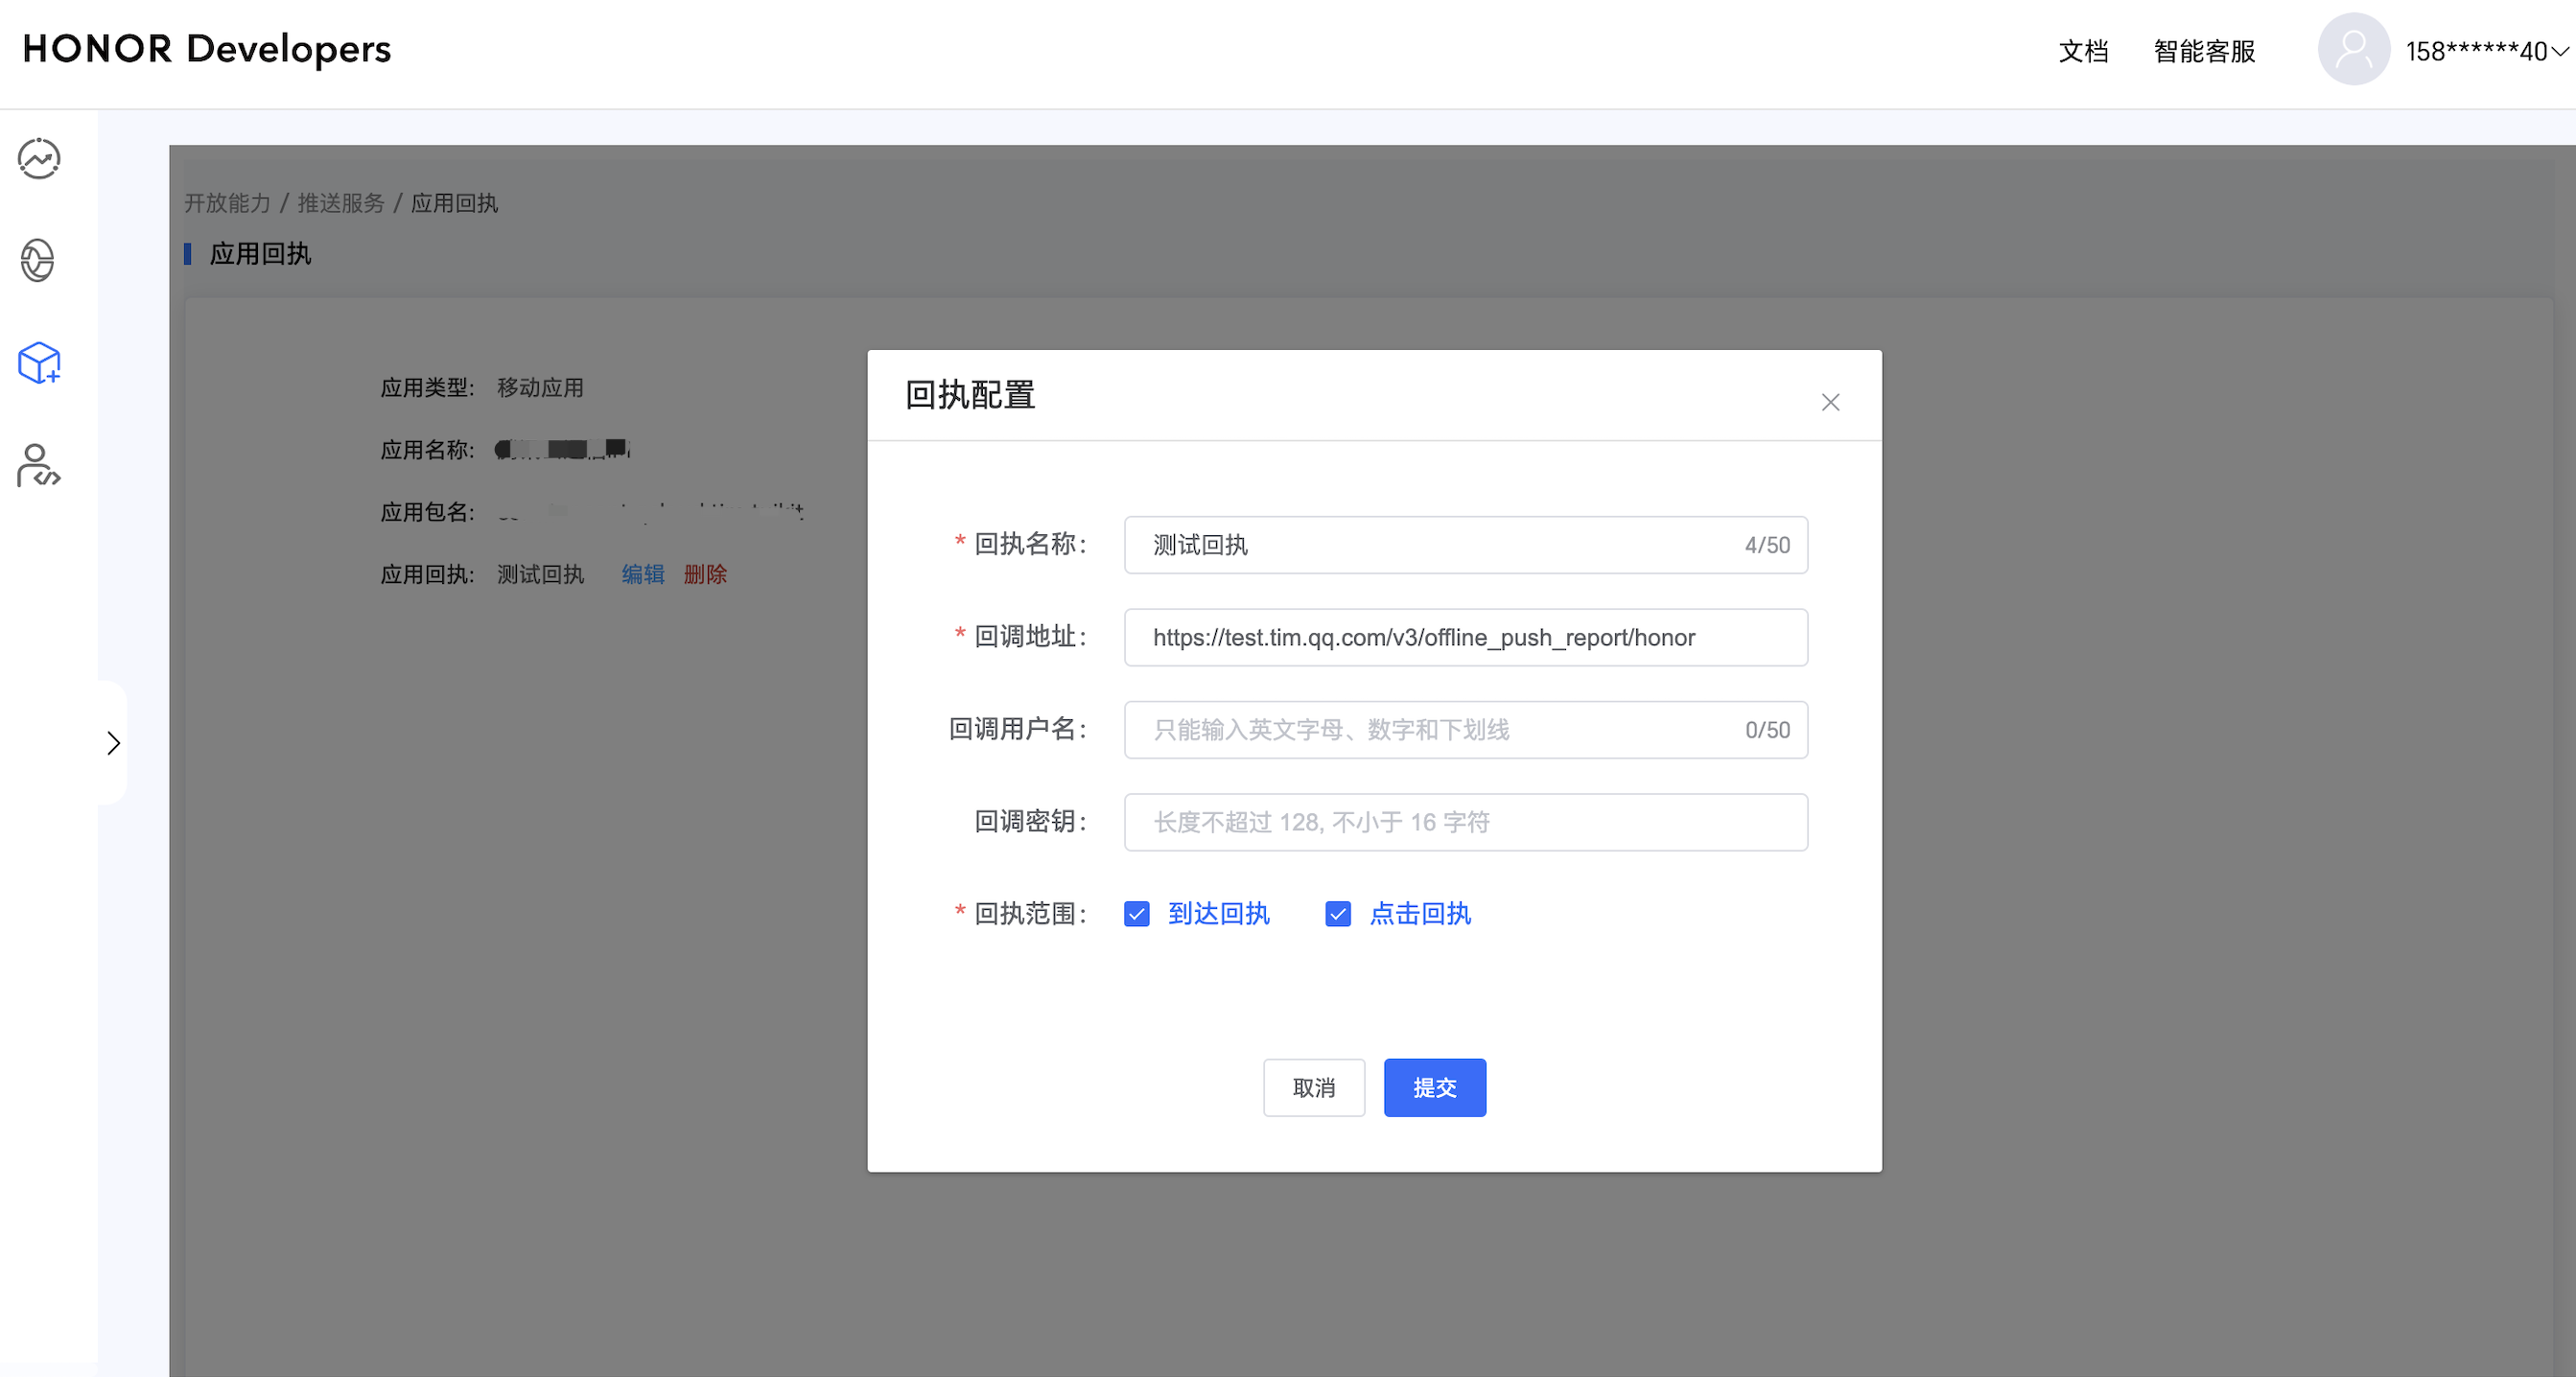
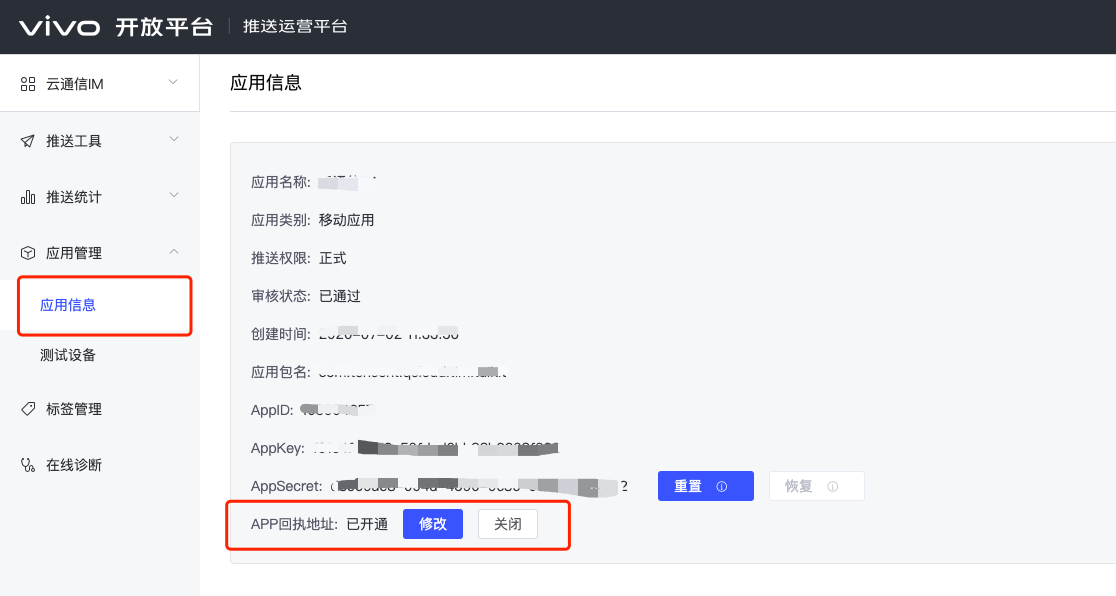
If you need to collect data on delivery, please complete the setup as follows:
Huawei Push Certificate ID <= 11344, using Huawei Push v2 version interface does not support reach and click receipt, please regenerate and update the certificate ID.
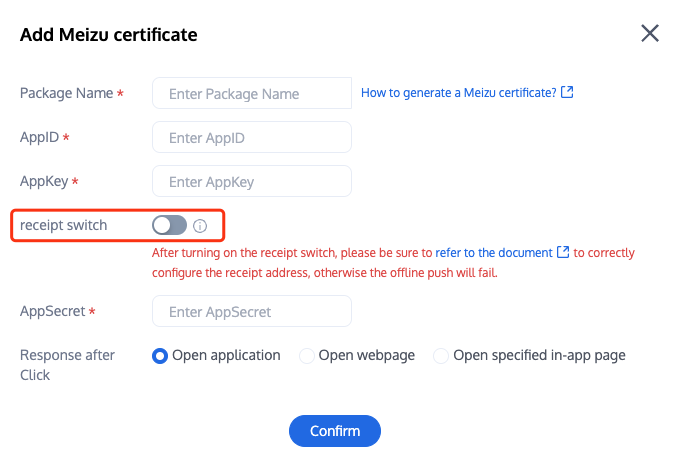
After enabling the Receipt Switch, please make sure the Receipt Address is configured correctly. Failing to configure or configuring the wrong address will affect the push feature.