AI Integration (MCP)
Supercharge your workflow by turning your AI IDE into a TRTC expert.
Ditch the boilerplate and let the Model Context Protocol (MCP) do the heavy lifting—scaffolding, SDK setup, and UI integration.
See it in Action
Imagine typing a single prompt and watching your entire Chat UI come to life.
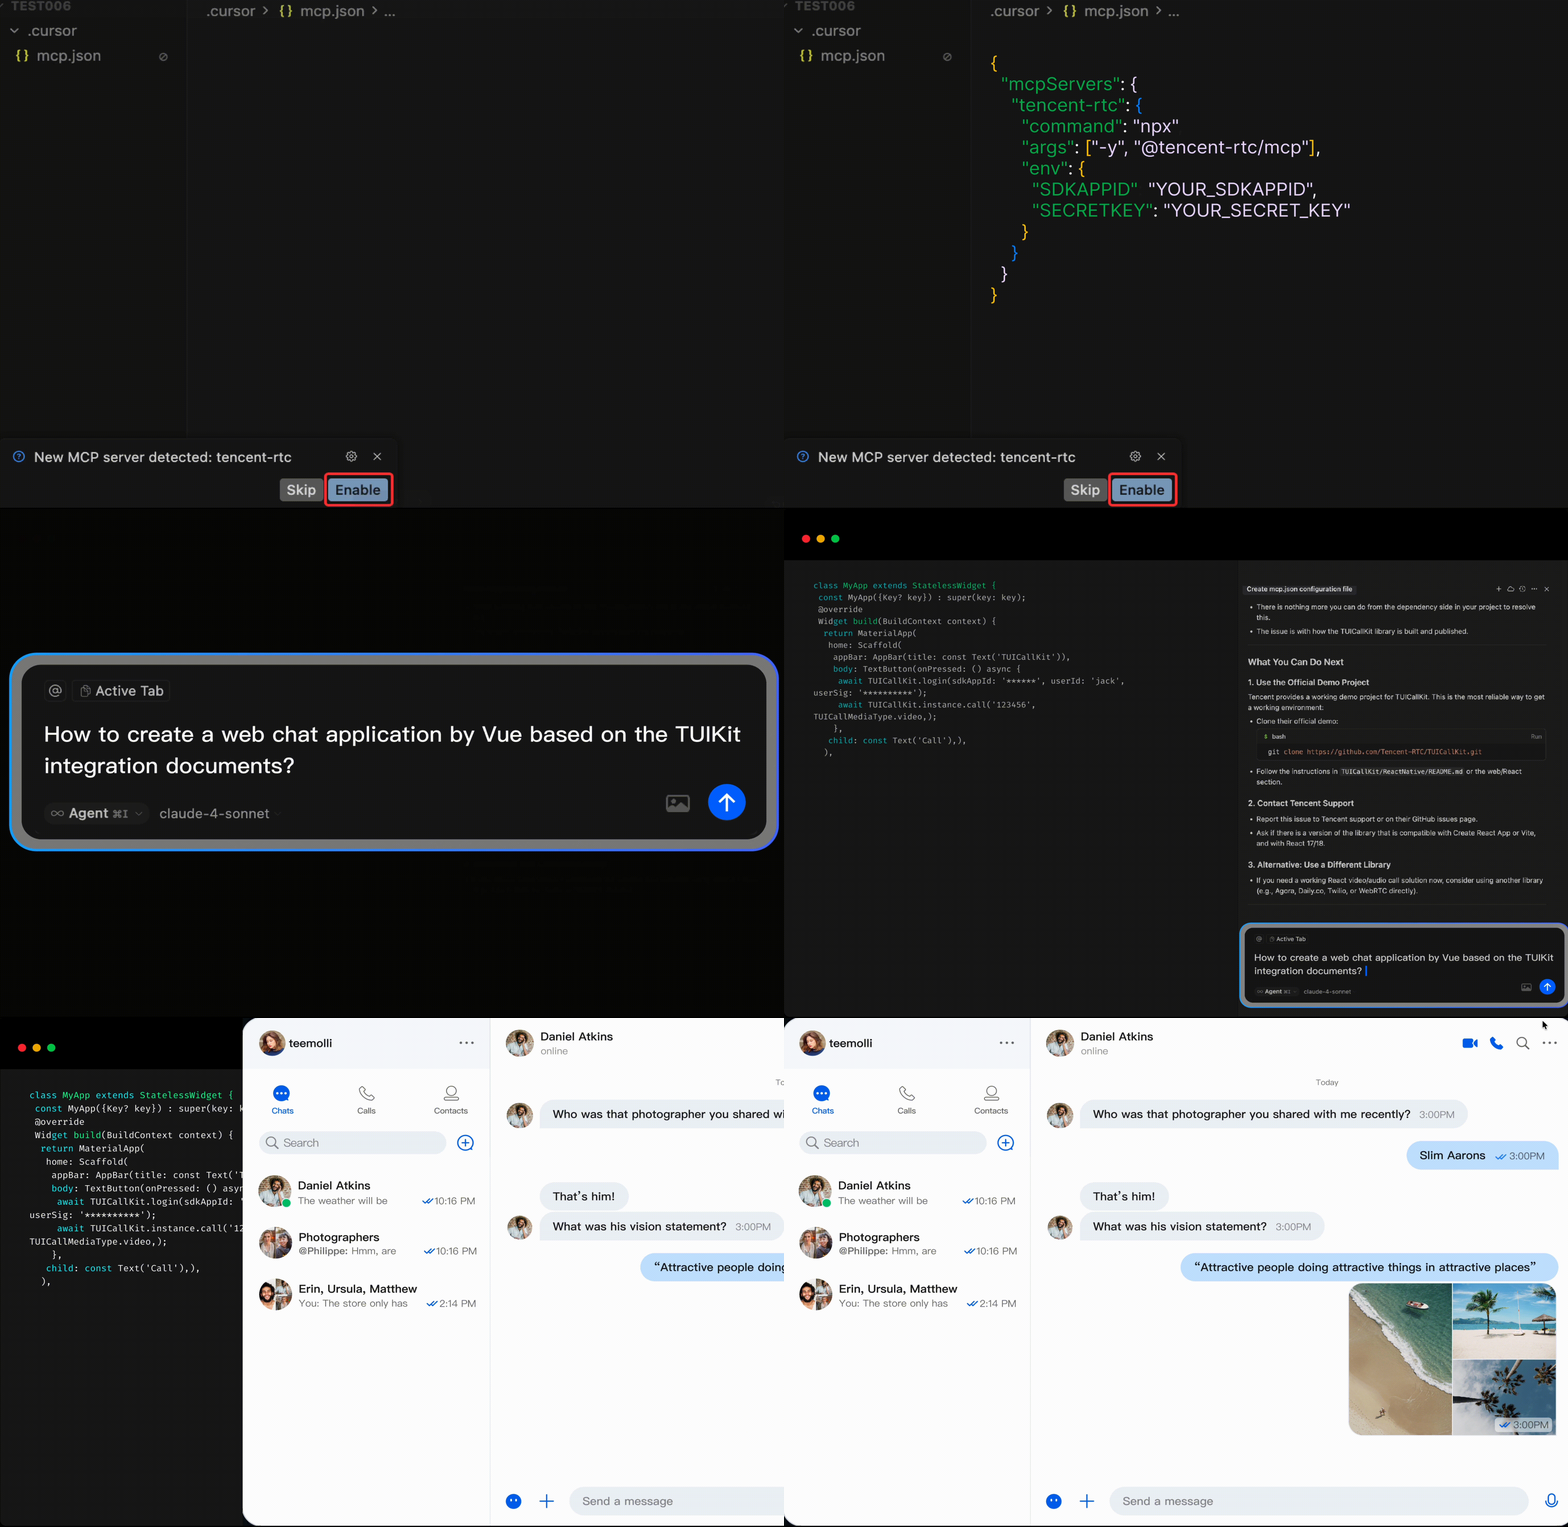
Execution Roadmap
To successfully integrate Chat using AI, simply follow these 3 steps:
1. Configure MCP server
2. Trigger integration
3. Run your project
Prerequisites
Node.js: v18.x or v20.x (LTS recommended). Run
node -v to verify.TRTC account: See Activate the Service to create a Chat application and retrieving its
SDKAppID and secretKey.1. Configure MCP Server
Enable the MCP tools in your preferred editor. It’s recommended to set this up in your project’s root directory.
1. Download Cursor (If already downloaded, skip this step).
2. Navigate to your project root.
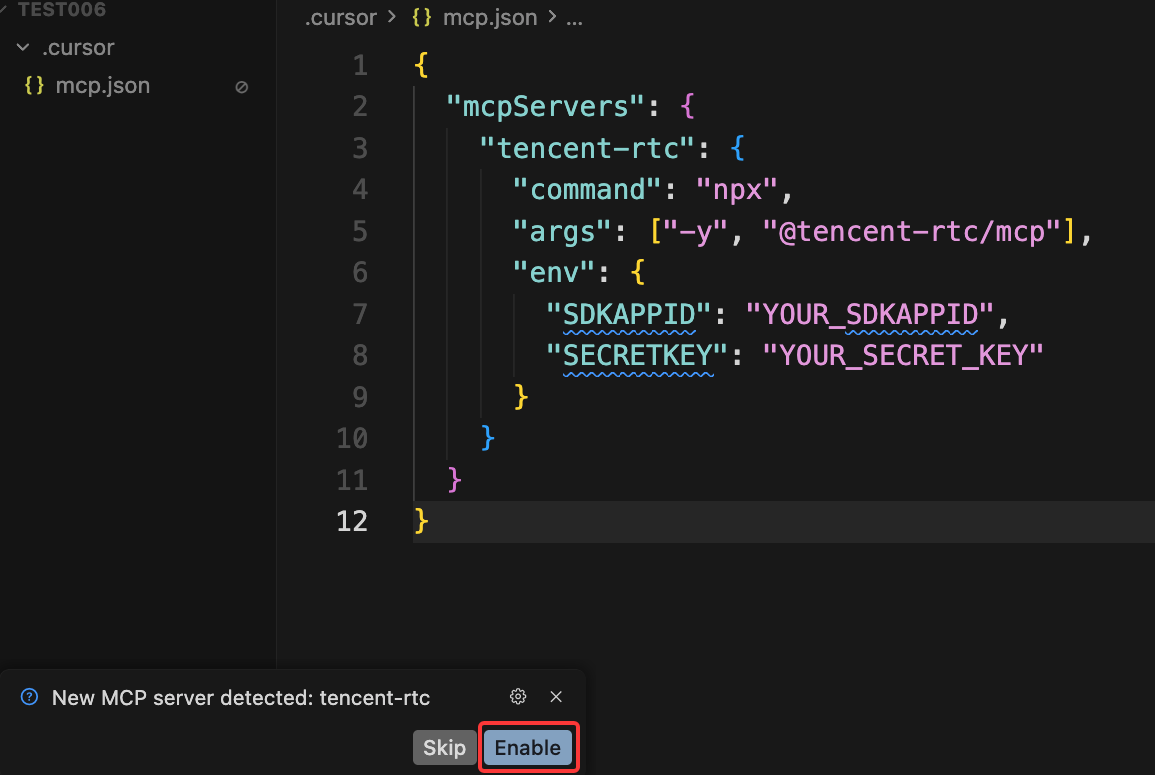
3. Create or update
.cursor/mcp.json with the following, and fill in your SDKAPPID and SECRETKEY:{"mcpServers": {"tencent-rtc": {"command": "npx","args": ["-y", "@tencent-rtc/mcp"],"env": {"SDKAPPID": "YOUR_SDKAPPID","SECRETKEY": "YOUR_SECRET_KEY"}}}}
4. Save your changes. When prompted by Cursor that "New MCP server detected", click Enable.
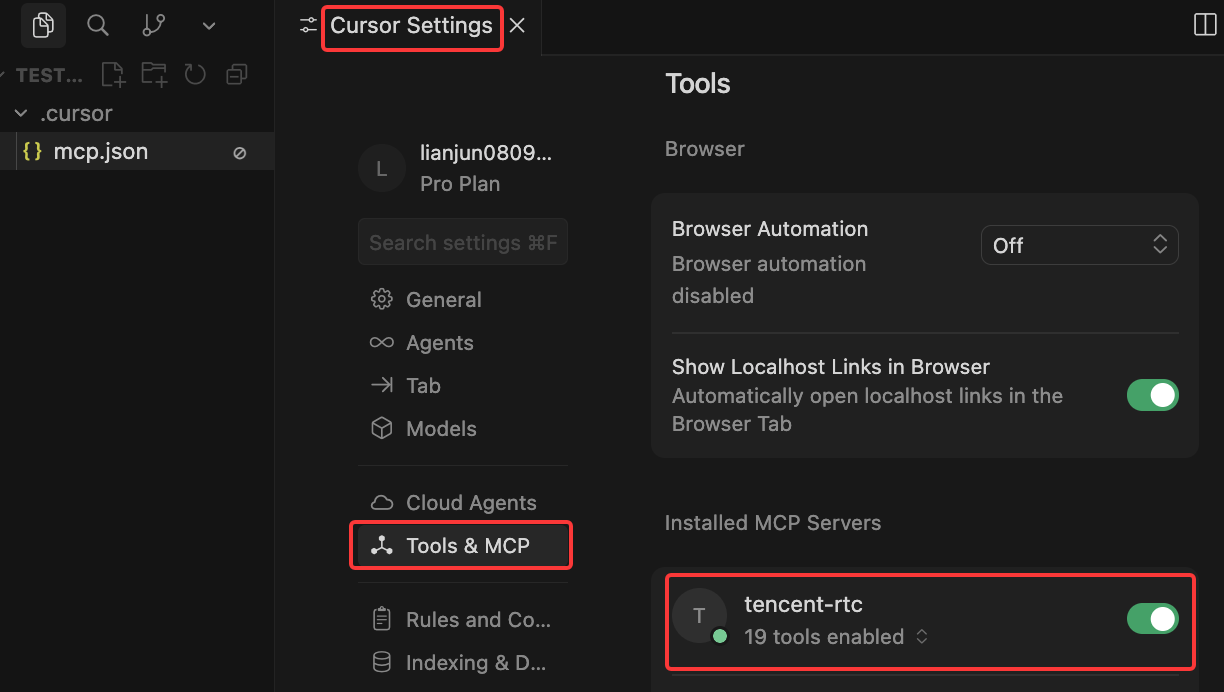
5. Go to Settings - Tools & MCP in Cursor to check if the MCP tool has been enabled successfully.
1. Download Trae(If already downloaded, skip this step).
2. Click Settings > MCP.
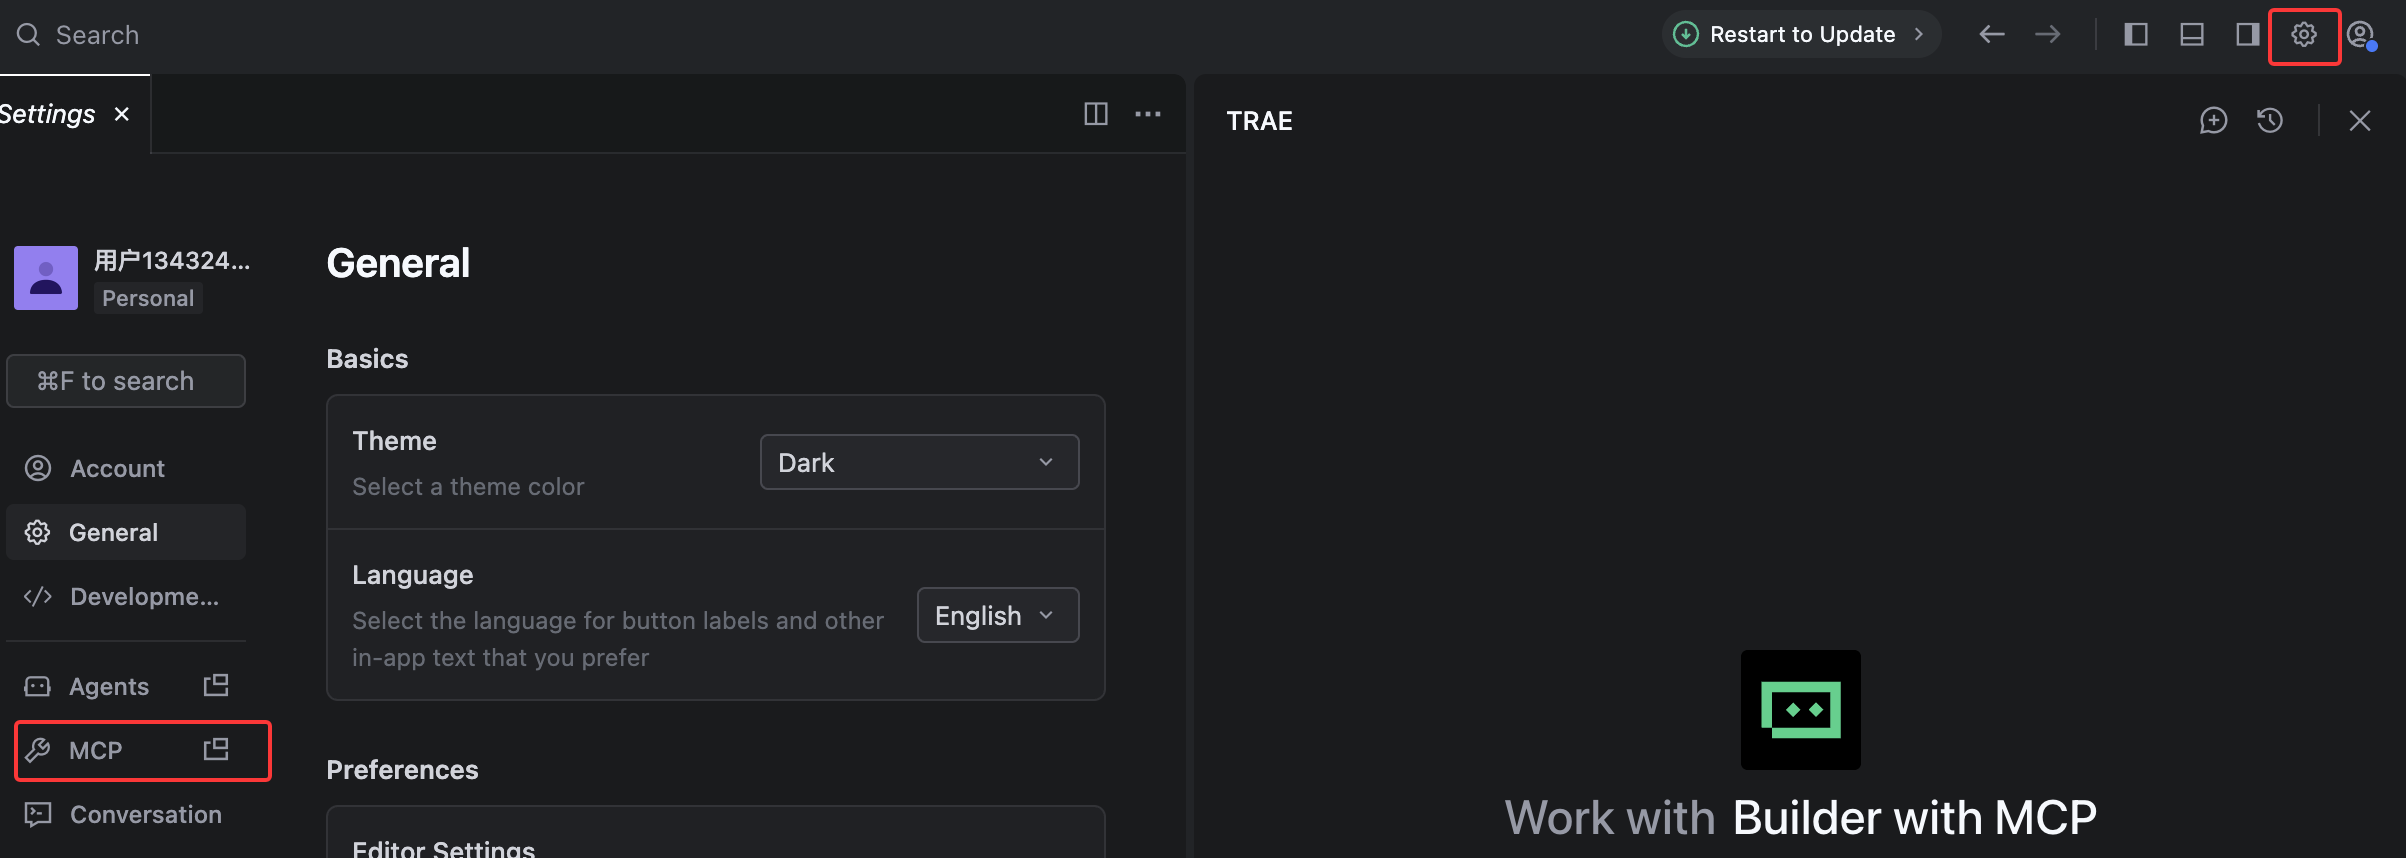
3. Click Add > Select Configure Manually, and then click Raw Config (JSON) to update the
mcpServers section.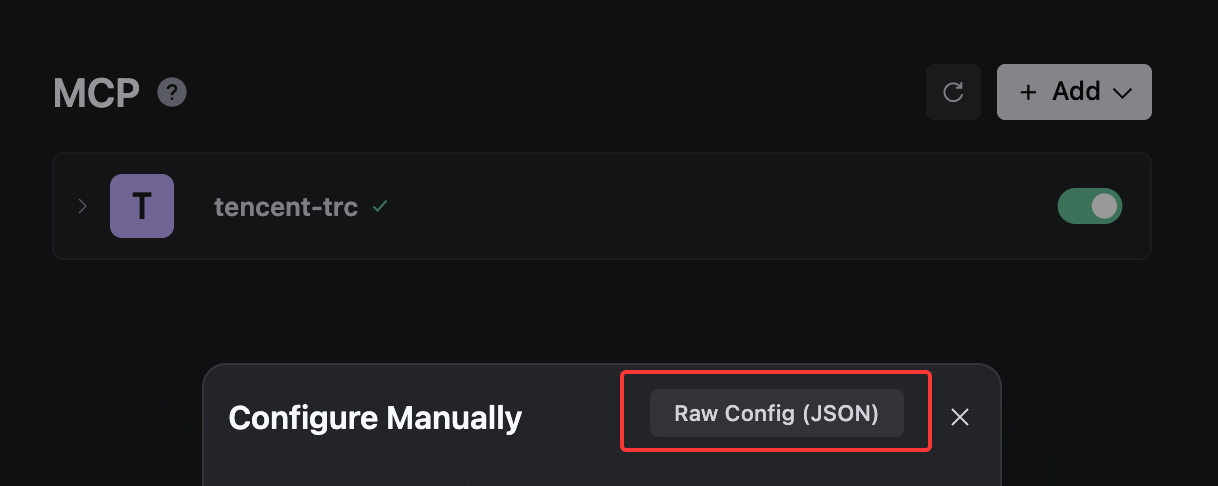
{"mcpServers": {"tencent-rtc": {"command": "npx","args": ["-y", "@tencent-rtc/mcp"],"env": {"SDKAPPID": "YOUR_SDKAPPID","SECRETKEY": "YOUR_SECRET_KEY"}}}}
4. Save your changes. Select the editor's default Builder with MCP or add MCP to your custom Builder.
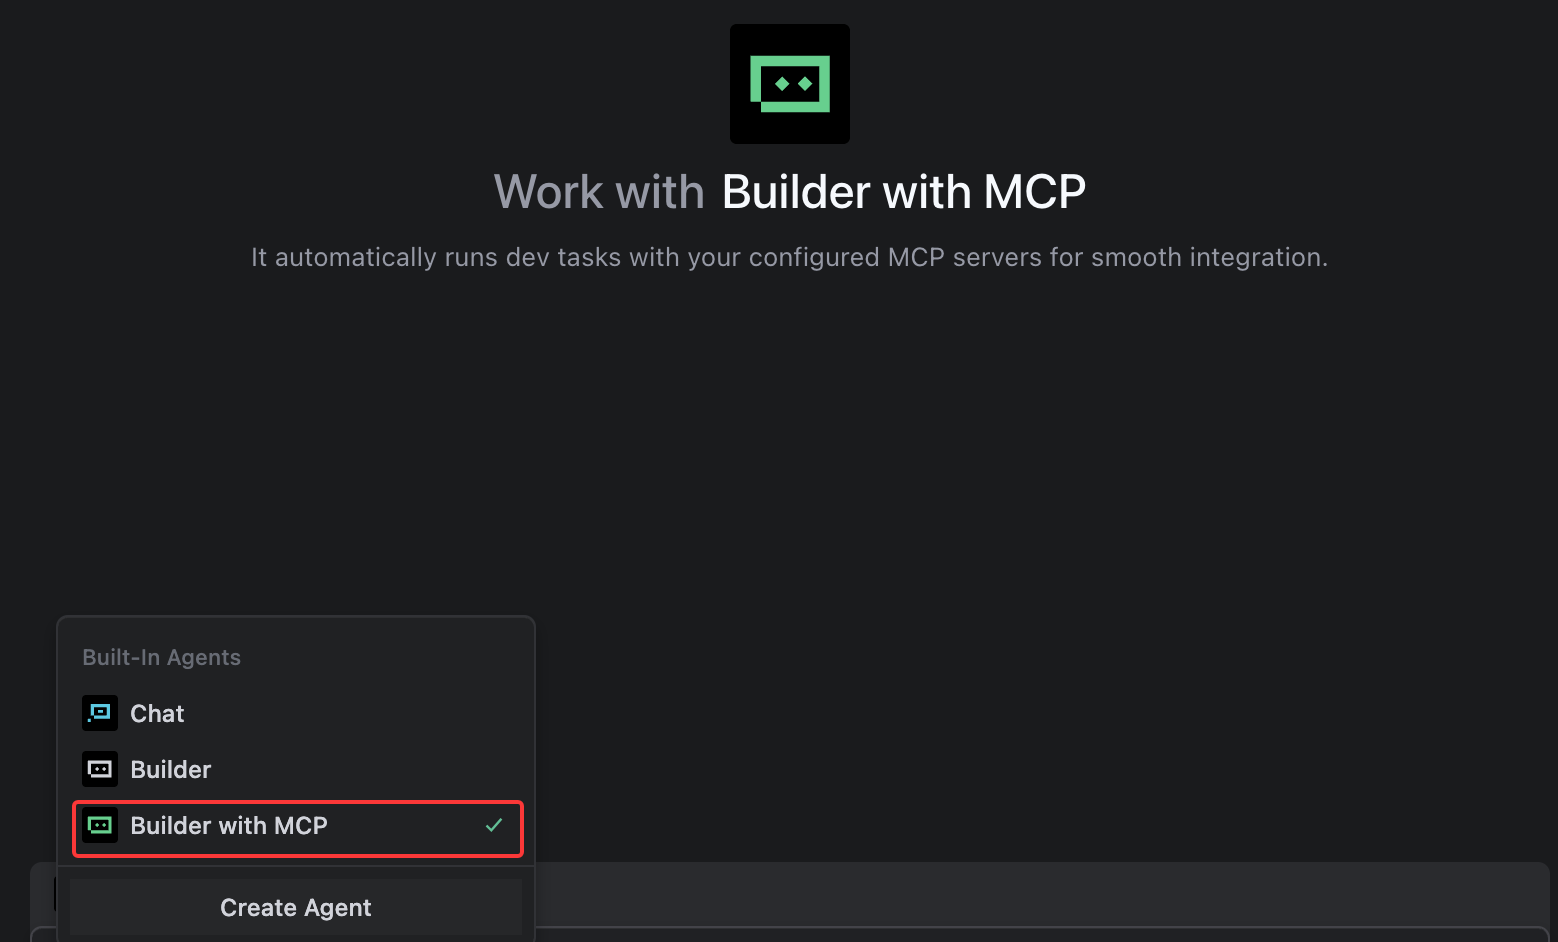
1. Download CodeBuddy (If already downloaded, skip this step).
2. Go to Settings > Add MCP to open
settings.json and configure MCP.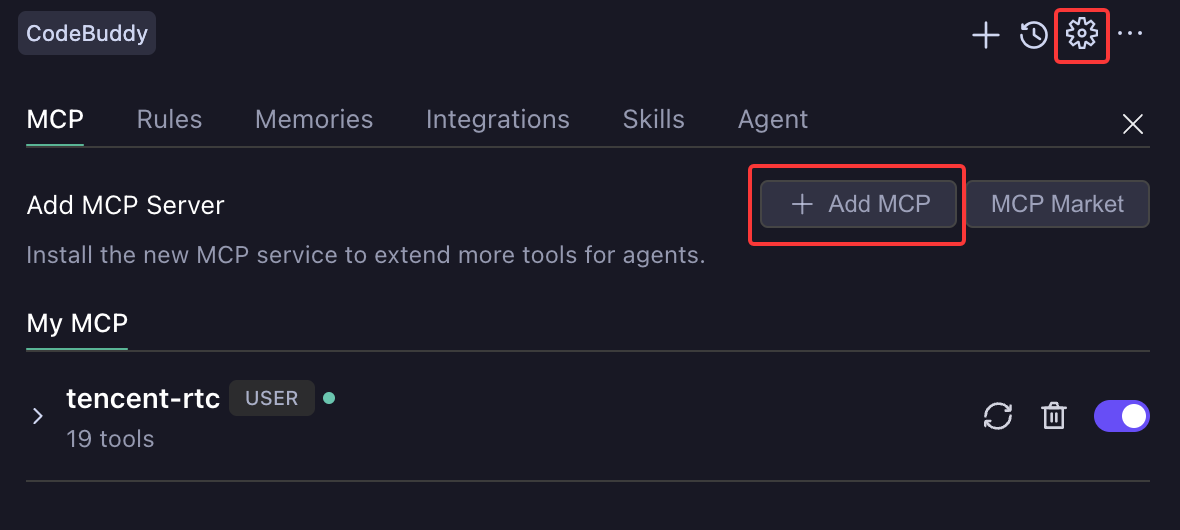
3. Update the
mcpServers section and save the changes.{"mcpServers": {"tencent-rtc": {"command": "npx","args": ["-y", "@tencent-rtc/mcp"],"env": {"SDKAPPID": "YOUR_SDKAPPID","SECRETKEY": "YOUR_SECRET_KEY"}}}}
4. Check whether the MCP tool is successfully loaded to tools.

2: Trigger Integration
Now that your environment is configured and guarded, use natural language to build your app.
Perfect for starting from scratch.
Prompt Examples:
"Use the TUIKit component to create a Vue3 chat app."
"Use the TUIKit component to create an iOS chat app."
Target specific files for integration.
Prompt Example:
"Integrate the Vue3 Chat window component into src/views/ChatPage.tsx"
3: Run and Verify
Create Test Accounts
1. To test the interoperability of sending and receiving messages, two accounts need to be created. Let the AI generate the userSig for two test accounts.
Prompt Example:
Use the MCP tool to generate userSig for test001 and test002.
2. After the AI outputs the userSig, let the AI automatically fill all login information into the code.
Prompt Example:
Fill the userSig of test001 and test002 into the code.
Run Your Project
Once the AI completes the code generation, start the development server to test your application.
You can simply ask the AI to "start the project".
The following is a reference example using a custom UI. Your actual interface may vary depending on your implementation:
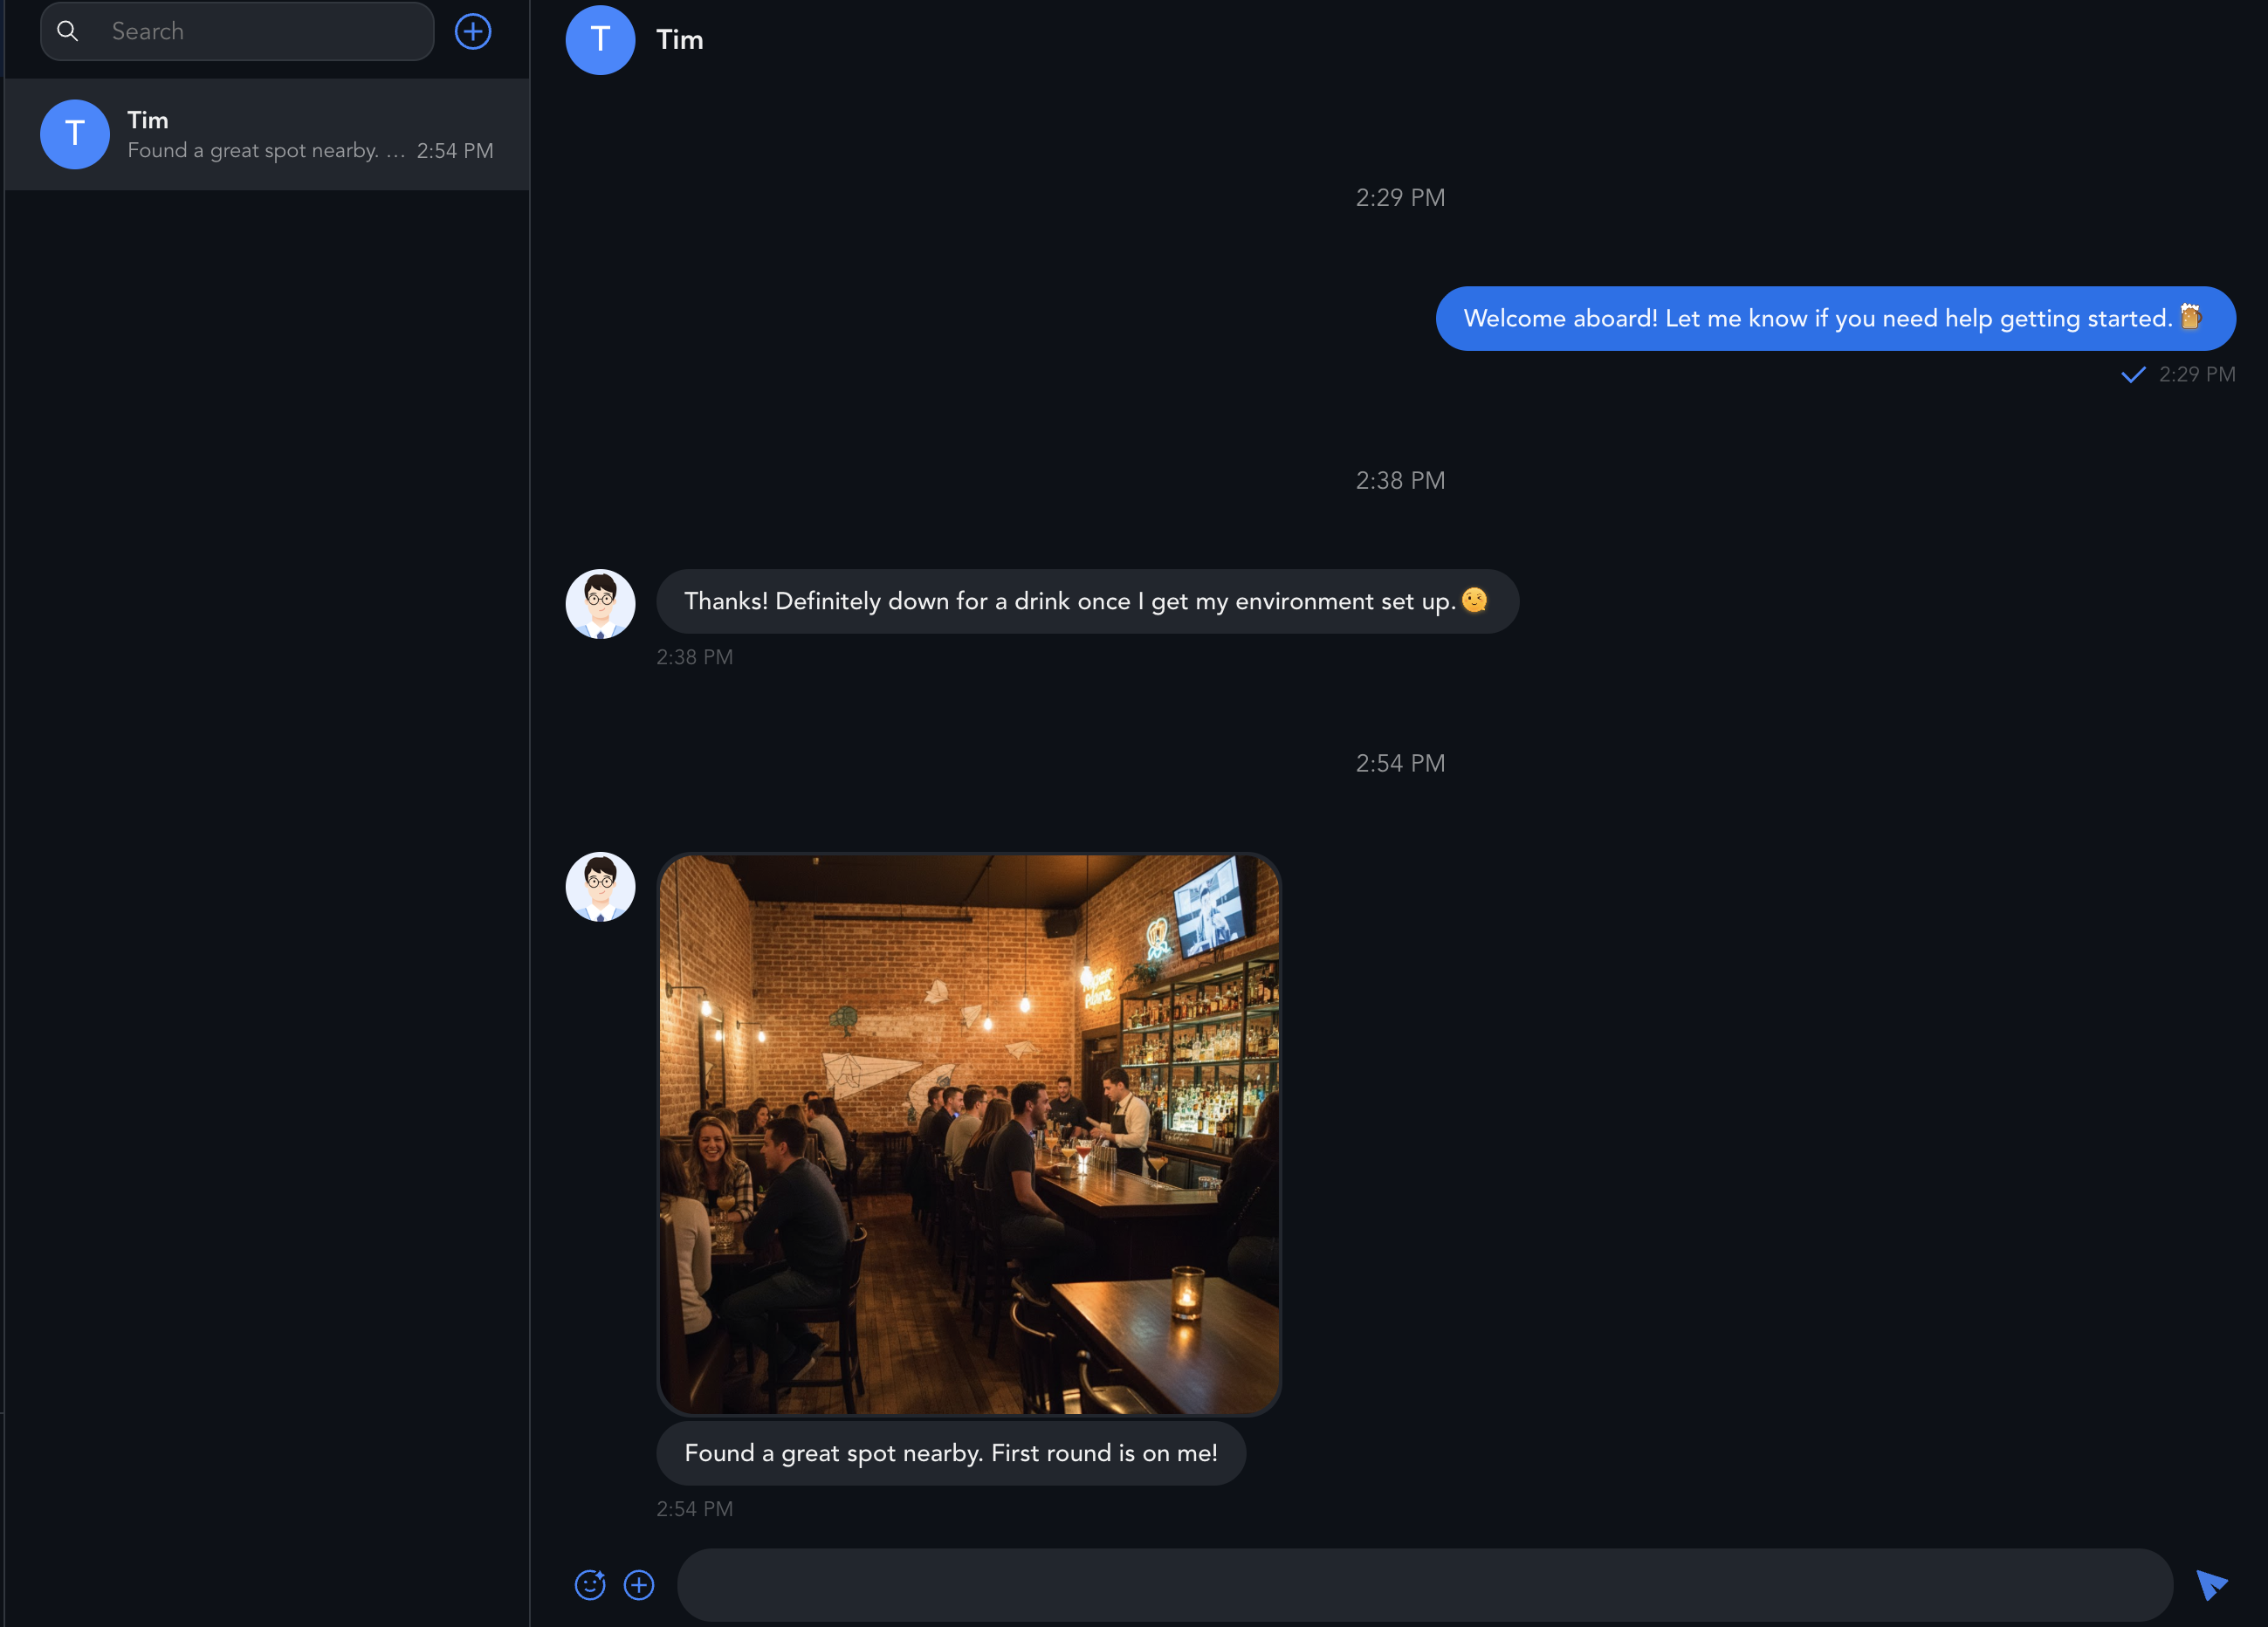
Troubleshooting and FAQ
Issue | Root Cause | Solution |
MCP Server Offline | Missing Node/NPM path. | Run npx -y @tencent-rtc/mcp manually in your terminal to verify the server is installed and accessible. |
Auth Errors | Invalid UserSig. | Prompt AI: "Regenerate the UserSig using the MCP tool and update the config." |
Permission denied during scaffolding | Insufficient folder permissions. | Check your folder permissions. On macOS/Linux, try running the IDE or command with elevated privileges (or sudo for terminal commands). |
How do I manually install the MCP server if the IDE fails?
You can always bypass the IDE's auto-install by running the following command directly in your project root:
npx -y @tencent-rtc/mcp
Pro Tips for Better AI Results
How do I ensure the AI picks the right tool every time?
AI models work best with specific keywords.
Good Prompt: "Build a React chat application using TUIKit. Include the ConversationList and Chat Window components."
Key Takeaway: Always mention "TUIKit", "React" (or Vue), and the specific Component Names in your prompt.