Host Streaming
The TUILiveKit Host Live Streaming Page provides a full-featured UI for live streaming scenarios. It supports the rapid deployment of core host capabilities, allowing you to efficiently integrate the live streaming workflow without worrying about complex UI and logic implementation.
Feature Overview
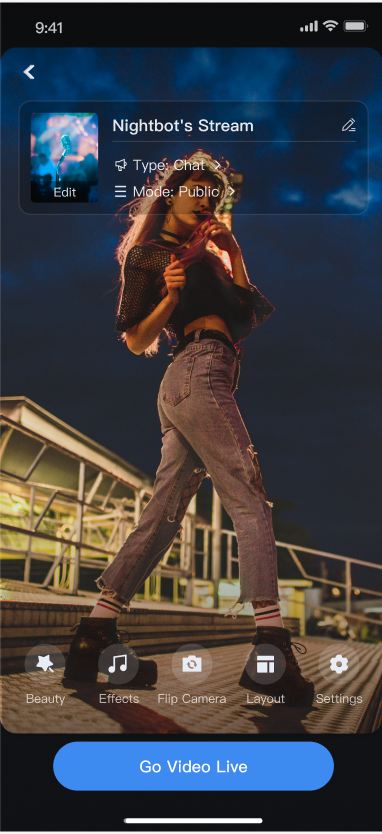
Pre-stream Setup: Supports various personalized configurations before the host goes live, including room name, background, video preview, beauty filters (beauty effects) debugging, audio effects debugging, and layout templates.
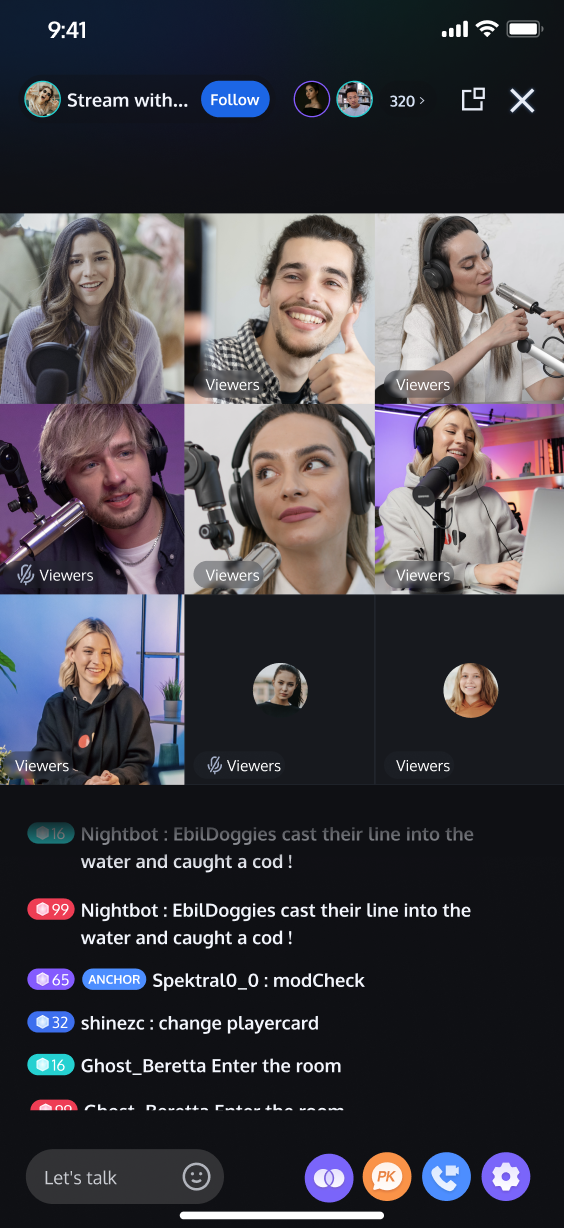
Co-Host Interaction: Supports real-time interaction (co-hosting) with viewers or other hosts during the live stream.
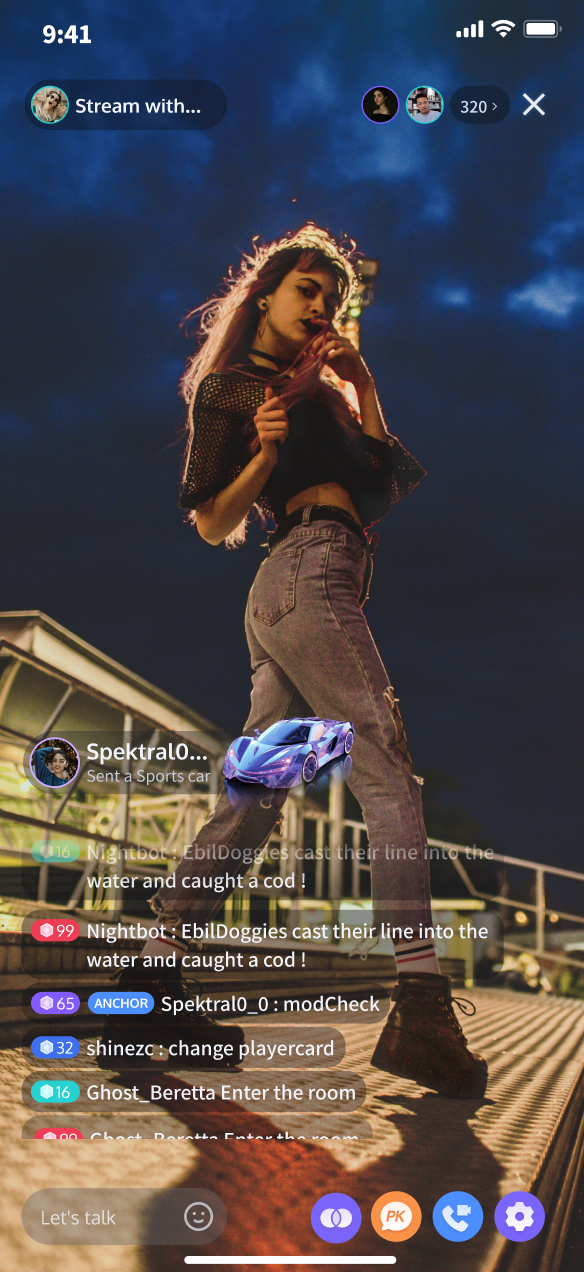
Audience Interaction: Supports rich interaction forms such as barrage (bullet screen) and gifts.
Live Room Management: Supports displaying the online user list and various management operations within the room, such as muting (banning) and kicking users.
Pre-stream Setup | Co-Host Interaction | Audience Interaction | Live Room Management |
 |  |  |  |
Quick Start
Step 1. Activate the Service
Refer to the Activate Service document to enable the trial version or activate the Pro Edition package.
Step 2. Install the TUILiveKit
Step 3. Add Host Page
TUILiveRoomAnchorWidget has built-in complete UI and business logic for live-streaming scenarios. This component does not support floating window mode. If you need floating window functionality, navigate to Add Floating Window (Host Page). Simply configure the entry point for invoking TUILiveRoomAnchorWidget (based on your business logic), then use one of the following methods to navigate to or embed the host page within your Widget tree:import 'package:tencent_live_uikit/tencent_live_uikit.dart';// navigate to the host webpageNavigator.push(context, MaterialPageRoute(builder: (BuildContext context) {final roomId = "test_live_room_id";return TUILiveRoomAnchorWidget(roomId: roomId);}));
// --- Select a way to integrate based on your Widget tree structure ---// [option one] as the only child Widget (single subtree)// Suitable for containers like Container, Padding that usually only contain one child WidgetContainer(child: TUILiveRoomAnchorWidget(roomId: roomId) // integrate the host page here)// [option two] as one of multiple child Widgets (multi-subtree)// Suitable for layouts like Column, Row, Stack that can contain multiple child WidgetsStack(children: [YourOtherWidget(), // your other child WidgetTUILiveRoomAnchorWidget(roomId: roomId), // integrate the host page hereYourOtherWidget(), // your other child Widget])
After integration, launching this code will display the host page, as shown in in the live streaming preview image of Feature Overview.
Step 4. (Optional) Add a Floating Window
TUILiveRoomAudienceOverlay enables floating window mode for the audience viewing page. During a live stream, you can switch between in-app and out-of-app (Picture-in-Picture) floating window modes. TUILiveRoomAudienceOverlay is built using Flutter’s official Overlay API and native Picture-in-Picture. To integrate:1. Enable System Picture-in-Picture
2. Navigate to the Floating Window
At the entry point where your audience enters the room (based on your business logic), navigate to the viewing page as follows:
import 'package:tencent_live_uikit/tencent_live_uikit.dart';// Navigate to the Anchor webpageNavigator.push(context, MaterialPageRoute(builder: (BuildContext context) {final roomId = "test_live_room_id";return TUILiveRoomAnchorOverlay(roomId: roomId);}));
Note:
1.
TUILiveRoomAudienceOverlay cannot be embedded as a child widget in container widgets (such as Container, Stack, etc.); it must be navigated to as a standalone page. This is because Overlay is used internally, and LiveKit needs to control the entire Overlay page to switch floating window modes.2. On iOS, only regular audience members can enter out-of-app floating window mode.
Floating Window Mode Effect
Click the floating window button at the top right of the host page to enter floating window mode, as shown below.
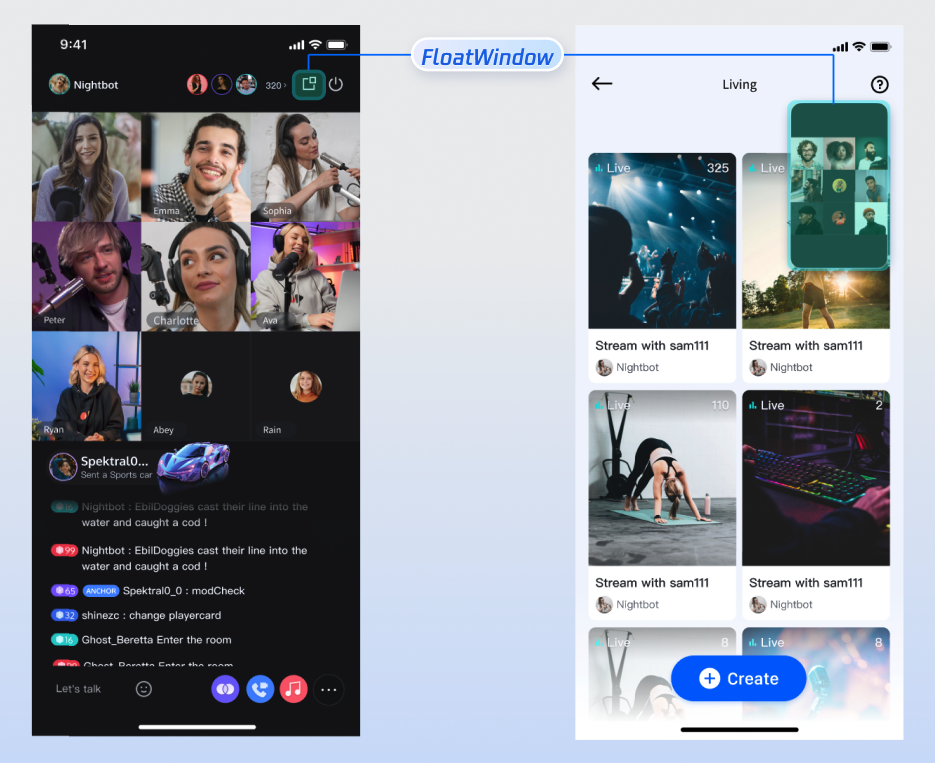
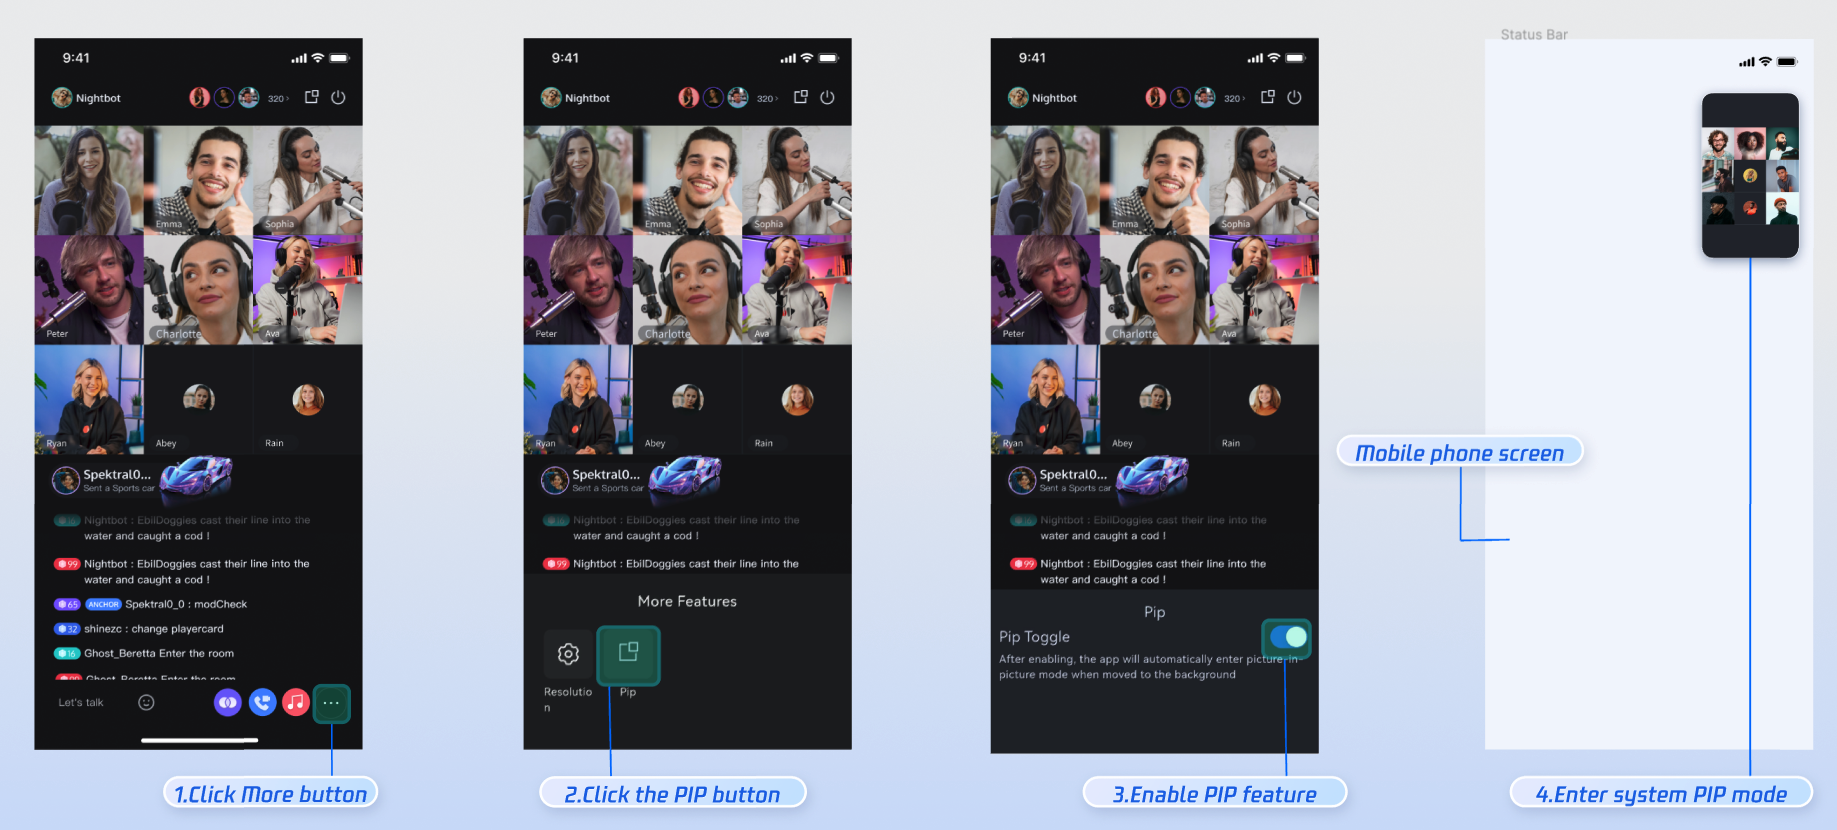
Out-of-App Floating Window Effect
Click More > Picture-in-Picture at the bottom-right corner of the host page, then toggle on the PIP switch. When your App goes into the background, it will automatically proceed to system Picture-in-Picture mode, as shown below.
Customize UI Layout
TUILiveKit lets you tailor the go-live and live stream page features and styles to fit your business requirements.
Live Room Layout Templates
TUILiveKit provides 4 layout templates. Select your preferred style in the Layout section of the host go-live page:
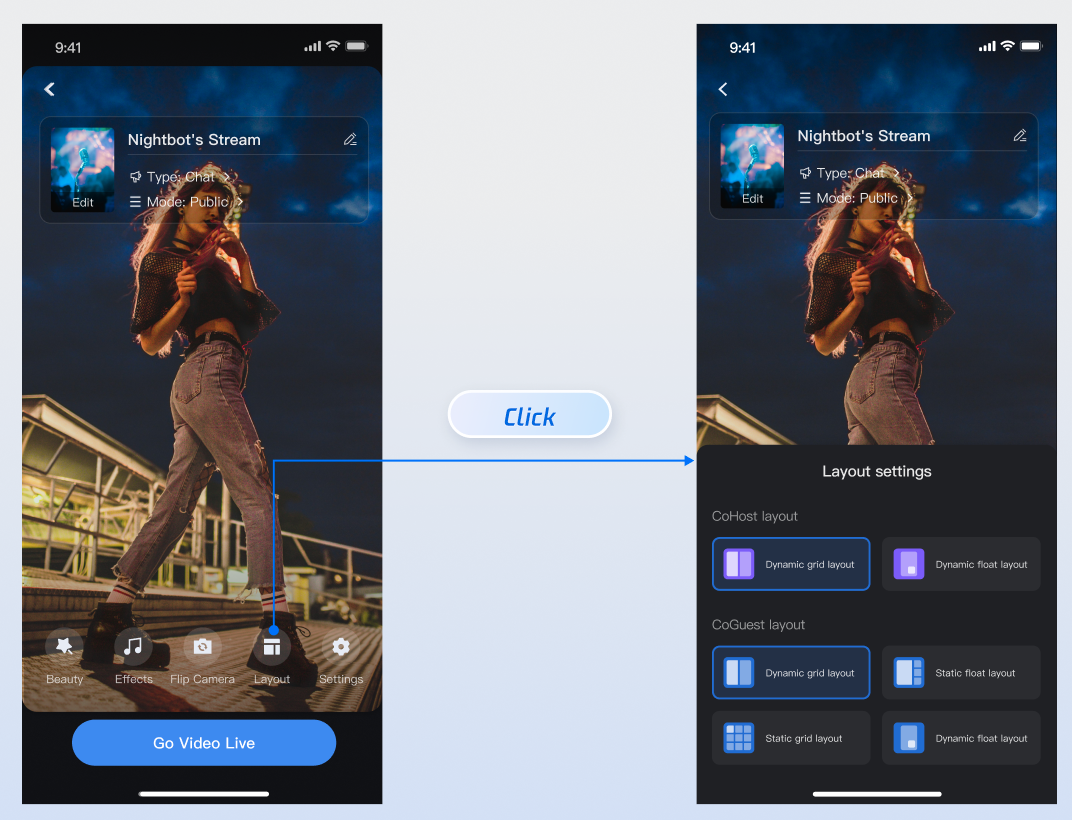
Layout Template Overview
Name | Dynamic Grid Layout | Floating Window Layout | Fixed Grid Layout | Fixed Window Layout |
Template ID | 600 | 601 | 800 | 801 |
Description | Default layout. Grid size automatically adjusts based on the number of co-hosts. | Co-hosts are displayed in floating windows. | Fixed number of co-hosts, each in a dedicated grid. | Fixed number of co-hosts, each in a dedicated window. |
Preview | 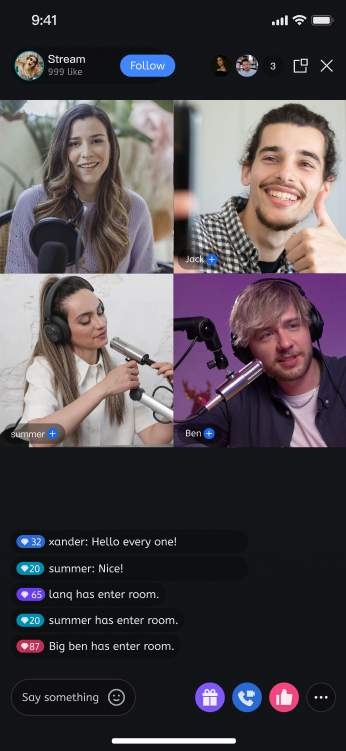 | 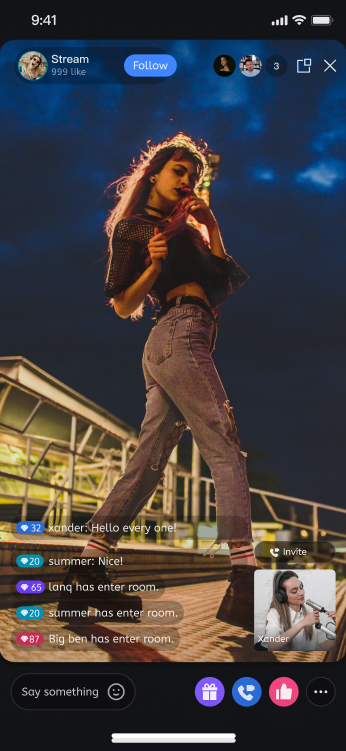 | 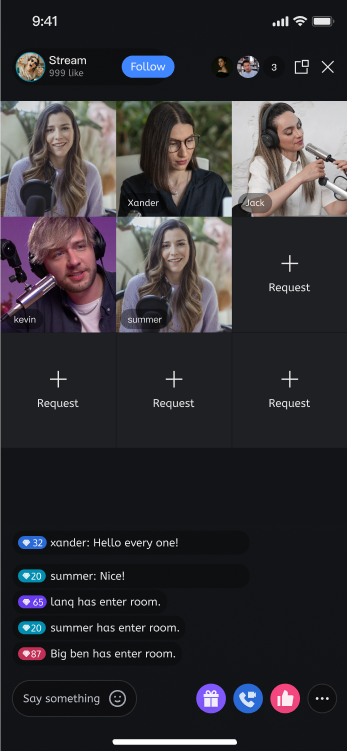 | 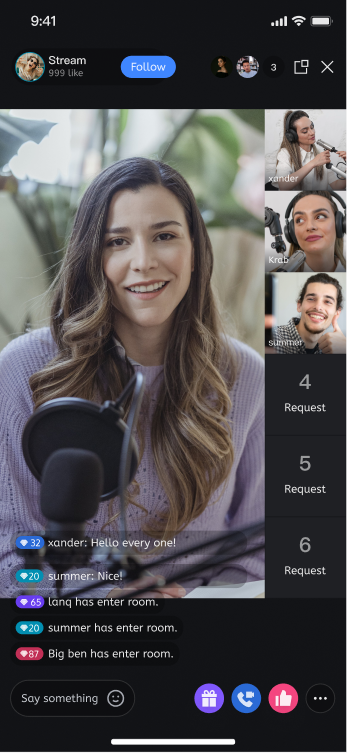 |
Text Customization (ARB)
TUILiveKit uses ARB files and the Flutter standard internationalization (i18n) solution to manage the UI text display. You can directly edit the ARB files in the
livekit/lib/common/language/i10n/ directory to modify the text: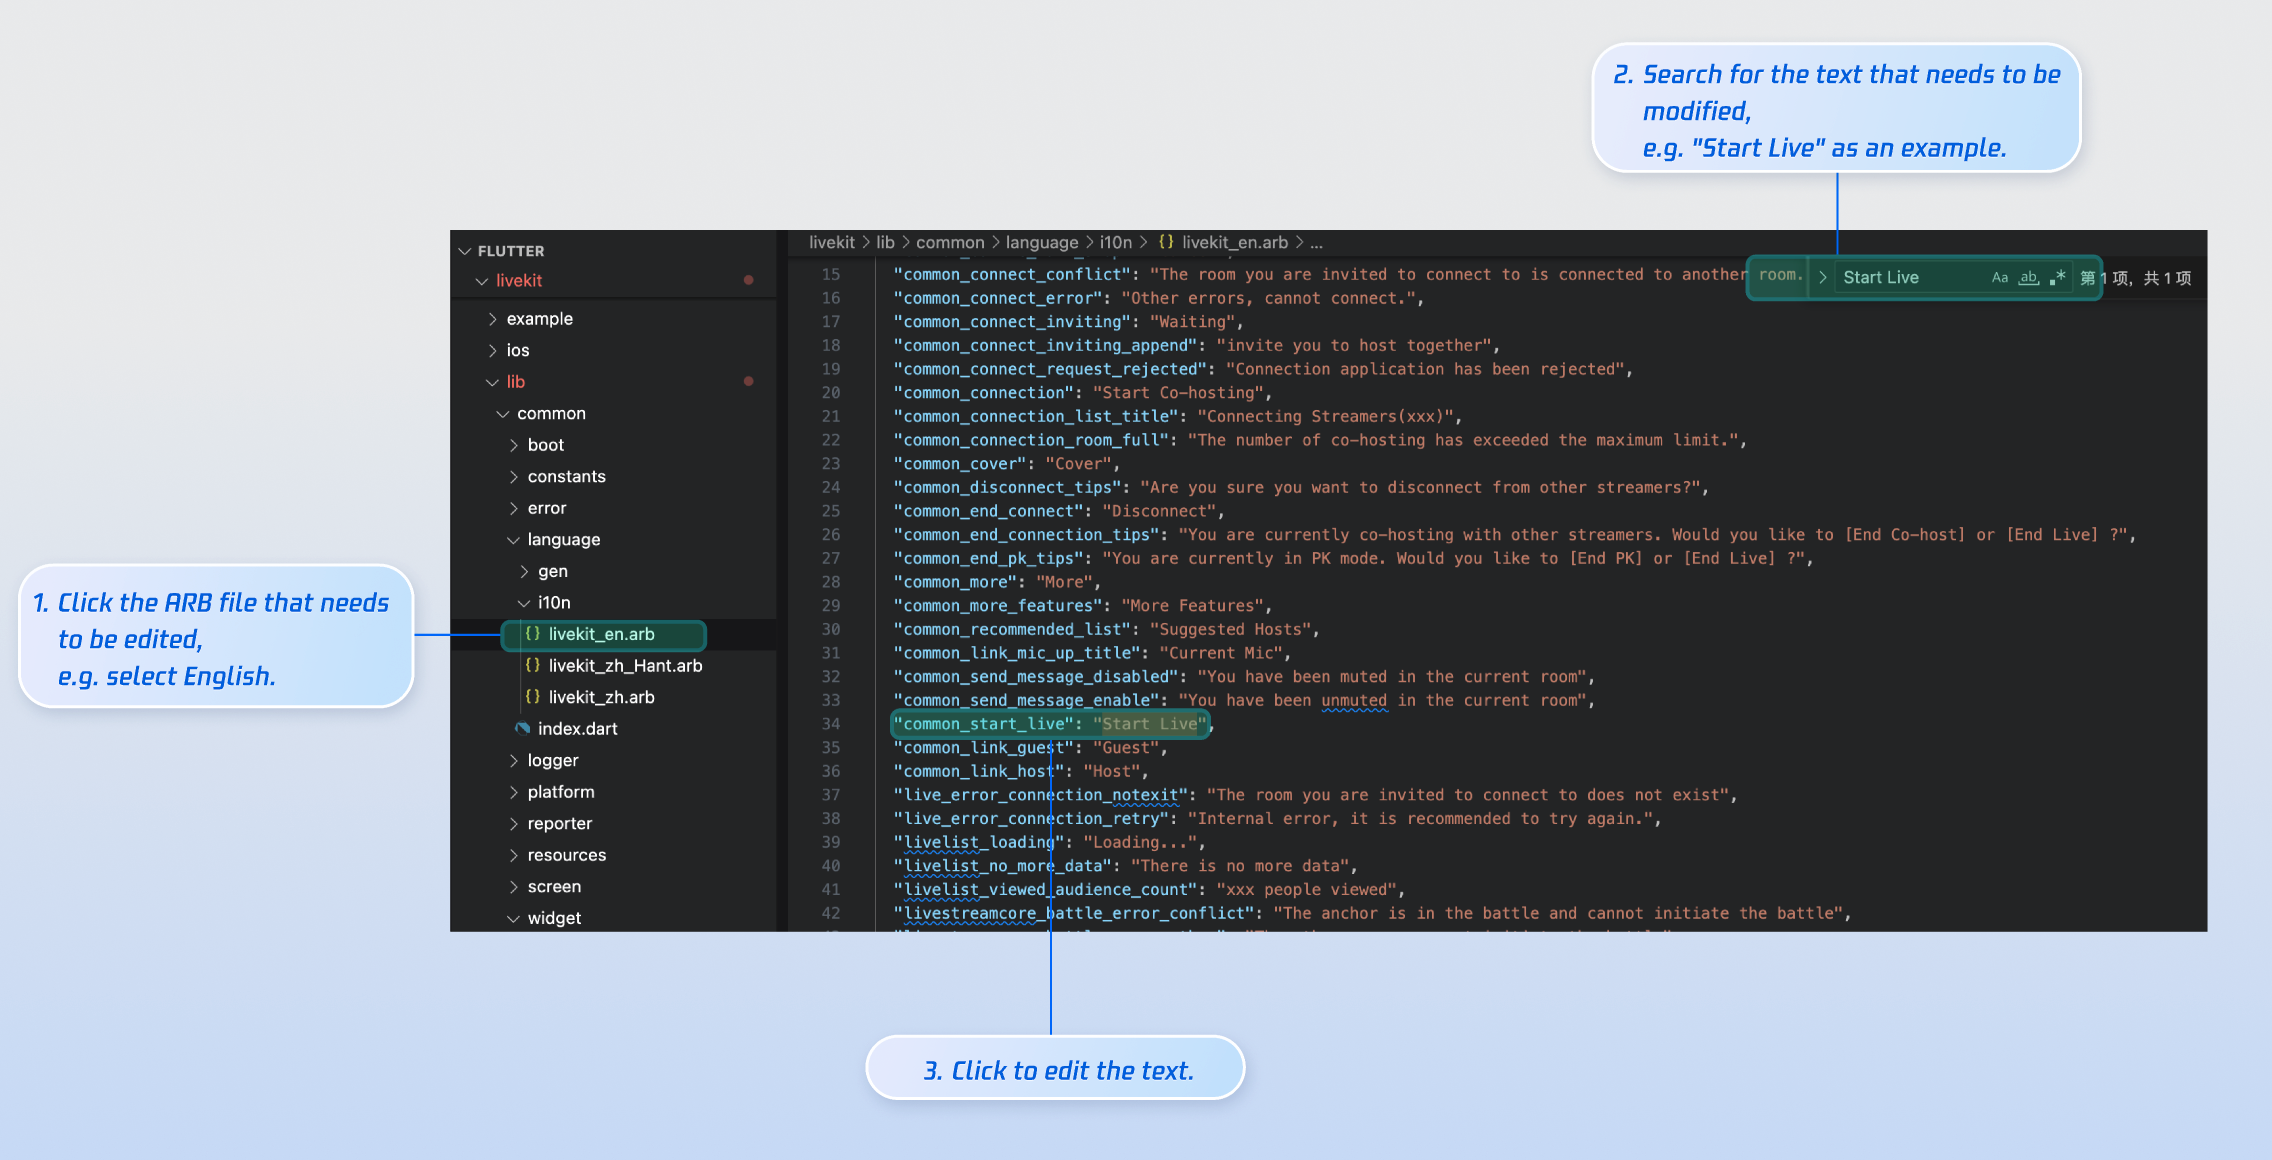
livekit_en.arb: English Text.livekit_zh.arb: Simplified Chinese Text.livekit_zh_Hant.arb: Traditional Chinese Text.After making changes, execute
flutter gen-l10n in the command line to regenerate the localization code.Icon Customization (Image Assets)
TUILiveKit’s UI image assets are stored in the
livekit/assets/images/ directory. To update icons, simply replace the PNG files in this folder.
Rebuild and run the application, and you will see the updated icon.
Next Steps
Congratulations! You have successfully integrated the Host Live Streaming component. Next, you can implement features such as audience viewing and live stream list. Please refer to the table below:
Feature | Description | Integration Guide |
Audience Viewing | Audience can watch live streaming after entering the anchor's live streaming room, with features like audience mic connection, live room information, online audience, and bullet screen display. | |
Live Stream List | Display the live stream list interface and features, including the live stream list and room information display. |
FAQs
No Video After Going Live?
Go to Settings > App > Camera and make sure camera permissions are enabled. See the examples below:
iOS | Android |
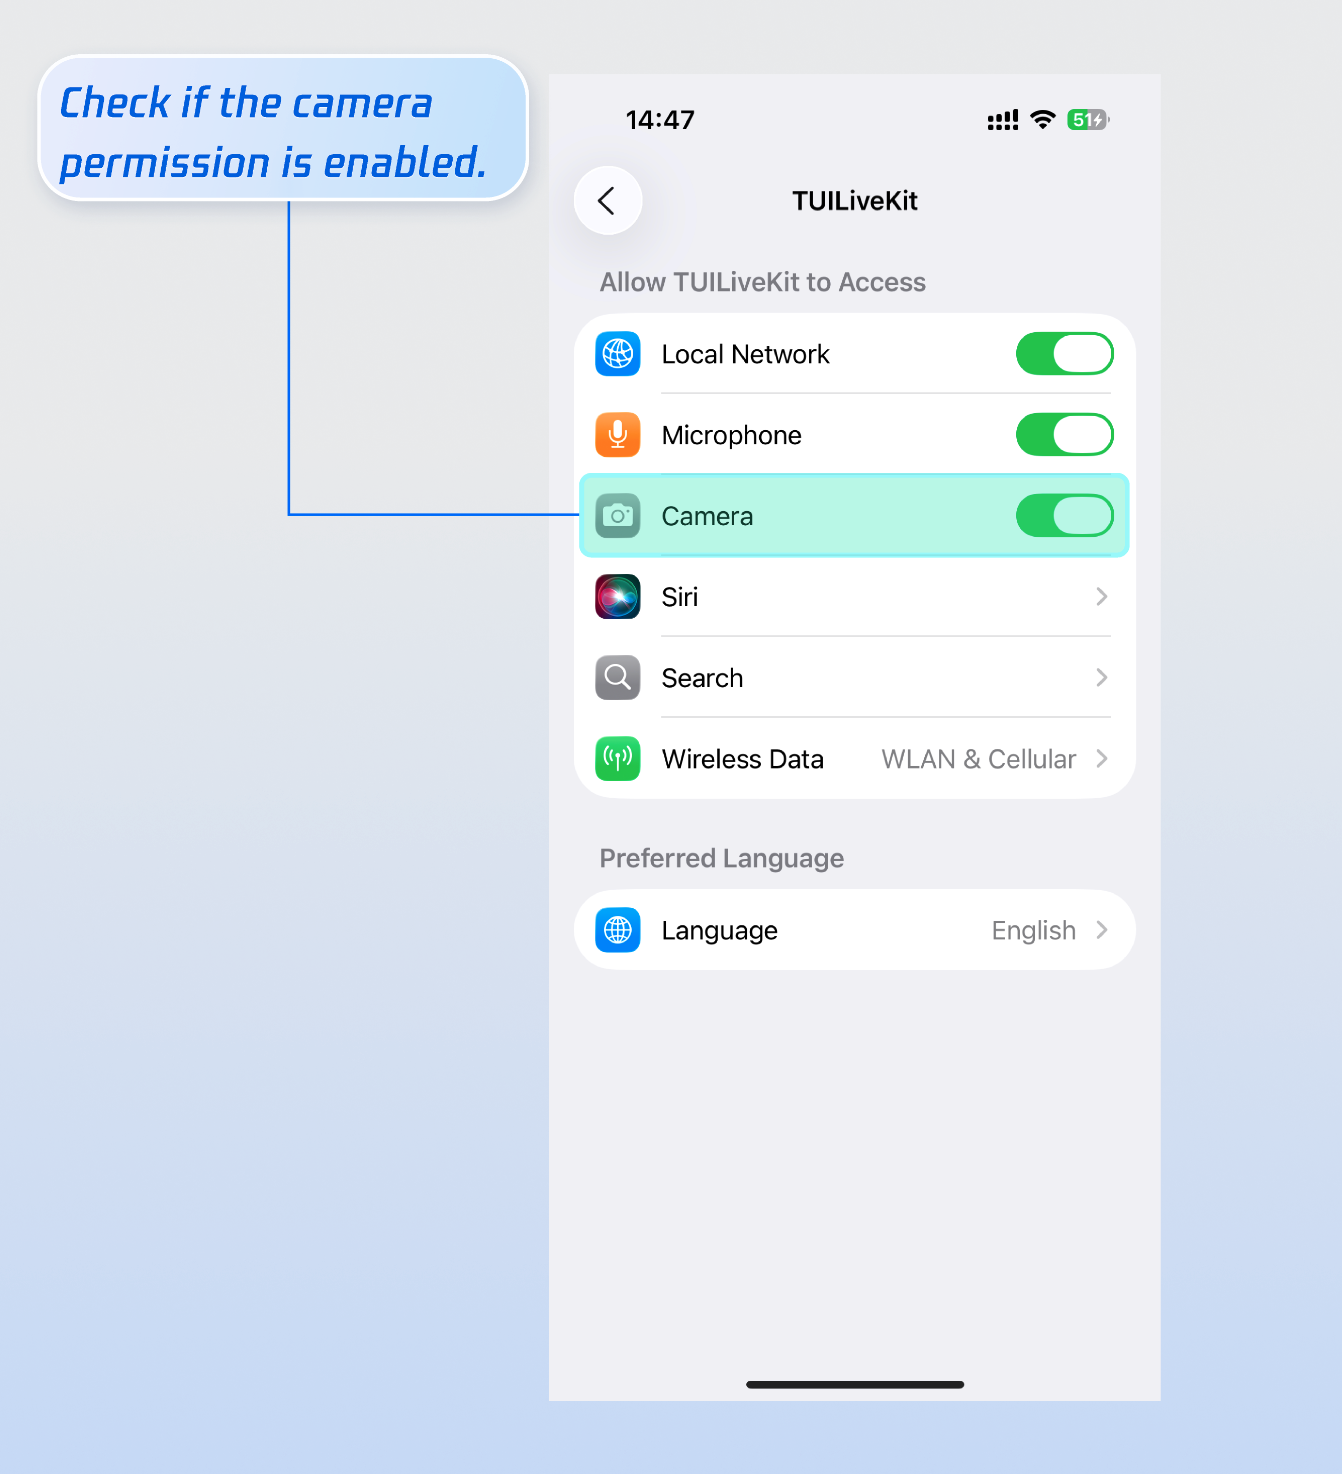 | 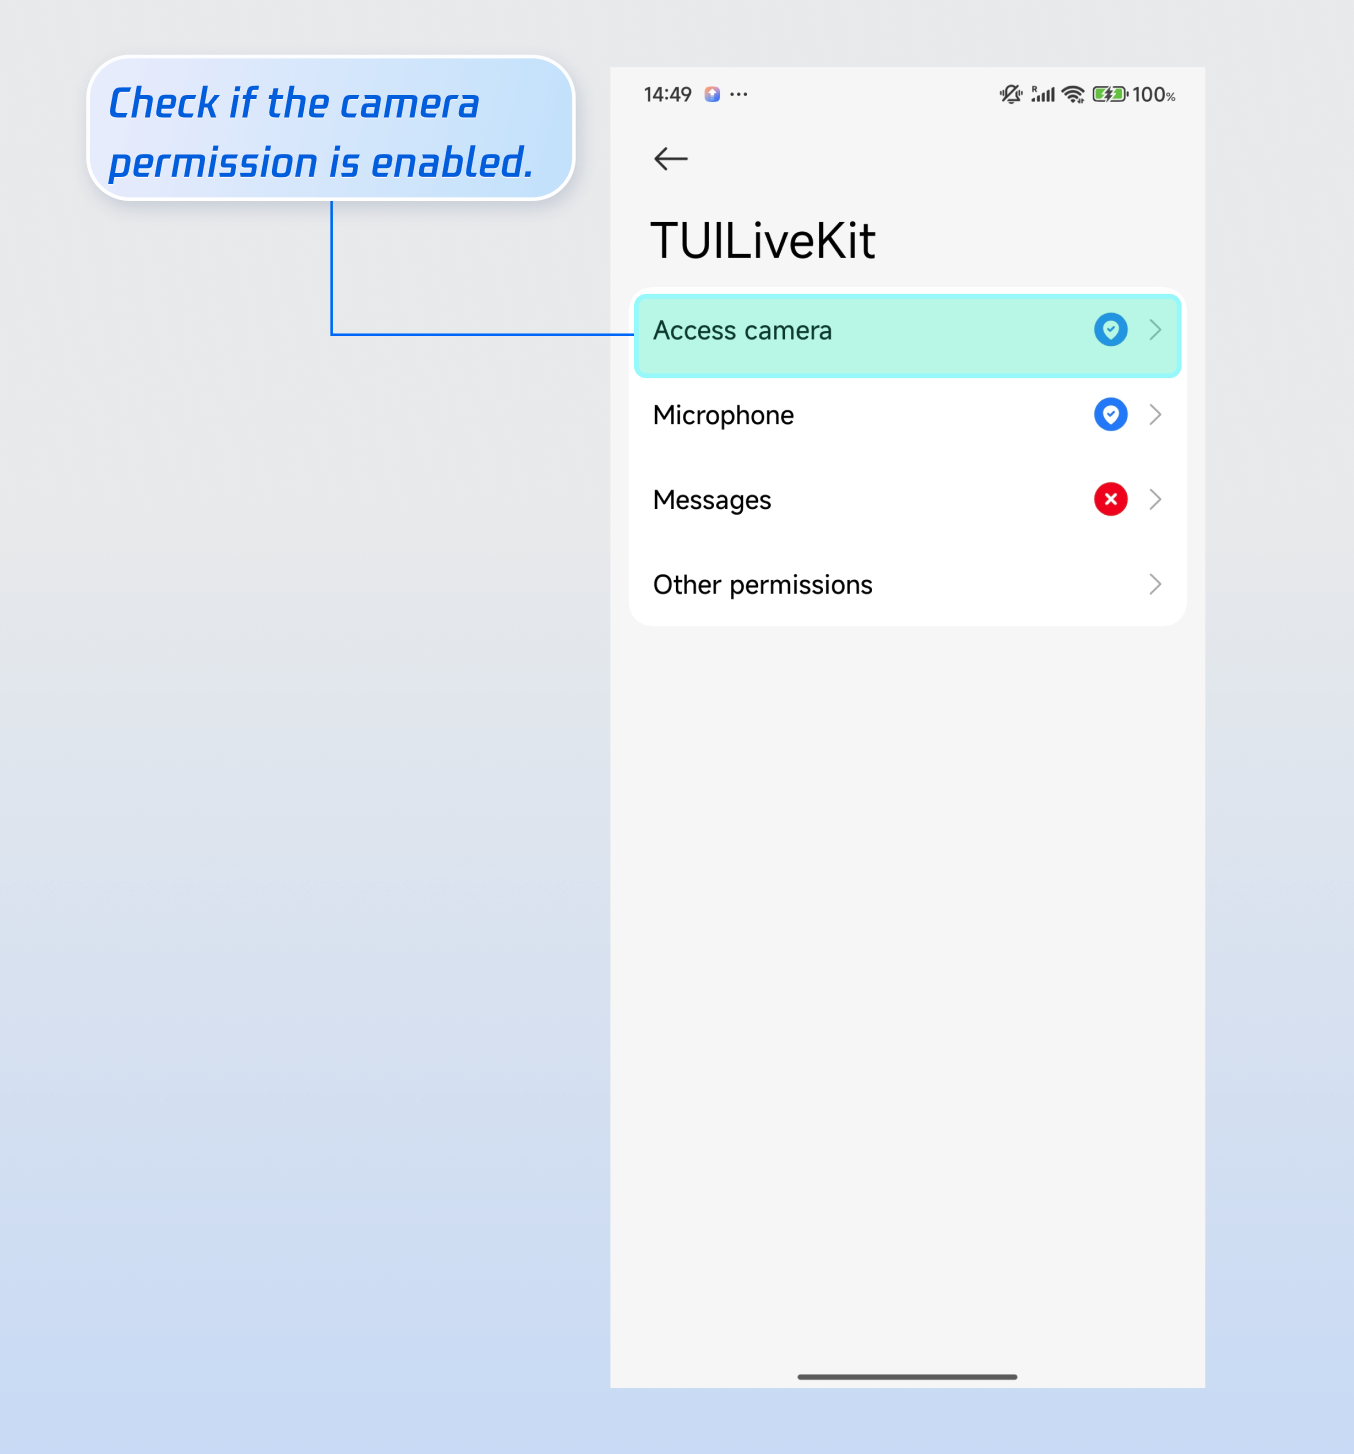 |
"Not Logged In" Prompt When Starting Live Streaming?
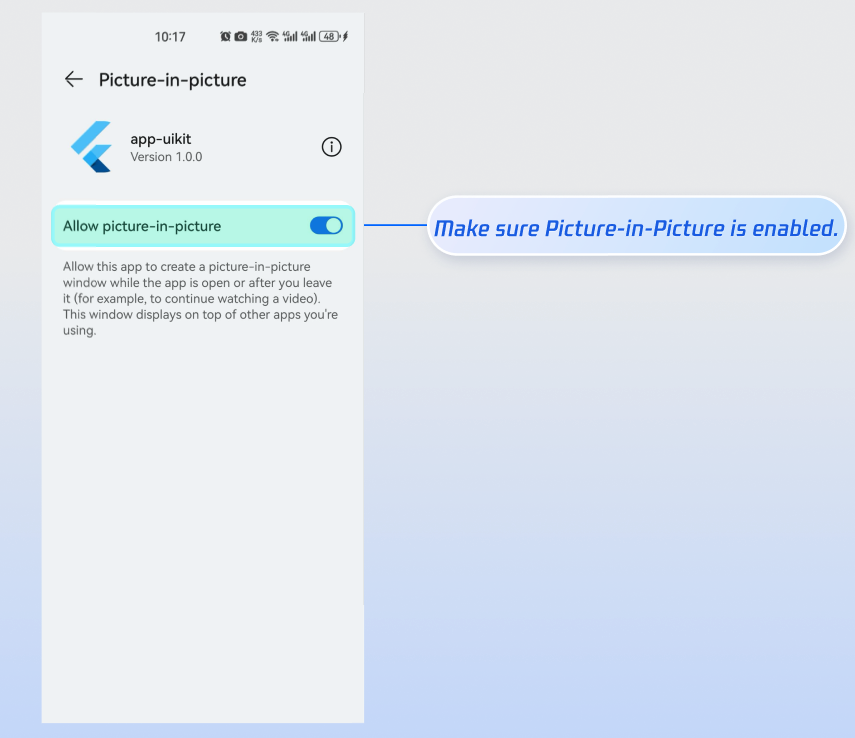
Why can’t the app enter out-of-app floating window (Picture-in-Picture) mode when in the background?
Refer to Out-Of-Application Floating Window Mode. After entering the live room, enable the Picture-in-Picture switch.
On Android, after enabling Picture-in-Picture, the app will automatically check the system setting. If Picture-in-Picture is not enabled, the app will prompt you to allow this mode in system settings: