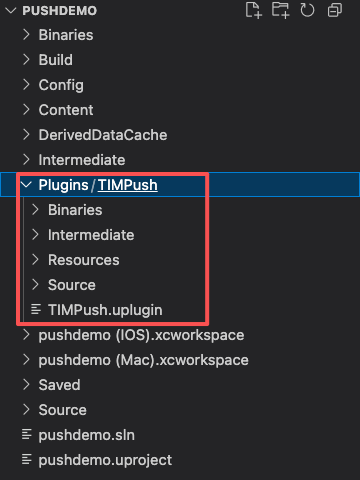
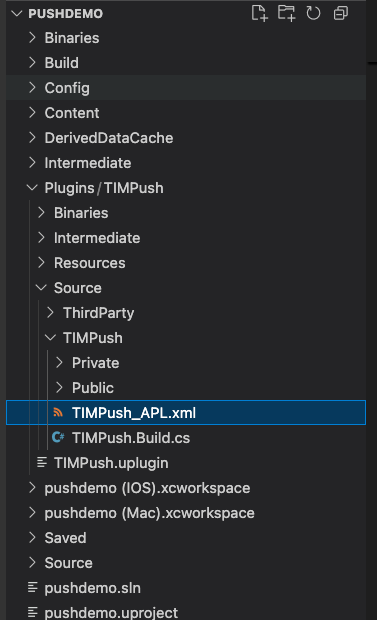
Download TIMPush and copy to the Plugins directory under the project. In the Build.cs file of the main module, introduce TIMPush.
copy directory
Introduce plug-in
Step 2: Push Parameter Configuration
iOS
Android
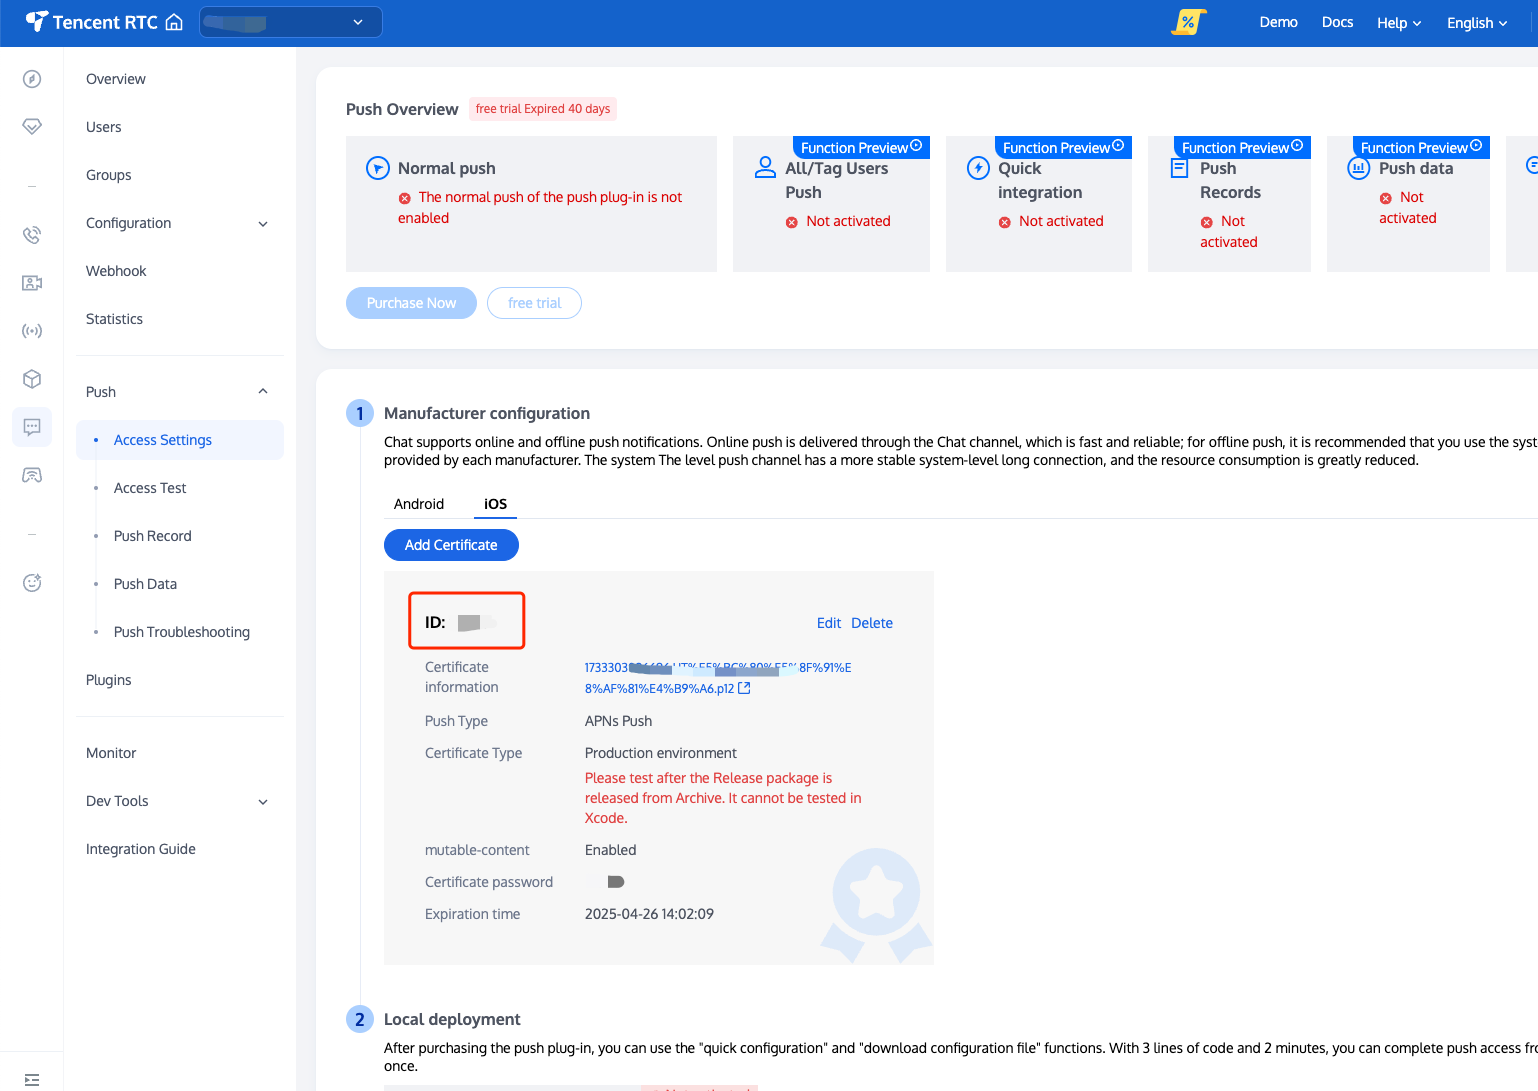
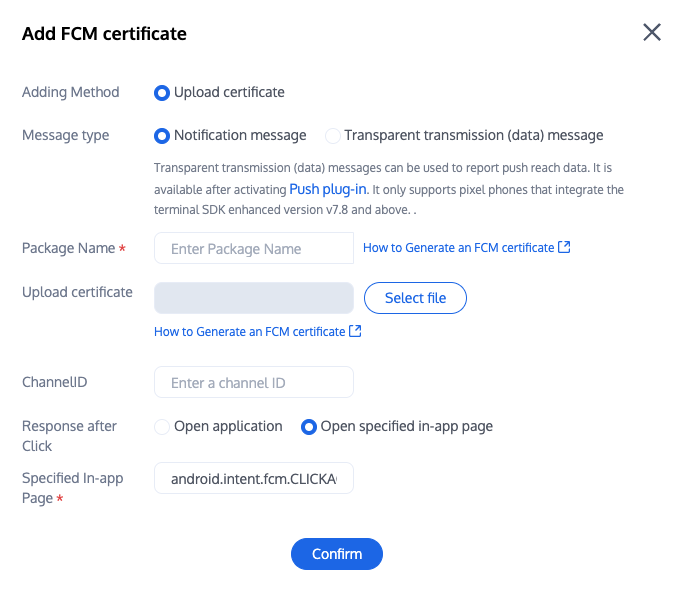
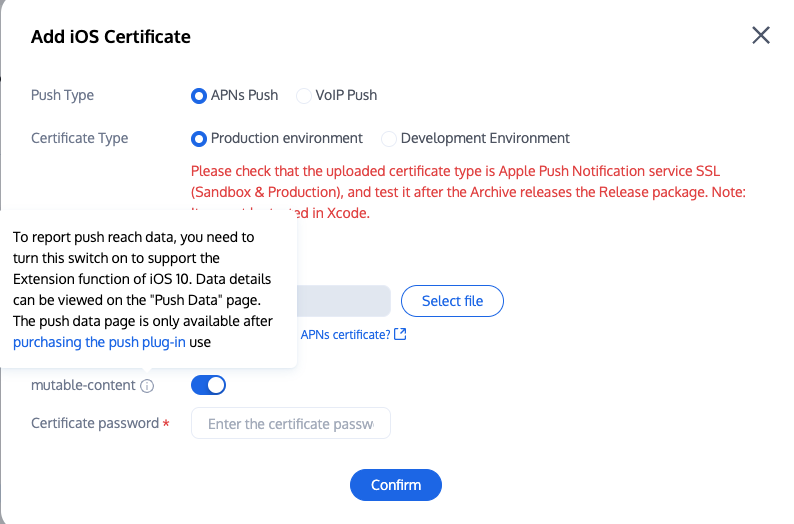
Upload the obtained iOS APNs Push Certificate to the IM console during the manufacturer configuration process.
The IM console will allocate a certificate ID for you, as shown below:
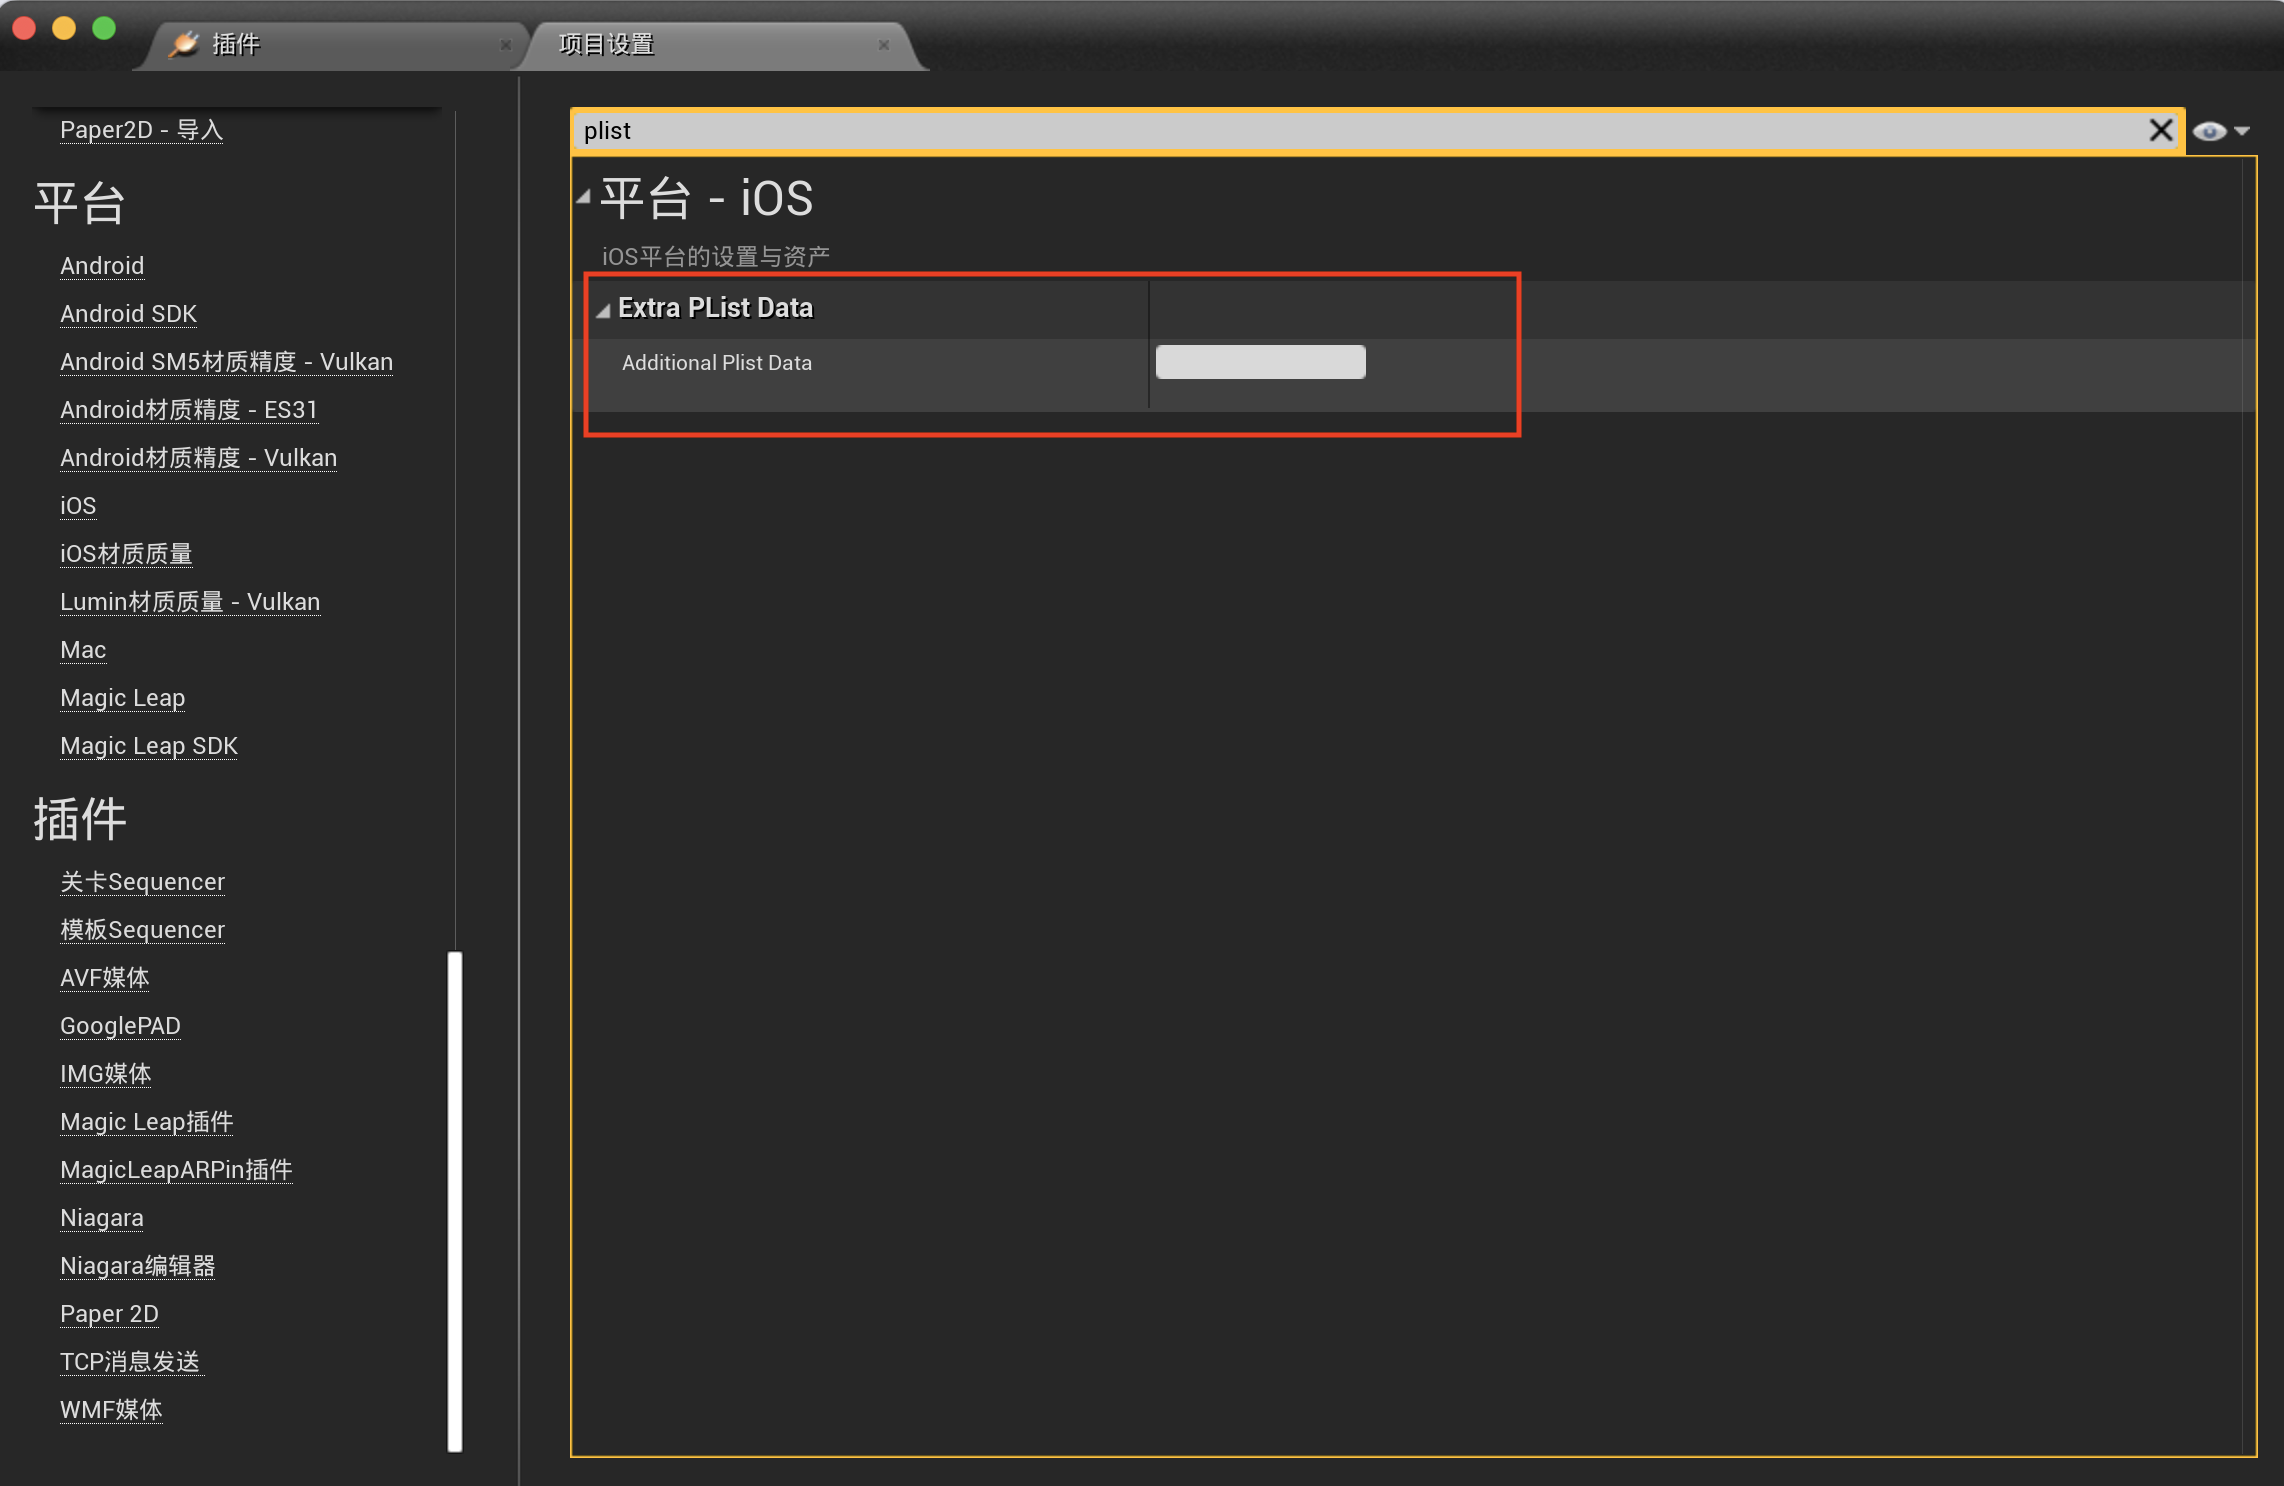
Set businessID:
Open "Project Settings" in UE4 Editor, search for Additional Plist Data, modify the following text and copy it into the textbox. YourBusinessID is required, while YourGroupID needs to be modified when you need to count push reach and click data.
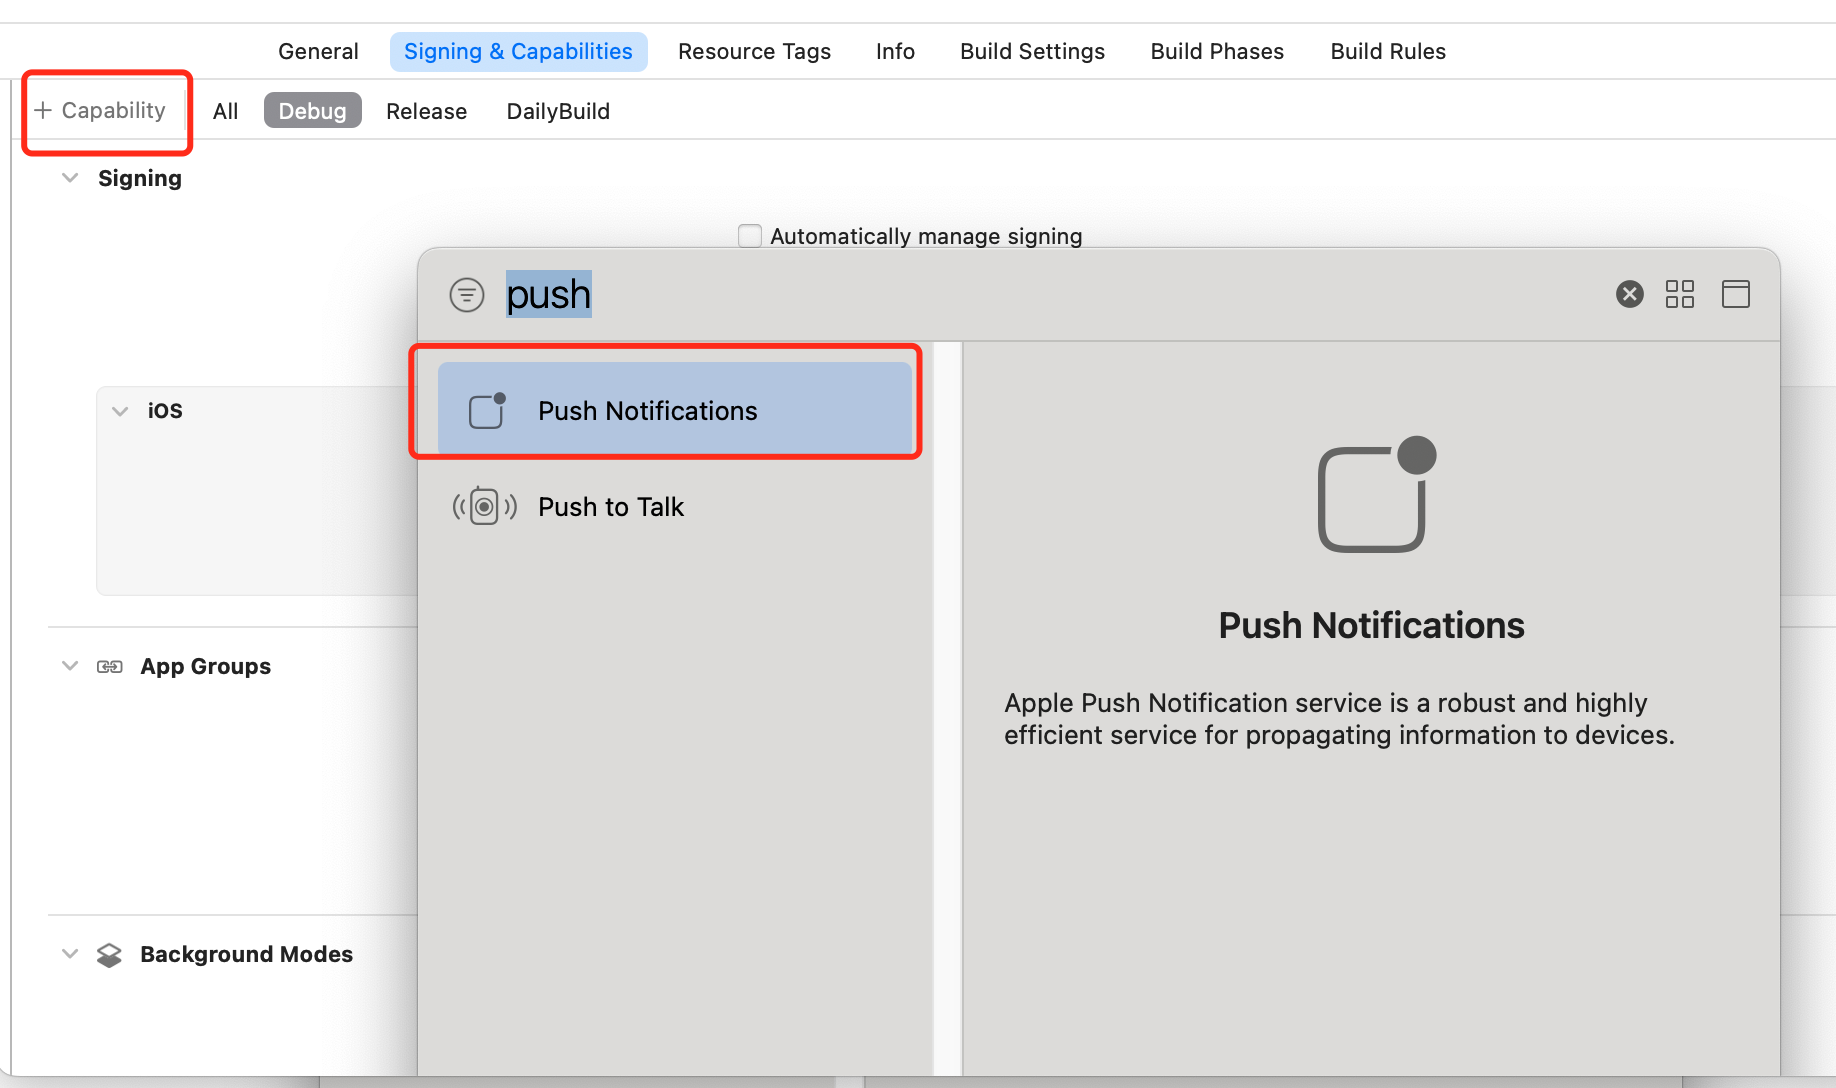
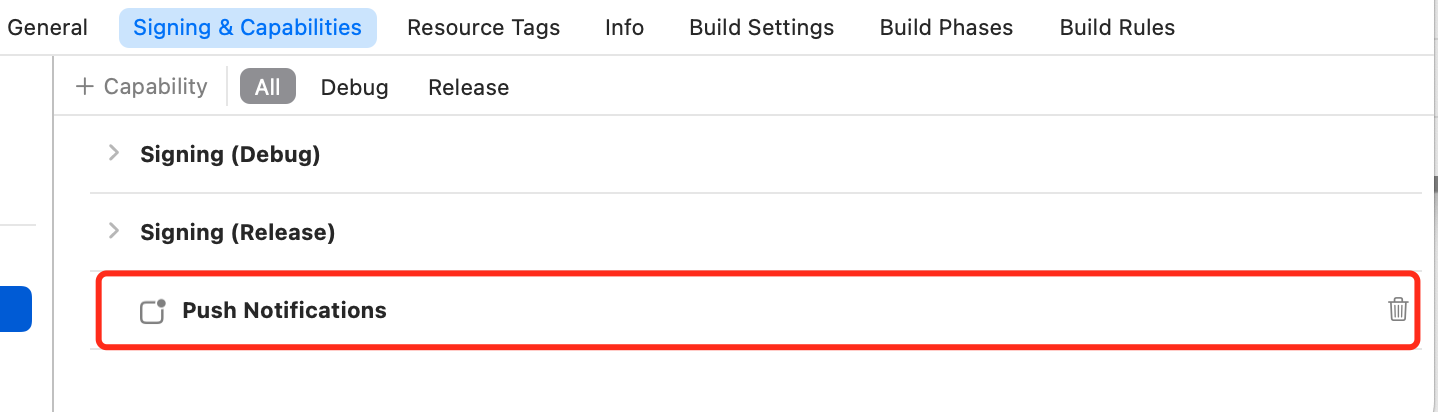
After completing the certificate ID configuration, you need to enable the app's Push Notifications capability:
If your UE engine is built from source code manually, you can enable the corresponding capacity by checking "Enable Remote Notifications Support" in Project Settings > iOS.
If your UE engine is downloaded from Epic Games, you can open "<proj_dir>/Config/DefaultEngine.ini" and add the following under IOSRuntimeSettings in the script:
// Some code
[/Script/IOSRuntimeSettings.IOSRuntimeSettings]
bEnableRemoteNotificationsSupport=True
Alternatively, you can also choose to open the UE-generated YourProject.xcworkspace with Xcode in the project root directory. Under Project > Target, click the Signing & Capabilities option, select Capability in the top-left corner, and search to add Push Notifications capability to your project.
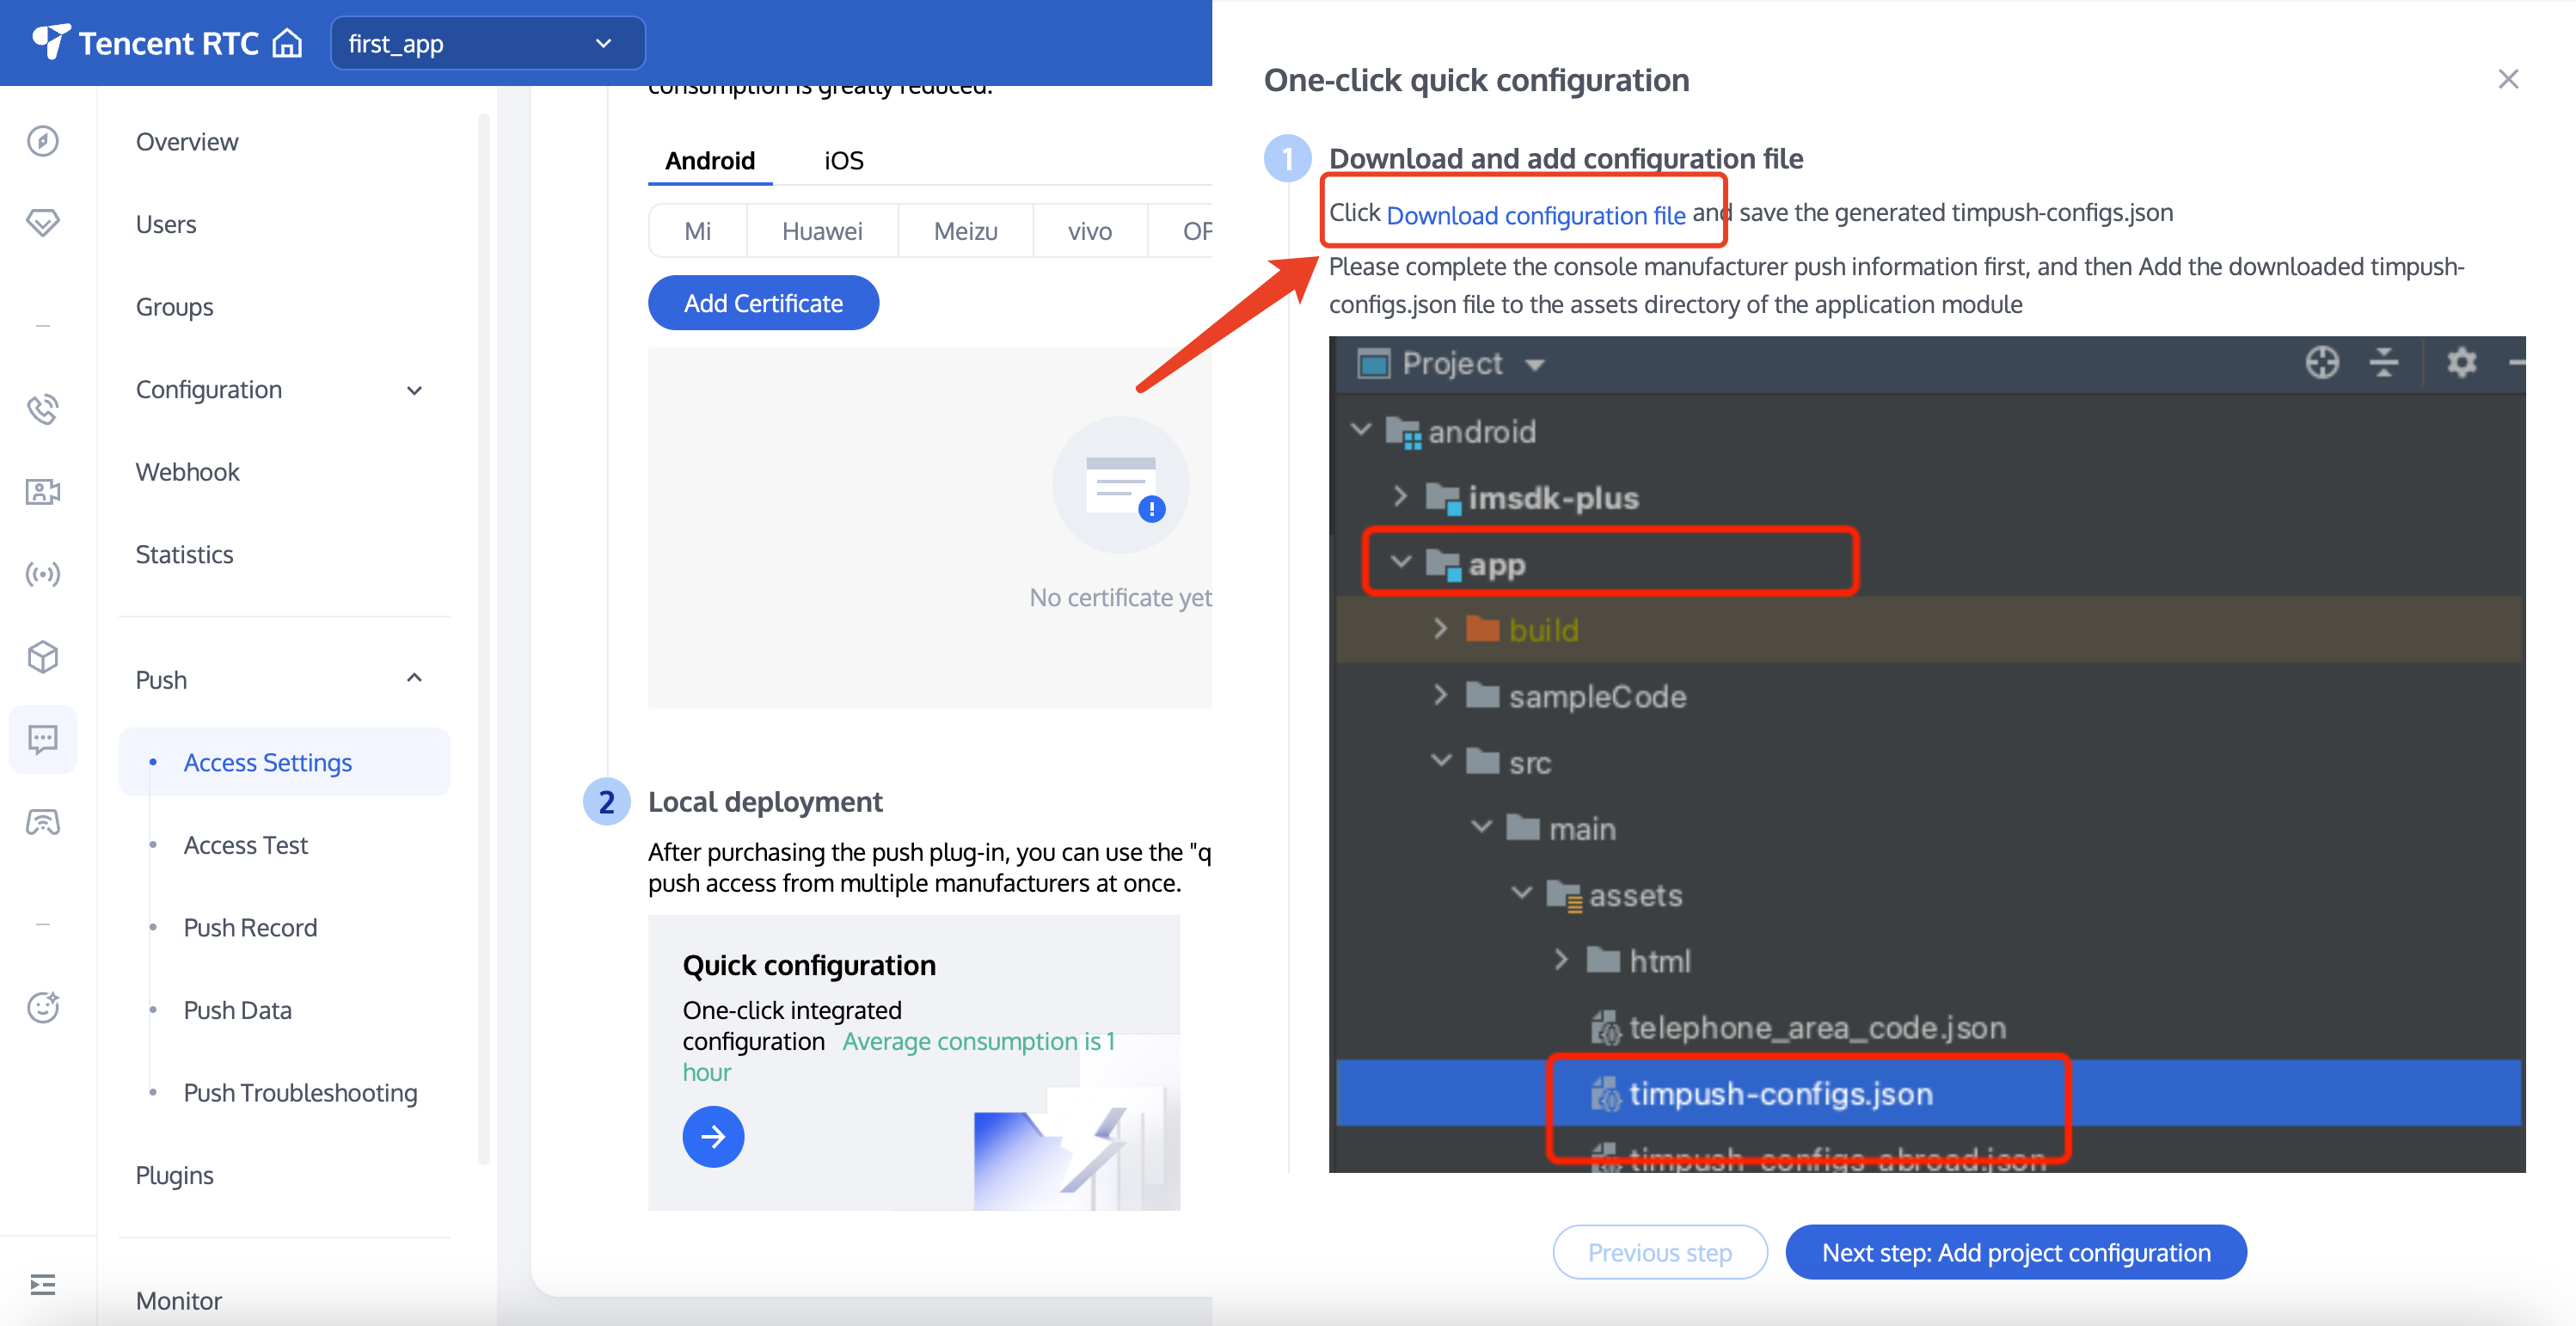
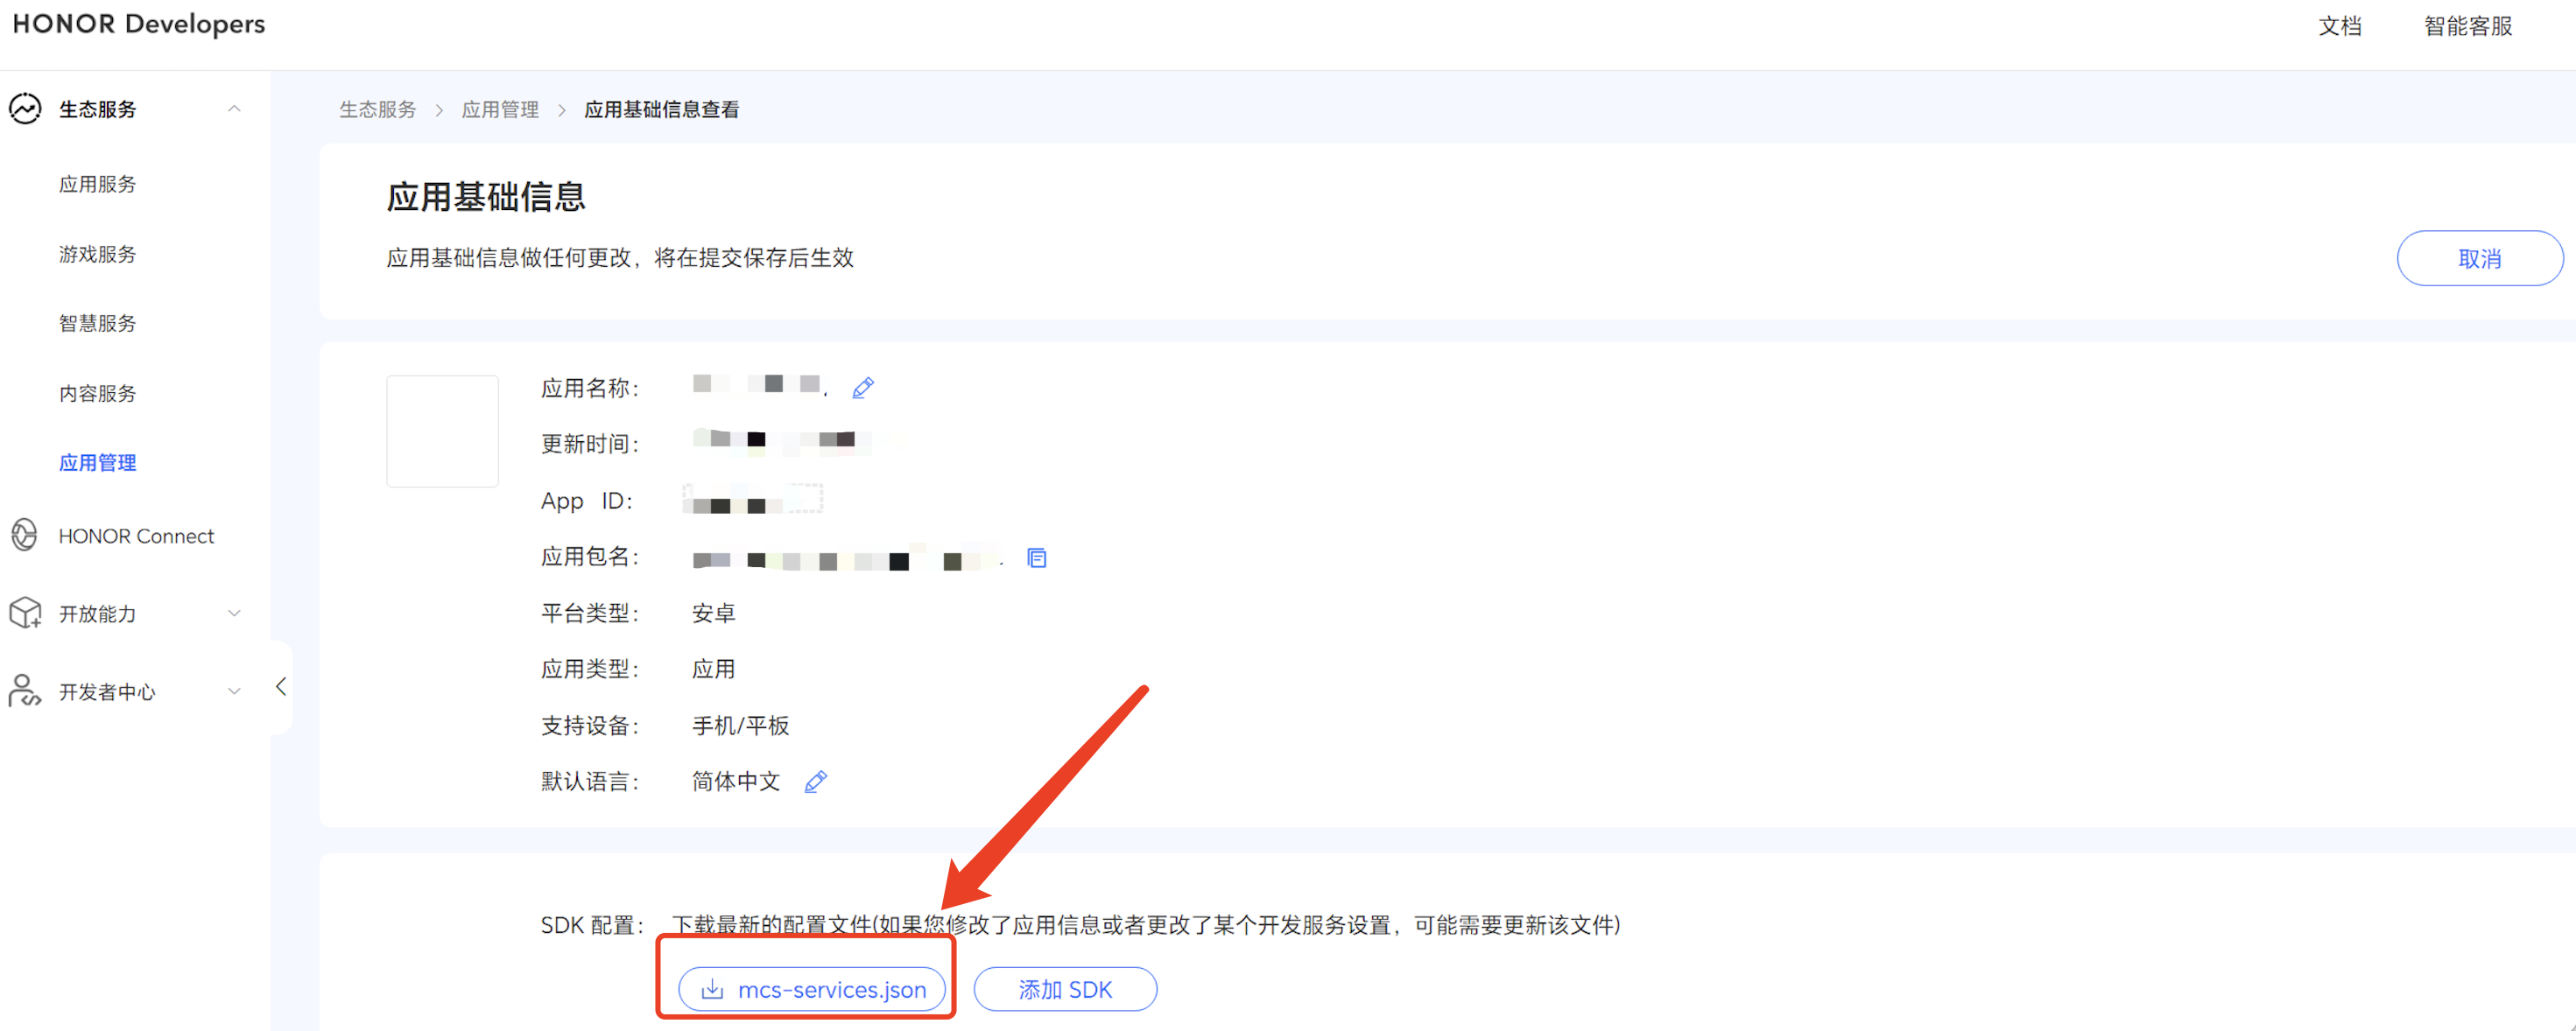
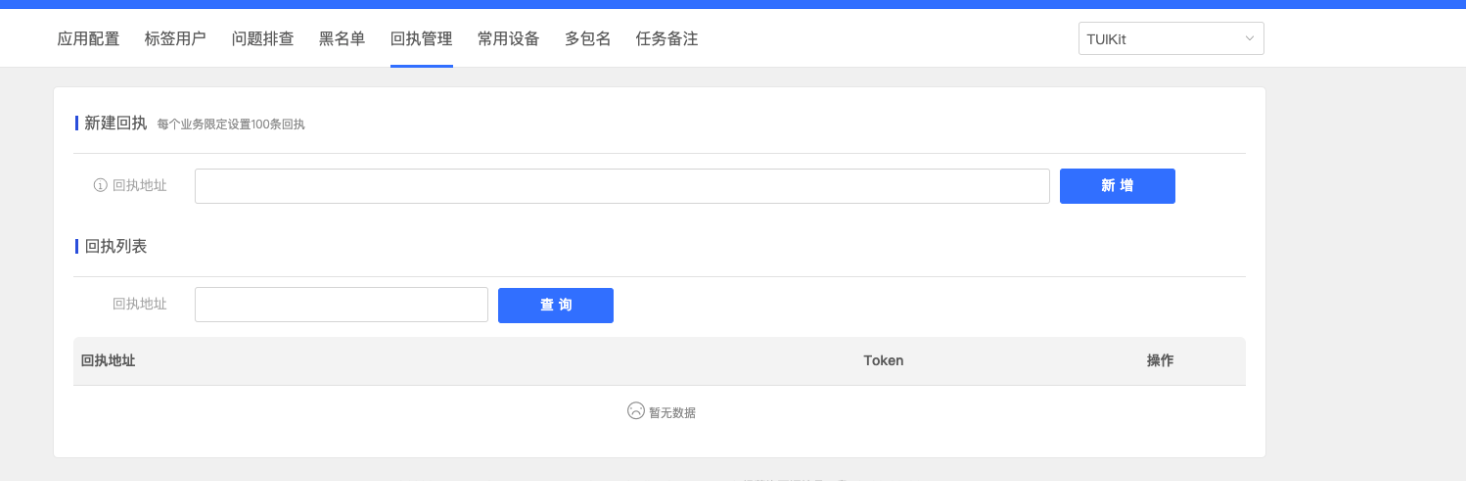
After completing the console manufacturer push information, download and add the configuration file to the project. Place the downloaded timpush-configs.json file under the Source/ThirdParty/TIMPushLibrary/Android/TIMPush/Assets directory.
download configuration file
copy path
Step 3: Client Vendor Configuration
iOS
Android
No need to perform this step on iOS.
APL configuration details are configured, only need to replace with your own configuration message. The path of TIMPush_APL.xml is: /Plugins/TIMPush/Source/TIMPush/
Push Package Integration Configuration
<buildGradleAdditions>
<insert>
dependencies {
// Version number "VERSION", please visit update log to get configuration.
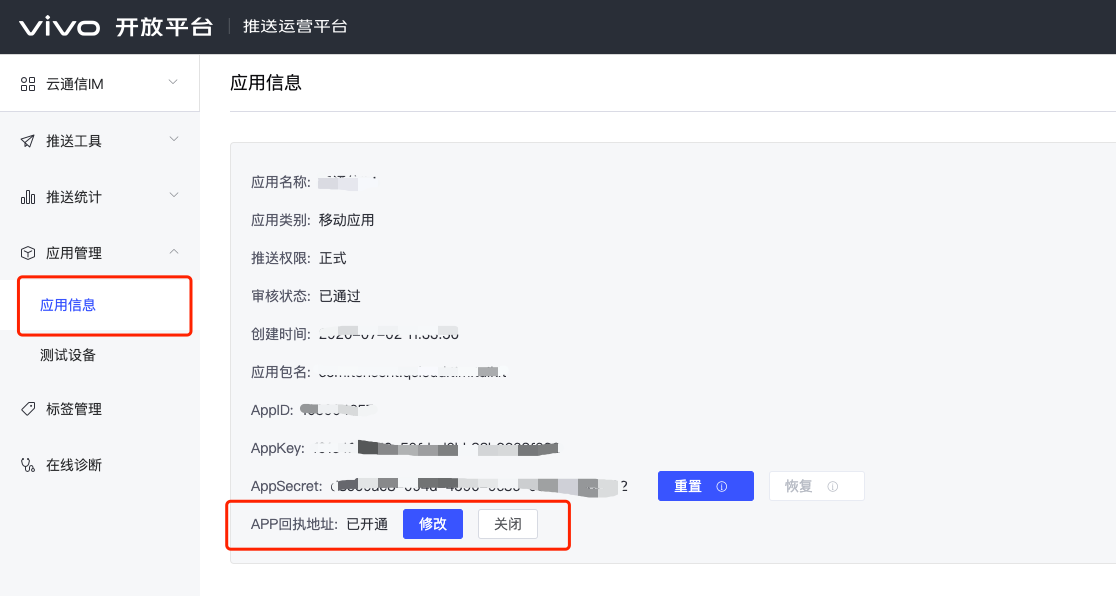
Vivo and Honor Adaptation (Attention Required Only for Manufacturer Integration)
According to the vivo and Honor vendor access guide, you need to add APPID and APPKEY in the configuration file, otherwise compilation issues may occur.
<buildGradleAdditions>
<insert>
android {
defaultConfig {
manifestPlaceholders = [
"VIVO_APPKEY" : "xxxxxx", // VIVO AppKey
"VIVO_APPID" : "xxxxxx", // VIVO AppId
"HONOR_APPID" : "xxxxxx" // Honor AppId
]
}
}
</insert>
</buildGradleAdditions>
3. Huawei, Honor and Google FCM Adaptation
Integrate the corresponding plugin and json configuration file using the vendor method.
Note:
Note: The following Honor adaptation requires configuration for version 7.7.5283 and above.
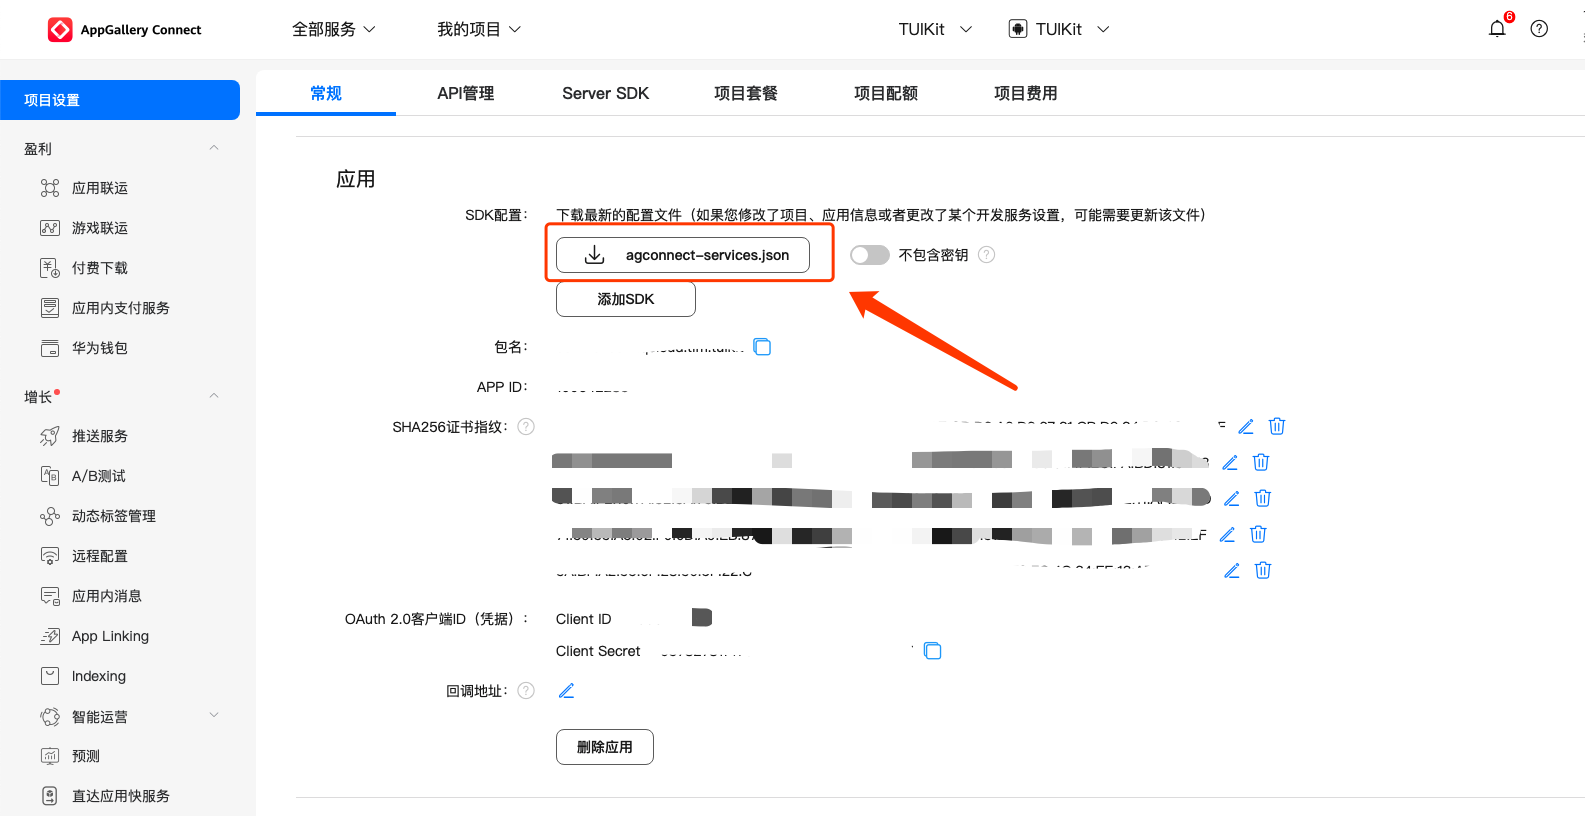
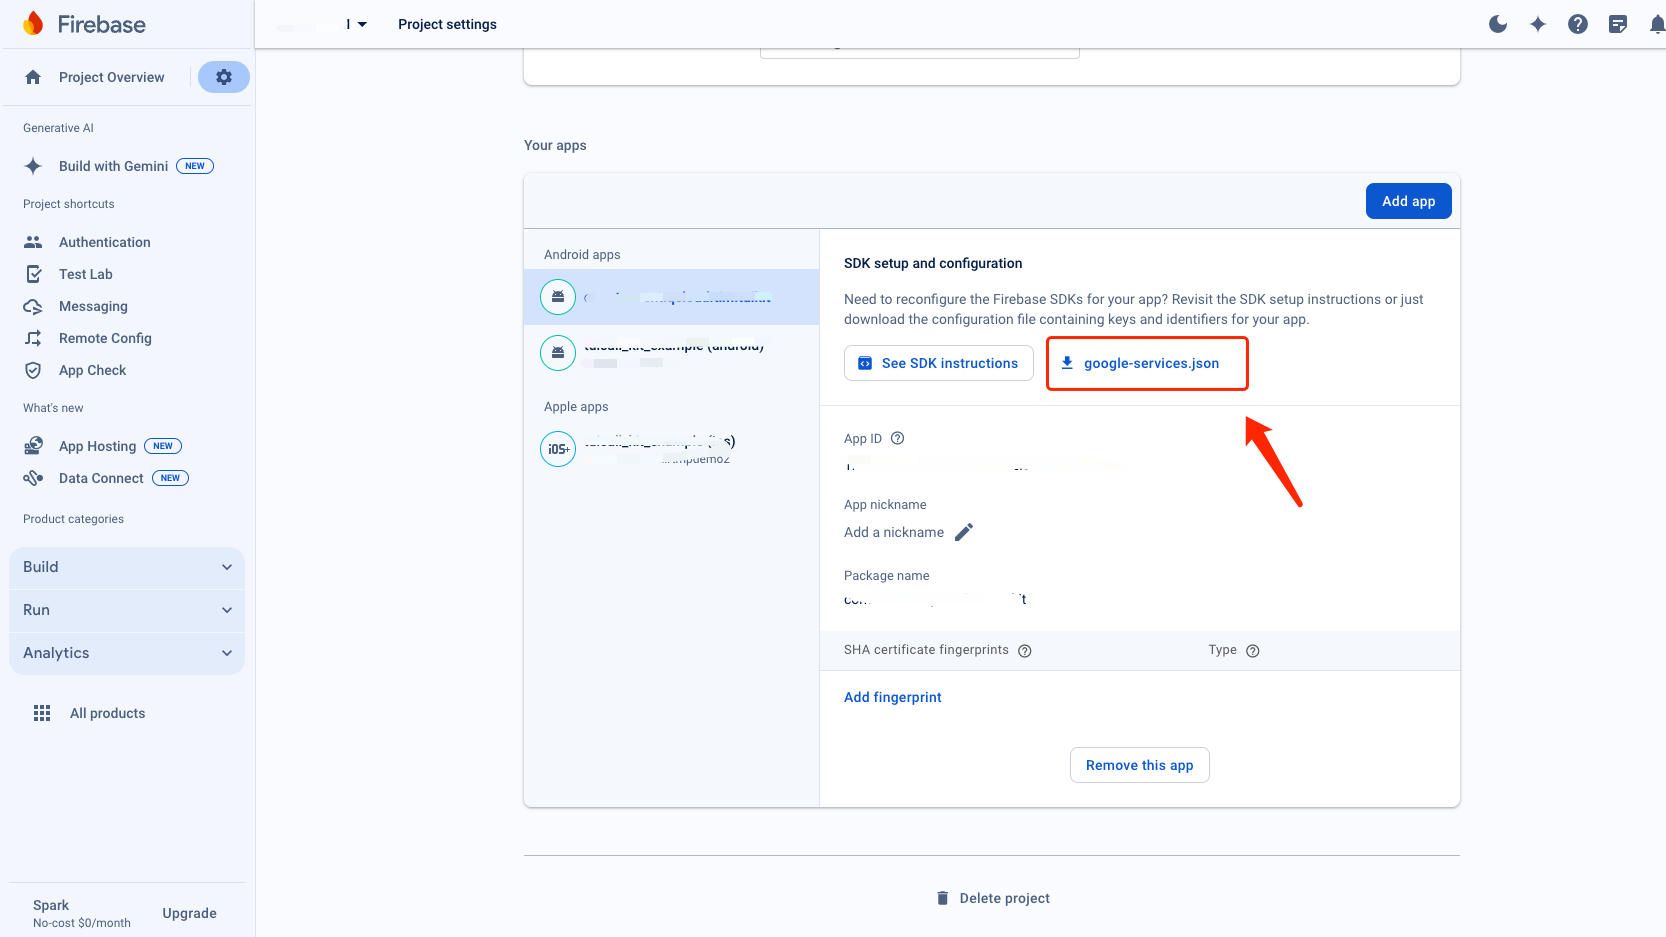
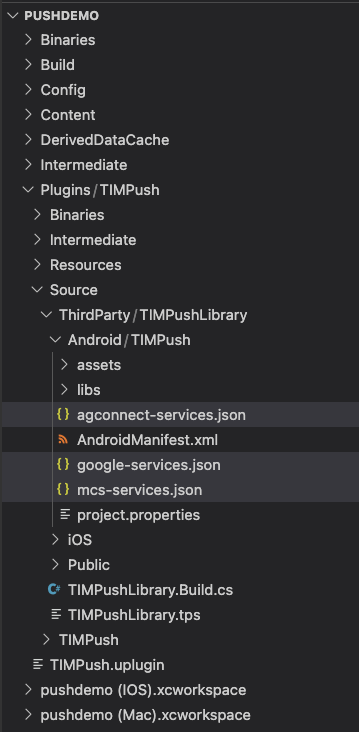
3.1 Download the json configuration file and add it to the TIMPush plug-in directory Source/ThirdParty/TIMPushLibrary/Android/TIMPush/.
Huawei
Honor
Google FCM
Target Path
3.2 The plugin configuration is configured and can be scaled or version-adapted as needed.
Step 4: Handling Message Click Callback and Parsing Parameters
If you need custom parsing for received remote push, you can implement it by the following method.
Note:
1. Register callback timing is recommended to be placed in the program entry function.
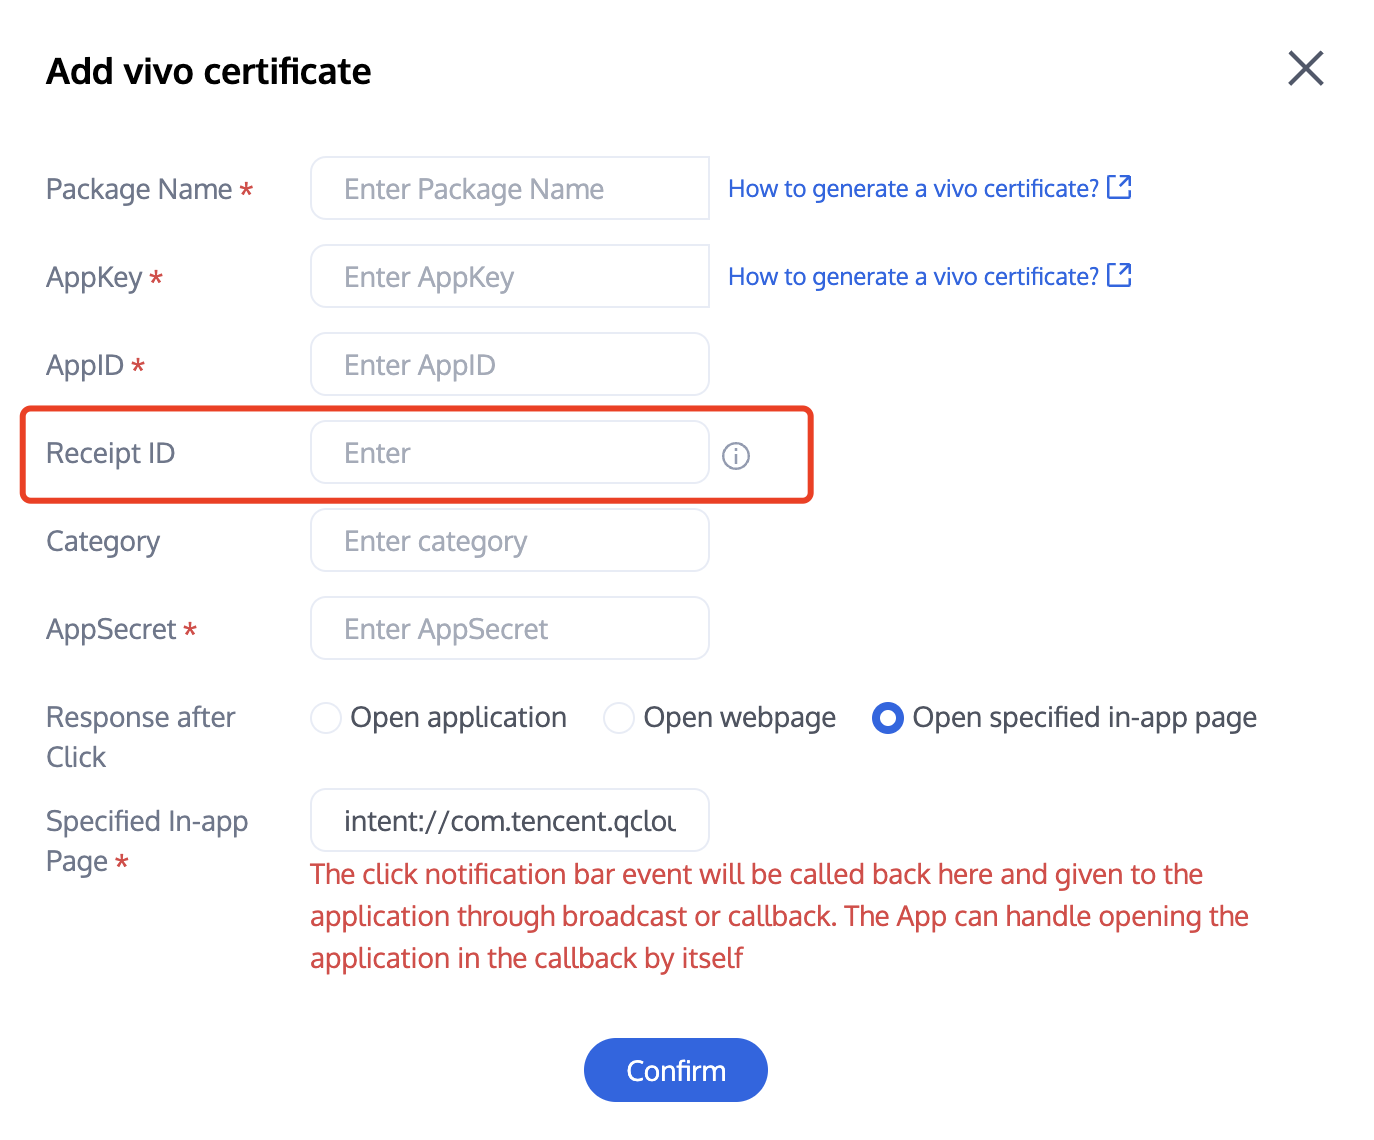
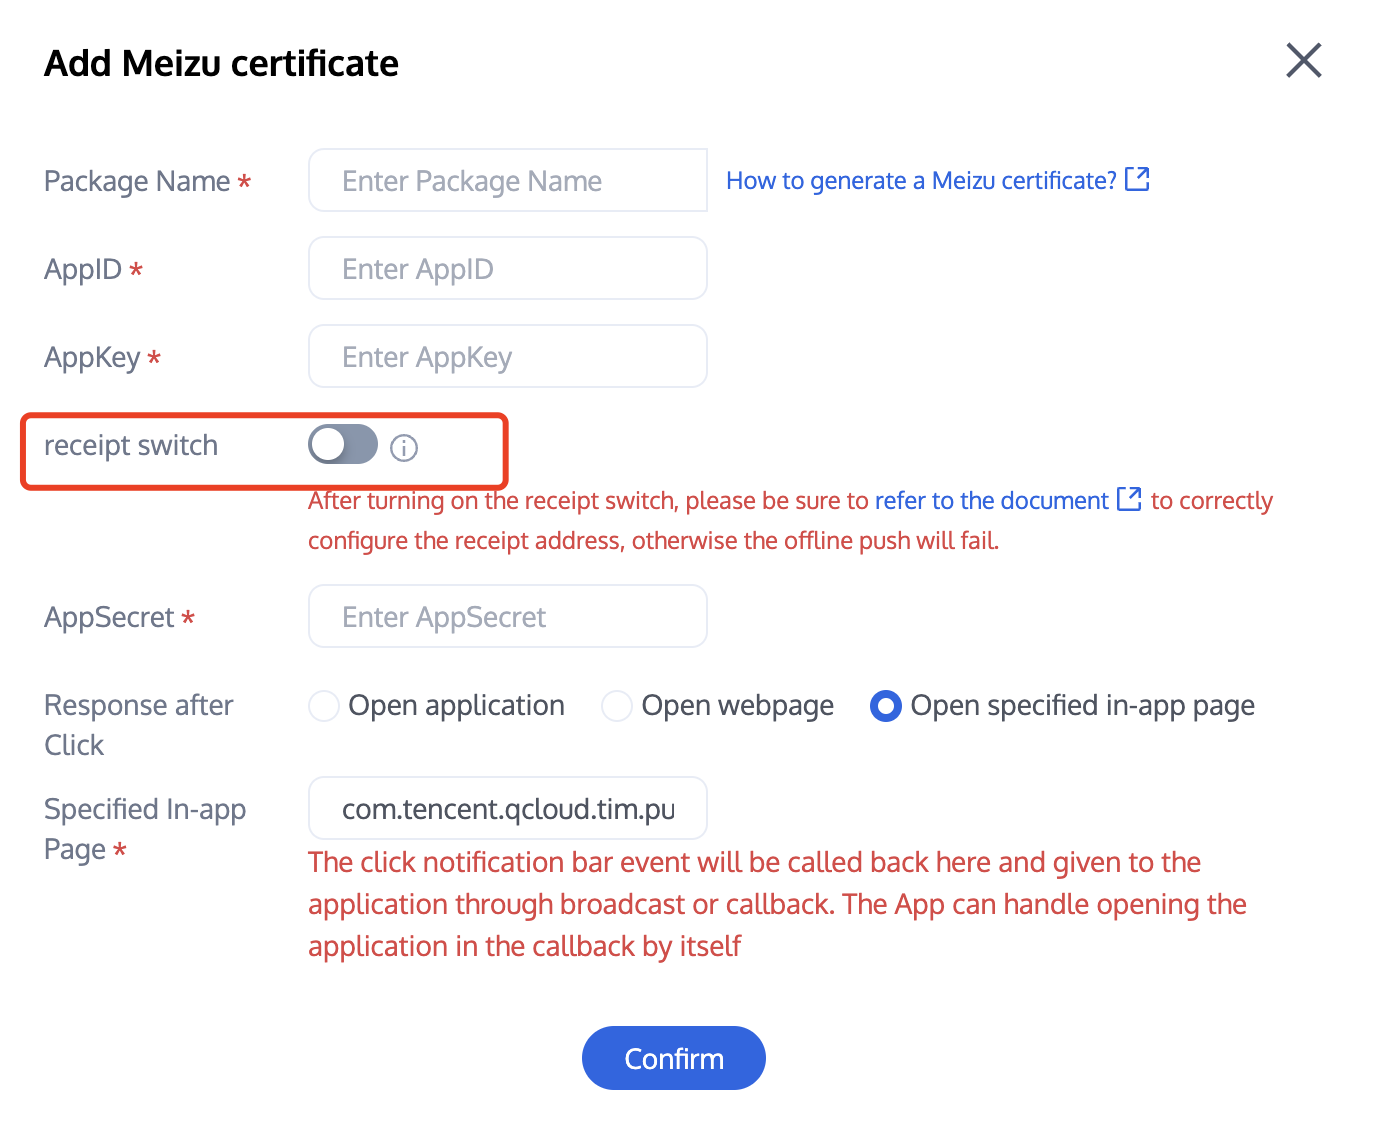
2. Configure the console and click subsequent actions with the following configuration. Select open specified in-app page. Do not modify and use default values.
classDemoPushListener:public PushListener{
public:
using OnRecvPushMessageCallback = std::function<void(const PushMessage &)>;
using OnRevokePushMessageCallback = std::function<void(const FString &)>;
using OnNotificationClickedCallback = std::function<void(const FString &)>;
Note: Huawei Push certificate ID <= 11344 uses Huawei Push v2 API. Reach and Receipt Click are unsupported. Please regenerate and update the certificate ID.
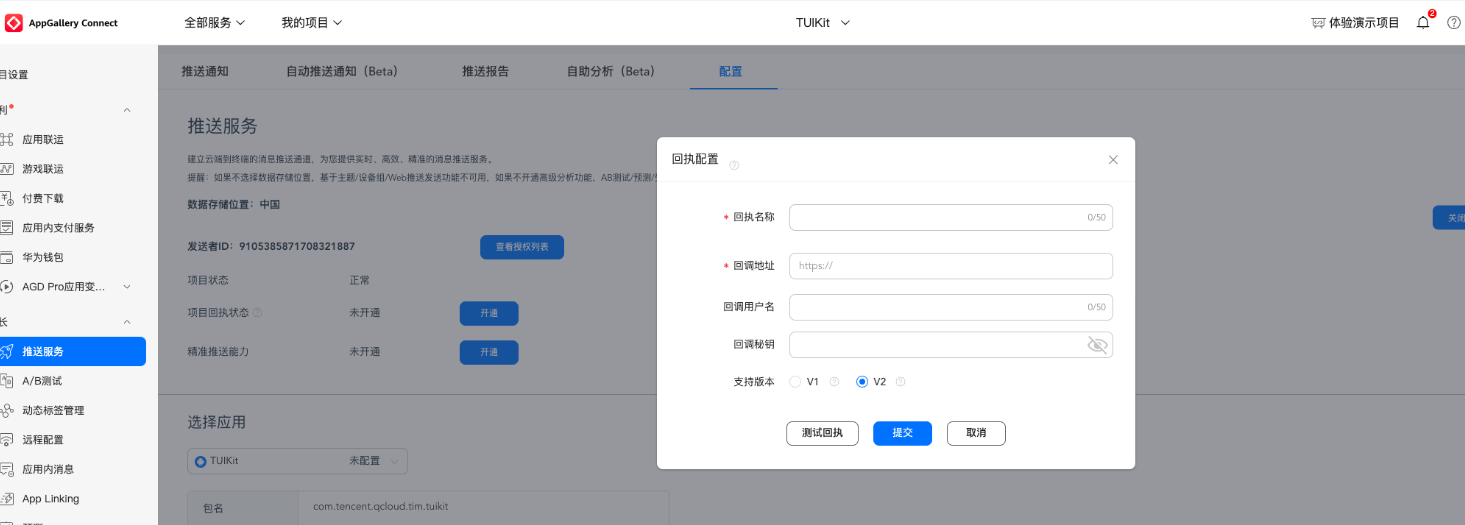
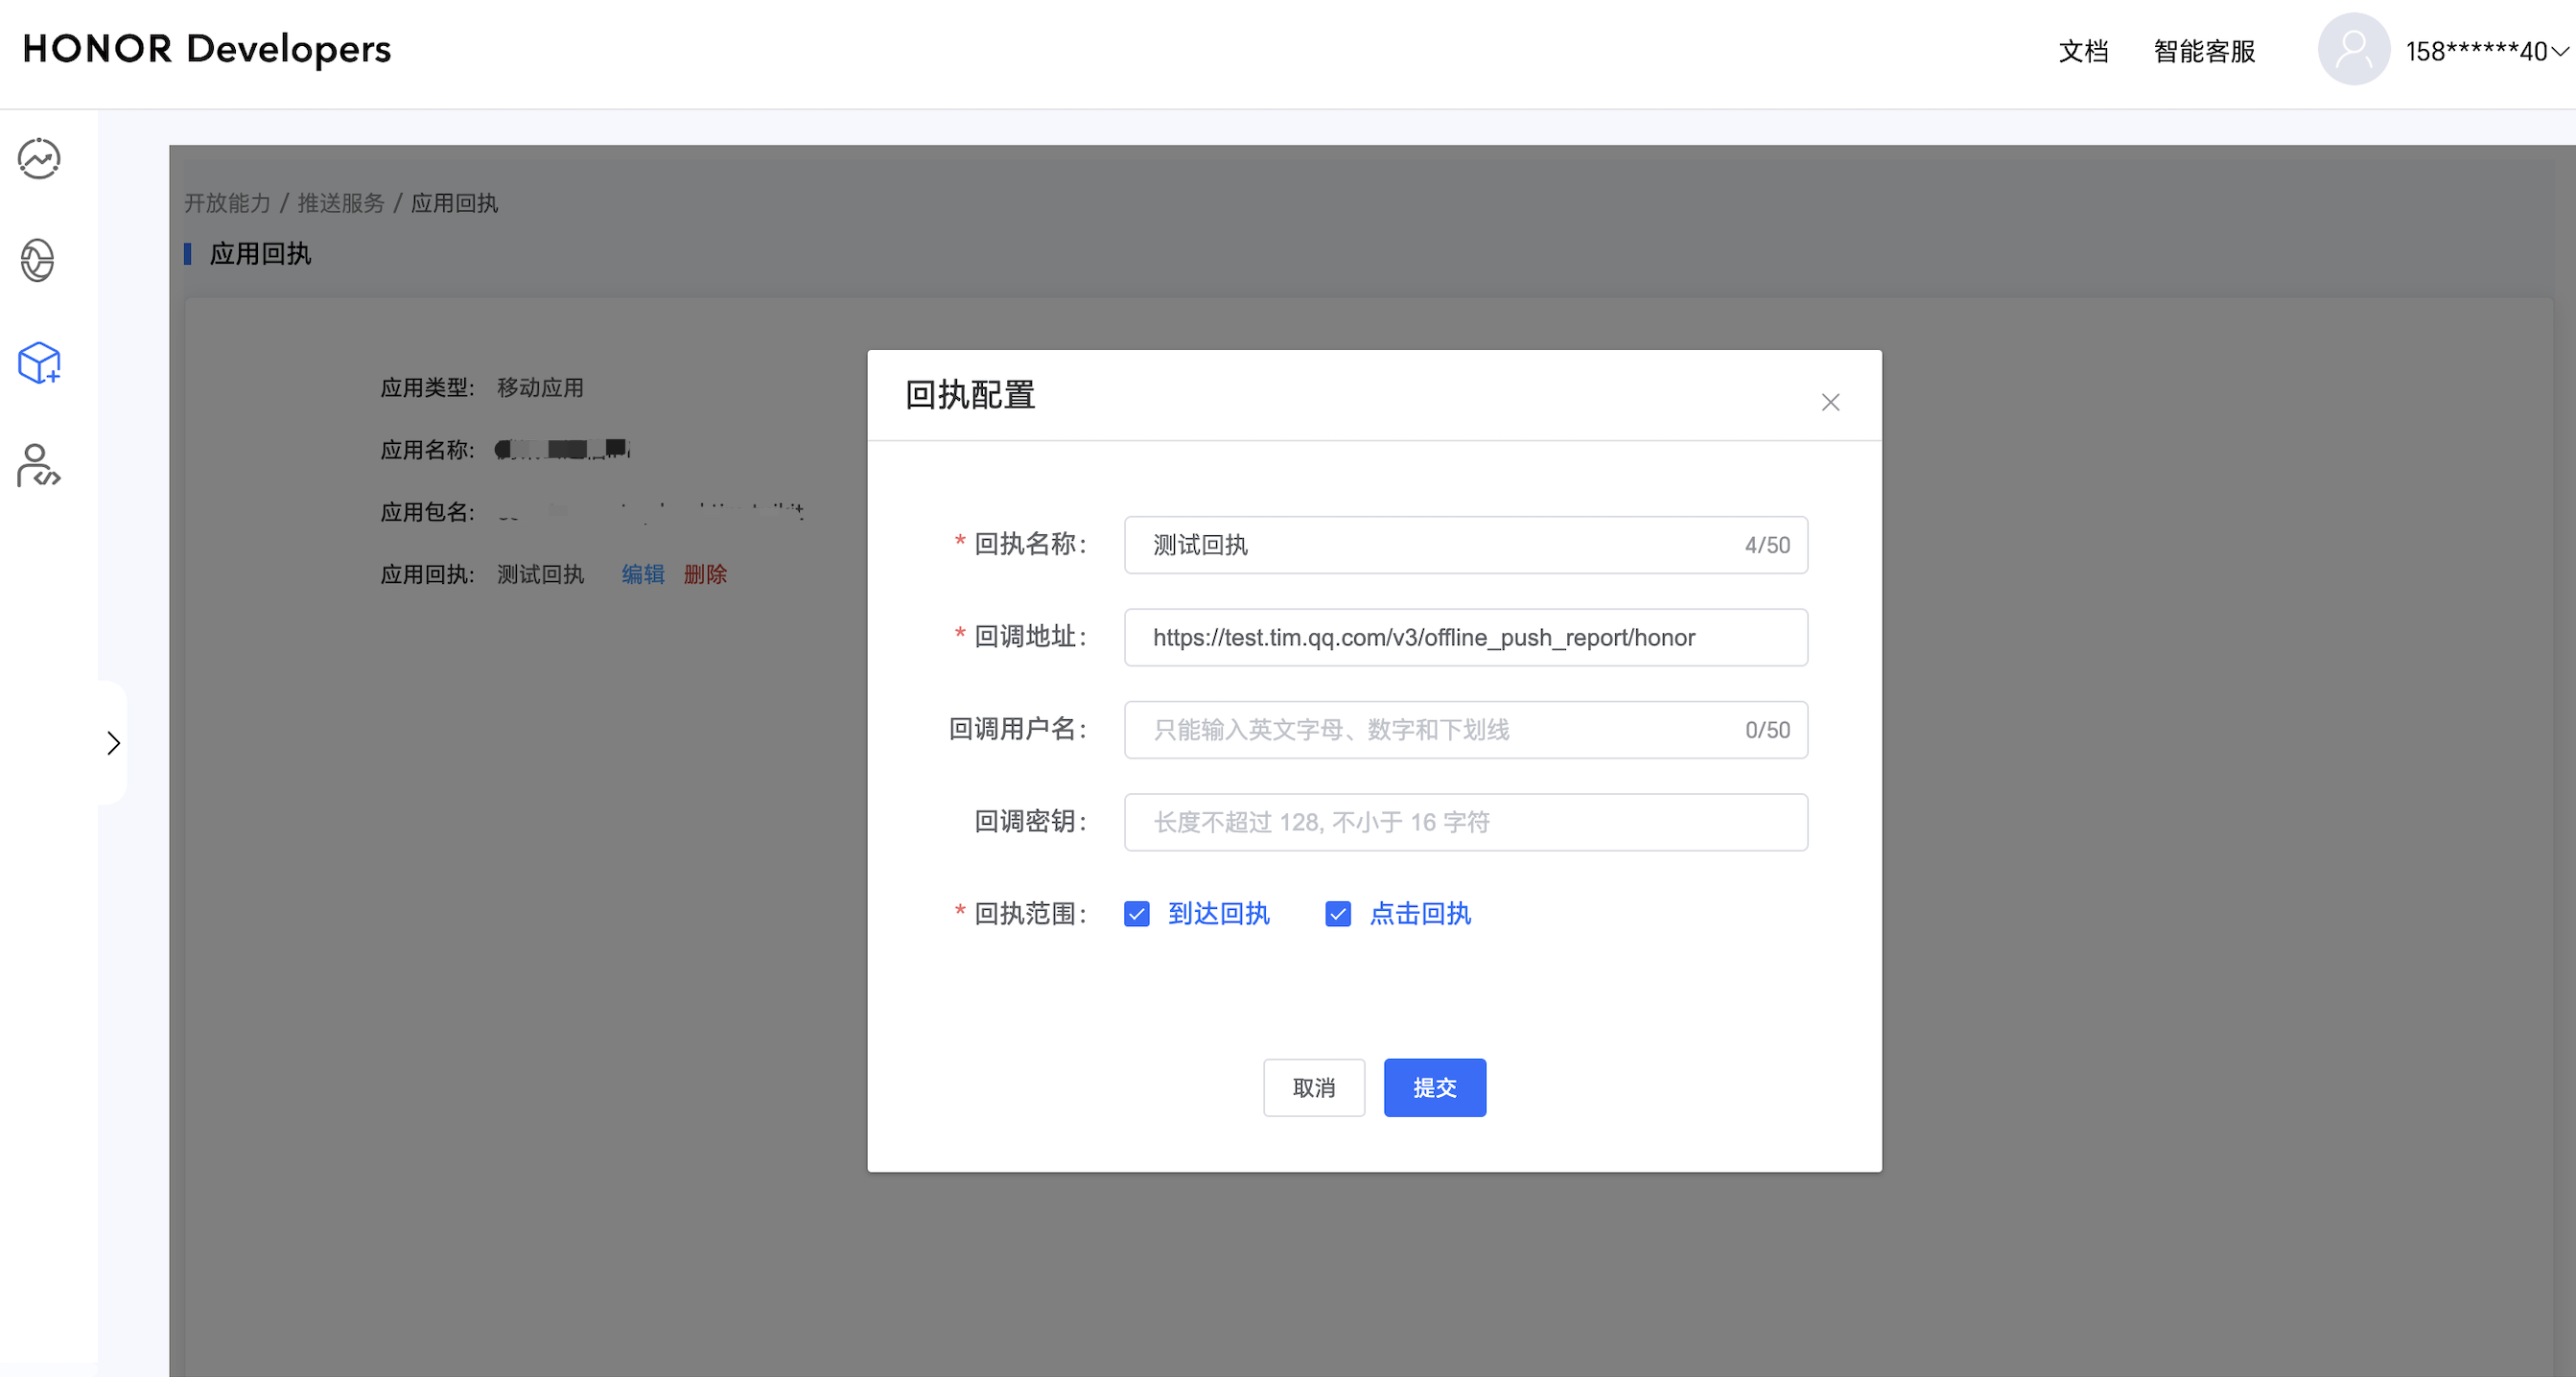
Note: After enabling the receipt switch, please ensure the receipt address is configured correctly. Without configuring or with an incorrect address, it will impact the push notification feature.
2. After configuring the App Group ID, you need to use Xcode to open the xcworkspace file generated by UE in the project directory, and refer to the method in Manufacturer Configuration - Generate App Group ID - Step 4 to configure your App Group ID. Then, enable the Notification Service Extension Target in Editor - Add Target in the Xcode project.
3. You also need to unzip the two framework compressed packages in the Plugins-TIMPush-Source-ThirdParty-TIMPushLibrary-iOS path of the project root directory, and add the internal .framework folder to your pushservice target in the Xcode project.
4. You can now call the push arrival rate statistics function in the Notification Service Extension's -didReceiveNotificationRequest:withContentHandler: method:
//appGroup indicates the shared APP Group between the main APP and Extension, and the App Groups capacity needs to be configured in the main APP's Capability.
1. Report push reach data. The mutable-content switch needs to be enabled to support the Extension function for iOS 10.
2. Data details can be viewed on the push data page. The push data page is only available after purchasing the push plugin.
Other manufacturers support it with no need to configure. FCM does not currently support the push notification statistics feature.
Congratulations on completing the access of the push plugin. Remind you: the push plugin will automatically stop providing push service (including regular message offline push, all users/tag push, etc.) after trial or purchase expiry. To avoid affecting normal business operation, please advise in advance to purchase/renew.
Note:
1. Manufacturer offline channels have a message categorization mechanism, and different types will also have different push strategies.
If the push demand belongs to IM type push and requires timely delivery, set your own app to the corresponding push type according to the vendor's rules. It will be categorized as a high-priority system message type or important message type.
Conversely, offline push has quantity and frequency limits and may not reach devices in time.
2. Integration completed but not receiving push notifications. Please first use the troubleshooting tool to check the reason. To view push metrics data, use data statistics for querying.