This document will help you use the core component LiveView of the AtomicXCore SDK to quickly build a basic live streaming web application featuring host broadcasting and audience viewing capabilities.
Core Features
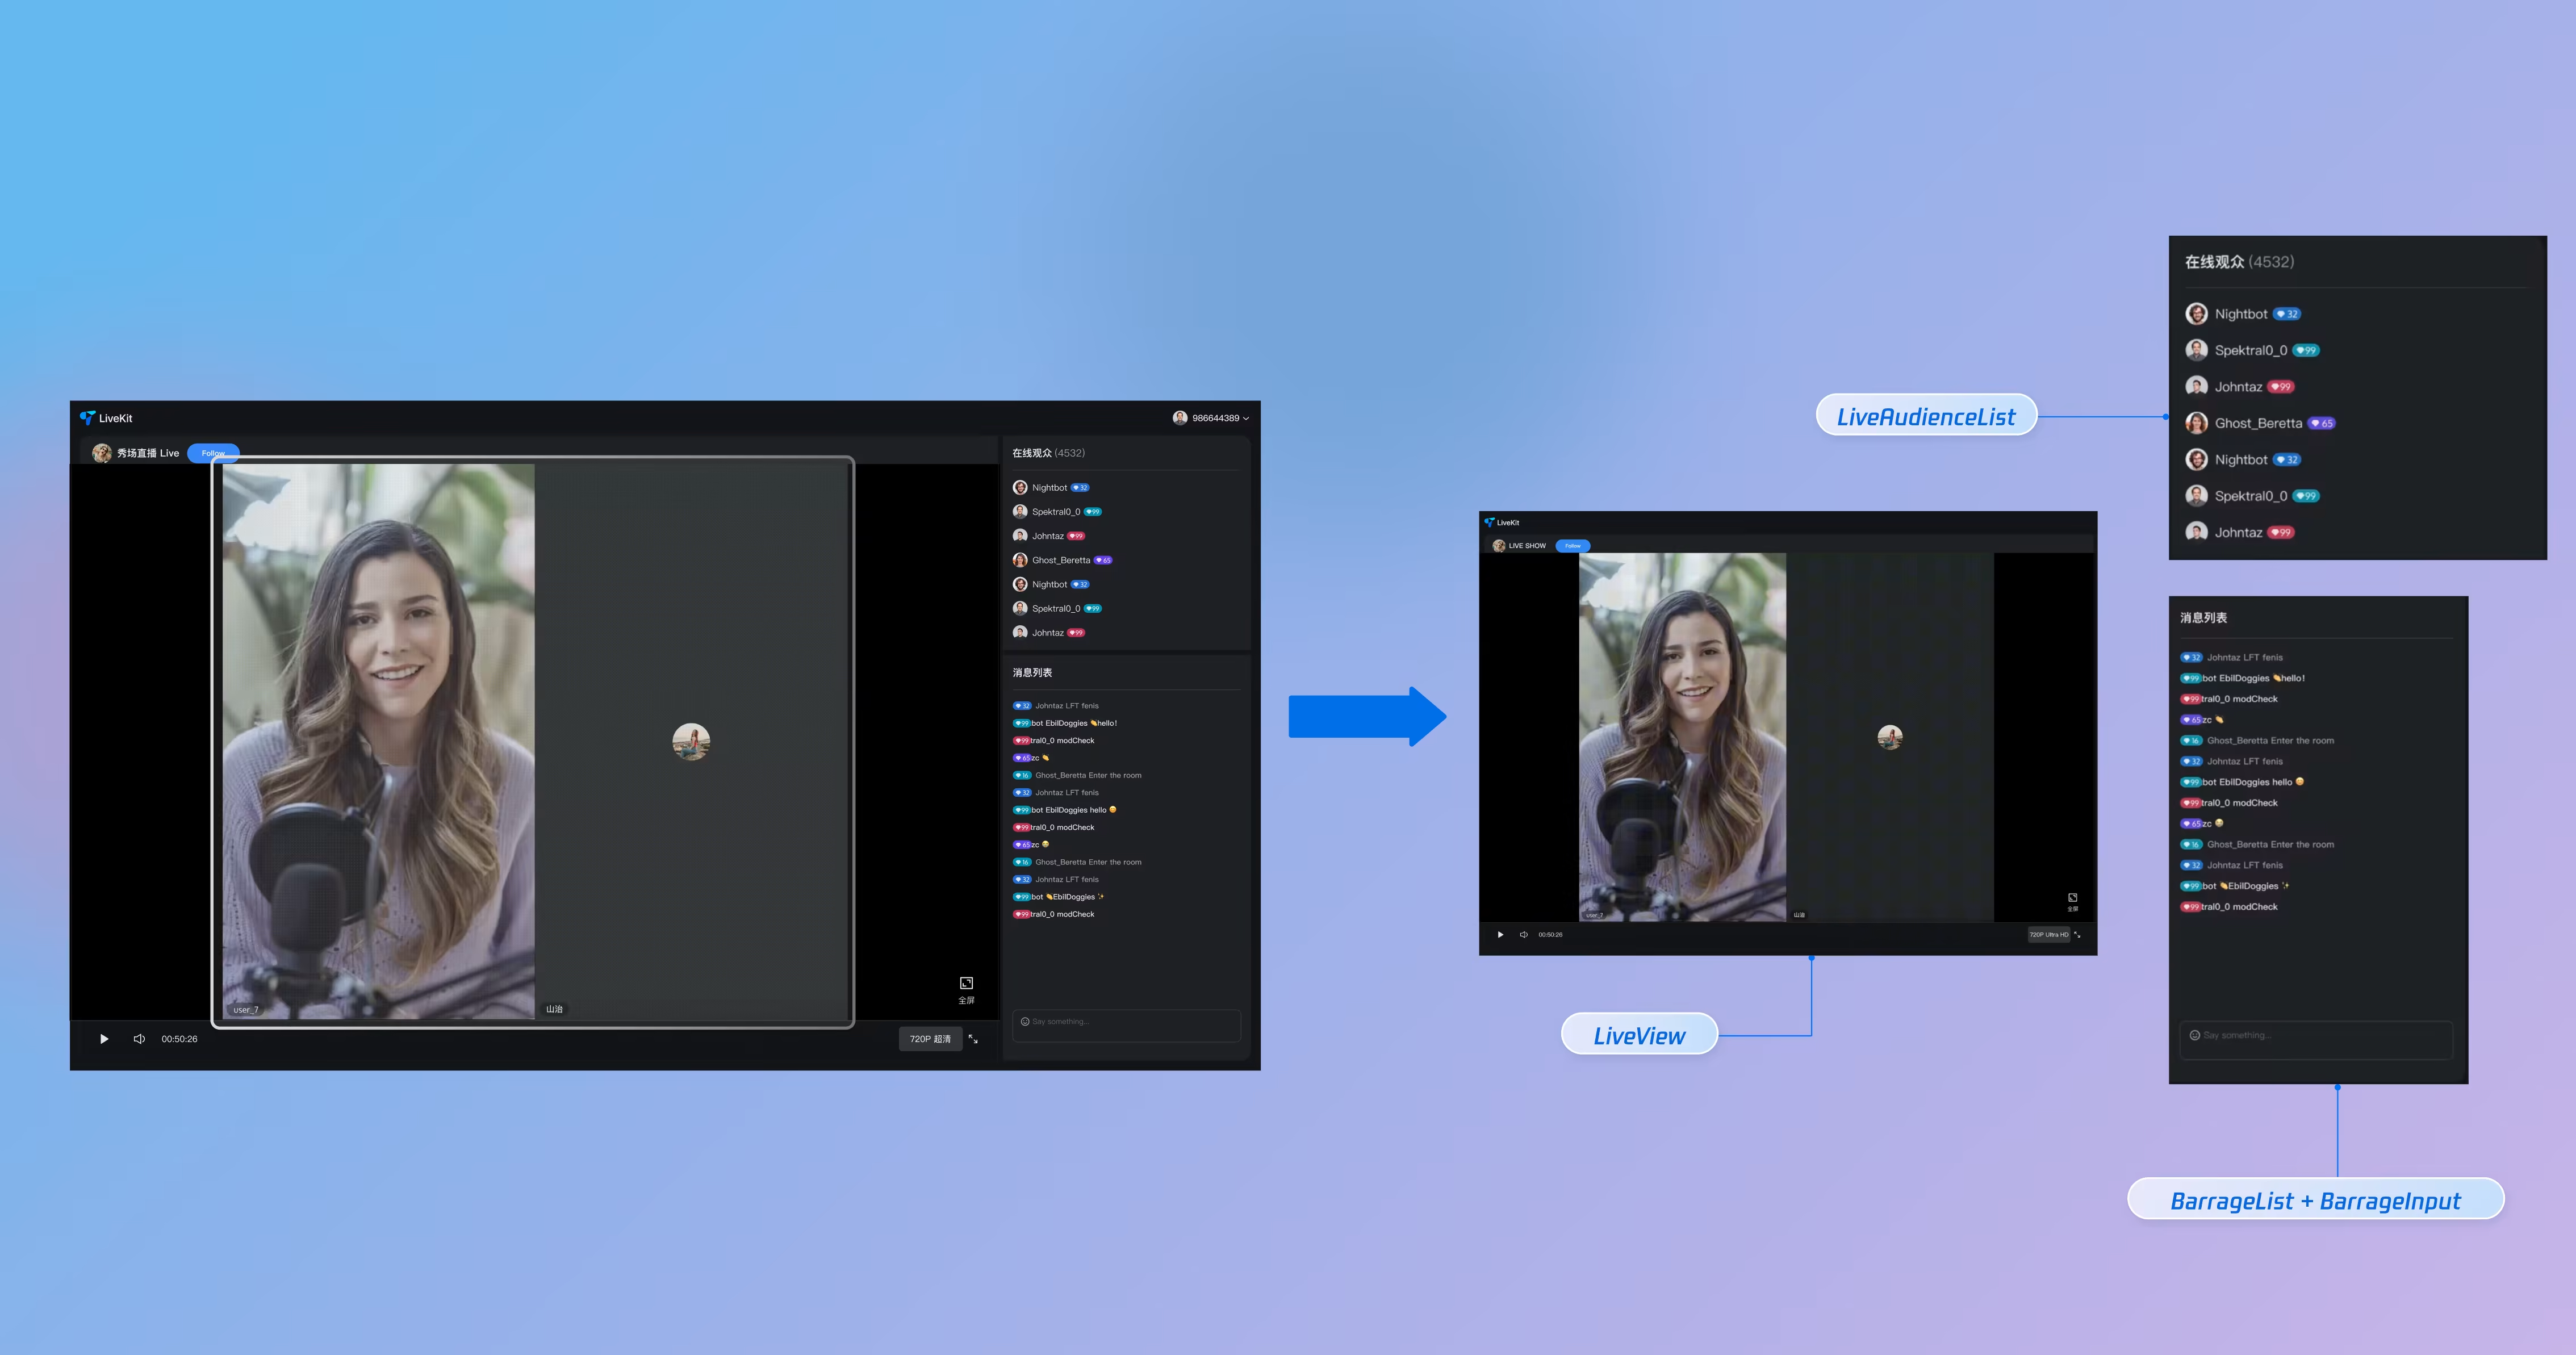
LiveView is a core video display component purpose-built for live streaming scenarios. It provides the foundation for building live broadcast interfaces, abstracting all underlying streaming technologies—including stream publishing and playback, co-hosting, and audio/video rendering. Treat LiveView as the "canvas" for your live video, enabling you to focus on developing your UI and interactive features. The following view hierarchy diagram illustrates the role and placement of LiveView within a typical live streaming interface:
Example Project
Refer to our LiveView component on GitHub for a complete implementation example.
Preparation
Step 1: Enable Service
See Activate Service to obtain either a trial or paid version of the SDK.
Note:
AtomicXCore SDK is designed for Vue 3 projects. Ensure your development environment is compatible with Vue 3 before proceeding.
Step 2: Import AtomicXCore into Your Project
1. Install the Component:
2. Install the tuikit-atomicx-vue3 package using one of the following commands:
npm
pnpm
yarn
npminstall tuikit-atomicx-vue3 --save
pnpmadd tuikit-atomicx-vue3
yarnadd tuikit-atomicx-vue3
3. Configure Browser Permissions: Ensure your web application requests permission to use the camera and microphone. Modern browsers typically prompt users for these permissions on first access.
Step 3: Implement Login Logic
Call the login method from useLoginState() in your project to authenticate. Logging in is required before you can use any AtomicXCore functionality.
Note:
Call the login method in useLoginState only after your own user account login is successful. This ensures clarity and consistency in your authentication logic.
import{ useLoginState }from'tuikit-atomicx-vue3';
const{ login }=useLoginState();
asyncfunctioninitLogin(){
try{
awaitlogin({
sdkAppId:0,// Replace with your sdkAppId
userId:"",// Replace with your userId
userSig:""// Replace with your userSig
});
}catch(error){
console.error("login failed:", error);
}
}
initLogin();// Call initLogin when the component mounts or at the appropriate time
Login API Parameter Description:
Parameter
Type
Description
sdkAppId
int
The ID of the live application created in the Console.
userId
string
Unique identifier for the current user. Use only letters, numbers, hyphens, and underscores. Avoid simple IDs like 1, 123, etc., to prevent multi-device login conflicts.
userSig
string
A ticket for Tencent Cloud authentication. Please note:
Development Environment: You can use the local GenerateTestUserSig.genTestSig function to generate a UserSig or generate a temporary UserSig via the UserSig Generation Tool.
Production Environment: To prevent key leakage, you must use a server-side method to generate UserSig. For details, see Generating UserSig on the Server.
Building a Basic Live Room
Step 1: Implement Host Video Broadcasting
Follow these steps to quickly set up host video streaming
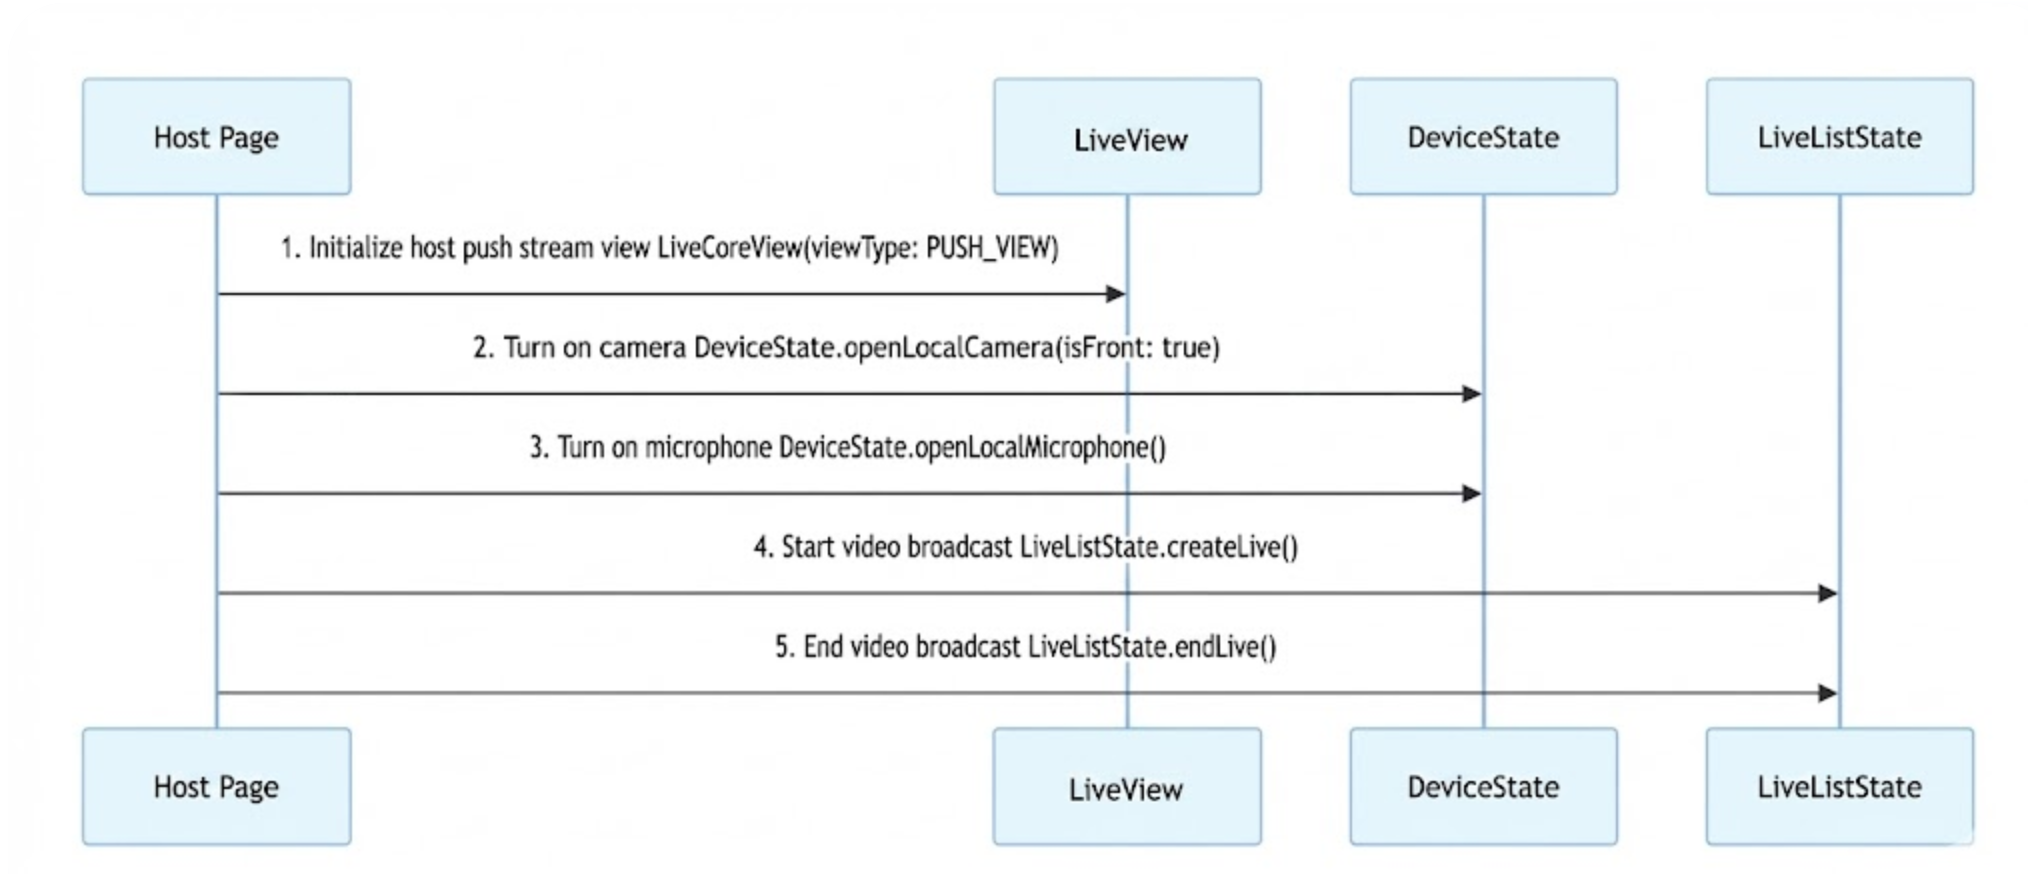
1. Initialize the Host Streaming View
In your host Vue component, import and use the StreamMixer component:
<template>
<StreamMixer />
</template>
<script setup lang="ts">
import{ StreamMixer }from'tuikit-atomicx-vue3';
</script>
2. Enable Camera and Microphone
Use the openLocalCamera and openLocalMicrophone methods from useDeviceState to enable the camera and microphone. StreamMixer will automatically preview the current camera video stream.
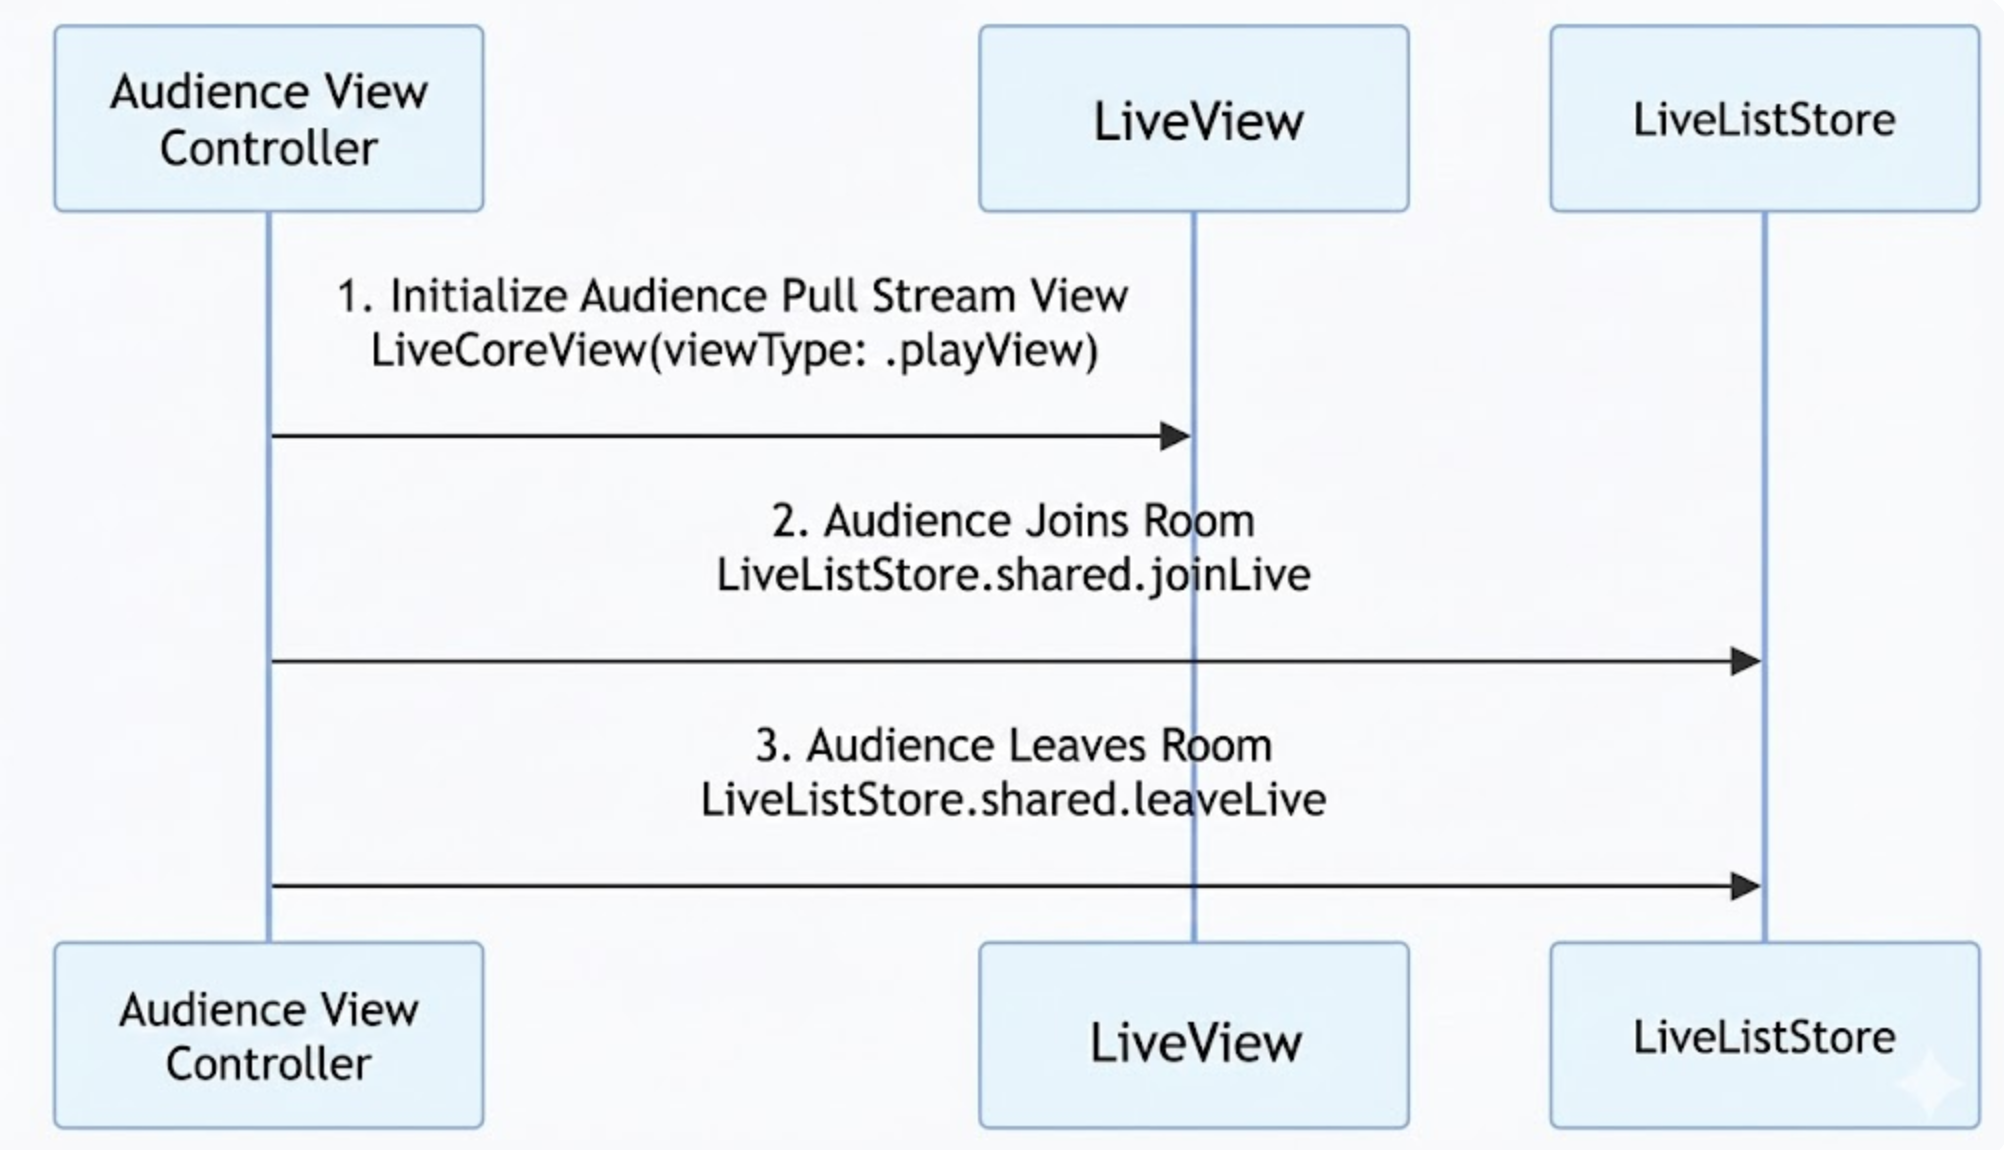
awaitjoinLive({ liveId: liveId.value });// Use the same liveId as the host
}catch(error){
console.error('Failed to enter live room:', error);
}
}
3. Exit Live Streaming
When an audience member leaves the live room, call the leaveLive method from useLiveListState. The SDK will automatically stop playback and exit the room.
console.error('Failed to leave live room:', error);
}
}
Step 3: Listen for Live Events
After an audience member enters a live room, handle passive events such as the host ending the live stream or users being removed for violations. Without event handling, the UI may remain on a black screen, impacting user experience. Subscribe to events using subscribeEvent from useLiveListState:
After integrating LiveView, you will have a clean video rendering area with full live streaming capabilities, but no interactive UI. See the next section, Enhancing the Live Experience, to add interactive features to your live stream.
Enhancing the Live Experience
After implementing basic live streaming, refer to the following feature guides to add interactive elements to your live stream.
Live Feature
Feature Description
Feature State
Implementation Guide
Enable Audience Audio/Video Link
Audience can request to join the stream and interact with the host via real-time video.
Full lifecycle management of live rooms: create, enter, leave, destroy room, query room list, modify live info (name, announcement, etc.), listen for live status (such as being removed, ended).