
Audience Watching
This guide walks you through integrating the audience viewing page, enabling users to watch a host’s live stream, join as co-hosts, view live room details, check the online audience, send gifts, like streams, and interact via live comments.
Feature Preview
The audience viewing page includes default behaviors and styles out of the box. If these defaults don’t fully match your requirements, you can customize the UI to fit your needs.

Quick Integration
Step 1: Activate the Service
Refer to the Activate Service document to enable the trial version or activate the Pro Edition package.
Step 2: Integrate the Code
Make sure your project includes react-native-safe-area-context. If not, install it with:
yarn add react-native-safe-area-context
Step 3: Add an Audience Viewing Page
react-native-tuikit-live provides a complete audience-side UI and business logic for live streaming. To display the audience viewing page, configure the entry point for calling LiveAudiencePage based on your business logic, then follow these steps to navigate to the audience viewing page:Note:
This example uses
useState for a simple page switching. For production apps, it is recommended to use navigation libraries like React Navigation for page management. To understand how to integrate navigation libraries, refer to React Navigation official documentation./*** Simple navigation example - manage page transitions using useState*/import React, { useState } from 'react';import { View, Button, StyleSheet } from 'react-native';import { SafeAreaProvider } from 'react-native-safe-area-context';import { LiveAudiencePage } from 'react-native-tuikit-live';import { useLiveListState } from 'react-native-tuikit-atomic-x';type PageType = 'home' | 'liveAudience' | 'liveEnd';function MyApp() {// In real scenarios, liveID is typically sourced from:// 1. Parameters when entering a live stream from the Live Stream List// 2. Route parameters// 3. Server API response// Here, '1234' is used as an exampleconst liveID = '1234'const { joinLive } = useLiveListState(liveID)const [currentPage, setCurrentPage] = useState<PageType>('home');const [endedLiveID, setEndedLiveID] = useState<string>('');// Navigate to the audience viewing pageconst handleJumpLiveAudience = async () => {await joinLive({liveID,onSuccess: () => {setCurrentPage('liveAudience');},onError: (error) => {console.error('Failed to join live room:', error);// Handle the error, e.g., notify the user}})};// Return from the audience viewing pageconst handleBackFromAudience = () => {setCurrentPage('home');};// End the live streamconst handleEndLive = (liveID?: string) => {setEndedLiveID(liveID || '');setCurrentPage('liveEnd');};return (<SafeAreaProvider>{currentPage === 'home' && (<View style={styles.container}><Button title="Enter Audience View" onPress={handleJumpLiveAudience} /></View>)}{currentPage === 'liveAudience' && (<LiveAudiencePageonBack={handleBackFromAudience}onEndLive={handleEndLive}/>)}{currentPage === 'liveEnd' && (<View style={styles.container}><Button title="Return to Home" onPress={() => setCurrentPage('home')} /></View>)}</SafeAreaProvider>);}const styles = StyleSheet.create({container: {flex: 1,justifyContent: 'center',alignItems: 'center',},});export default MyApp;
Customize UI Layout
TUILiveKit supports extensive customization of the audience viewing page, so you can tailor features and styles to your business requirements.Customize Icons
All icons used by
TUILiveKit are located in the tuikit-atomic-x/src/static/images directory. Some examples are listed below. To update an icon, simply replace the corresponding file in this directory.Icon Path | Description |
/static/images/dashboard.png | “Dashboard” icon in the bottom action bar |
/static/images/link-guest.png | “Apply for co-hosting” icon in the bottom action bar |
/static/images/live-gift.png | “Gift” icon in the bottom action bar |
/static/images/live-like.png | “Like” icon in the bottom action bar |
/static/images/close.png | “Leave live room” icon in the top action bar |
After updating the icons, rebuild and run your app to see the changes.
Customize Texts
All UI text in TUILiveKit is managed in a centralized location. To update any text, edit the relevant json files in the
tuikit-atomic-x/src/locales/ directory.
zh.json - Chinese texten.json - English textAfter editing, rebuild and run your app to apply the updates.
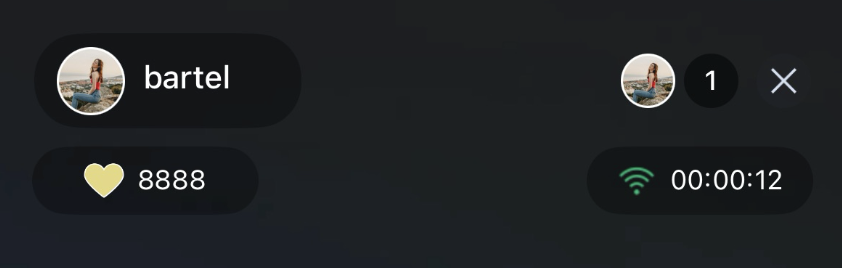
Add a Button
To add a Like button to the top left of the video area, edit
live/src/pages/LiveAudience/index.tsx and insert the following code:<View style={{ flex: 1 }}>{/* ...other content... */}<Viewstyle={{position: 'absolute',top: 100,left: 15,width: 100,height: 30,backgroundColor: 'rgba(0, 0, 0, 0.3)',borderRadius: 22.5,flexDirection: 'row',justifyContent: 'center',alignItems: 'center',}}>{/* Replace the image address with your resources */}<Imagestyle={{ width: 18, height: 18 }}source={require('/static/images/gift_heart0.png')}resizeMode="contain"/><Text style={{ color: '#fff', fontSize: 12 }}>8888</Text></View></View>
Result:
Hide a Button
To hide a button, comment out the relevant code block. The following code shows how to hide the Gift button:
{/* <TouchableOpacitystyle={styles.actionBtn}onPress={showGiftPicker}activeOpacity={0.7}><Imagesource={require('react-native-tuikit-atomic-x/src/static/images/live-gift.png')}style={styles.actionBtnIcon}resizeMode="contain"/></TouchableOpacity> */}
Next Steps
You’ve now integrated the audience viewing feature. Next, you can add features such as Host Live Start and Live Stream List. See the table below for details:
Feature | Description | Integration Guide |
Host Live Start | Complete workflow for host live start, including pre-stream setup and post-stream interaction | |
Live Stream List | Displays the Live Stream List interface and features, including list and room details |
FAQs
Live comments sent by other audience members cannot be seen?
Reason 1: Check the network connection to ensure the audience’s device is online.
Reason 2: The audience has been muted by the host and cannot send live comments.
Reason 3: The live comment contains blocked keywords. Make sure the comment complies with live room rules.
How to display audience levels?
If you need to show audience levels, insert the relevant element at the desired location. For example, to display audience levels in the audience list, locate the audience info display code in the
tuikit-atomic-x/src/components/LiveAudienceList.tsx component and add the audience level display code:<View style={styles.audienceInfo}>.......{/* Audience level */}<Text style={styles.audienceLevel}>{level}</Text><View style={styles.audienceAvatarContainer}><Image source={{ uri: avatarURL }} style={styles.audienceAvatar} /></View></View>

