
MCP 구성
Step 1: Get your credentials
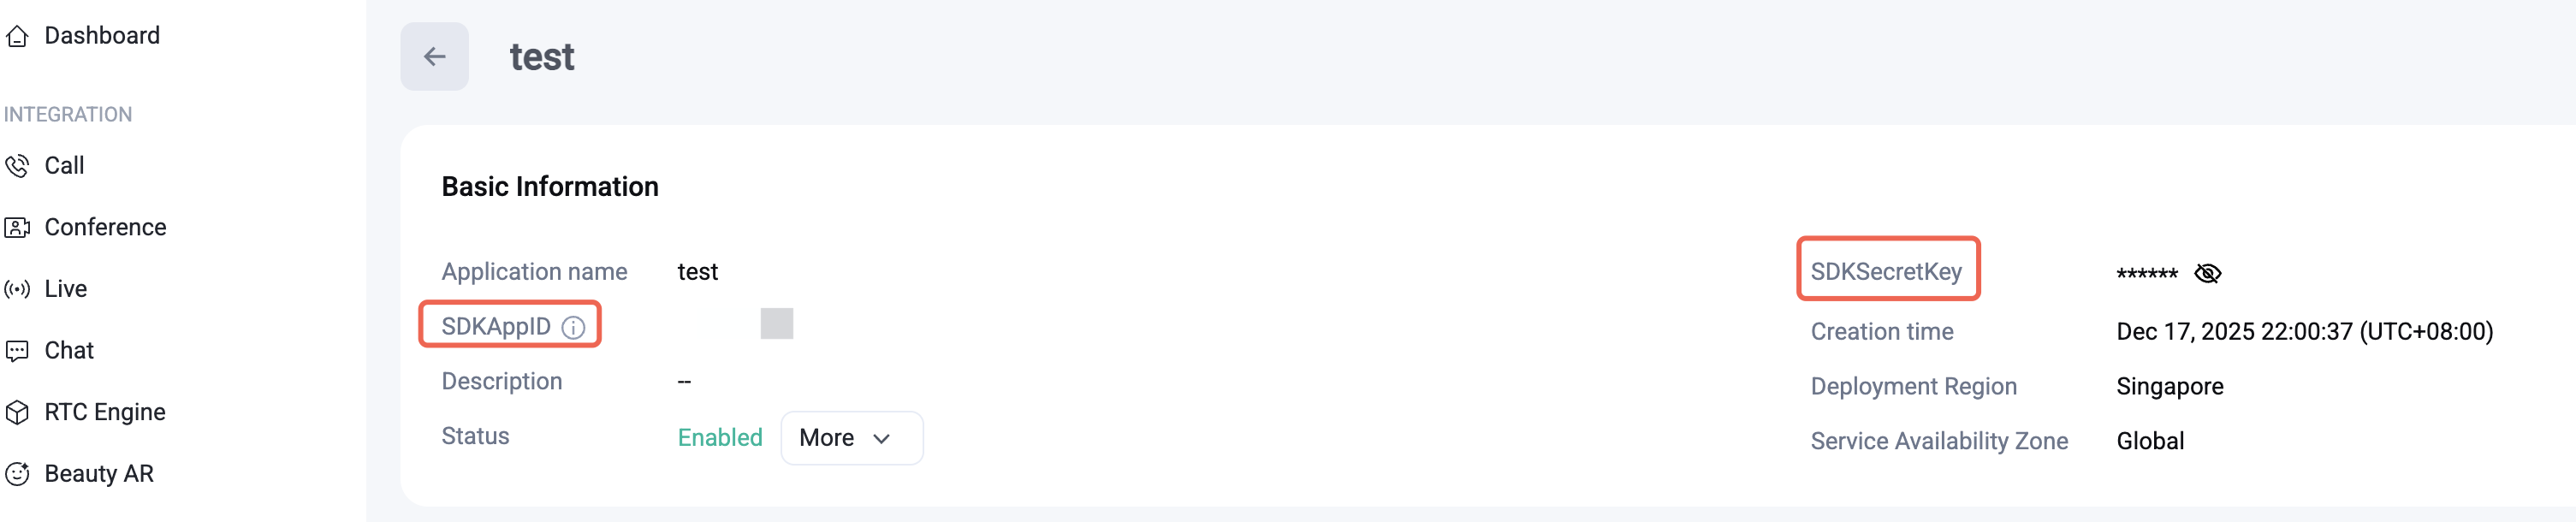
1. Open the Tencent RTC Console
2. Copy SDKAppID and SDKSecretKey
From the application details page, copy both values. You'll paste them into the config below.
Caution:
SECRET_KEY is a sensitive credential. Never commit it to a repository or share it publicly. For local development it's safe to store in your MCP config file — but before going to production, move UserSig generation to your backend. See Generate UserSig on your server.Step 2: Configure MCP Server
MCP config scoped to a project lives at
.cursor/mcp.json inside your project directory. For a global config that applies to all projects, use ~/.cursor/mcp.json.1. Download Cursor (If already downloaded, skip this step).
2. Navigate to your project root.
3. Create or update
.cursor/mcp.json with the following, and fill in your SDKAPPID and SECRETKEY, and save your changes:{"mcpServers": {"tencent-rtc": {"command": "npx","args": ["-y", "@tencent-rtc/mcp@latest"],"env": {"SDKAPPID": "YOUR_SDKAPPID","SECRETKEY": "YOUR_SECRET_KEY"}}}}
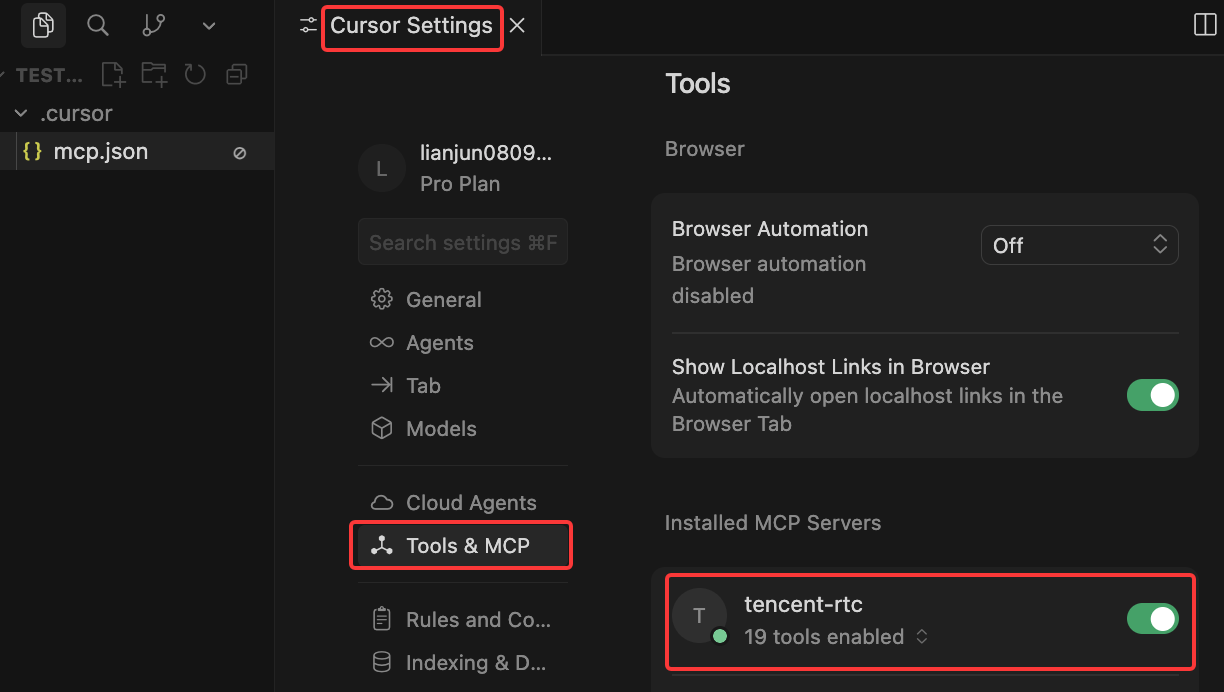
4. Go to Settings - Tools & MCP in Cursor to check if the MCP tool has been enabled successfully.
1. Download Trae(If already downloaded, skip this step).
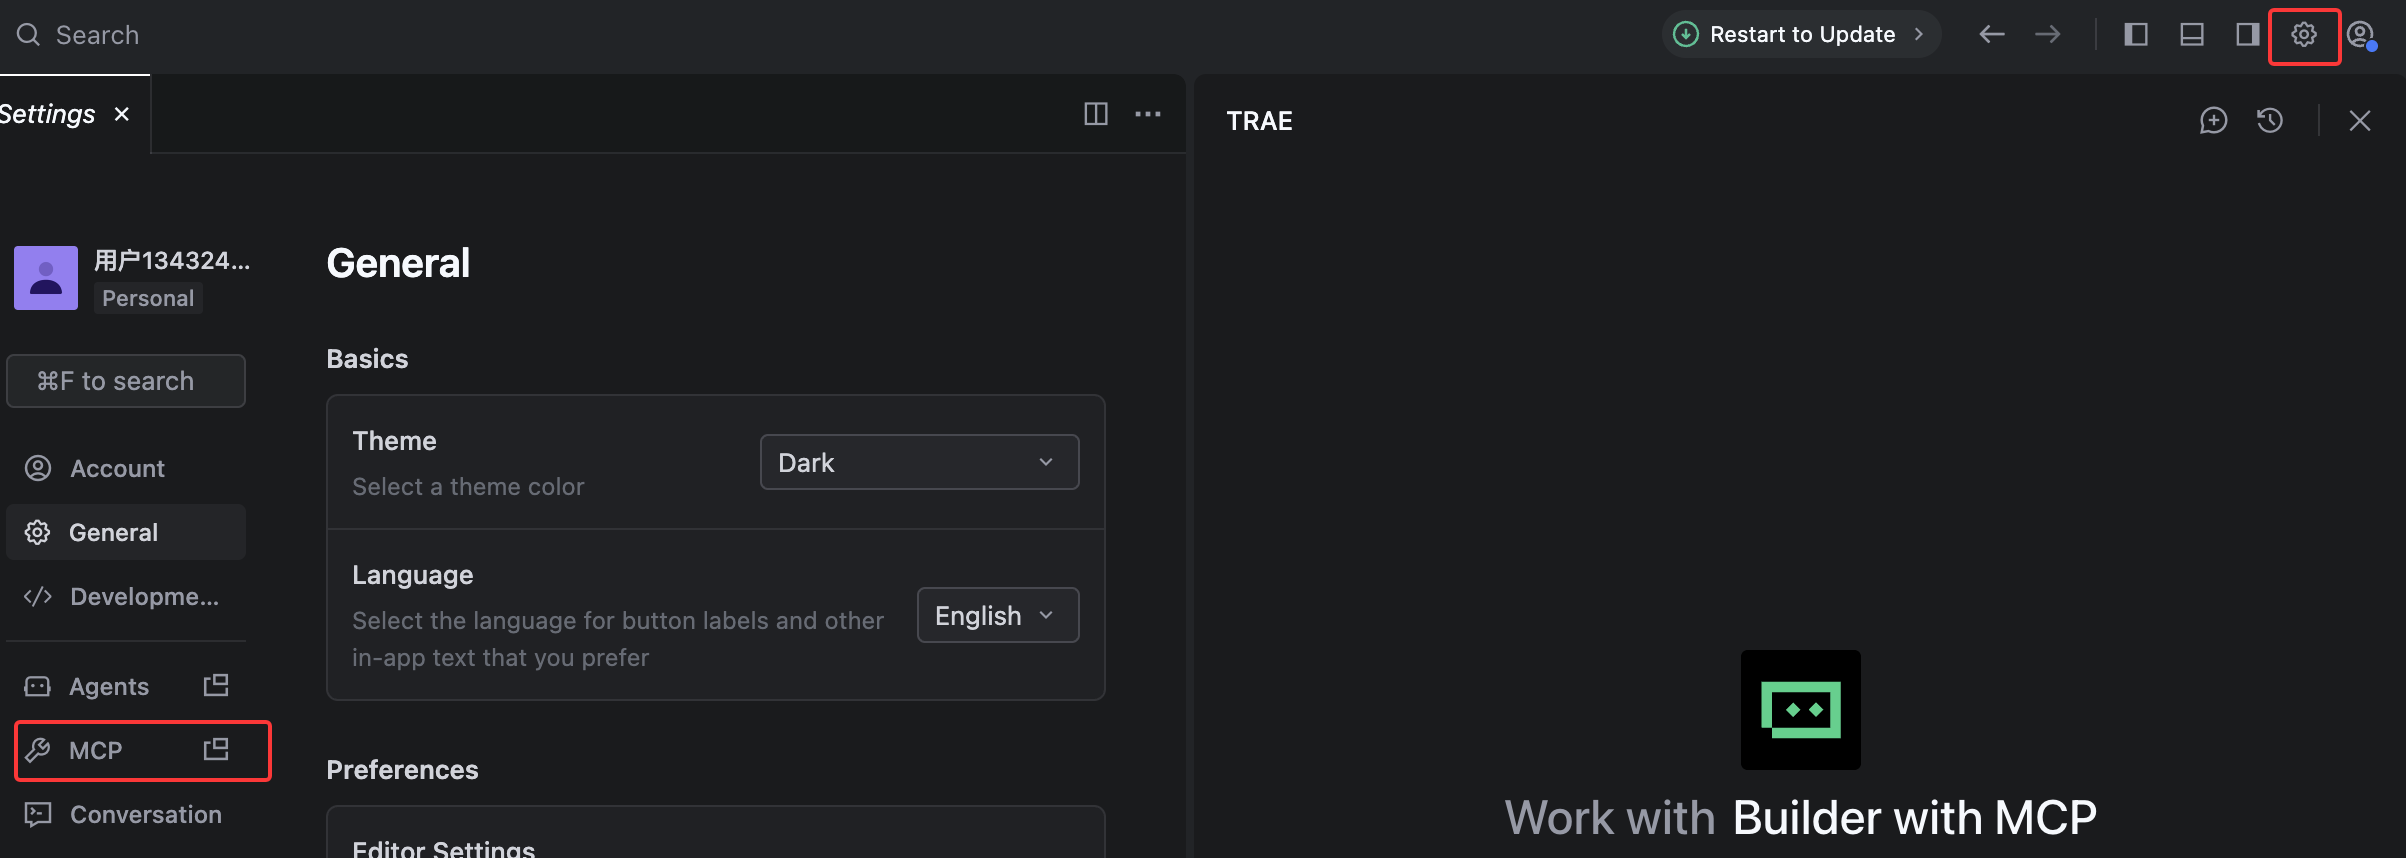
2. Click Settings > MCP.
3. Click Add > Configure Manually, and then click Raw Config (JSON) to update the
mcpServers section.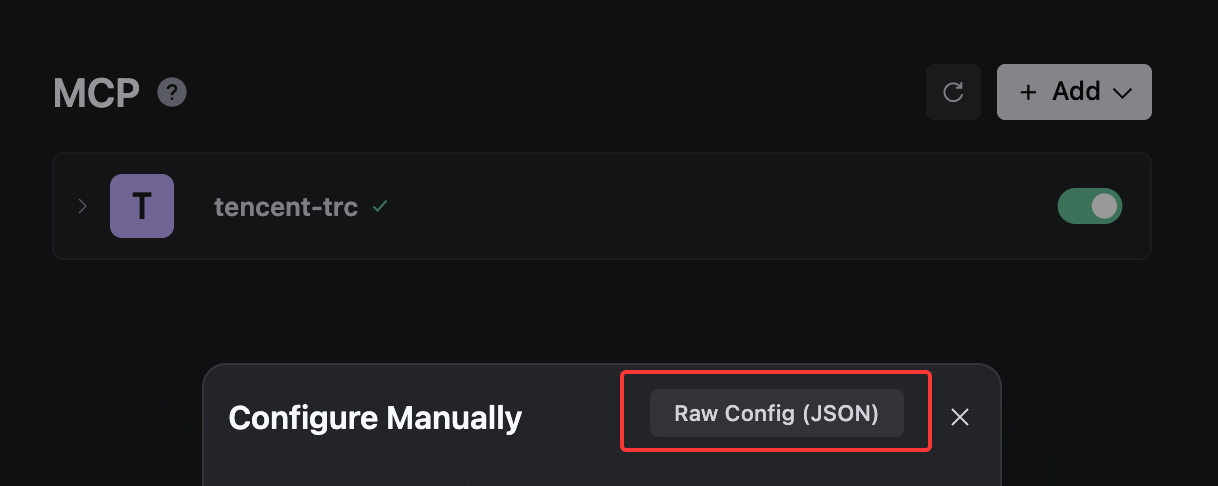
{"mcpServers": {"tencent-rtc": {"command": "npx","args": ["-y", "@tencent-rtc/mcp@latest"],"env": {"SDKAPPID": "YOUR_SDKAPPID","SECRETKEY": "YOUR_SECRET_KEY"}}}}
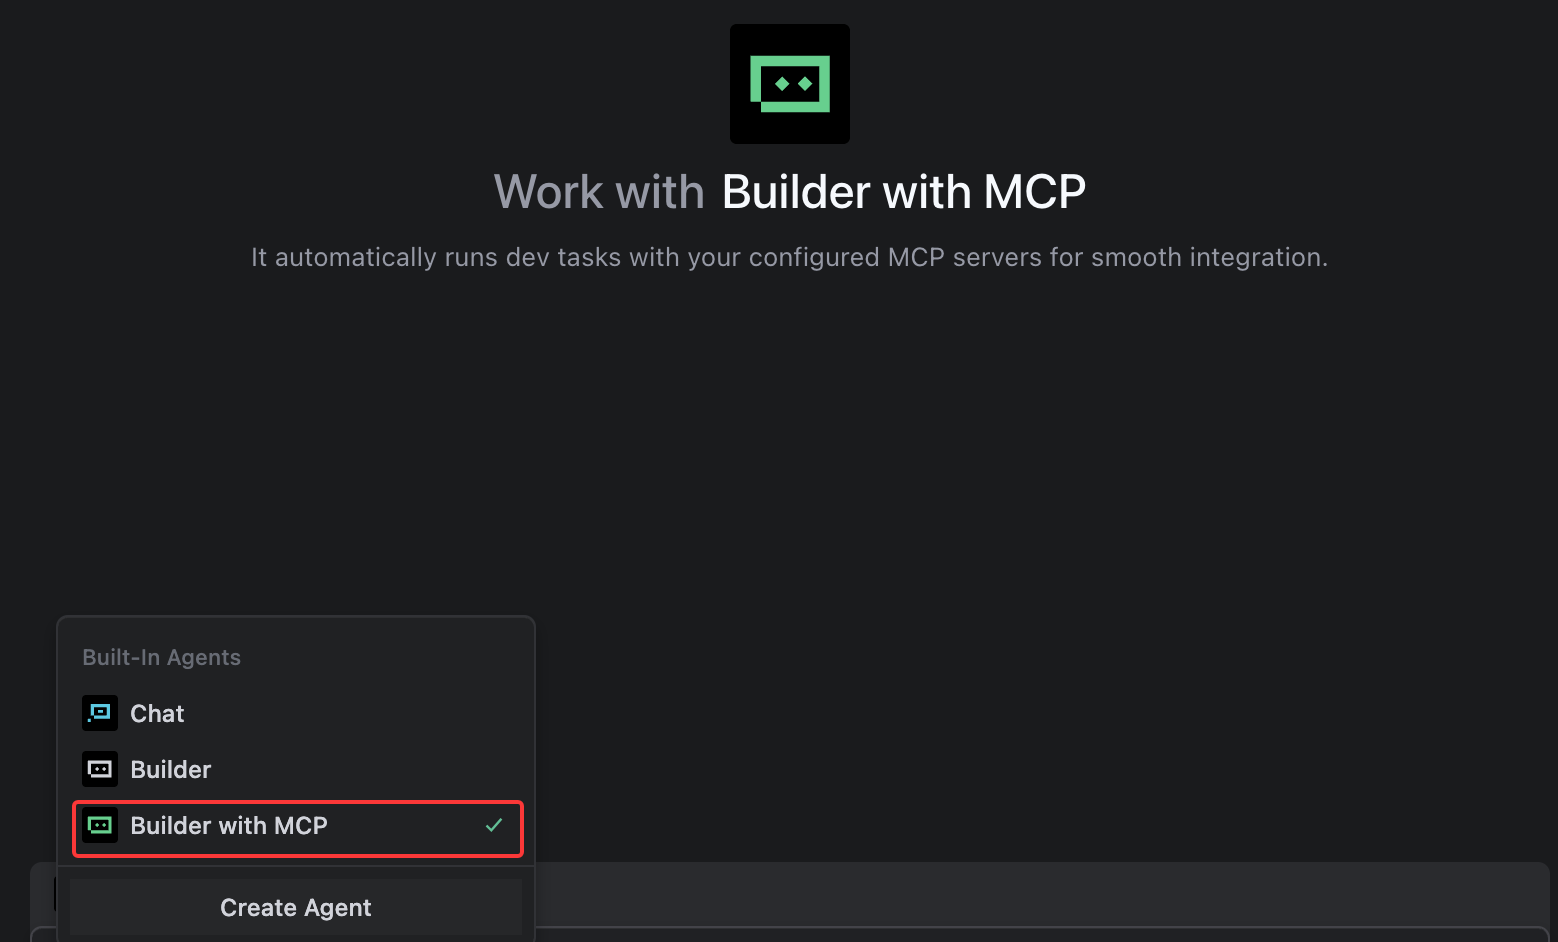
4. Save your changes. Select the editor's default Builder with MCP or add MCP to your custom Builder.
1. Download CodeBuddy (If already downloaded, skip this step).
2. Go to Settings > Add MCP to open
settings.json and configure MCP.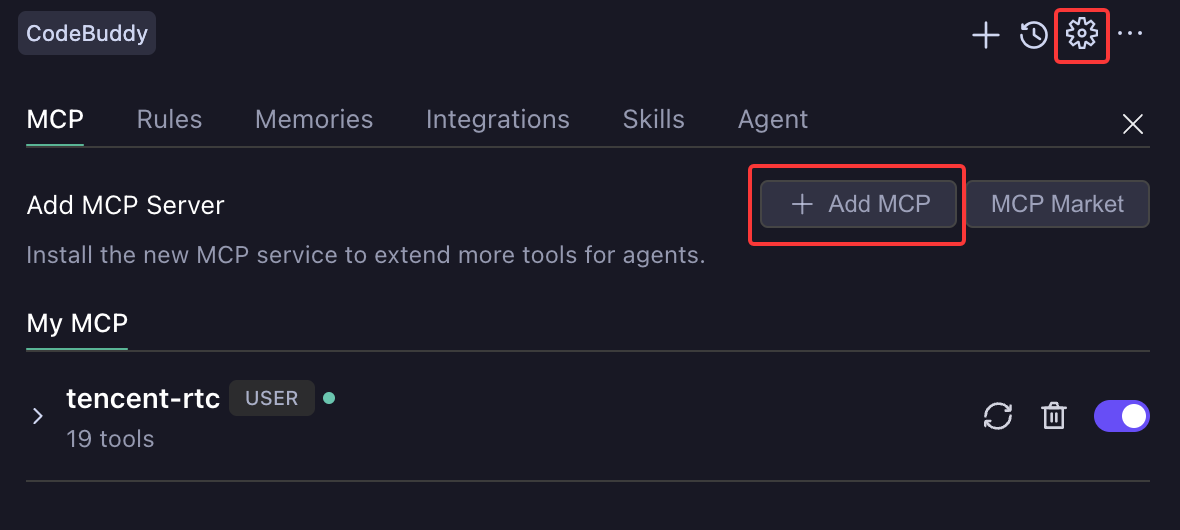
3. Update the
mcpServers section and save the changes.{"mcpServers": {"tencent-rtc": {"command": "npx","args": ["-y", "@tencent-rtc/mcp@latest"],"env": {"SDKAPPID": "YOUR_SDKAPPID","SECRETKEY": "YOUR_SECRET_KEY"}}}}
4. Check whether the MCP tool is successfully loaded to tools.

1. Run this command to add the server with credentials in one step:
claude mcp add tencent-rtc -e SDKAPPID=YOUR_SDK_APP_ID -e SECRETKEY=YOUR_SECRET_KEY -- npx -y @tencent-rtc/mcp@latest
This writes to
~/.claude.json. For project-scoped config, add --scope project — it writes to .mcp.json at your project root.2. Verify with
claude mcp list to confirm tencent-rtc appears.1. Run this command to add the server with credentials in one step:
codex mcp add tencent-rtc --env SDKAPPID=YOUR_SDK_APP_ID --env SECRETKEY=YOUR_SECRET_KEY -- npx -y @tencent-rtc/mcp@latest
This writes to
~/.codex/config.toml. For project-scoped config, create .codex/config.toml at your project root.2. Verify with
codex mcp list to confirm tencent-rtc appears.Step 3: Verify the setup
Send this prompt in your AI chat to confirm the MCP server is working:
Use the tencent-rtc MCP tool to generate a userSig for test001
A successful response returns JSON with
SDKAppID, userID, and userSig fields.
