This document provides step-by-step instructions for implementing offline push notifications using the tencent_cloud_chat_push plugin. This solution is ideal for scenarios where AtomicXCore is integrated without a user interface.
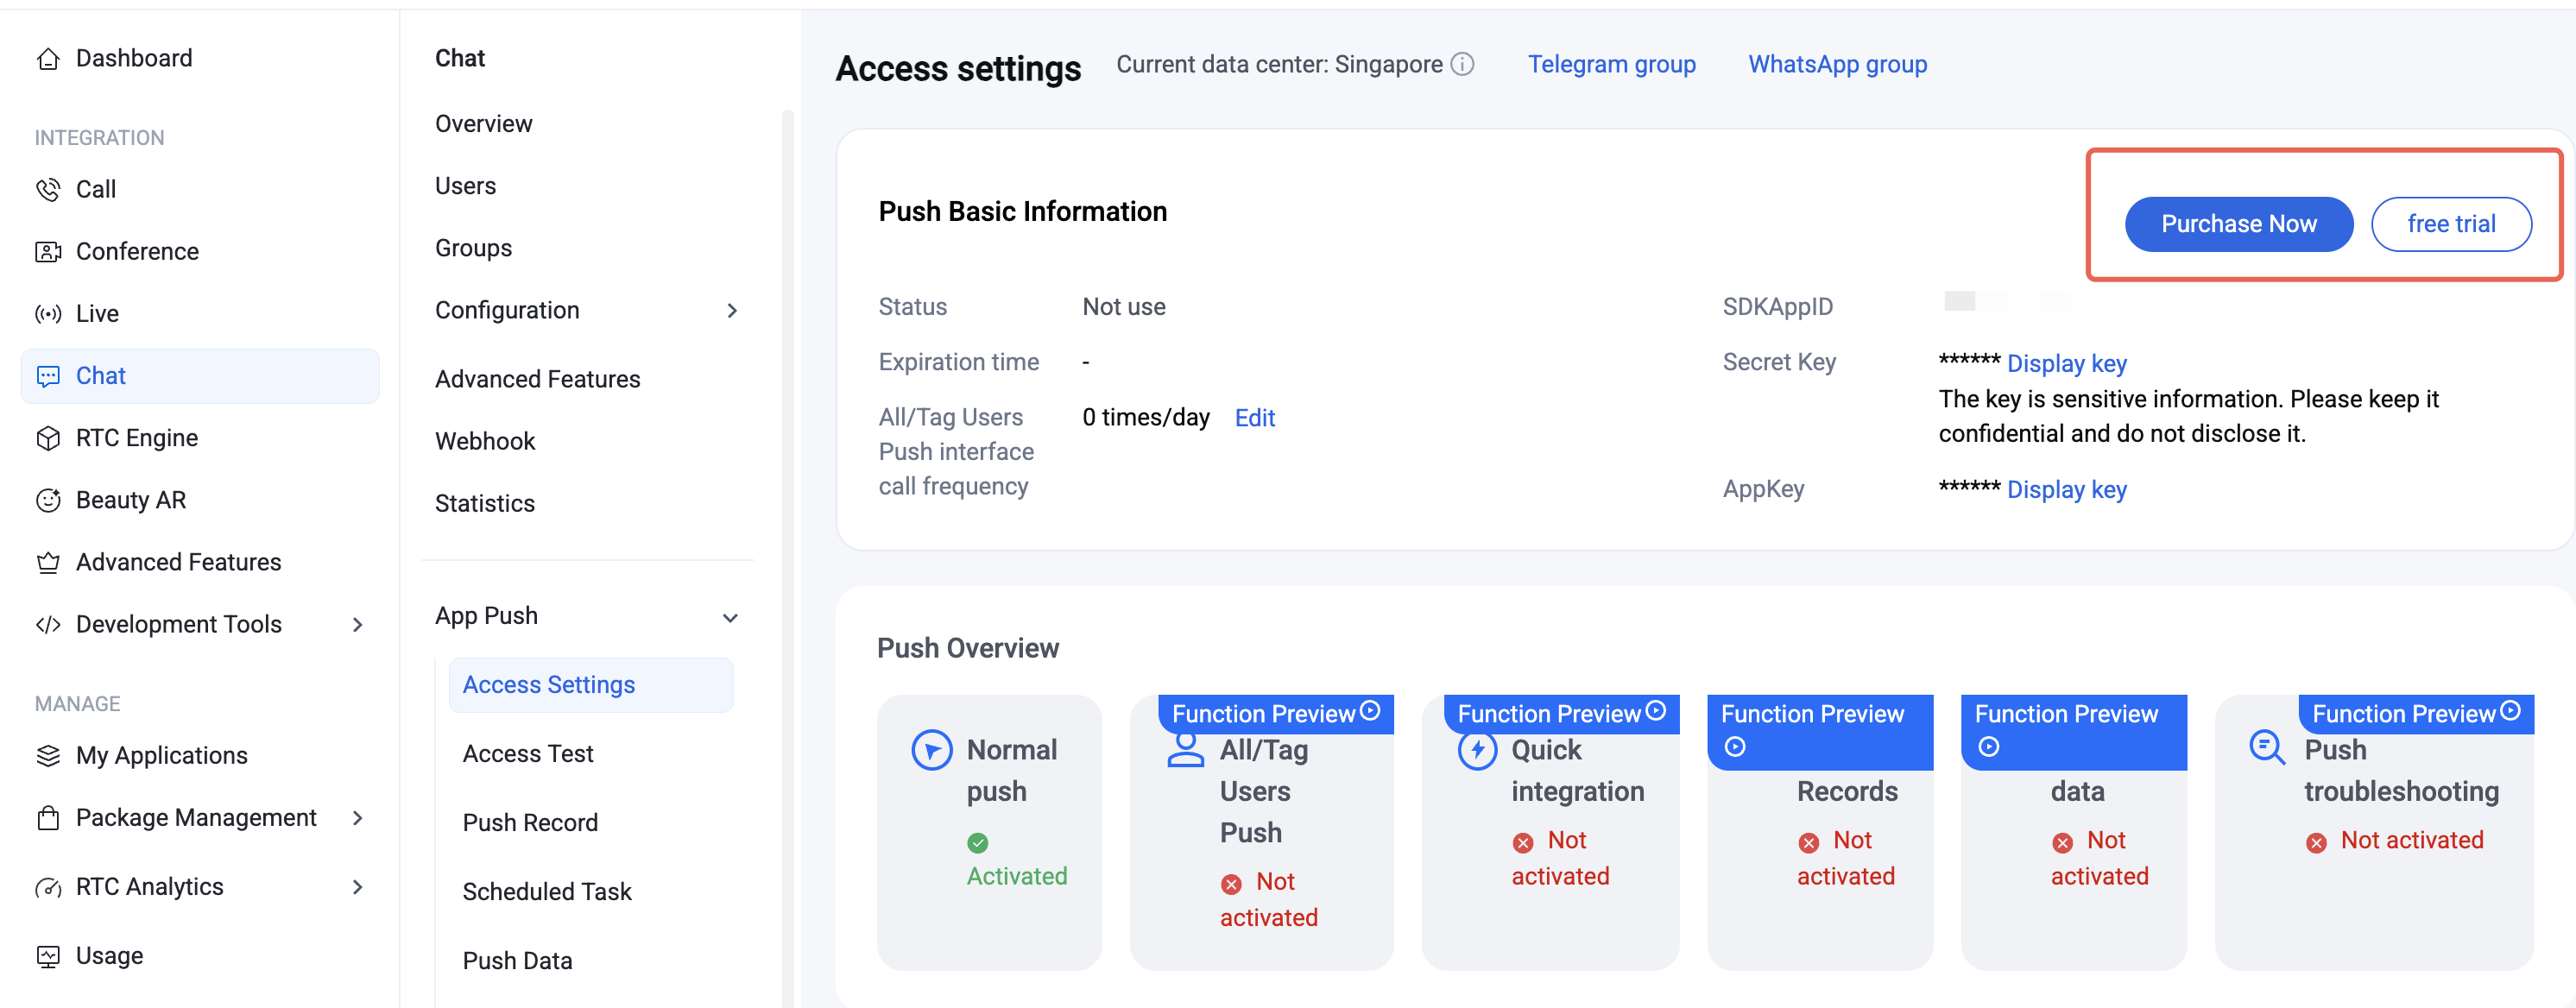
After the push plugin trial or purchase expires, push services (including offline push for standard messages, broadcast/tag push, etc.) will be automatically disabled. To avoid business interruption, please purchase or renew the service in advance.
Integration Recommendations
Choosing a Push Channel
Since FCM depends on Google services, select your integration strategy based on your business's operational region:
Global operations (including China and overseas): For reliable message delivery worldwide, integrate both domestic vendor push services and FCM push services.
Overseas-only operations (excluding Mainland China): Domestic vendor push services are not necessary. Follow this guide to integrate FCM Data Message.
Improving Push Delivery Rates
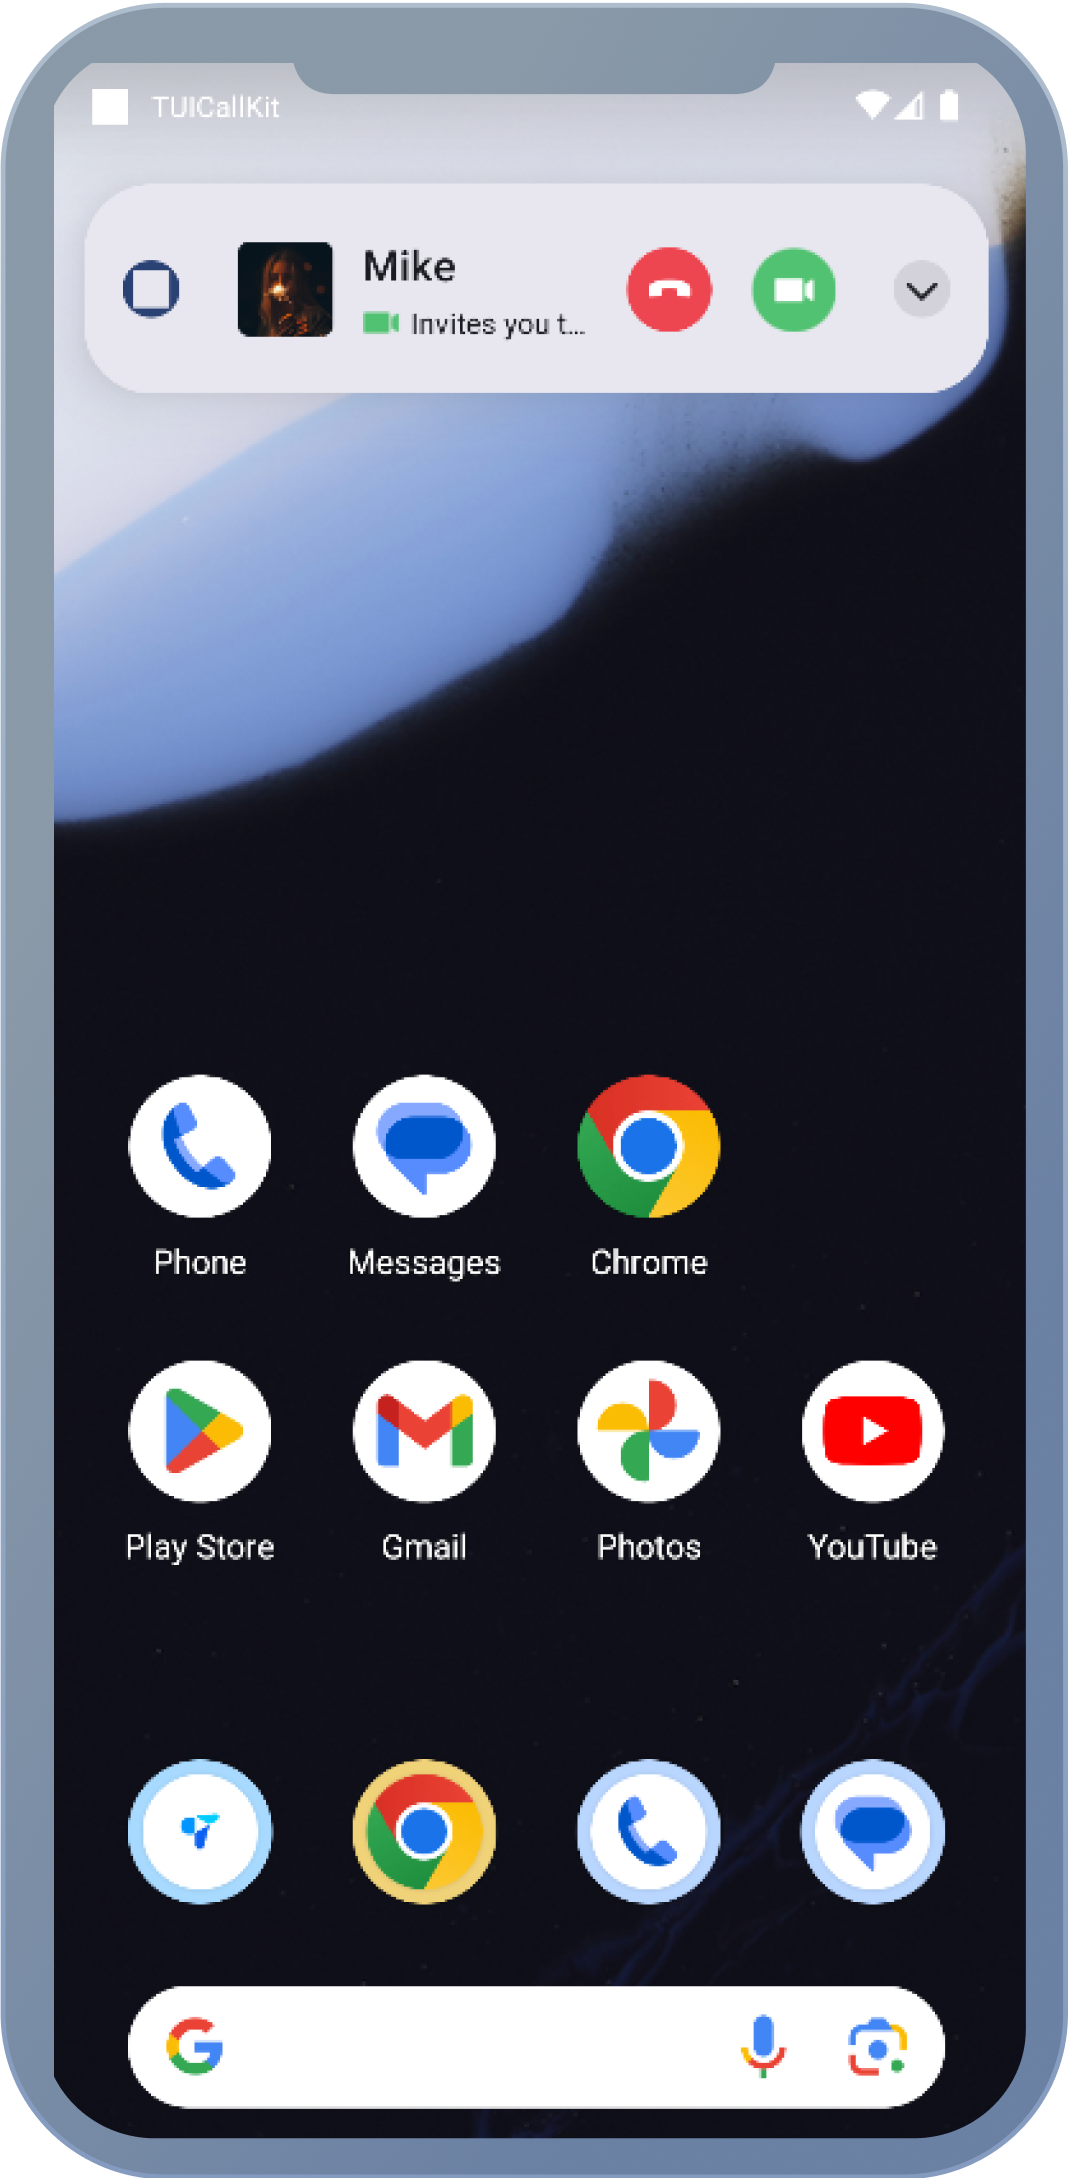
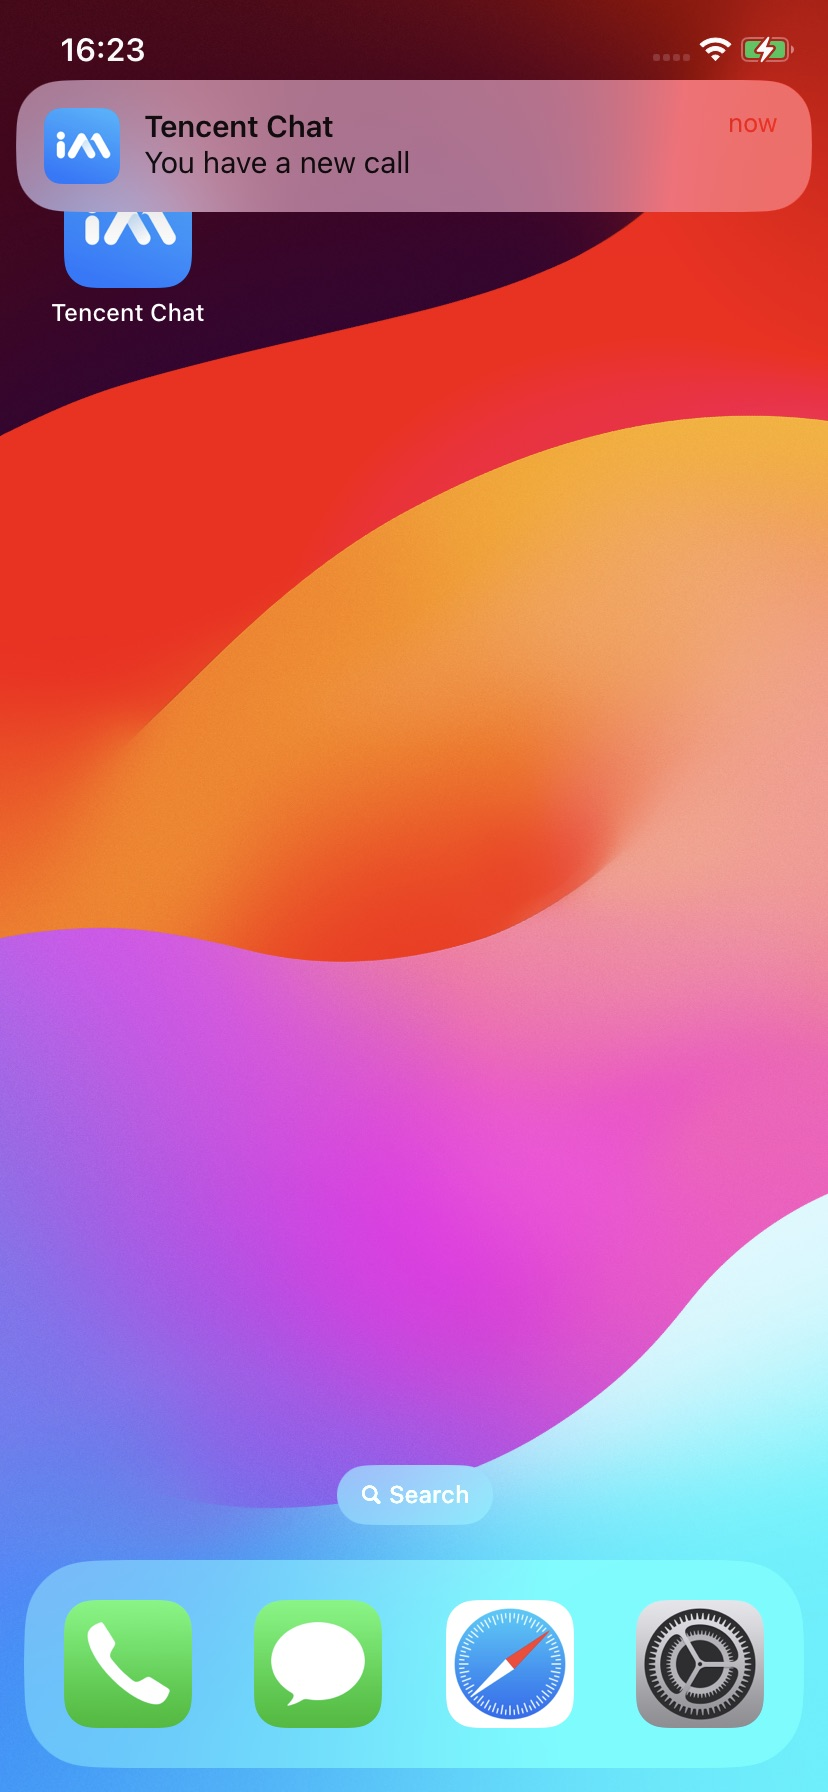
From our experience, over 90% of users miss call notifications because they manually disable app notification permissions. To maximize call notification reach, we recommend:
1. Send notifications responsibly: Avoid pushing low-quality or irrelevant notifications that may cause users to disable notification permissions due to spam.
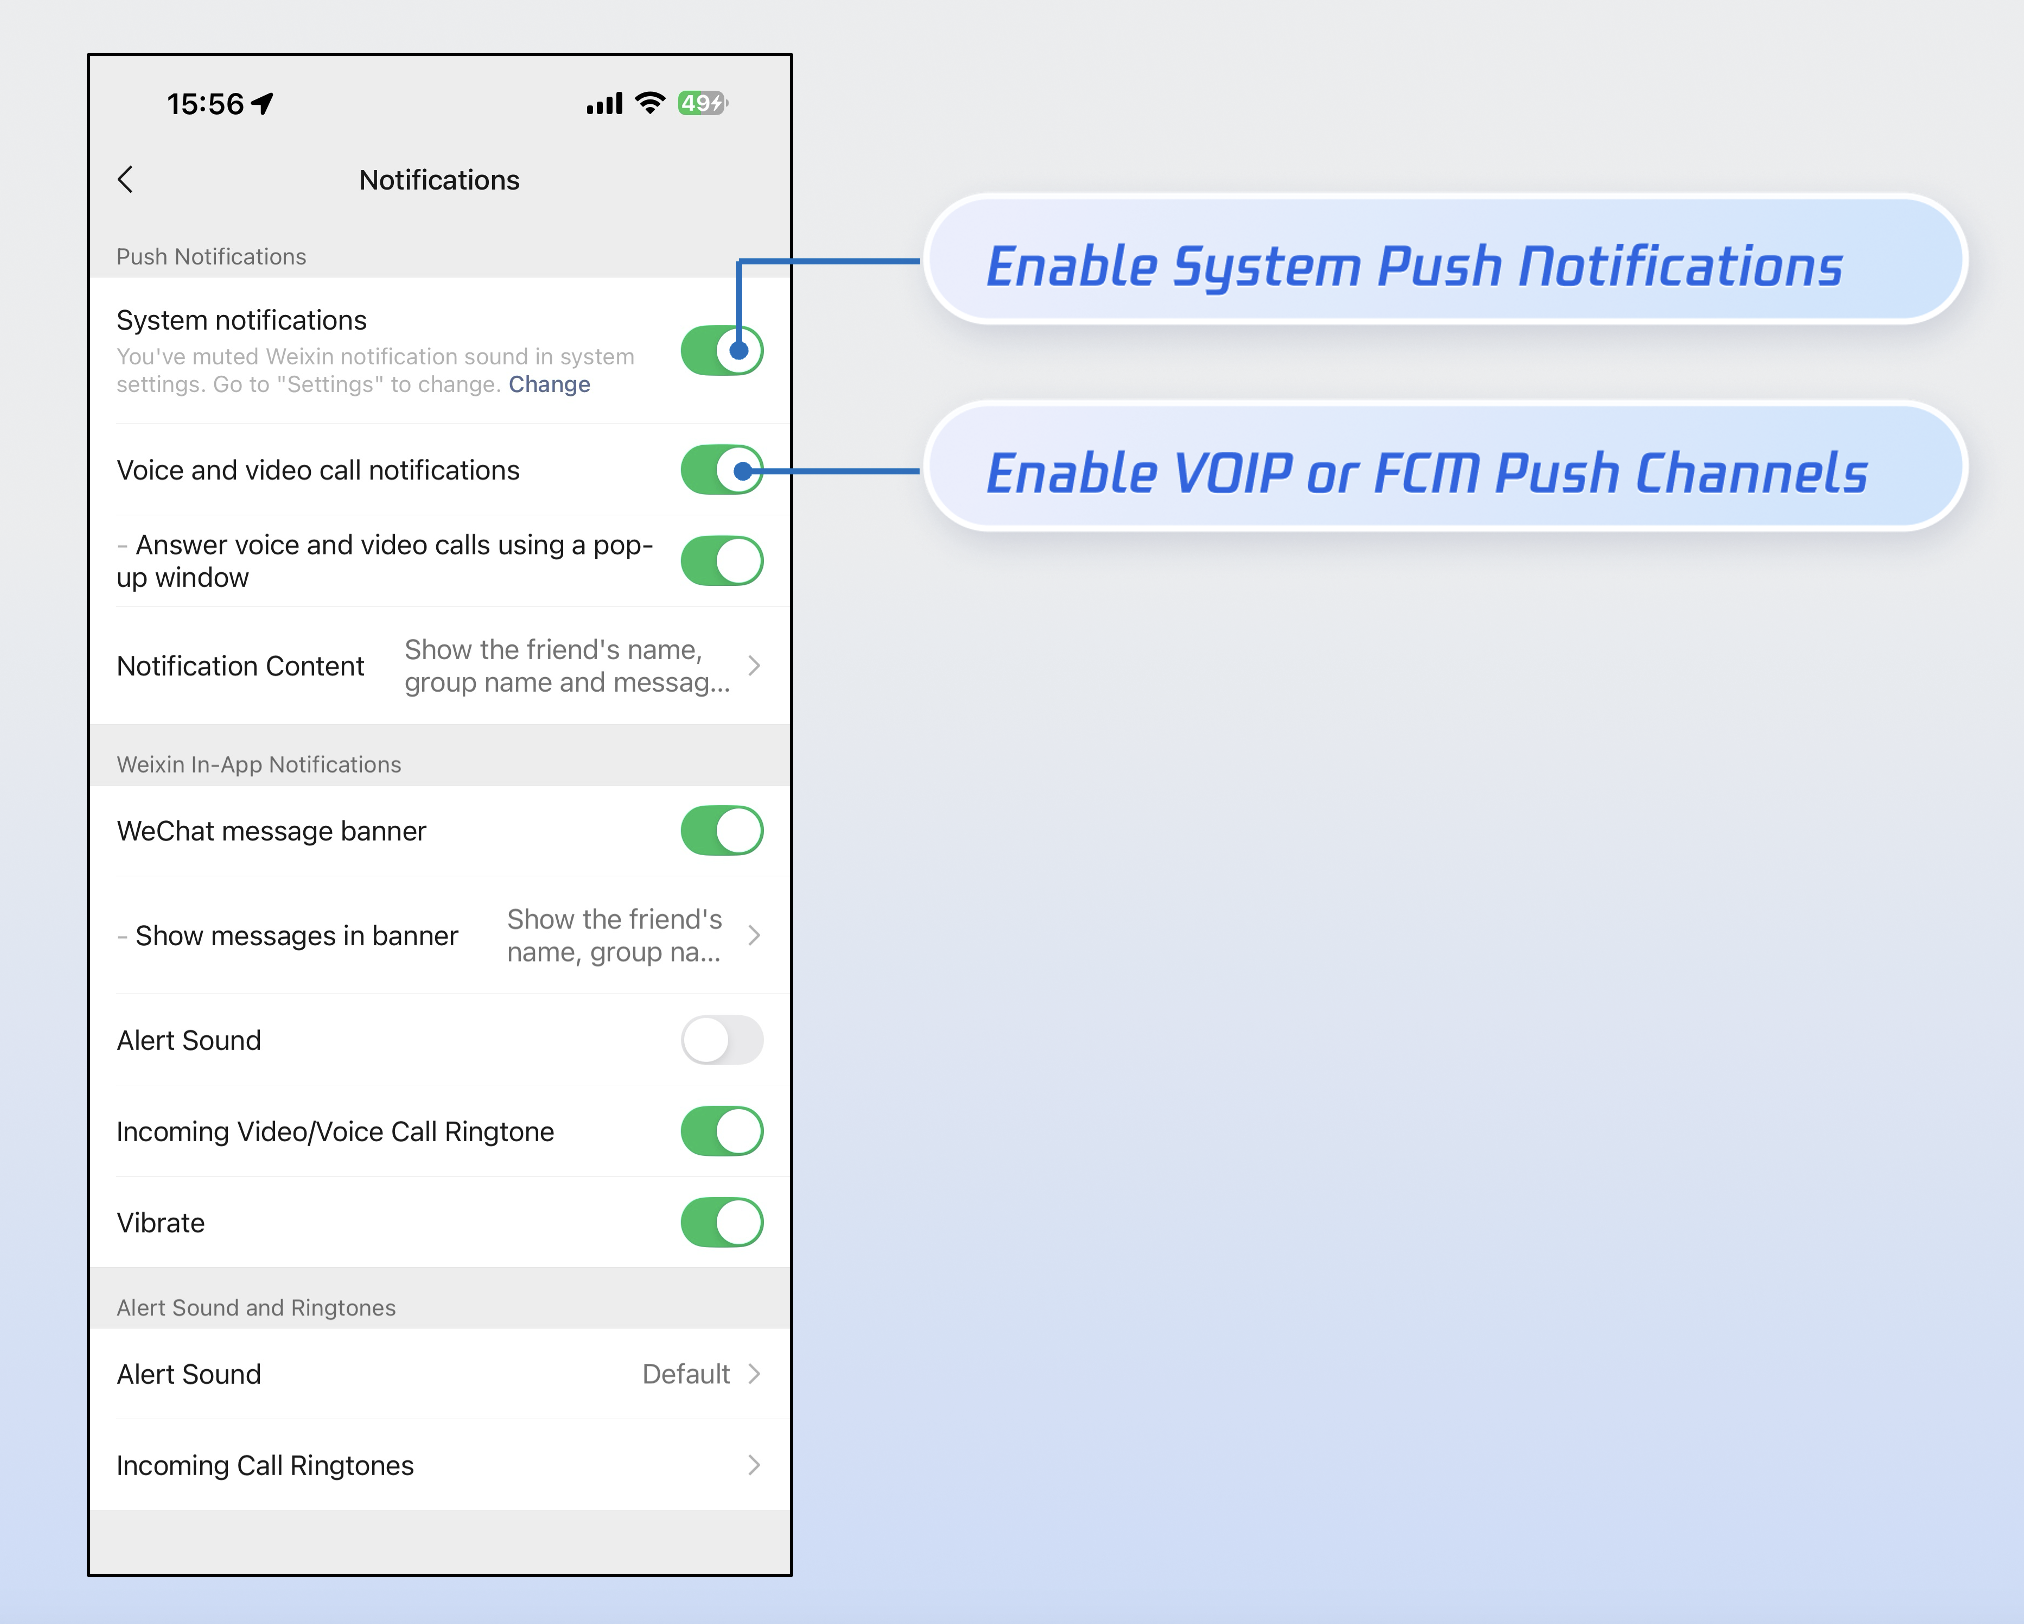
2. Offer granular notification controls: Take inspiration from apps like WeChat—provide distinct toggles for Notification and FCM Data Message in your app settings, rather than advising users to disable all notifications in system settings.
Implementation
Install the plugin:
In your project root directory, run the following command to install the tencent_cloud_chat_push plugin.
flutter pub add tencent_cloud_chat_push
Android
Step 1: Vendor Configuration
Prerequisites
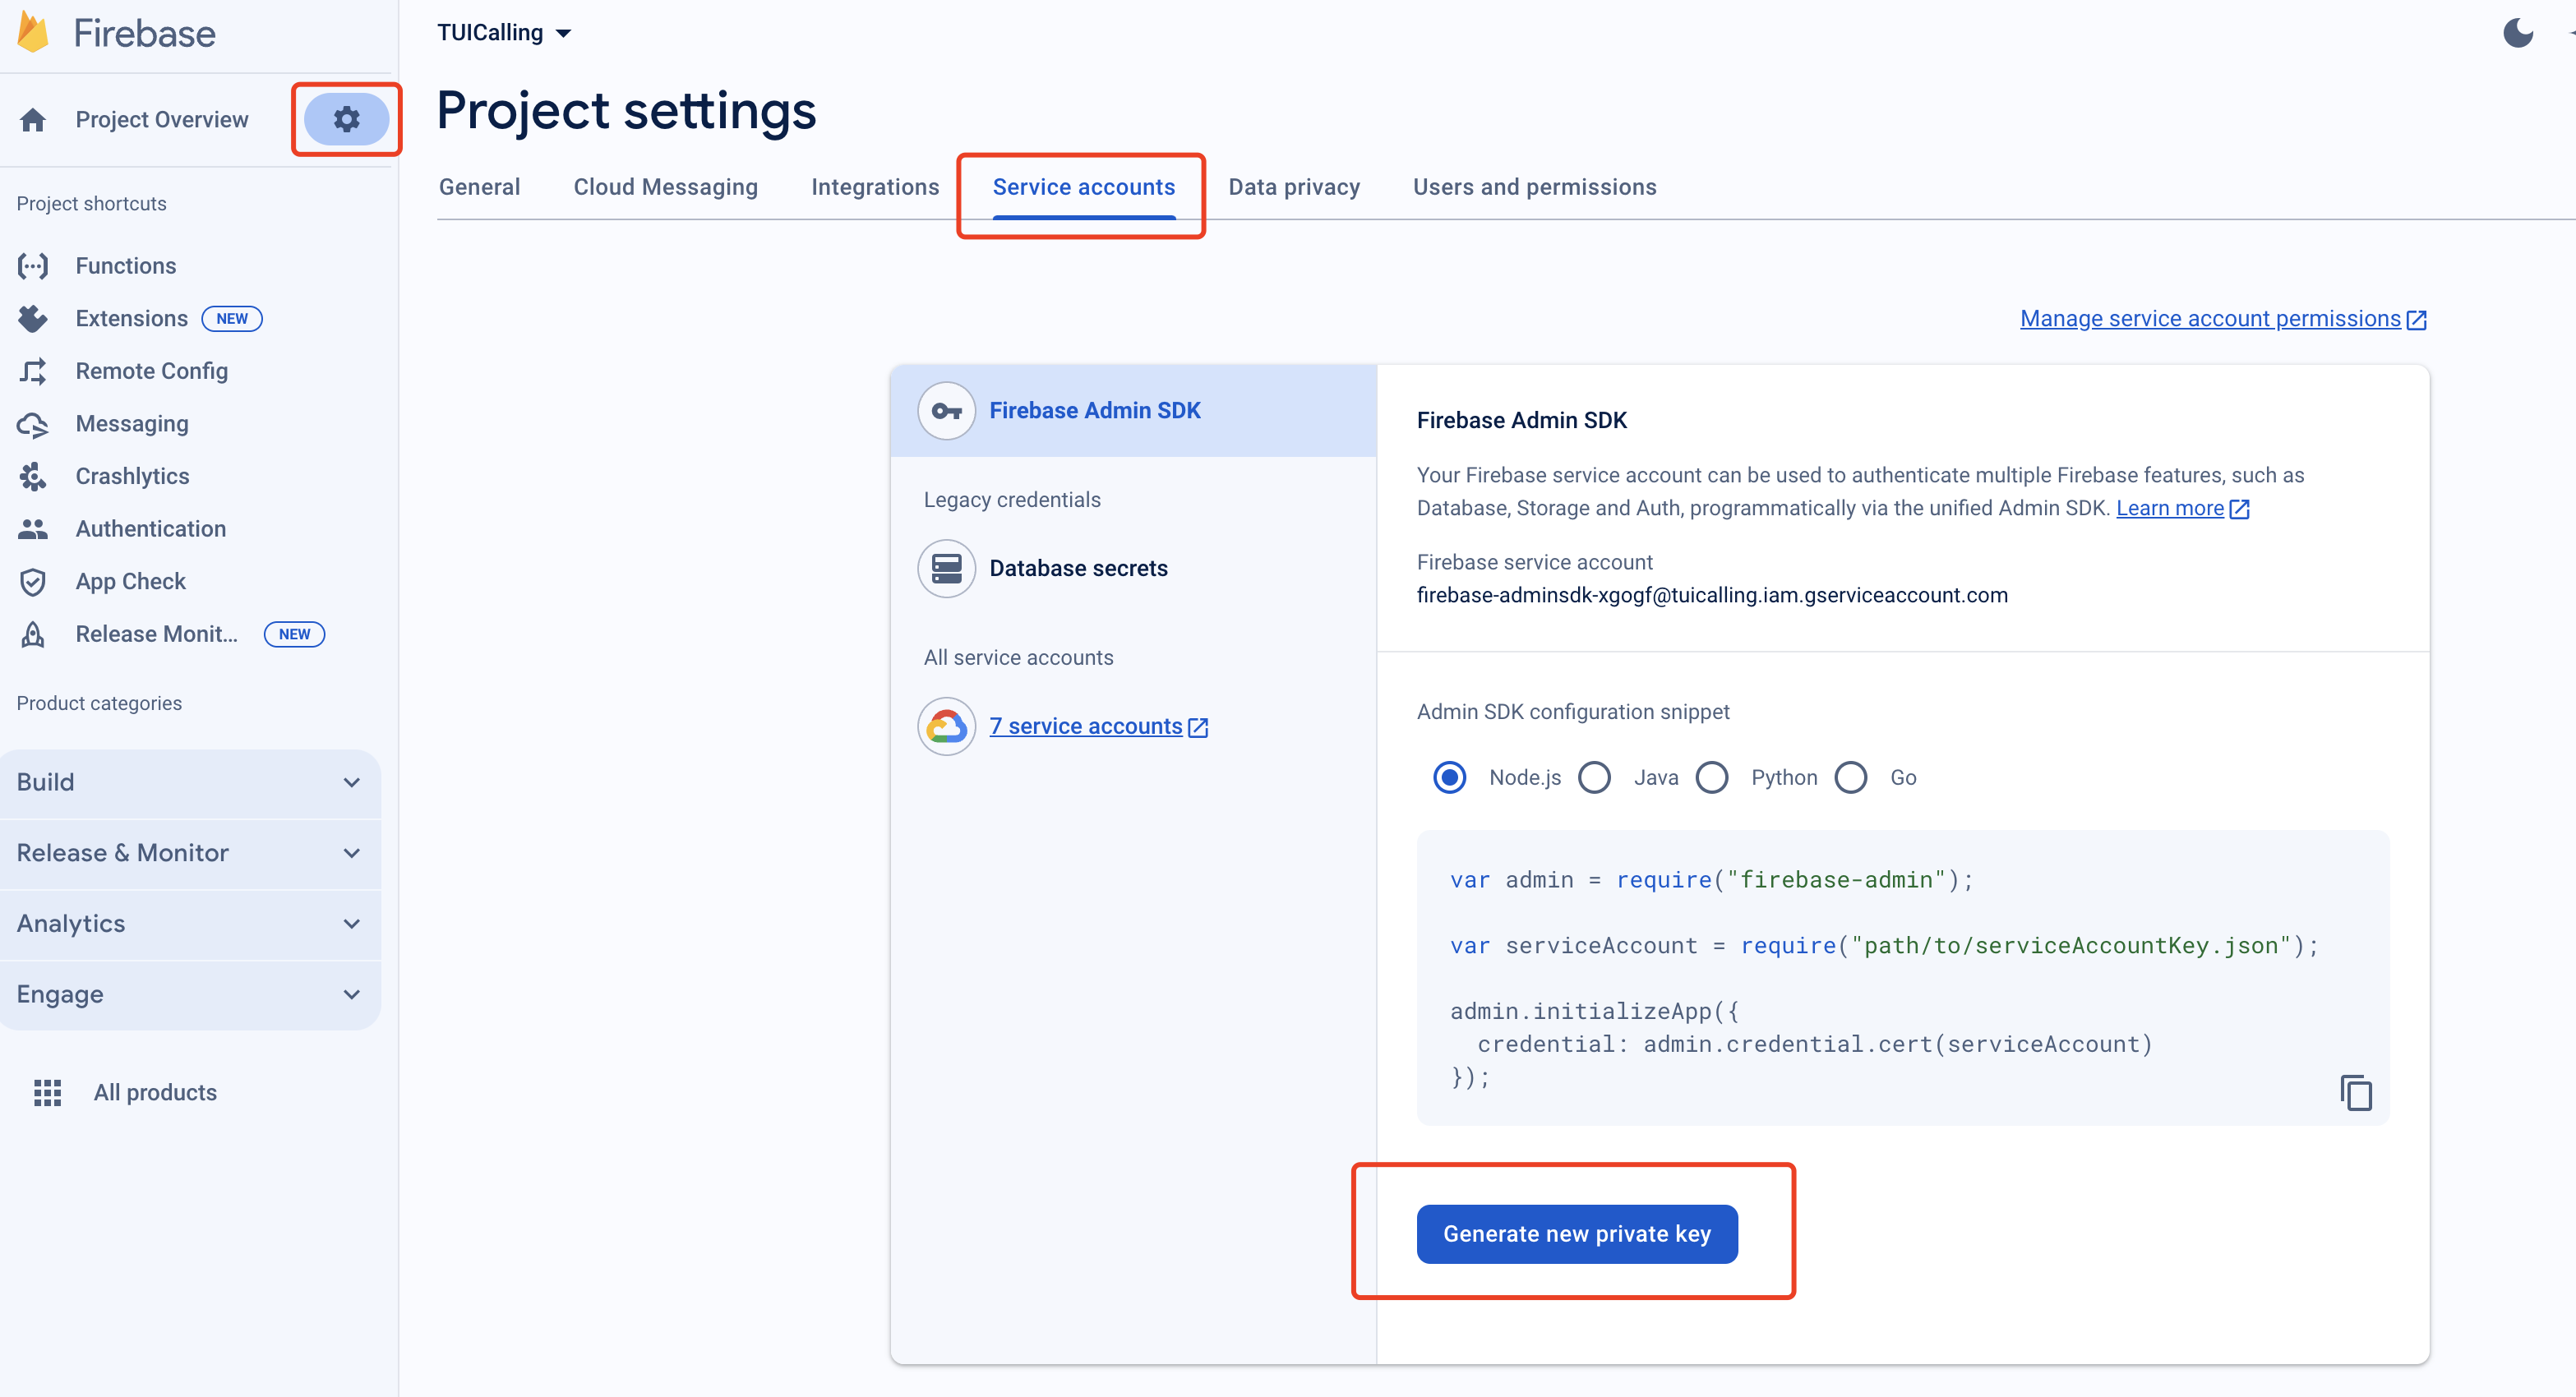
1. Register your app on the FCM Push Platform to obtain your AppID, AppKey, and the google-services.json file required for offline push functionality.
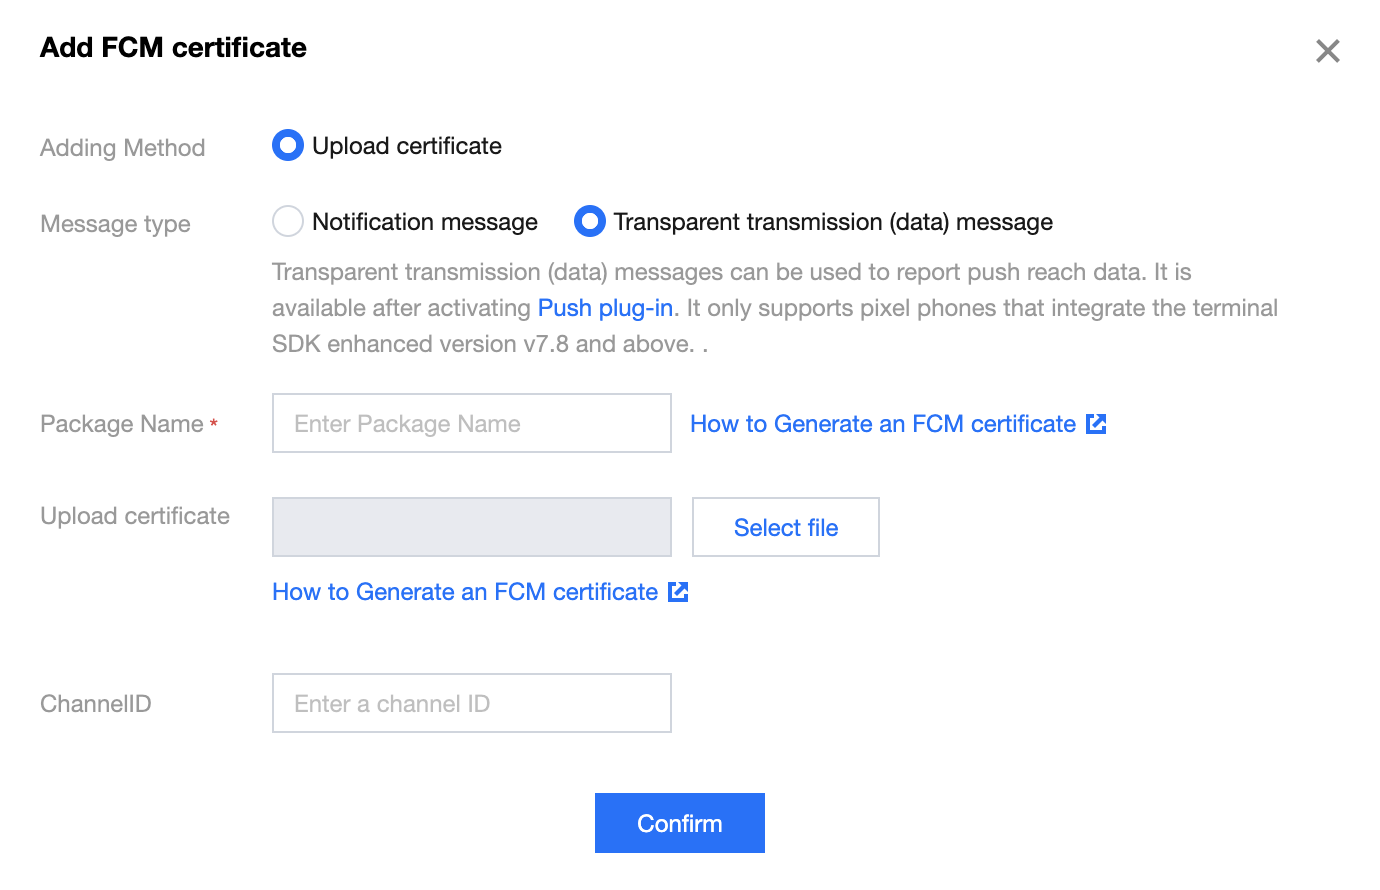
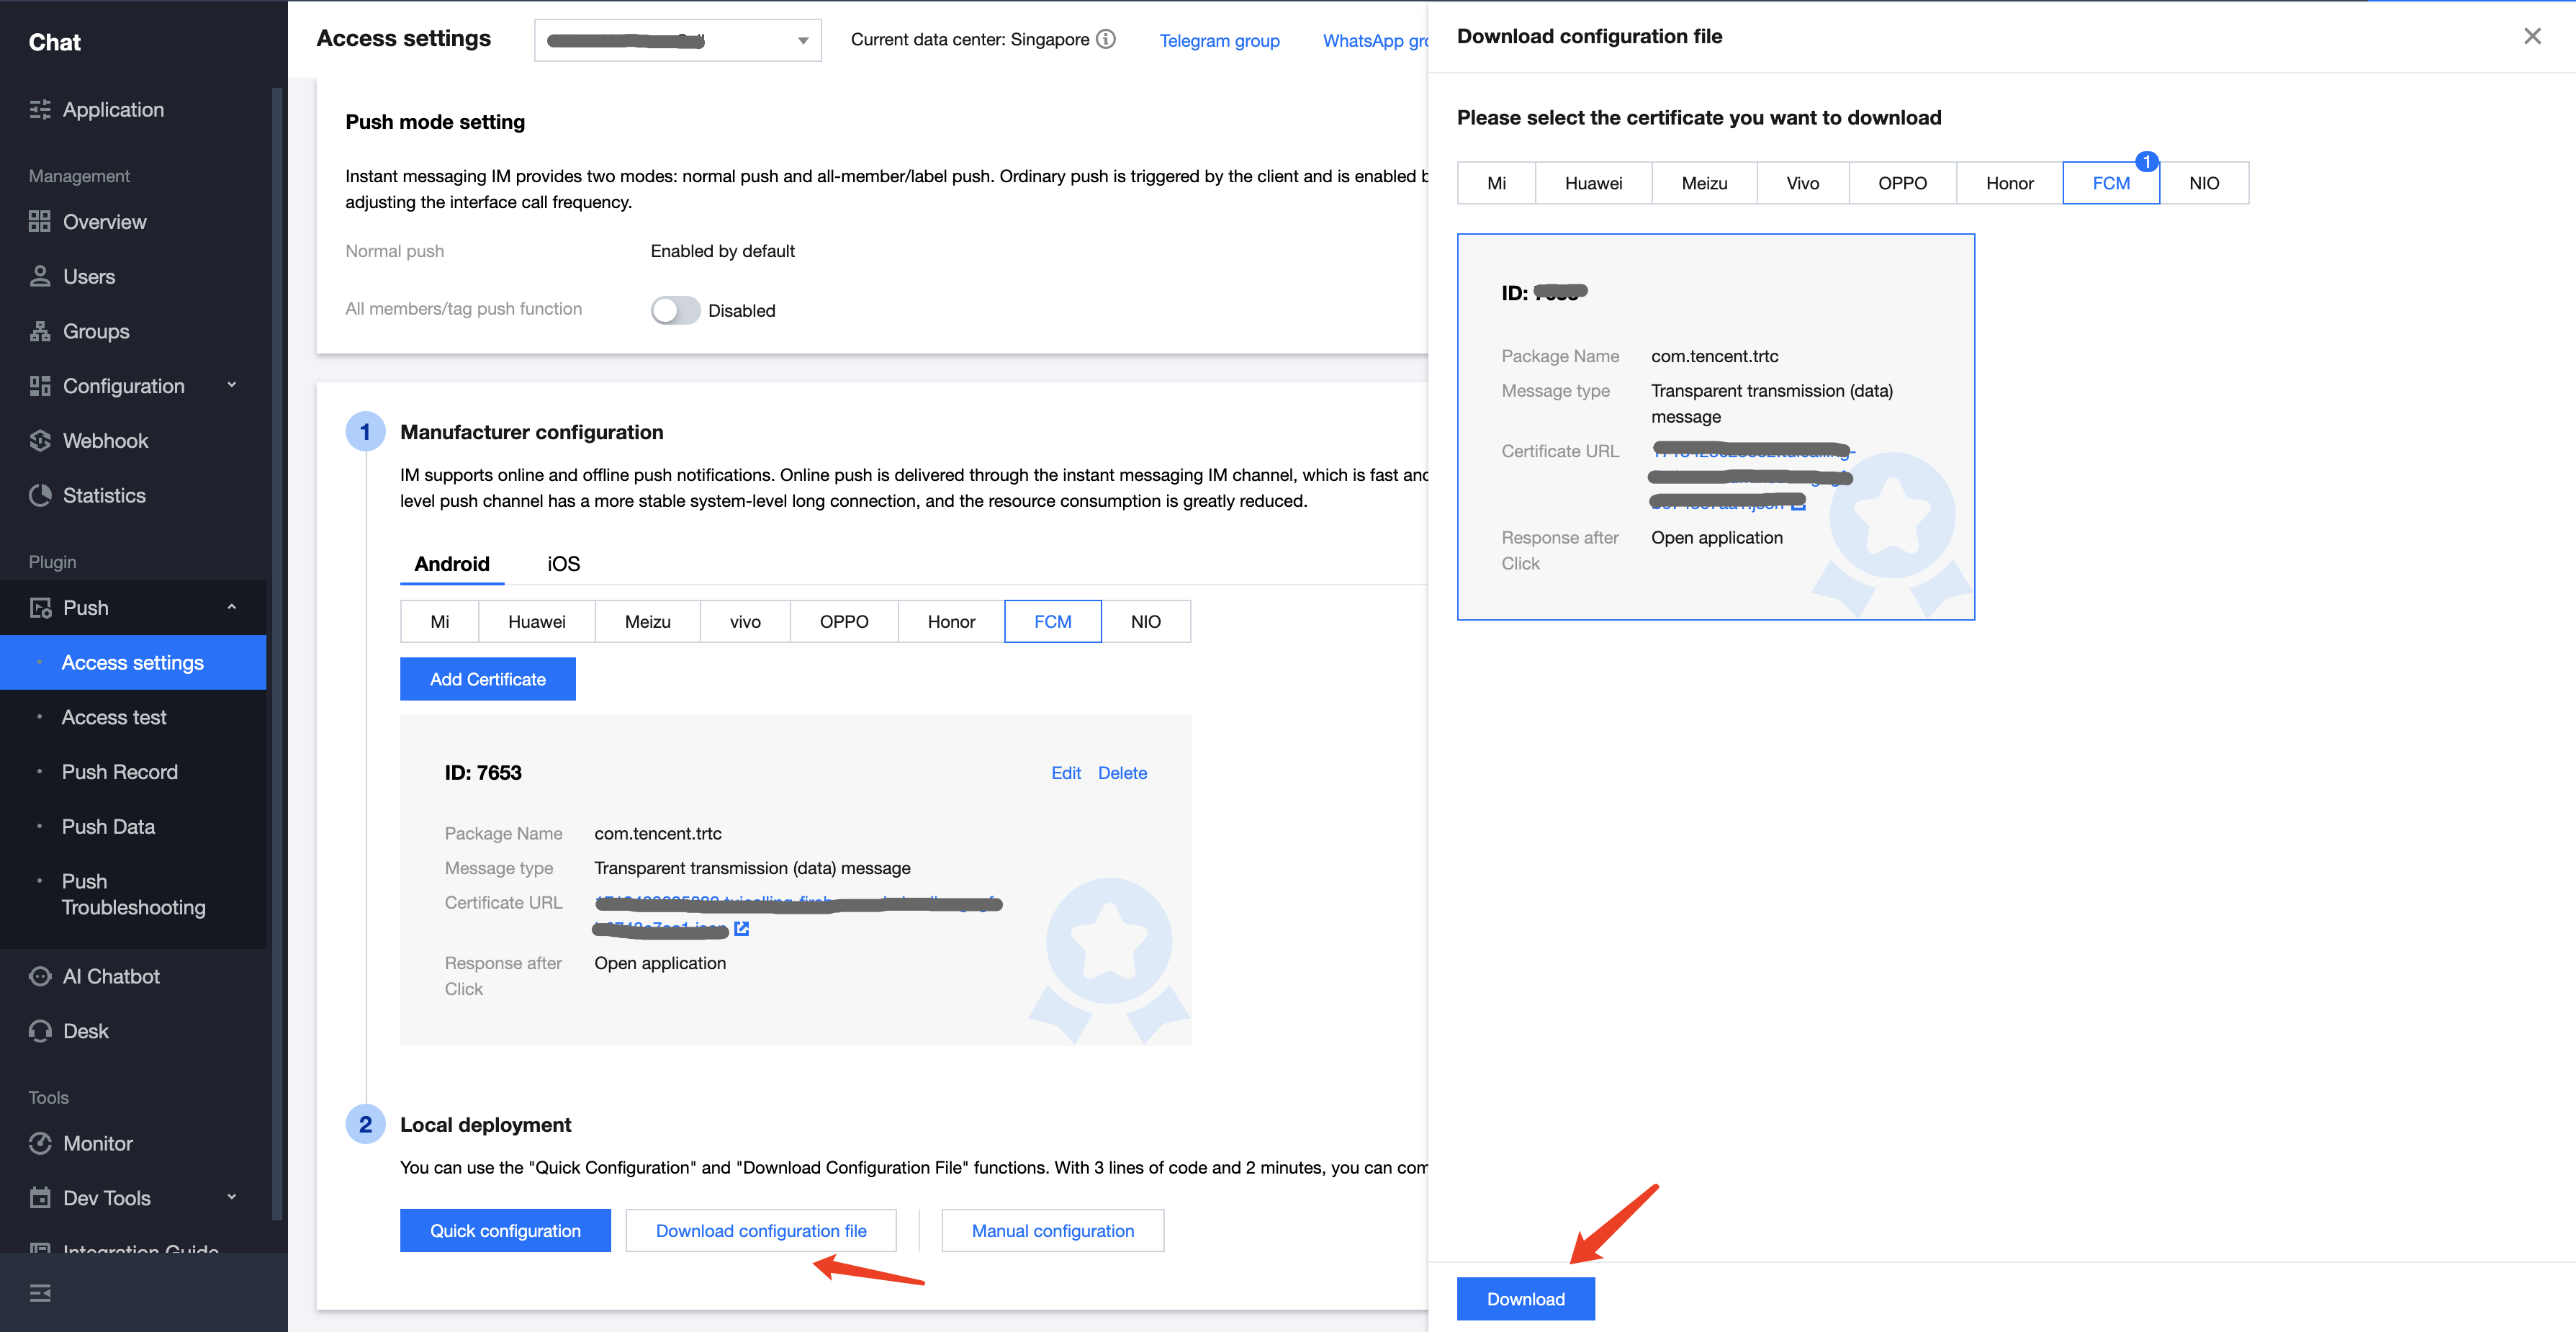
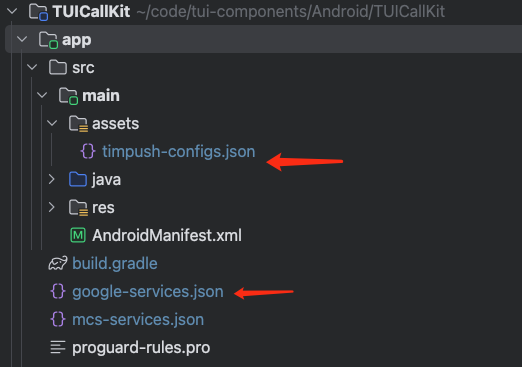
Once you complete the vendor push setup in the console, download and add the configuration files to your project. Place the downloaded timpush-configs.json in your app module's assets directory, and add google-services.json to your app directory.
Select and download timpush-configs.json
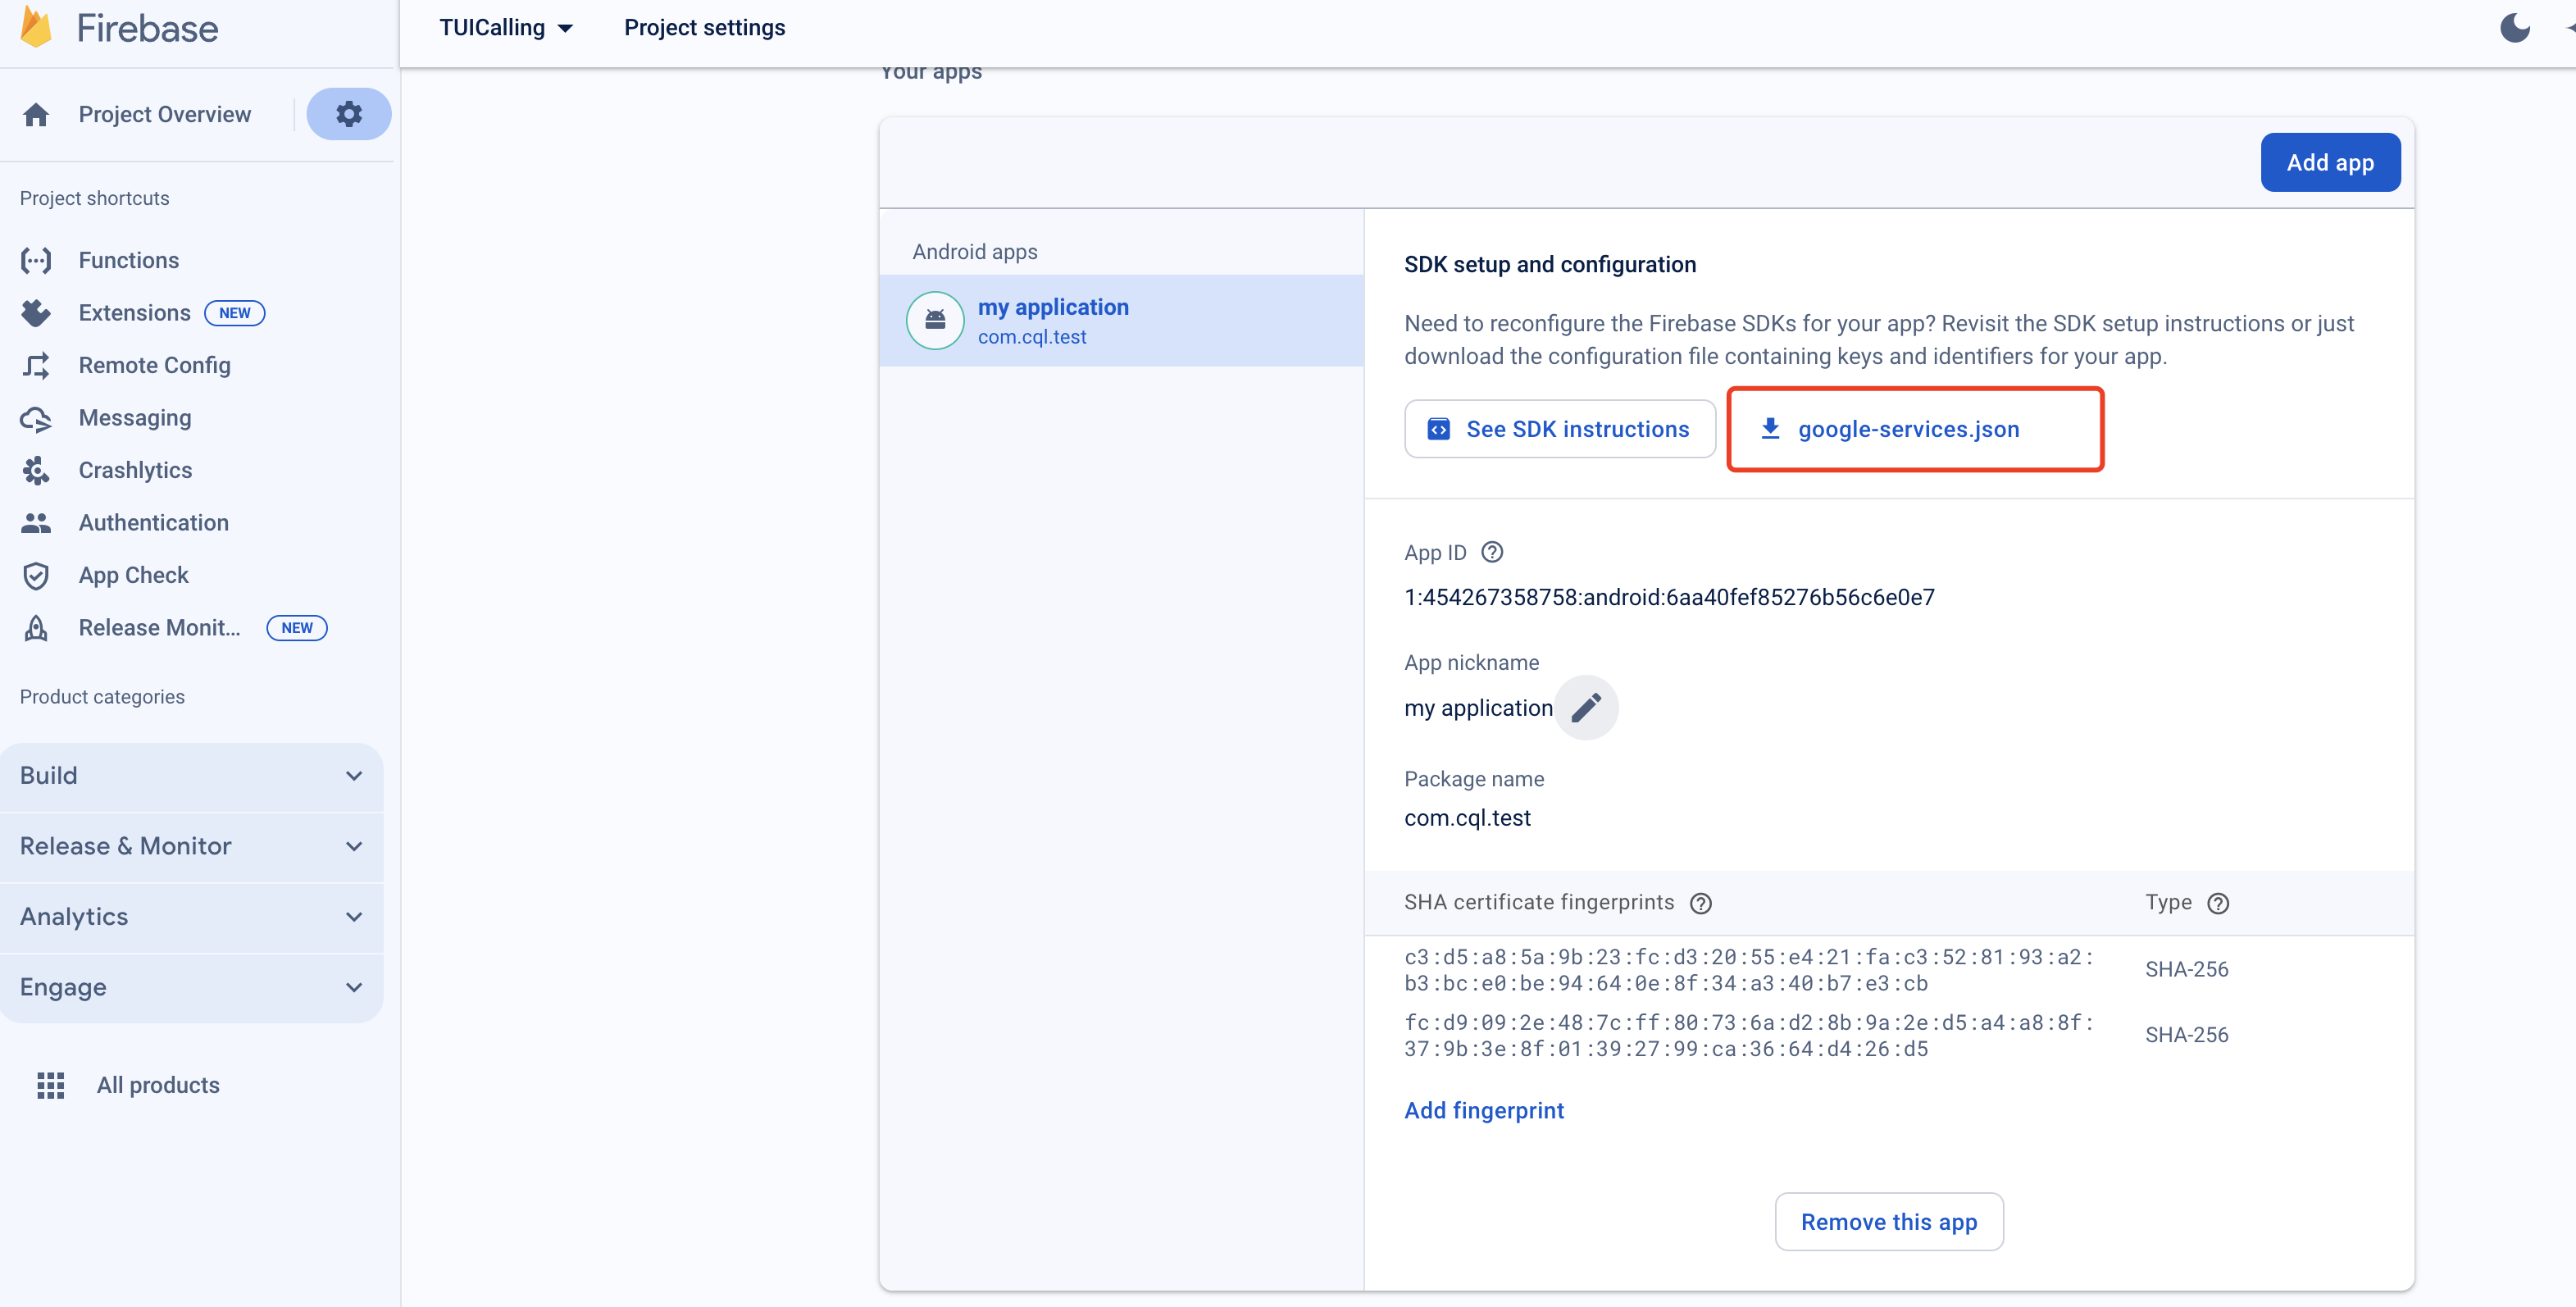
Download google-services.json
Add to your project
Step 2: Integrate Android Push Plugin
Add the following dependency to your project's android/app/build.gradle file:
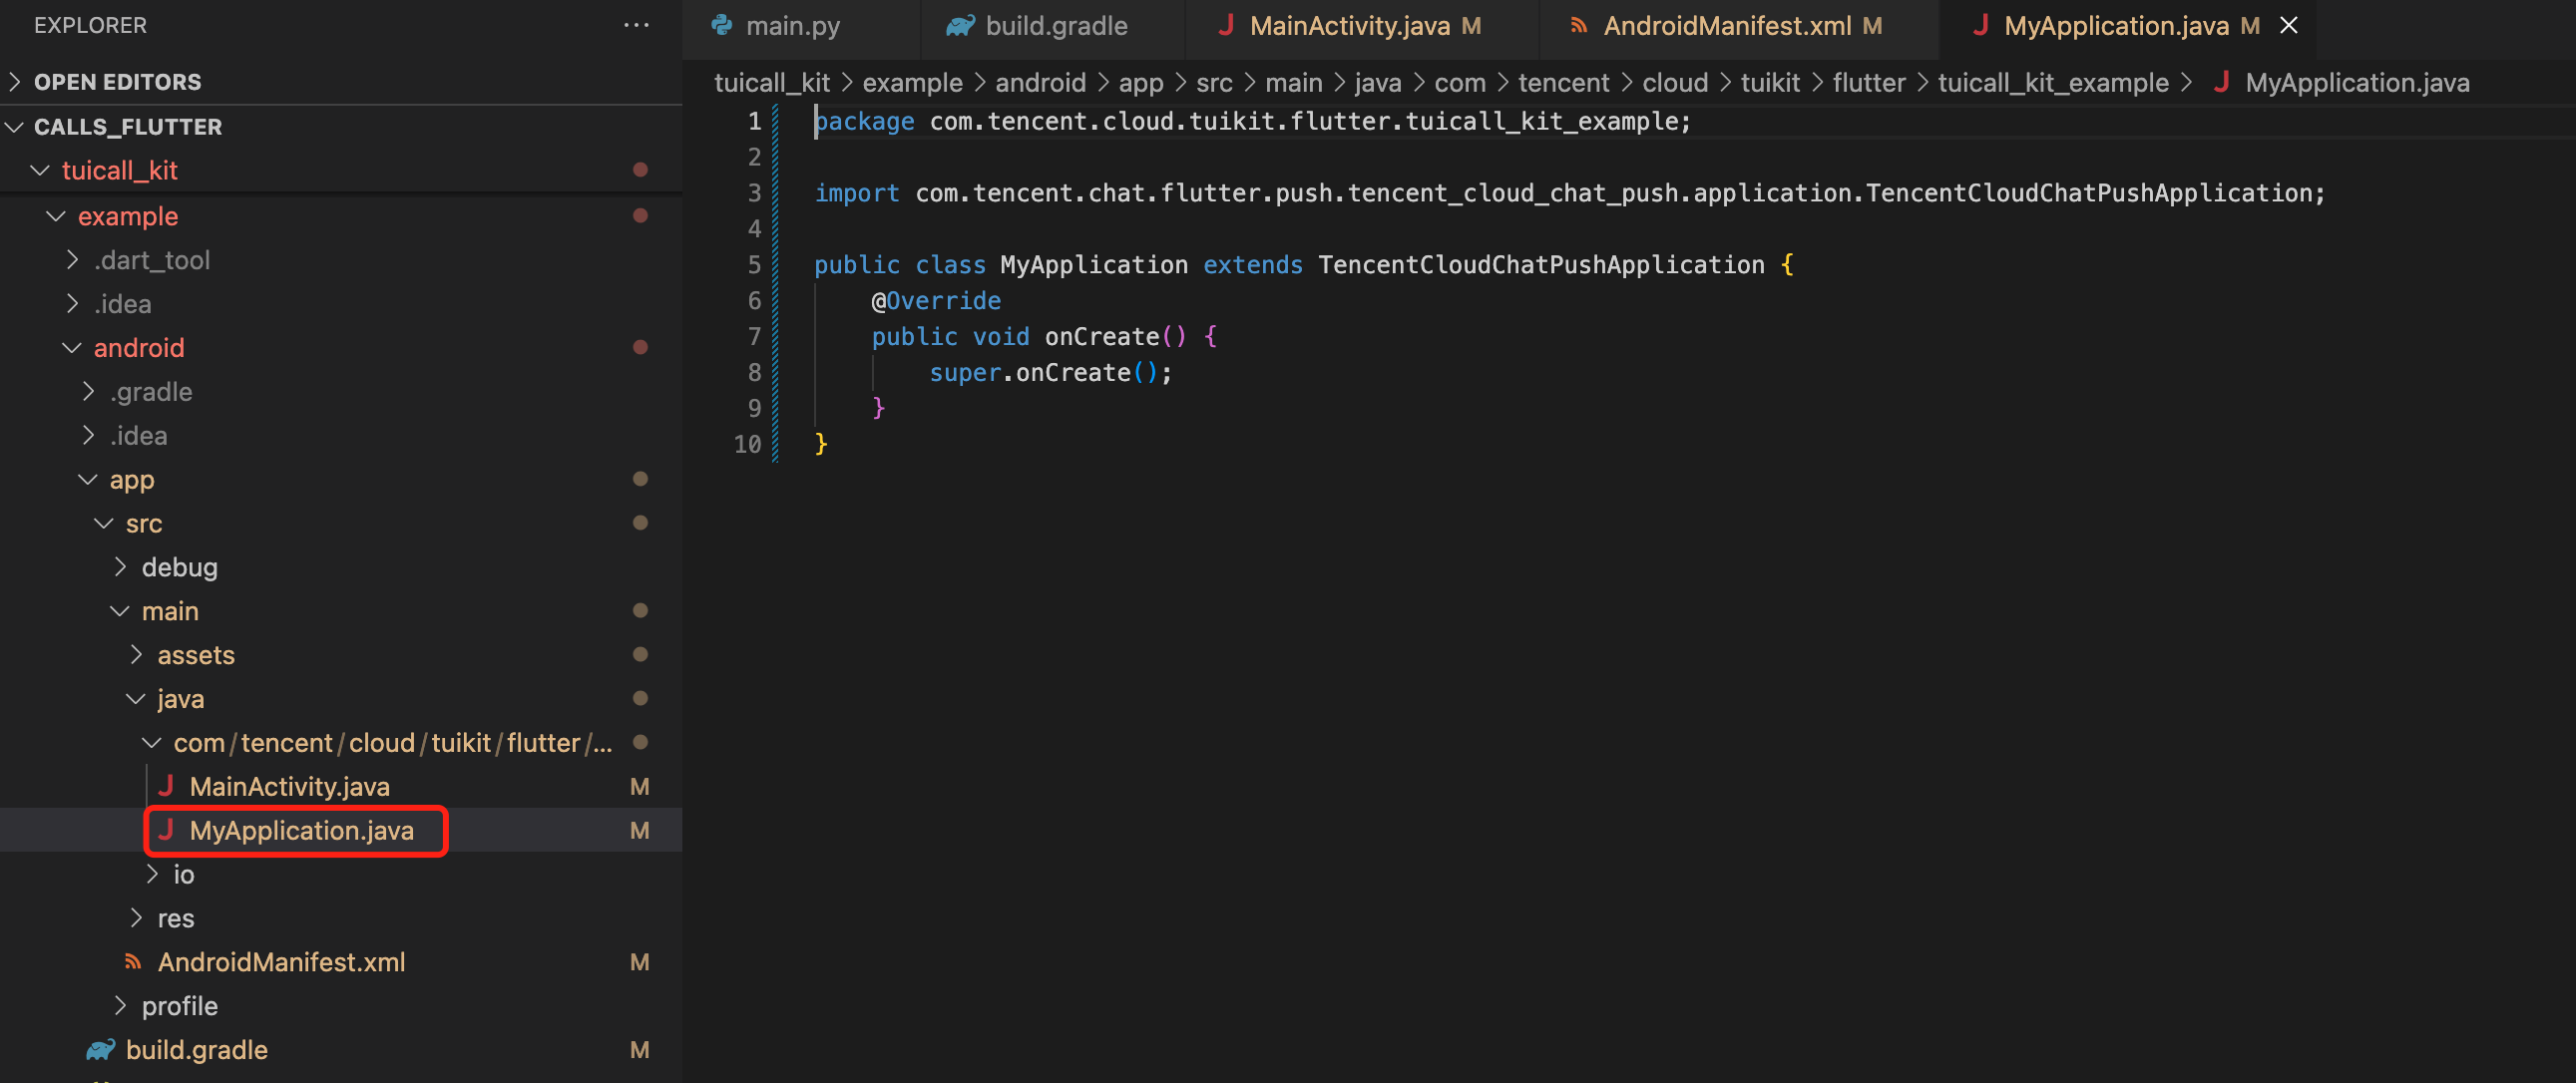
If you have an existing Application class, simply extend TencentCloudChatPushApplication and ensure onCreate() calls super.onCreate();.
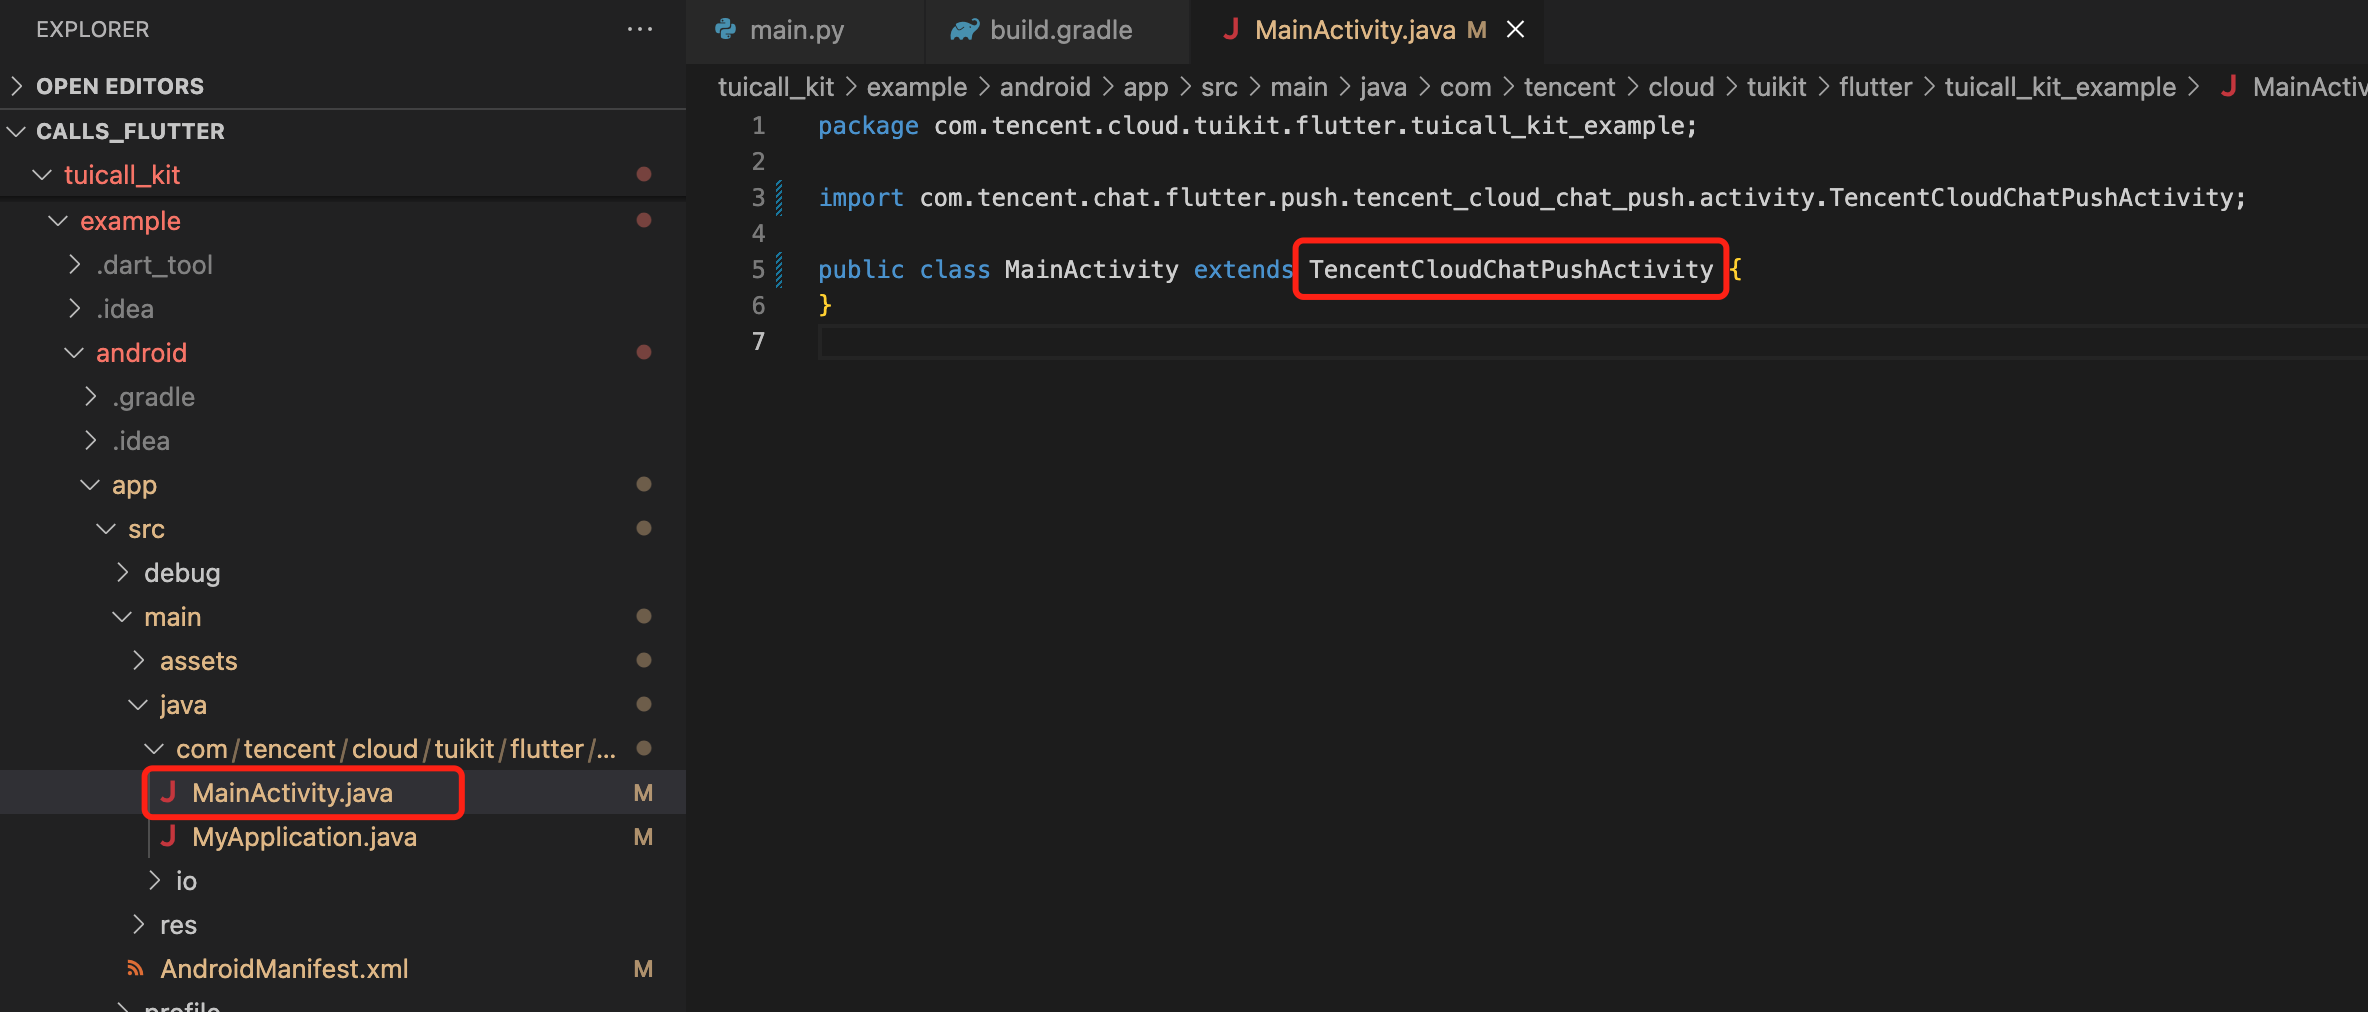
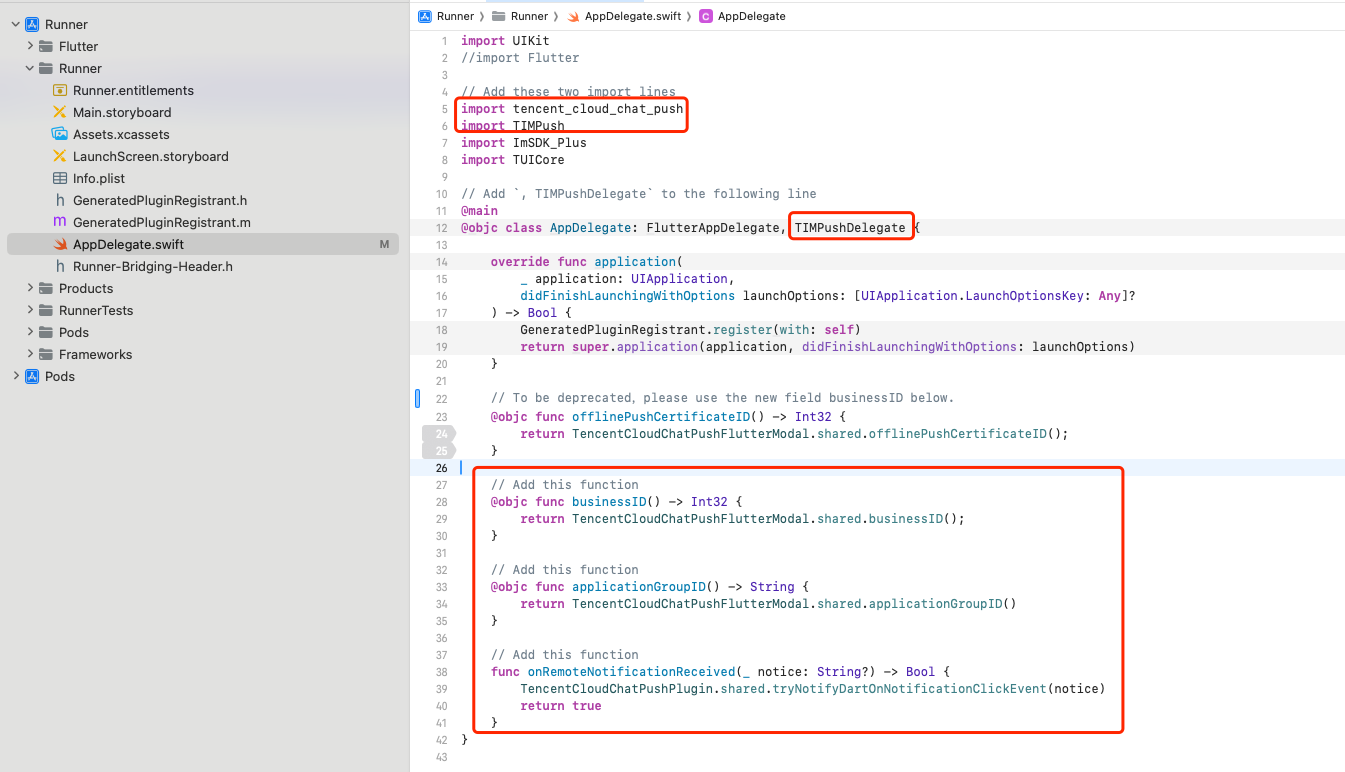
You also need to update your MainActivity file:
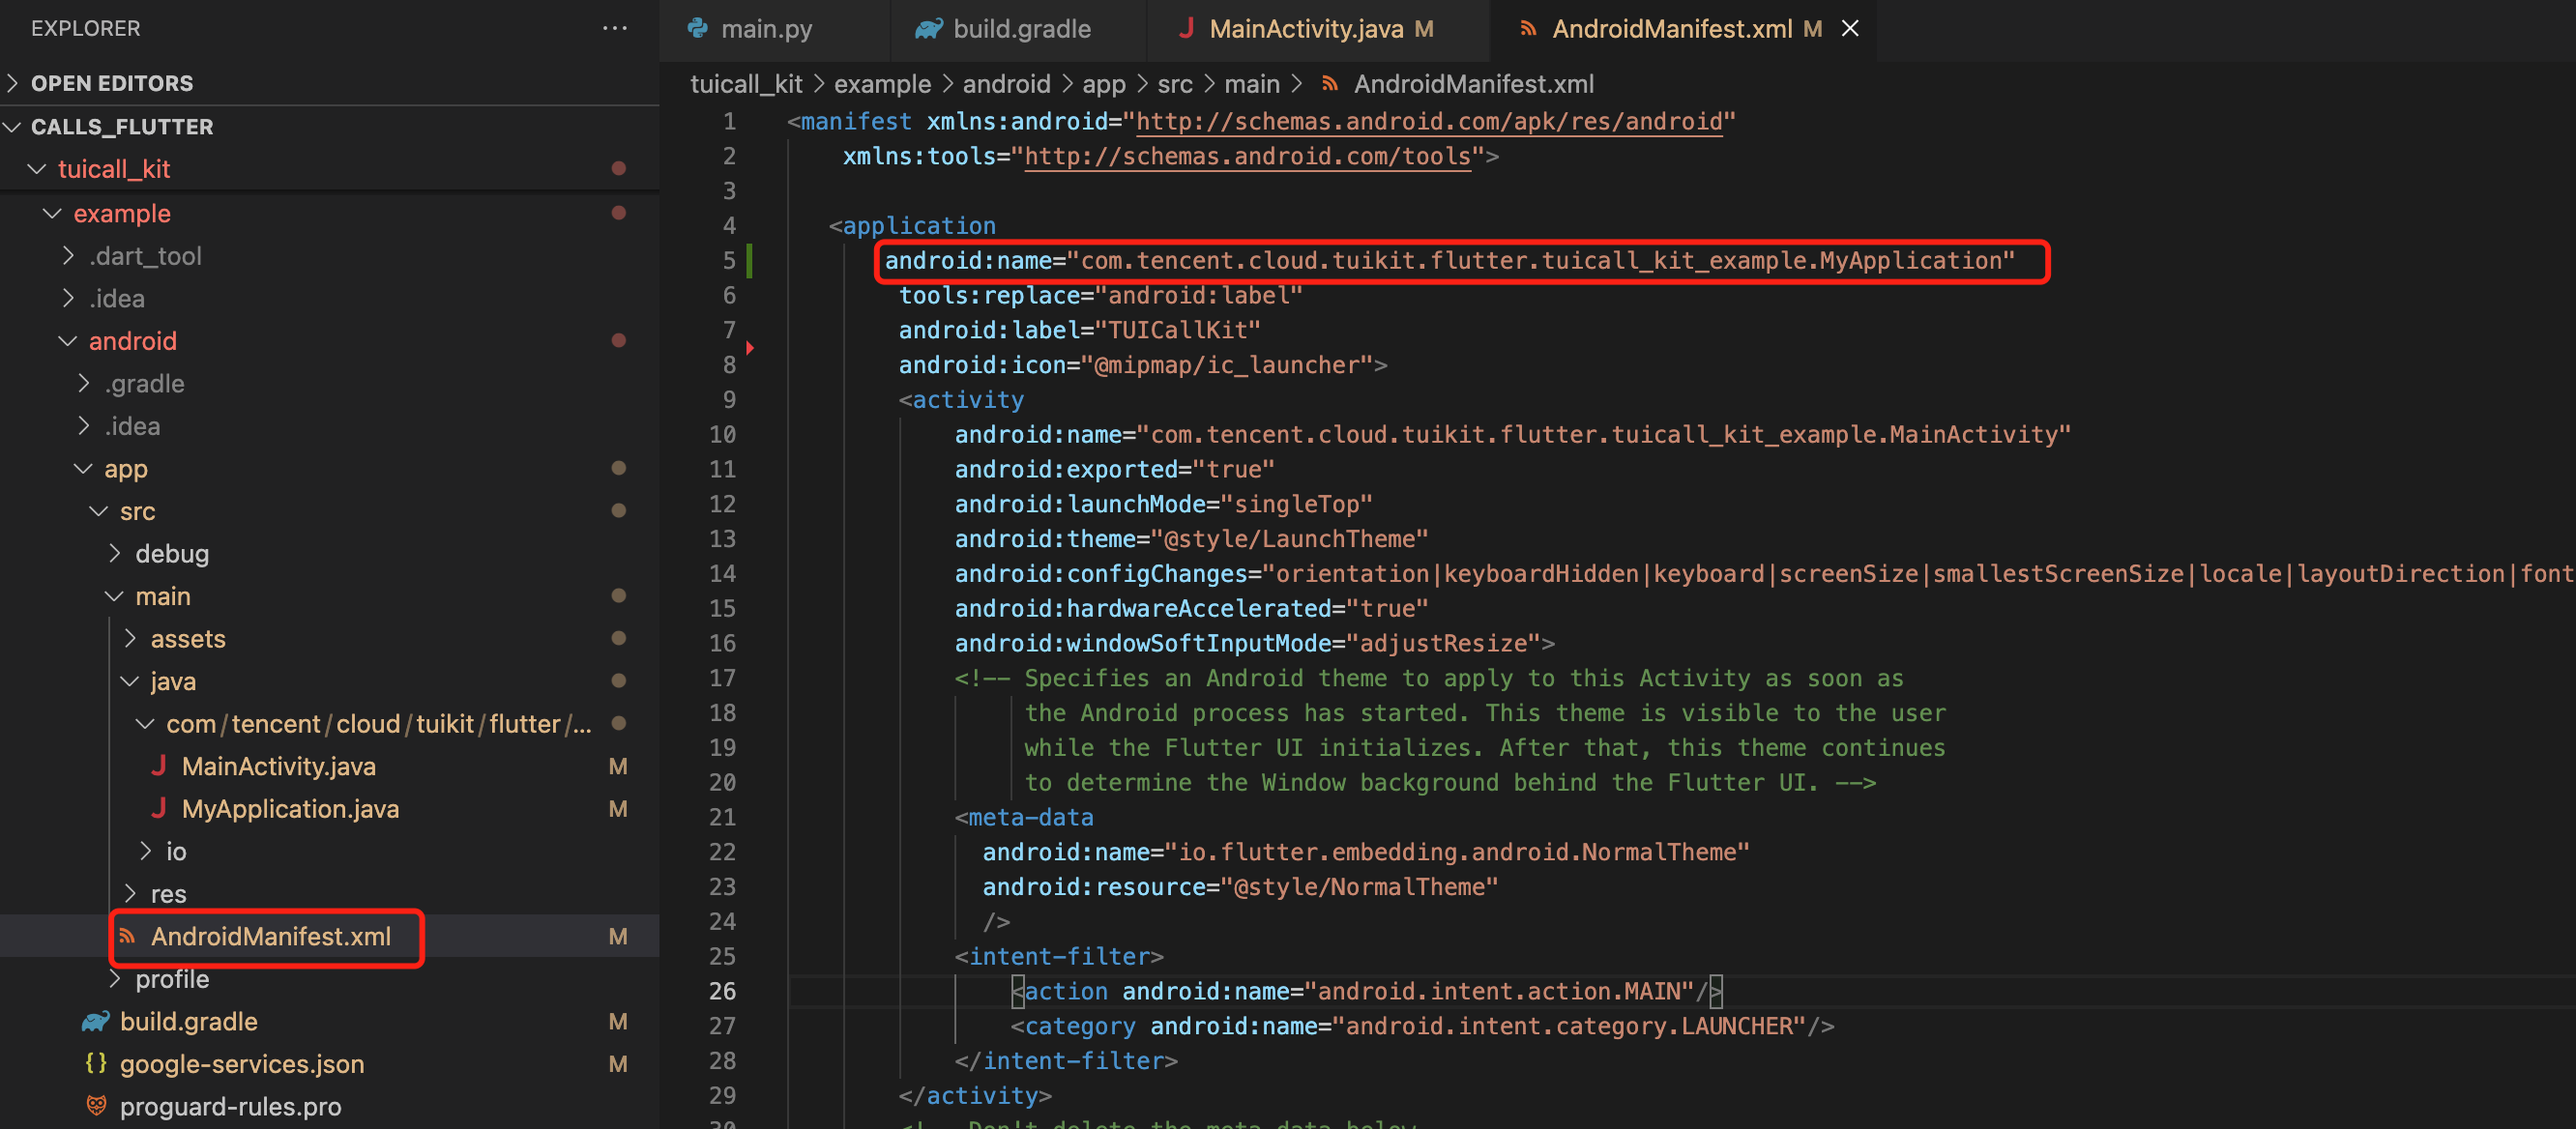
Open android/app/src/main/AndroidManifest.xml and add the android:name attribute to the `` tag, referencing your custom Application class:
4.Complete Project Configuration
In the project-level build.gradle file under buildscript > dependencies, add:
buildscript {
dependencies {
classpath 'com.google.gms:google-services:4.3.15'
}
}
In the app directory's build.gradle file, add:
apply plugin: 'com.google.gms.google-services'
In the app directory's build.gradle, set your application package name:
applicationId 'com.****.callkit'
iOS (APNs)
Step 1: Vendor Configuration
Apply for APNs Certificate
Enable Remote Push for Your App
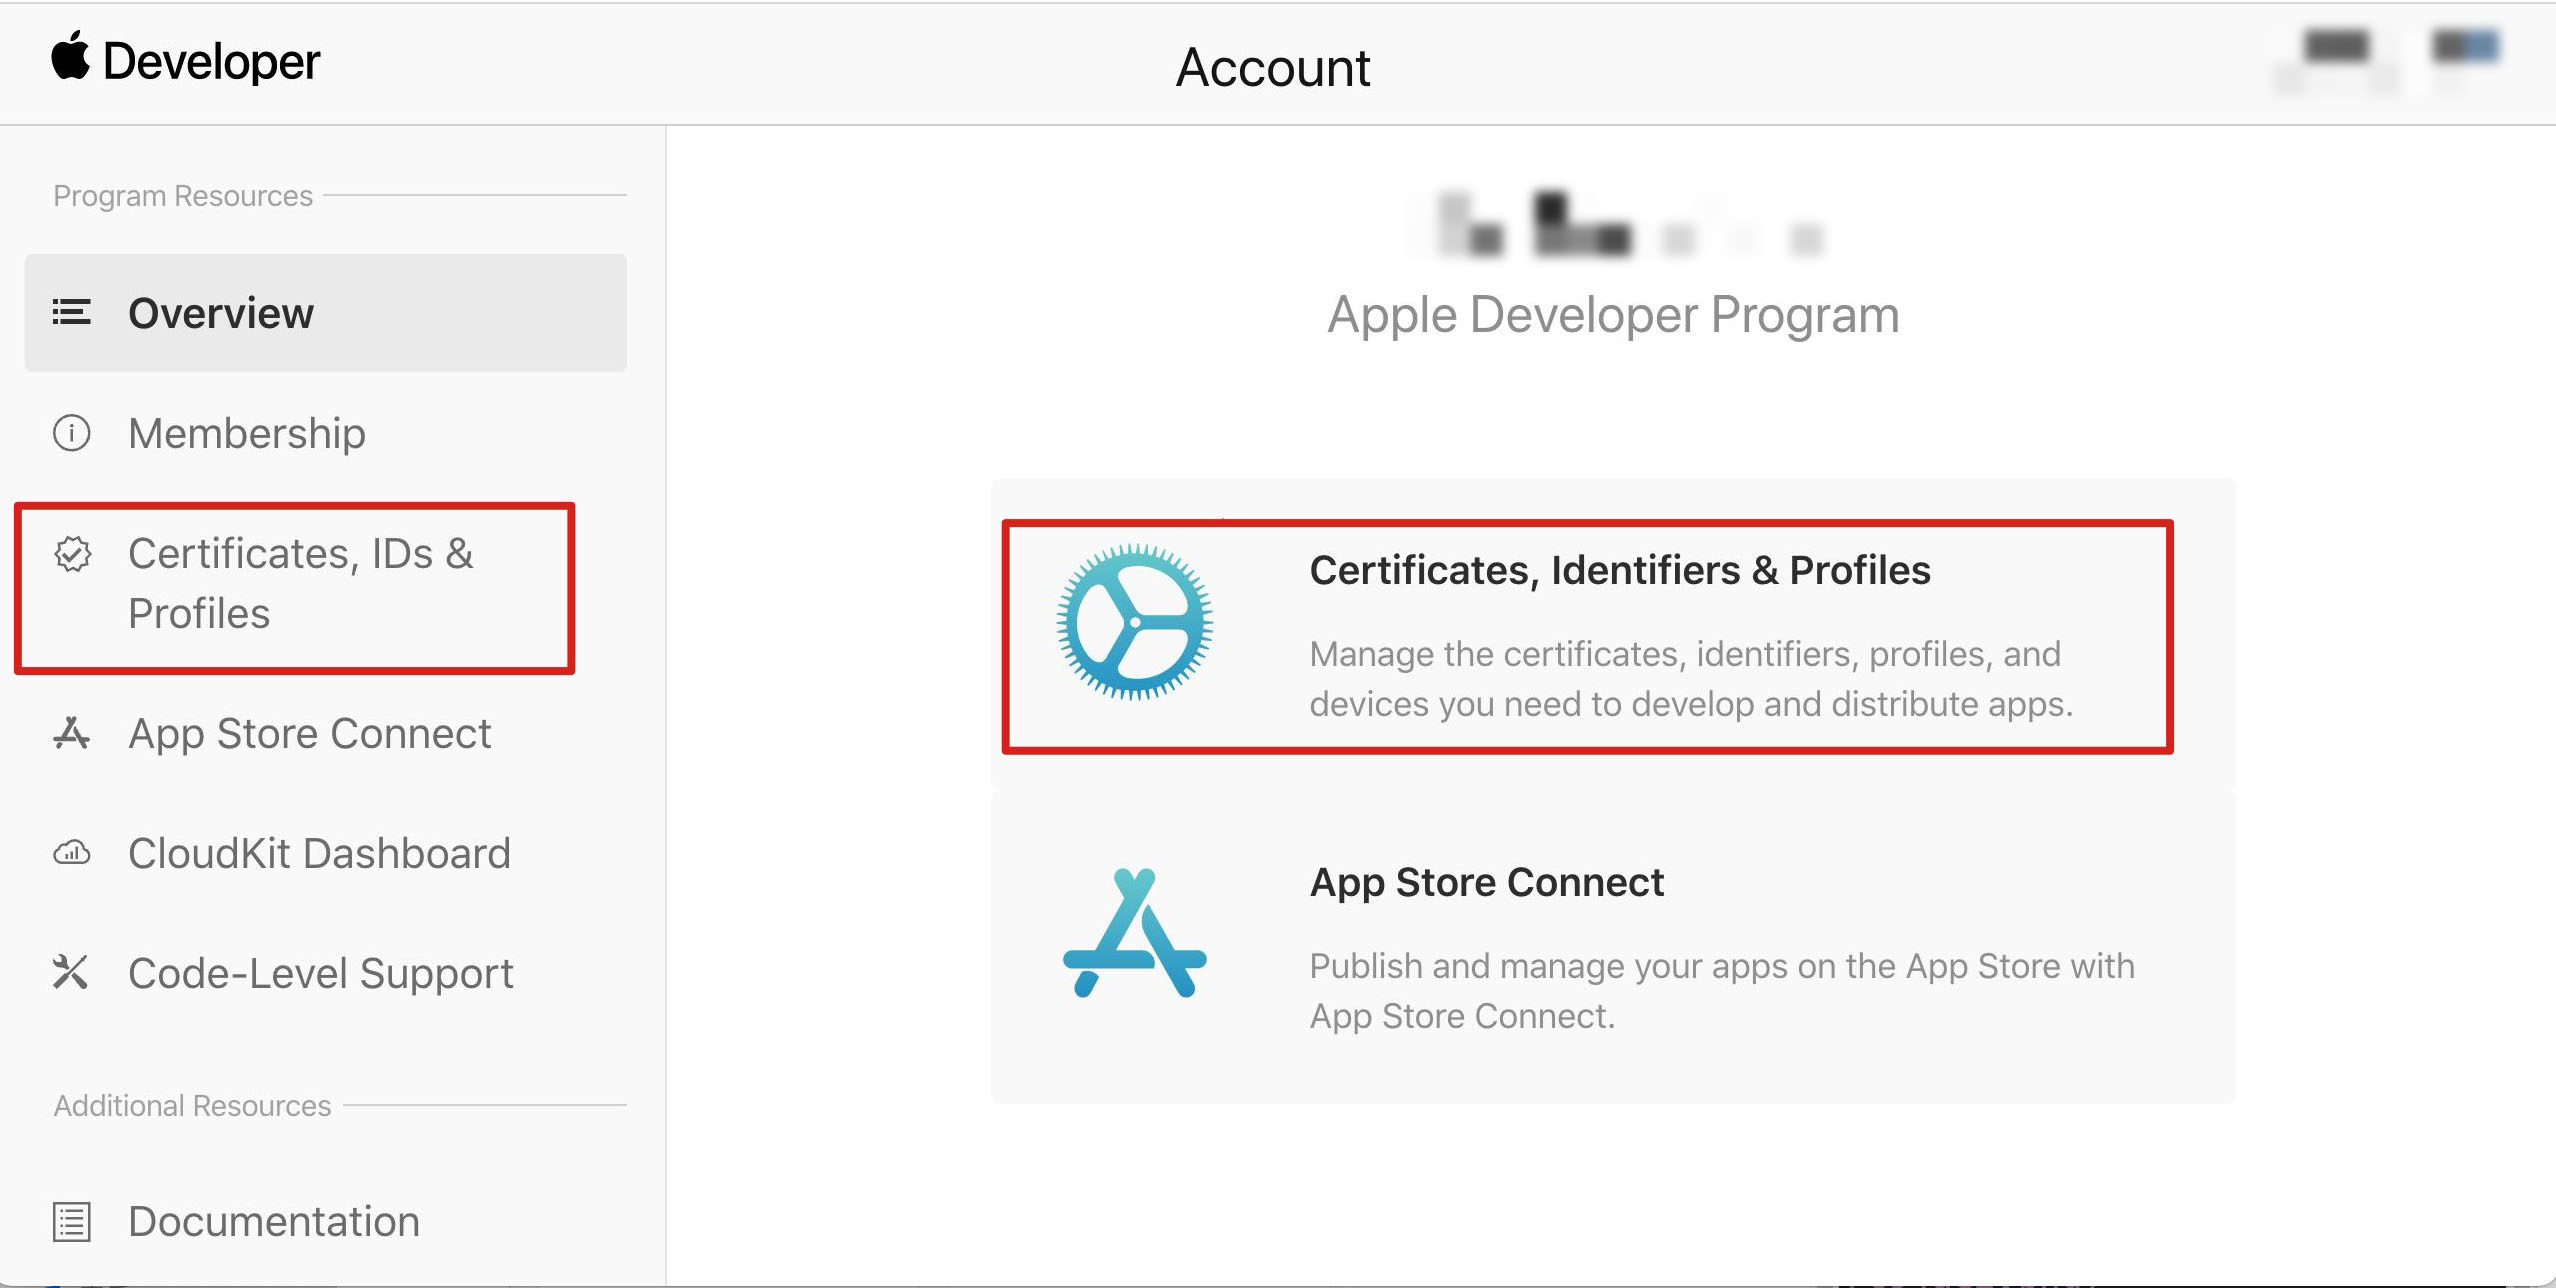
1. Log in to the Apple Developer Center, click Certificates, Identifiers & Profiles or use the sidebar to access the Certificates, IDs & Profiles page.
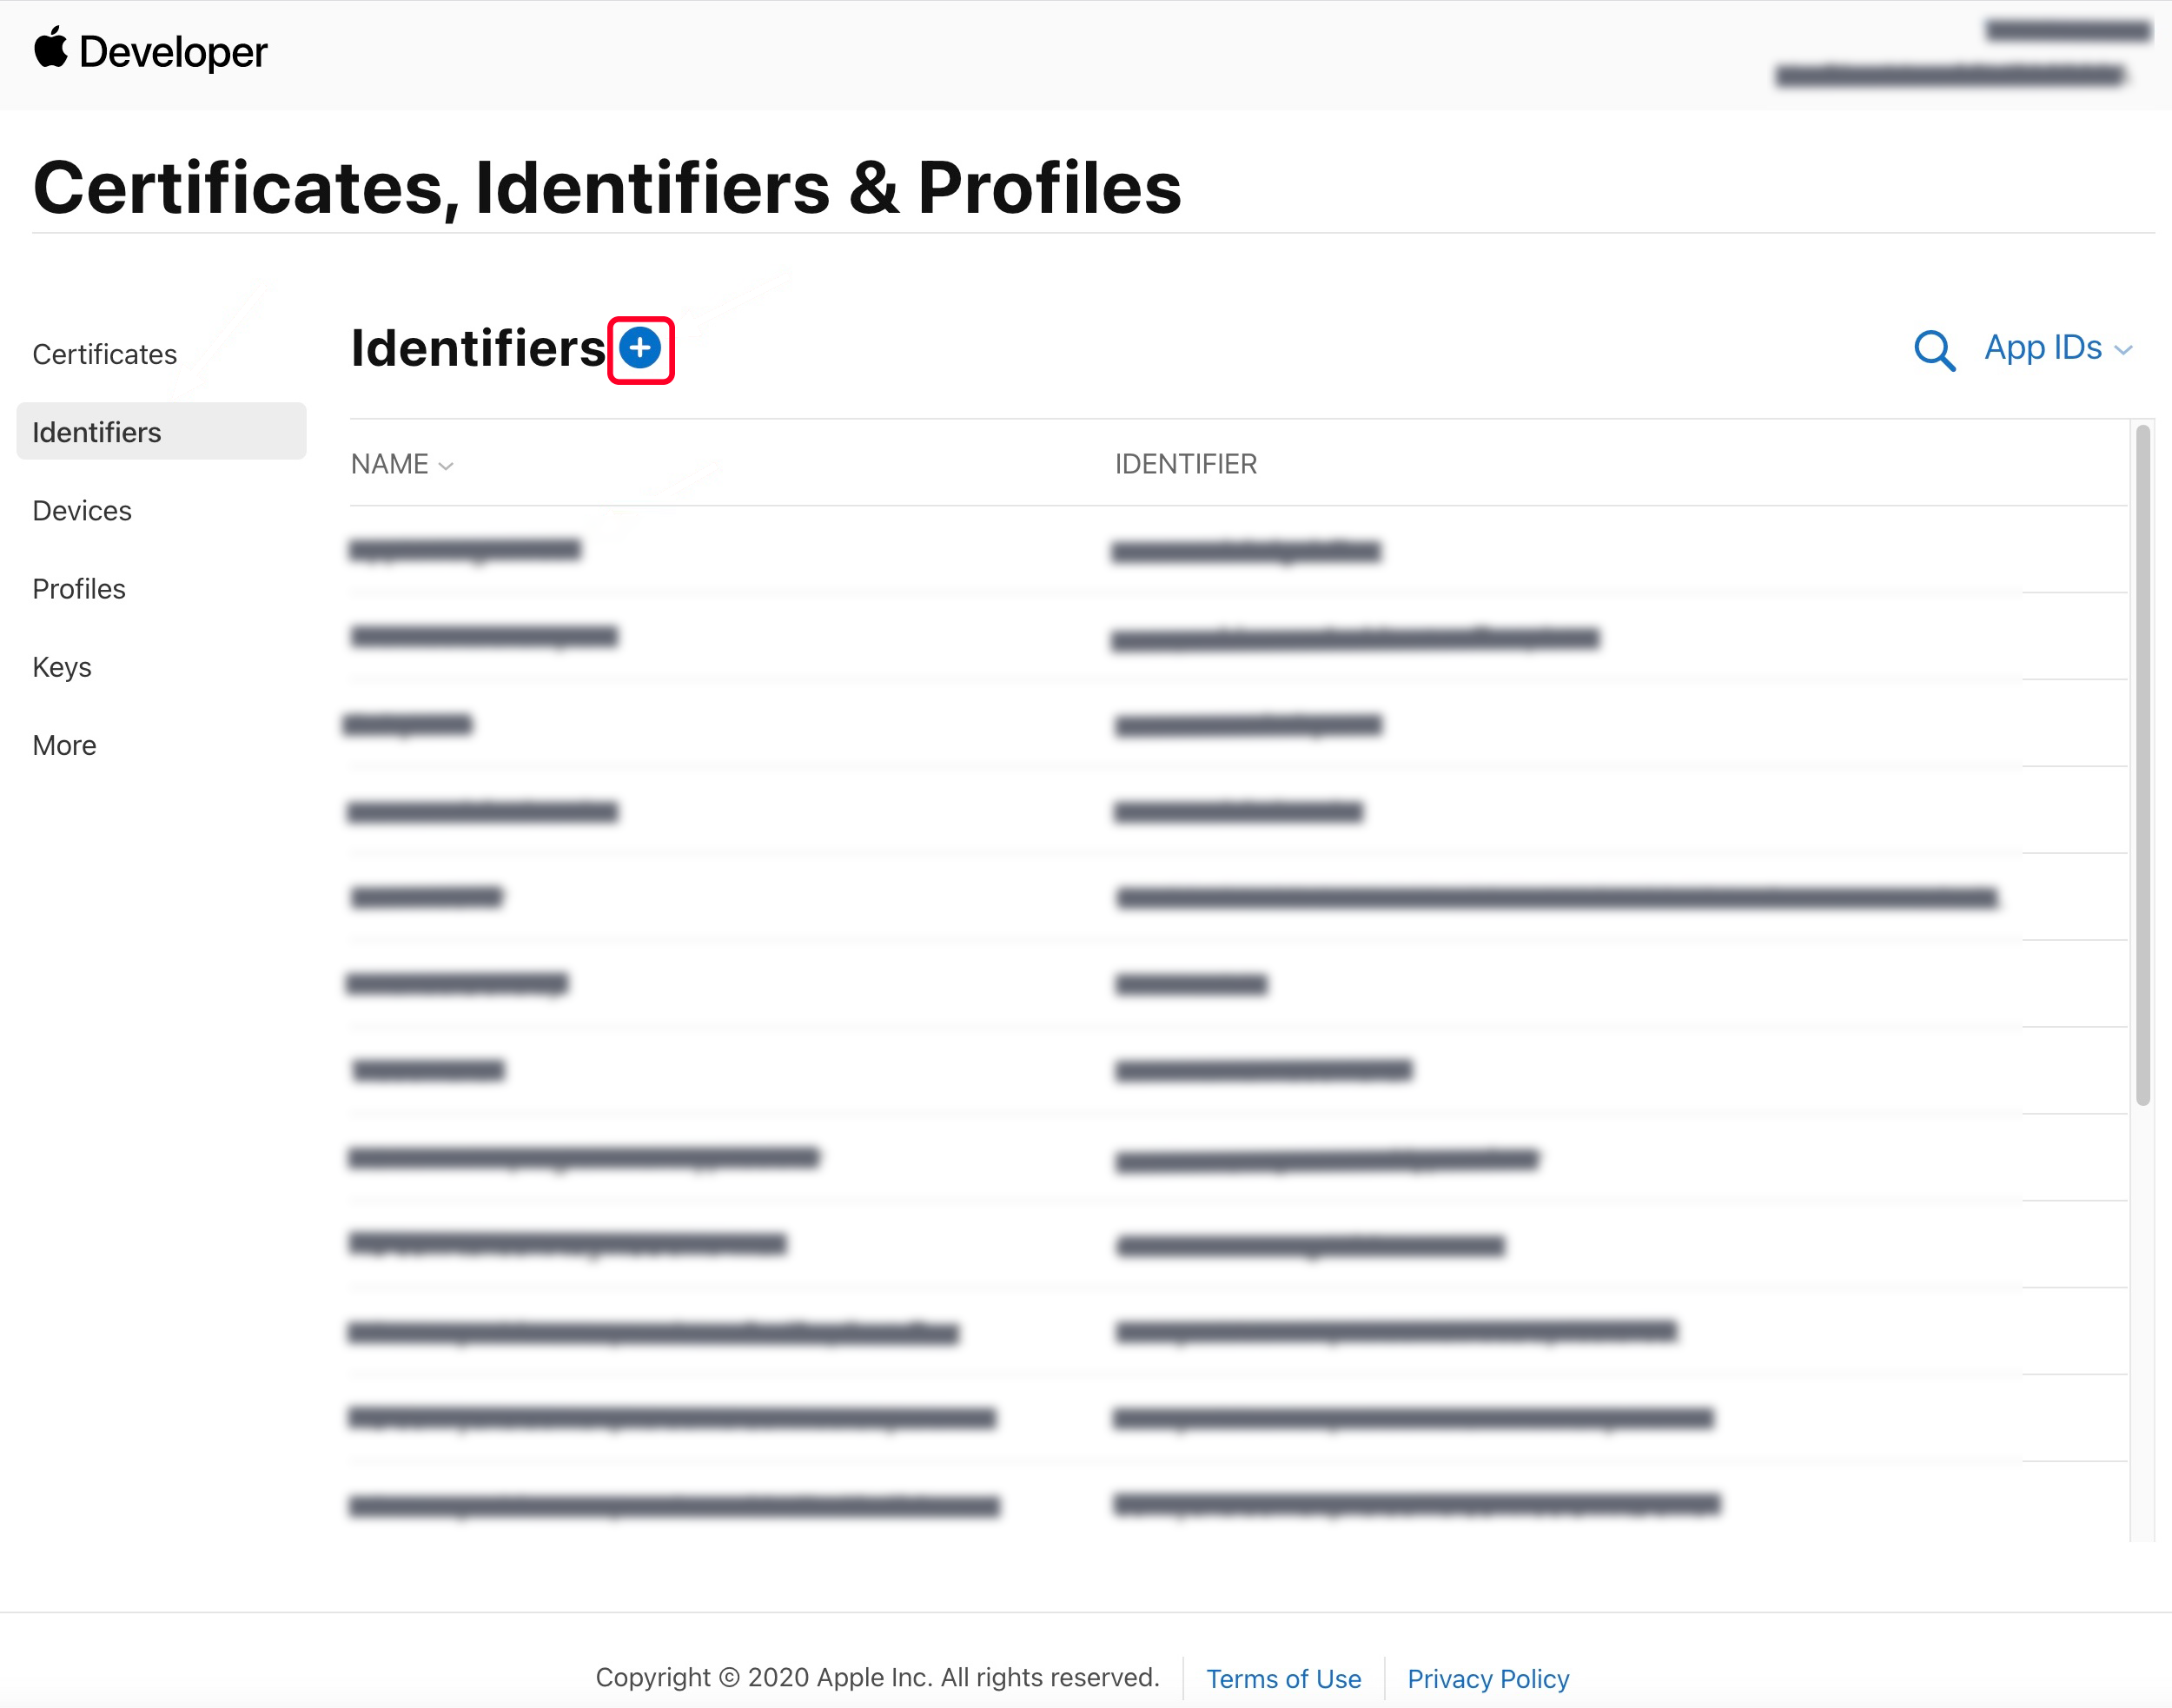
2. Click the + button next to Identifiers.
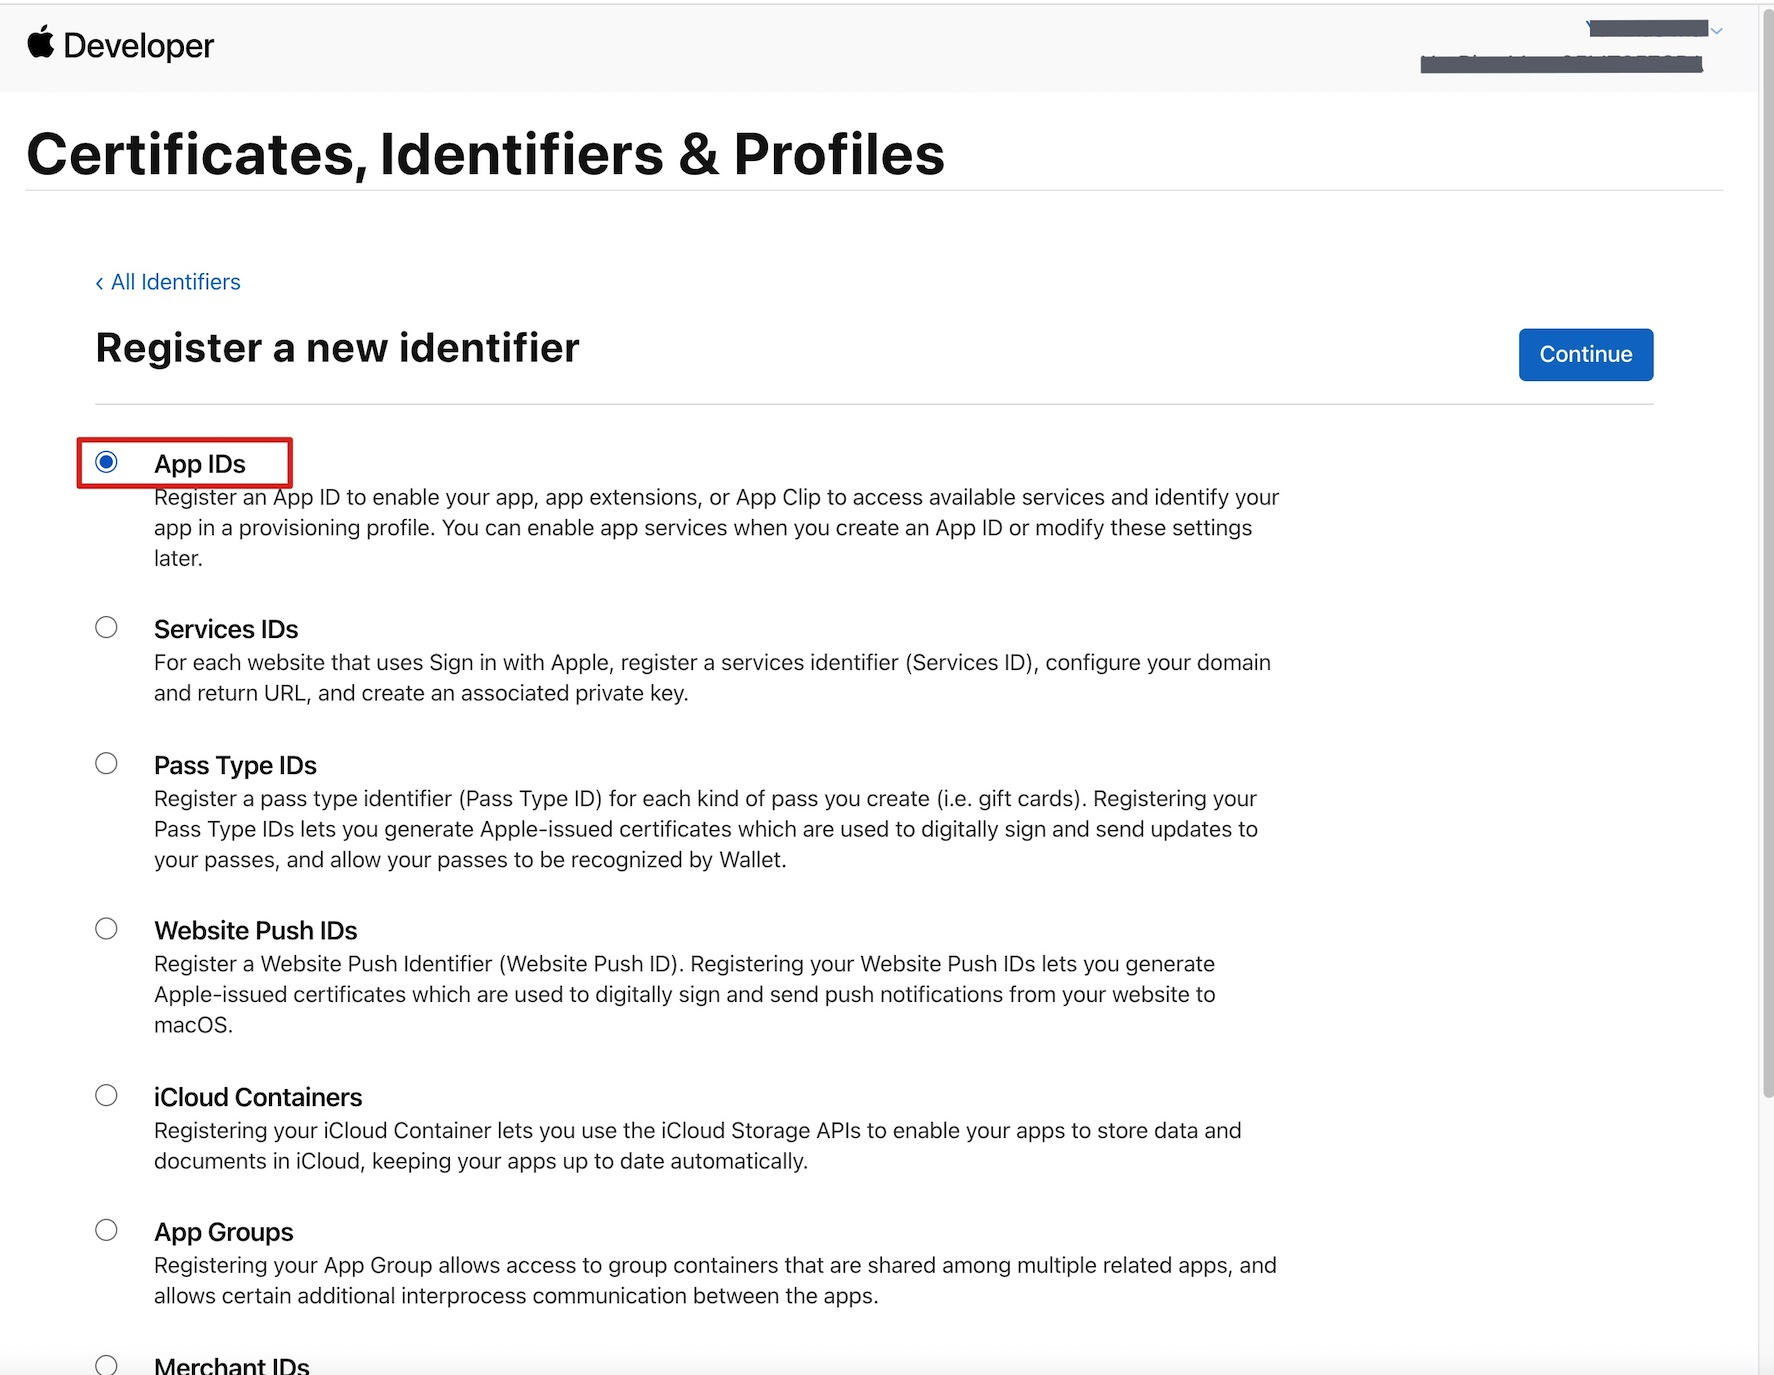
3. You can either create a new AppID or add the Push Notification service to your existing AppID.
Note:
Your app's Bundle ID cannot use a wildcard *; otherwise, remote push will not work.
4. Select App IDs and click Continue.
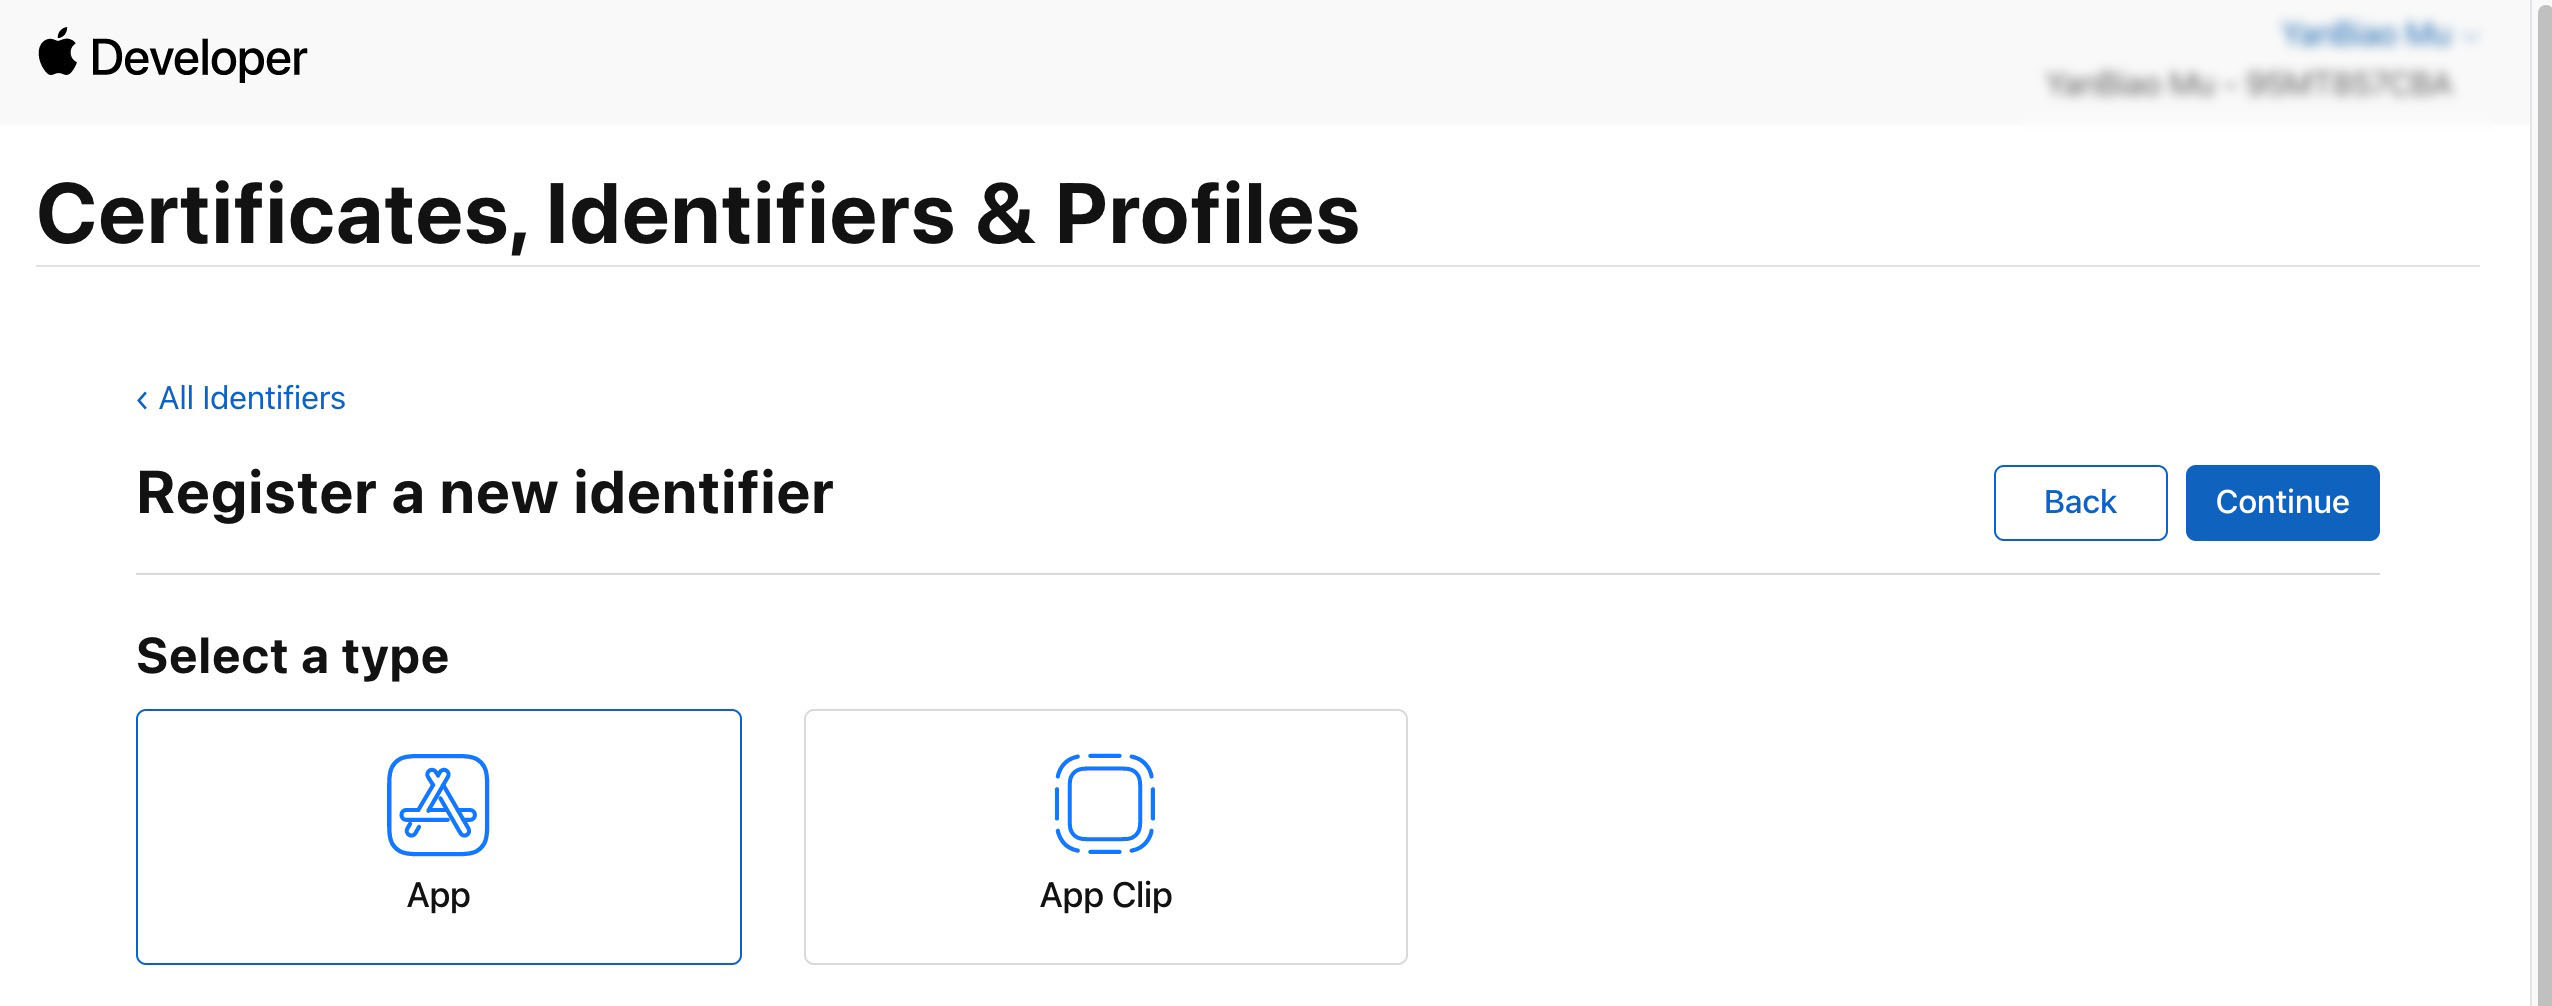
5. Select App and click Continue.
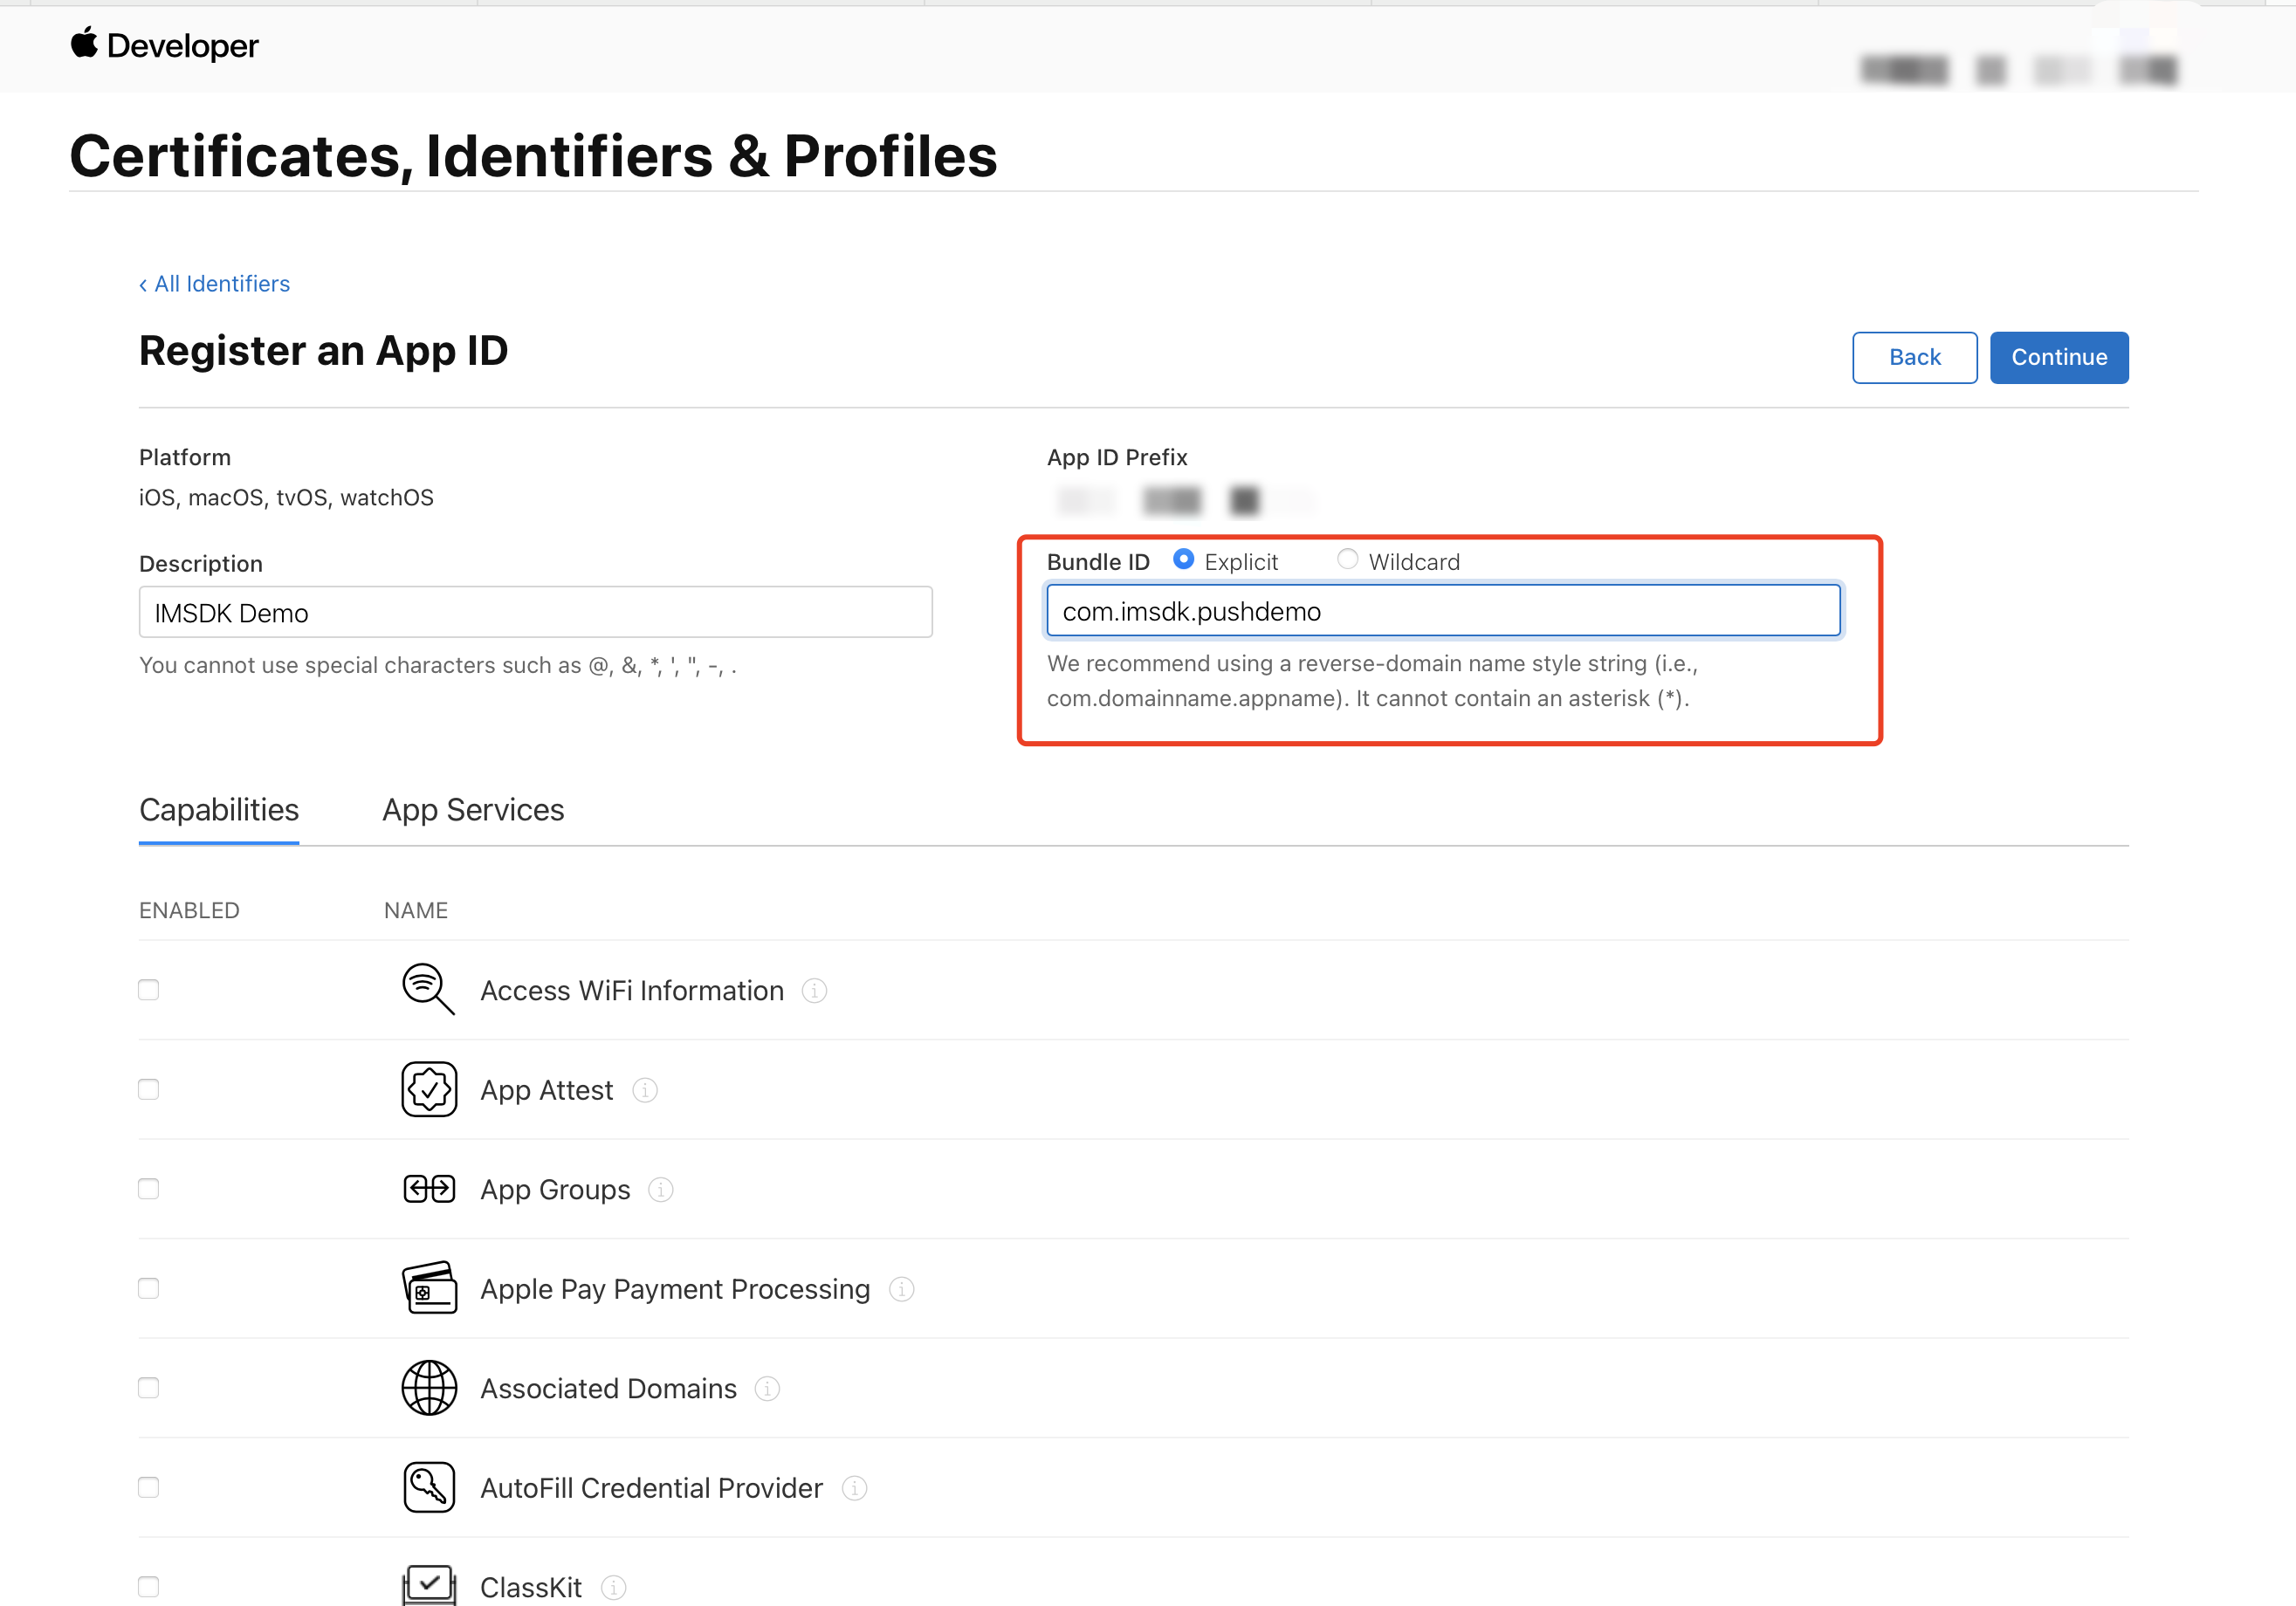
6. Configure the Bundle ID and other required fields, then click Continue.
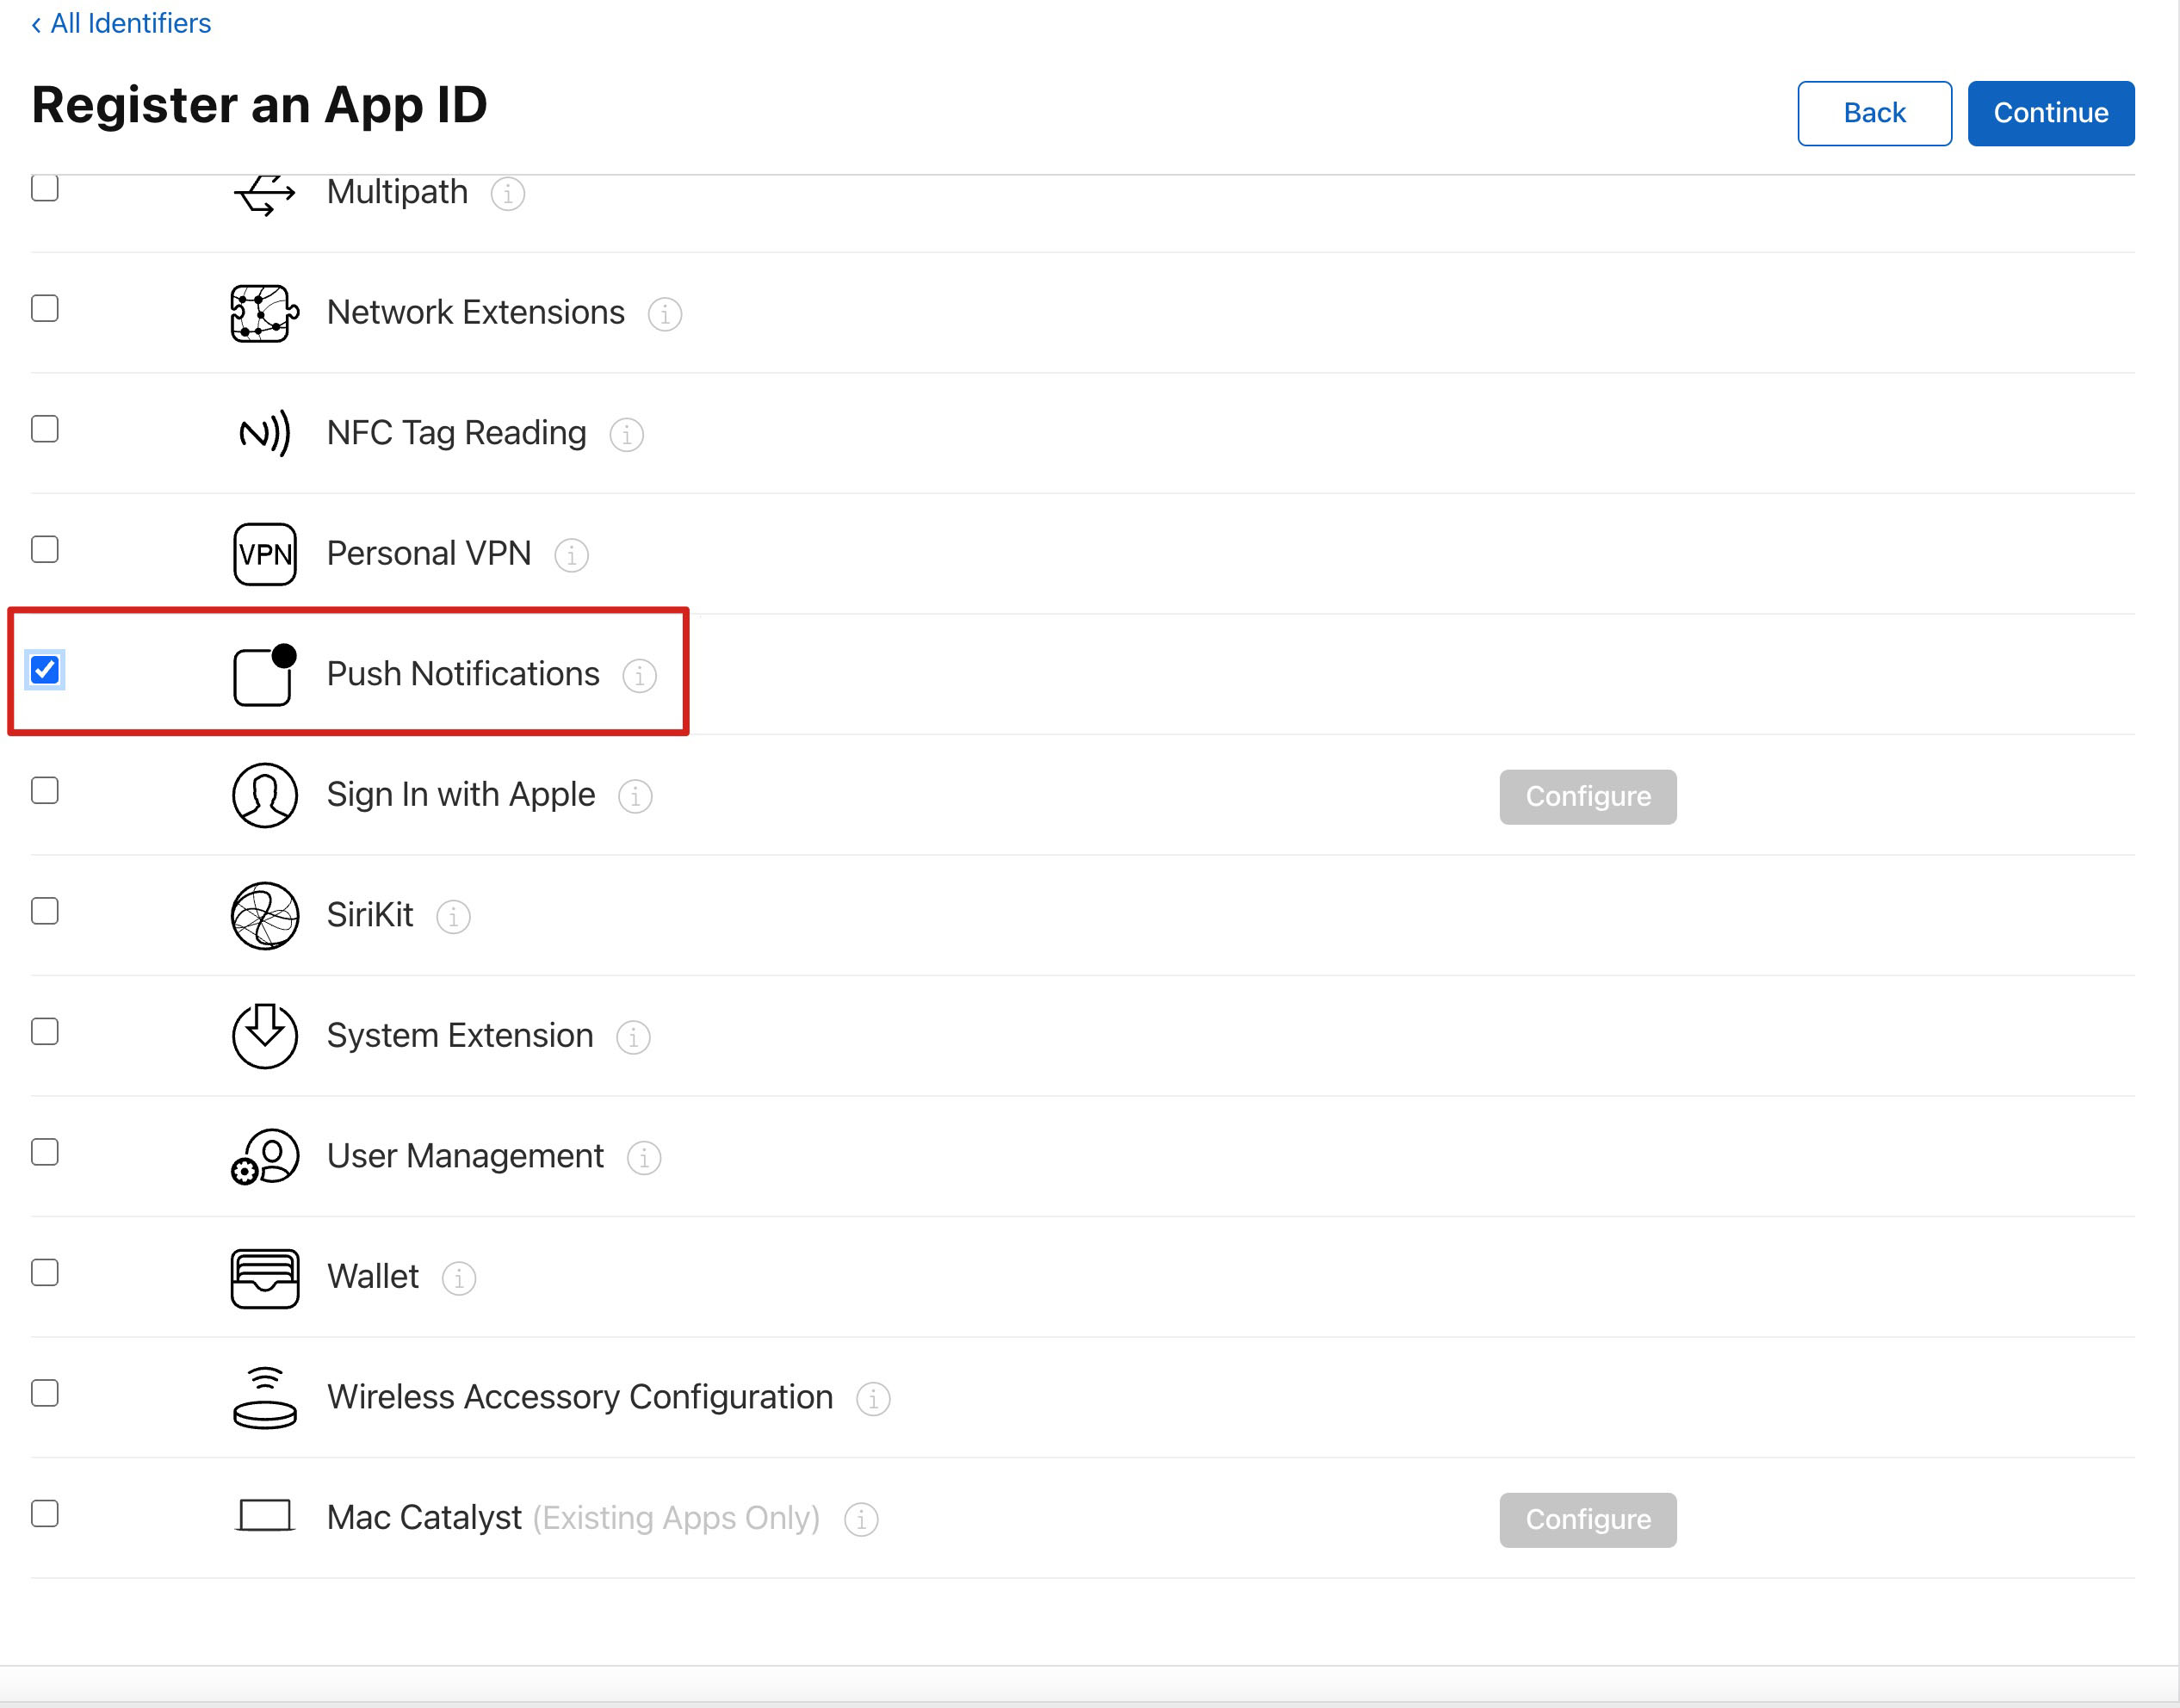
7. Check Push Notifications to enable remote push.
Generating the Certificate
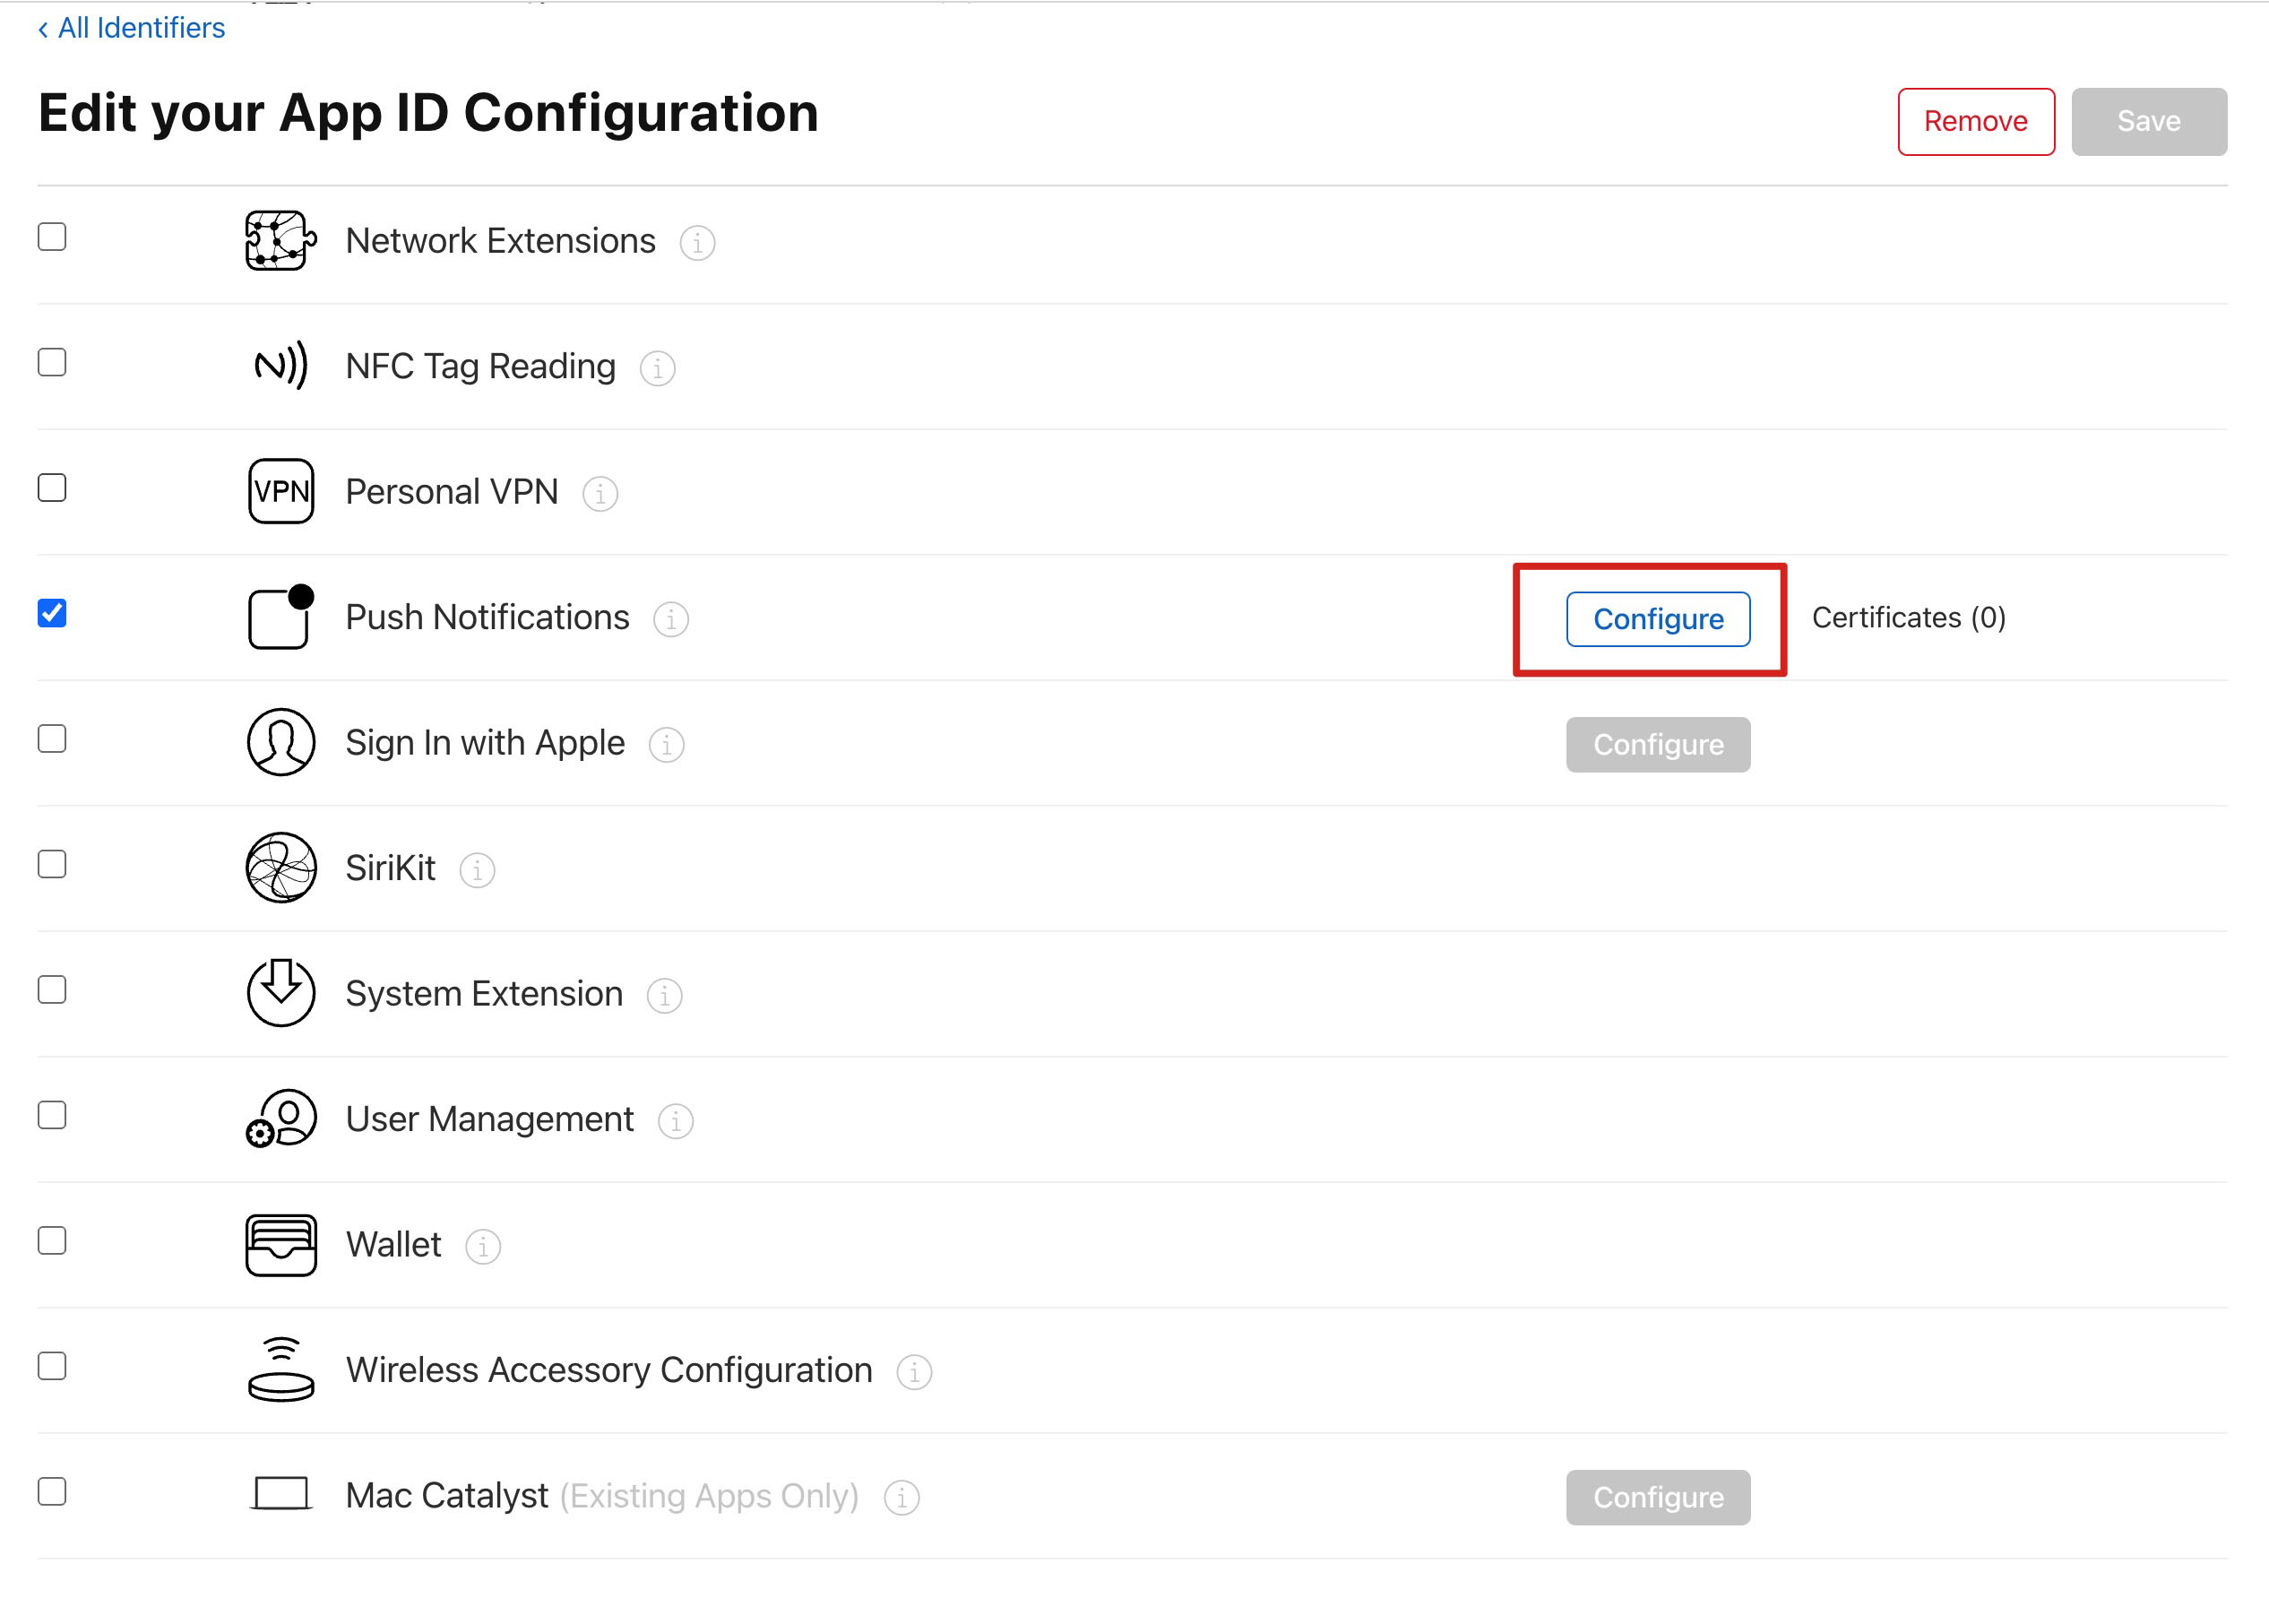
1. Select your AppID and click Configure.
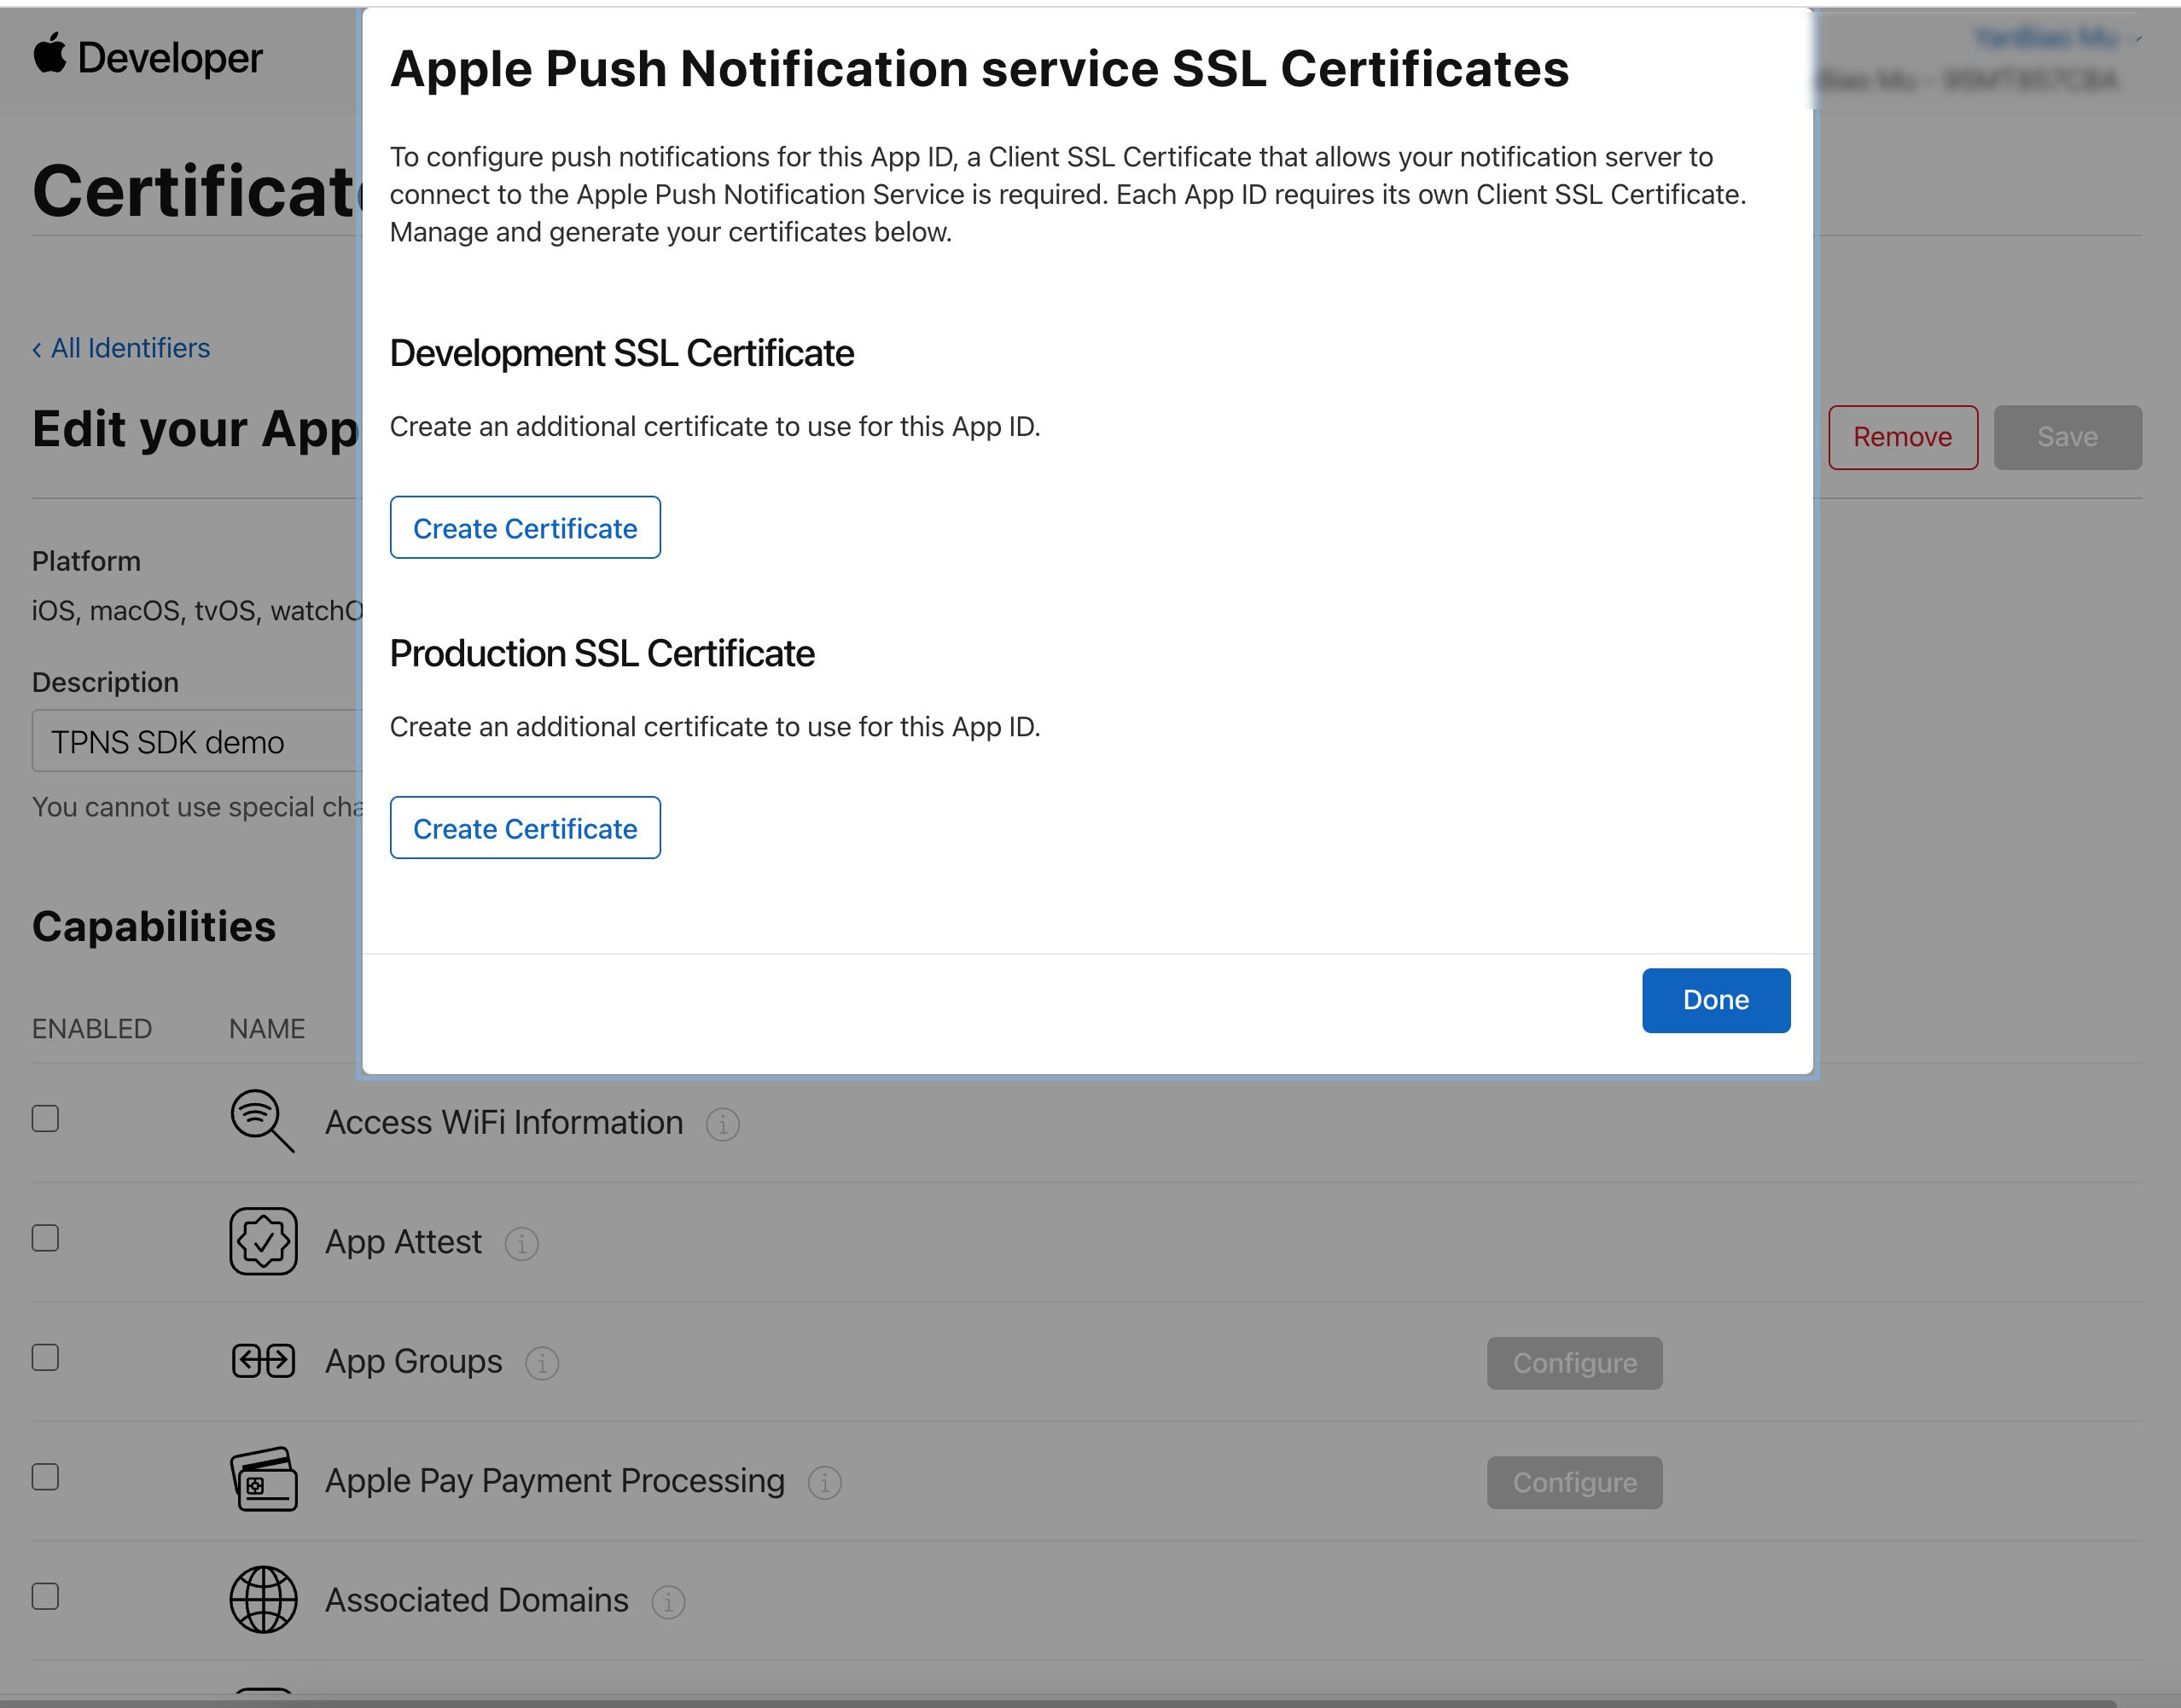
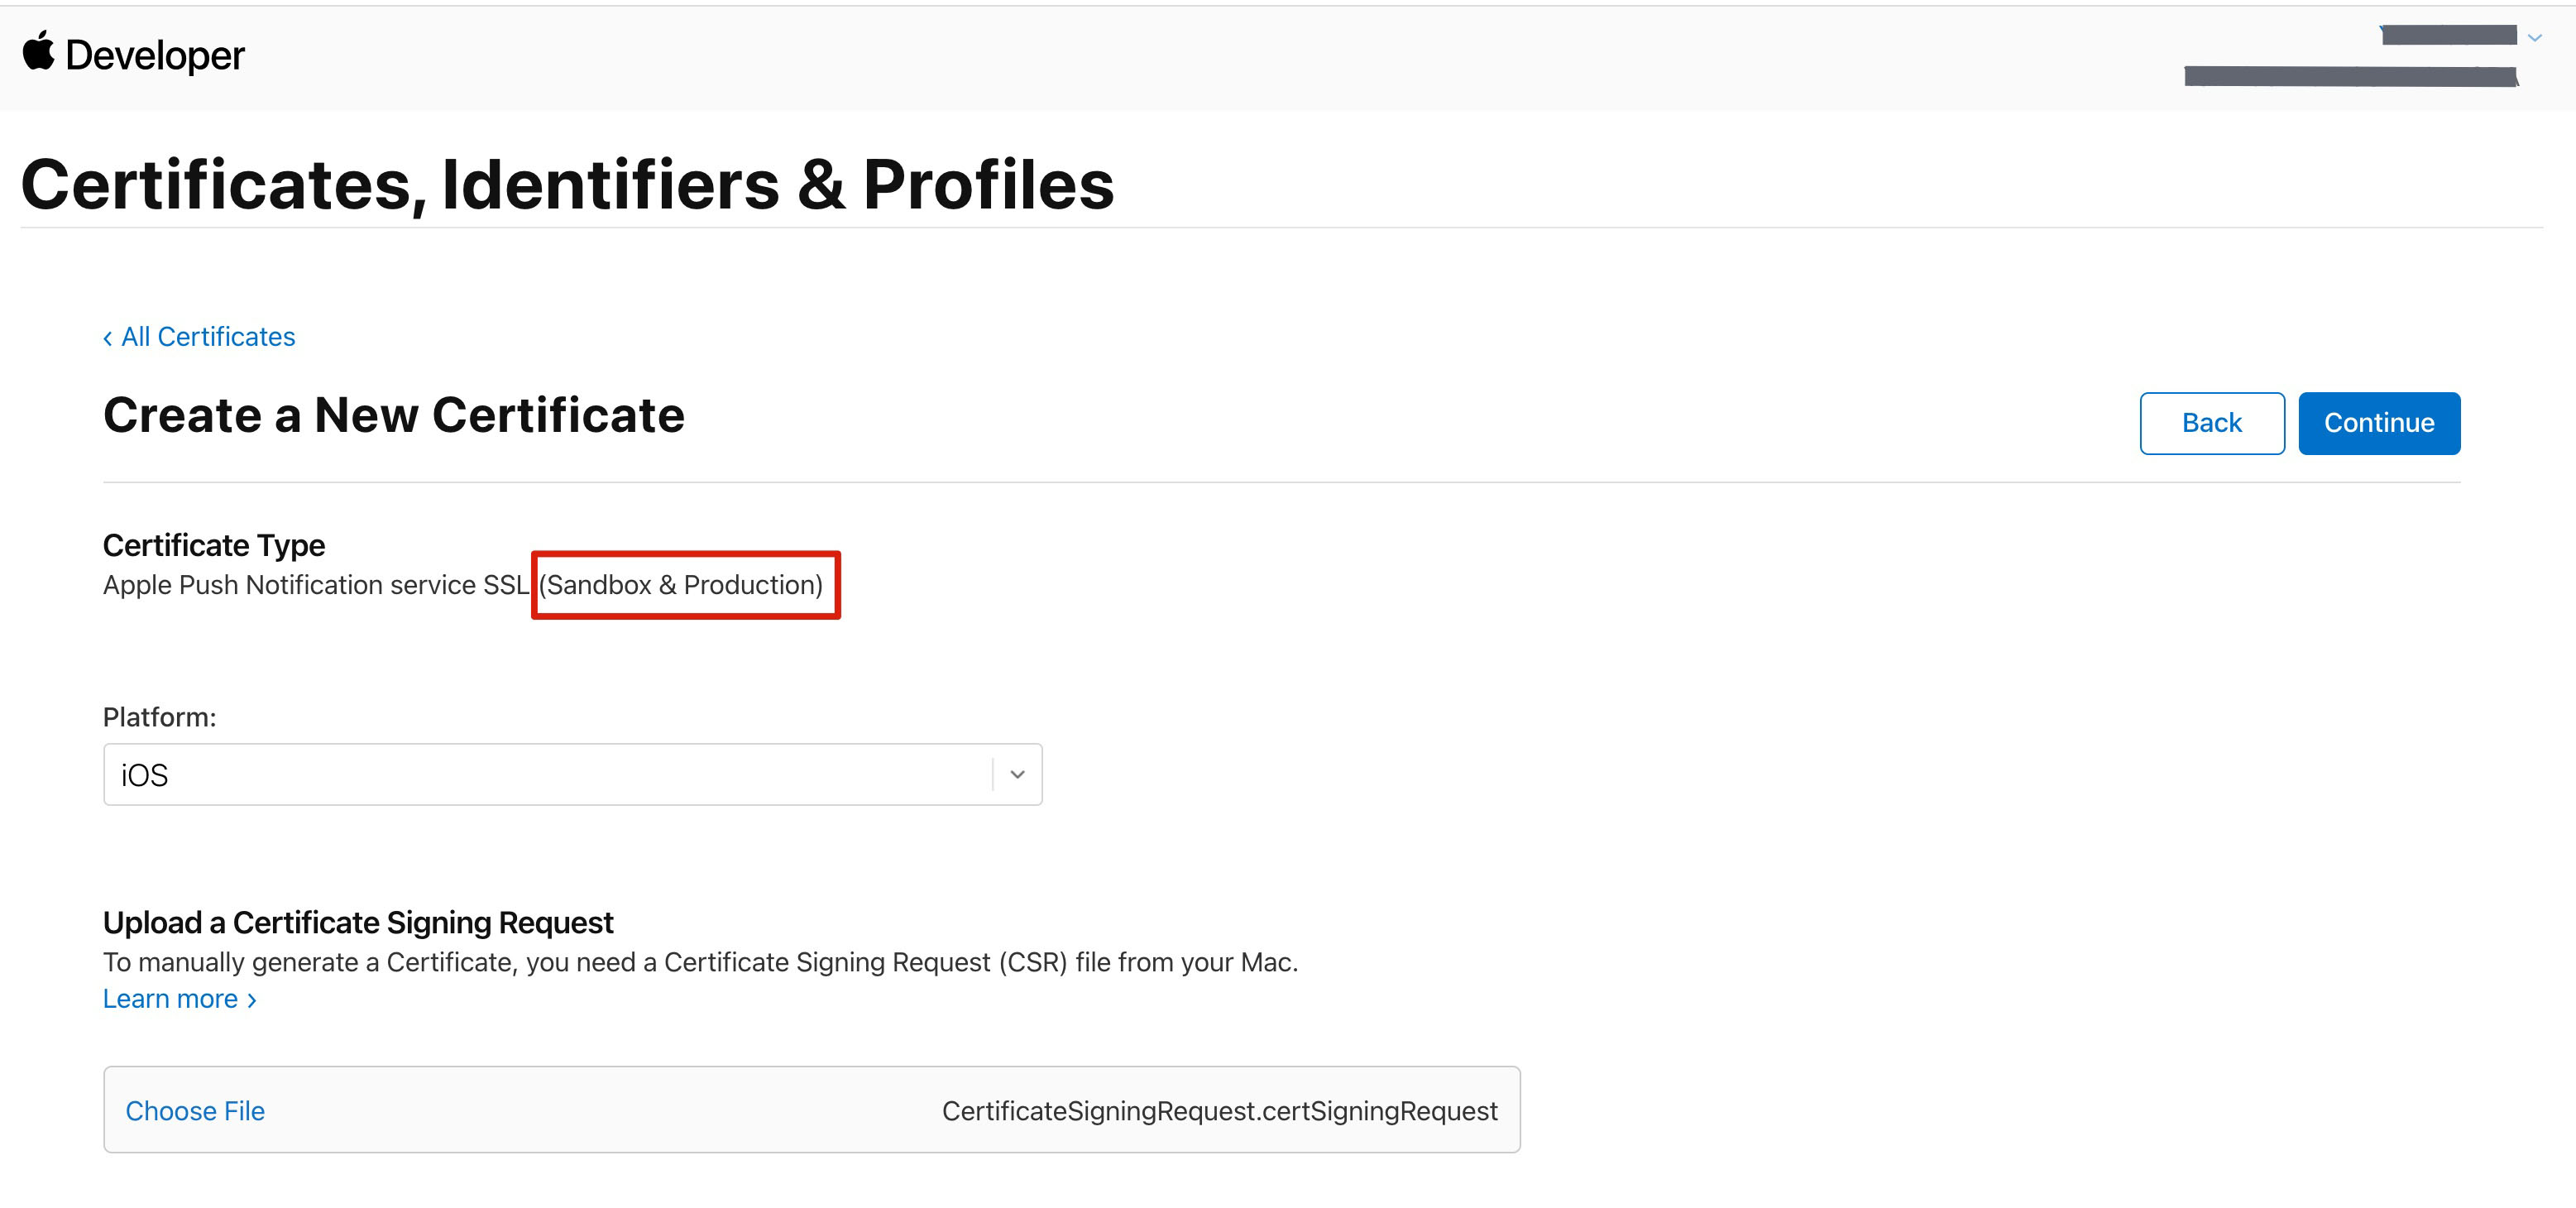
2. In the Apple Push Notification service SSL Certificates section, you'll see two SSL Certificate entries: one for Development, one for Production.
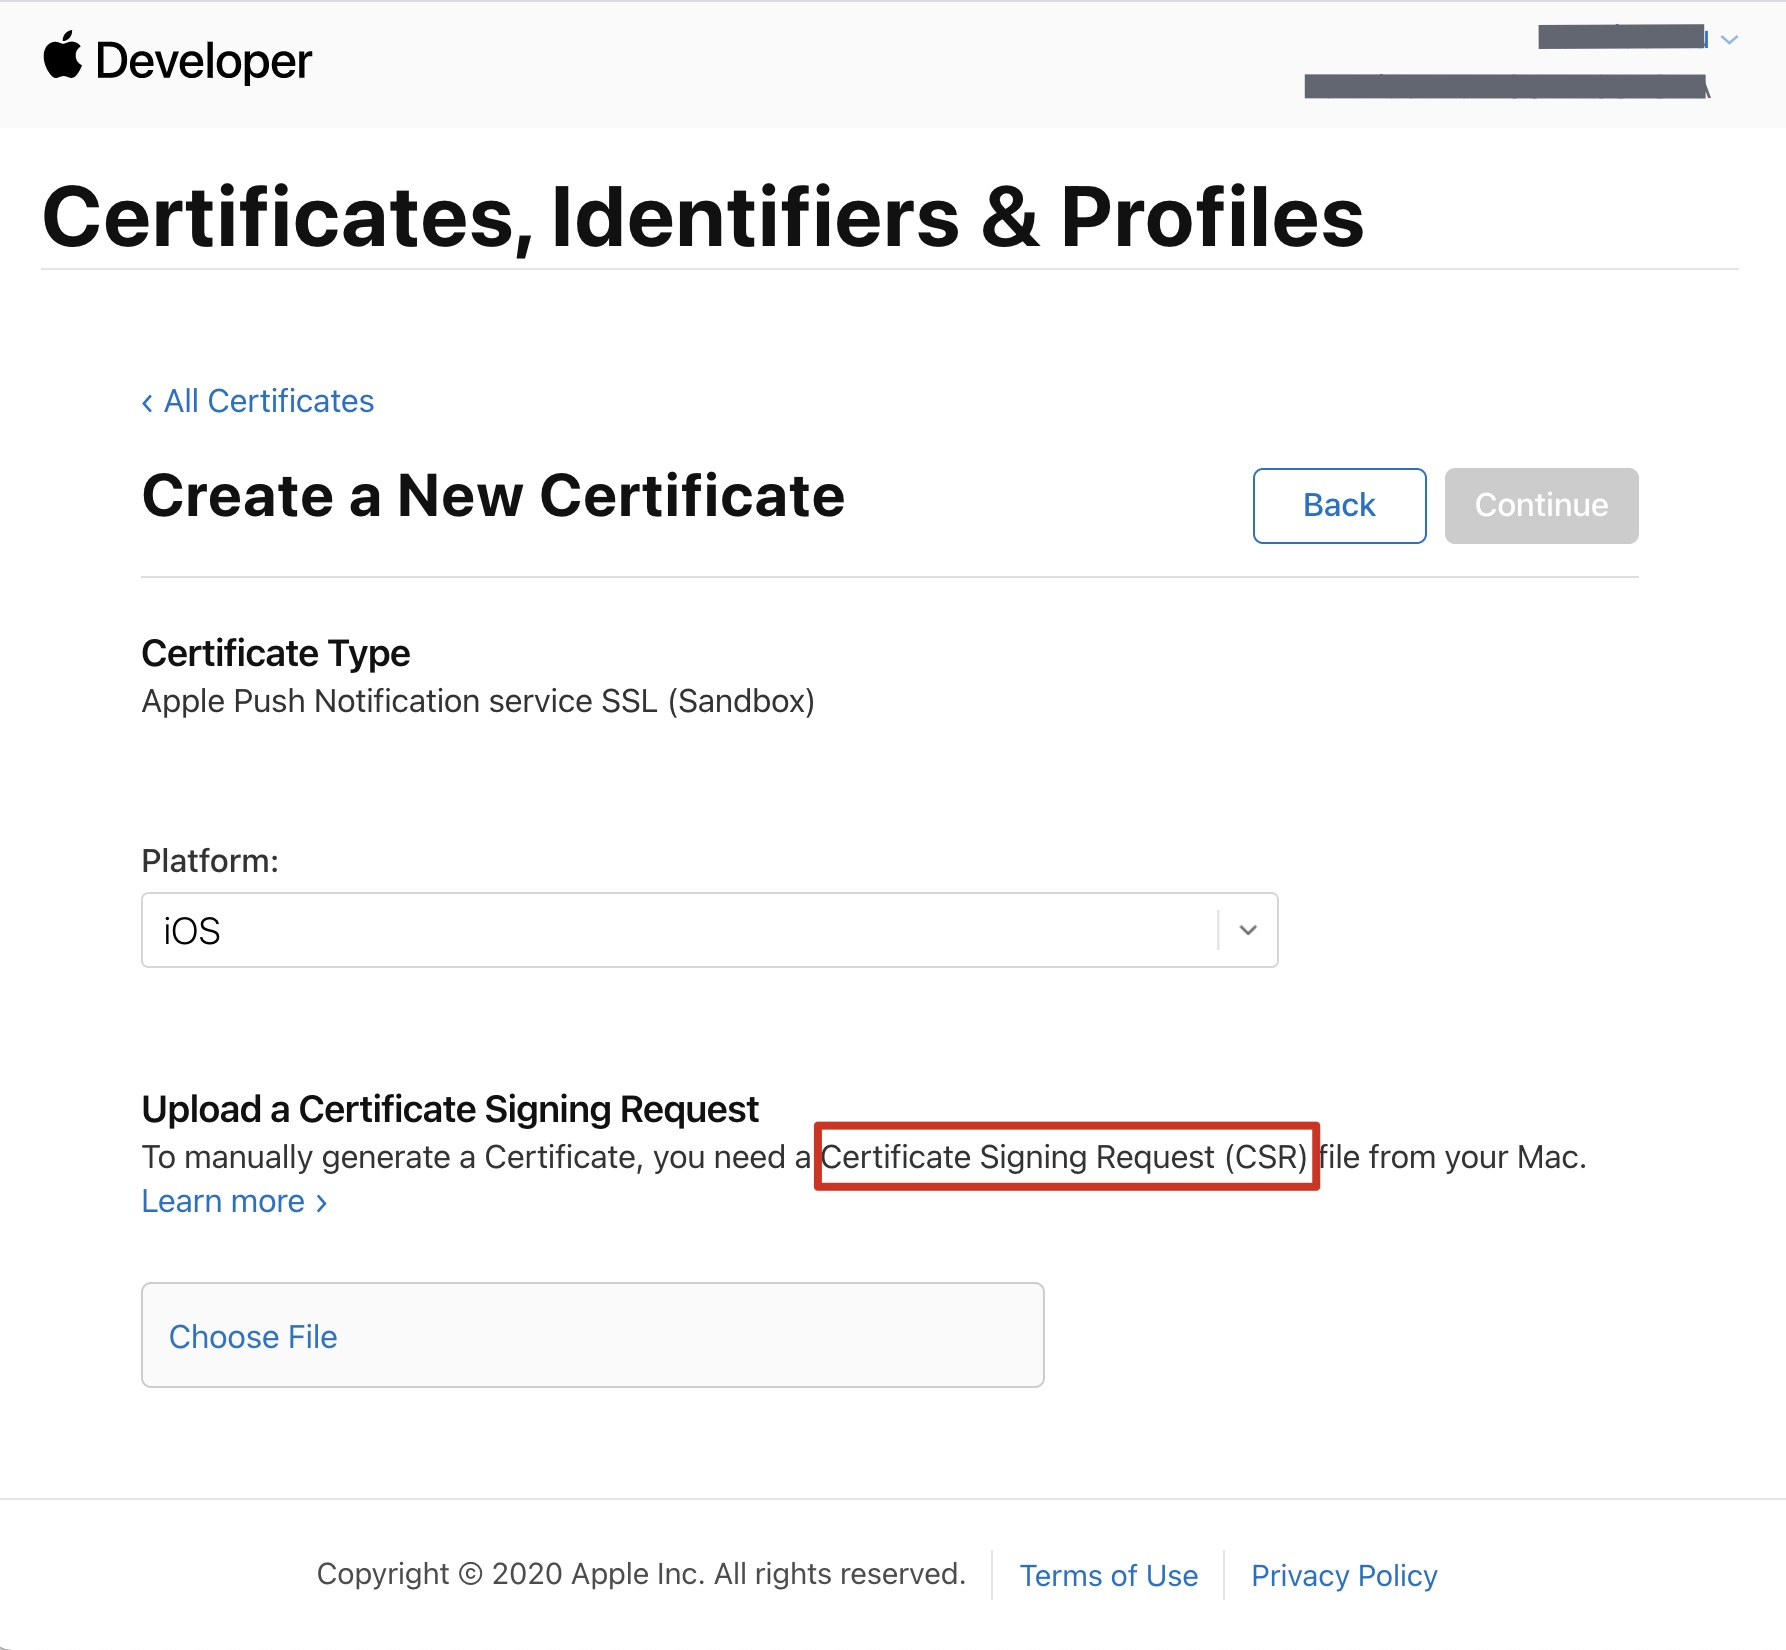
3. Choose Create Certificate for the Development environment. The system will prompt you to provide a Certificate Signing Request (CSR).
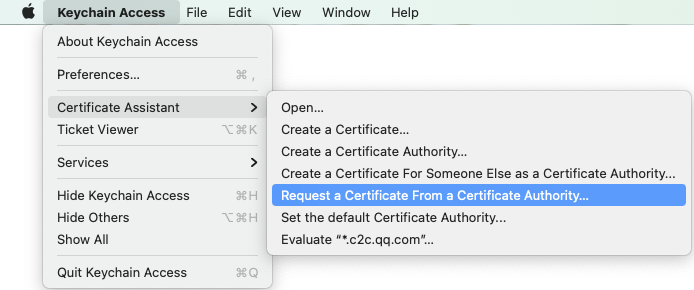
4. On your Mac, open Keychain Access and select Keychain Access > Certificate Assistant > Request a Certificate From a Certificate Authority.
5. Enter your email address and common name (your name or company name), select Save to disk, and click Continue to generate a *.certSigningRequest file.
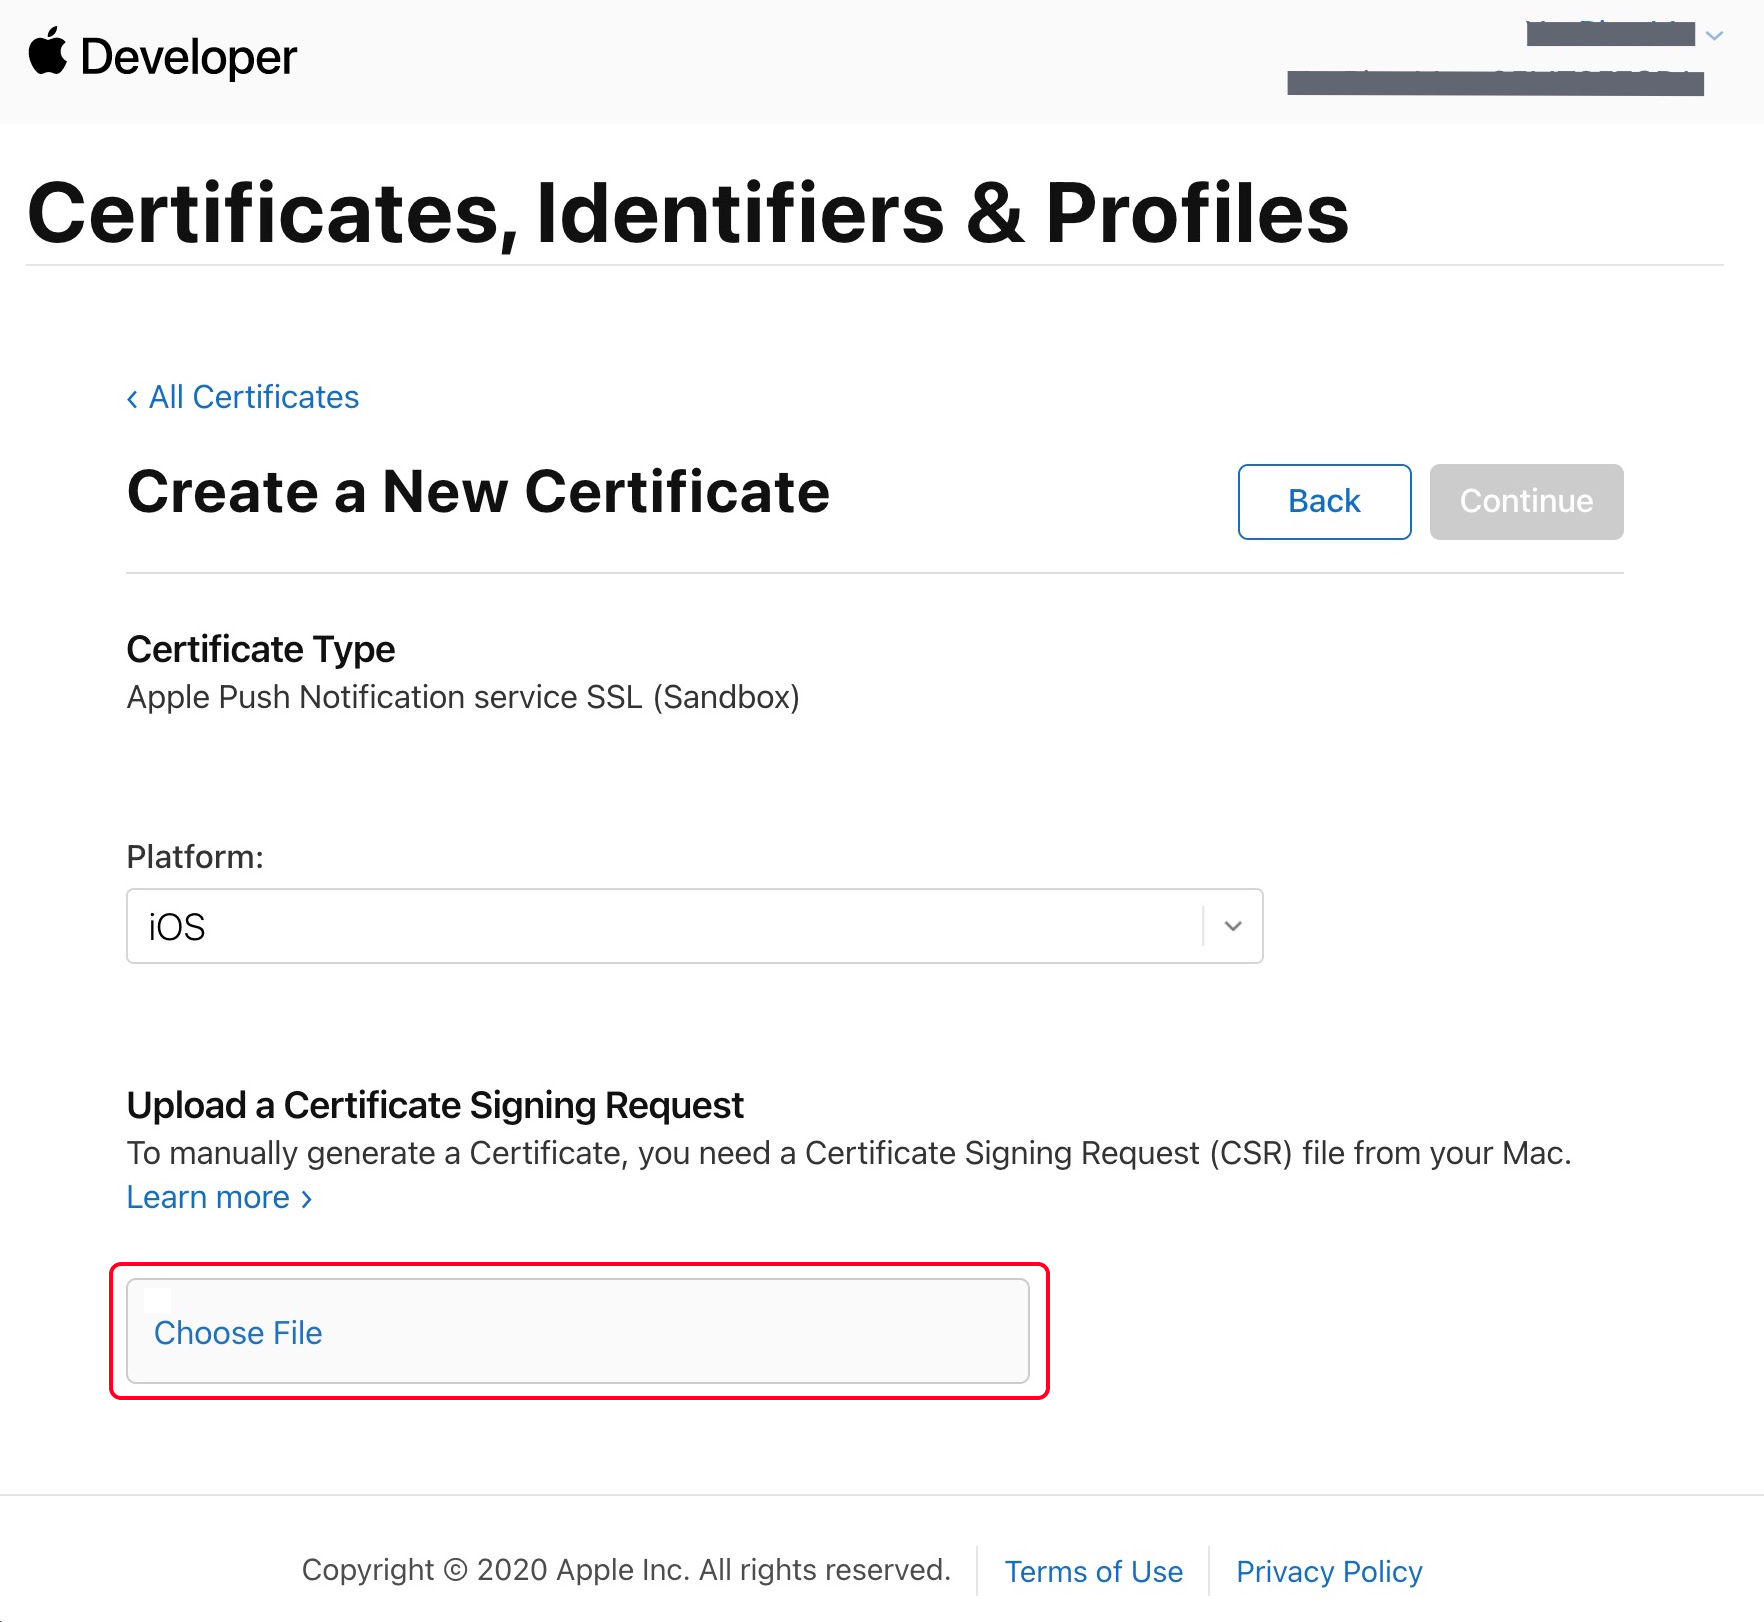
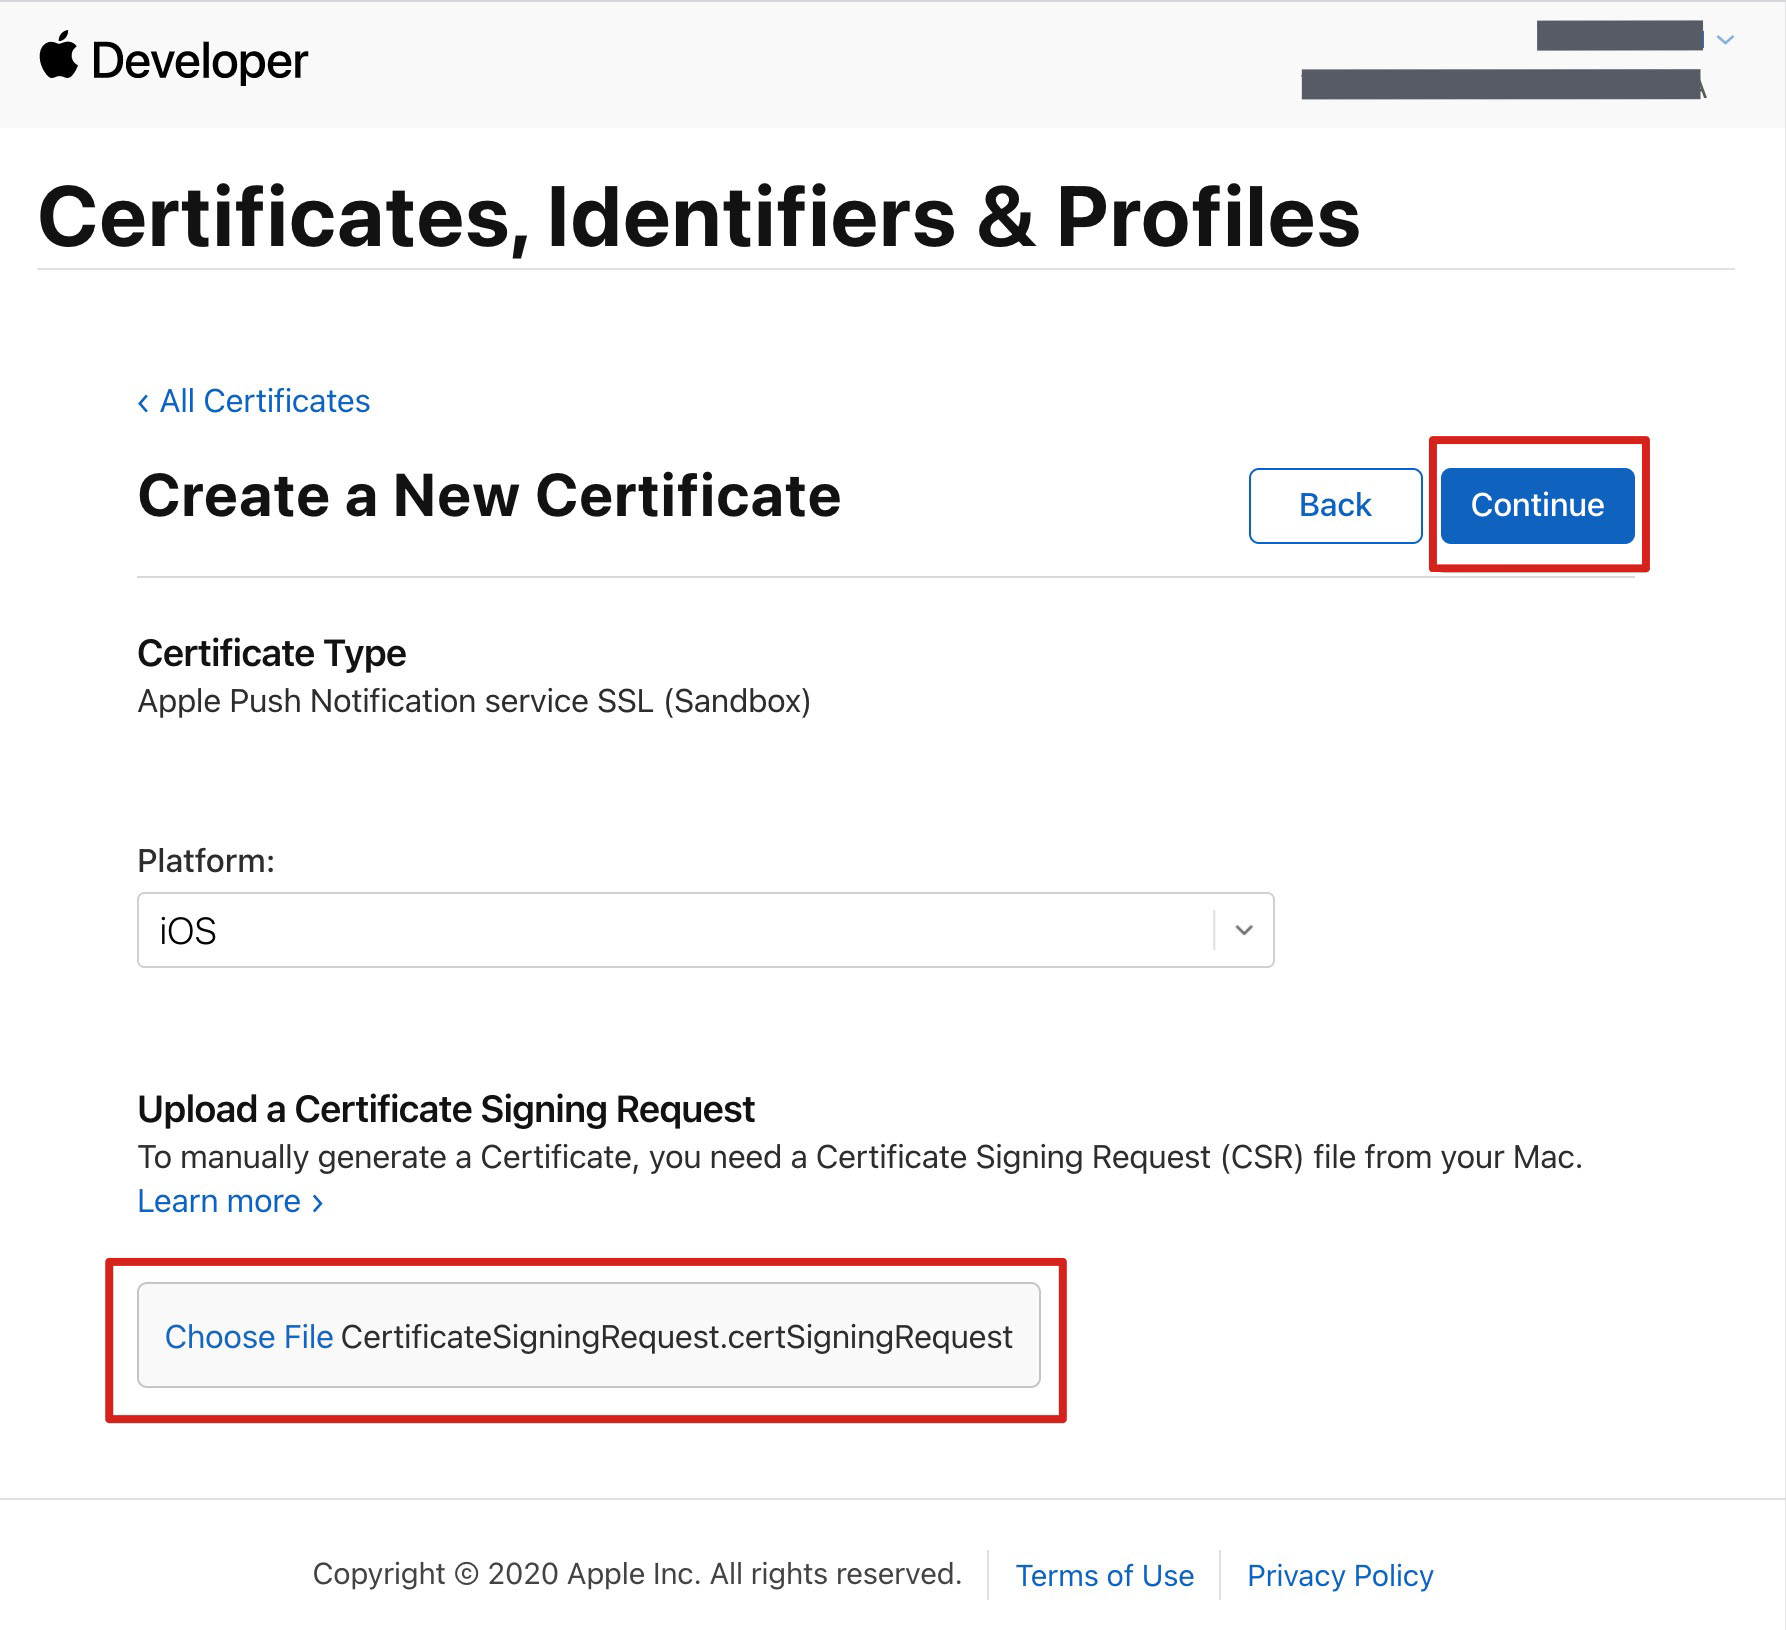
6. Return to the Apple Developer website, click Choose File to upload the generated *.certSigningRequest.
7. Click Continue to generate the push certificate.
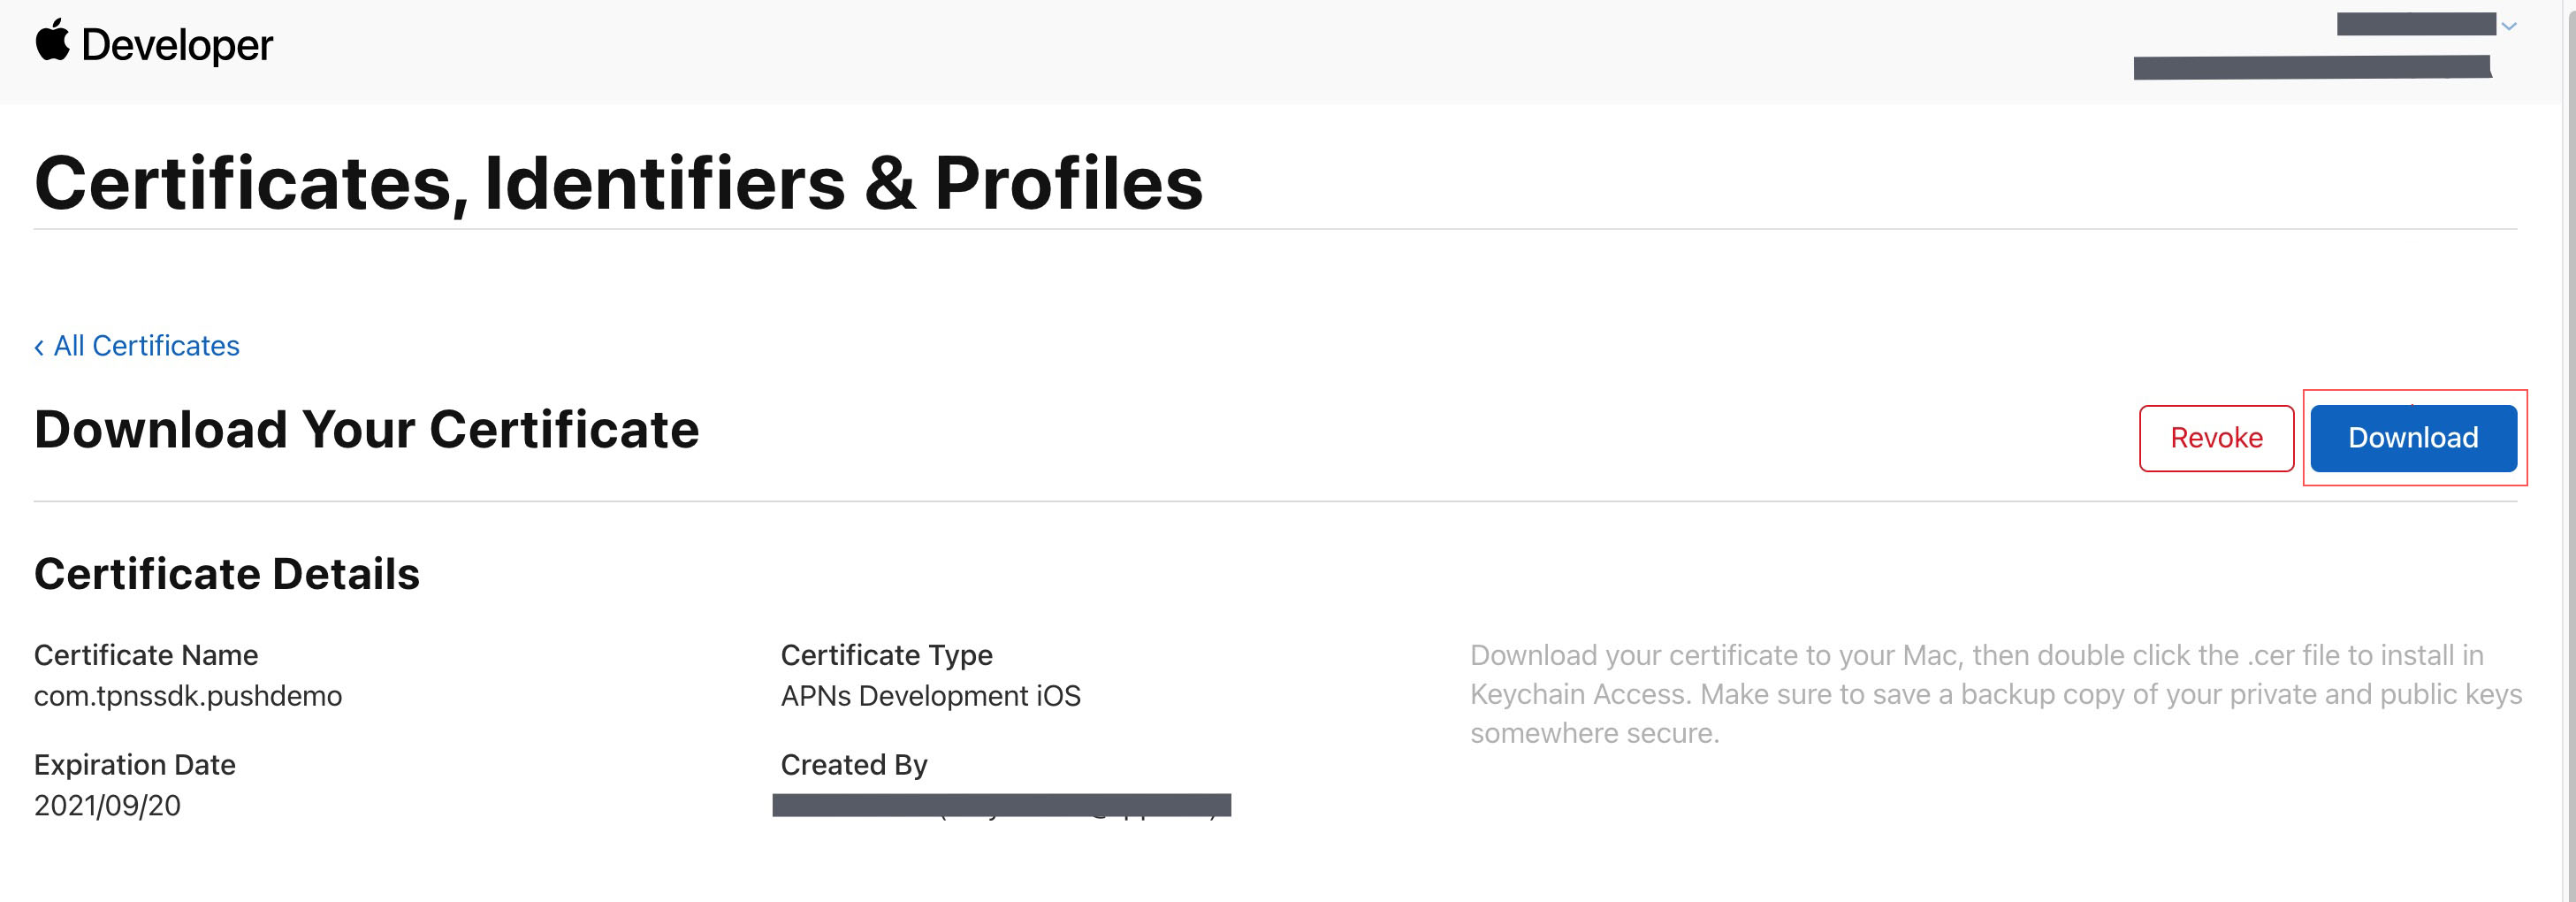
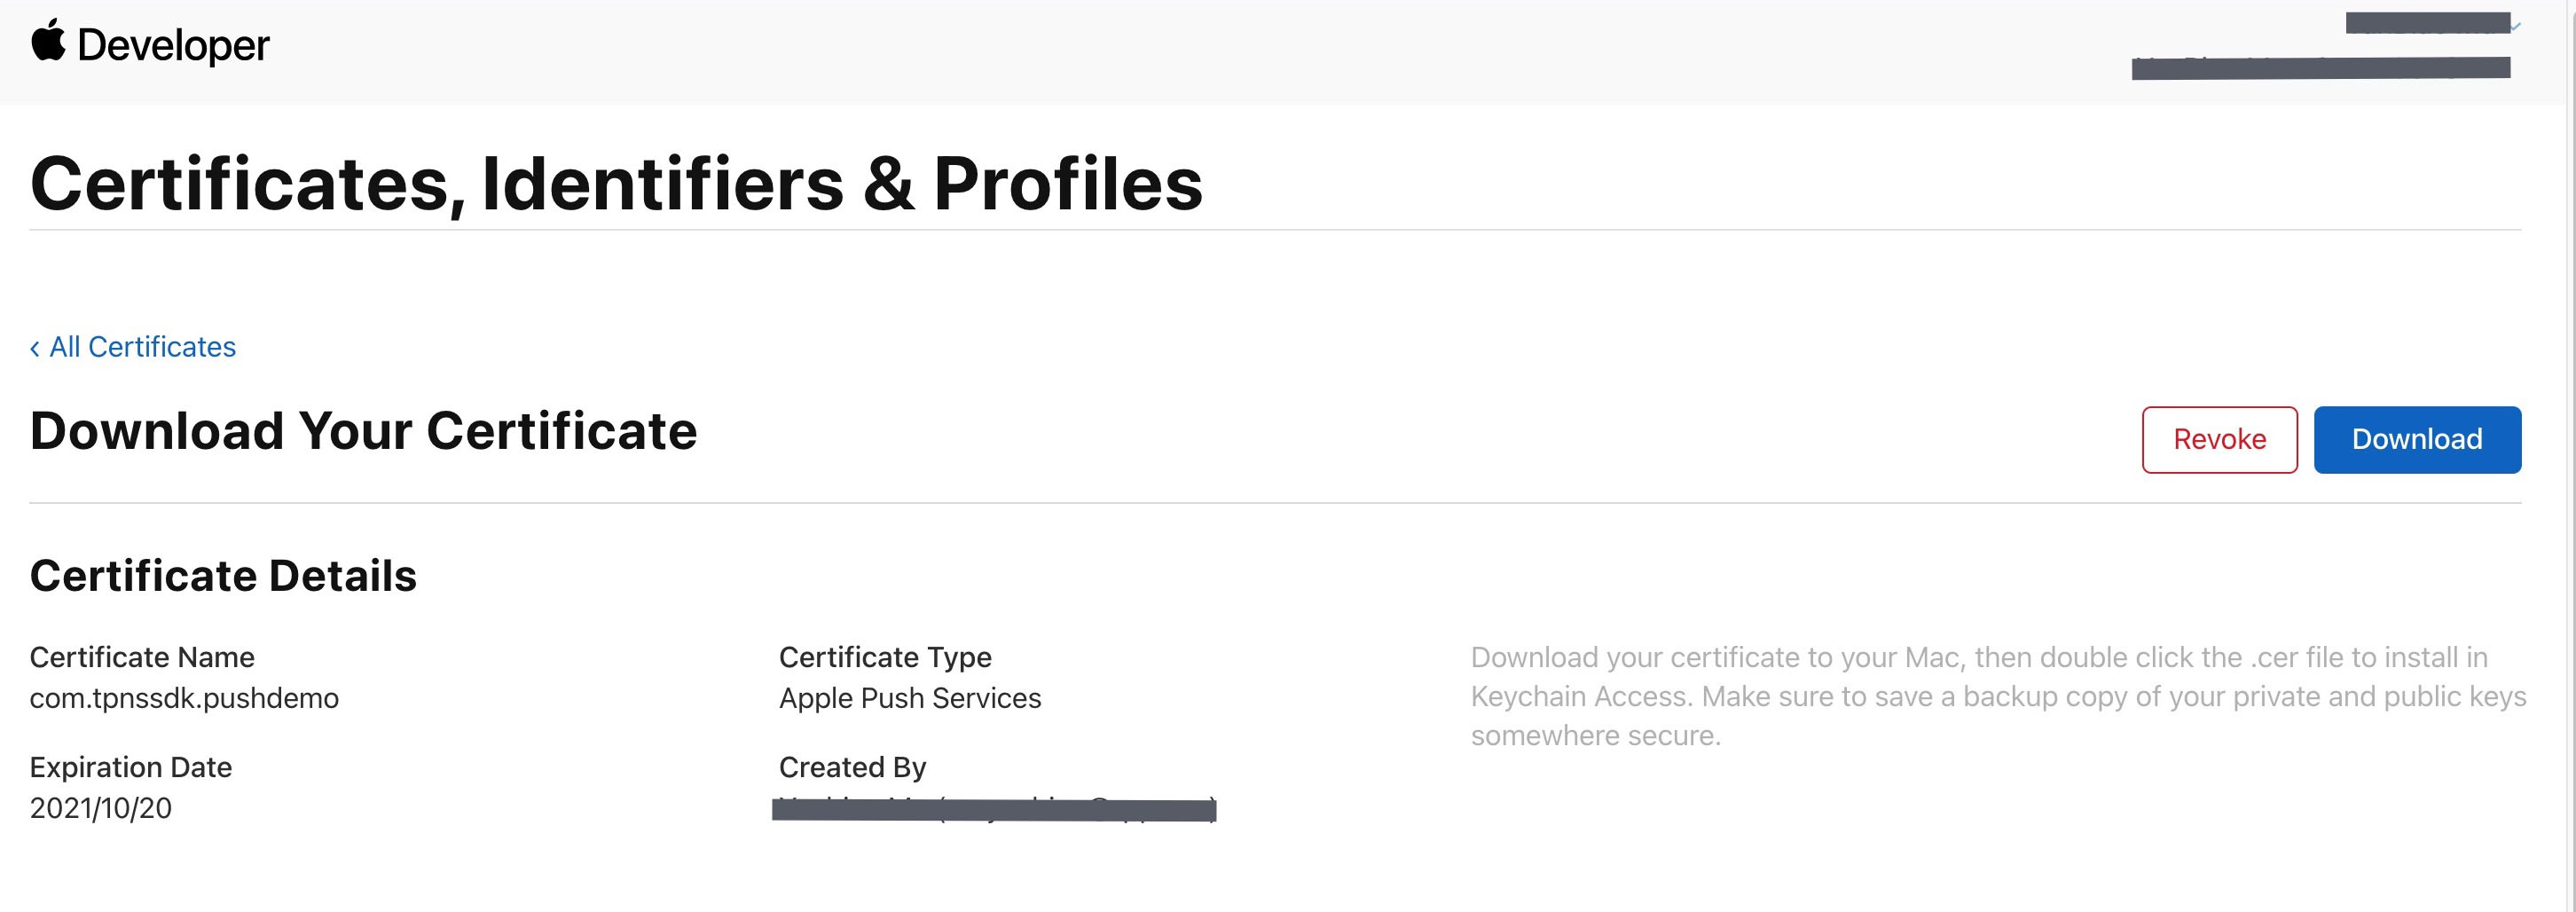
8. Click Download to save the Development SSL Certificate.
9. Repeat steps 1–8 to download the Production SSL Certificate.
Note:
The Production certificate is actually a combined certificate for both Sandbox (Development) and Production environments and can be used for both.
10. Double-click to open the downloaded Development and Production SSL certificates, which will be imported into Keychain.
11. In Keychain Access, under Login > My Certificates, right-click to export the newly created Development (Apple Development IOS Push Service) and Production (Apple Push Services) certificates as .p12 files.
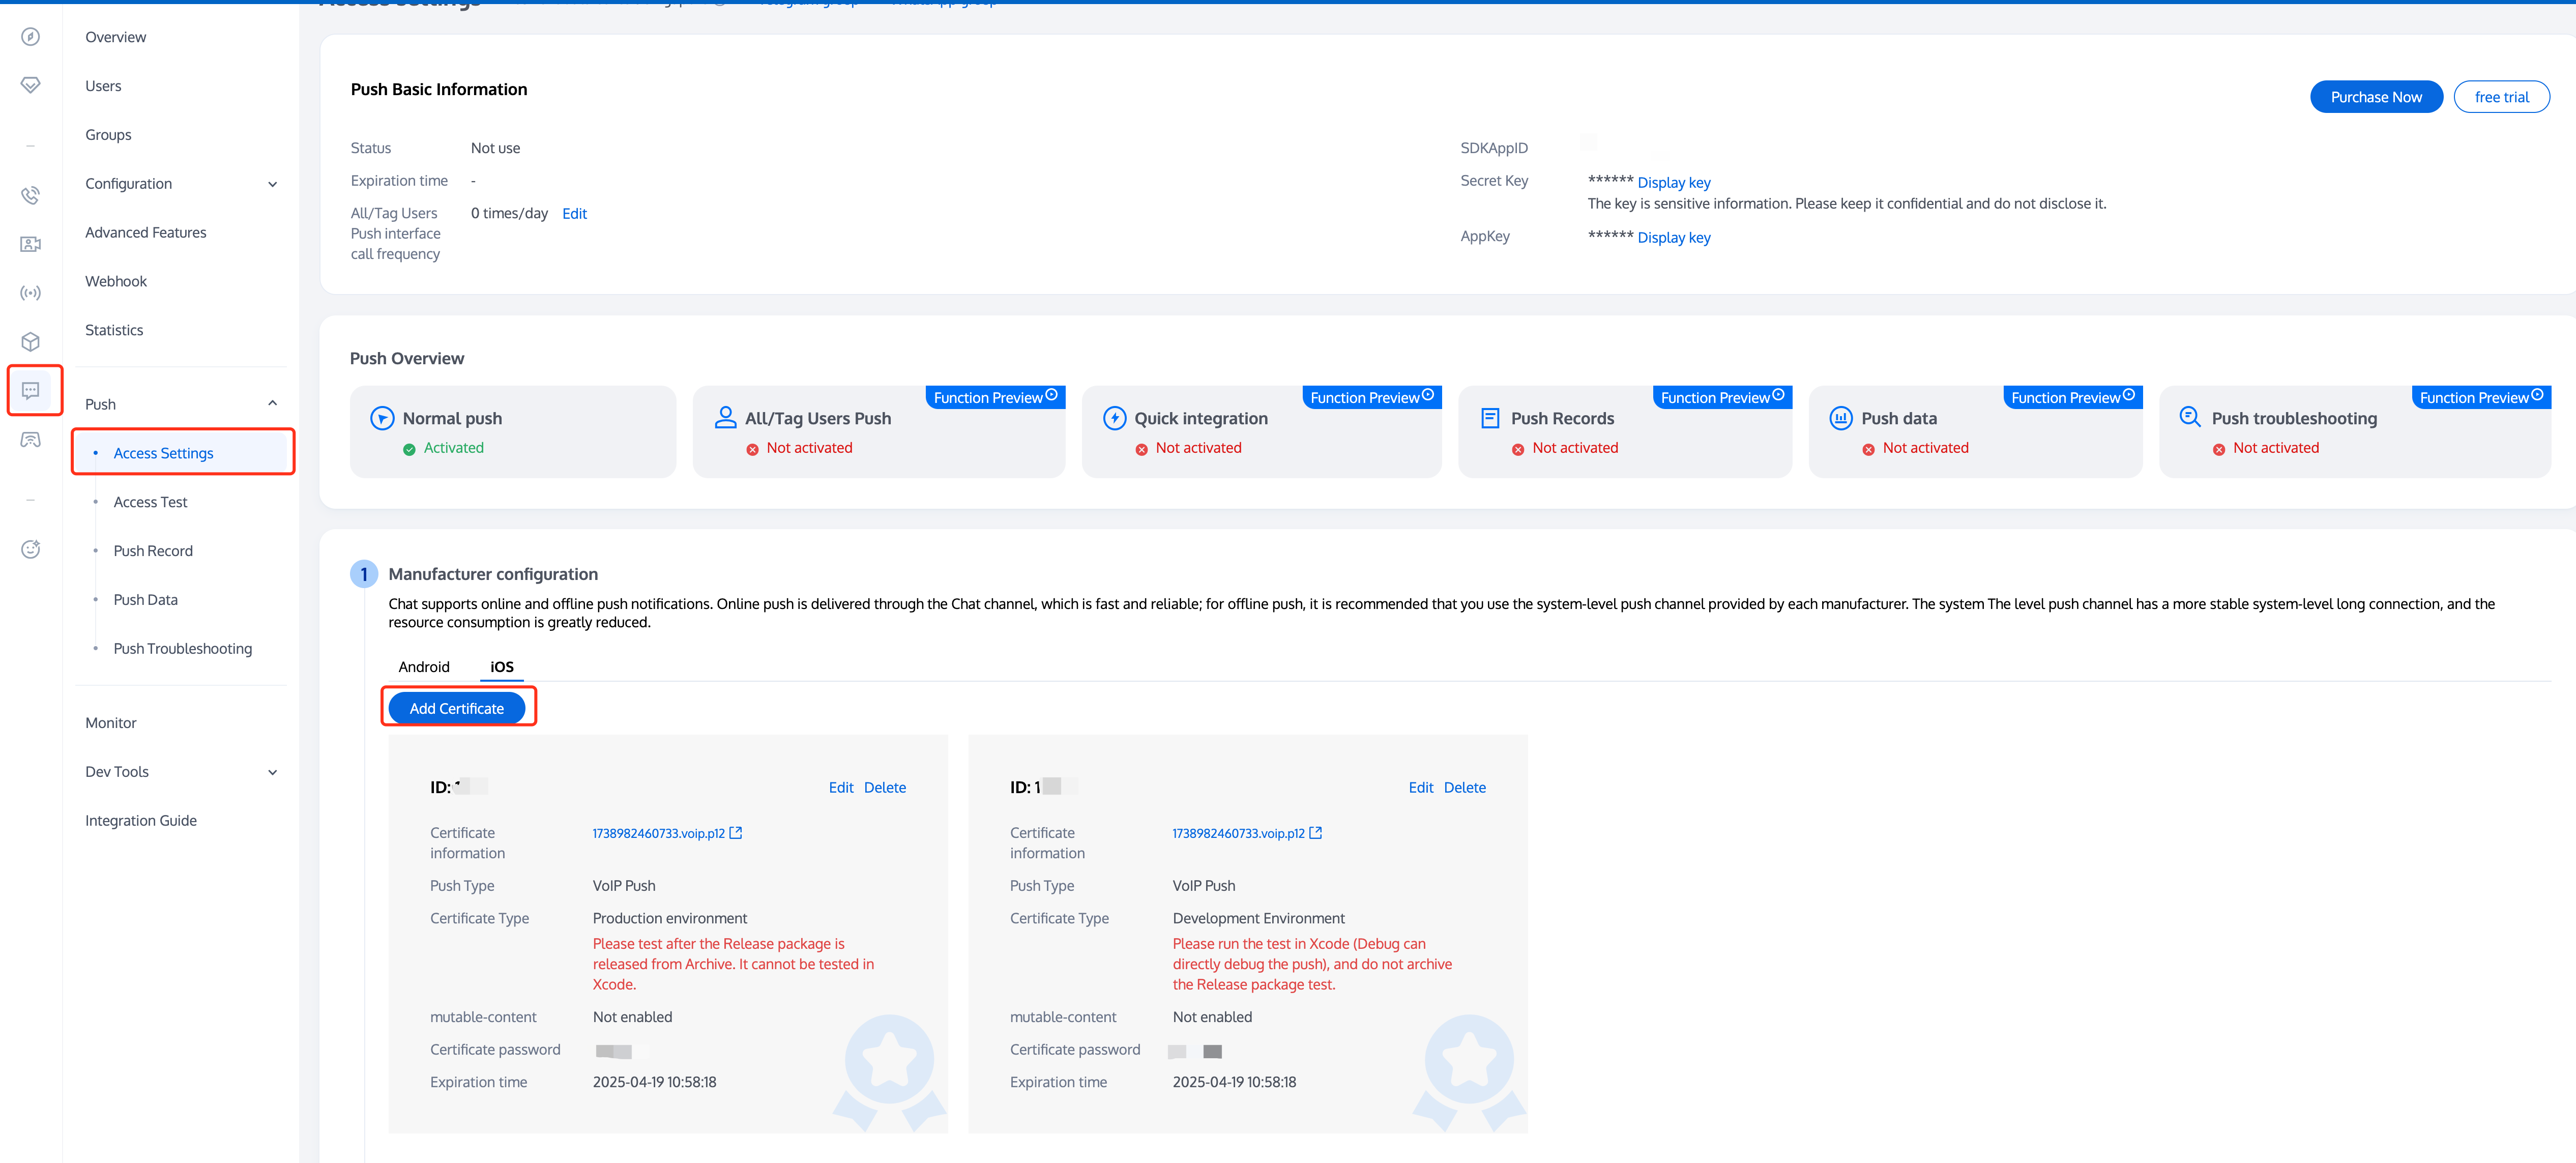
2. Select your Chat application and go to its Access Settings.
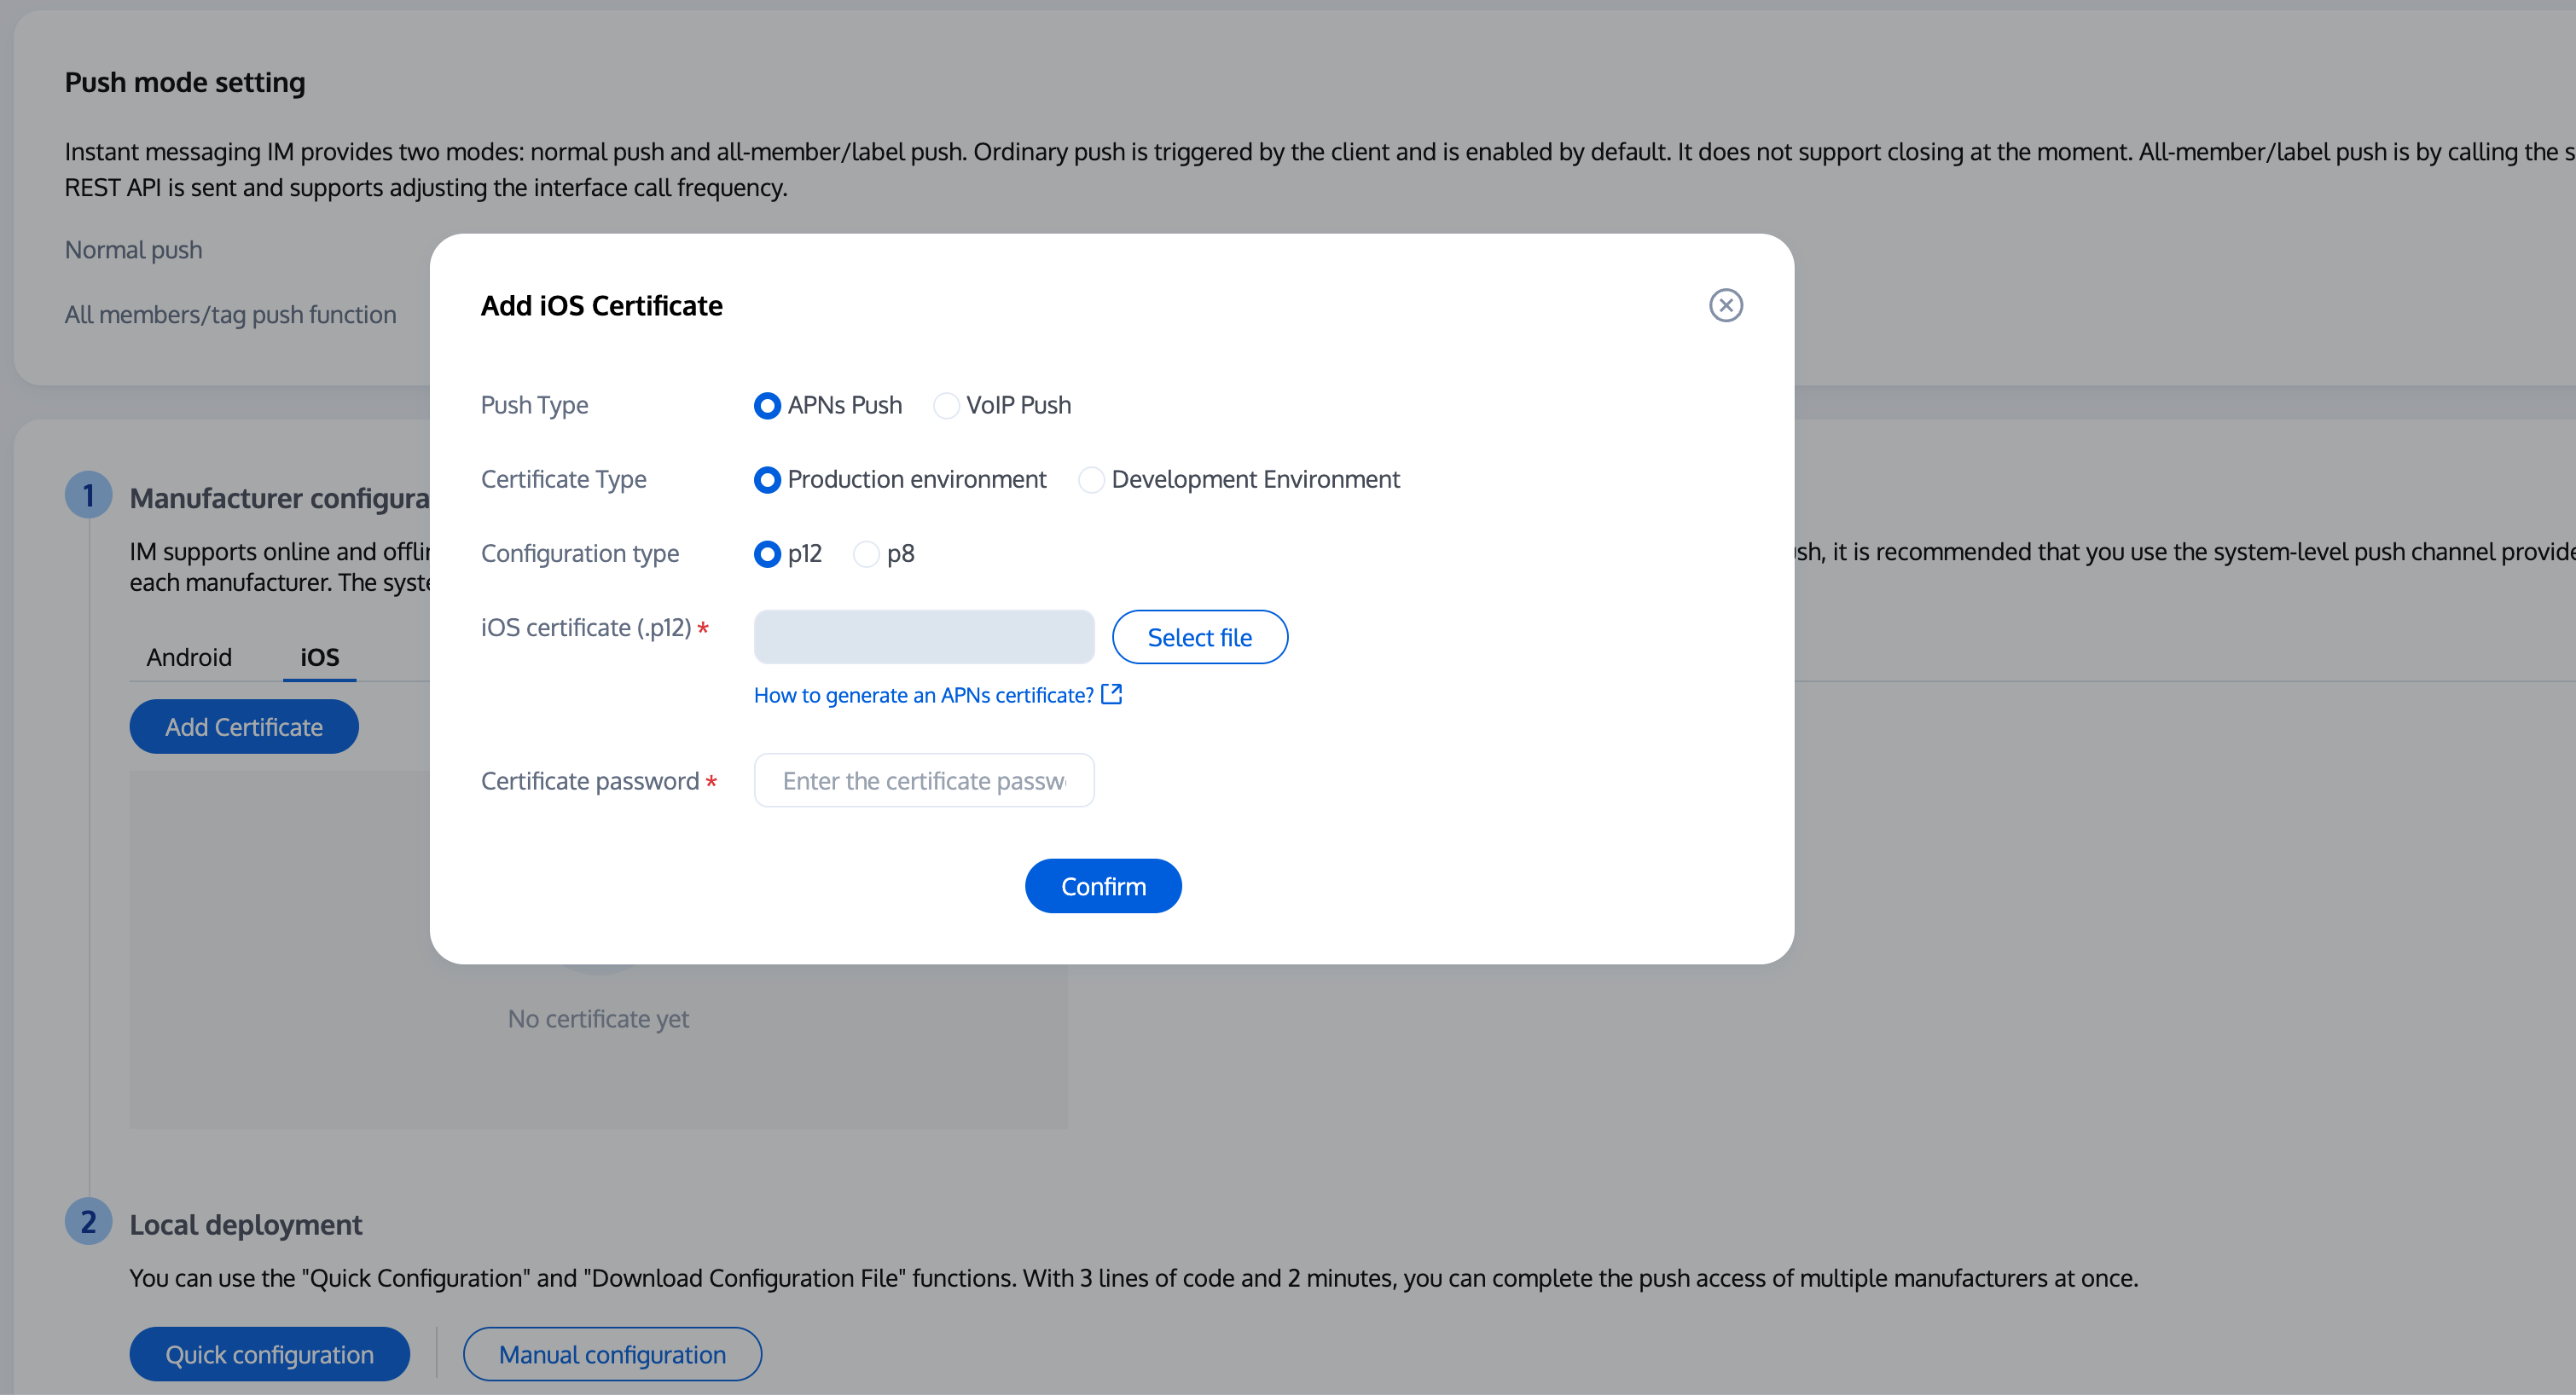
3. In Access Settings, switch to iOS, click Add Certificate, select certificate type, upload the iOS certificate (.p12), set the certificate password, and click Confirm.
Note:
Use only English characters for certificate names (avoid brackets or special characters).
You must set a password when uploading the certificate; otherwise, push notifications will not be received.
Certificates for App Store release must be set to Production environment; otherwise, push notifications will not be received.
The uploaded .p12 certificate must be a valid certificate you applied for.
Step 2: Push Parameter Configuration
Upload the iOS APNs push certificate you obtained to the Chat Console.
The Chat Console assigns a certificate ID. Register push notifications by passing this certificate ID (apnsCertificateID) as follows:
1. Register the push plugin immediately after login completes.
Call TencentCloudChatPush().registerPush, passing the click callback function you previously defined.
You may also pass apnsCertificateID (iOS certificate ID) and androidPushOEMConfig (Android vendor push configuration). These were specified in earlier steps; if unchanged, you can omit them.
TencentCloudChatPush().registerPush(
onNotificationClicked: _onNotificationClicked,
sdkAppId:Your sdkAppId,
appKey:"Client secret",
apnsCertificateID:Your certificate ID);
2. Implement Android auto-login.
FCM's data mode wakes up the offline app, so you also need to implement login and app launch in onAppWakeUpEvent.
You can use third-party plugins (such as flutter_local_notifications) to display notifications, or create a native NotificationView for advanced notification styles. Here, we demonstrate using flutter_local_notifications:
You need to listen for incoming call events. After login (Step 1), if there are offline incoming call events, CallStore will automatically resend them. You can display custom push notifications (Step 2) for these events:
1. Listen for incoming call events: Subscribe to the onCallReceived event. This event is triggered when an incoming call is received and provides call details.
2. Show incoming call notification: When the onCallReceived event is triggered, display the notification UI using the call information from the event. In the callback, use the event's call data to trigger your custom push notification (see Step 2).
Not receiving push notifications and backend reports a bad deviceToken?
Apple's deviceToken depends on the current build environment. Please check:
During integration, ensure the businessID used for push parameter configuration matches the certificate ID for the corresponding environment.
Console certificate creation check:
Production environment certificate: Upload as Apple Push Notification Service SSL (Sandbox & Production), and test after archiving a Release build. Do not test directly in Xcode.
Development environment certificate: Archive a Release build for testing, and select the correct certificate type when creating.
In the iOS development environment, registration sometimes does not return deviceToken or APNs token request fails?
This is typically caused by APNs service instability. Try the following:
1. Insert a SIM card and test using a 4G network.
2. Uninstall and reinstall, restart the app, or reboot the device and retry.
3. Test with a production build.
4. Test on a different iOS device.
Incoming call UI does not appear after app is killed?
Confirm that push notifications are received. If not, check if the IM console certificate was uploaded correctly. Refer to Step 1 of Vendor Configuration.
Verify that FCM Data Message is selected in the console.
Check if data messages are being received. Filter logs (keyword: TIMPush) and look for the log shown below.
Confirm that auto-login is implemented. Only after auto-login will call requests be pulled and the incoming call UI displayed.