
Demo 실행
TUIRoomKit is a UI solution for audio/video conference rooms developed by TRTC. This update introduces a new atomic component access model, enabling developers to flexibly assemble atomic components to create custom audio/video conference room interfaces.
This guide walks you through running the TUIRoomKit sample project, so you can explore key features such as pre-meeting device checks, multi-party rooms, screen sharing, participant management, and in-meeting call invitations.
Feature Showcase
Pre-Meeting Preparation
Standard Video Conference
Prerequisites
Activate the Service
Follow the instructions in Activate the Service to obtain the TUIRoomKit trial version and retrieve your SDKAppID and SDKSecretKey.
SDKAppID: Application identifier. TRTC uses
SDKAppID for billing and analytics.SDKSecretKey: Application secret, used to initialize secret information in the configuration file.
Environment Setup
Node.js: Version 18.19.1 or higher (LTS recommended)
React: Version 18.2.0 or higher
Modern Browser: Must support WebRTC APIs
Devices: Camera, microphone, speakers
Instructions
Step 1: Download Source Code
Clone the project from GitHub to your local machine.
git clone https://github.com/Tencent-RTC/TUIRoomKit.git --depth=1
Step 2: Enter the Project Root Directory
cd TUIRoomKit/Web/example/vite-react-ts
Step 3: Install Dependencies
Install all required dependencies in the project root directory.
npm install
pnpm install
yarn
Step 4: Configure Application Information
Open the
TUIRoomKit/Web/example/vite-react-ts/src/config/basic-info-config.js configuration file and enter the SDKAppID and SDKSecretKey you obtained from the TRTC Console into the corresponding variables.
Caution:
In this demo, authentication uses the
SDKSecretKey directly in client code. The SDKSecretKey can be easily reverse-engineered; if leaked, attackers may steal your TRTC traffic. This approach is only suitable for local demo testing and feature debugging.For production environments, generate UserSig on your server. When UserSig is needed, your app should request a dynamic UserSig from your business server for authentication. See How to calculate UserSig in production?
Step 5: Start the Project
Start the development server with the following commands.
npm run dev
pnpm run dev
yarn run dev
Once the server starts successfully, your browser will automatically open the debug address (usually http://localhost:5173). Enter a user ID and log in to access the conference interface shown below:
Standard Conference Room Experience
Core Feature Showcase
The TUIRoomKit sample project delivers a complete audio/video conferencing solution. Below are the main features supported by TUIRoomKit (React):
Pre-Meeting Device Check
Preview your camera feed and test microphone volume before joining a meeting.
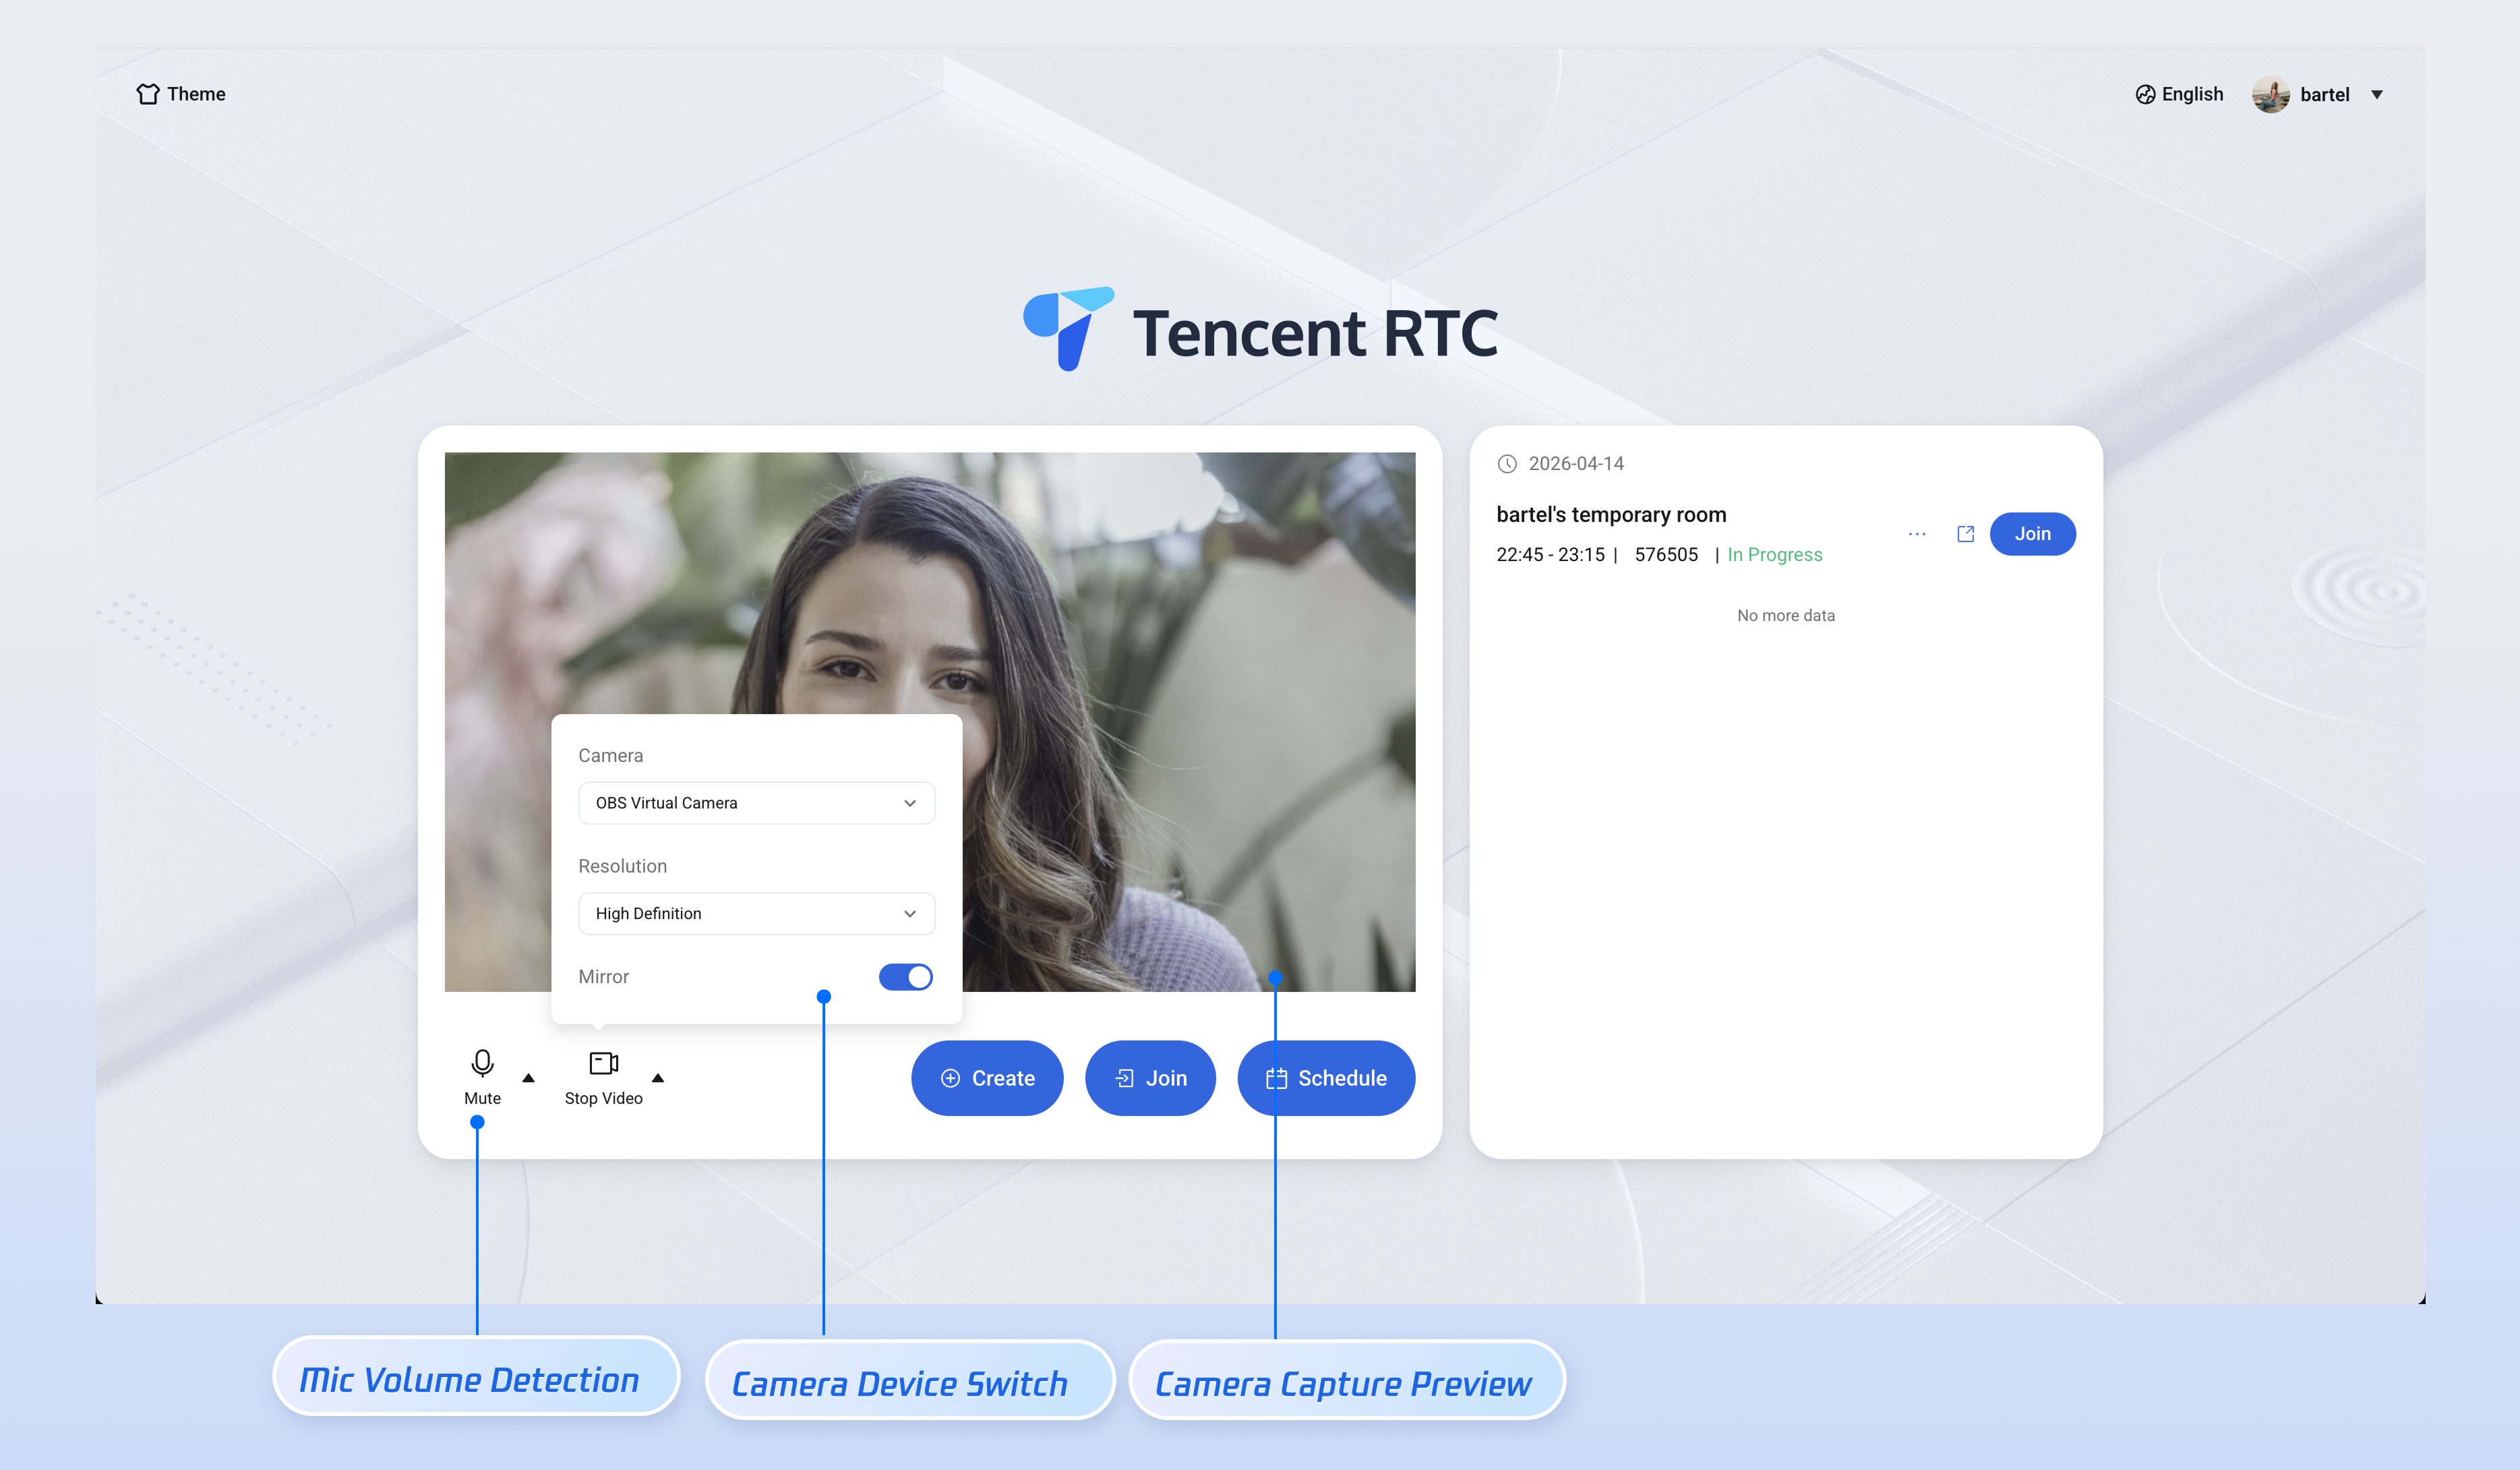
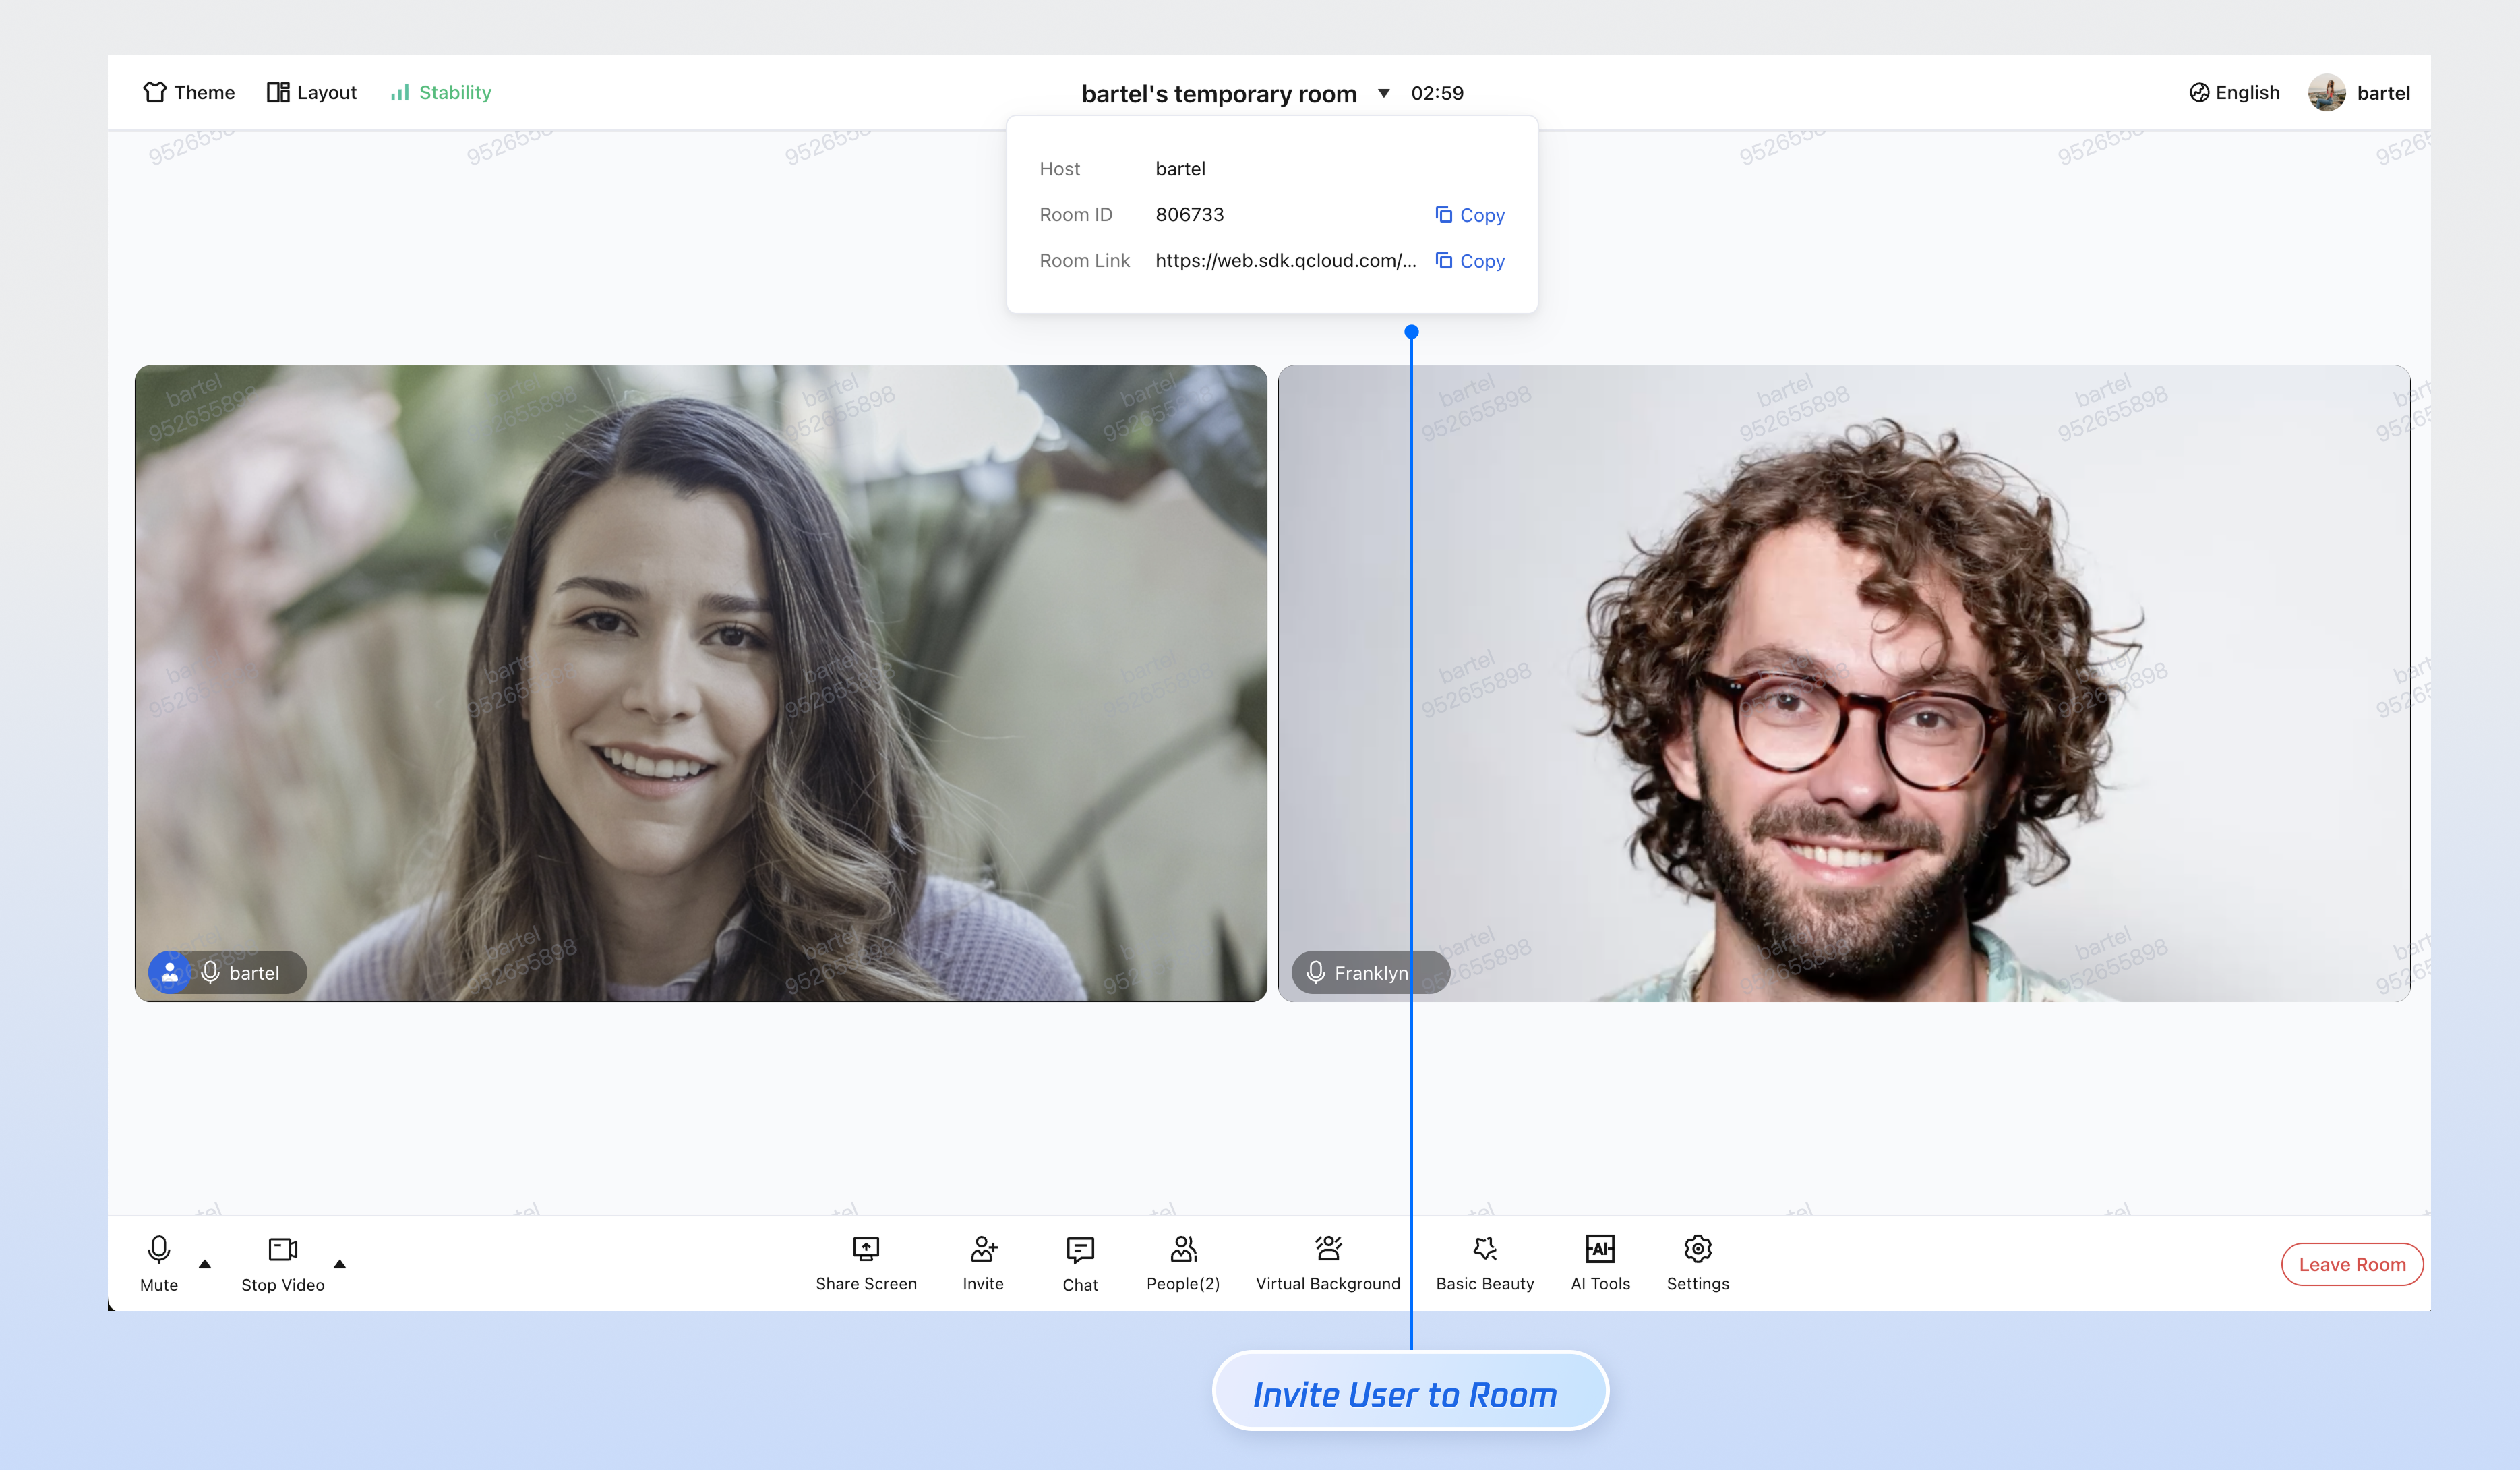
Create/Join Room
Use two separate clients to join the same room ID and experience multi-party conferencing.
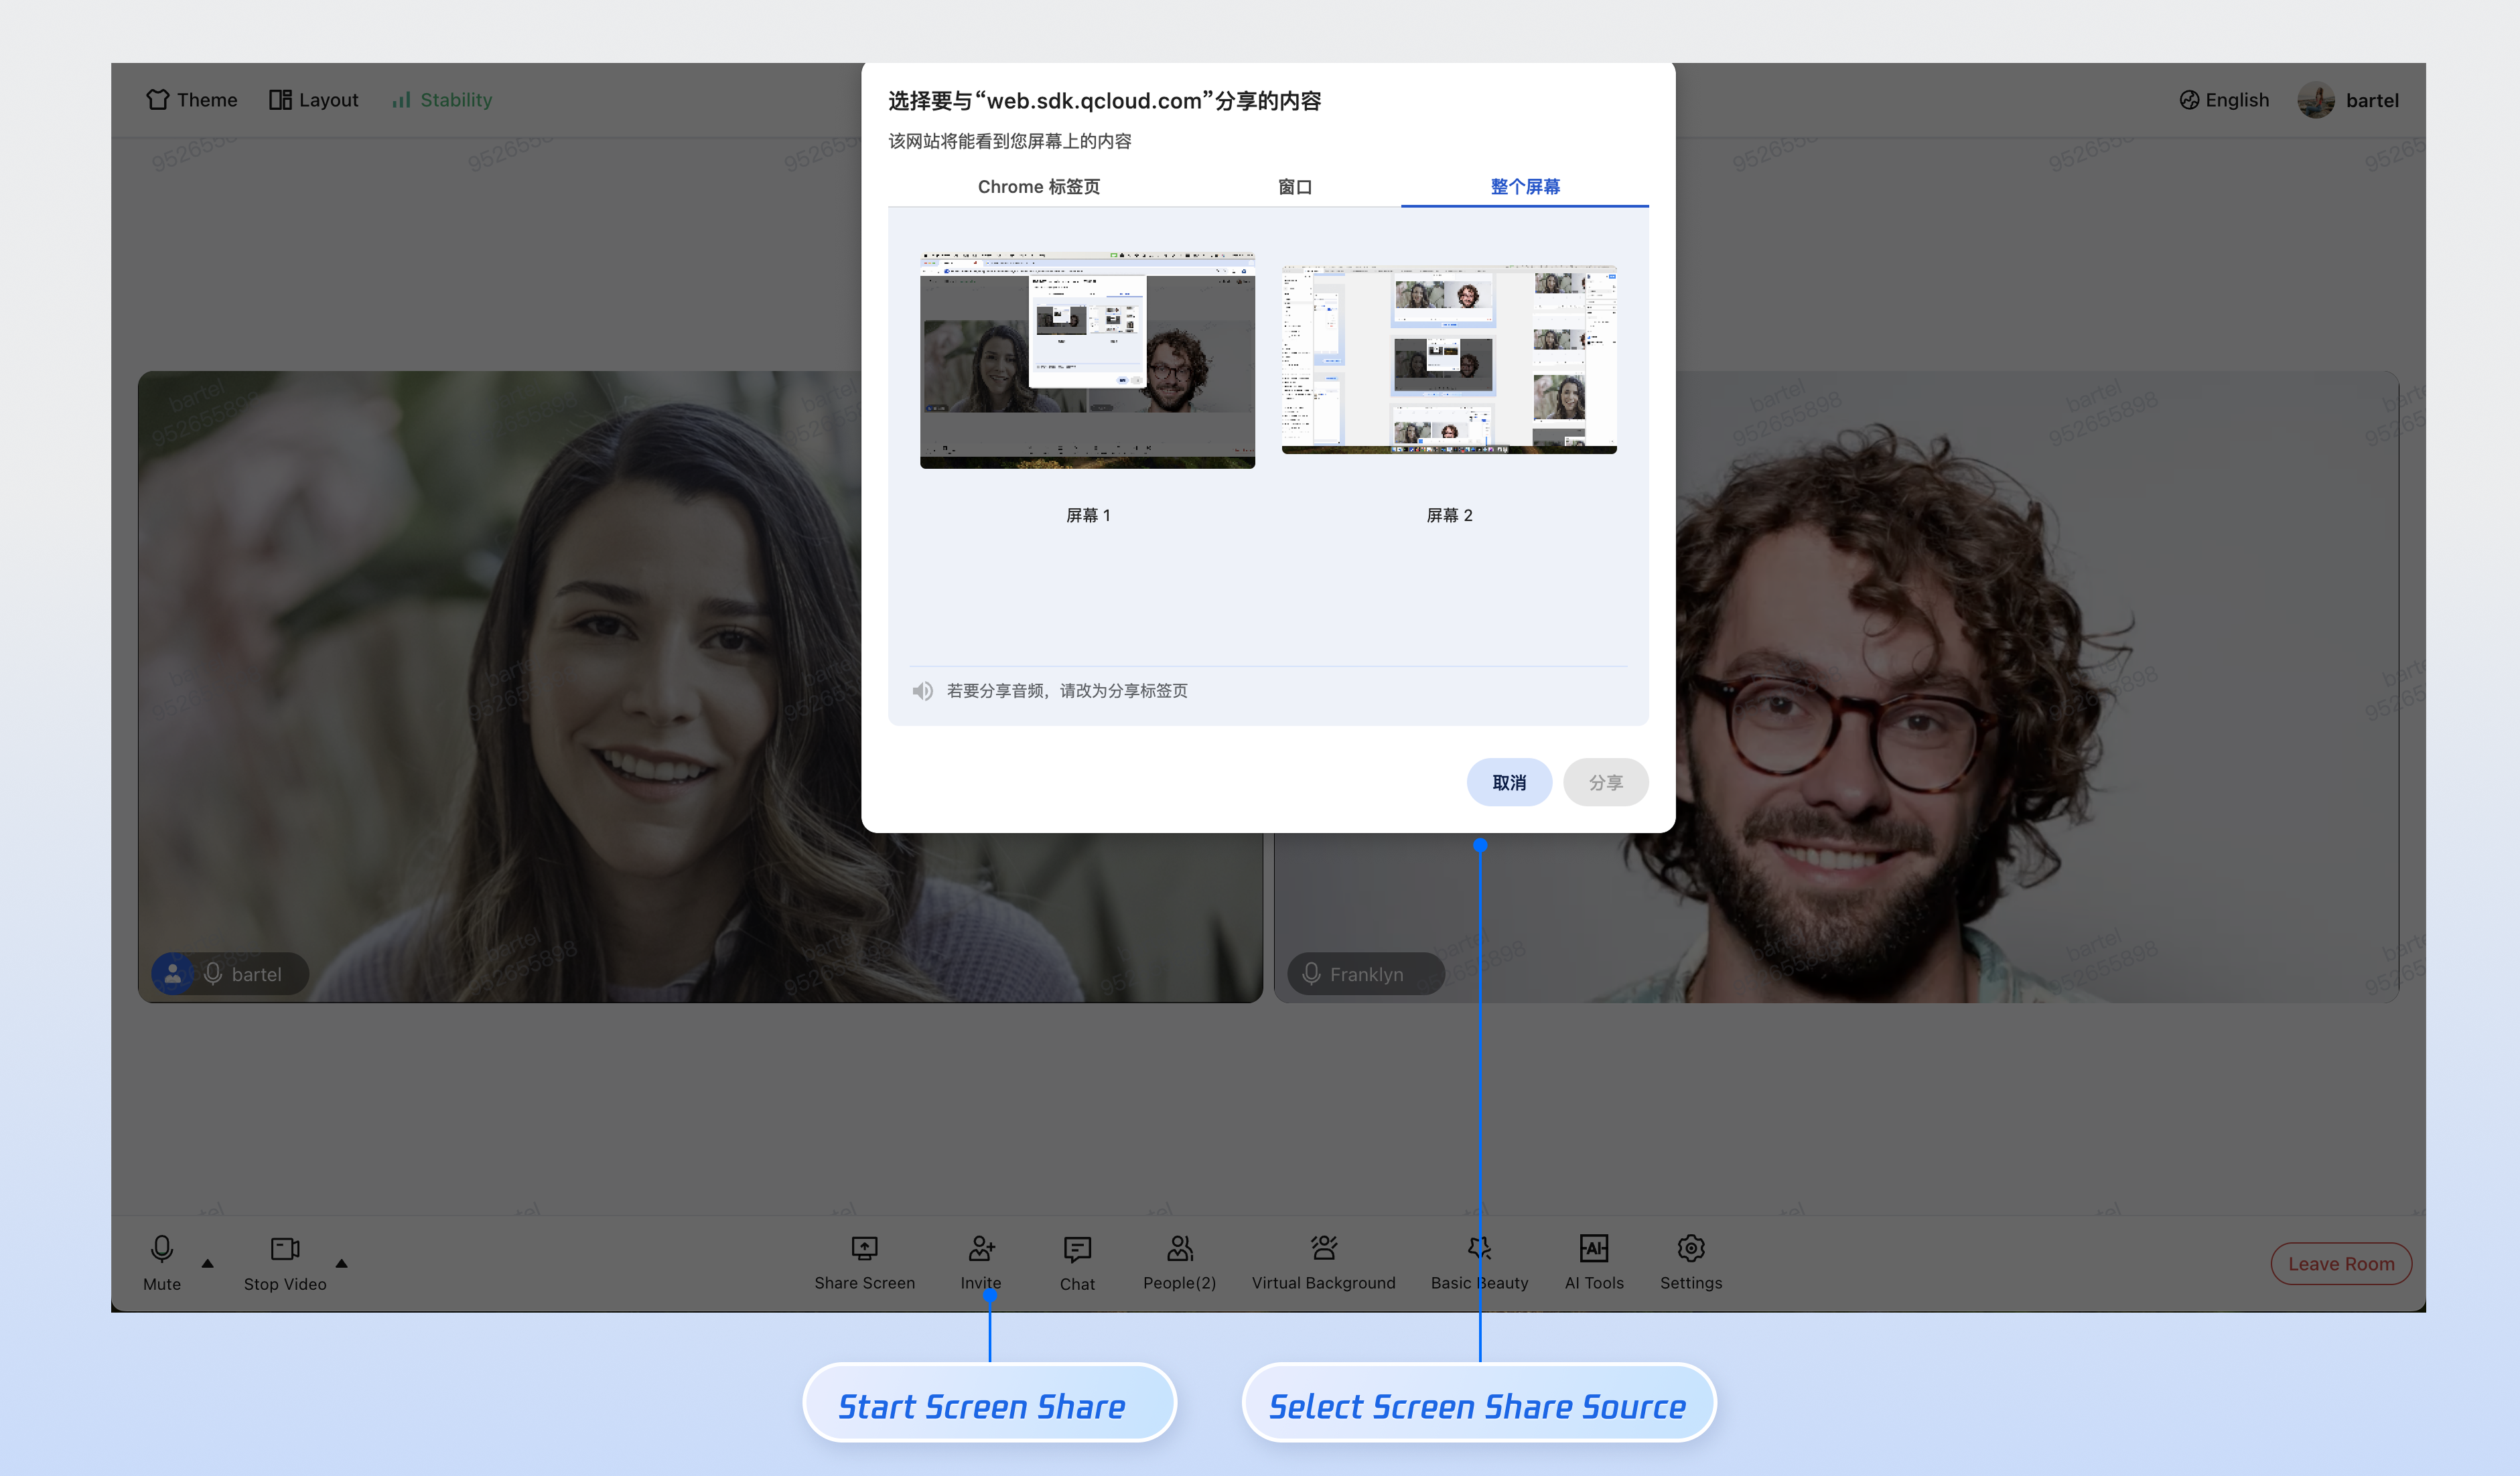
Screen Sharing
Share various types of screen content for remote presentations and collaboration.
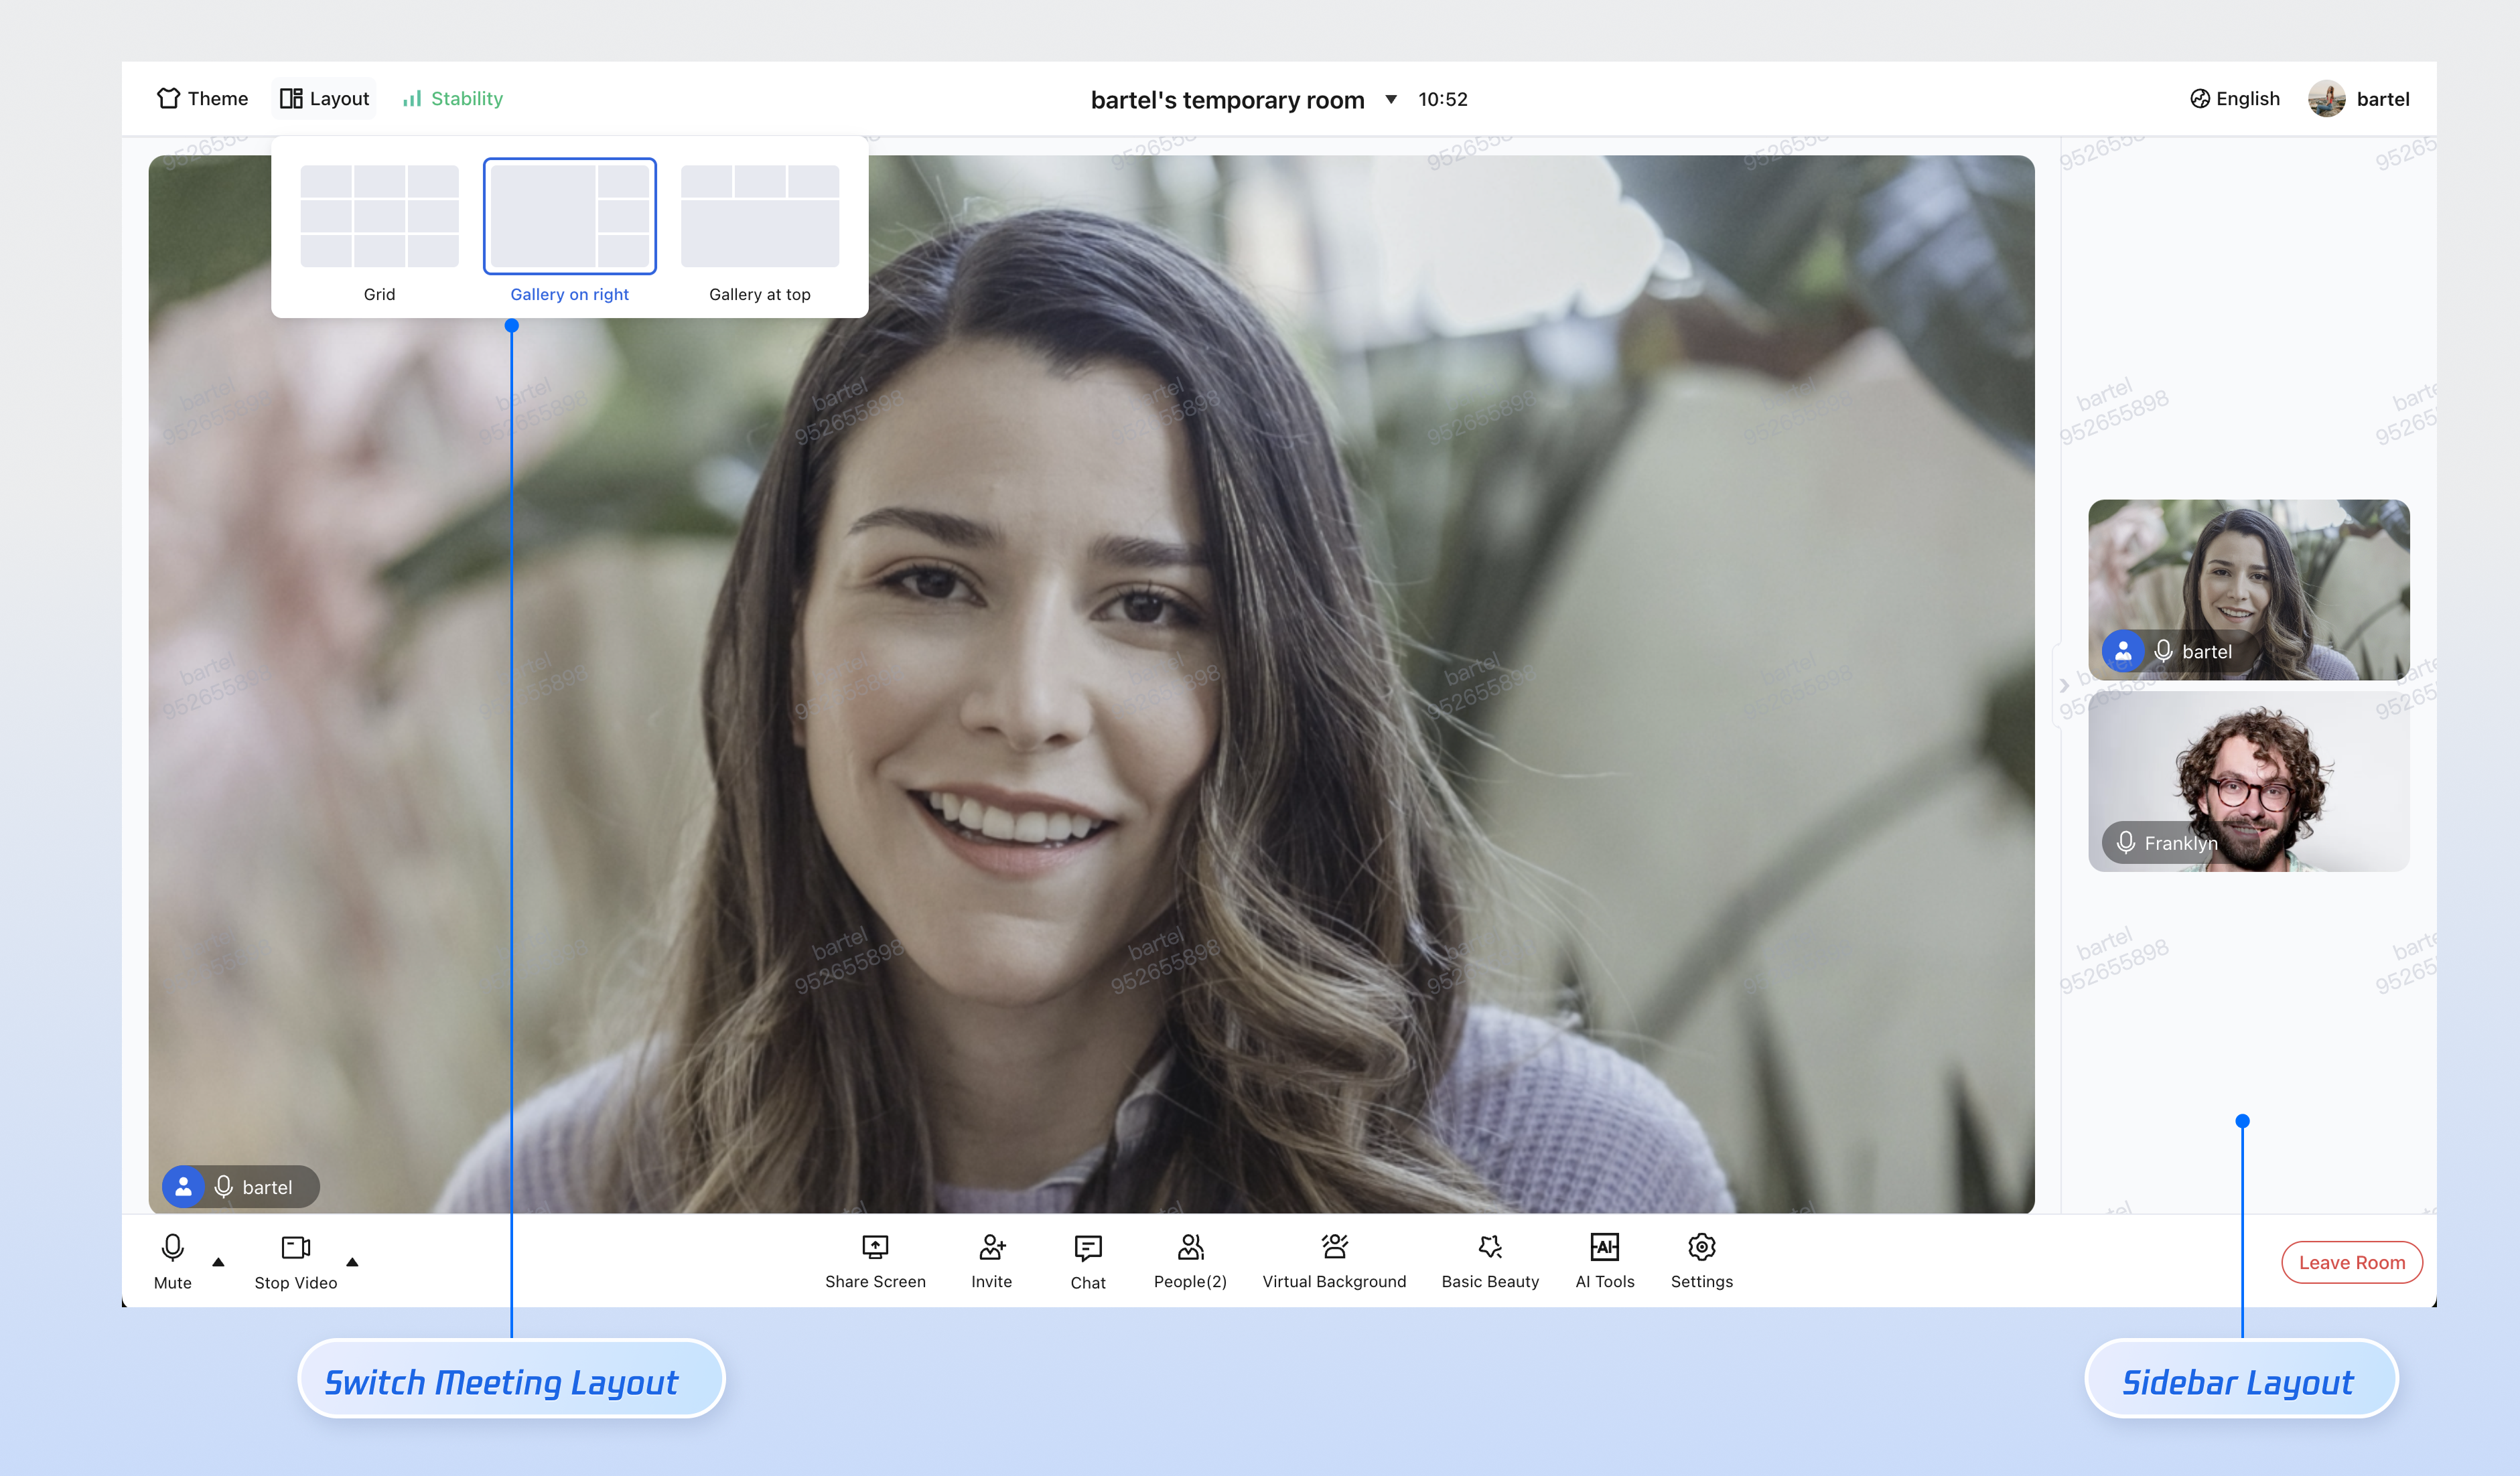
Conference Layout Management
Switch between grid view and speaker mode to adapt to different screen sizes and interaction needs.
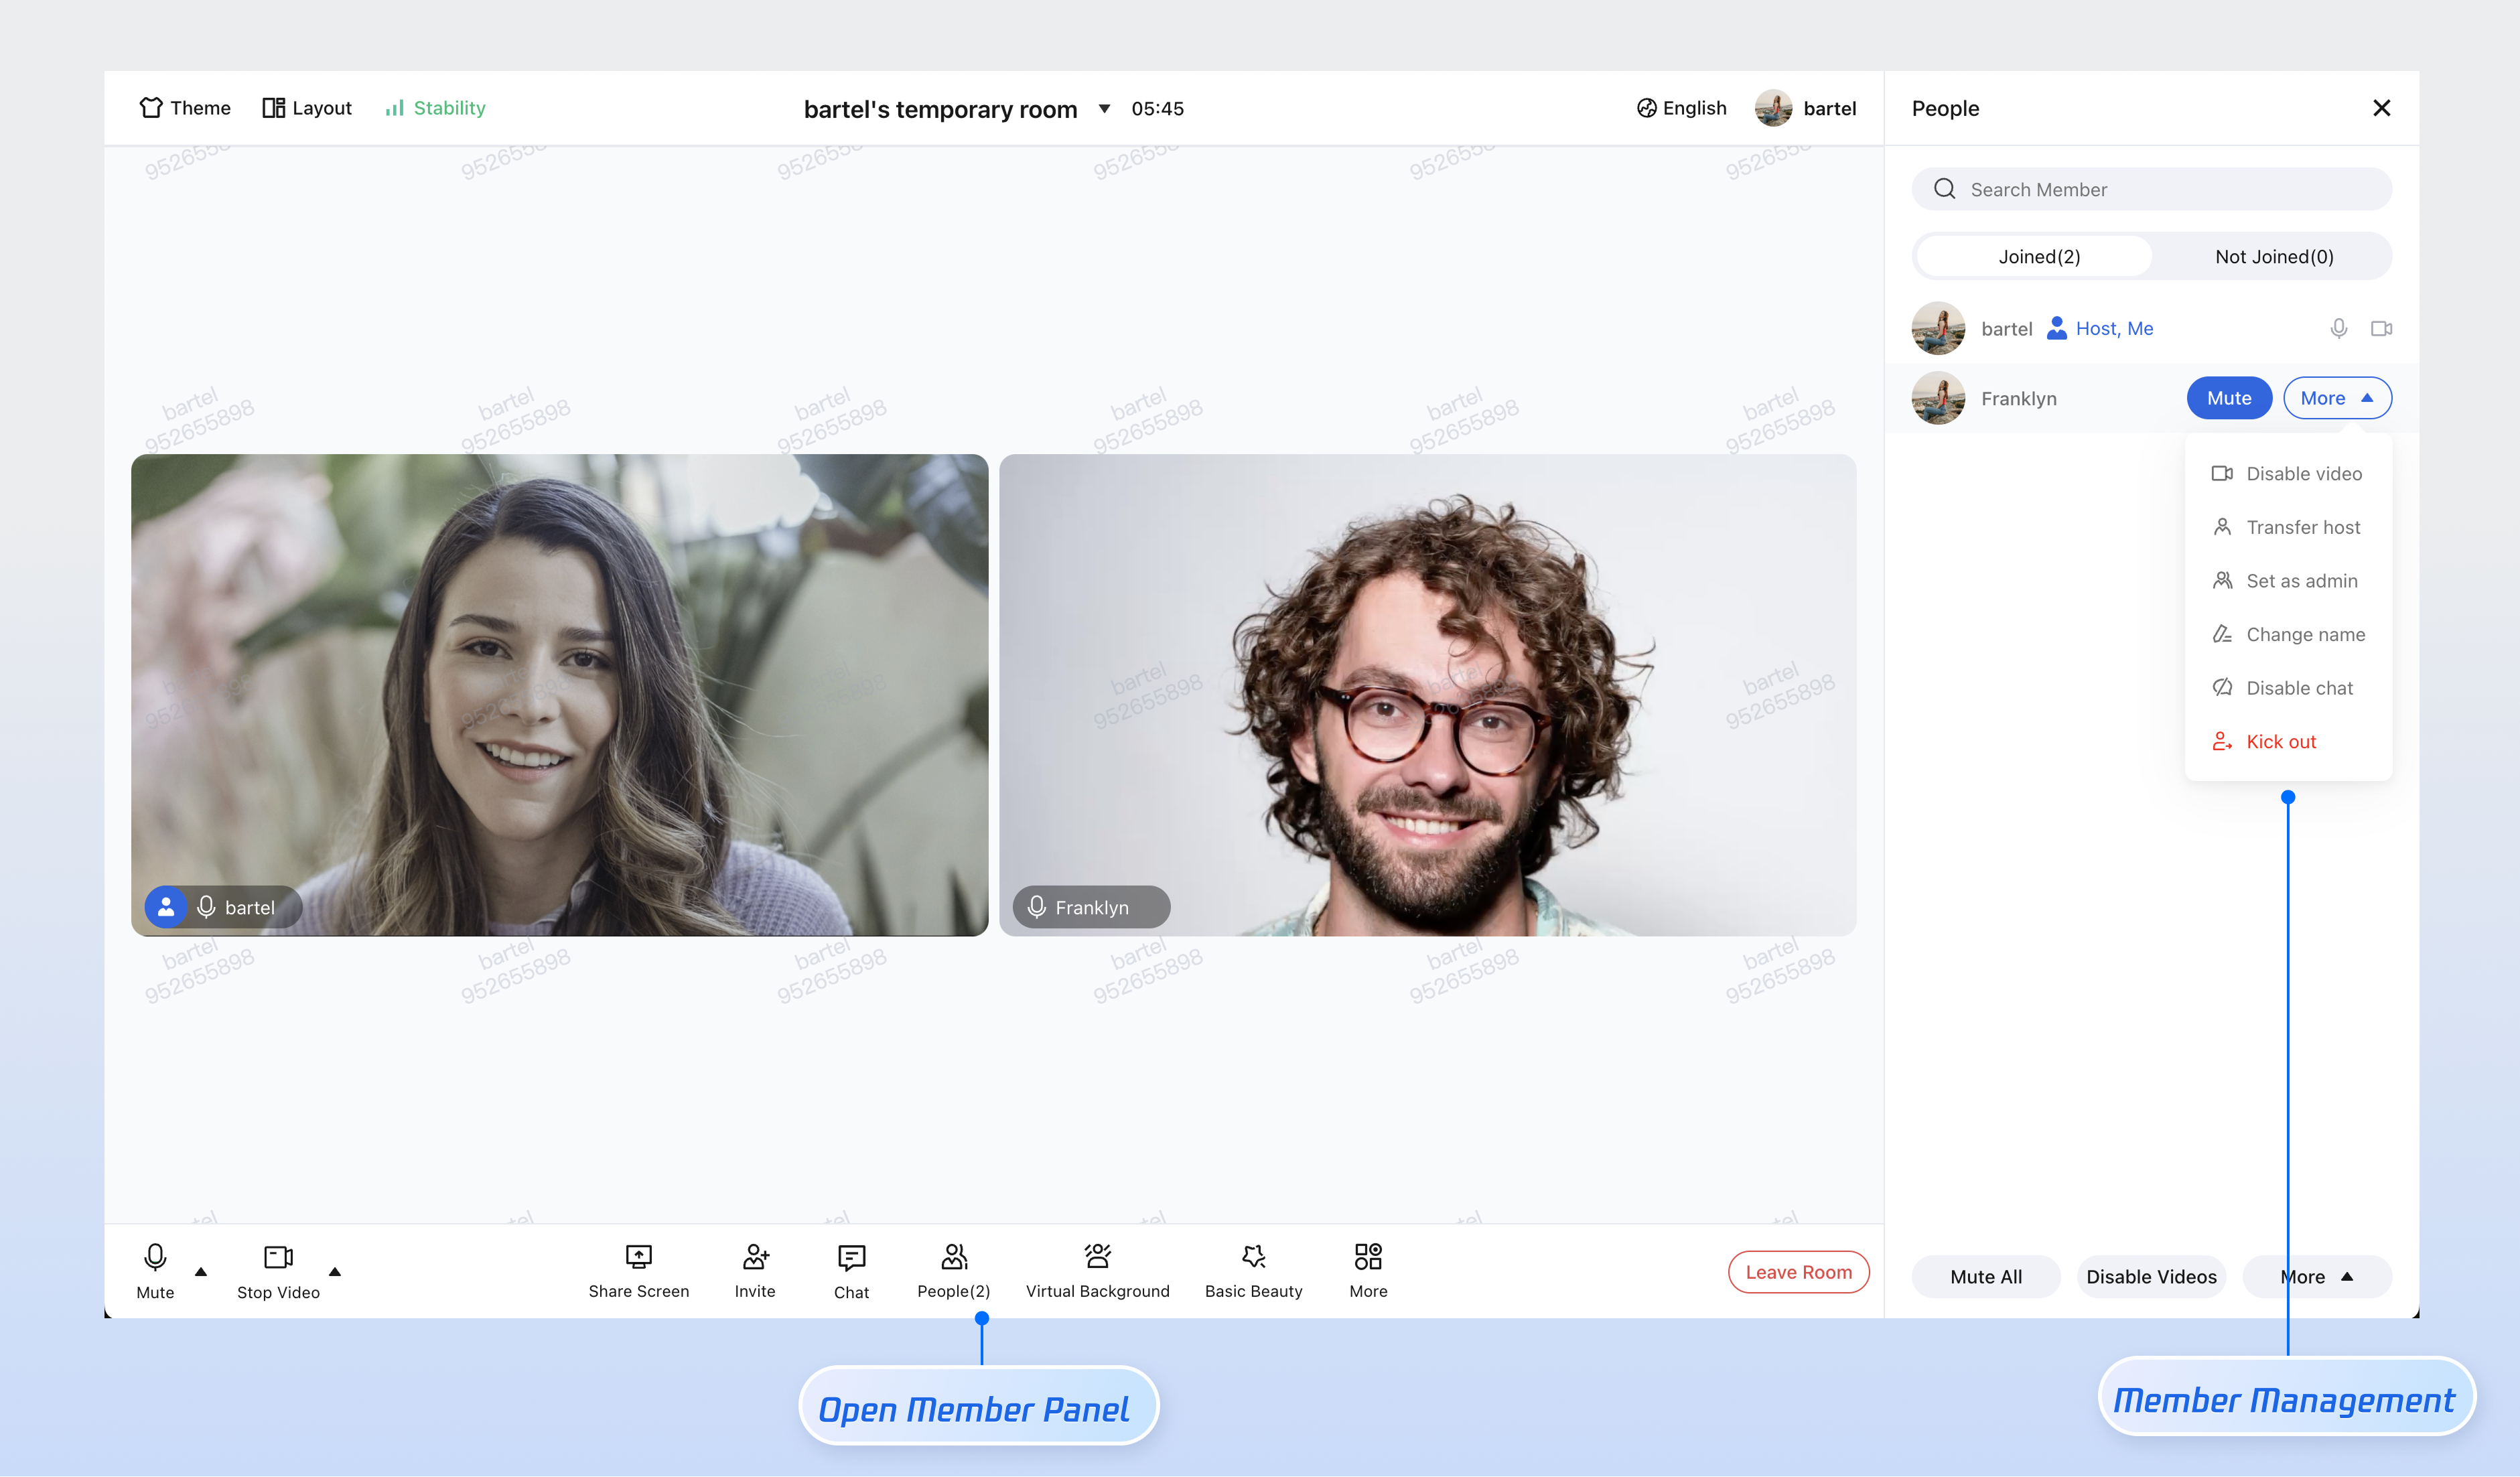
Participant Management
View the participant list. Hosts and administrators can mute/unmute specific members or remove them from the room.
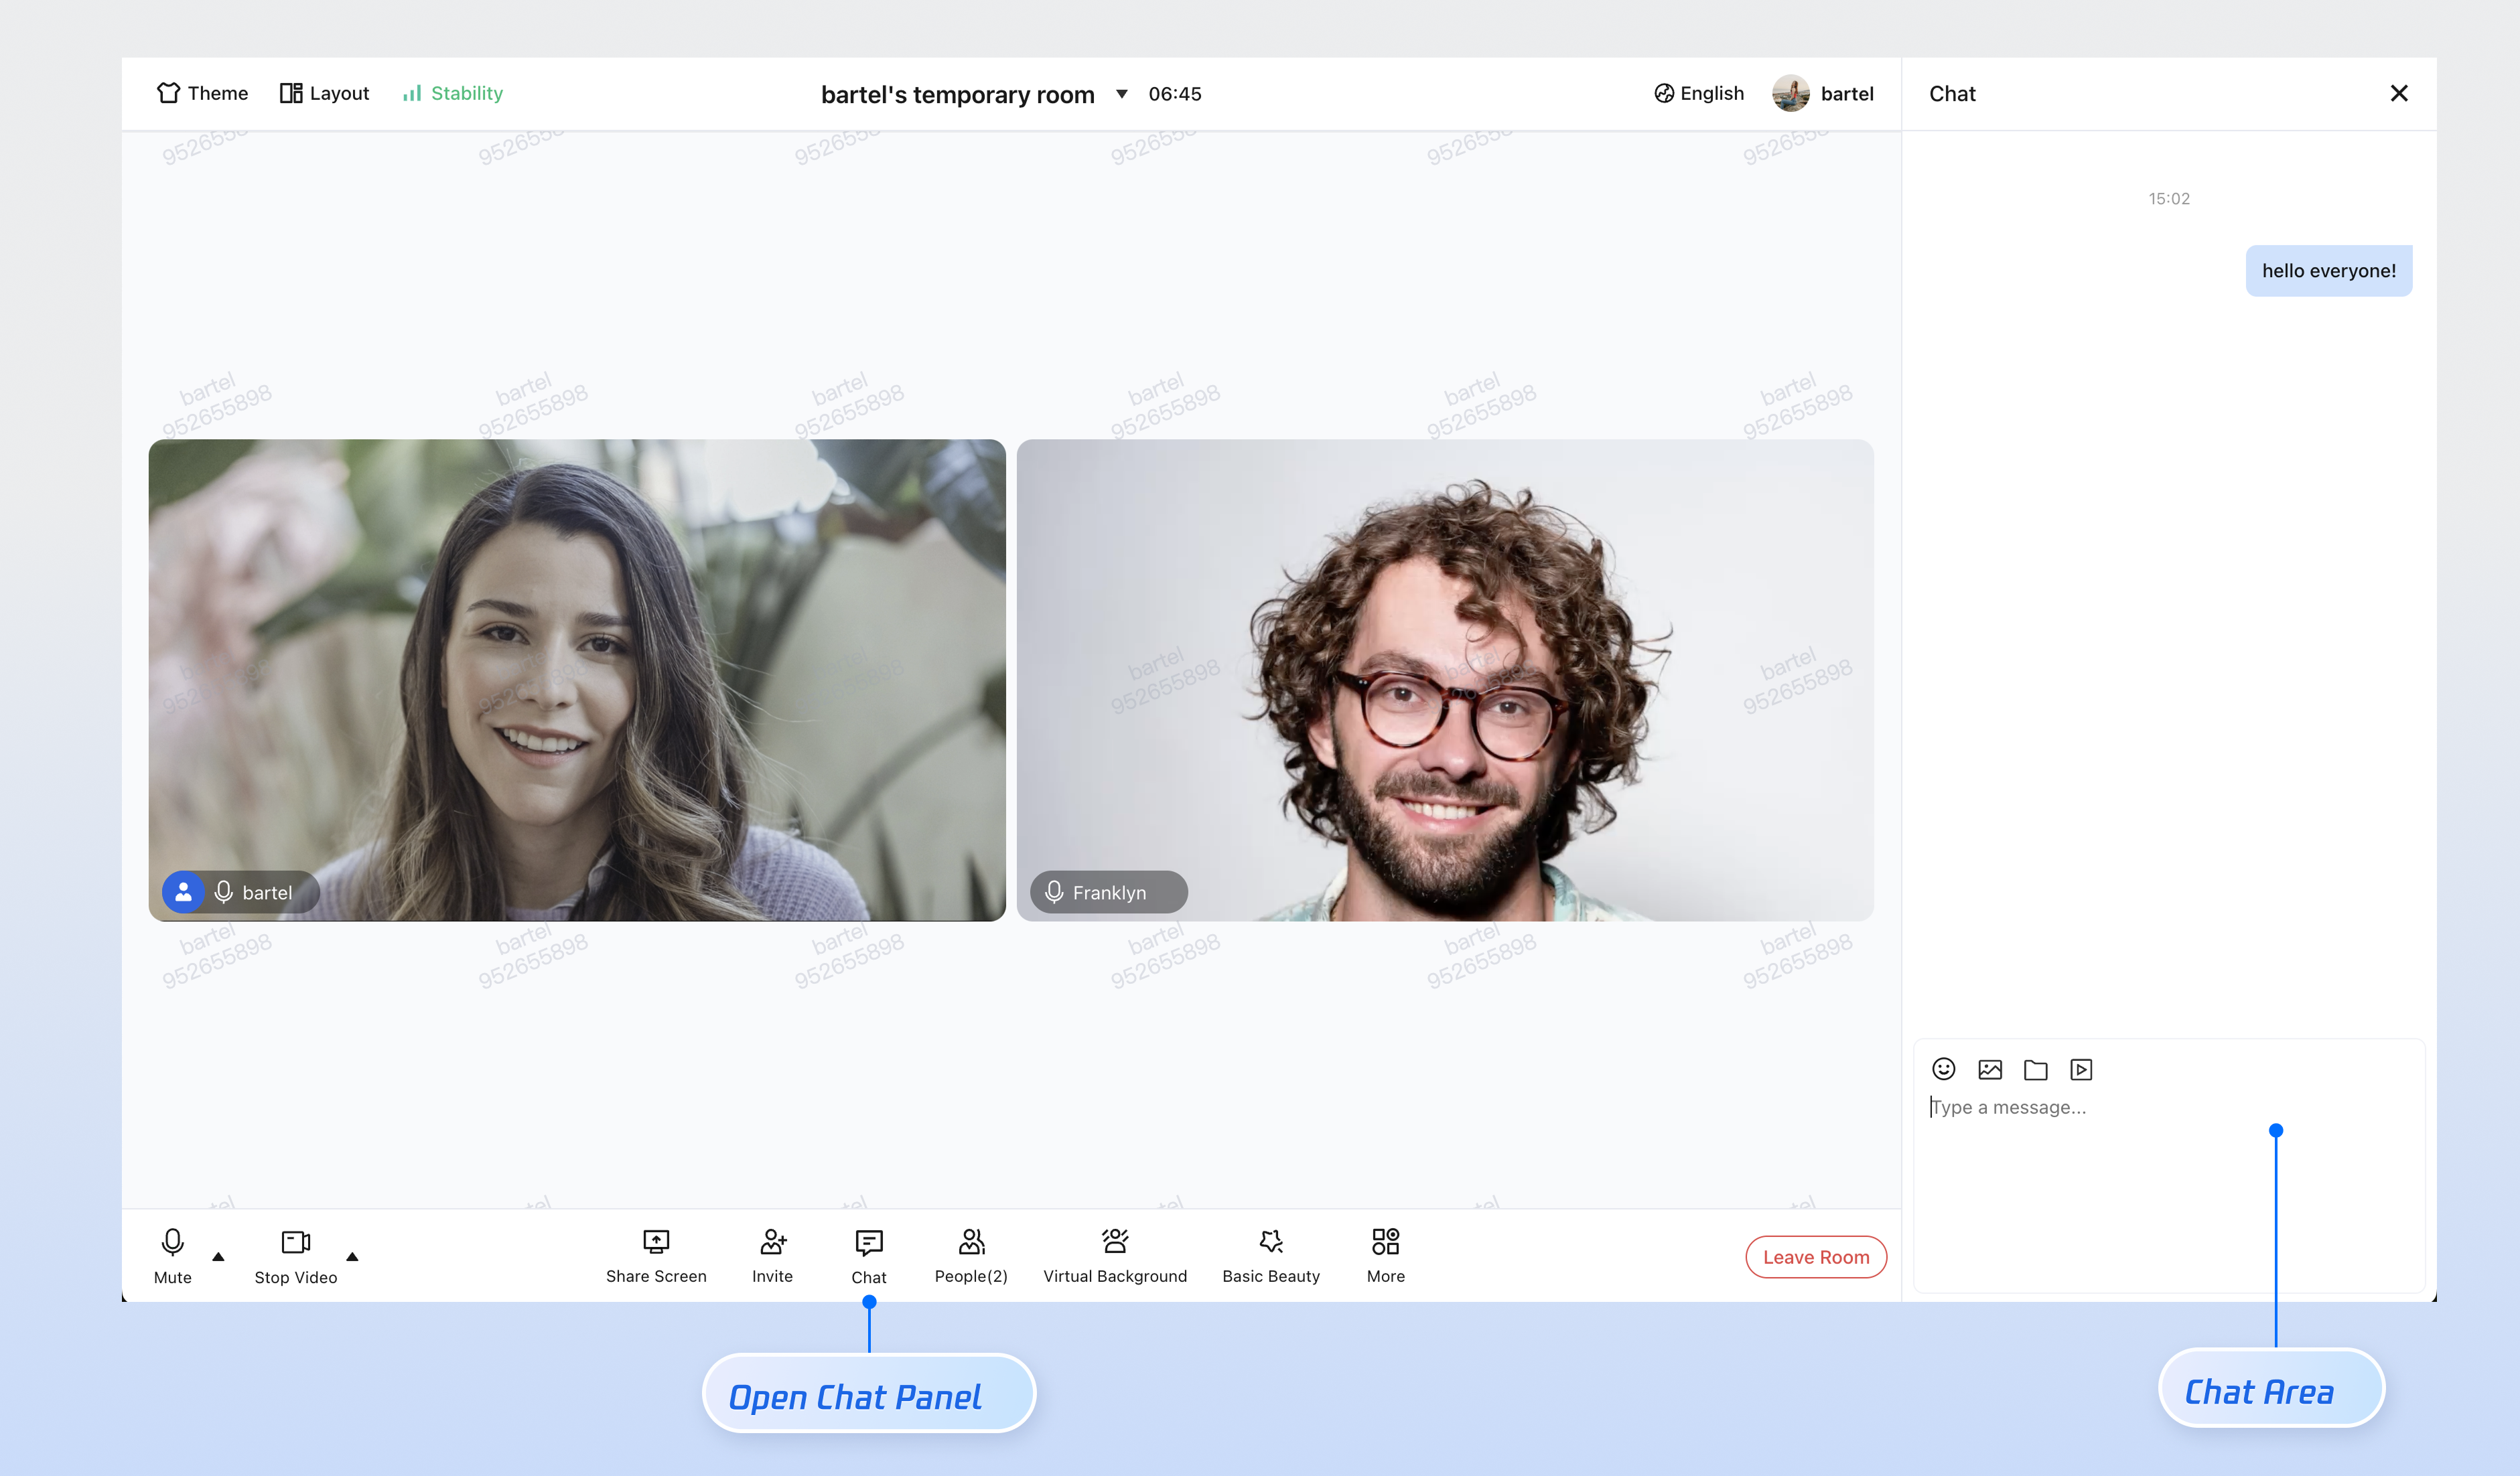
Chat Interaction
Exchange real-time messages with participants during the meeting.
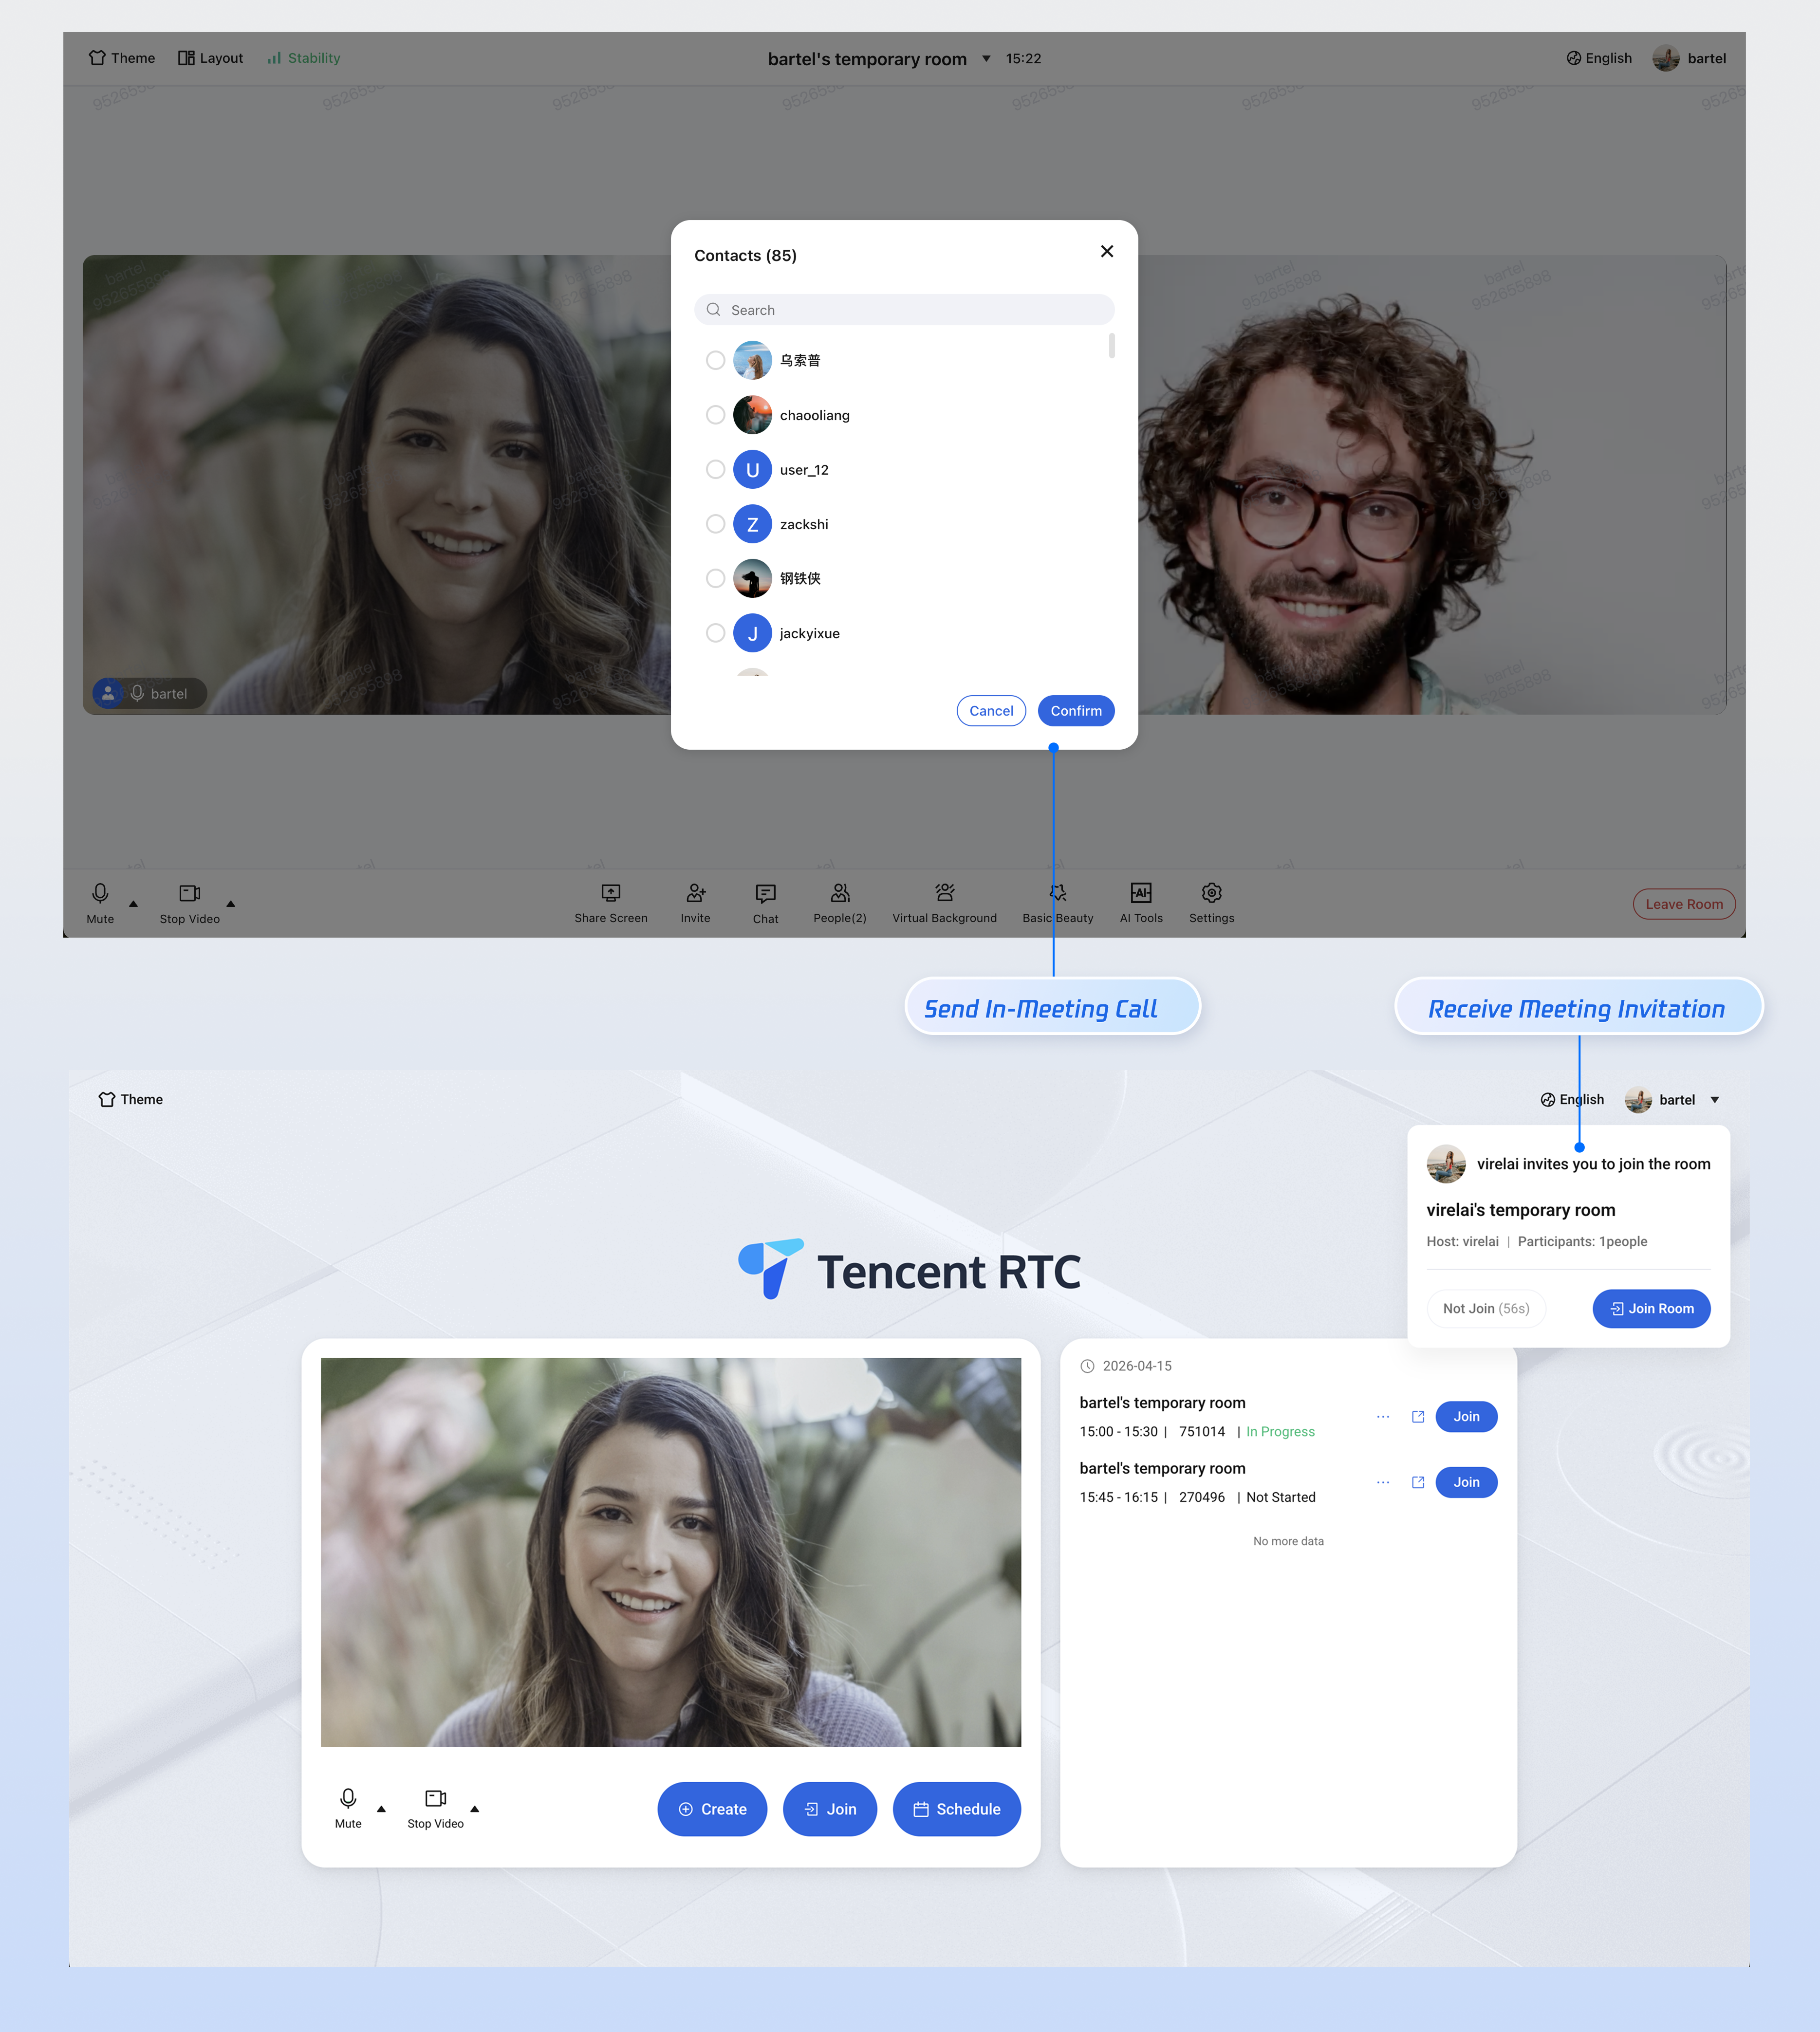
In-Meeting Call Invitation
Invite specific users to join the meeting during an ongoing session (the user list defaults to the contact list). To add a contact list, see Add Friends (REST API).
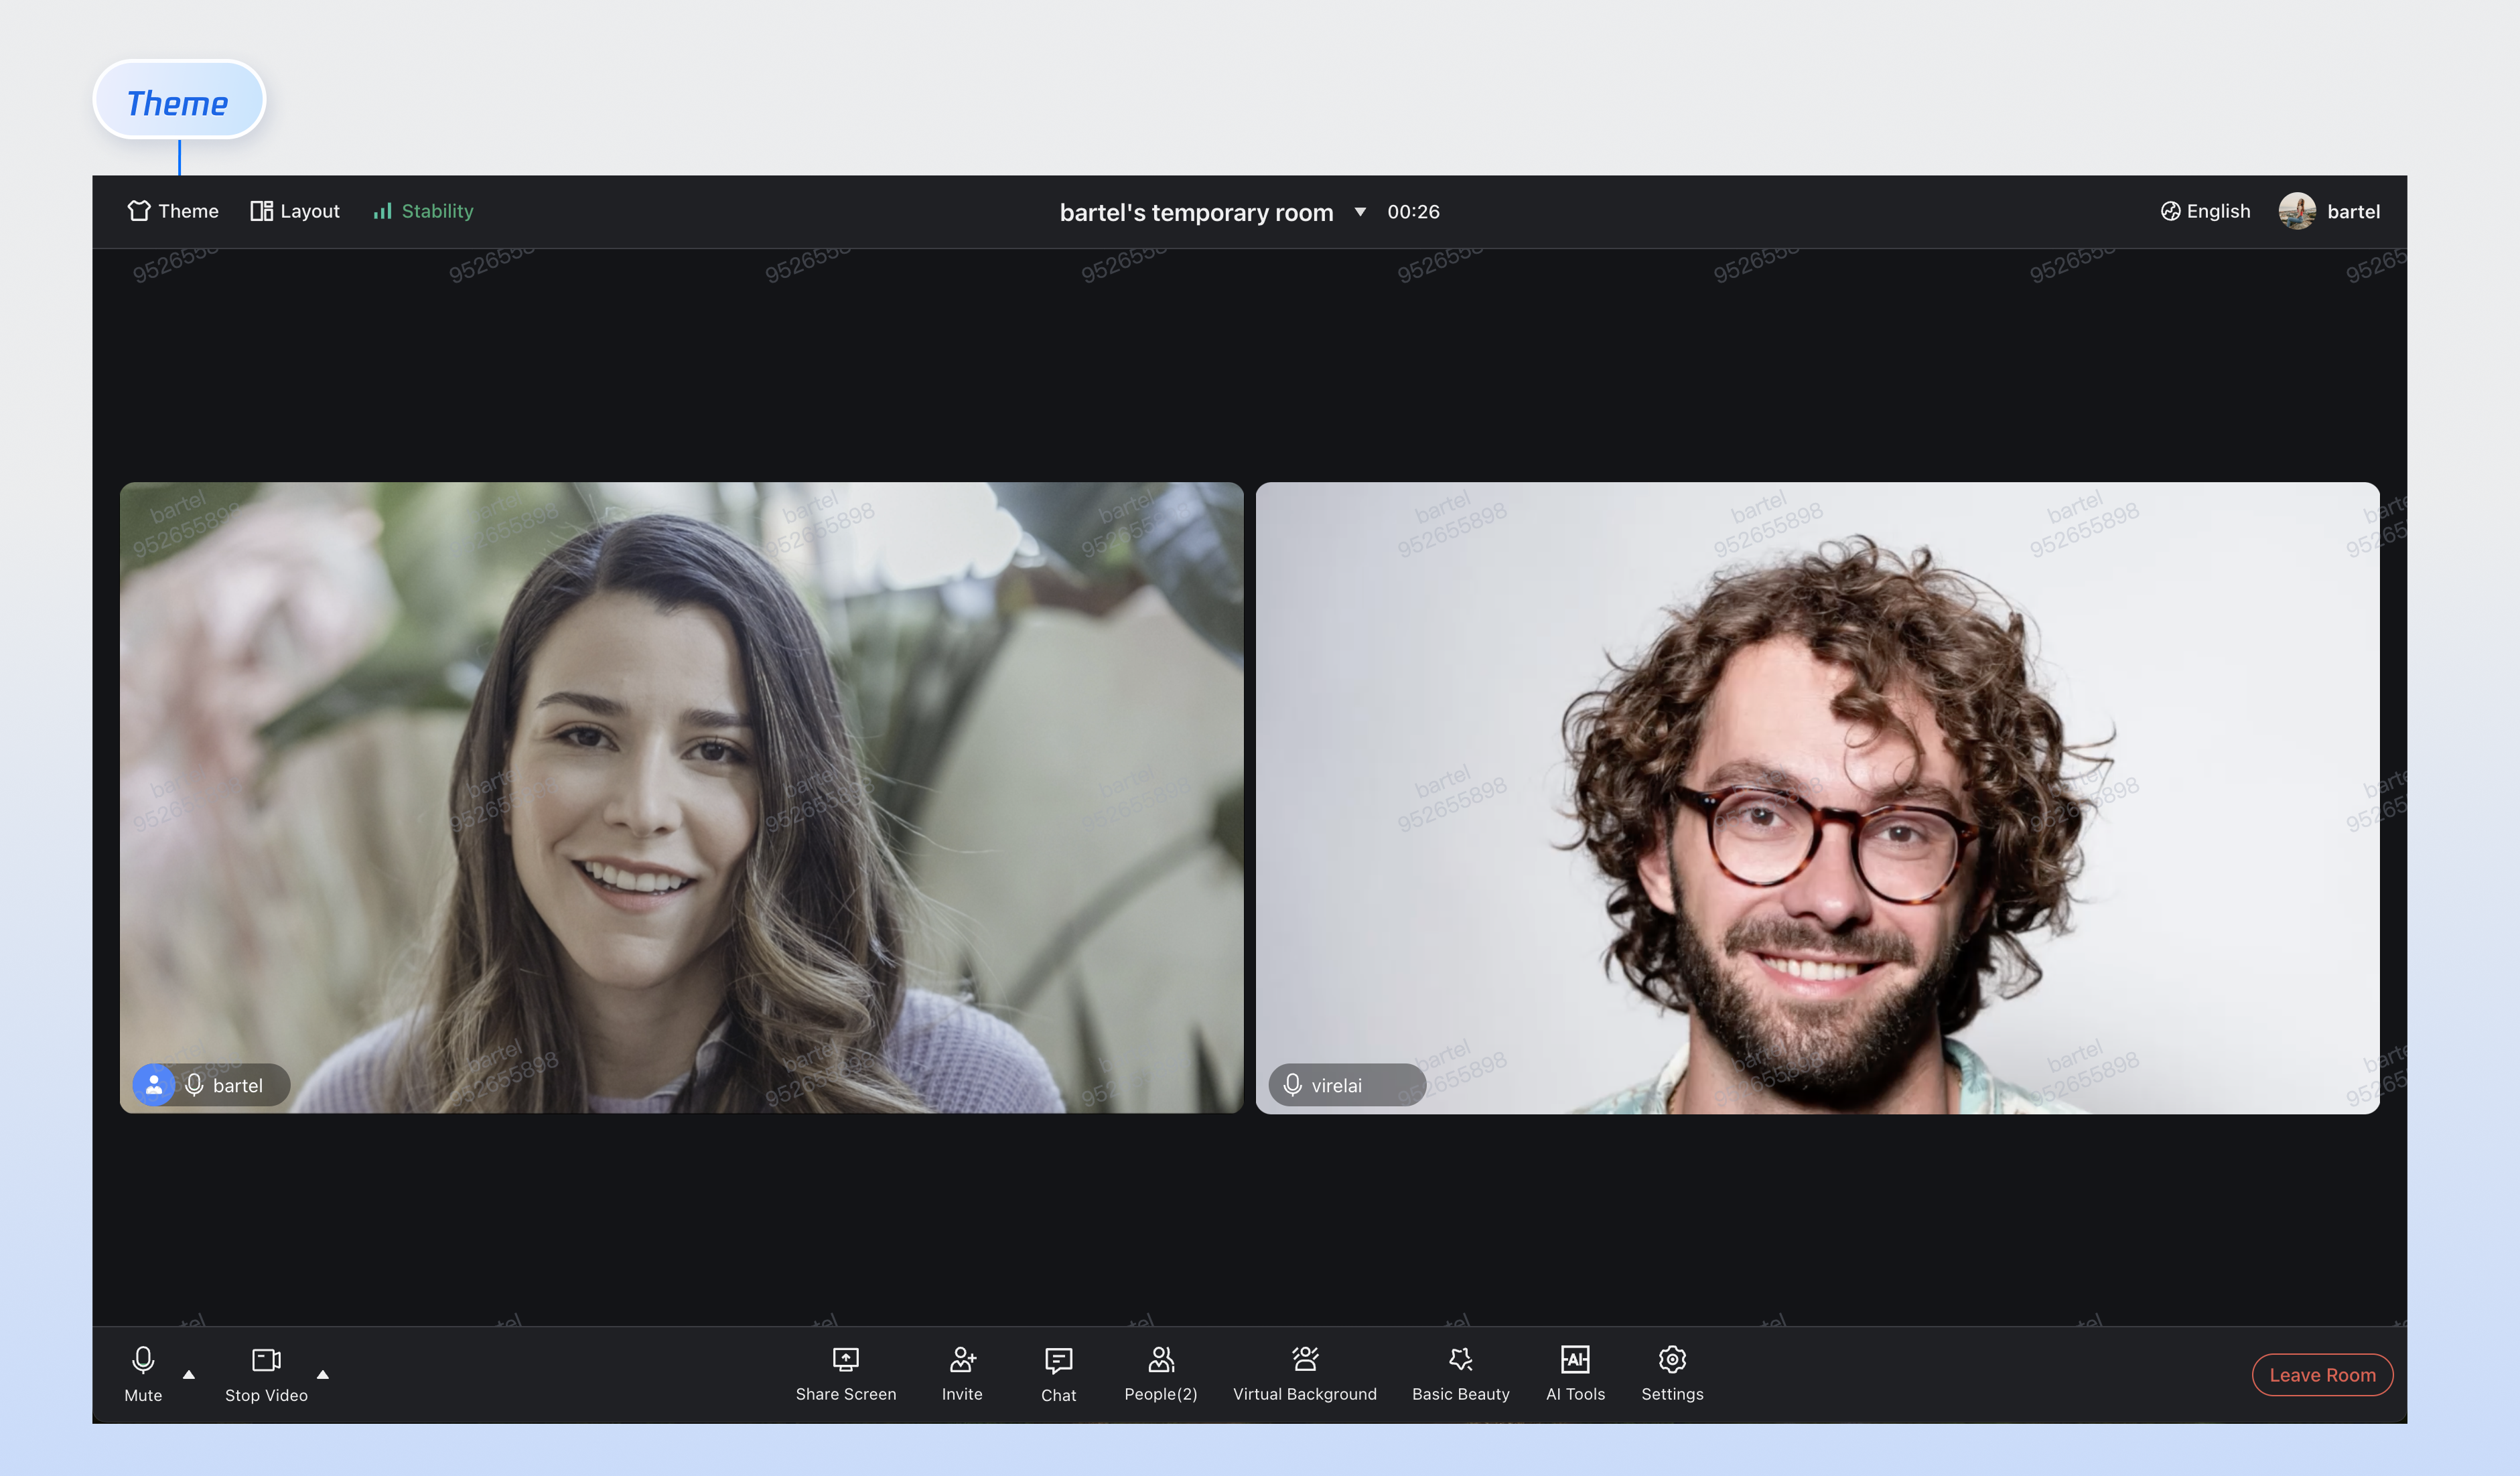
Theme Customization
Customize brand colors and UI styles using CSS variables in TUIRoomKit components.
Next Steps
Congratulations! You have successfully launched the TUIRoomKit React project. To integrate features based on your business needs, refer to the following guide:
Page | Documentation Link |
Quick Integration |
FAQs
TUIRoomKit works during local development, but cannot access the user's camera or microphone after deployment to production?
Analysis:For security and privacy, browsers strictly limit access to audio/video devices (microphone, camera). Device access is only allowed in secure environments, such as https://, localhost, file://, etc. HTTP is considered insecure, so browsers block media device access by default.
Solution:If everything works locally (localhost) but fails after deployment, check if your webpage is using HTTP. You must deploy your site with HTTPS and a valid security certificate.
Related Resources:For details on URL domain and protocol restrictions, see URL Domain and Protocol Restrictions.
Does TUIRoomKit support iframe integration?
Yes. To integrate TUIRoomKit via iframe, configure the allow attribute in the iframe tag to grant necessary browser permissions (microphone, camera, screen sharing, fullscreen, etc.), as shown below:
// Enable microphone, camera, screen sharing, and fullscreen permissions<iframe allow="microphone; camera; display-capture; display; fullscreen;">
Contact Us
If you have any questions or suggestions during integration or usage, you are welcome to join our Telegram technical group or contact us for support.

