跑通Demo
本文介绍如何快速跑通 Chat Demo 来体验文字、语音、视频等消息发送功能。
快速体验
前提条件
开通服务
1. 登录 即时通信 Chat 控制台,在应用管理页面,单击创建新应用。如果您已有应用,可省略创建应用过程。
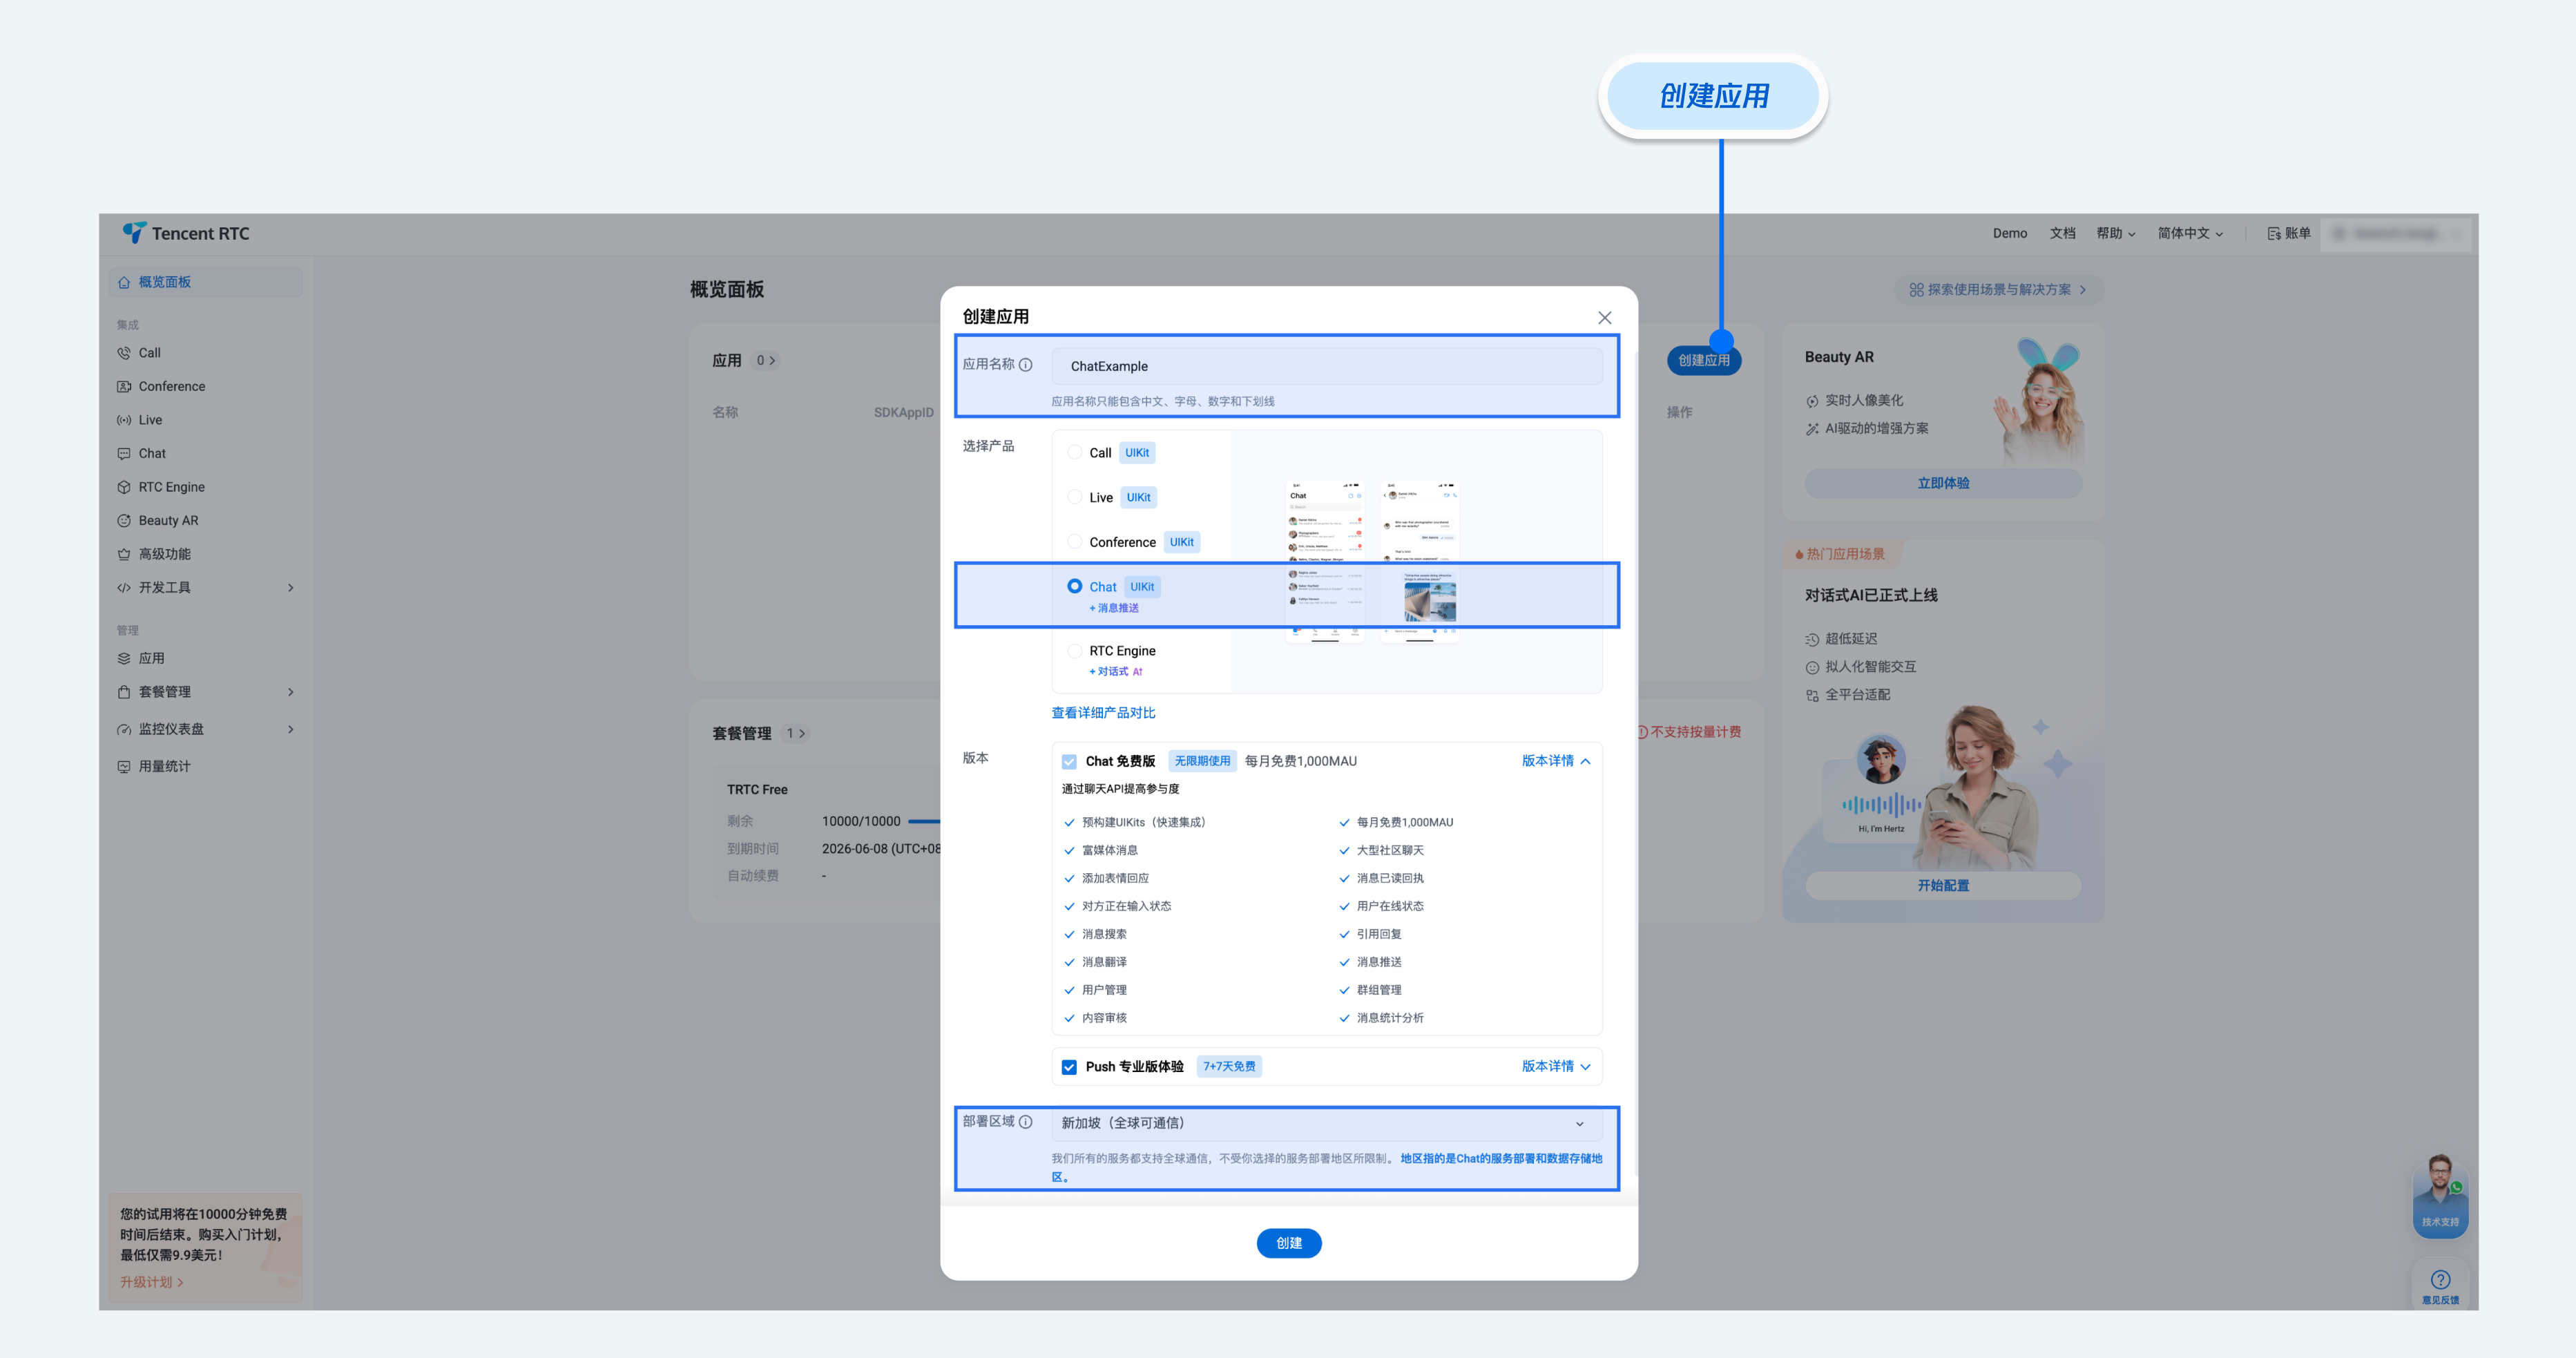
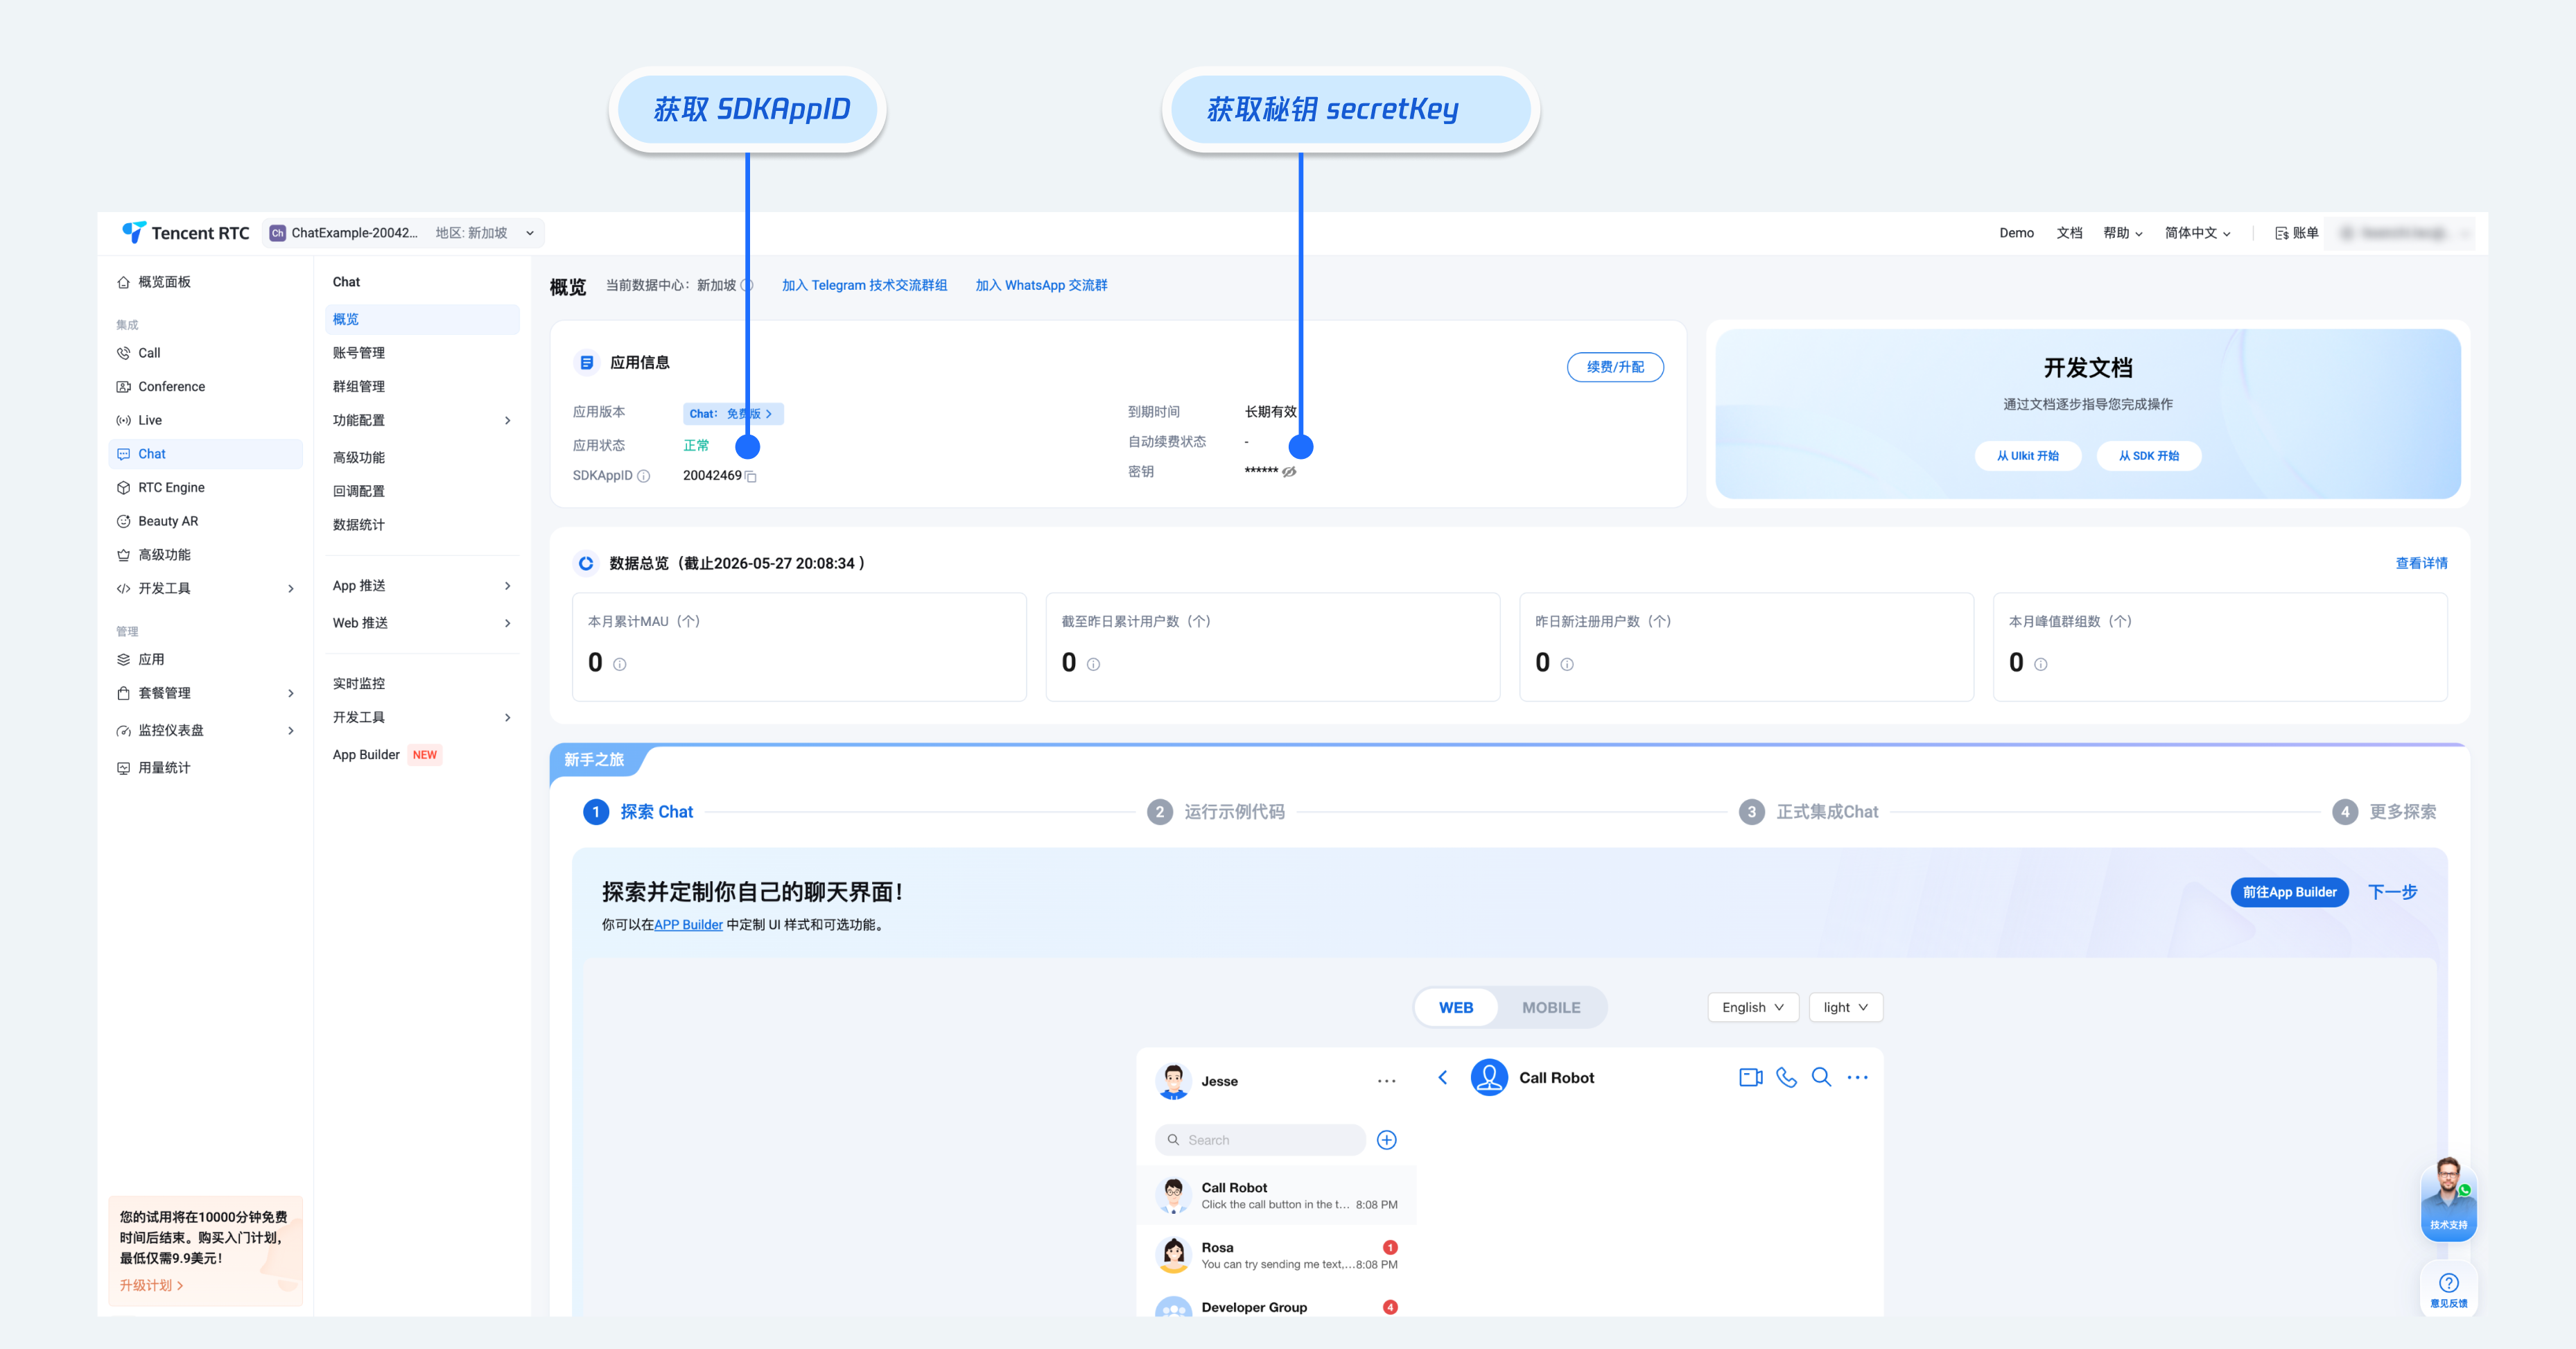
2. 在应用管理页面的 SDKAppID 列获取 SDKAppID 和 SDKSecretKey。
注意:
查看密钥信息需要验证身份。
密钥信息为敏感信息,为防止他人盗用,请妥善保管,谨防泄露。
3. 进入用户管理页面,创建 2~3 个测试账号,用于体验单聊能力和群聊能力。
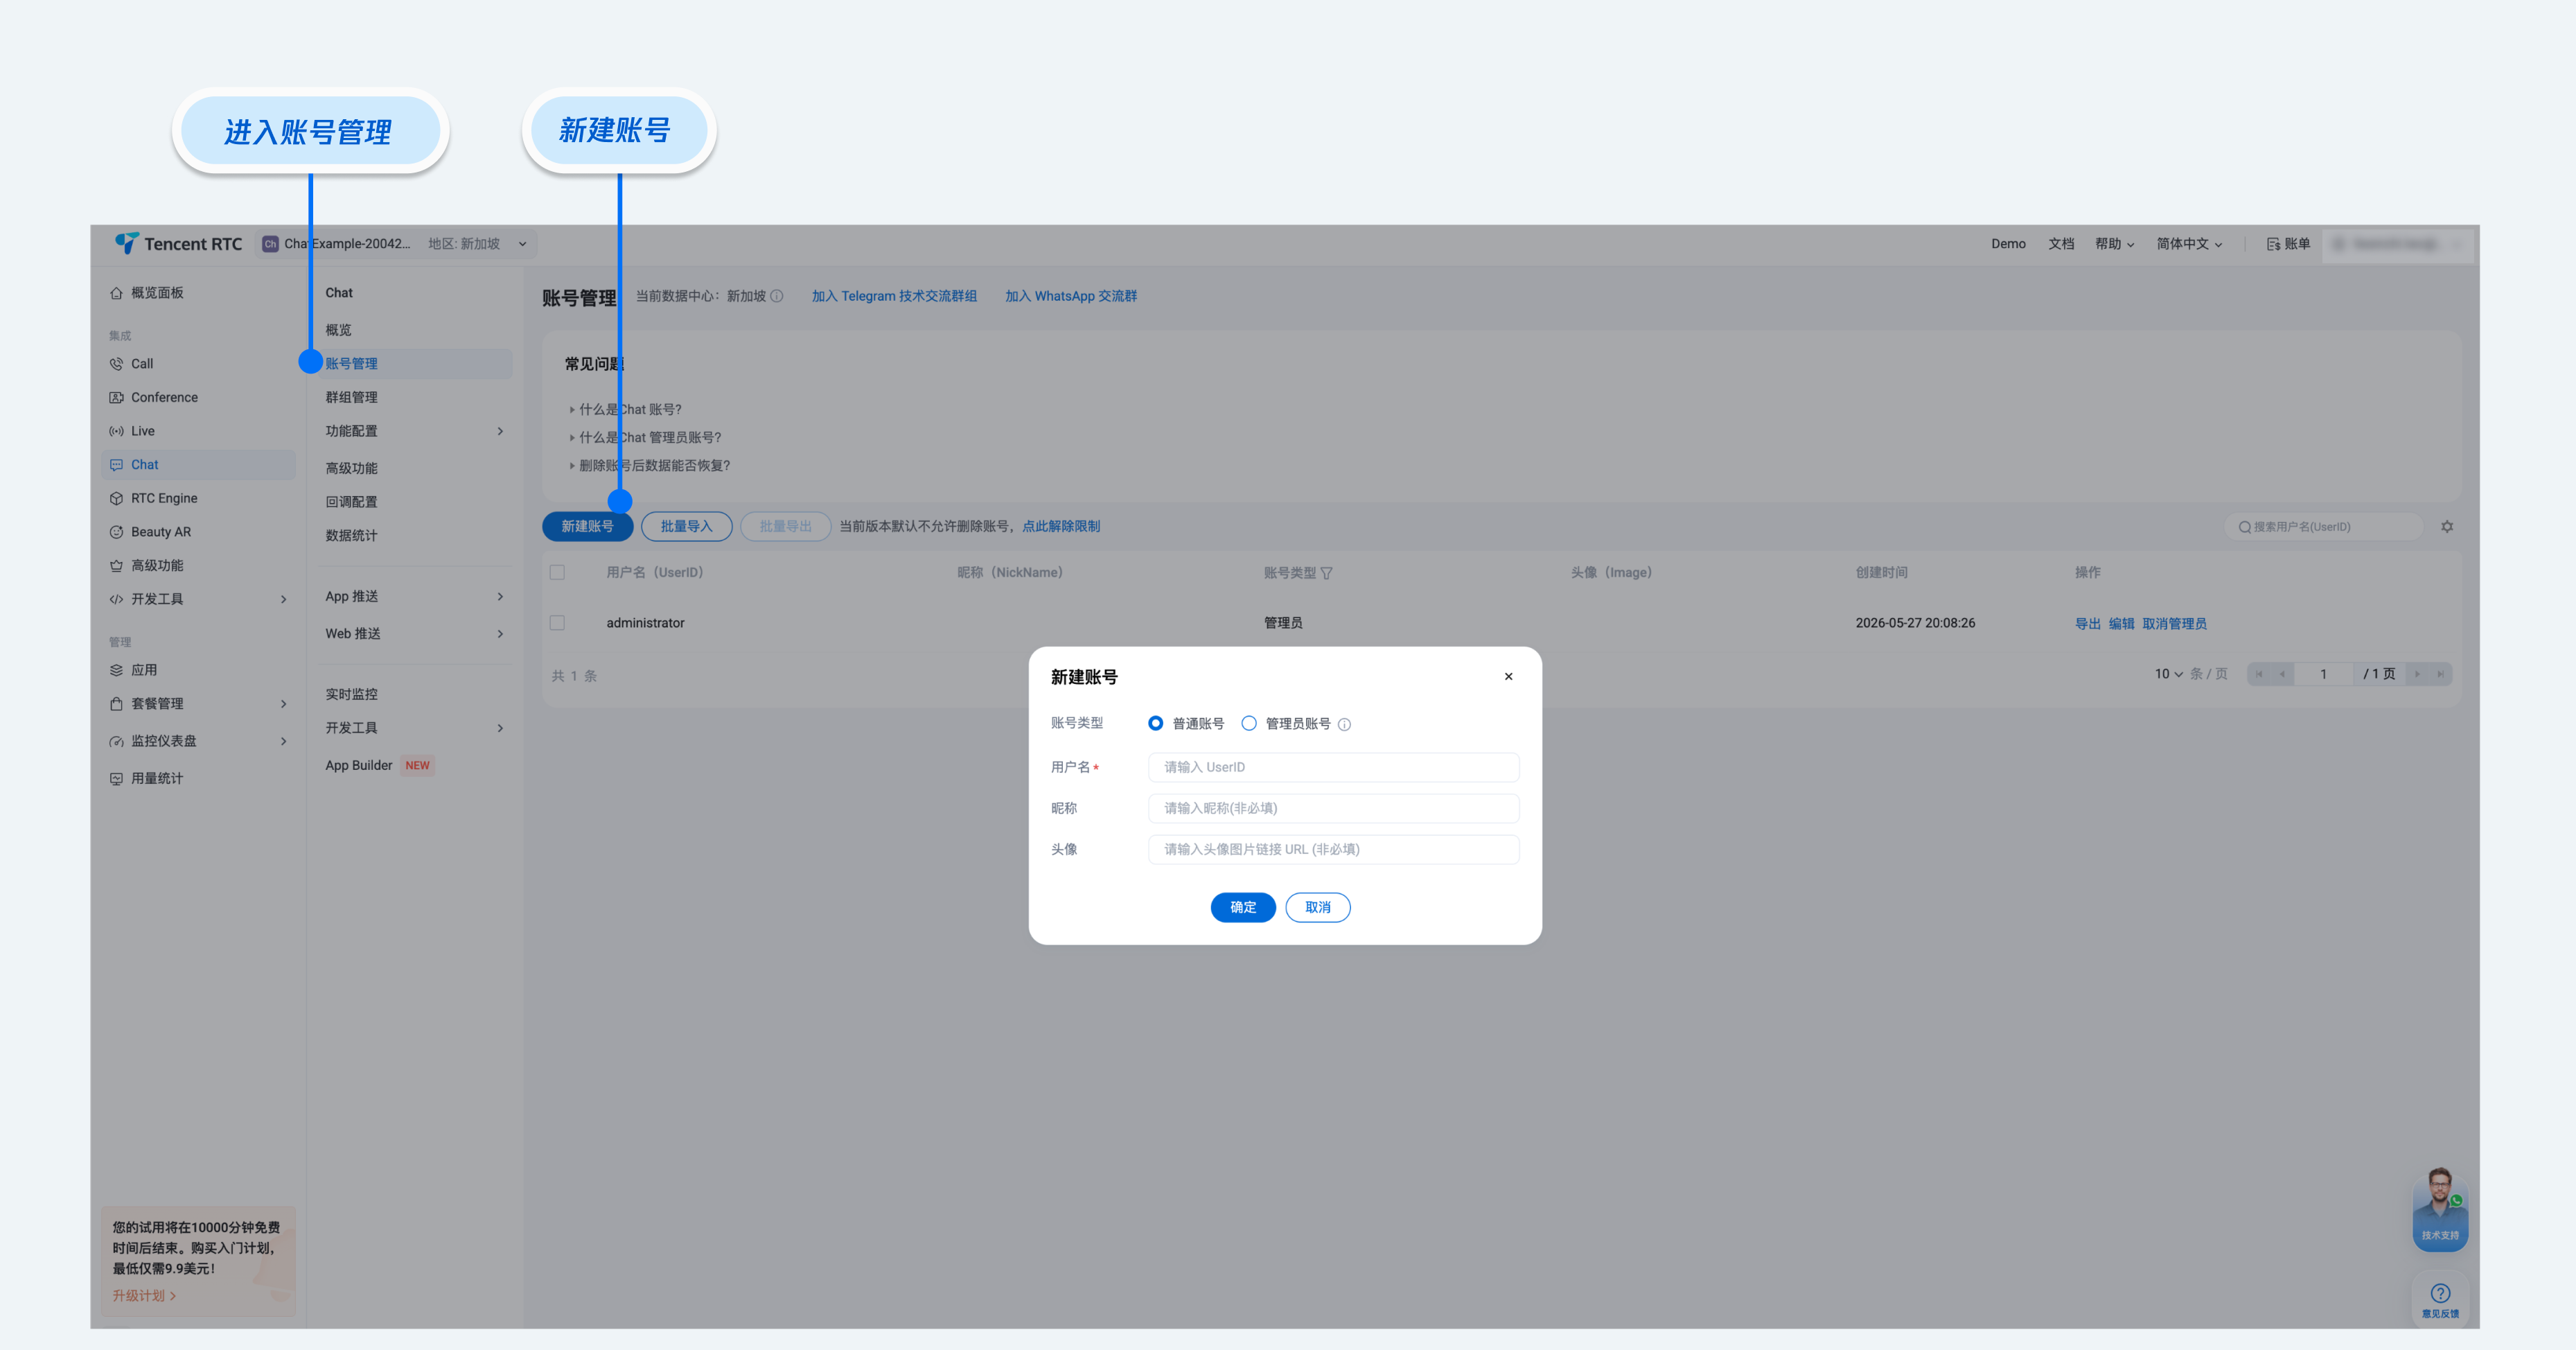
4. userSig 信息,可单击 即时通信 Chat 控制台 > 开发工具 > UserSig 工具,填写创建的 userID,即可生成 userSig。

注意:
本文提到的生成 UserSig 的方案是在客户端代码中配置 SECRETKEY,该方法中 SECRETKEY 很容易被反编译逆向破解,一旦您的密钥泄露,攻击者就可以盗用您的腾讯云流量,因此该方法仅适合本地跑通 Demo 和功能调试。
正确的 UserSig 签发方式是将 UserSig 的计算代码集成到您的服务端,并提供面向 App 的接口,在需要 UserSig 时由您的 App 向业务服务器发起请求获取动态 UserSig。更多详情请参见 服务端生成 UserSig。
开发环境要求
React^18.2 || React^19.0.0 版本
TypeScript
Node.js >= v18(推荐使用当前的稳定版本 LTS v22.x)
npm(版本请与 Node.js 版本匹配)
Git
操作步骤
获取 Demo
# Run the code in CLI$ git clone https://github.com/Tencent-RTC/TUIKit_React.git# Go to the project$ cd ./TUIKit_React/demos/rtcube-vite-react# Install dependencies of the demo and build chat-uikit-react$ npm install
运行 Demo
# Launch the project$ npm run dev
运行之后点击体验 Chat 功能卡片进入登录页,填入获取的 SDKAppID、userID、secretKey 后即可体验聊天功能。
体验单聊和群聊功能
登录完成后会自动跳转到 Chat 场景,可以体验聊天功能。
体验单聊功能:搜索好友并发送您的第一条消息
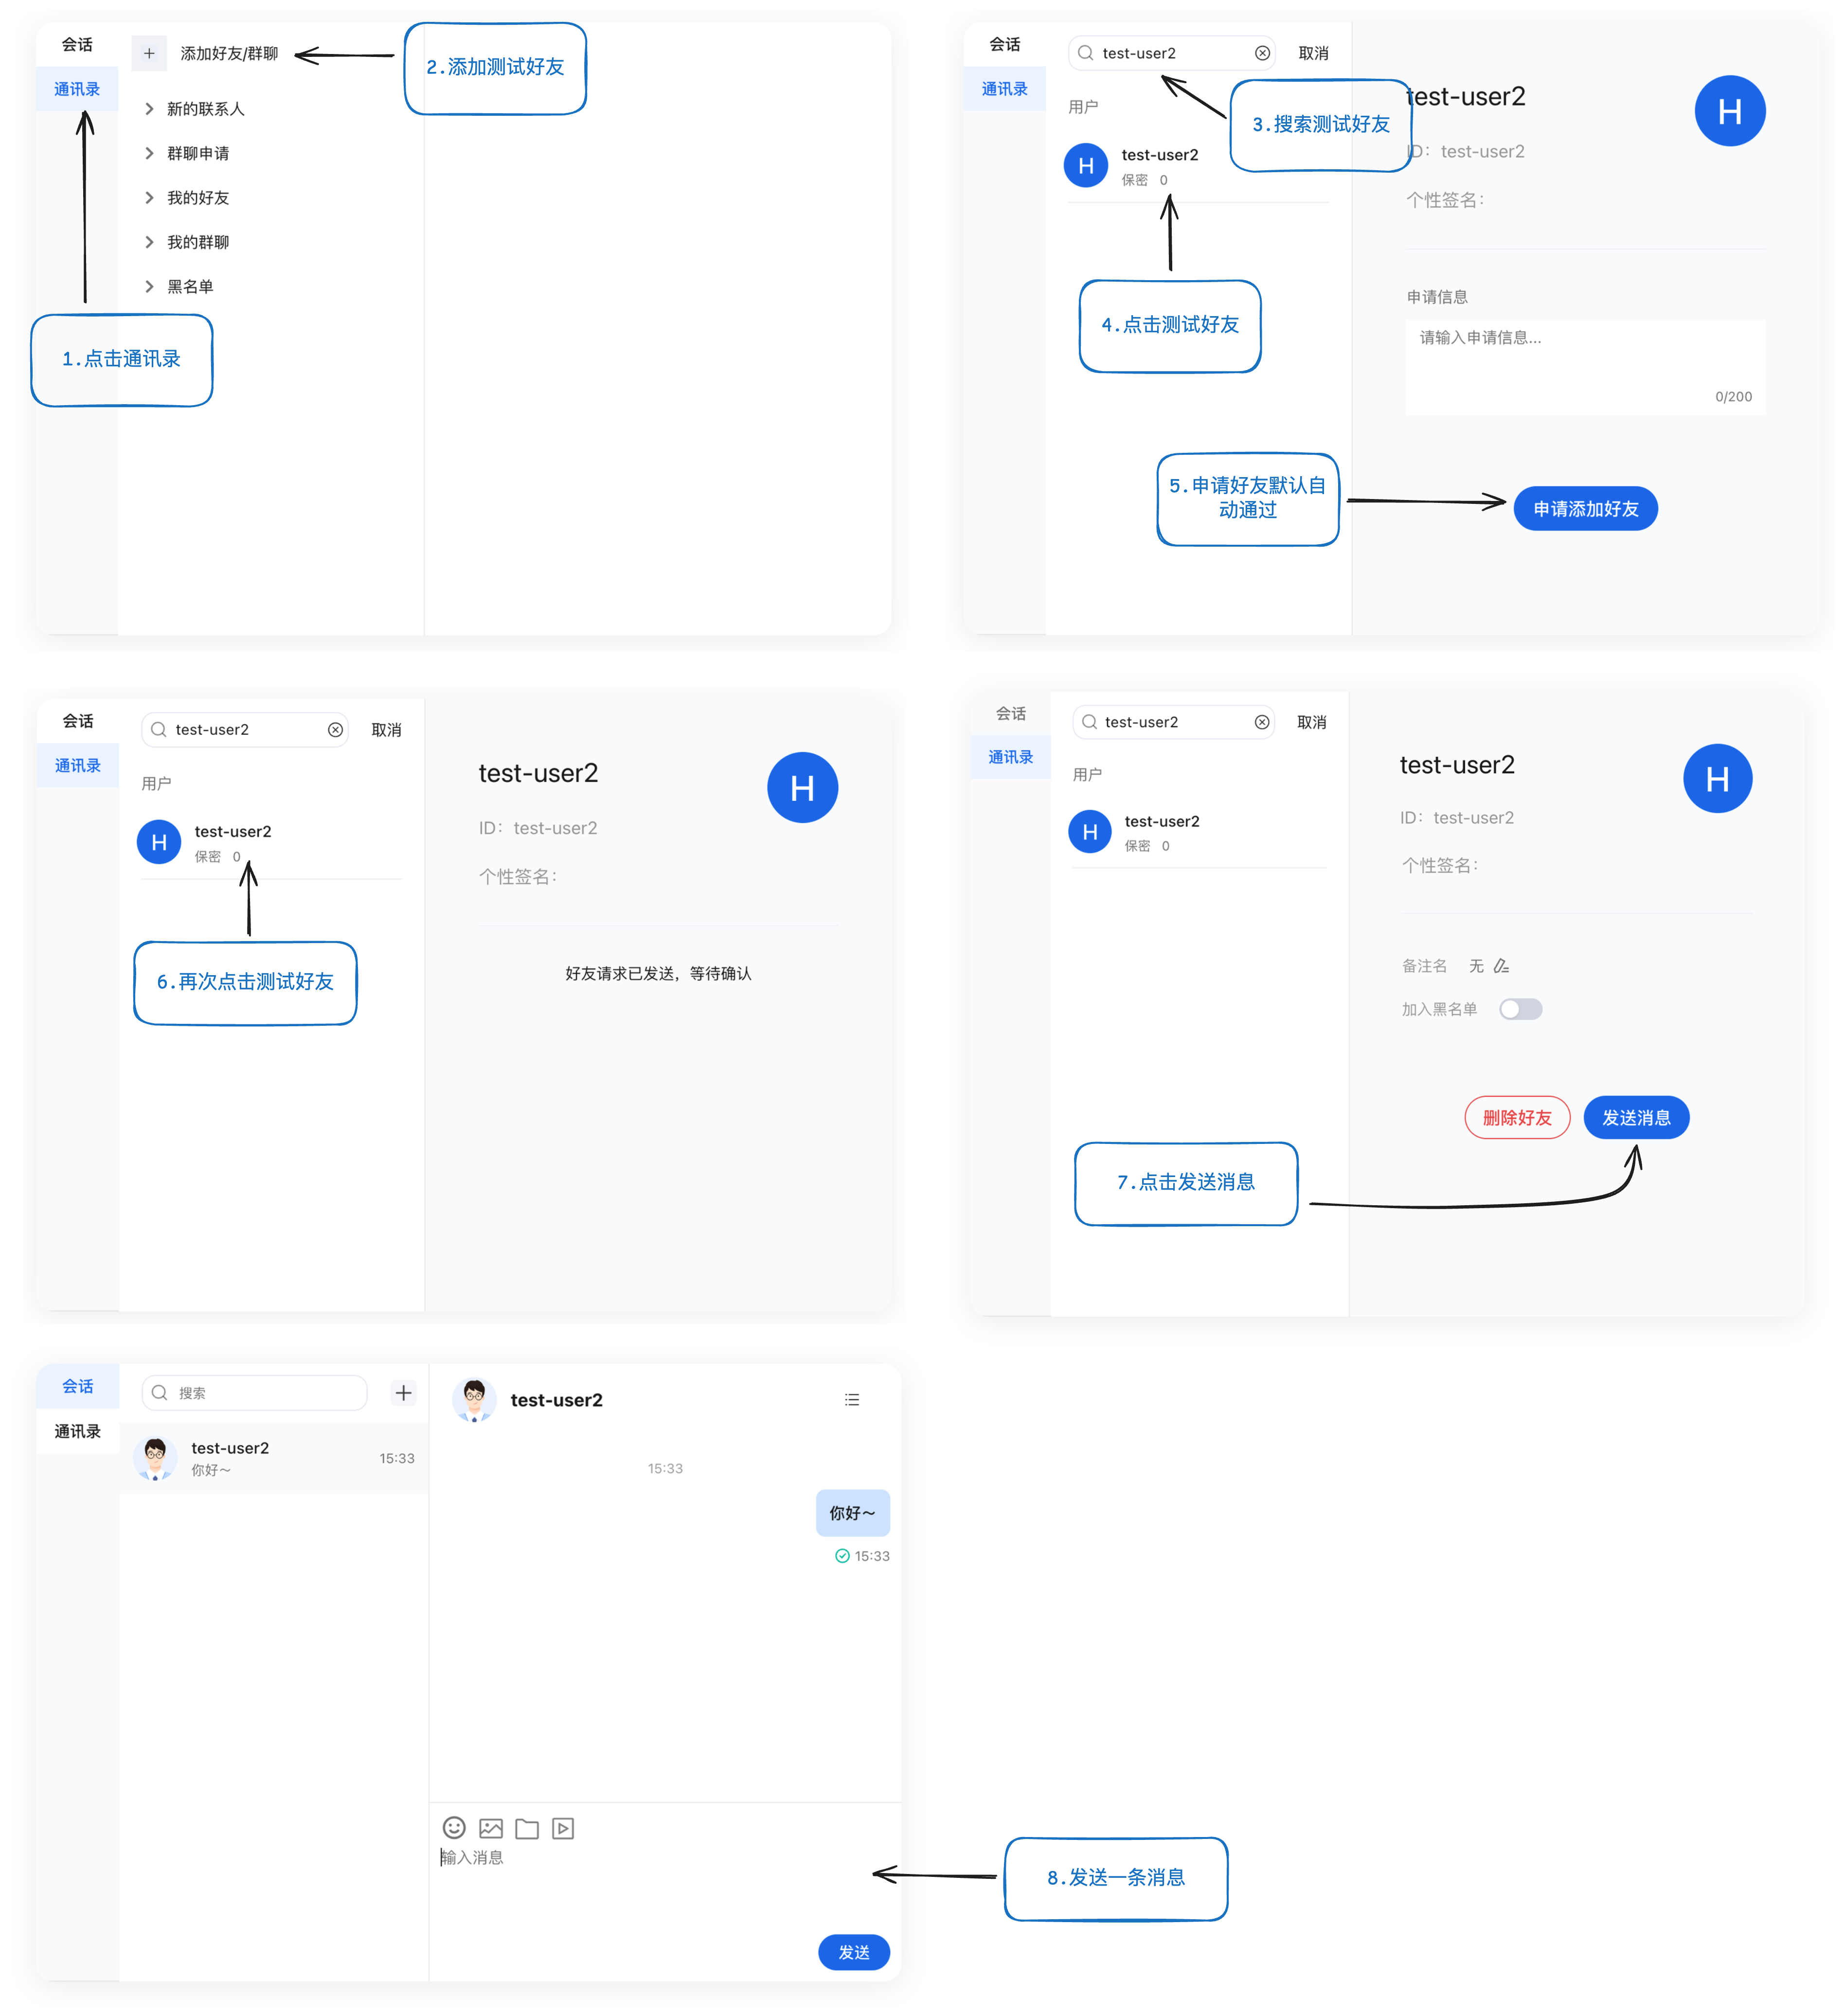
体验群聊功能:创建群聊并发送一条消息

常见问题
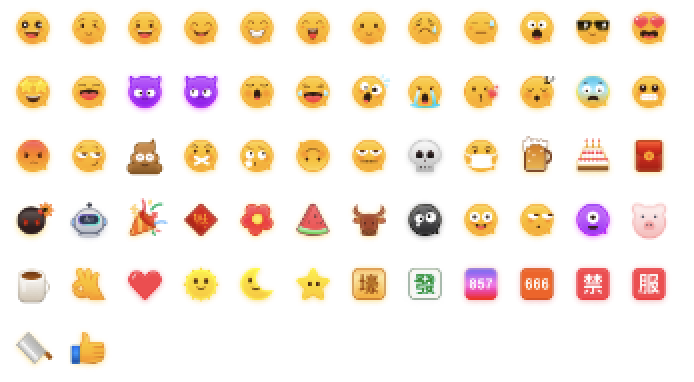
表情包的使用
为了尊重版权,Chat TUIKit 工程中默认不包含大表情元素切图。在正式上线商用前,请您替换为自己设计或拥有版权的其他表情包。请注意,下图所示的默认小黄脸表情包版权属于腾讯云,您可以通过升级至 Chat 专业版 Plus 和企业版 免费使用该表情包。