Log in to the Console > Chat Product Details Page, and select the target application at the top. On the page, you can manage the basic configuration of the app based on your business needs.
Application Package Information
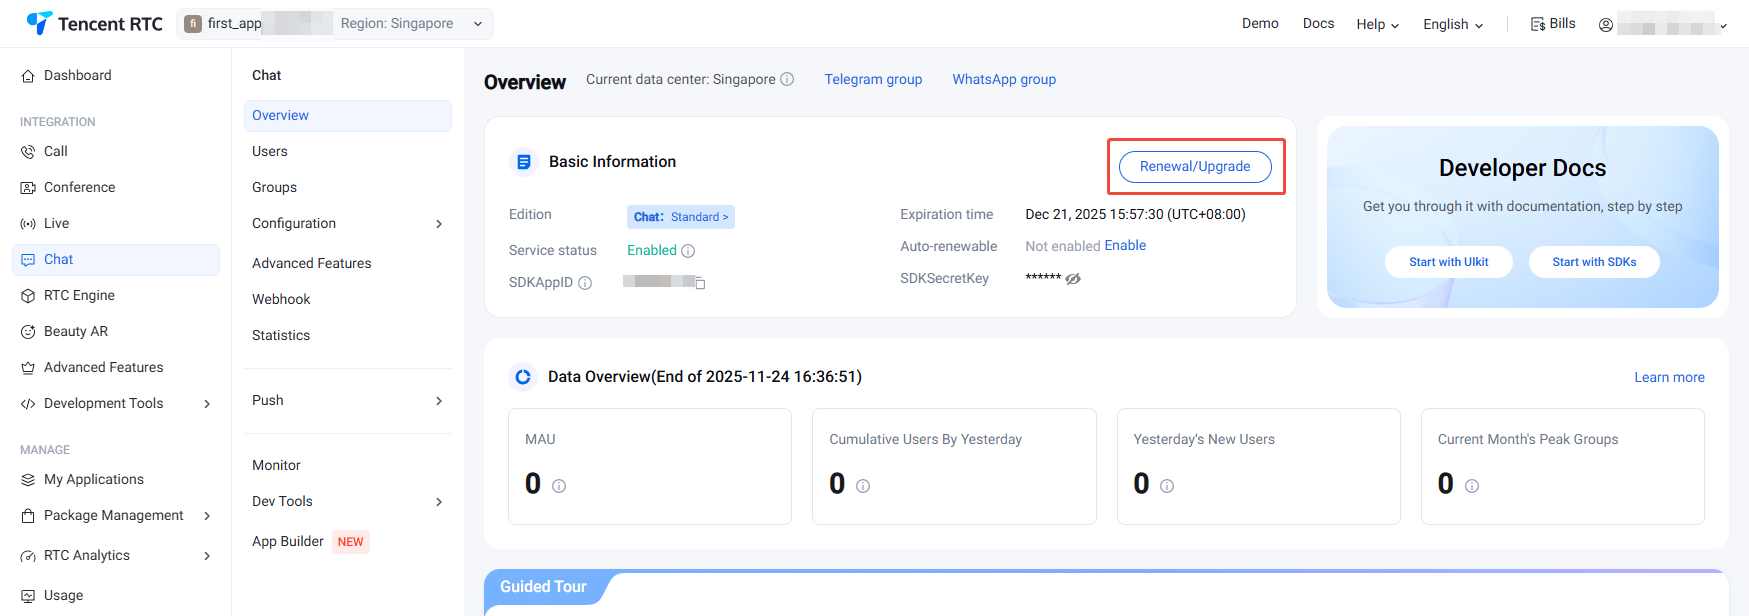
Upgrade Package
On the Chat product detail page, you can see the current business package information of the application. Click Basic information in the Renewal/Upgrade section to upgrade the business package version or configuration. For details, see Upgrading an Application.
Status Update Latency: After manually disabling, re-enabling, or deleting an application, it takes 3–5 minutes for the changes to take effect across the system.
Billing During Update: During this 3–5 minute window, new users may still enter rooms, and usage will be billed as usual.
Once disabled or deleted, new entries are blocked, but billing continues for users already in rooms. Use the Dismiss Room API to force-close active rooms.
Global Impact: Disabling or deleting an application affects all associated services, including Call, Conference, RTC Engine, Live, and Chat. All services will become unavailable.
Applications in a Enabled state cannot be deleted directly. You must disable the application first before performing a deletion.
Cloud Recording Assets: Disabling an application will not automatically delete your cloud recording files. Please manage these files via the COS or VOD console.
Trial Edition Application
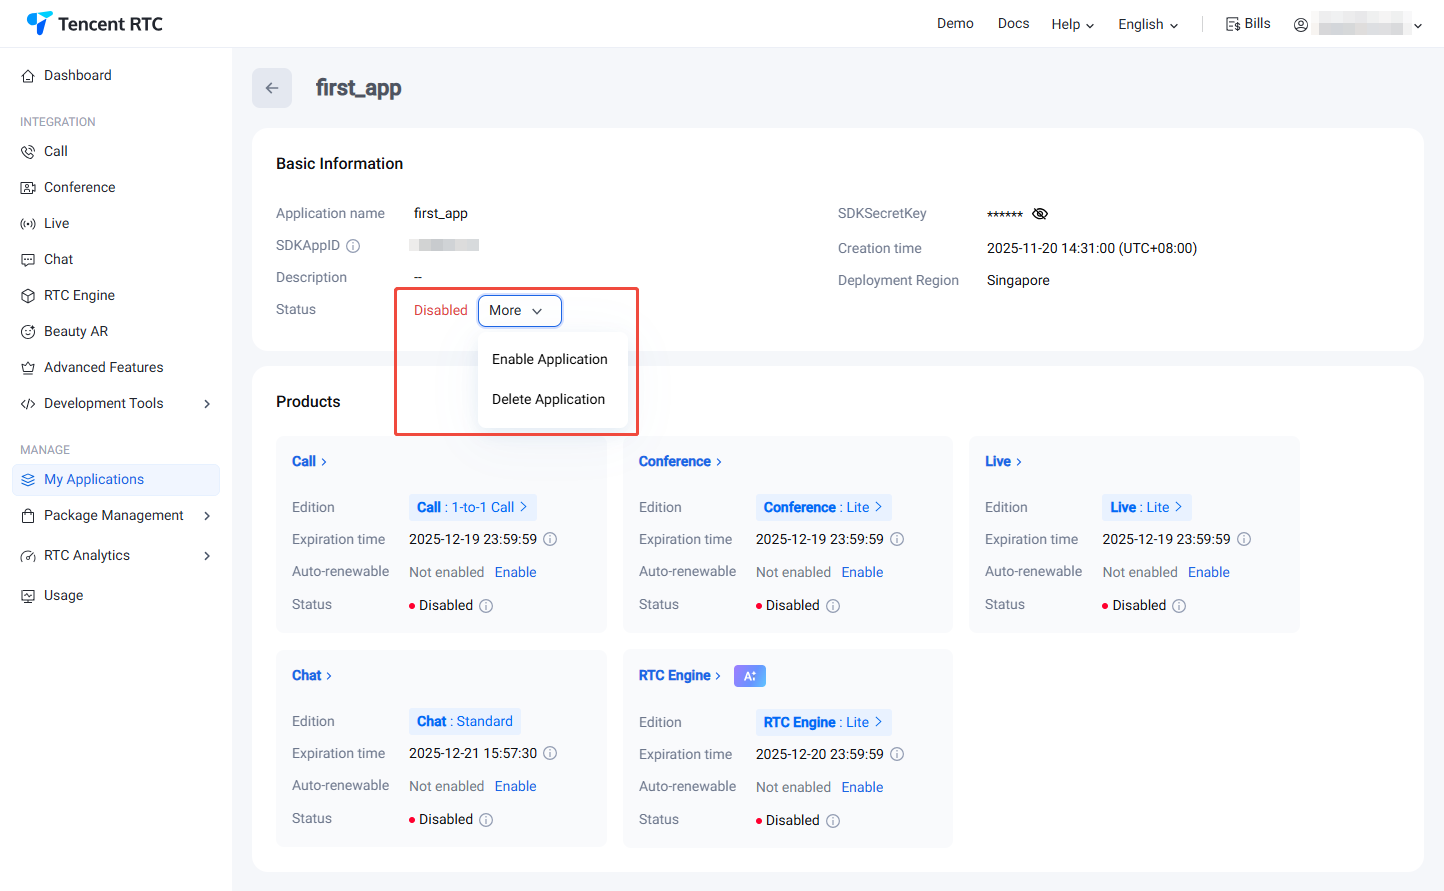
Support manual deactivation: In the Basic Information section, click Disable on the right of Status, then click Confirm in the pop-up deactivation reminder dialog box to disable.
Support manual deletion: In the Basic Information section, click Delete on the right of Status, then click Confirm in the pop-up confirmation dialog box to delete.
Standard Edition, Pro Edition, Pro Edition Plus, Enterprise Edition Applications
Automatically changes to disabled status after 24 hours in arrears. If you need to delete, please contact us to delete this application.
Automatically changes to disabled status after refund. If you need to delete, please contact us to delete this application.
Note:
Disable the application before deleting it.
Deleting or deactivating the application will stop ALL subservices.
Extending Trial Edition Valid Period
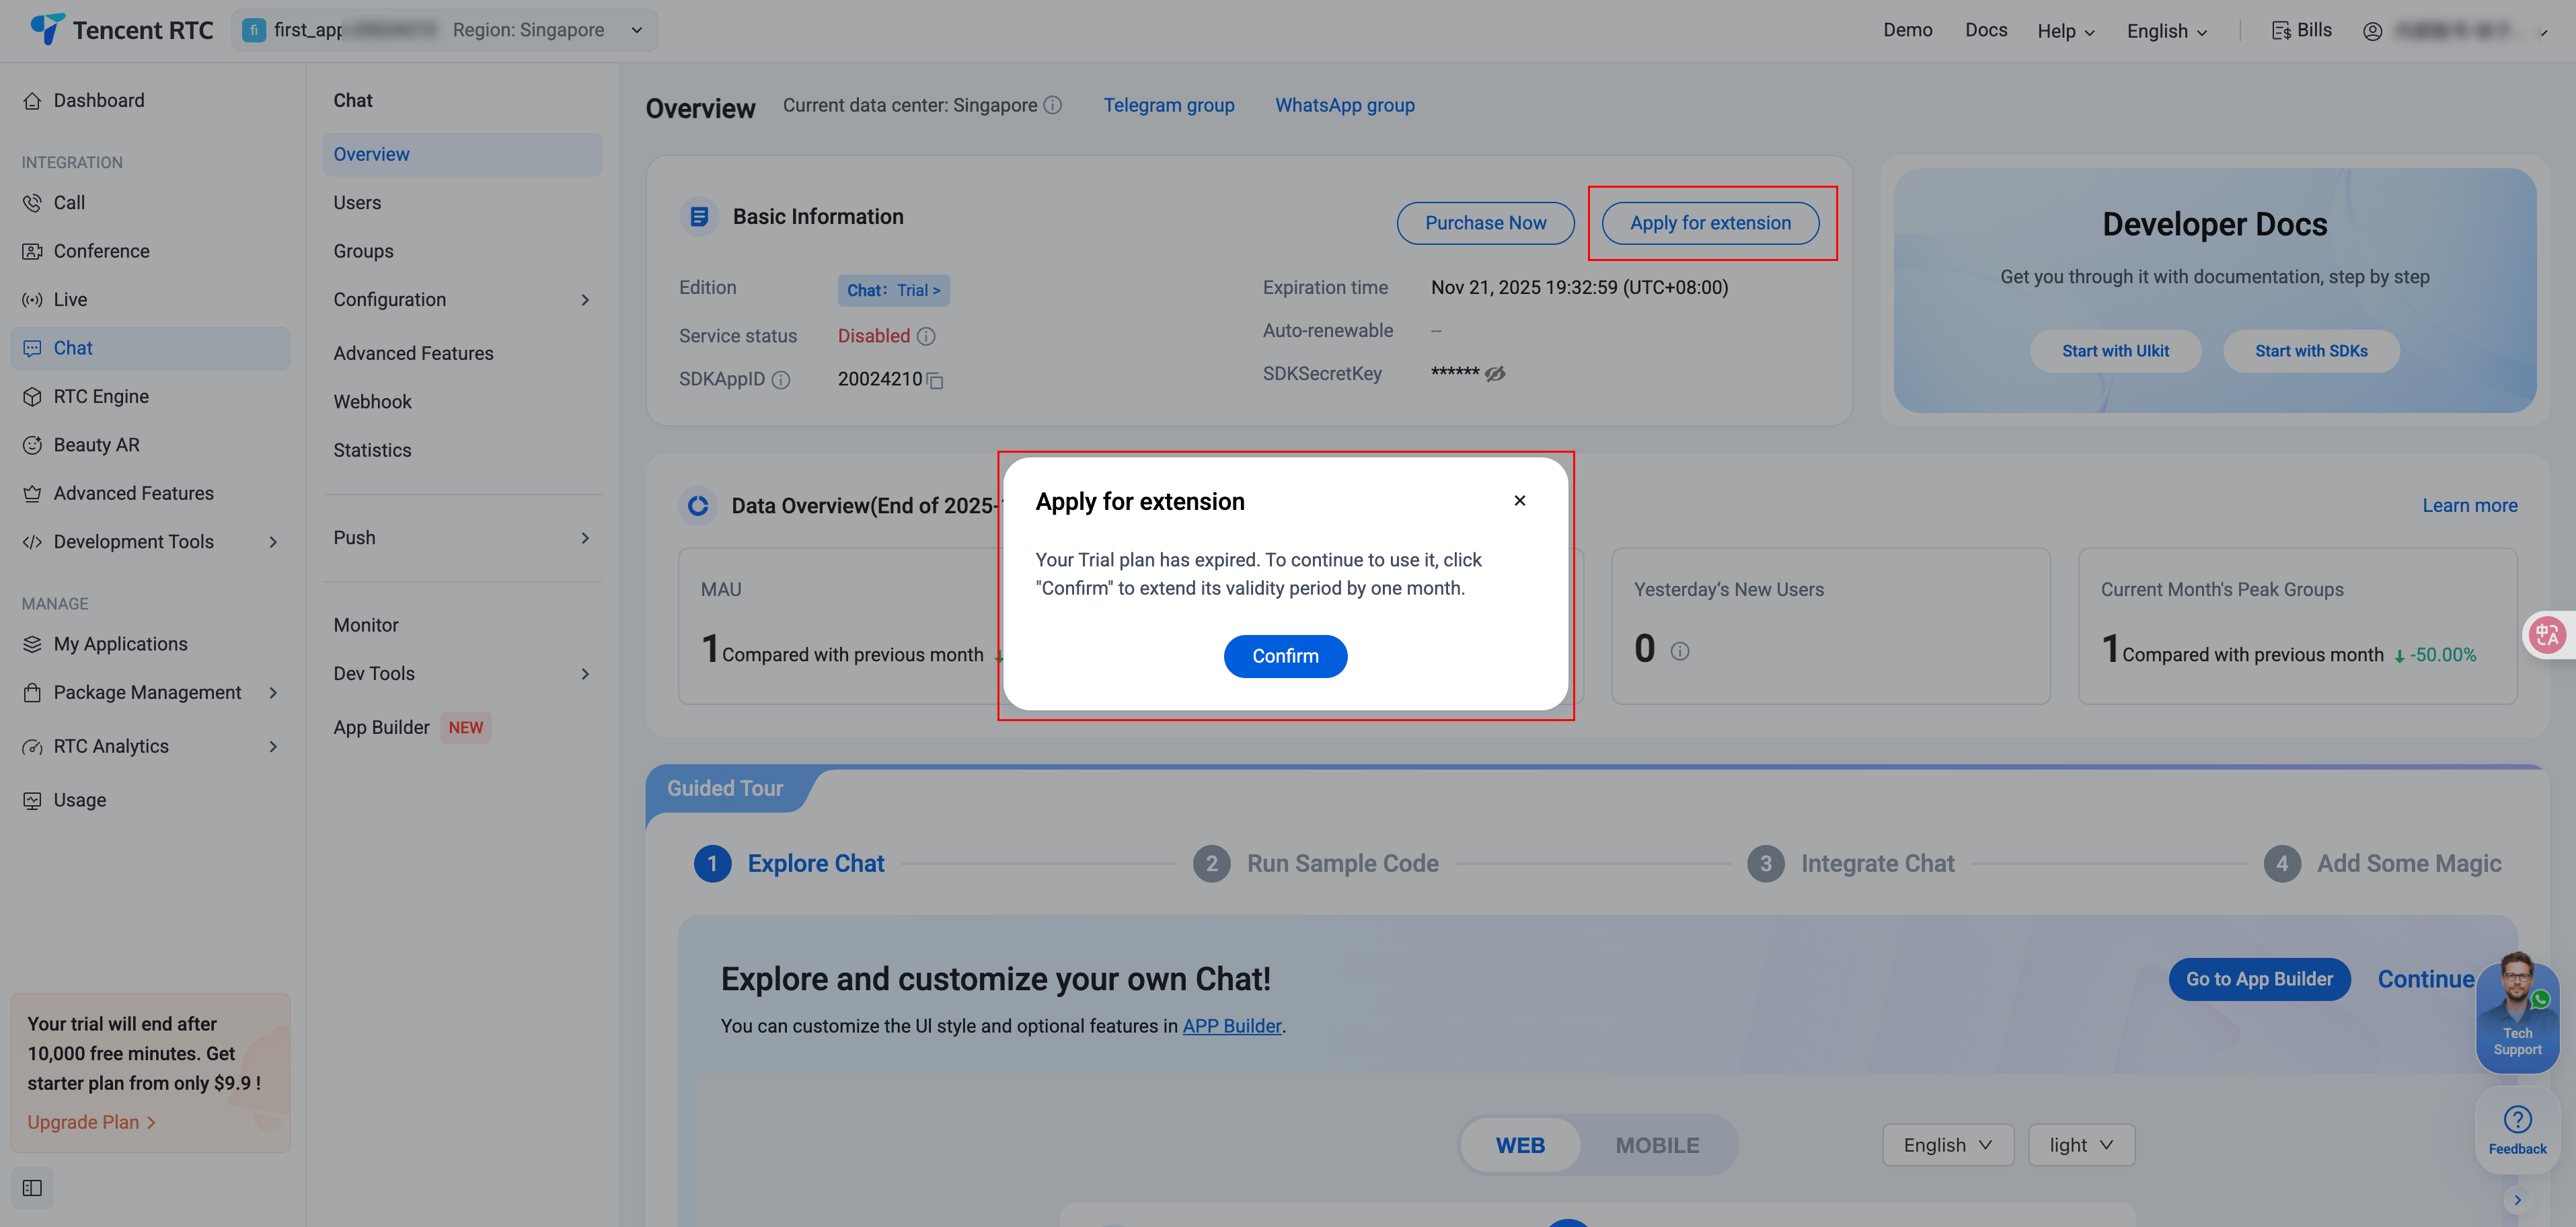
When the application package is Trial Edition and exceeds a one-month valid period, the application will be suspended upon expiration. To continue using Trial Edition for test development, you can apply for extension for in the console for this application.
1. Go to console > Chat App Details Page, select the target application at the top, and enter the Overview page of this application.
2. Click Basic Information and then Apply for Extension.
3. Click Confirm to complete the application for extending the Trial Edition valid period by one month.
Configure Application Information
In the Basic Information section, you can edit the basic information of the application, including Application Name and Description.
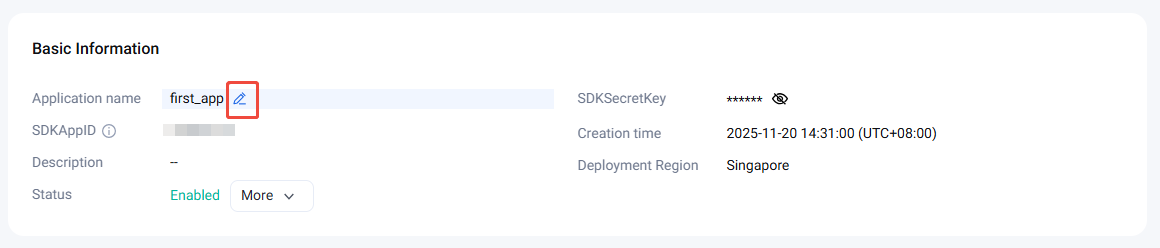
Editing Basic Information
1. Click Edit on the right of Basic Info to edit the app settings.
2. You can modify the application name and description.
3. Click Save.
Configuring Basic Information
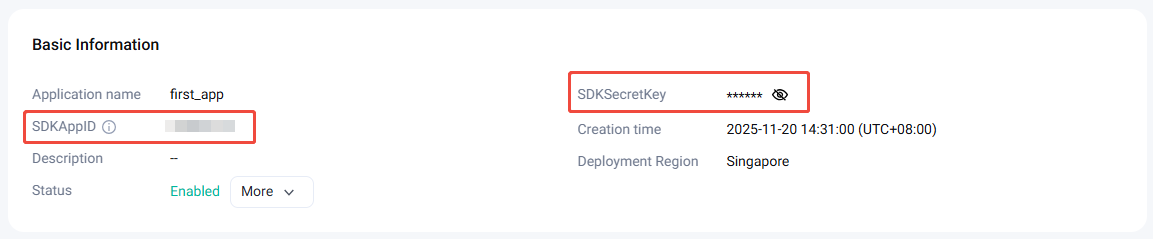
In the Basic Information section, you can obtain the key of this application.
Obtaining a key
Key information is sensitive. Keep it secret to prevent leakage. By default, apps (SDKAppIDs) created before August 15, 2019 use the ECDSA-SHA256 signature algorithm that uses a public key and a private key. You can choose to update to the HMAC-SHA256 signature algorithm.
1. Click SDKSecretKey on the right to view your SDKSecretKey.
2. Click Copy to copy and store the key information. The key can be used to generate UserSig. For detailed operations, see Generating UserSig.