Granting Console Operation Permissions to Sub-accounts
Overview
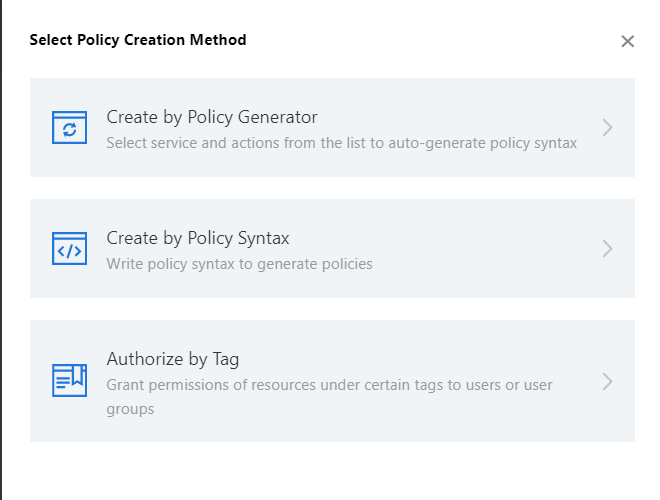
This document describes two authorization methods to resolve the following issues. Detailed steps are as below. To configure more complex permission policies, see Custom Policy.
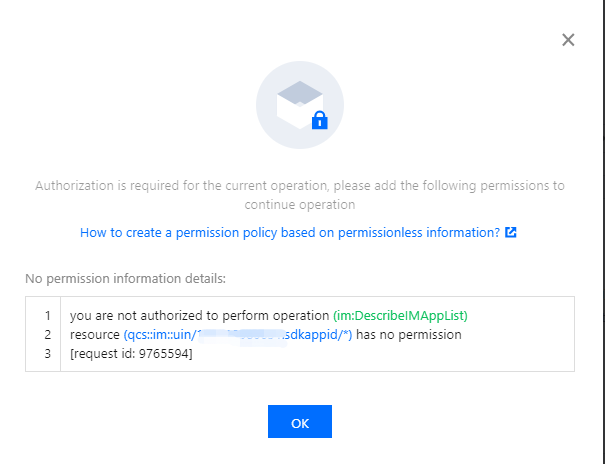
When you are using the Chat service with a sub-account, the root account needs to authorize the sub-account to access the Chat console and to configure settings. Otherwise, the console will not display the application list, as shown below:
When a sub-account has access to tags, but it does not match its access to the console application tags, the sub-account cannot view the newly created applications.
Solution 1. Global Authorization
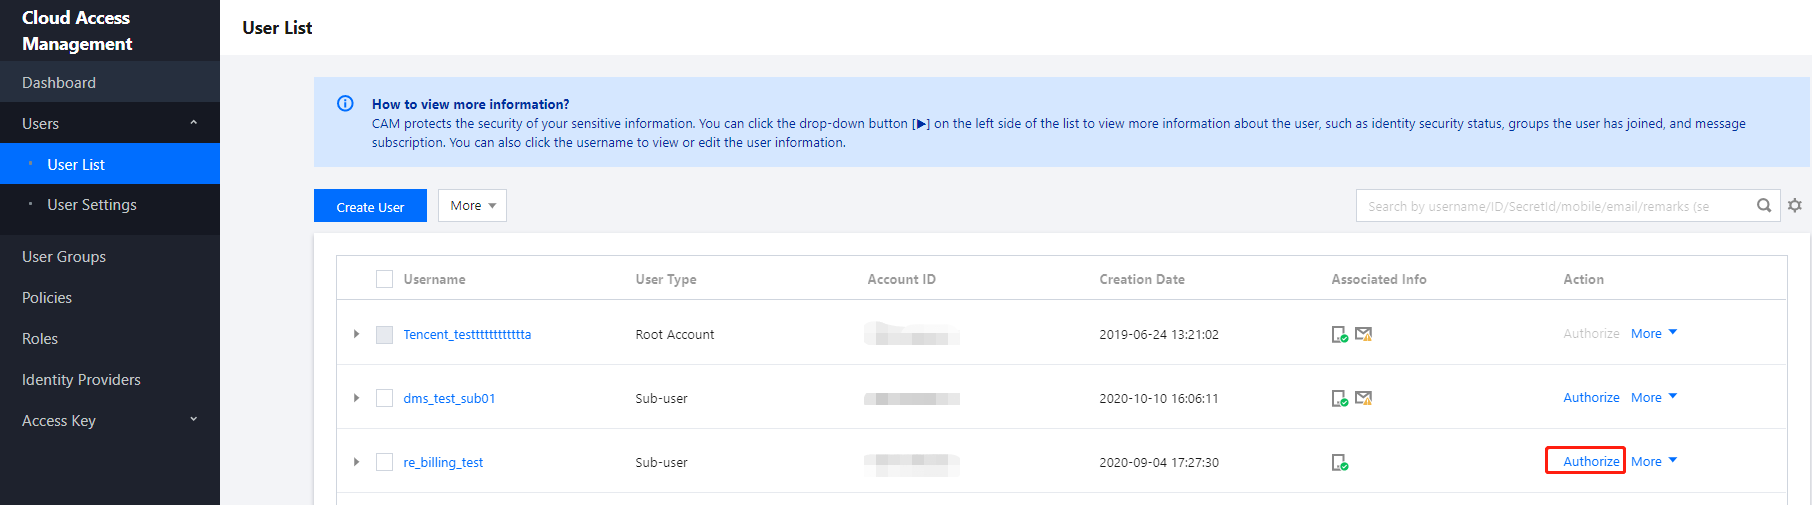
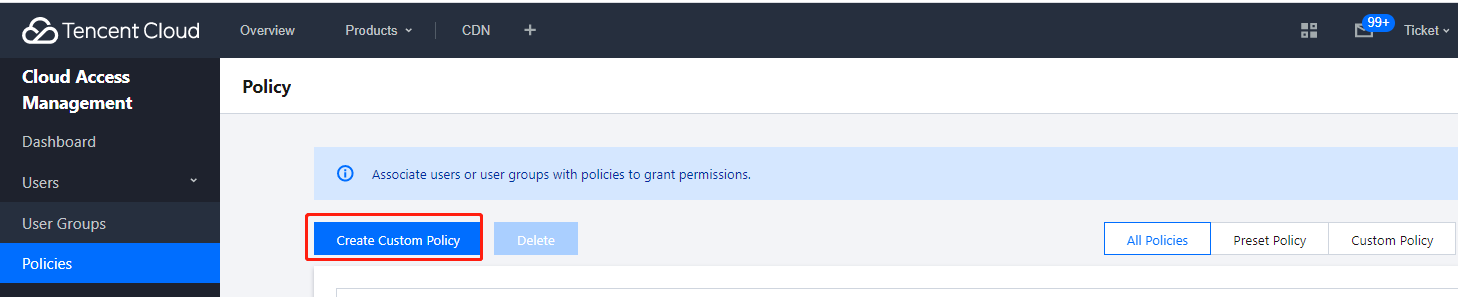
Step 1. Go to CAM to authorize
Log in to the CAM console using the root account, go to User List, click Authorize on the left of the sub-user, and the Associate Policy dialog box will pop up.
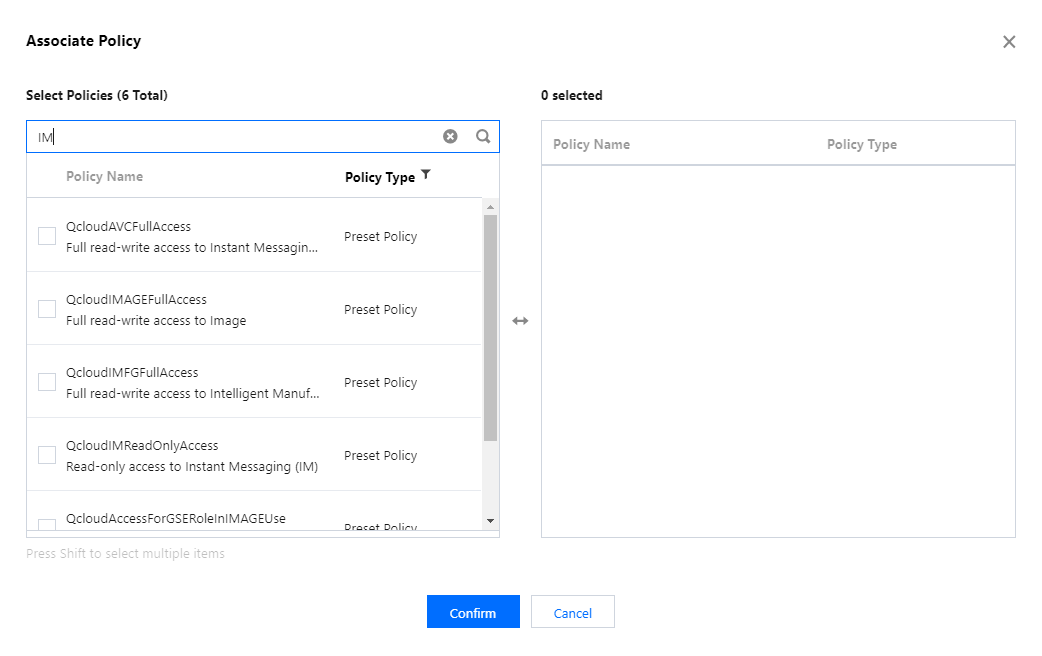
Step 2. Select policies
Search by Chat, select the desired policies, and click Confirm to complete the authorization.
Note:
Read/write access: Allows users to access the console and modify configurations.
Read-only access: Allows users to access the console only, not to perform other operations.
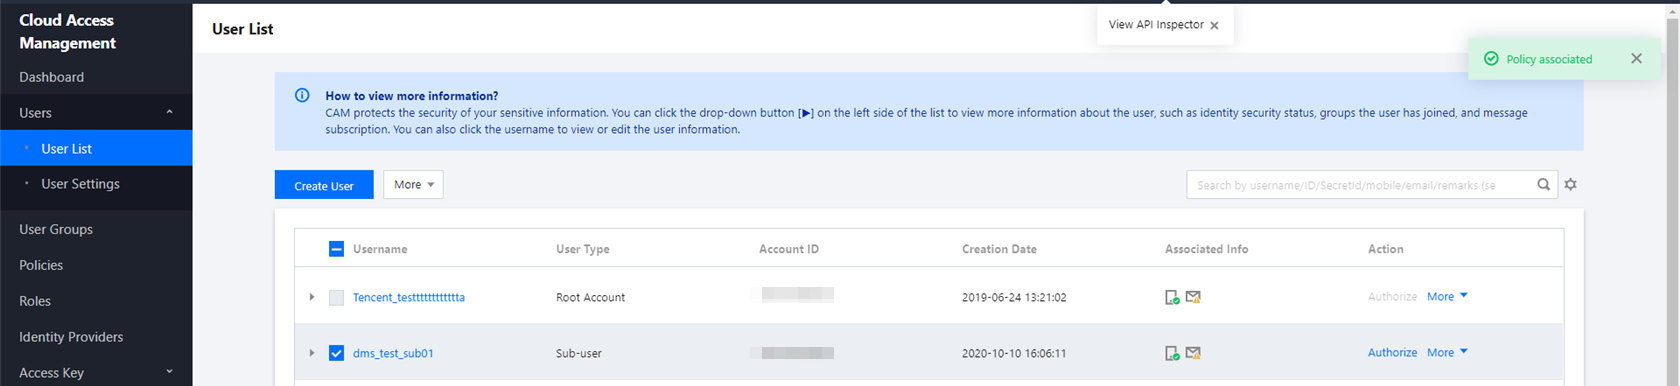
Step 3. Complete authorization
If Policy associated is prompted in the upper right corner, the authorization is completed.
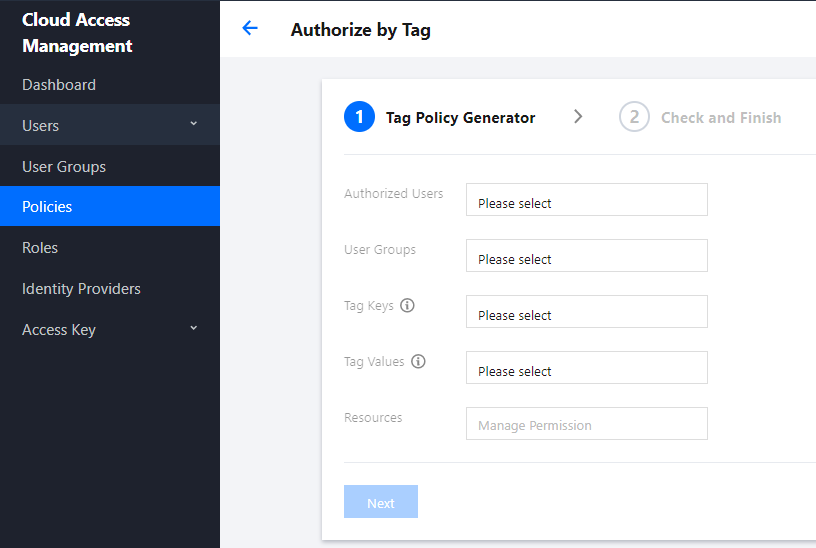
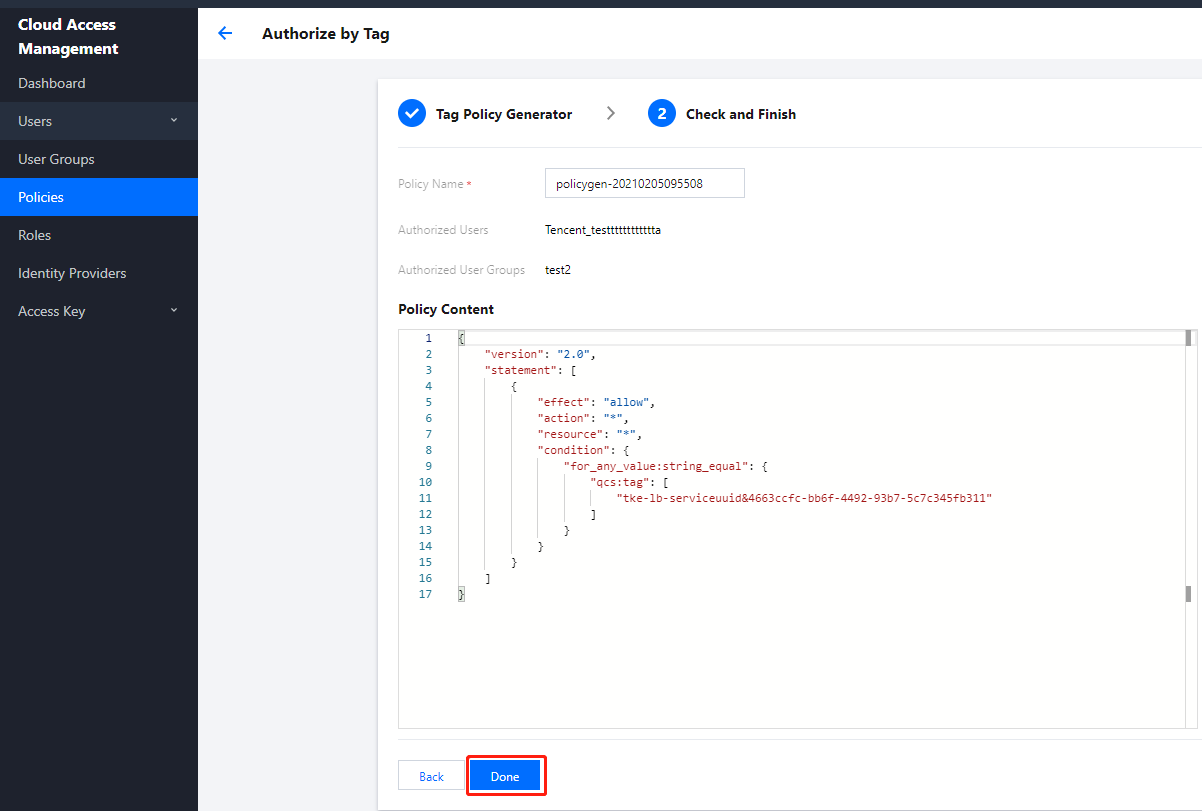
Solution 2. Authorization by Tag
This solution is designed for customers who need to authorize and manage sub-accounts by tag. Sub-accounts can only access and operate applications under the authorized tags.
Caution:
After a tag policy is assigned to a sub-account, the sub-account cannot access or operate applications with no tags. For a sub-account, there are no tags in a newly created application in the Chat console. Therefore, the root account needs to change the application tags to authorized tags so that the sub-account can use the application.
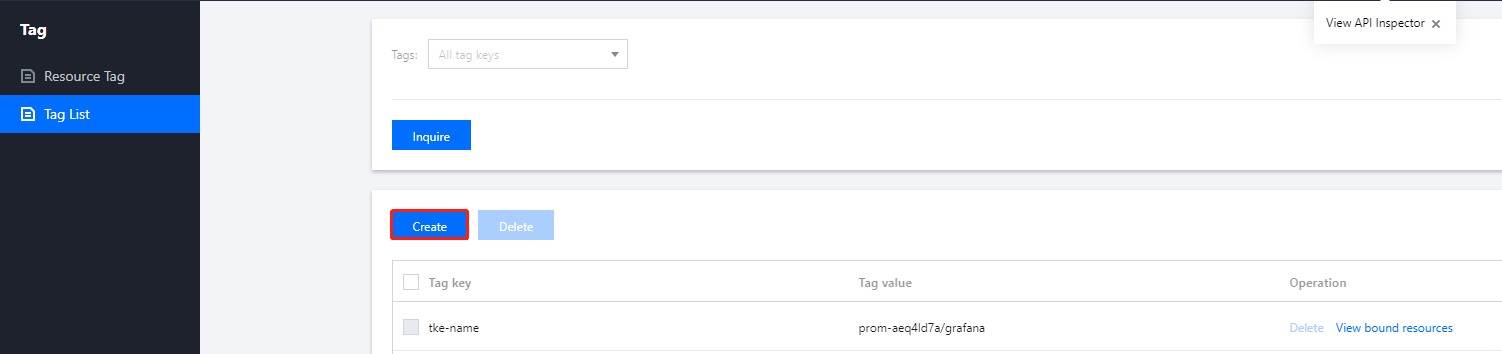
If you want to grant a sub-account the access to an existing app by tag, make sure you have configured tags for the app; otherwise, you will be unable to authorize by tag.
If no tags are configured for the app, go to the Basic Configuration page in the Chat console to configure. For more information, see the Configuring Tags section in Basic Configuration.