If you already have an app, record its SDKAppID and obtain key information.
A Tencent Cloud account can create a maximum of 300 Chat apps. If you want to create a new app, disable and delete an unwanted app first. Once an app (along with its SDKAppID) is deleted, the service it provides and all its data are lost. Proceed with caution.
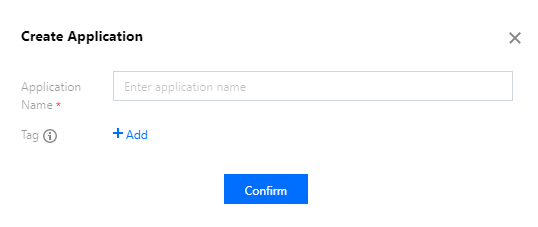
2. Click Create Application, enter your app name, and click Confirm.
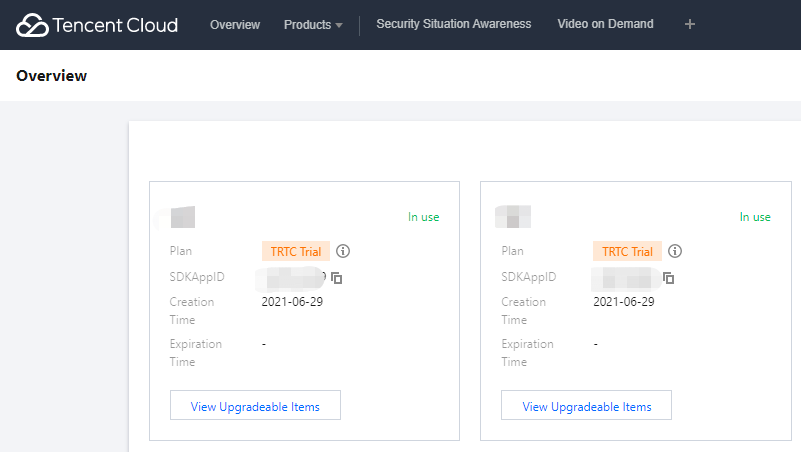
3. After creation, you can see the status, service version, SDKAppID, tag, creation time, and expiry time of the new app on the overview page of the console. Record the SDKAppID.
4. Click the created app. In the left sidebar, click Auxiliary Tools > UserSig Tools to create a UserID and the corresponding UserSig. Then copy the UserSig for future login.
Step 2. Select an appropriate method to integrate the Electron SDK
Tencent Cloud Chat offers two integration schemes:
Integration Scheme
Applicable Scenario
Using a demo
The Chat demo includes all chat features and provides open-source code. If you need to implement chat scenarios, you can use the demo for secondary development. Try it out here.
Self implementation
Implement Chat on your own if the demo does not meet your UI requirements.
To help you better understand Chat SDK APIs, sample APIs are provided here.
Step 3. Use the demo
1. Clone the source code of the Chat Electron demo to the local system.
In the demo, the main process directory src/app/main.js, and the rendering process directory is src/client. If any problem occurs during running, see the FAQs for troubleshooting first.
Step 4. Self implementation
Installing the Electron SDK
Install the latest version of the Electron SDK as follows.
Run the following command:
3. Log in as a test user.
Log in with the test account initially generated in the console for login verification.
Call the timRender.TIMLogin method to log in as the test user.
If the returned code is 0, the login is successful.
This account is for development and testing only. Before the application is launched, the correct UserSig distribution method is to integrate the calculation code of UserSig into your server and provide an application-oriented API. When UserSig is needed, your application can send a request to the business server for a dynamic UserSig. For more information, see Generating UserSig.
Sending a message
The following sample shows how to send a text message. If the returned code is 0, the message is sent successfully.
Sample code:
If sending the message fails, it may be that your sdkAppID does not support sending messages to strangers. In this case, you can disable the friend relationship chain check in the console for testing.
Getting the conversation list
Log in with the other test account to pull the conversation list.
Common use cases include:
Get the conversation list upon application start and listen for the persistent connection to update the conversation list in real time.
At this point, you have completed the Chat module development, and now users can send and receive messages and enter different conversations.
You can develop more features, such as group, user profile, relationship chain, offline push, and local search.
For detailed directions, see here.
FAQs
What platforms are supported?
Currently, both macOS and Windows platforms are supported.
What should I do if the error npm ERR! gyp ERR! stack TypeError: Cannot assign to read only property 'cflags' of object '#<Object>' is reported during development environment installation?
Downgrade the node version to 16.18.1.
What should I do if the error gypgyp ERR!ERR is reported during development environment installation?
What should I do if the error npm ERR! Fix the upstream dependency conflict, or retry is reported when npm install is run?
In versions earlier than npm v7, dependency conflicts that occur during installation are automatically ignored.
In npmv7 or later versions, dependency conflicts will not be automatically ignored, and you need to manually enter a command to ignore them.
The command for ignoring dependency conflicts is as follows:
npminstall --force
What should I do if the error Error: error:0308010C:digital envelope routines::unsupported is reported when npm run start is run?
Downgrade the node version to 16.18.1.
What should I do if the screen turns white when I run npm run start on a macOS client demo?
The error occurs because the rendering process code is not completely built and the port 3000 opened by the main process points to an empty page. The error will be resolved after the rendering process code is completely built and you refresh the window. Alternatively, you can run cd src/client && npm run dev:react and npm run dev:electron to start the rendering process and main process separately.
How do I use native modules in projects built with vue-cli-plugin-electron-builder?
Getting __dirname is not defined when using electron-vite?
Since electron-vite does not support node integration and communicating between main and renderer processes in renderer process, Tencent Cloud Chat SDK needs to be written in preload for use. The code for Main process should be written in main process normally. For details, please refer to electron-vite documentation.
The usage is the same. Please refer to the example code of the document. Taking initialization as an example, the example code is as follows:
//The content of the main process is written to the main process
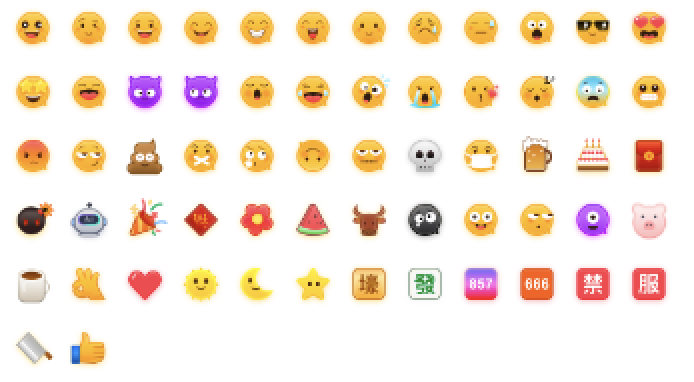
To respect the copyright of emoji designs, the Chat Demo/TUIKit project does not include cutouts of large emoji elements. Please replace them with your own designs or other emoji packs for which you hold the copyright before officially launching for commercial use. The default smiley face emoji pack shown below is copyrighted by Tencent RTC, you can upgrade to Chat Pro Plus Edition and Enterprise Edition to use it for free.