TUIKit is a UI component library based on the Chat SDK. It enables quick implementation of chat, session, search, relationship chain, group, and other features through UI components. This article introduces how to quickly integrate TUIKit and implement core features.
Or, if you prefer a faster and more automated approach, you can refer to Get started with AI integration to streamline the process.
Prerequisites
Node.js v18 or higher (LTS v22 version is recommended)
React^18.2.0 || React^19.0.0
Create a project
Create a new React project named chat-app , and complete project initialization as prompted by the scaffold.
Step 2: Introducing the chat UIKit react component
Note:
The following code does not include SDKAppID, userID, and UserSig. You need to replace them with the relevant information obtained in Step 4.
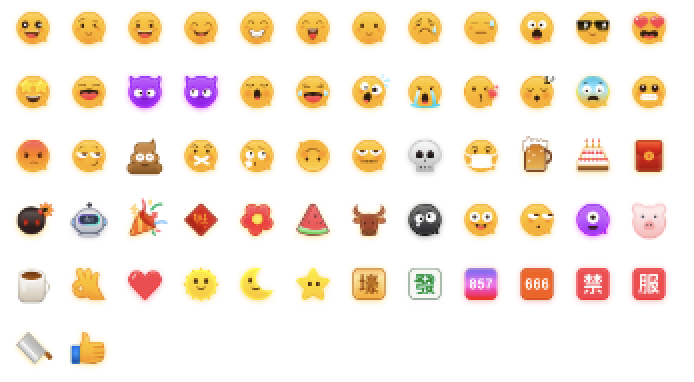
To respect the copyright of emoji designs, the Chat Demo/TUIKit project does not include large emoji graphics. Please replace them with your own designs or other emoji packs for which you hold the copyright before officially launching for commercial use. The default smiley face emoji pack shown below is copyrighted by Tencent RTC, you can upgrade to Chat Pro Plus Edition and Enterprise Edition to use it for free.
Copy the following App.tsx code and replace the original content in App.tsx.
Copy the following App.css code and replace the App.css style file in the same directory.
App.tsx
App.css
import{
UIKitProvider,
useLoginState,
LoginStatus,
ConversationList,
Chat,
ChatHeader,
MessageList,
MessageInput,
ContactList,
ContactInfo,
useUIKit,
useConversationListState,
}from"@tencentcloud/chat-uikit-react";
import{ useEffect, useState }from"react";
import'./App.css';
functionApp(){
// Language support en-US(default) / zh-CN / ja-JP / ko-KR / zh-TW
:{ chats:'Chats', contacts:'Contacts', emptyTitle:'No conversation', emptySub:'Select a conversation to start chatting', error:'Please check the SDKAppID, userID, and userSig. View the specific error information through the developer tools (F12).', loading:'Logging in...'};
Here is the translation. I have replaced the **Ant Design** example with **Material UI (MUI)**, which is widely used in the international React community.
---
**Does it support React 17?**
React v17.x is currently not supported. We only support React v18.2 or higher.
**Can I use third-party component libraries, such as Material UI?**
Yes, you can use other libraries for the "glue code" connecting the core components. You can see this in the example below, where `<ChatSetting />` is encapsulated within a Drawer component. However, please note that the internal elements of the core components cannot be modified at this time.
In the previously copied App.tsx code, the login authentication information is empty. You need to fill in your Tencent Cloud application authentication information in the useLoginState hook, as shown below:
Parameter
Type
Note
userID
String
Unique identifier of the user, defined by you, it is allowed to contain only upper and lower case letters (a-z, A-Z), numbers (0-9), underscores, and hyphens.
SDKAppID
Number
The unique identifier for the audio and video application created in the Tencent RTC Console.
SDKSecretKey
String
The SDKSecretKey of the audio and video application created in the Tencent RTC Console.
userSig
String
A security protection signature used for user login authentication to confirm the user's identity and prevent malicious attackers from stealing your cloud service usage rights.
Explanation of UserSig:
Development environment: If you are running a demo locally and developing or debugging, you can use the genTestUserSig (Refer to Step 3.2) function in the debug file to generate a 'userSig'. In this method, SDKSecretKey is vulnerable to decompilation and reverse engineering. Once your key is leaked, attackers can steal your Tencent Cloud traffic.
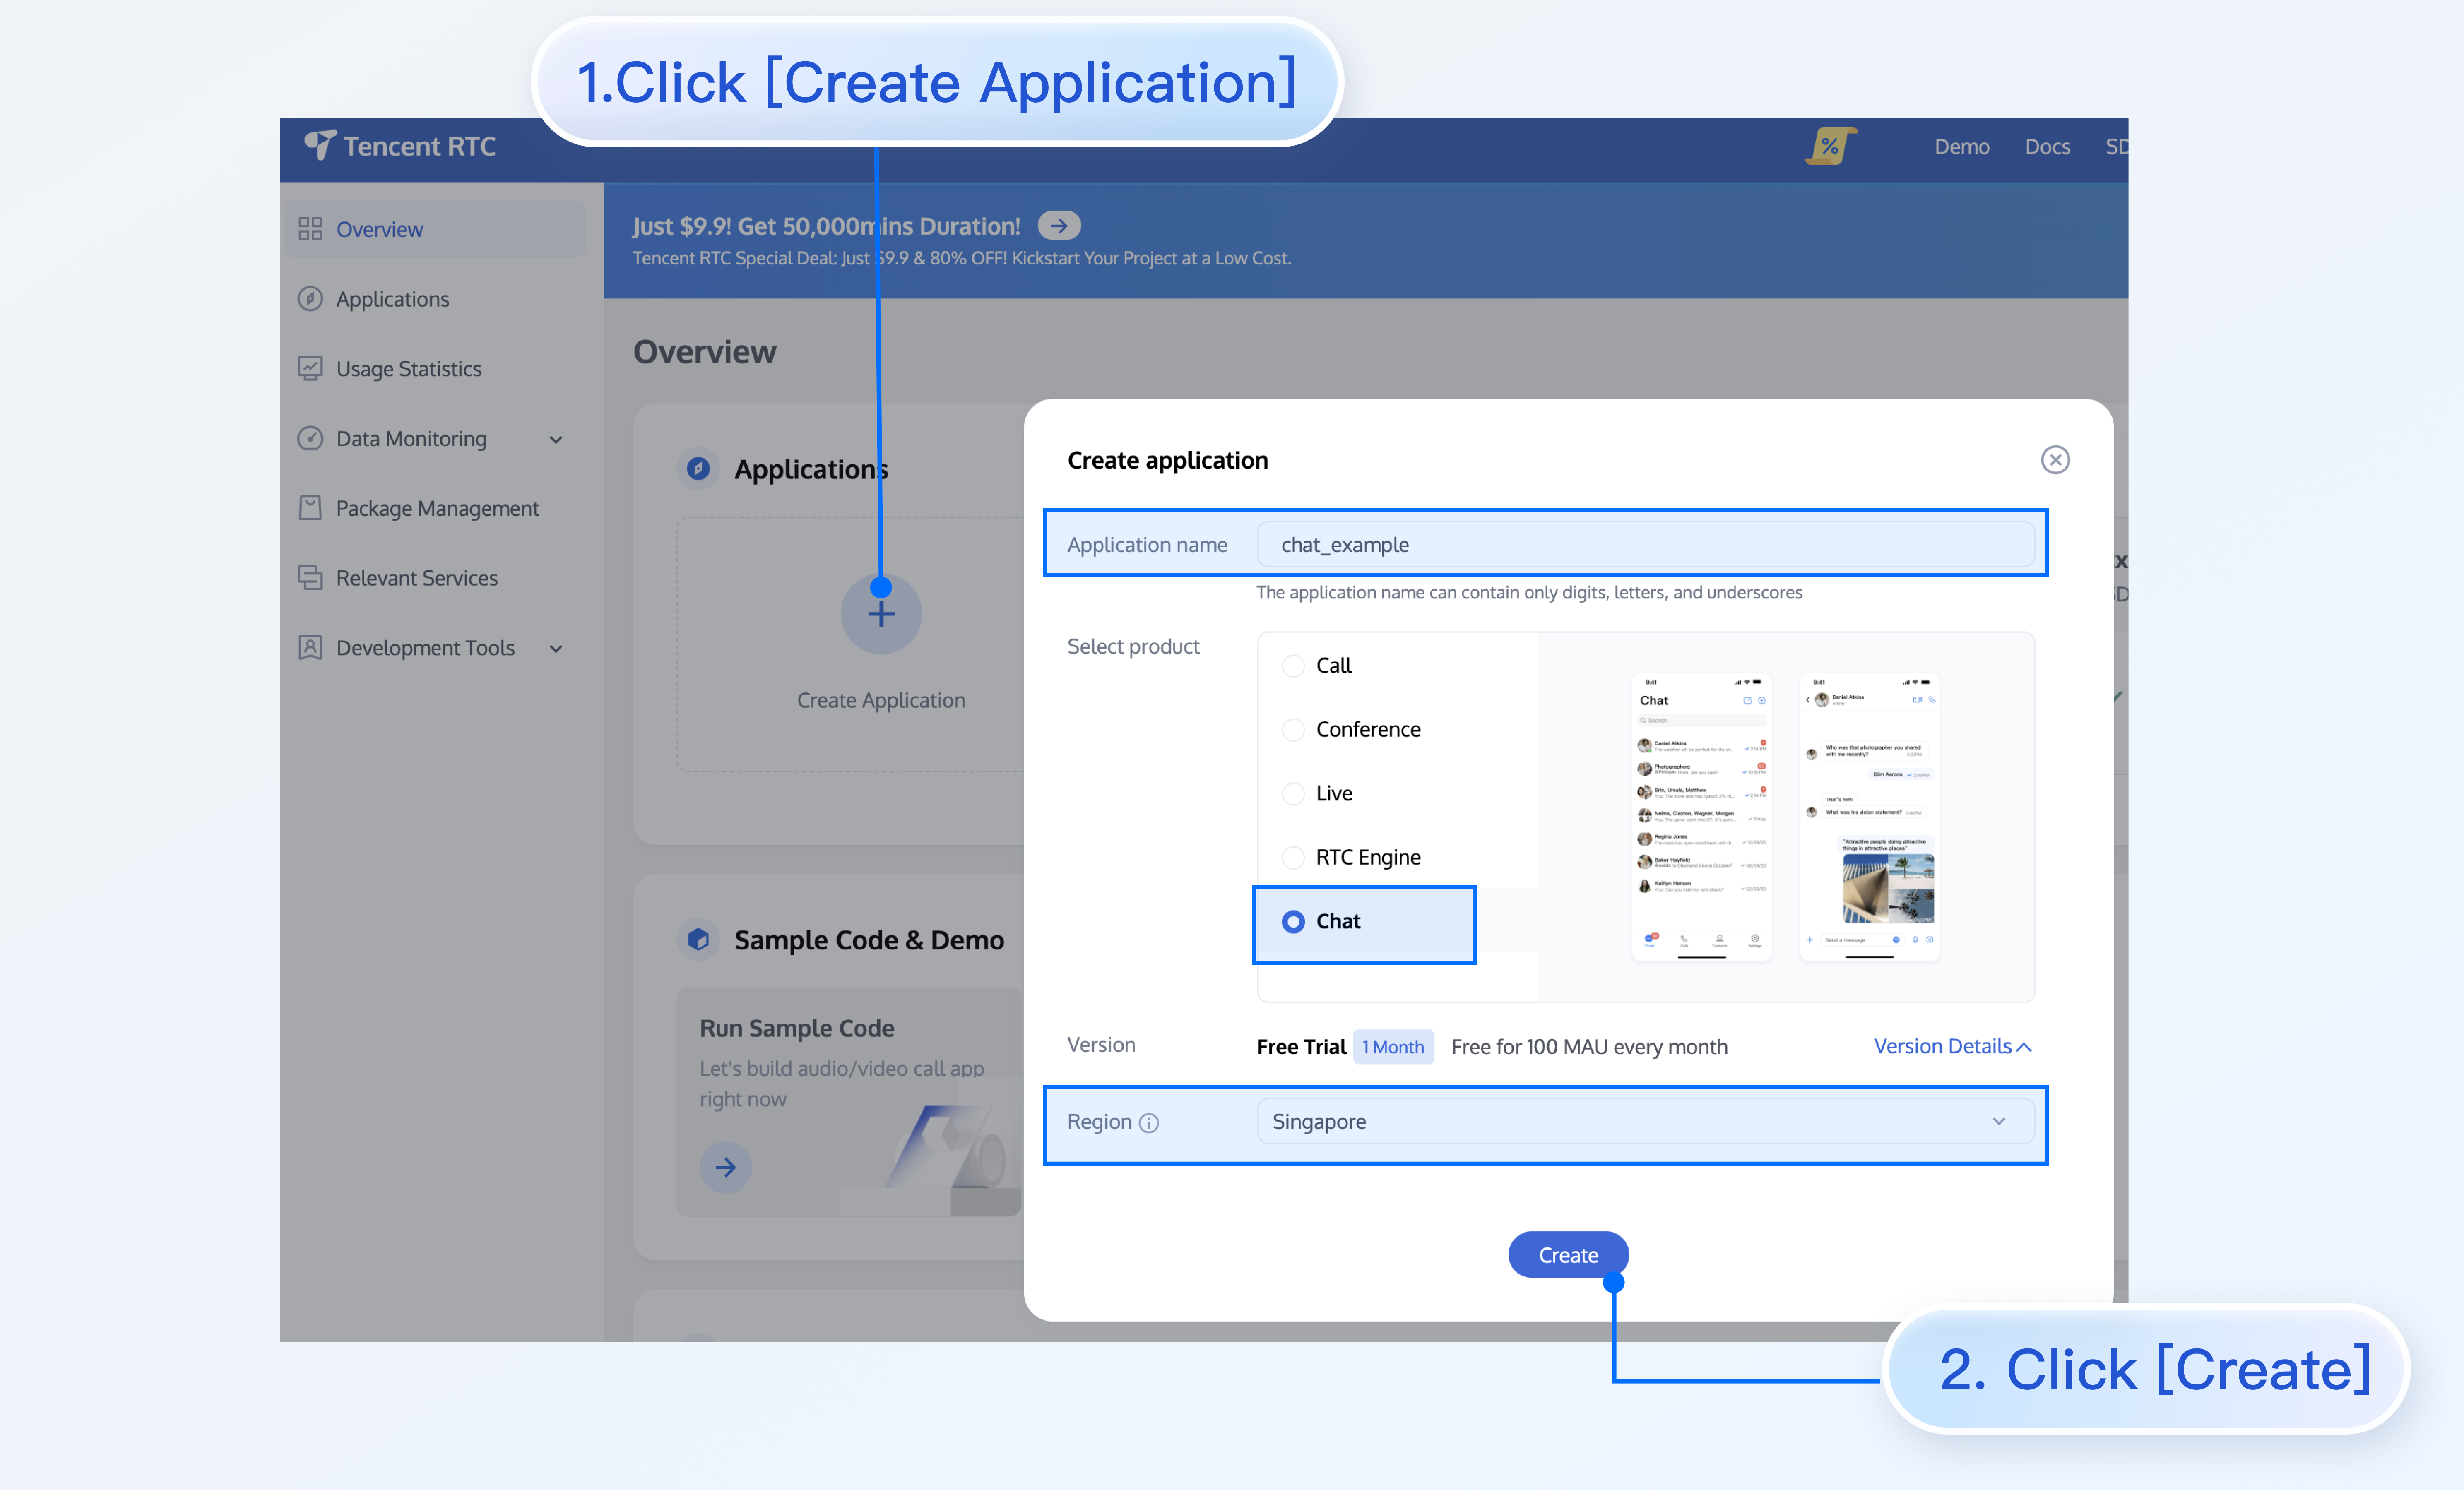
2. Click Create Application, enter your application name, then click Create.
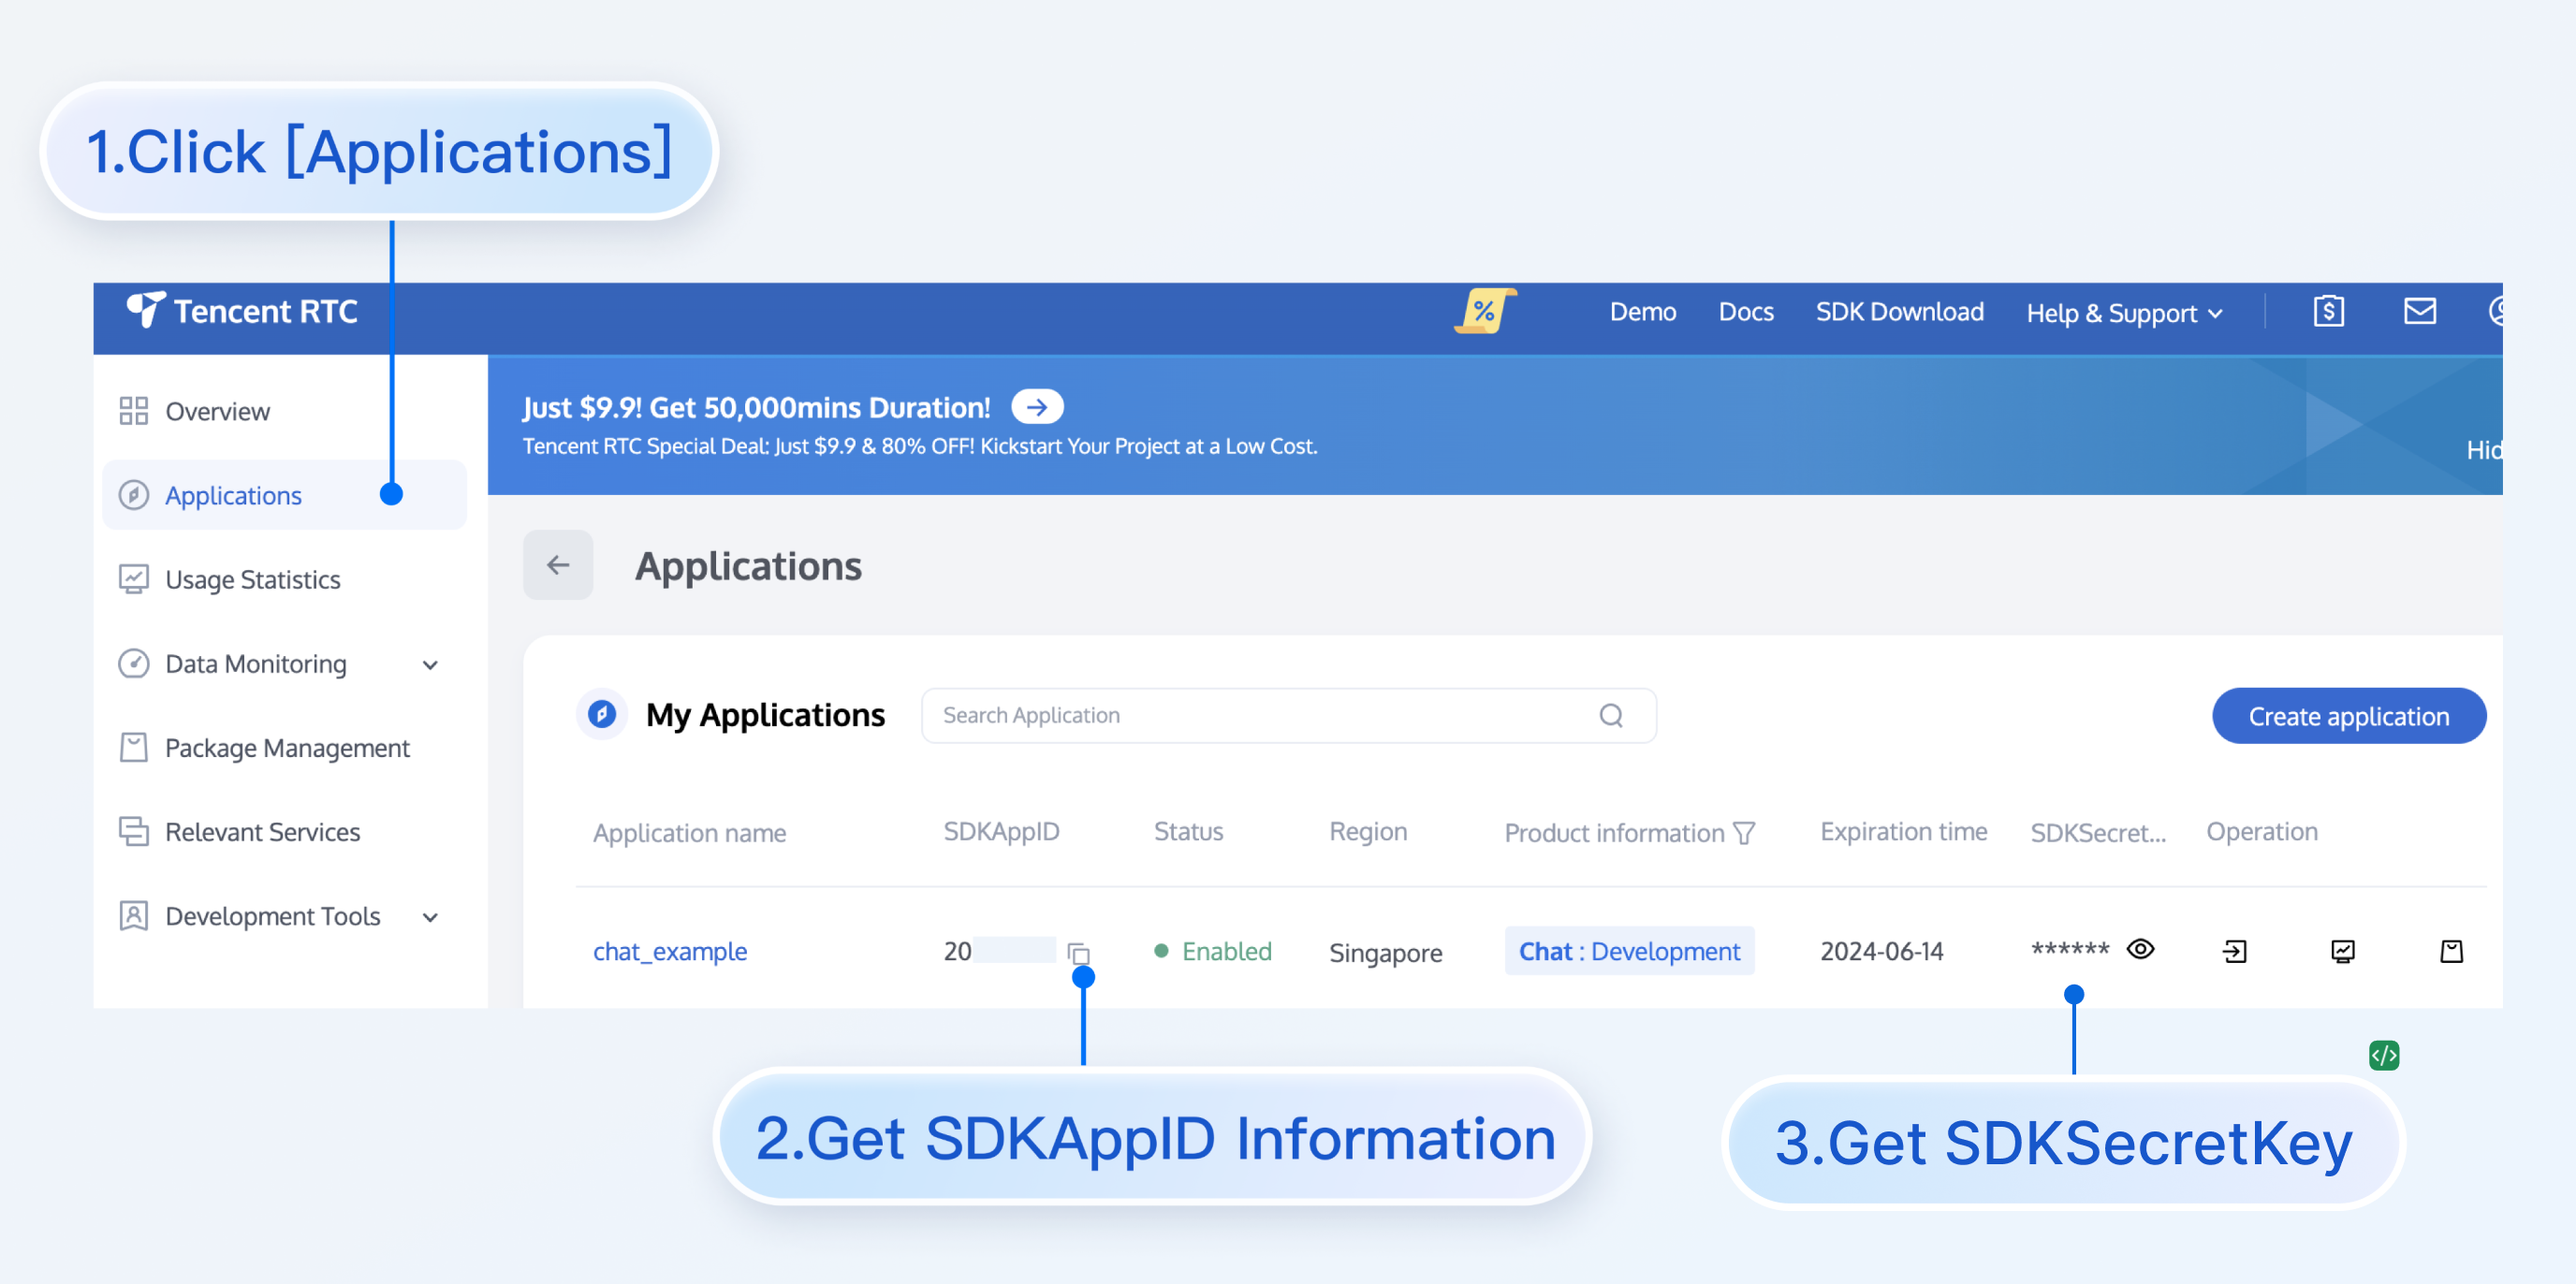
3. After creation, you can view the Application Status, service version, SDKAppID, creation time, Tag, and expiration time of the new application on the console overview page.
Replace SDKAppID, UserID, and UserSig in App.tsx, then run the following command:
npm run dev
Note:
1. Please ensure that in Step 3 code, SDKAppID, UserID, and UserSig are all successfully replaced. Failure to replace them will result in abnormal project behavior.
2. A userID corresponds to a userSig, for more information, see Generating UserSig.
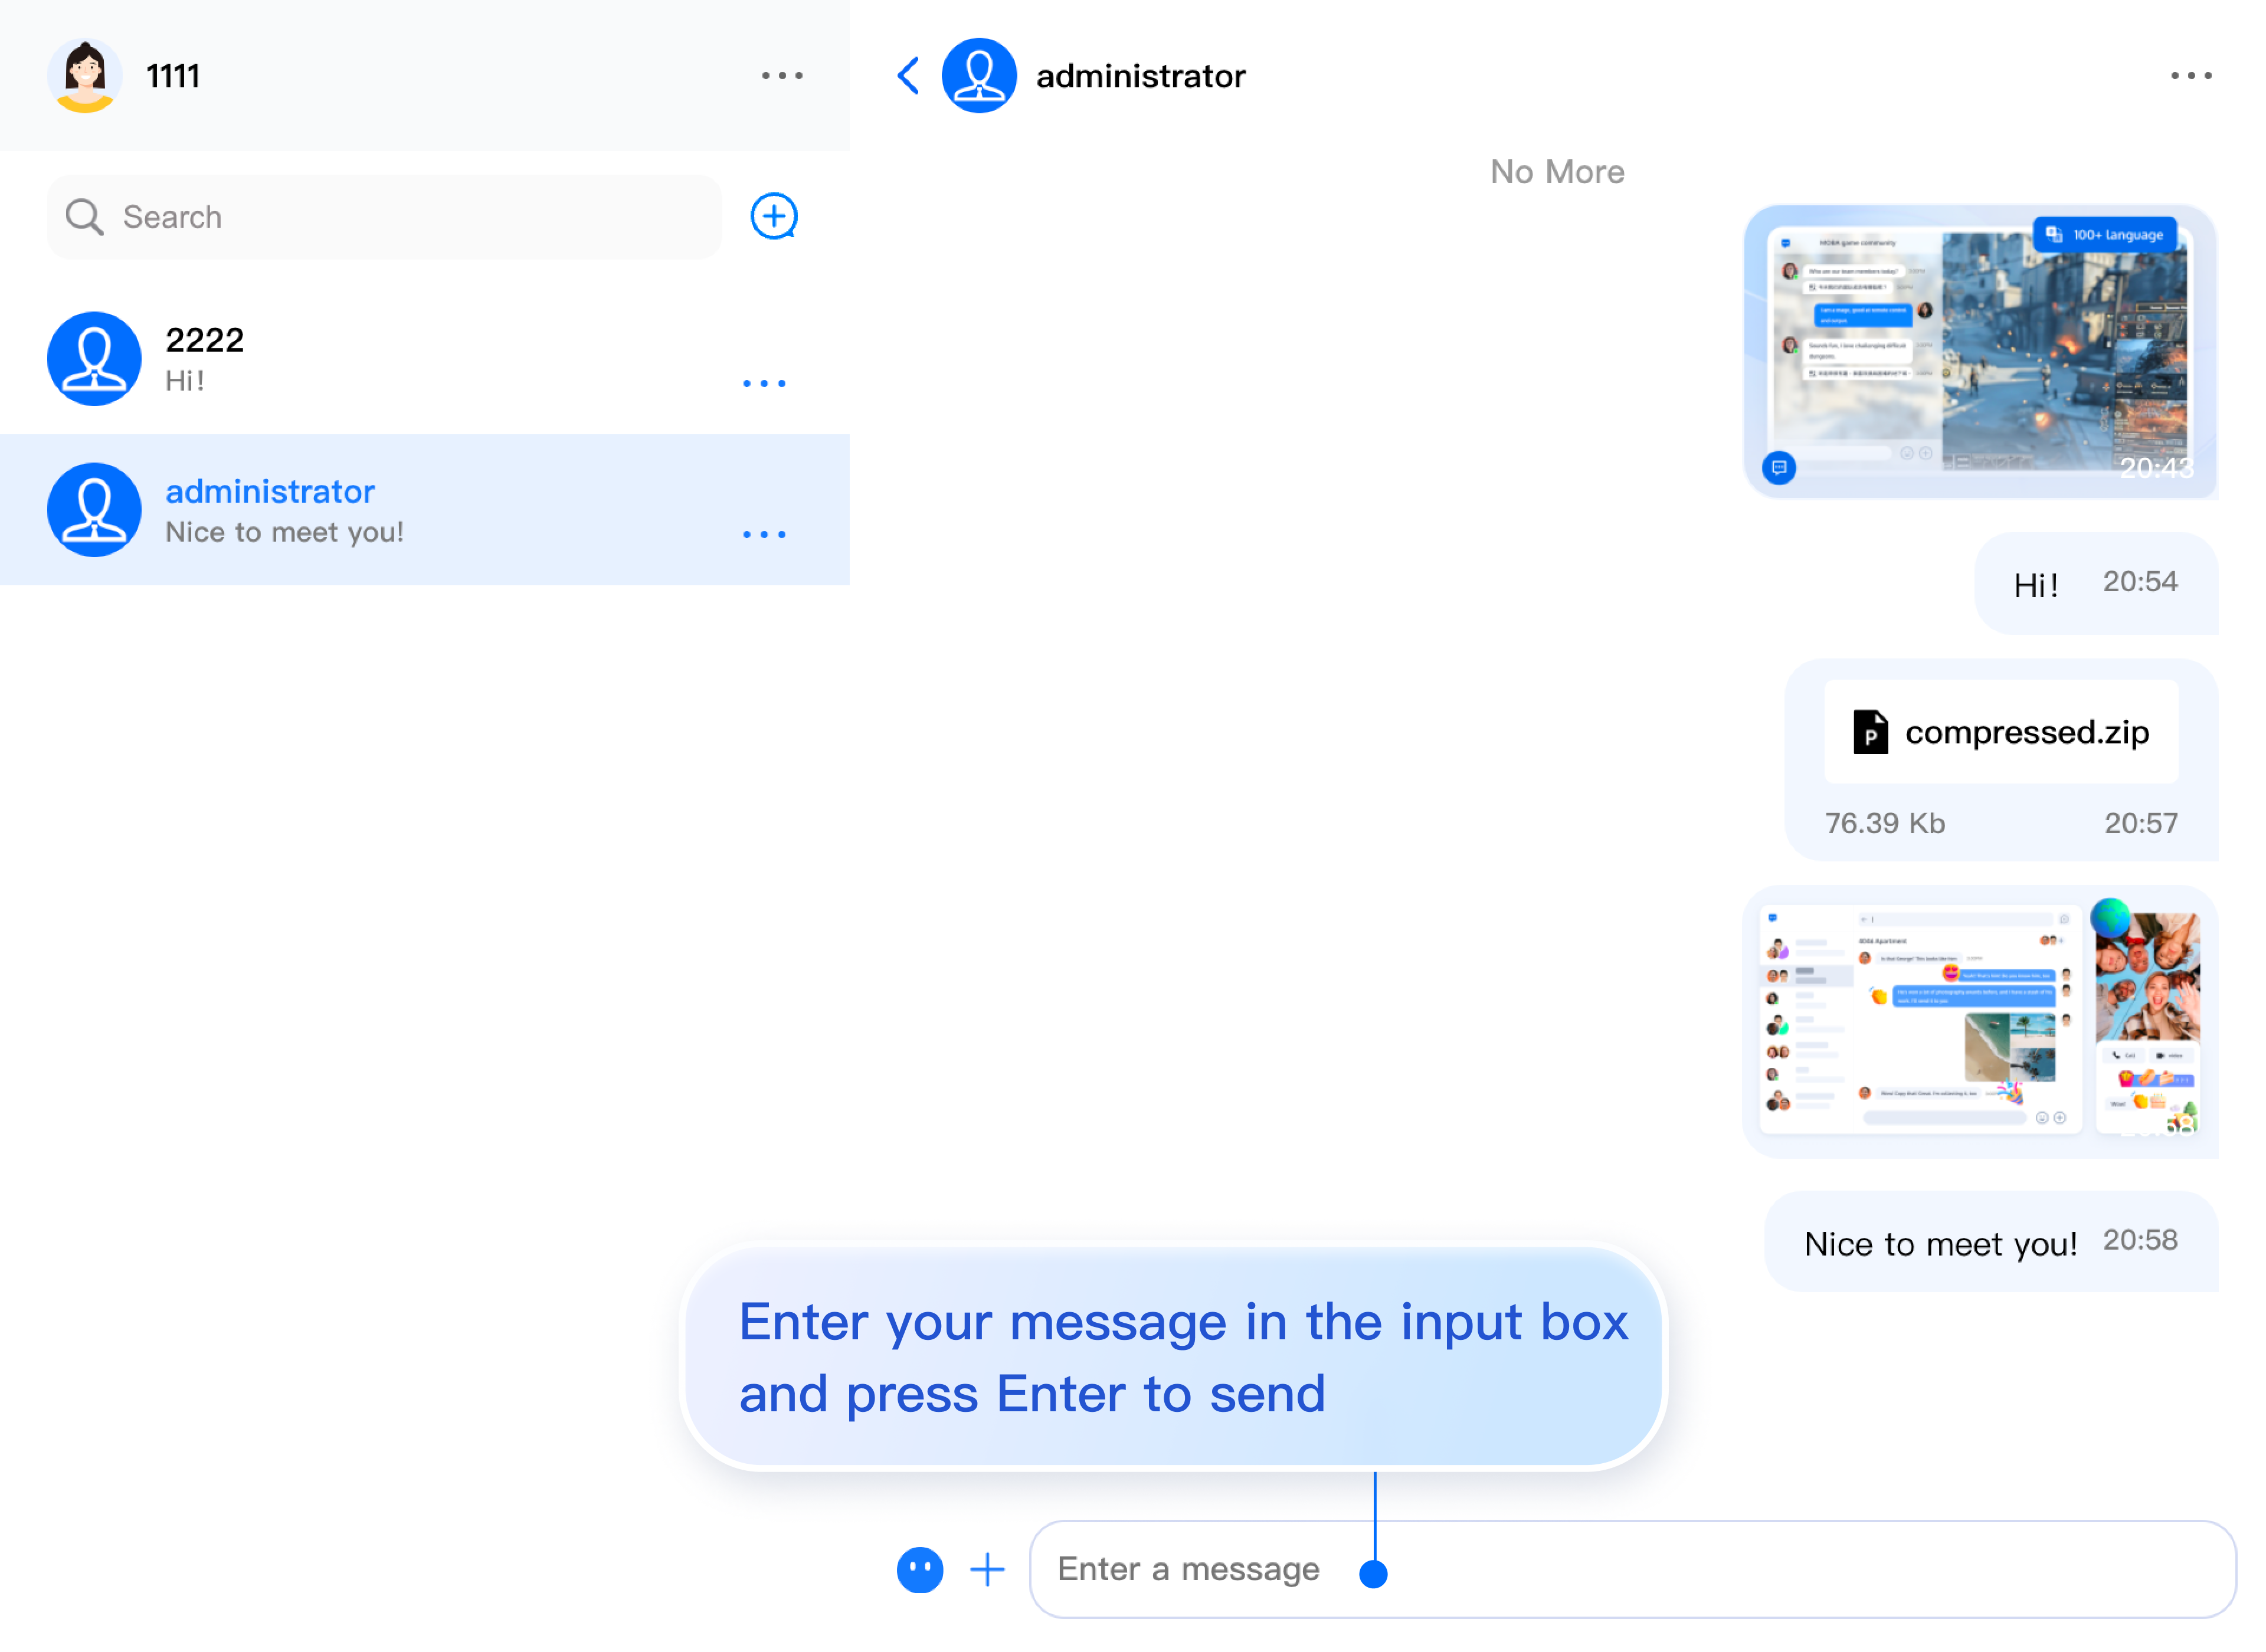
Enter your message in the input box and press Enter to send.
FAQs
What is UserSig?
A UserSig is a password for users to log in to Chat. It is essentially the ciphertext generated by encrypting information such as the UserID.
How can I generate a UserSig?
The issuance method for UserSig involves integrating the calculation code of UserSig into your server, and providing an interface oriented towards your project. When UserSig is needed, your project sends a request to the business server to access the dynamic UserSig. For more information, please see How to Generate a UserSig on the Server.
Note:
The exemplary code provided in this document retrieves the UserSig by embedding the SECRETKEY in the client code. This approach makes the SECRETKEY highly susceptible to decompilation and reverse engineering. Once your encryption key is compromised, attackers can misappropriate your Tencent Cloud traffic. Hence, this procedure is exclusively recommended for running functional debugging locally. For the correct issuance of UserSig, please refer to the previous sections.
Does it support React 17?
React v17.x is currently not supported. We only support React v18.2 or higher.
Can I use third-party component libraries, such as Material UI?
Yes, you can use other libraries for the "glue code" connecting the core components. You can see this in the example below, where <ChatSetting /> is encapsulated within a Drawer component. However, please note that the internal elements of the core components cannot be modified at this time.