TUIRoomKit is a comprehensive multi-party audio and video conferencing solution built on TRTC. It provides a complete set of UI components along with all the core functionality you need to get up and running quickly.
This documentation walks you through integrating TUIRoomKit into your project to enable reliable multi-party audio/video conferencing. You'll also find step-by-step guides for customizing image assets, localizing UI text, and configuring other options—everything you need to build audio/video experiences that align with your brand.
Room Preparation Page
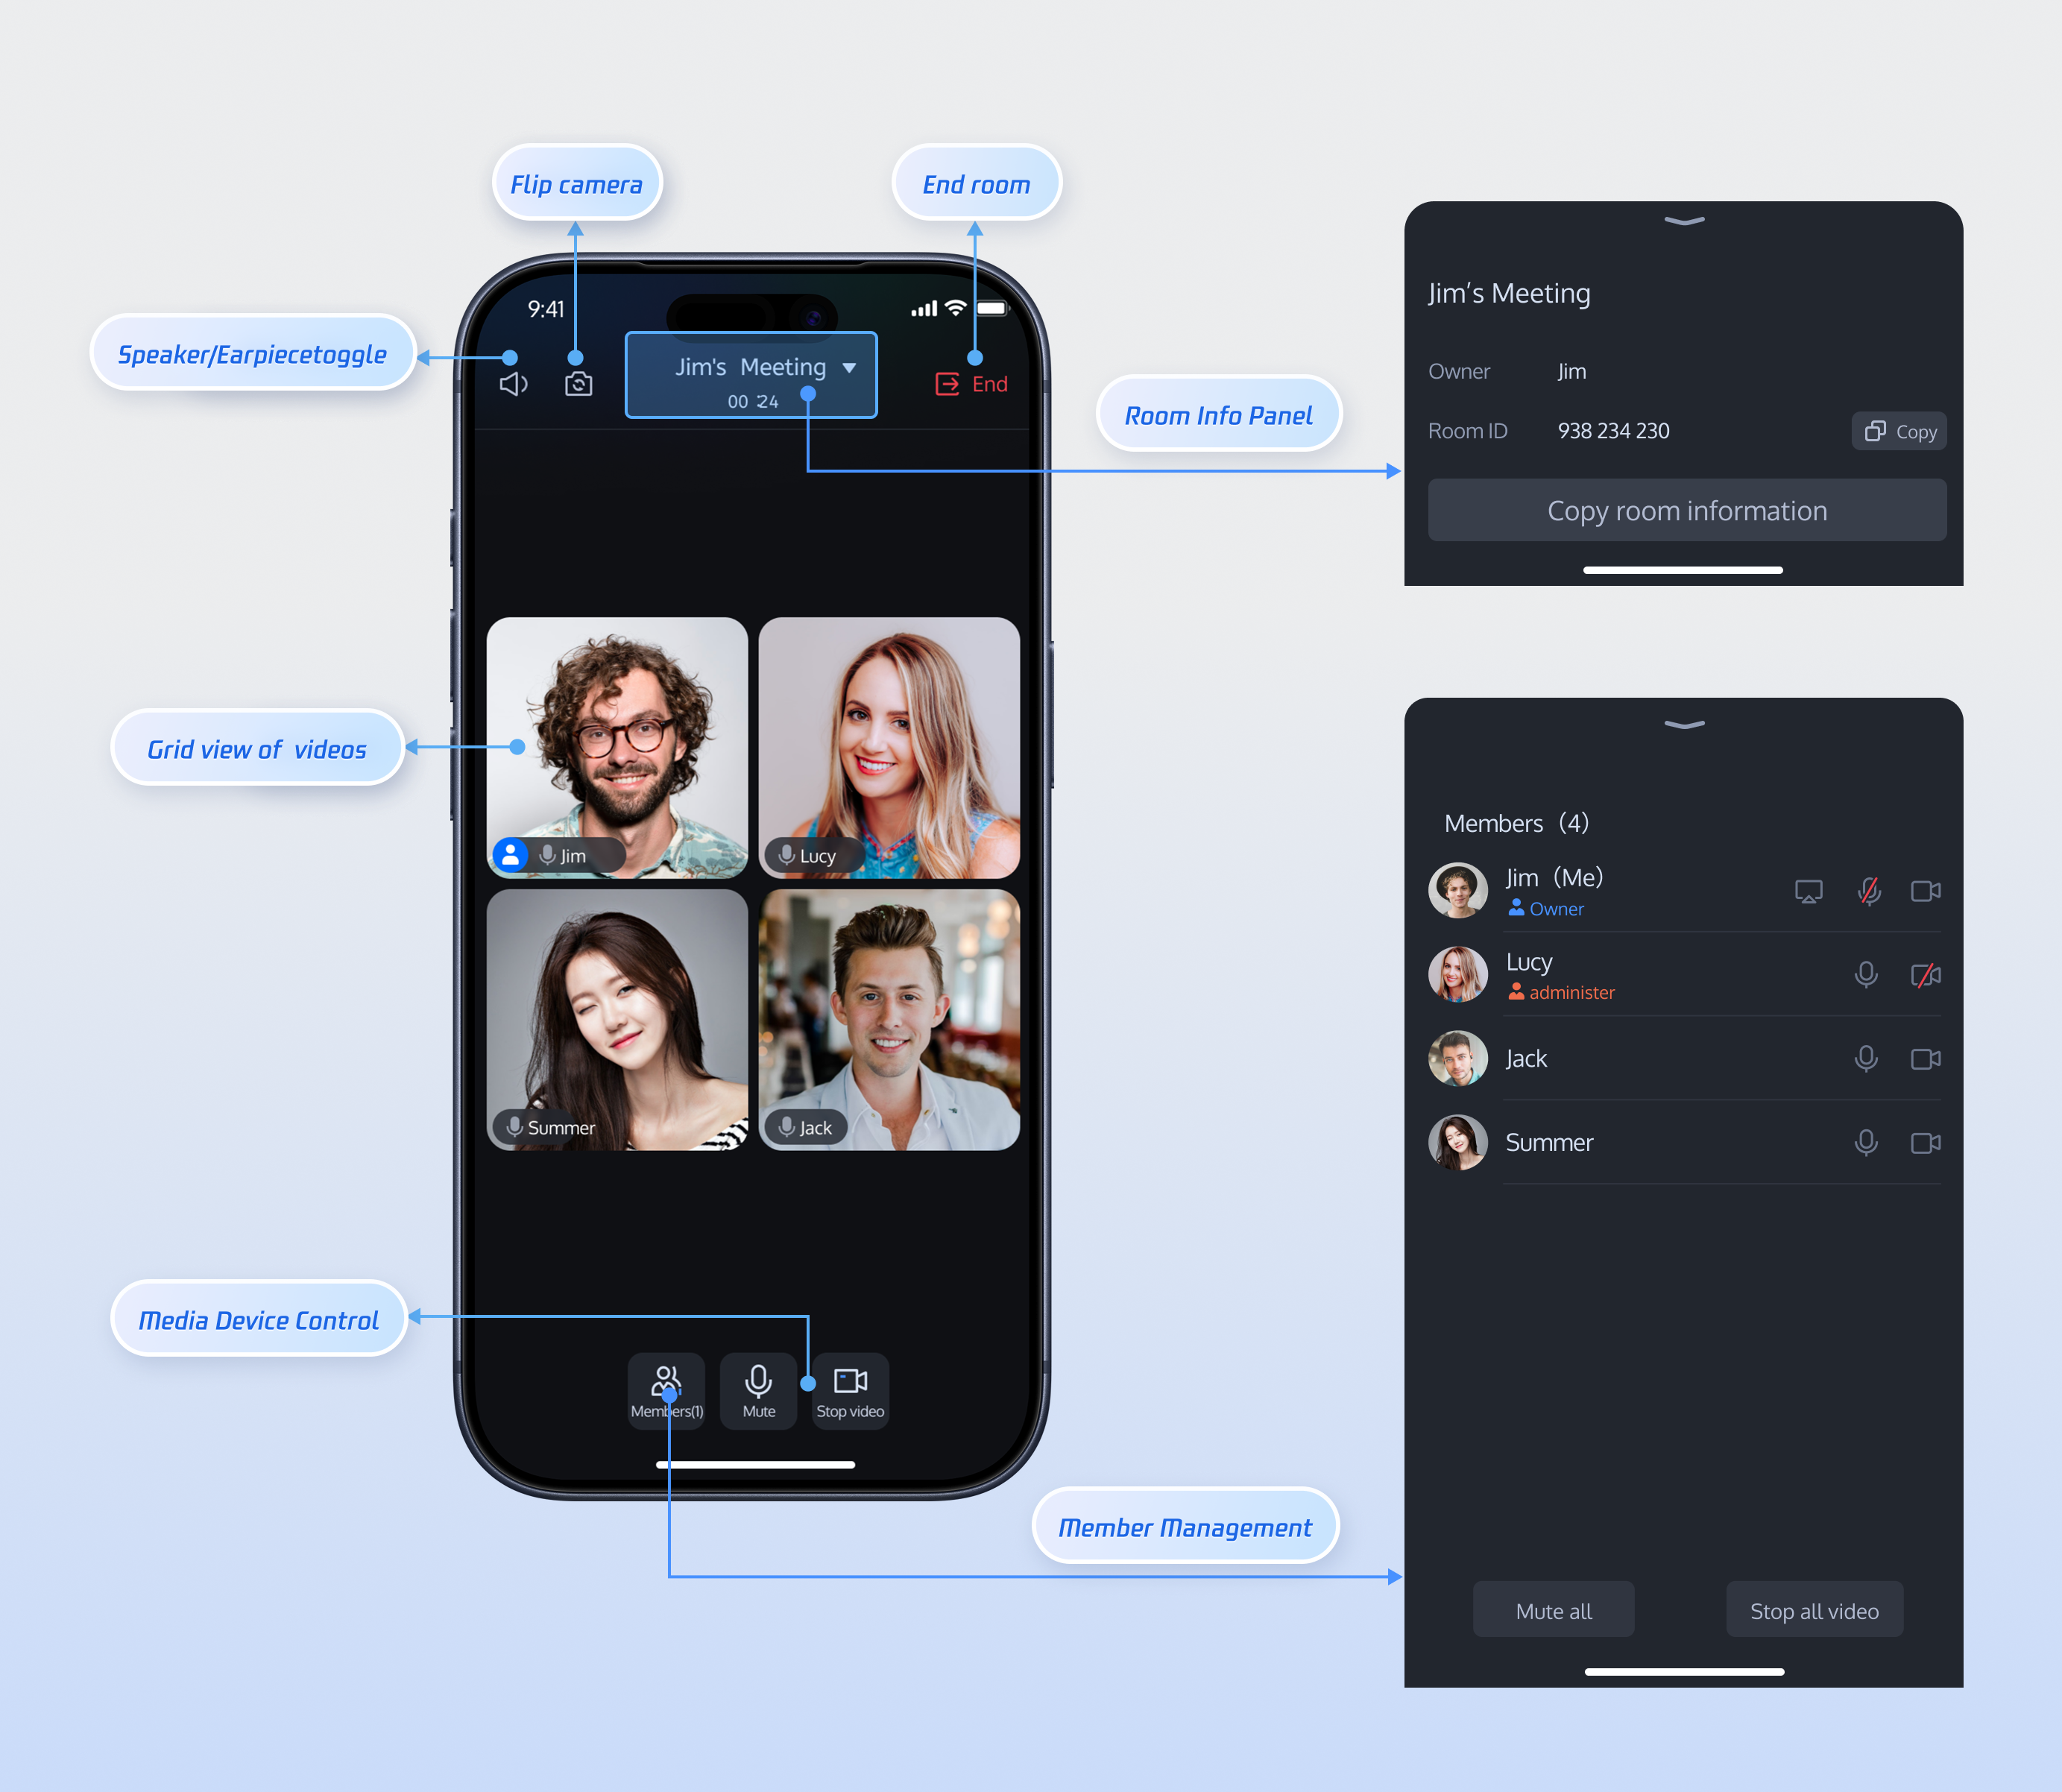
Room Main Page
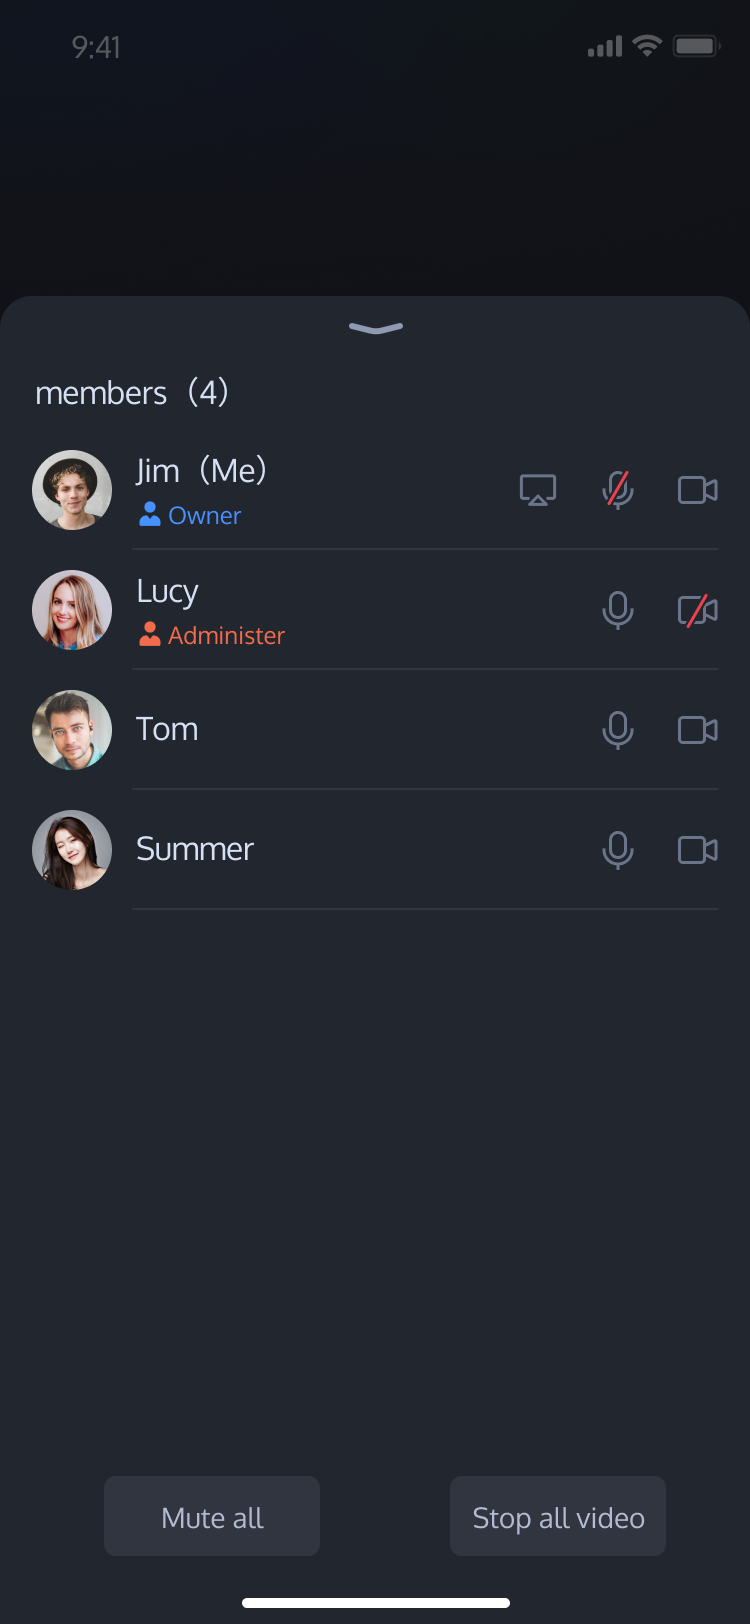
Member Management
Prerequisites
Activate the Service
To get started, follow Activate the Service to access the TUIRoomKit trial version and retrieve your SDKAppID and SDKSecretKey.
SDKAppID: Required. The application identifier used by TRTC for billing and analytics.
SDKSecretKey: The application secret key for initializing key information in configuration files.
Environment Setup
Android 5.0 (SDK API level 21) or later
Gradle 8.0 or higher
Devices running Android 5.0 or above
JDK version 17, 18, or 19
Quick Integration
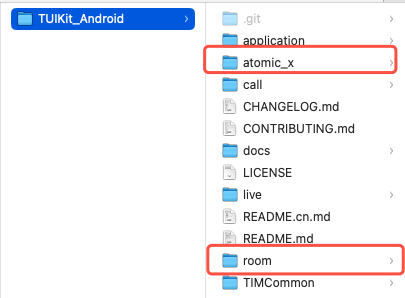
Step 1: Download the TUIRoomKit Component
Clone or download the repository from GitHub. Copy the room and atomic_x subdirectories to the same directory level as your Android project's app folder.
Step 2: Configure the Project
1. Import the TUIRoomKit Component
In your project’s root directory, add the following to your settings.gradle.kts or settings.gradle file to include the tuiroomkit component.
Find the build.gradle.kts (or build.gradle) file inside the app directory, and declare the dependency for the newly added tuiroomkit component.
dependencies {
// Add tuiroomkit dependency
api(project(":tuiroomkit"))
}
Note:
TUIRoomKit includes dependencies on TRTC SDK, IM SDK, and other common libraries by default. You do not need to configure these separately.
3. Configure Proguard Rules
Because the SDK uses Java reflection internally, add the following to your proguard-rules.pro file to prevent obfuscation of essential classes and ensure normal operation.
-keep class com.tencent.**{*;}
-keep class com.tencent.beacon.**{*;}
-keep class com.tencent.cloud.iai.lib.**{*;}
-keep class com.tencent.qimei.**{*;}
-keep class com.tencent.xmagic.**{*;}
-keep class com.tcmediax.**{*;}
# Google serialization/deserialization framework Gson library related rules
-keep class com.google.gson.**{*;}
4. Modify AndroidManifest.xml
To prevent attribute conflicts during AndroidManifest merging at build time, add tools:replace="android:allowBackup" and android:allowBackup="false" to the ` node in your app/src/main/AndroidManifest.xml`, overriding settings from the component.
<!-- Add the following configuration to override settings from dependent SDKs -->
<application
android:allowBackup="false"
tools:replace="android:allowBackup" />
</manifest>
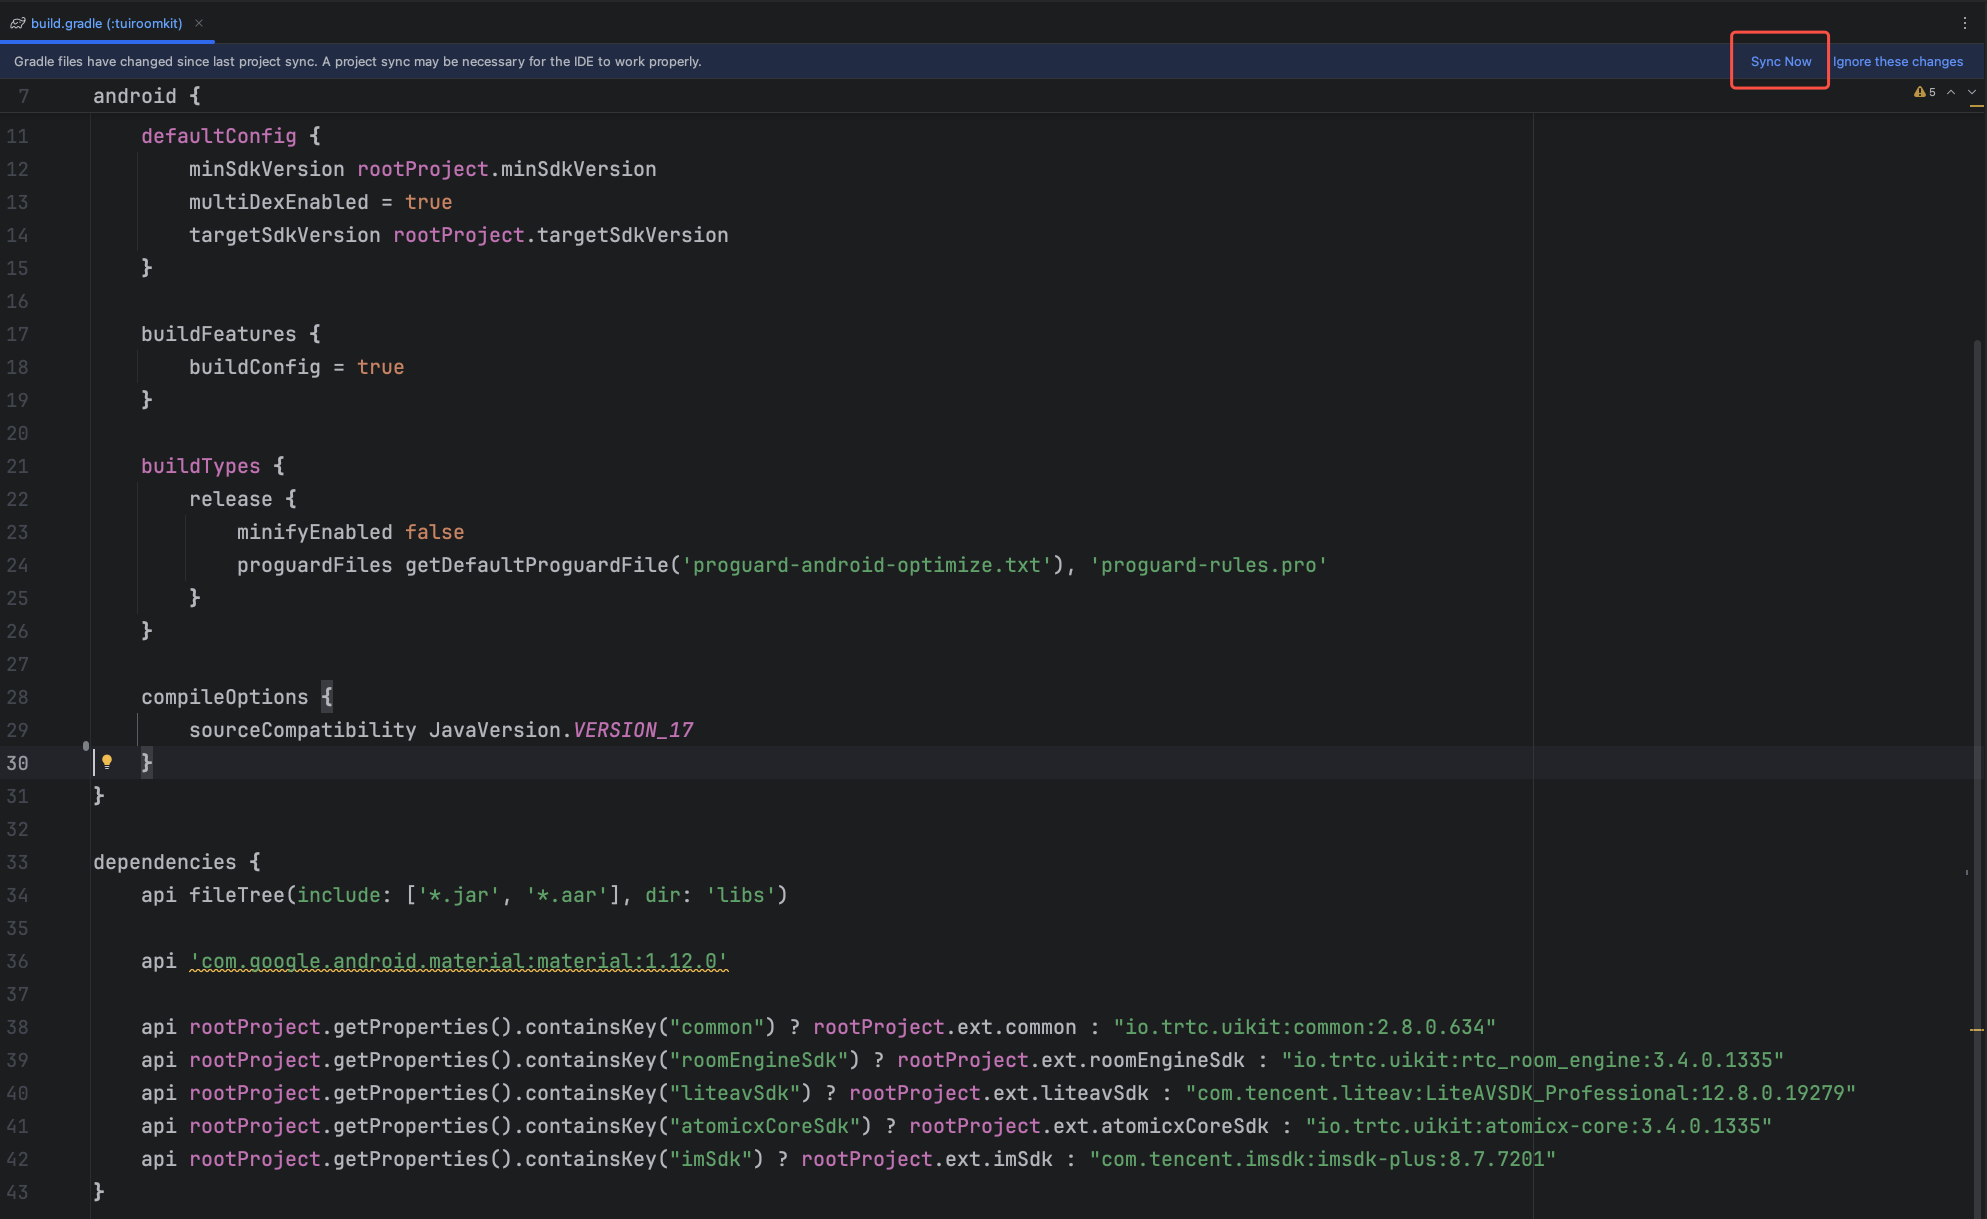
5. Complete Project Sync
After completing the above steps, Android Studio will usually prompt you to Sync Now. Click this button to synchronize your project. If the sync prompt does not appear, manually click the sync button in the toolbar. Once synced, Android Studio completes project configuration and indexing, enabling you to use the TUIRoomKit component.
Step 3: Log In
After integrating the code, complete the login process. This step is required to use TUIRoomKit features—you must log in successfully before accessing any functionality. Verify that all parameters are set correctly:
Note:
The sample code calls the login API directly. In production scenarios, always call AtomicXCore's login service after completing your own user authentication and login workflow. This ensures correct business logic flow, prevents data inconsistencies, and integrates seamlessly with your user management and permission systems.
The unique ID for the current user. Must contain only English letters, numbers, hyphens, and underscores.
userSig
String
A ticket for Tencent Cloud authentication. Please note:
Development Environment: You can use the local GenerateTestUserSig.genTestSig function to generate a UserSig or generate a temporary UserSig via the UserSig Generation Tool.
Production Environment: To prevent key leakage, you must use a server-side method to generate UserSig. For details, see Generating UserSig on the Server.
Callback for the result of setting user profile. If failed, returns error code and message.
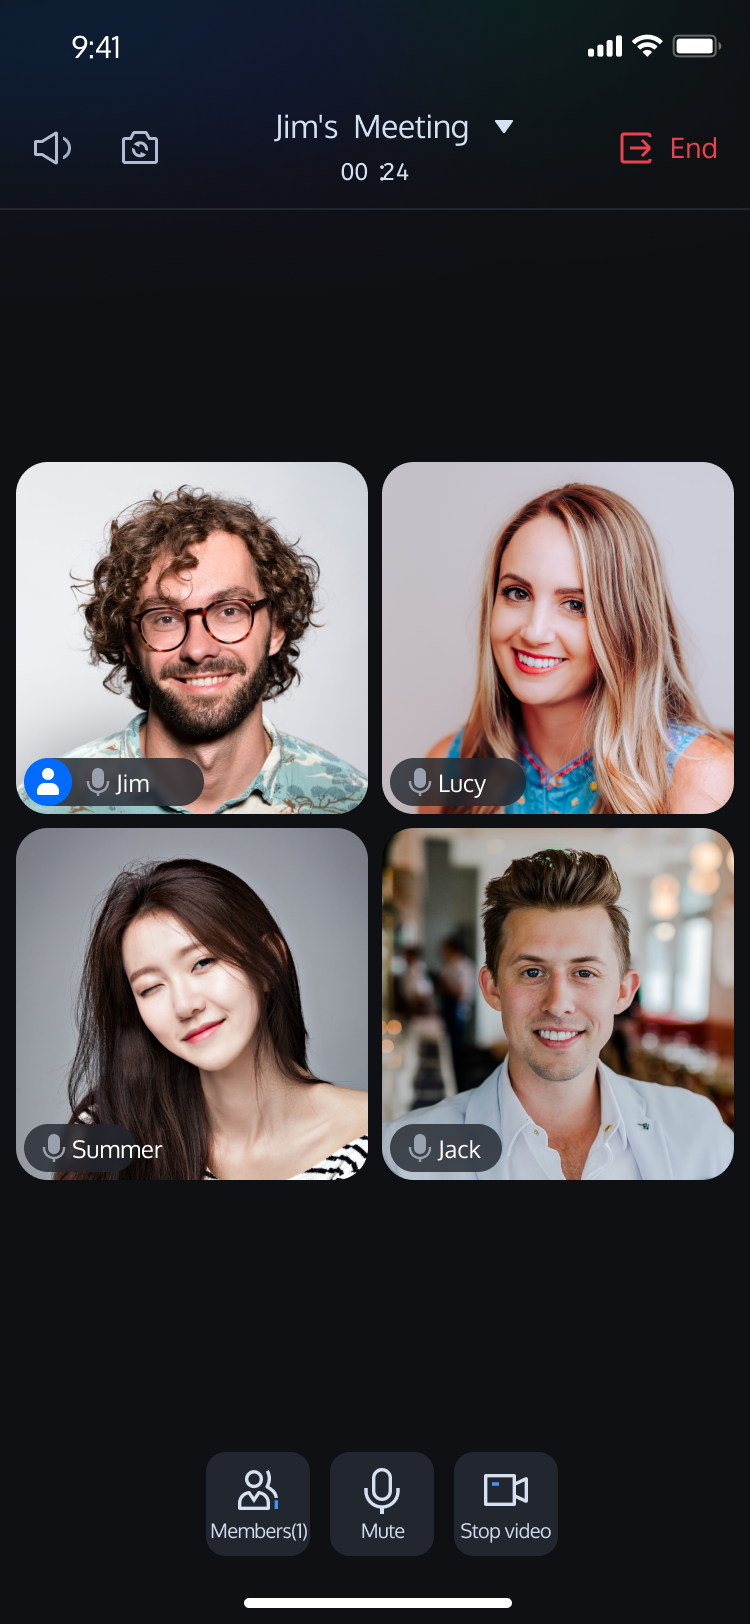
Step 5: Create a Room
In TUIRoomKit, RoomMainView serves as the core interface, offering complete multi-party audio/video conference functionality. The following example shows how to integrate RoomMainView as a room owner.
After integrating RoomMainView, you gain a complete multi-party audio/video conference page with member management, device controls, and room information display. These are the core features provided by TUIRoomKit.
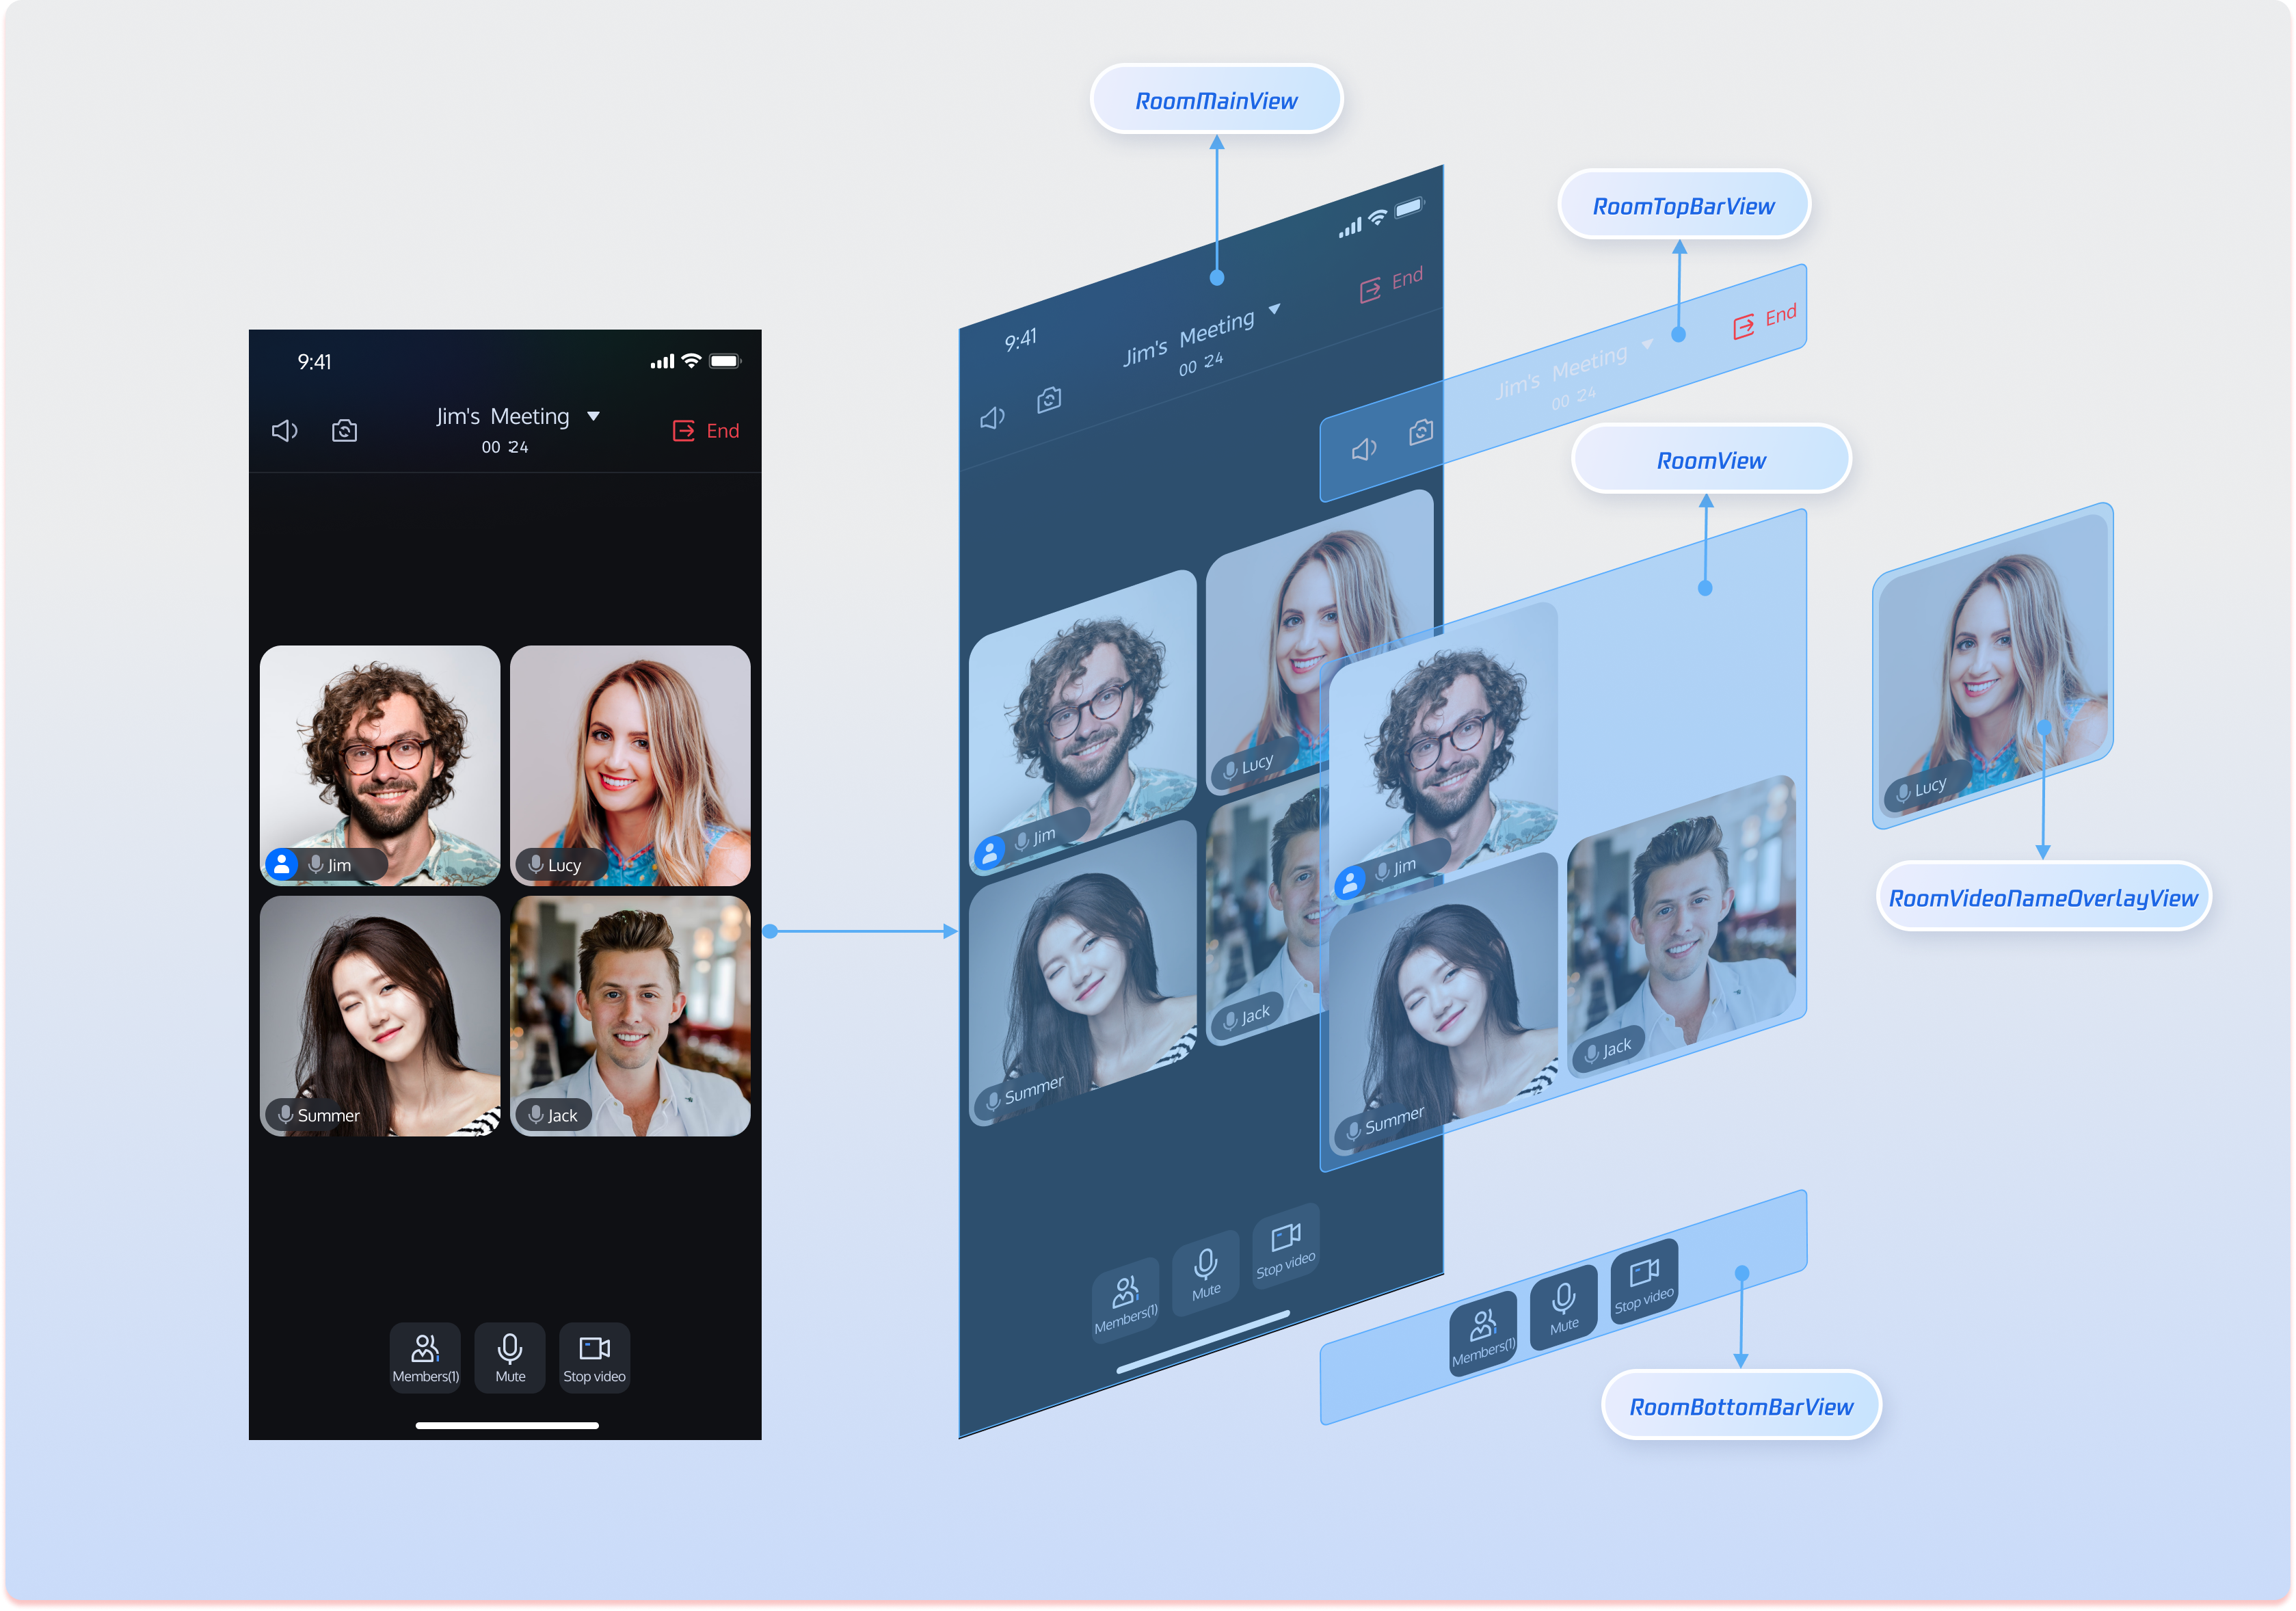
Customize the UI
The RoomMainView page offers rich features and high customizability. Adjust the UI to meet your product requirements and business scenarios. Below are the main view components in RoomMainView to help you quickly identify areas for customization.
Acts as the bottom toolbar, grouping microphone, camera, and member management controls.
Rearrange button order, update button styles (color, size), and add features such as screen sharing, in-room calling, or beauty effects.
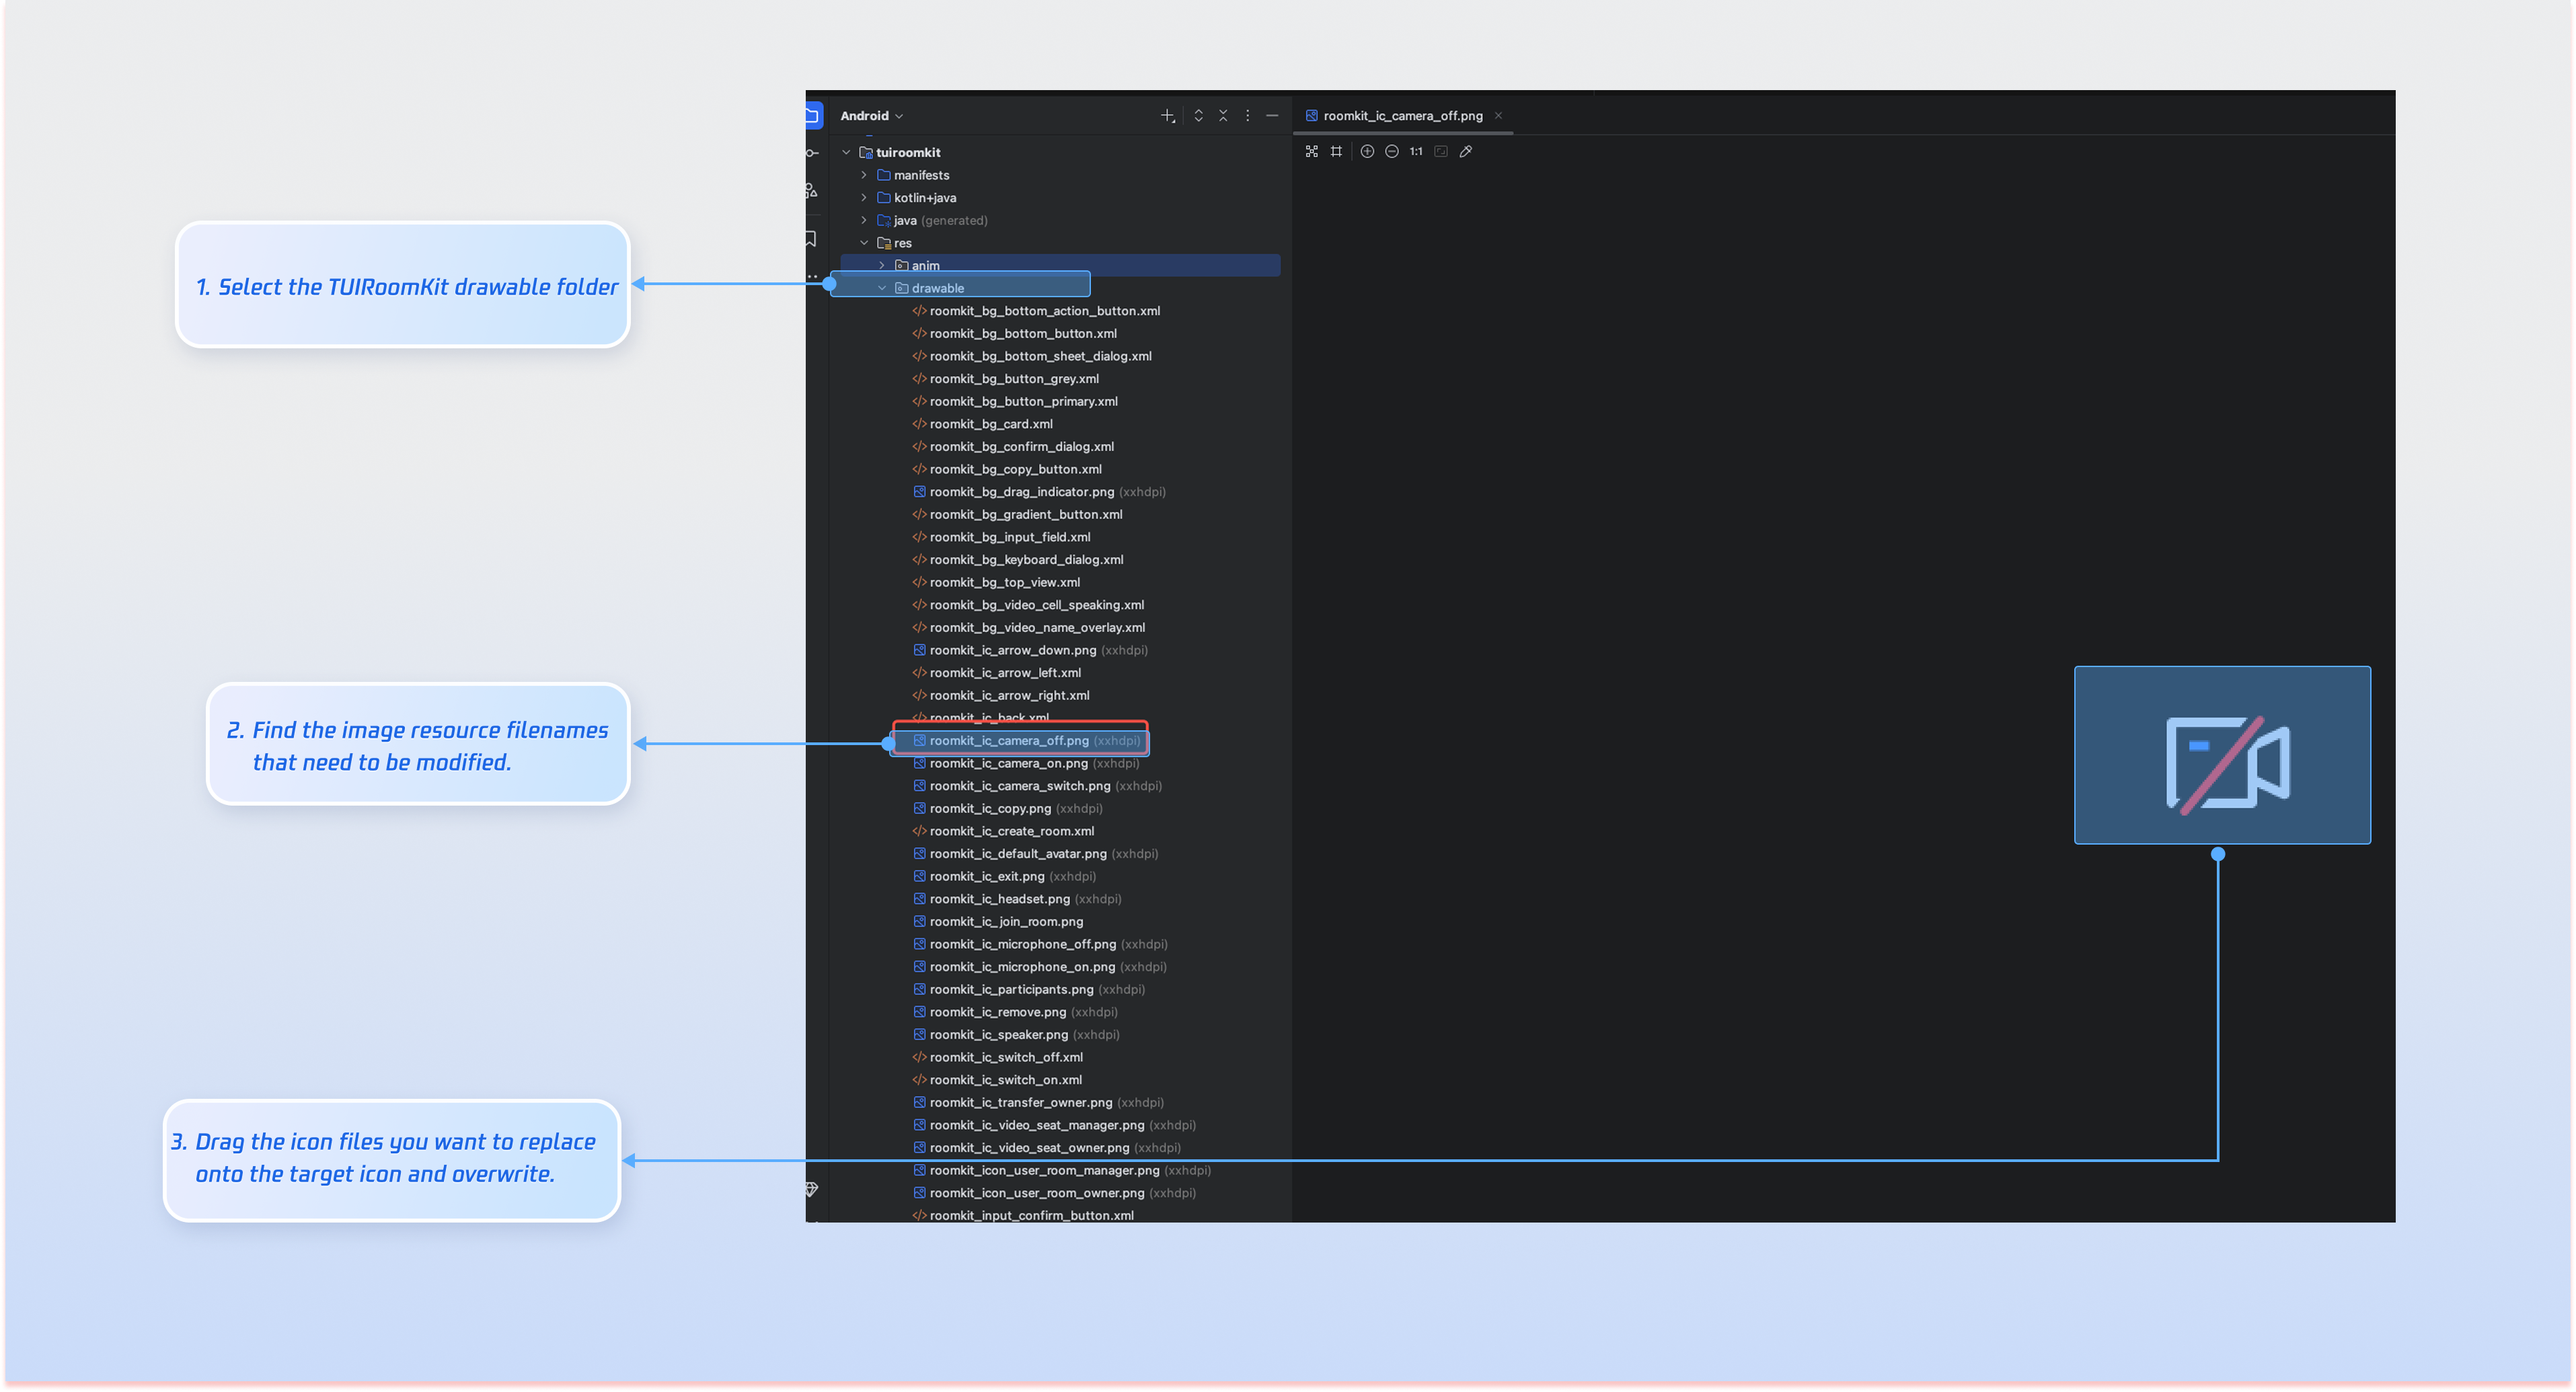
Customize Icons
Once TUIRoomKit is integrated, you can directly replace icon resources to match your product’s scenario and interaction requirements.
Common Image File List
Icon
Filename
Description
roomkit_ic_camera_off.png
Camera off icon
roomkit_ic_camera_on.png
Camera on icon
roomkit_ic_microphone_off.png
Microphone off icon
roomkit_ic_microphone_on.png
Microphone on icon
roomkit_icon_user_room_manager.png
Microphone on icon
roomkit_ic_video_seat_owner.png
Room owner icon
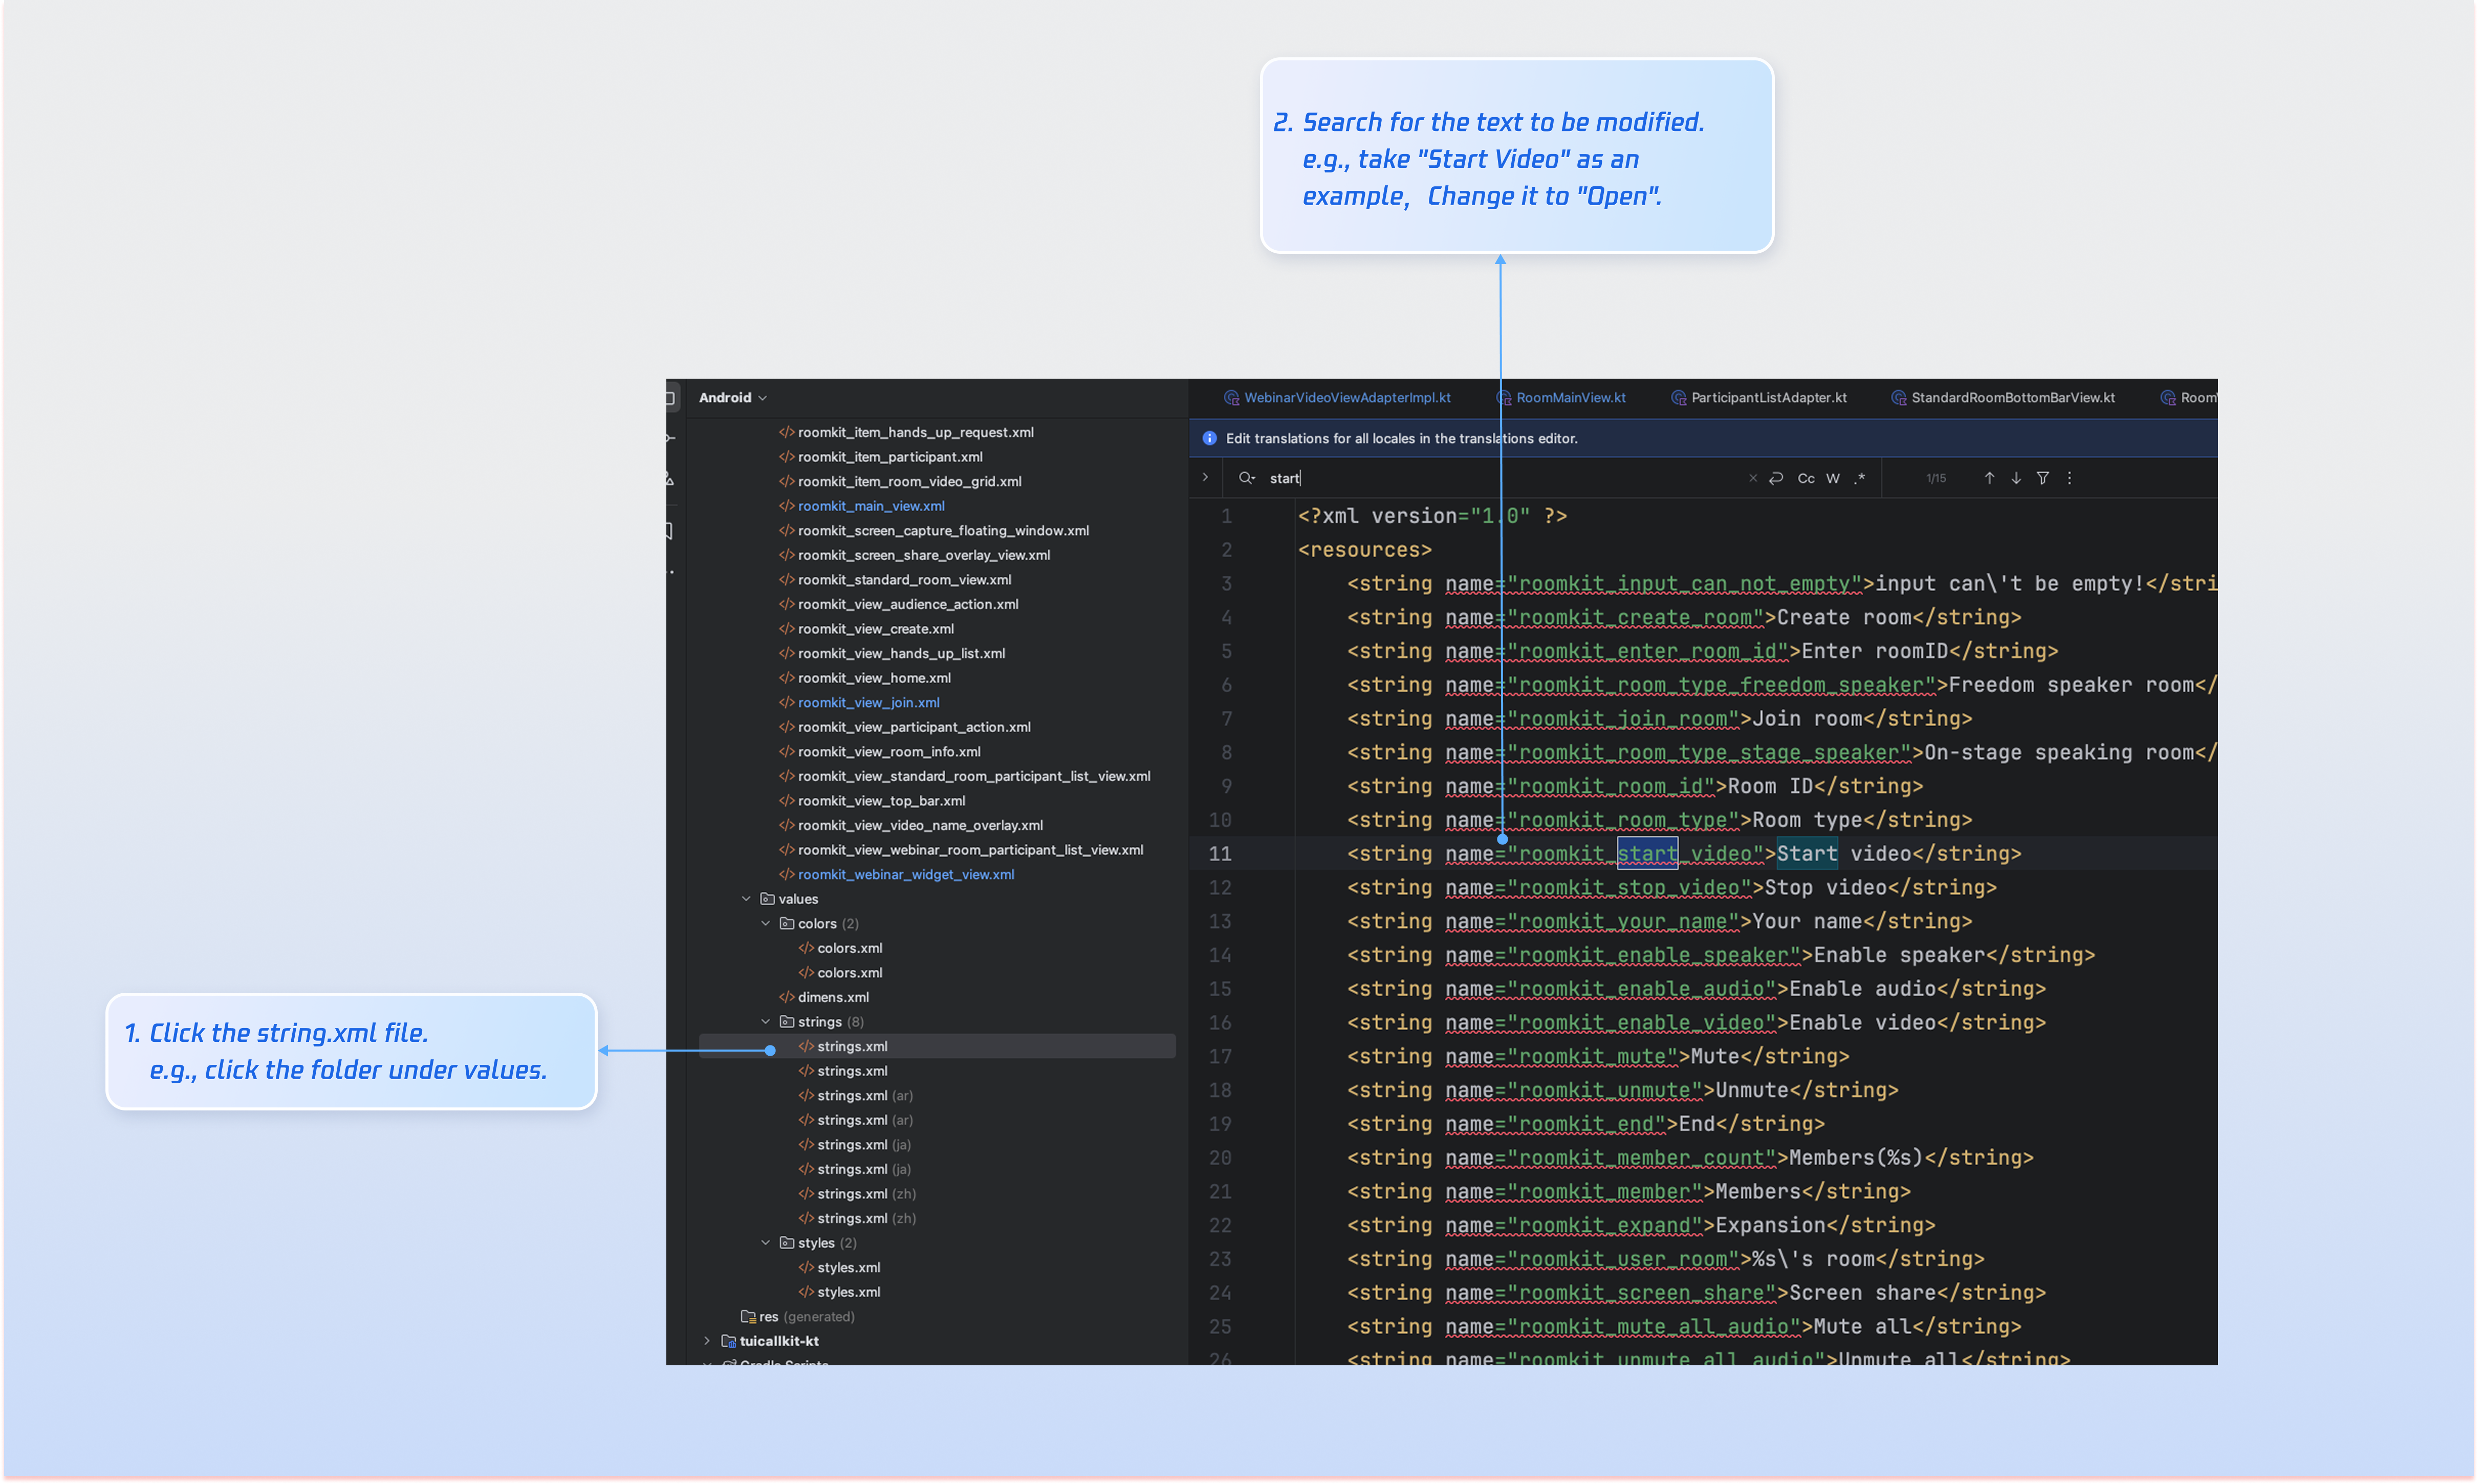
Customize Texts
TUIRoomKit manages UI text display using Android XML resource files. Modify UI strings directly in the XML file as needed:
FAQs
Do I need to call login every time I enter a room?
No. In most cases, you only need to call LoginStore.shared.login once. We recommend tying LoginStore.shared.login and LoginStore.shared.logout to your own login/logout business logic.
Why is there no video/audio when collecting audio/video in the background on Android 14 and above?
On Android 14 and above, if your app collects camera or microphone data while running in the background, you must start a foreground service and specify the correct service type. Otherwise, audio/video collection will not work. Follow these steps:
1.
Declare FOREGROUND_SERVICE, FOREGROUND_SERVICE_CAMERA, and FOREGROUND_SERVICE_MICROPHONE permissions and services in AndroidManifest.xml.