This document describes how to rapidly integrate the TUICallKit component. You can complete the following key steps within 10 minutes and obtain a complete audio and video call interface.
Before using the audio and video service provided by Tencent Cloud, go to the console to activate the service for your application. For specific steps, see activating the service. After enabling the service, record the SDKAppID and SDKSecretKey, which will be used in subsequent steps(login).
Implementation
Download the TUICallKit
1. Download the @trtc/calls-uikit-react component. In existing projects or empty projects created using scaffolding tools like Vite, the following introduces an empty project created with Vite.
npminstall @trtc/calls-uikit-react
2. Copy the debug directory to your project directory src/debug, it is necessary when generating userSig locally.
Unique identifier of the user, defined by you, it is allowed to contain only upper and lower case letters (a-z, A-Z), numbers (0-9), underscores, and hyphens.
SDKAppID
Number
The unique identifier for the audio and video application created in the Tencent RTC Console.
SDKSecretKey
String
The SDKSecretKey of the audio and video application created in the Tencent RTC Console.
userSig
String
A security protection signature used for user log in authentication to confirm the user's identity and prevent malicious attackers from stealing your cloud service usage rights.
Explanation of userSig:
Development environment: If you are running a demo locally and developing debugging, you can use the genTestUserSig (Refer to Step 3.2) function in the debug file to generate a `userSig`. In this method, SDKSecretKey is vulnerable to decompilation and reverse engineering. Once your key is leaked, attackers can steal your Tencent Cloud traffic.
The user logging in for the first time has no avatar and nickname information. You can set the avatar and nickname through the setSelfInfo API.
try{
await TUICallKitAPI.setSelfInfo({
nickName:"jack",
avatar:"http://xxx",
});
}catch(error:any){
alert(`[TUICallKit] Failed to call the setSelfInfo API. Reason: ${error}`);
}
Note:
Due to user privacy restrictions, for calls between non-friends, there might be a delay in updating the callee's nickname and avatar. This will be updated smoothly after the first successful call.
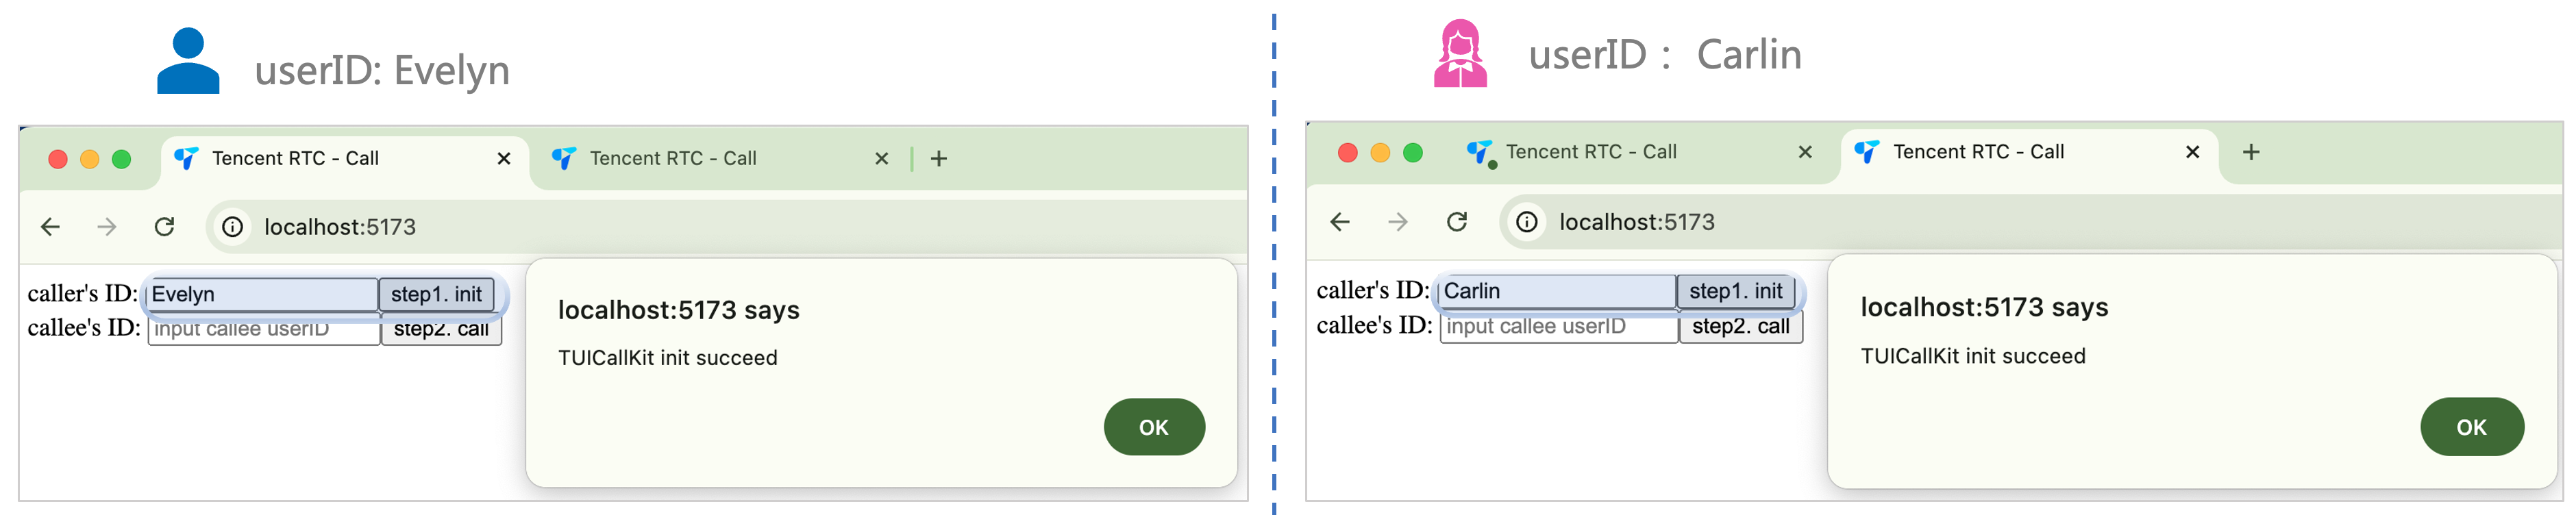
Start a Call
The caller can initiate a voice or video call by calling the calls function and specifying the call type and the callee's userID. The calls API simultaneously supports one-to-one calls and group calls. When the userIDList contains a single userID, it is a one-to-one call; when the userIDList contains multiple userIDs, it is a group call.
For local environment, please access under localhost protocol. For public network experience, please access under HTTPS protocol. For details, see Description of Network Access Protocol.
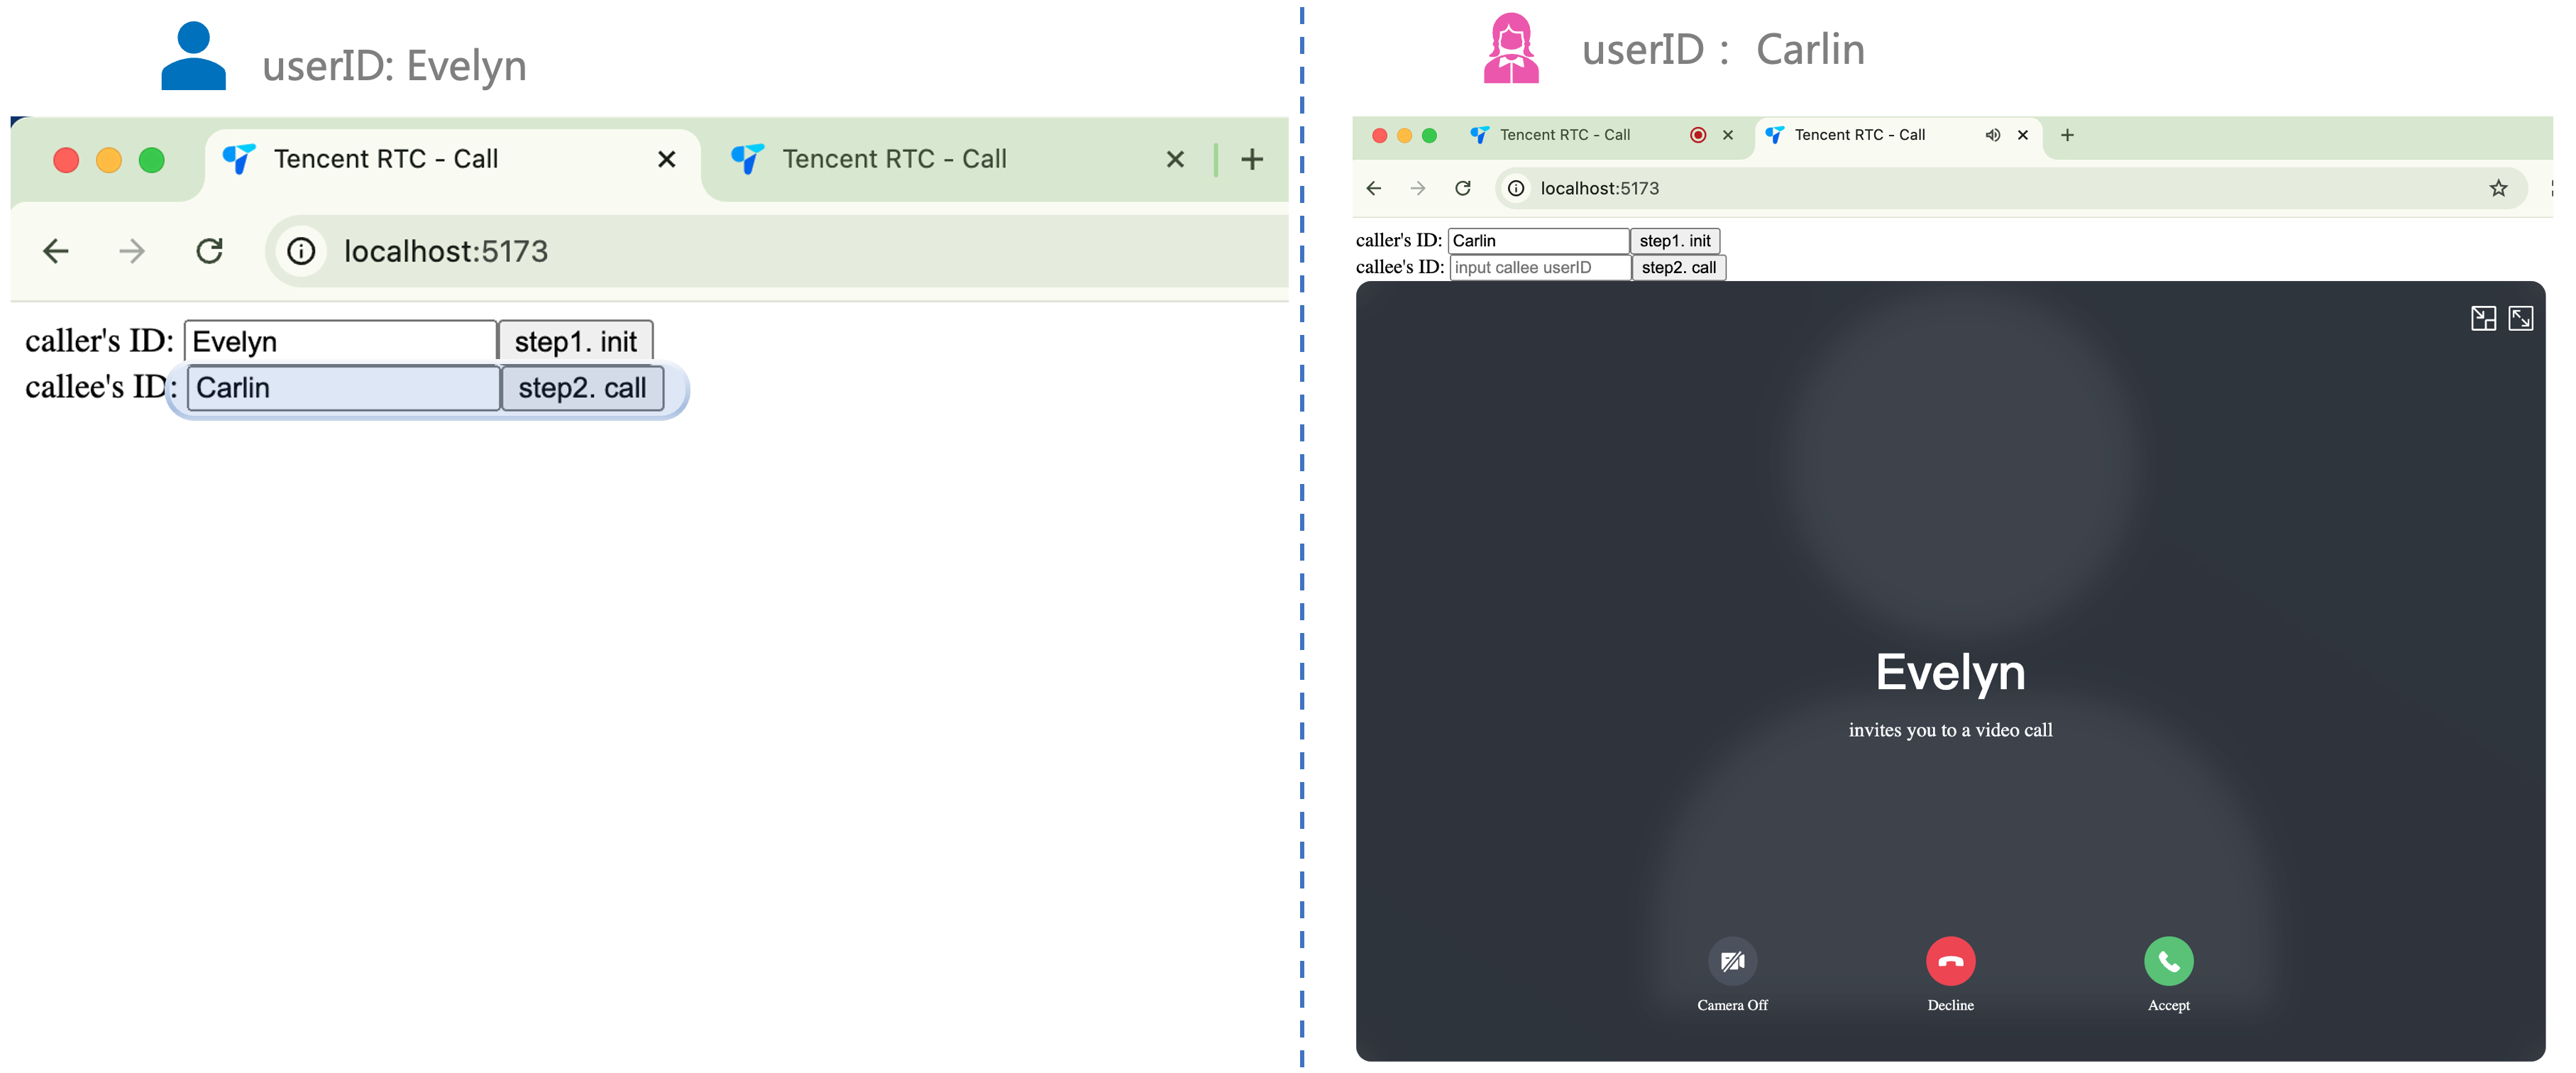
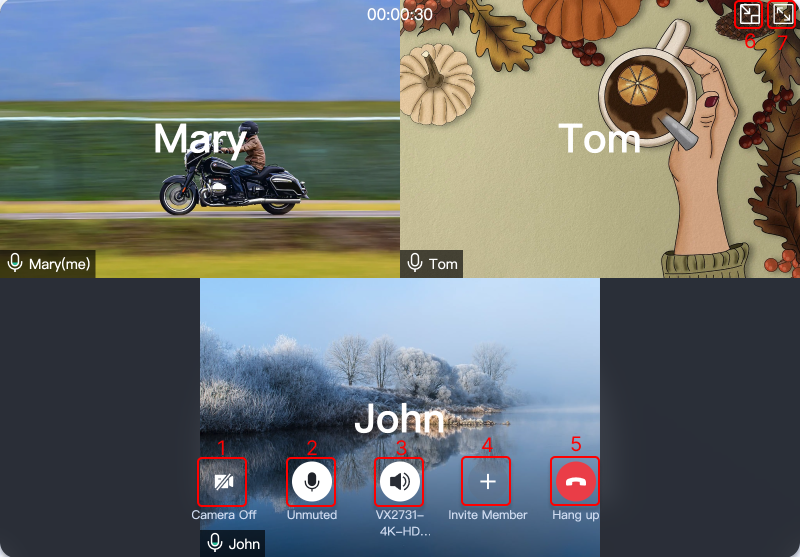
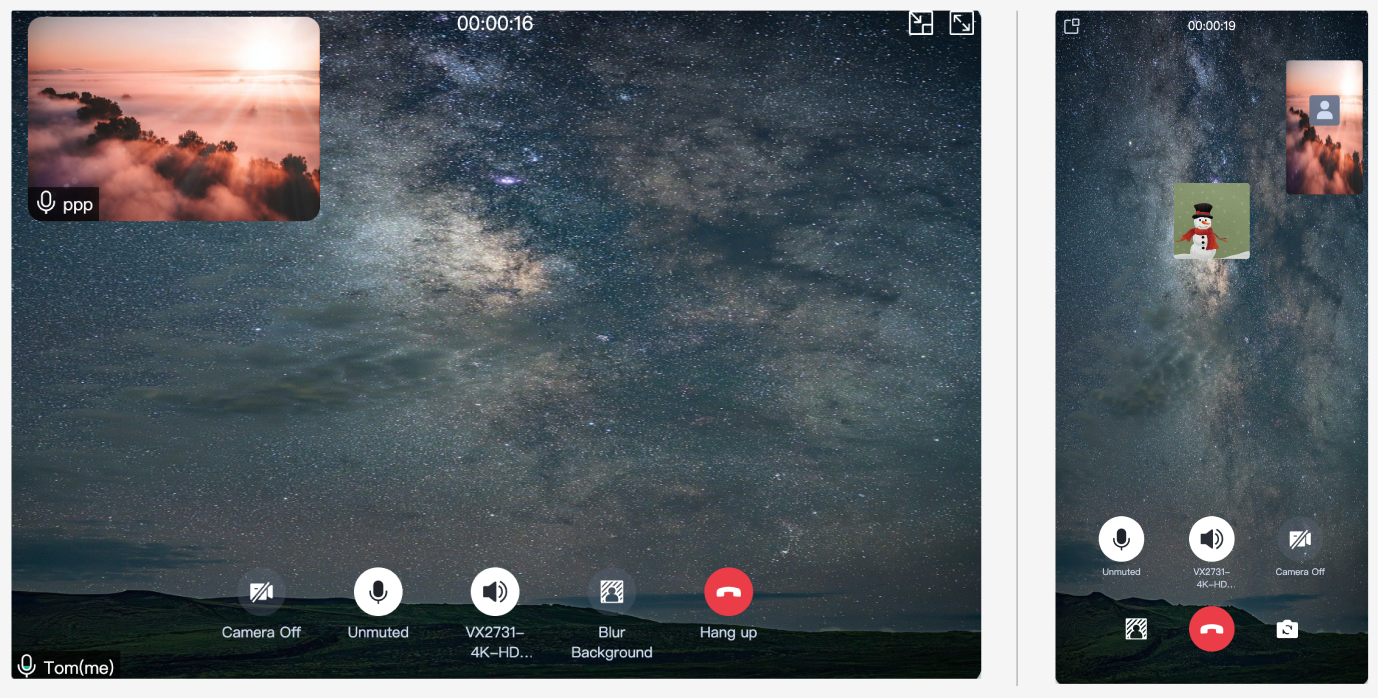
3. Open two browser pages, enter different userID (defined by you) click step1. init to login (caller and callee).
4. After both userID init to successfully, click on step2. callto make a call. If you have a call problem, refer to FAQs.
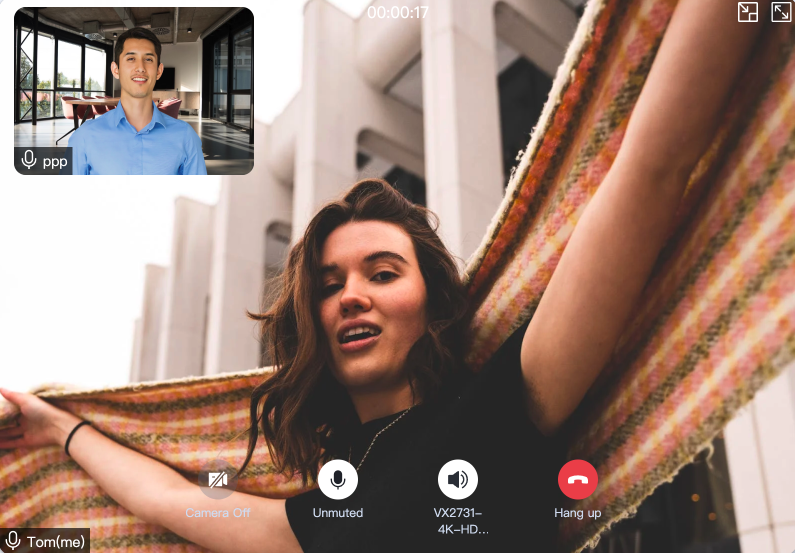
Answering a Call
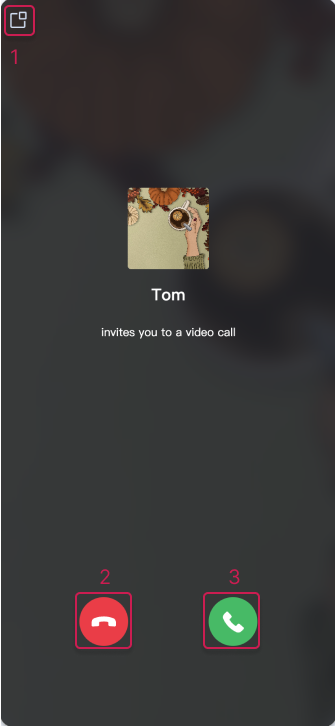
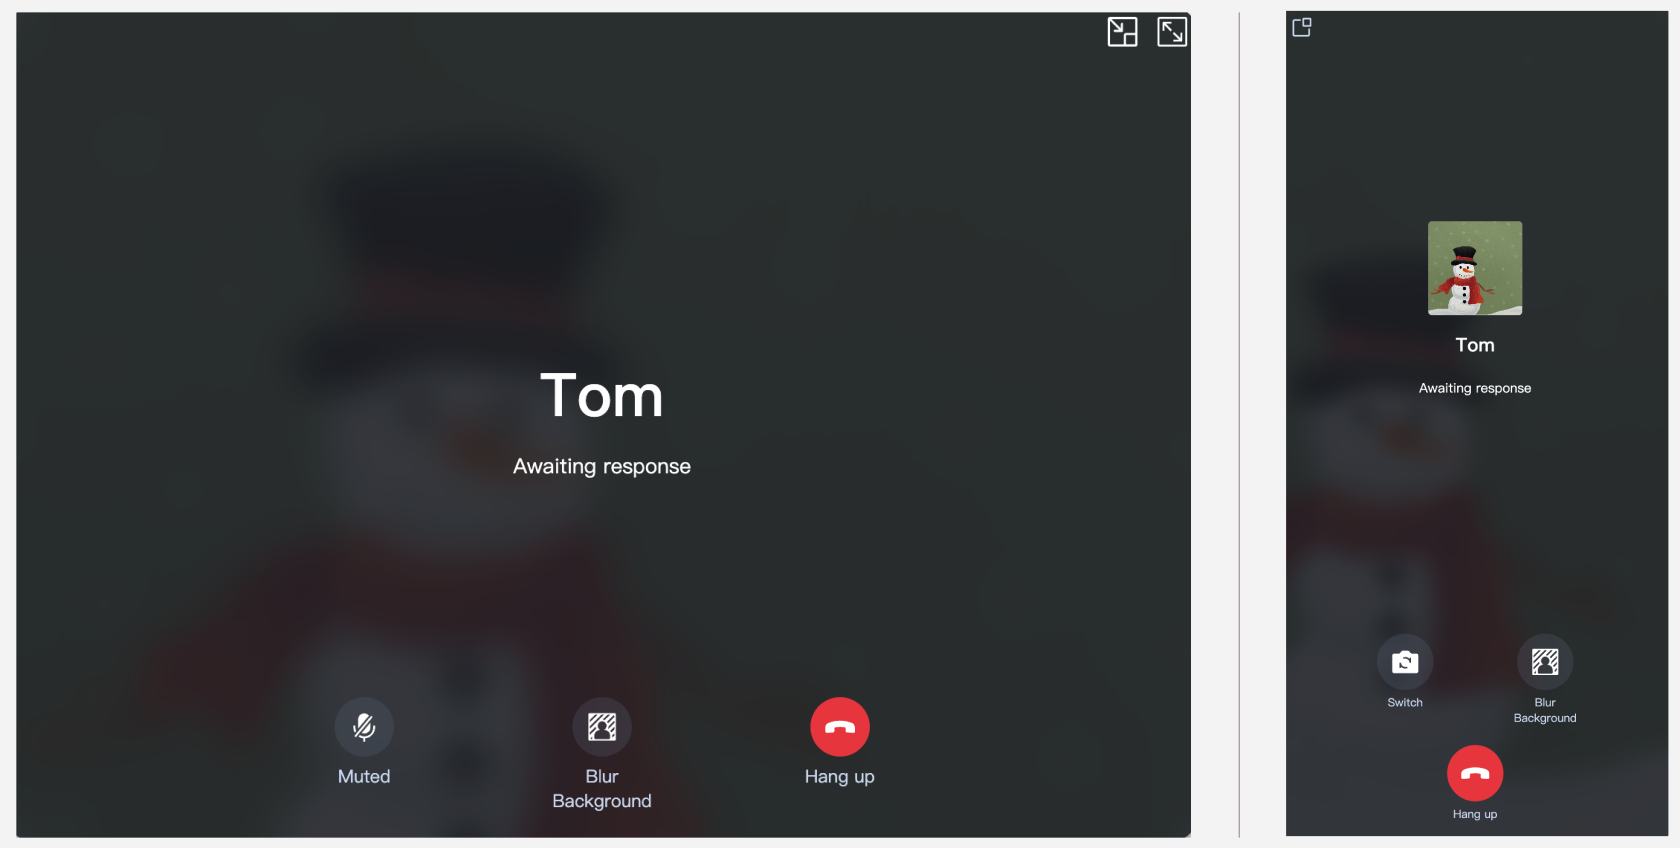
After the recipient completes login, the caller can initiate a call, and the recipient will receive the call invitation with ringtone and vibration.
More Features
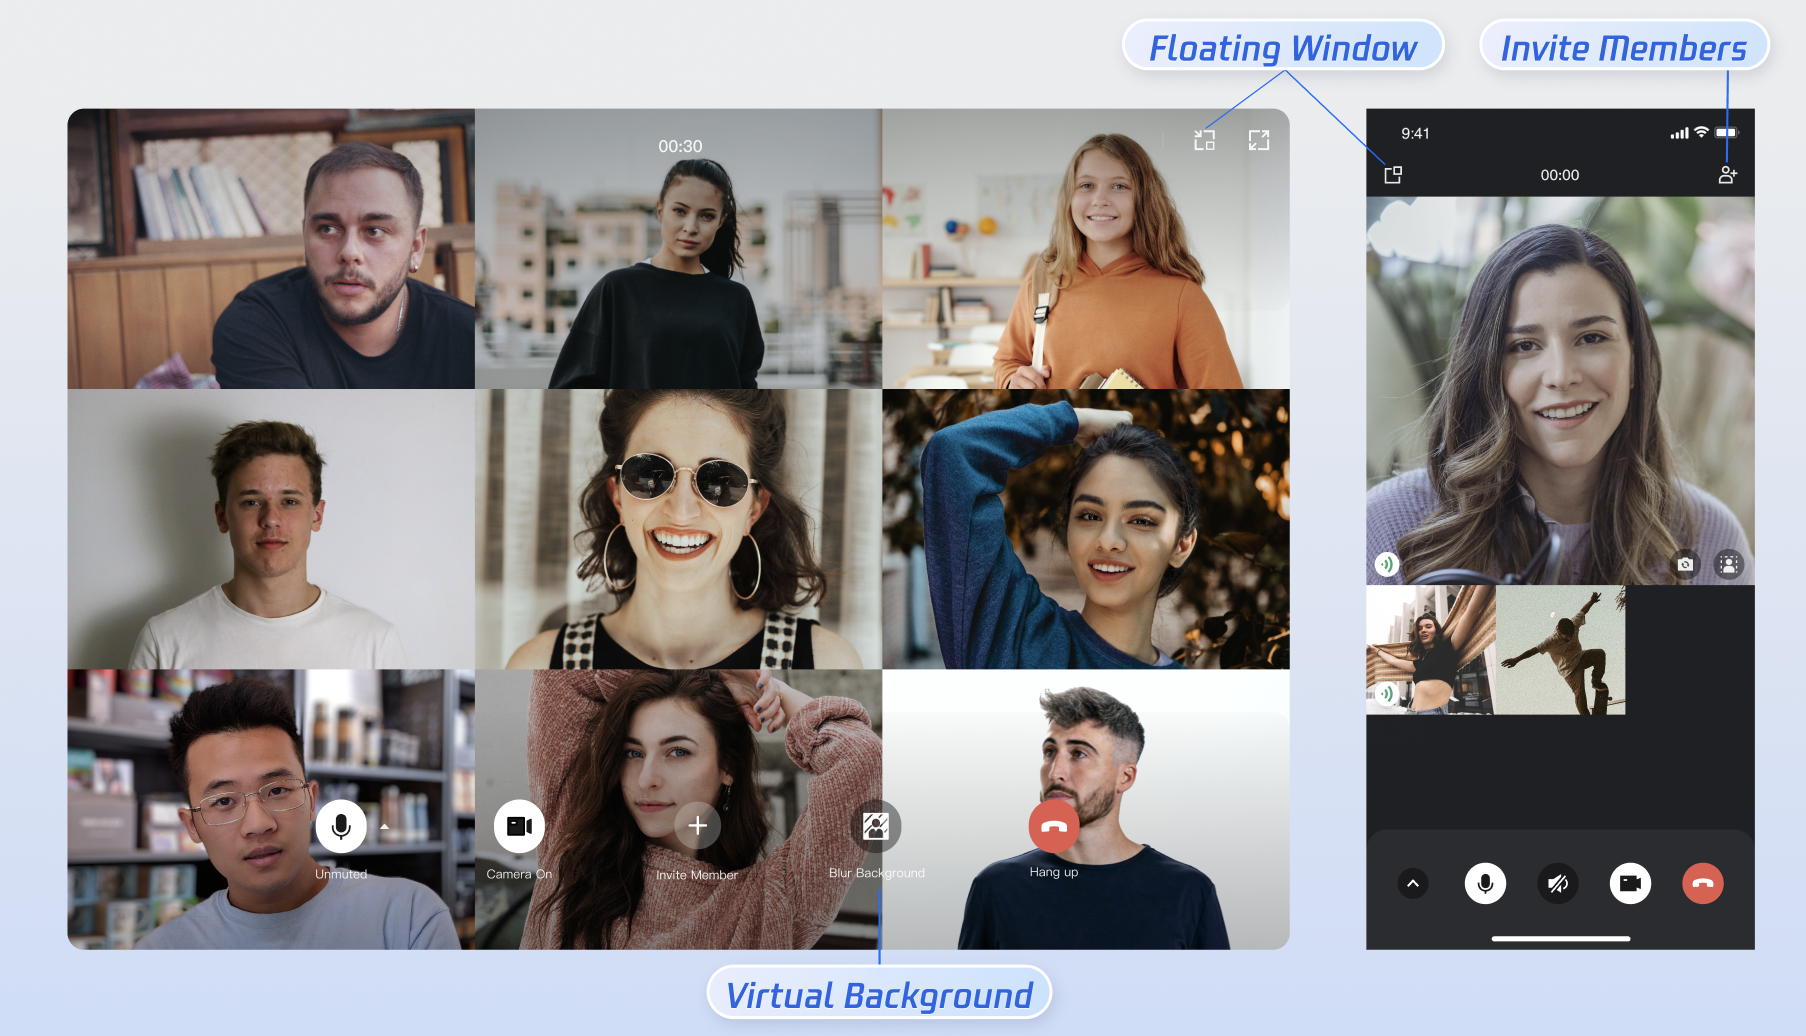
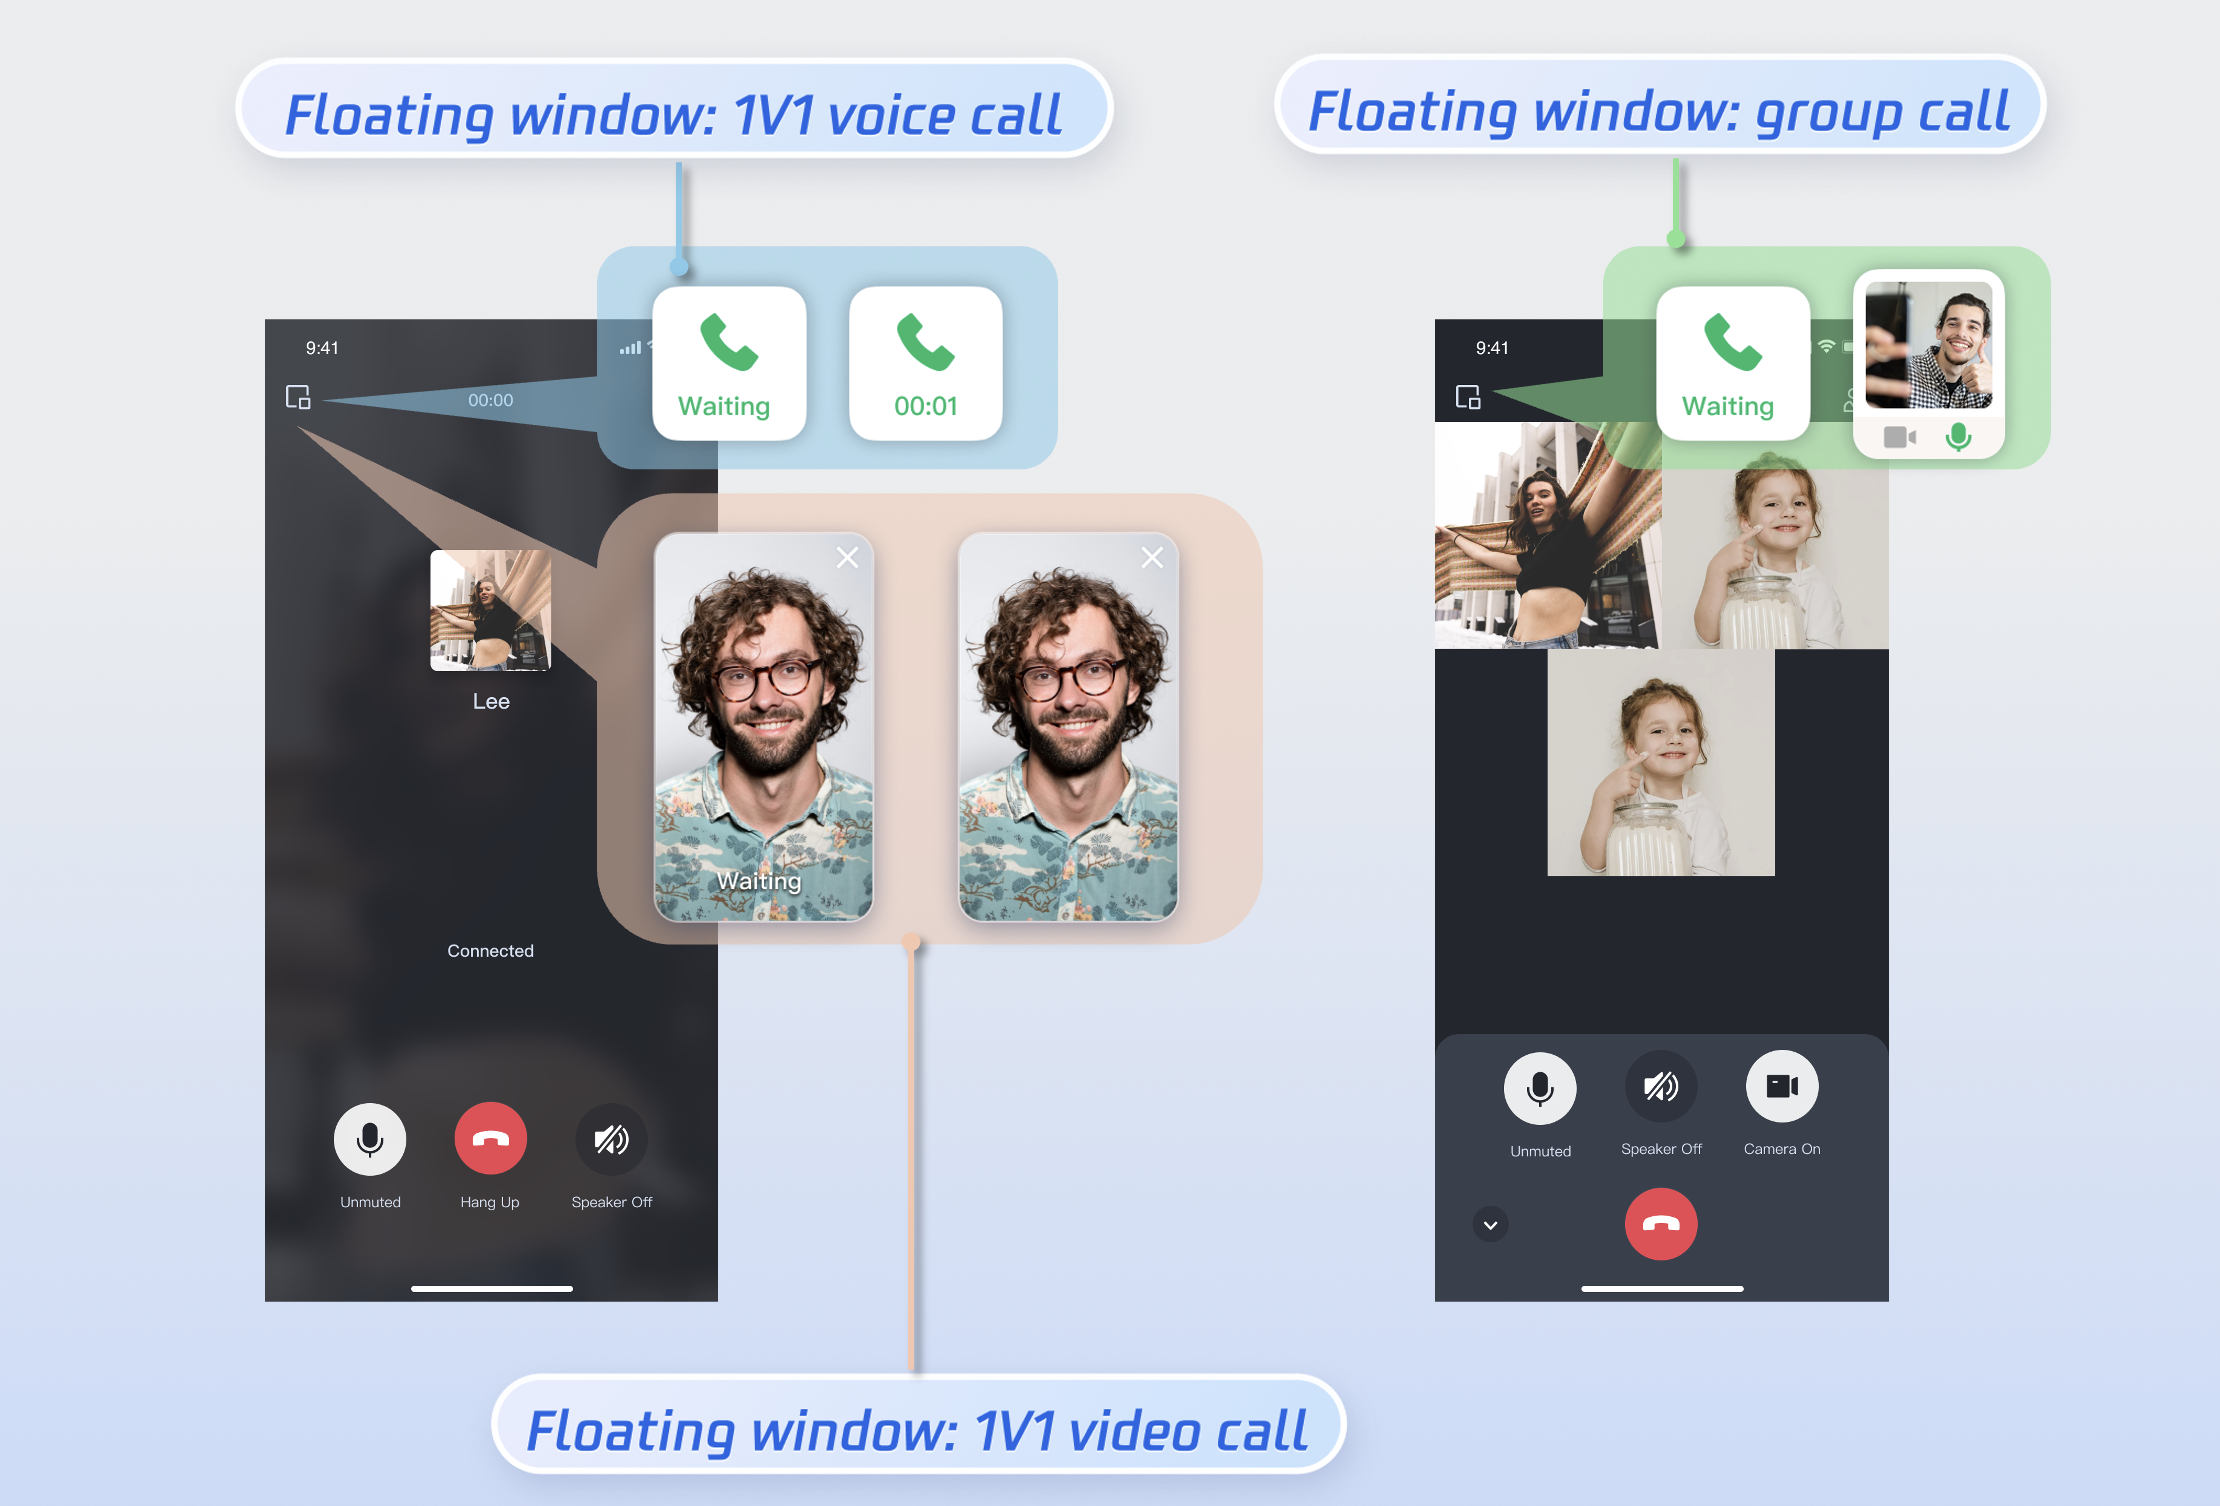
Enabling Floating Window
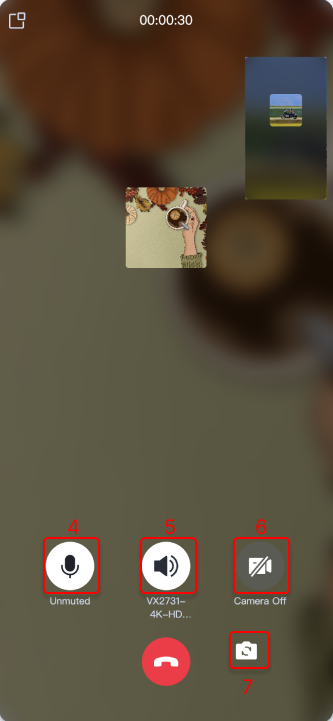
You can enable/disable the floating window feature by calling enableFloatWindow. Enable this feature when initializing the TUICallKit component, with the default status being Off (false). Click the floating window button in the top-left corner of the call interface to minimize the call interface into a floating window format.
Use enableFloatWindow(enable: boolean) to enable/disable the floating window.
TUICallKitAPI.enableFloatWindow(true)
Setting incoming call ringtone
You can configure the default ringtone and mute mode for incoming calls using the following methods:
Set the default ringtone: Use the setCallingBell interface to set the ringtone that the callee receives.
Only local MP3 format file addresses can be used, ensuring that the file is accessible.
To reset the ringtone, pass in an empty string for filePath.
Use the ES6 import method to import the ringtone file.
alert(`[TUICallKit] enableMuteMode API failed. Reason: ${error}`);
}
Customizing Your UI
Replacing icons
To replace an icon, source code import is required first. Copy the component to your project (the source code is in TypeScript version).
Note:
The Interface Replacing icons Plan is suitable for Vue3 + TypeScript and @trtc/calls-uikit-react version number is 3.2.2 or later projects. If you are using other languages or technology stacks, please use the Custom UI Implementation.
1. Download Source Code
React
npminstall @trtc/calls-uikit-react
2. Copy the source code into your own project, taking copying into the src/components/ directory as an example:
Solve Errors That May Be Caused by Copying Source Code
If you encounter an error while using the TUICallKit component, please don't worry. In most cases, this is due to inconsistencies between ESLint and TSConfig configurations. You can consult the documentation and configure correctly as required. If you need help, please feel free to contact us, and we will ensure that you can successfully use this component. Here are some common issues:
ESLint Error
TypeScript Error
If the TUICallKit causes an error due to inconsistency with your project's code style, you can block this component directory by adding a .eslintignore file in the root directory of your project, for example:
# .eslintignore
src/components/TUICallKit
1. If you encounter the 'Cannot find module '../package.json'' error, it's because TUICallKit references a JSON file. You can add the related configuration in tsconfig.json, example:
2. If you encounter the 'Uncaught SyntaxError: Invalid or unexpected token' error, it's because TUICallKit uses decorators. You can add the related configuration in tsconfig.json, example:
{
"compilerOptions":{
"experimentalDecorators":true
}
}
5. Modify the icon components in the TUICallKit/Components/assets folder
Note:
To ensure the icon color and style remain consistent throughout the application, please keep the icon file name unchanged when replacing.
Invoke the hideFeatureButton interface to hide buttons, currently supporting Camera, Microphone, SwitchCamera, InviteUser. For details, see the enumeration type FeatureButton.
Taking the hiding of the Camera Button as an example.
The call background image appears when the camera is turned off during a voice or video call. Modify the local user's call interface background image by calling setLocalViewBackgroundImage, and modify the remote user's call interface background image with setRemoteViewBackgroundImage.
Use setLayoutMode to set the call interface layout, currently only supports LocalInLargeView and RemoteInLargeView, see the LayoutMode enum for details.
1. LocalInLargeView layout, with the local user in the large window:
2. RemoteInLargeView layout, with the remote user in the large window: