
Run Sample Code
This document provides a step-by-step guide on how to get started with TRTC React Native SDK through
Prerequisites
React Native 0.63 or later
Node (later than v12) & Watchman
If you are targeting Android platform:
Android Studio 3.5 or later
Devices with Android 4.1 or later
If you are targeting iOS and macOS platform:
Xcode 11.0 or later
OS X 10.11 or later
A valid developer signature for your project
For how to set up the environment, see the React Native official document.
Account setup
Directions
Step 1. Create an application in your TRTC console
1. Log in to the TRTC console, click Create Application in the Applications section.
2. In the popup page, enter your application name, select RTC Engine, and then click Create.
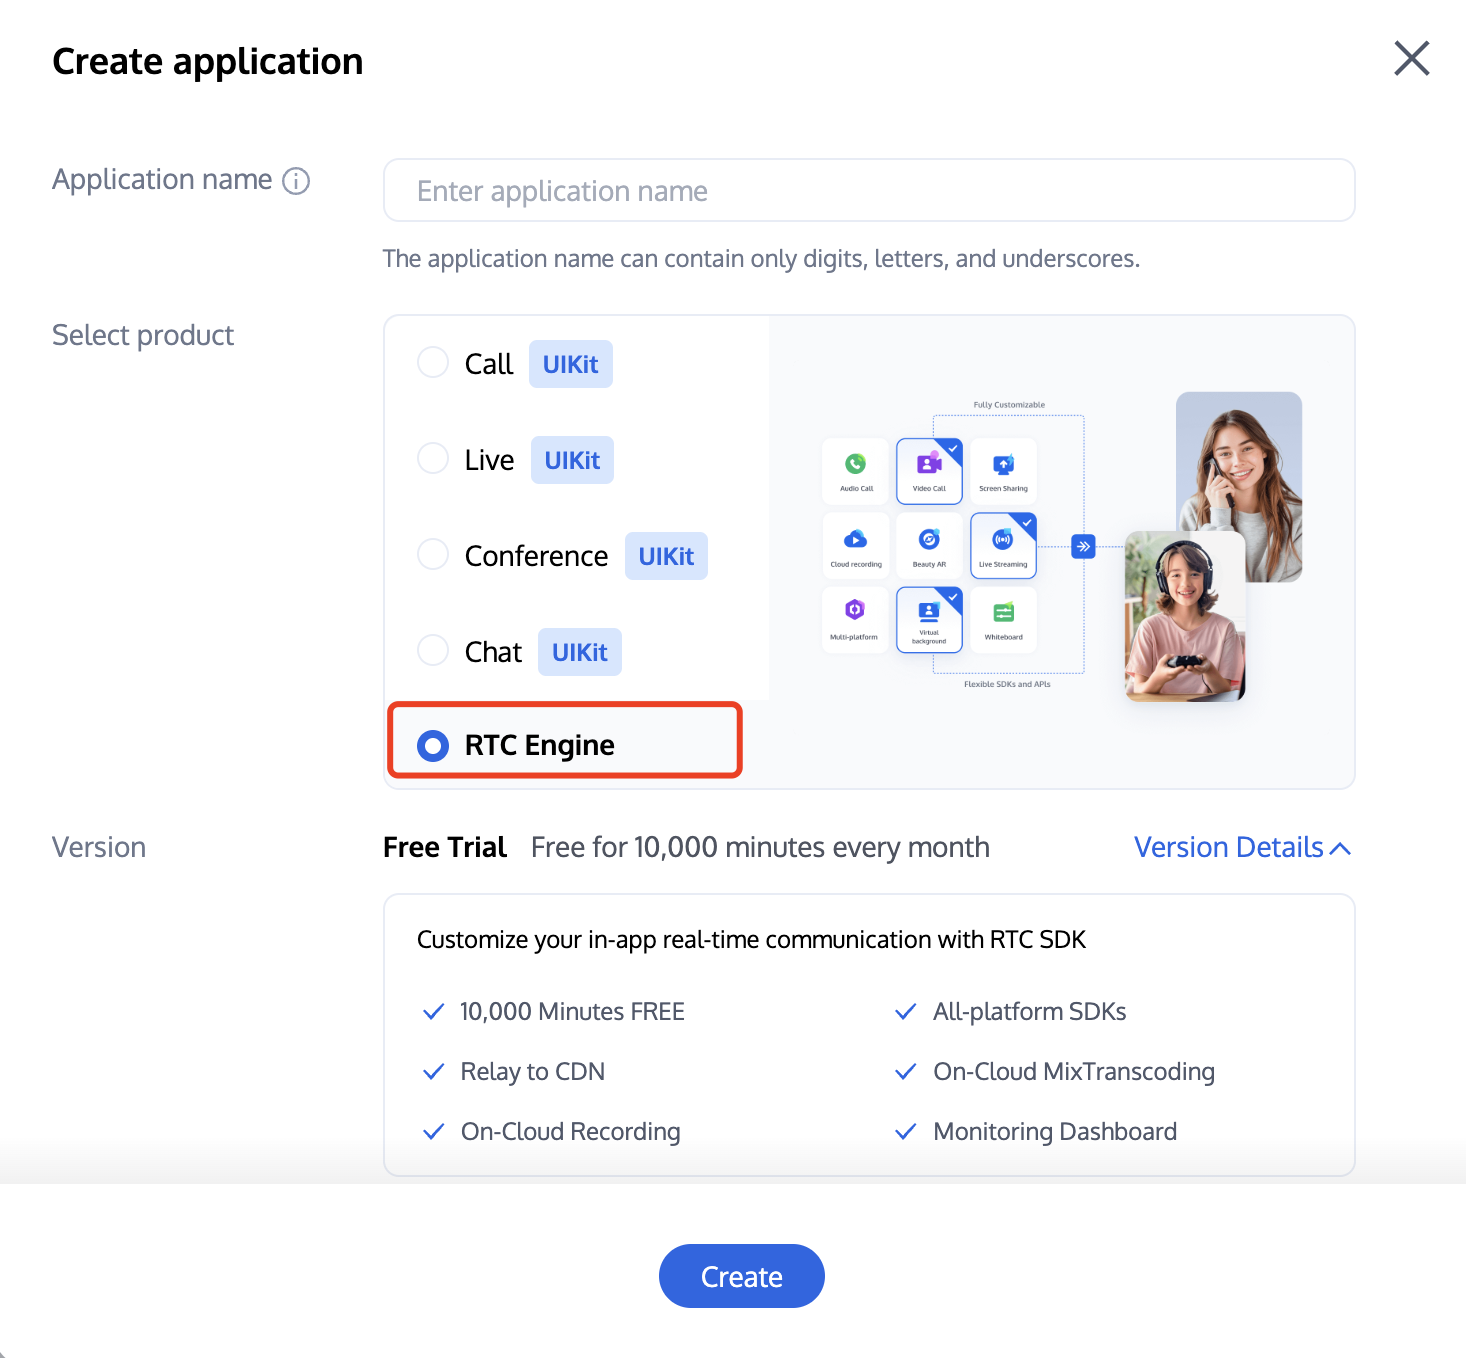
Note:
An application name can contain up to 15 characters. Only digits, letters, Chinese characters, and underscores are allowed.
Tags are used to identify and organize your Tencent Cloud resources. For example, an enterprise may have multiple business units, each of which has one or more TRTC applications. In this case, the enterprise can tag TRTC applications to mark out the unit information. Tags are optional and can be added or edited according to your actual business needs.
Step 2. Get your application's SDKAppId and SecretKey
Select the application you just created and obtain its
SDKAppID and SDKSecretKey in the Basic Information section. This information will be used later in project configuration.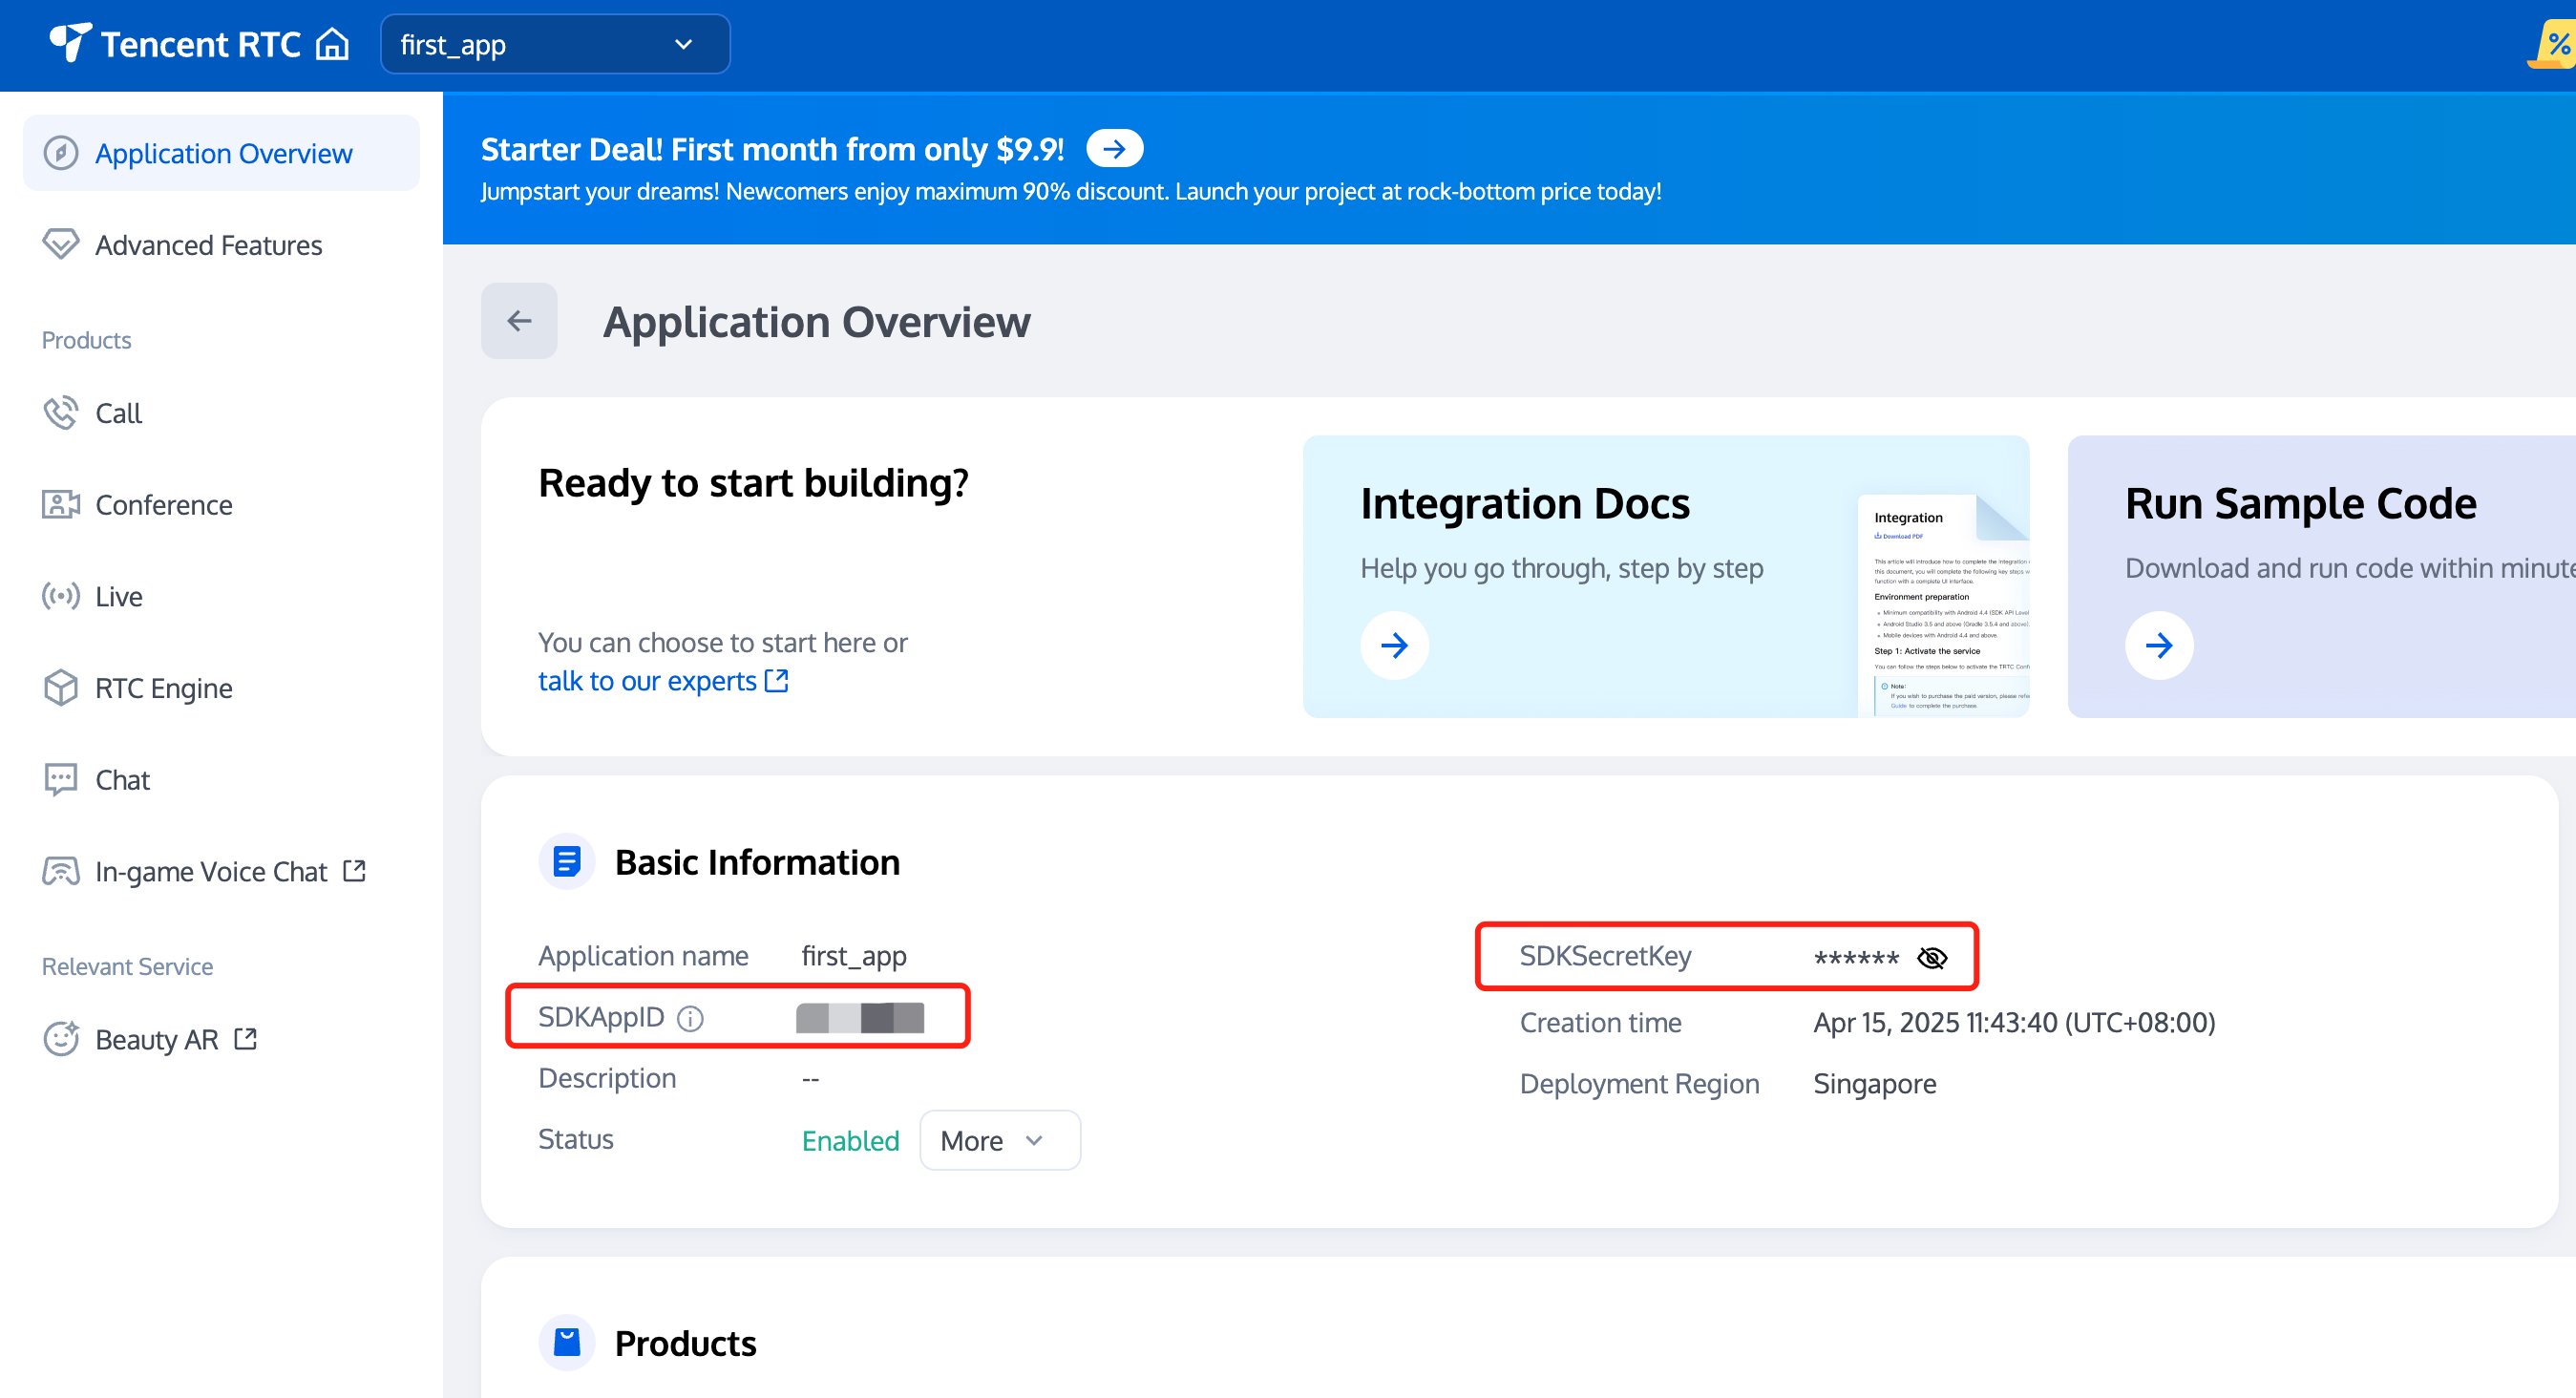
Step 3. Download the project
1. Download our SDK and demo code from GitHub, or run the following command to clone the repository.
git clone https://github.com/LiteAVSDK/TRTC_ReactNative.git
2. Switch to the
TRTC_ReactNative/TRTC-Simple-Demo directory, and run the following commands to install dependencies.yarn install
Step 4. Configure the project
Open
/TRTC-Simple-Demo/debug/config.js directory, and fill in the following parameters:SDKAPPID: your application's SDKAppID from step 2.SDKSECRETKEY: your application's SDKSecretKey from step 2.Note:
The method for generating `UserSig` described in this document involves configuring `SDKSECRETKEY` in the client code. In this method, `SDKSECRETKEY` may be easily decompiled and reversed, and if your key is disclosed, attackers can steal your Tencent Cloud traffic. Therefore, this method is only suitable for the local execution and debugging of TRTC-Simple-Demo.
The best practice is to integrate the calculation code of `UserSig` into your server and provide an application-oriented API. When
UserSig is needed, your application can send a request to your server for a dynamic UserSig. For more information, see How do I calculate UserSig during production?Step 5. Configure permission requests
Before building and running the project, the following permission requests must be configured:
1. Add the following permissions in
AndroidManifest.xml:<uses-permission android:name="android.permission.INTERNET" /><uses-permission android:name="android.permission.ACCESS_NETWORK_STATE" /><uses-permission android:name="android.permission.ACCESS_WIFI_STATE" /><uses-permission android:name="android.permission.WRITE_EXTERNAL_STORAGE" /><uses-permission android:name="android.permission.READ_EXTERNAL_STORAGE" /><uses-permission android:name="android.permission.RECORD_AUDIO" /><uses-permission android:name="android.permission.MODIFY_AUDIO_SETTINGS" /><uses-permission android:name="android.permission.BLUETOOTH" /><uses-permission android:name="android.permission.CAMERA" /><uses-permission android:name="android.permission.READ_PHONE_STATE" /><uses-feature android:name="android.hardware.camera" /><uses-feature android:name="android.hardware.camera.autofocus" />
Note:
Disabling hardware acceleration will result in failure to render remote videos. Please ensure that hardware acceleration is not disabled (do not use
android:hardwareAccelerated="false").2. On Android platform, audio and video permissions must be requested manually, for example:
if (Platform.OS === 'android') {await PermissionsAndroid.requestMultiple([PermissionsAndroid.PERMISSIONS.RECORD_AUDIO, //For audio callsPermissionsAndroid.PERMISSIONS.CAMERA, // For video calls]);}
Add the following permissions in
Info.plist:<key>NSCameraUsageDescription</key><string>You can make video calls only if you grant the app camera permission.</string><key>NSMicrophoneUsageDescription</key><string>You can make audio calls only if you grant the app mic permission.</string>
Step 6. Build and run the project
Start Metro in the demo directory.
1. Start Metro in the demo directory.
npx react-native run-android
2. Open a new window in the demo directory and start debugging.
npx react-native run-android
1. Run
pod install in the demo iOS directory to install dependencies.2. Start Metro in the demo directory.
npx react-native start
3. Open a new window in the demo directory and start debugging. if an error occurs, please use Xcode to debug your project.
npx react-native run-ios

