To better experience the features of TRTC Call, we provide a 7-day free trial. Each SDKAppID can try TRTC Call twice for free, each time for 7 days. Each account can try TRTC Call 10 times in total.
You can refer to the following guidelines to activate the trial edition of Call.
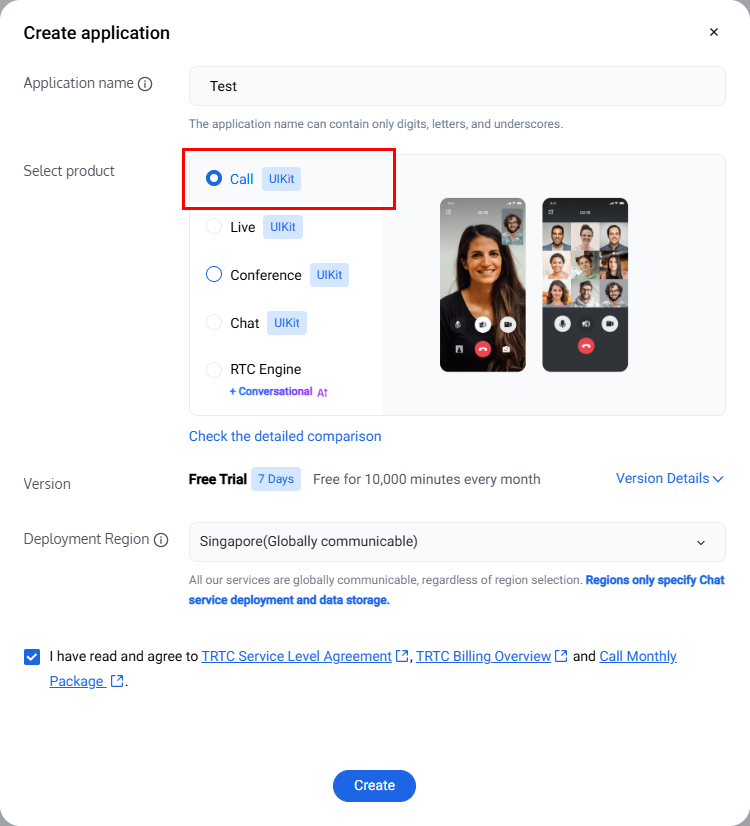
2. In the popup, enter an application name, select Call, and choose the appropriate deployment region. Then click Create. This will create a TRTC application bound to the trial edition of TRTC Call.
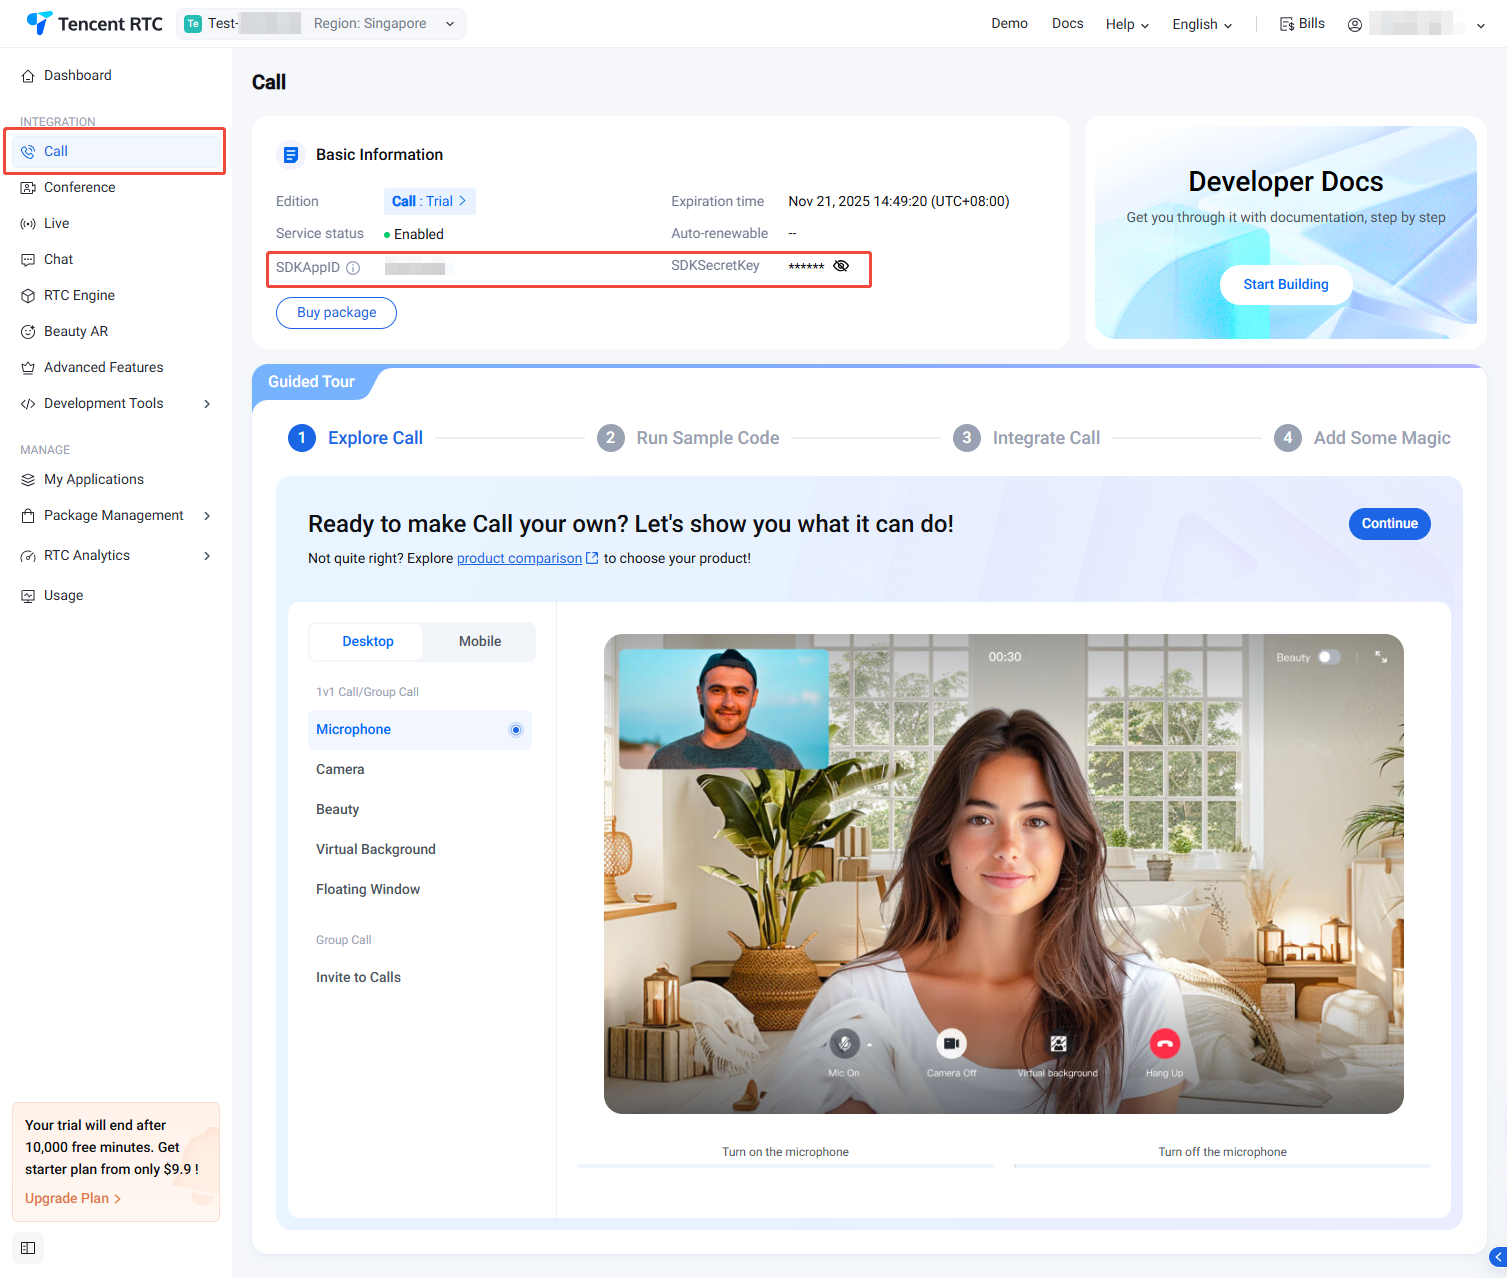
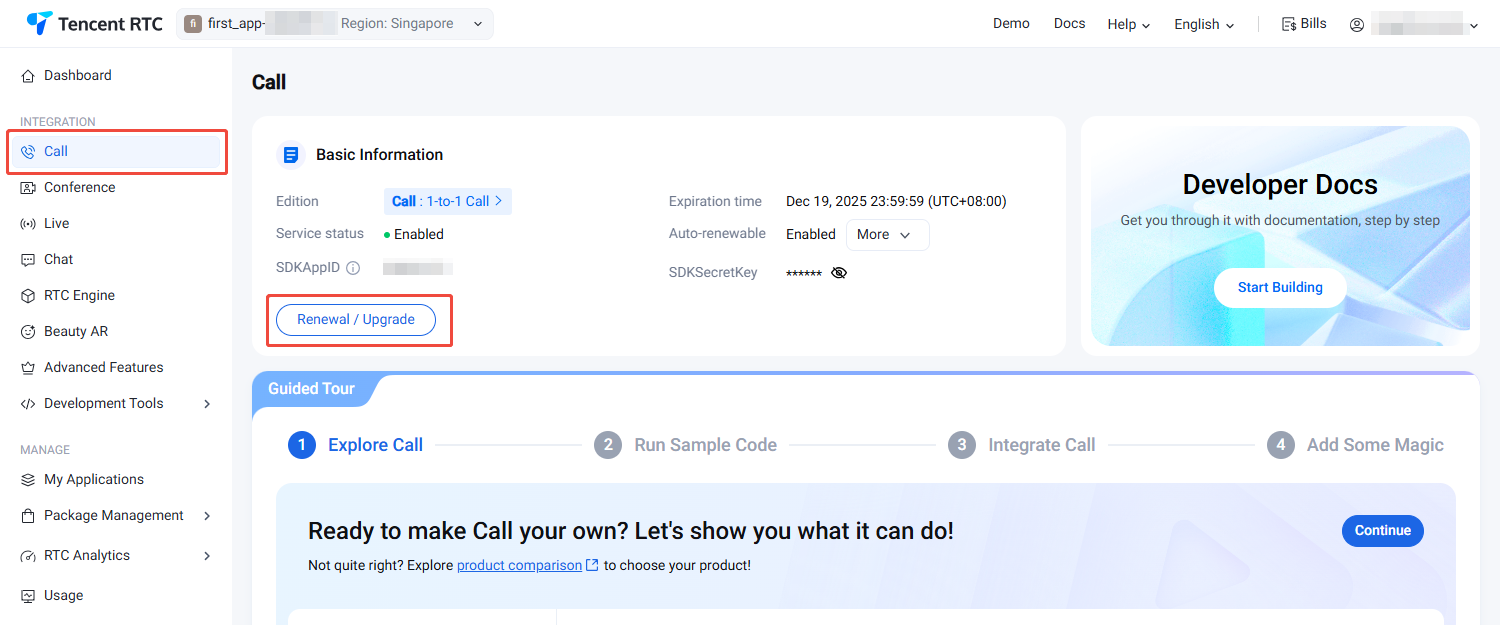
3. After the application has been created, you will automatically be taken to the Call product details page. At this point, you have quickly created an application and successfully received the TRTC Call (TUICallKit) trial version. You can view information on the current Call Product Details Page or My Applications, and refer to the Integration Guide for integration. The SDKAppID and SDKSecretKey will be used in the Integration Guide.
Purchasing the Official Edition
You need to purchase call monthly subscription to use TUICallKit. For the price and feature comparison details of the Call monthly subscription package, please refer to Call Monthly Packages Billing Instructions. To purchase, please follow the steps below:
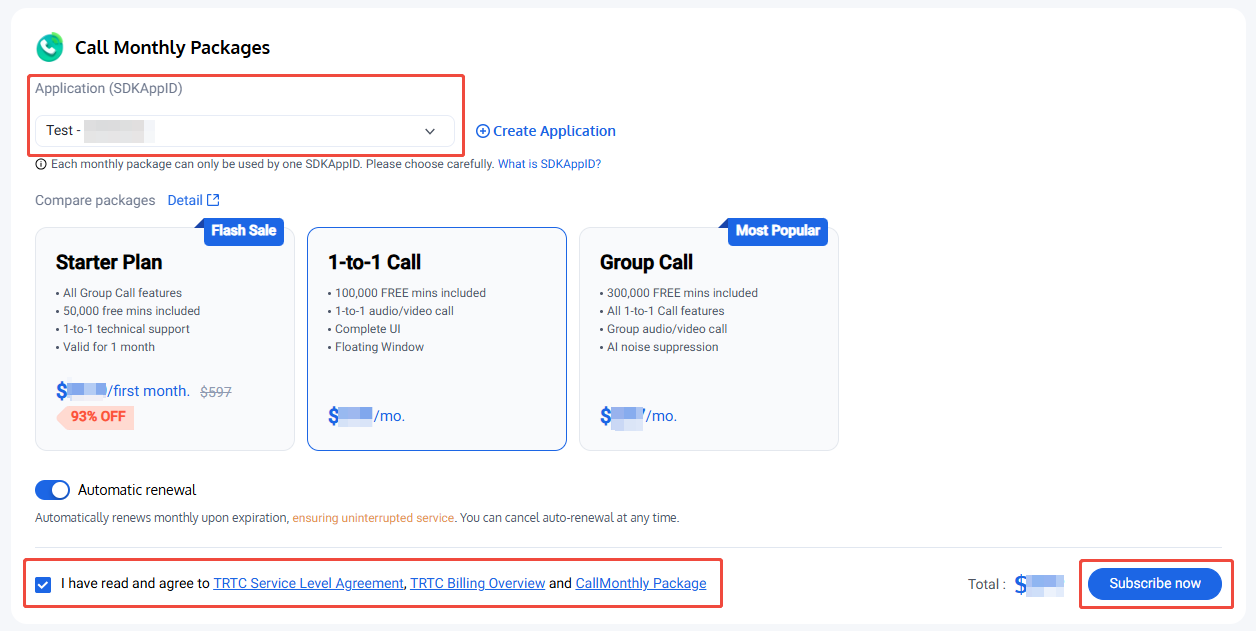
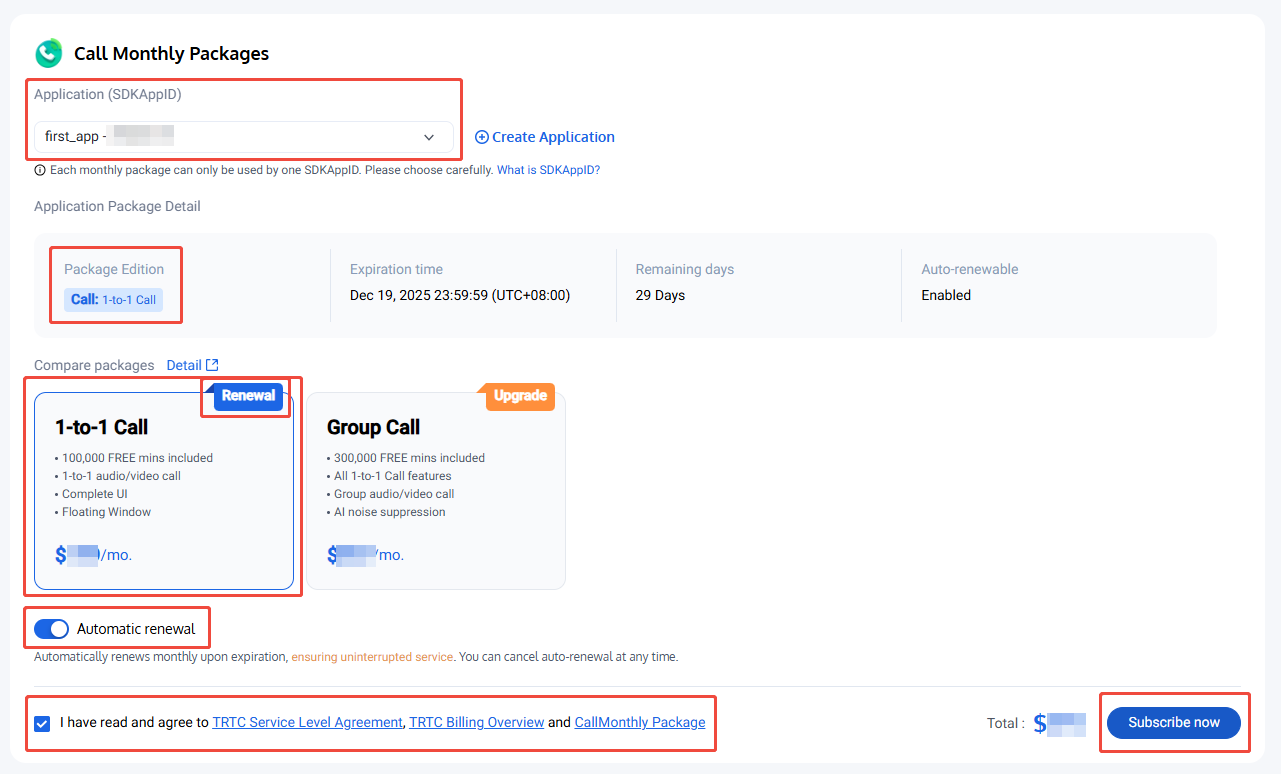
1. Visit the Call Purchase Page, select the application (SDKAppID) and package type you want to purchase, and it is recommended to enable auto-renewal to avoid impacting business usage. After confirming the purchase information and agreeing to the relevant agreement, click Subscribe now.
2. Visit Call Purchase Page, confirm the application (SDKAppID) to purchase, select the version of the same application package, and it is recommended to enable auto-renewal to avoid affecting business usage. When enabled, the system will automatically renew monthly after expiration when the account balance is sufficient. After confirming purchase information and agreeing to the relevant agreement, click Subscribe now.
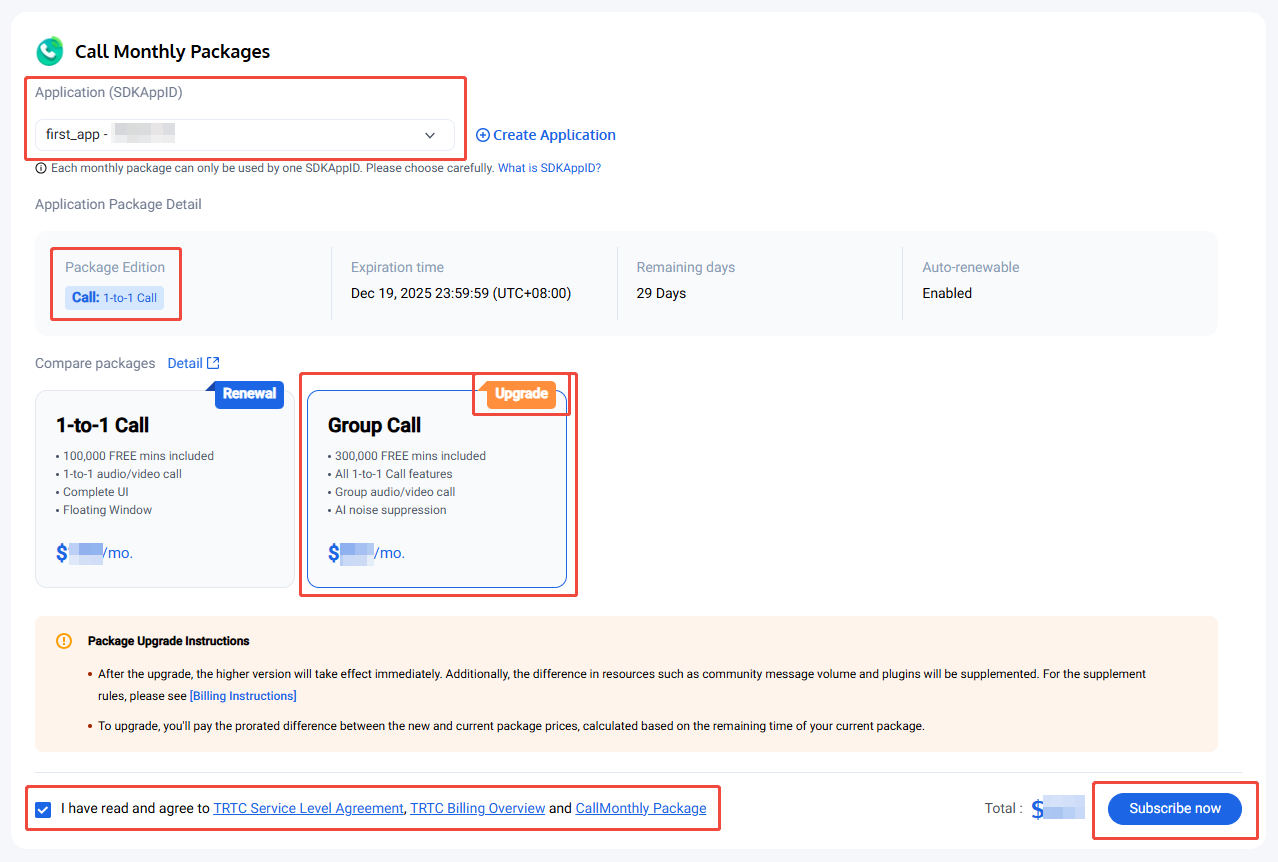
2. Visit Call Purchase Page, confirm the application (SDKAppID) that requires upgrading, select a more advanced version than the current application package, then click Subscribe now after confirming purchase information and agreeing to the relevant agreement.
3. Proceed to the payment page to complete payment. After purchase completion, you can go to Call Product Details Page or My Applications to view application version info.
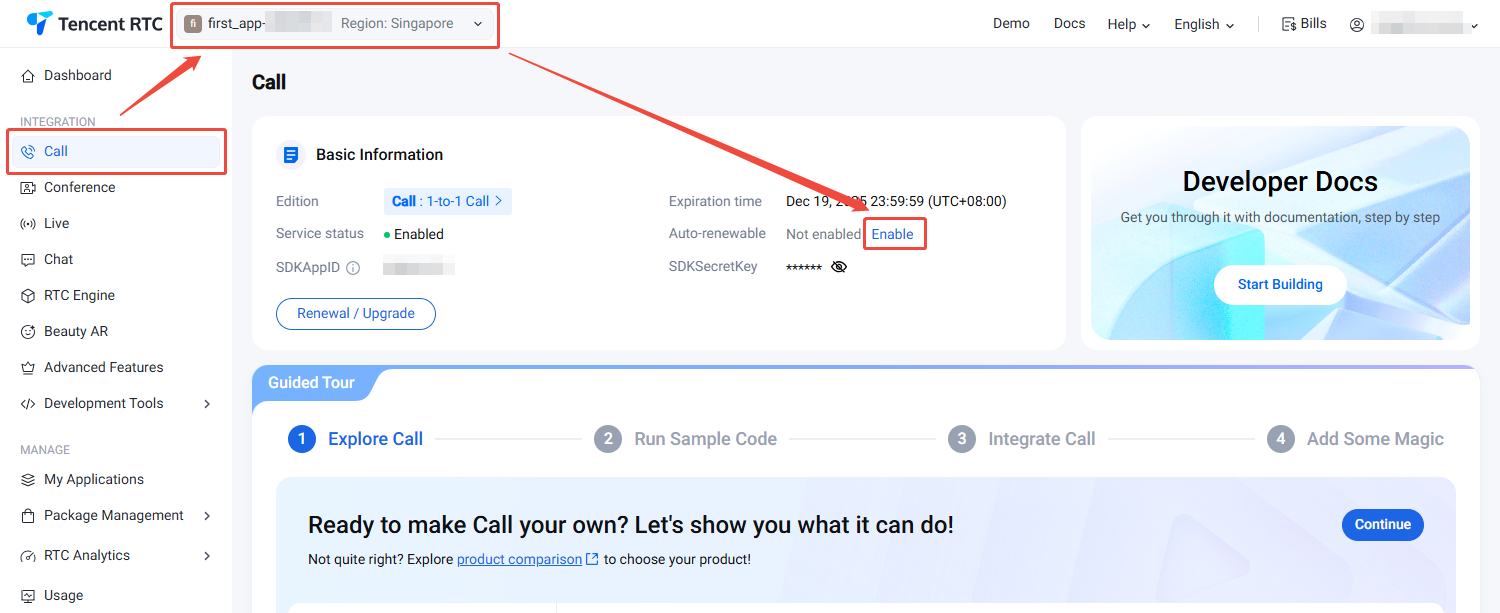
Automatic Renewal
The specific steps to enable auto-renewal in the console are as follows: