
TUIChat Only
This article will introduce how to integrate the
TUIChat chat component.Note:
Starting from version 5.7.1435, TUIChat supports the classic version of UI components.
Starting from version 6.9.3557, TUIChat introduced a brand new minimalist version of UI components.
You can freely choose between the classic or minimalist version of UI components according to your needs.
Demo
TUIChat offers both private chat (1V1) and group chat (Group) features, supporting multiple operations on messages, such as sending different types of messages, long pressing a message to like/reply/quote, and querying message read receipt details.
You can integrate TUIChat into your app on its own. The chat interface has a wide range of usage scenarios, such as real estate agency consultation, online medical consultation, e-commerce online customer service, and remote loss assessment for insurance. You can refer to the TUIChat Component documentation for interface effects.
Development Environment Requirements
Android Studio-Giraffe
Gradle-7.2
Android Gradle Plugin Version-7.0.0
kotlin-gradle-plugin-1.5.31
Integrate TUIChat Source Code
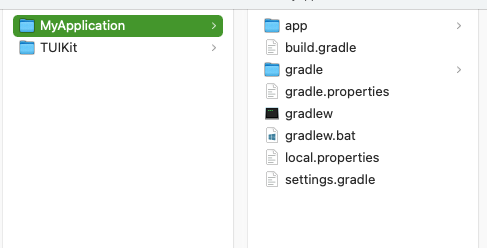
1. Download the source code from GitHub. Ensure the TUIKit folder is at the same level as your own project folder, for example:
2. Add the TUIChat component to settings.gradle:
// Include the internal communication module (required module)include ':tuicore'project(':tuicore').projectDir = new File(settingsDir, '../TUIKit/TUICore/tuicore')// Include the Chat component common module (required module)include ':timcommon'project(':timcommon').projectDir = new File(settingsDir, '../TUIKit/TIMCommon/timcommon')// Include the chat feature module (basic feature module)include ':tuichat'project(':tuichat').projectDir = new File(settingsDir, '../TUIKit/TUIChat/tuichat')
3. Add TUIChat dependency to the App module:
api project(':tuichat')
4.
Add the maven repository and Kotlin support in the
build.gradle file of the root project (at the same level as settings.gradle):buildscript {repositories {mavenCentral()}dependencies {classpath 'com.android.tools.build:gradle:7.0.0'classpath "org.jetbrains.kotlin:kotlin-gradle-plugin:1.5.31"}}
If you are using Gradle 8.x, you need to add the following code.
buildscript {repositories {mavenCentral()maven { url "https://mirrors.tencent.com/nexus/repository/maven-public/" }}dependencies {classpath 'com.android.tools.build:gradle:8.0.2'classpath "org.jetbrains.kotlin:kotlin-gradle-plugin:1.9.0"}}
Build Chat Interface
After integrating TUIChat, if you want to continue building the chat interface, please refer to the document: Build Chat Interface.
FAQs
How to handle error "Manifest merger failed: Attribute application@allowBackup value=(true) from AndroidManifest.xml"?
In the Chat SDK, the default value of
allowBackup is false, which indicates that the backup and restore features are disabled.
You can delete allowBackup attribute from your AndroidManifest.xml file to indicate that the backup and restore features are disabled. You can also add tools:replace="android:allowBackup" in the application node of AndroidManifest.xml file to indicate overriding Chat SDK settings and use your own settings.For example:
<manifest xmlns:android="http://schemas.android.com/apk/res/android"xmlns:tools="http://schemas.android.com/tools"package="com.tencent.qcloud.tuikit.myapplication"><applicationandroid:allowBackup="true"android:name=".MApplication"android:icon="@mipmap/ic_launcher"android:label="@string/app_name"android:roundIcon="@mipmap/ic_launcher_round"android:supportsRtl="true"android:theme="@style/Theme.MyApplication"tools:replace="android:allowBackup"><activity android:name=".MainActivity"><intent-filter><action android:name="android.intent.action.MAIN" /><category android:name="android.intent.category.LAUNCHER" /></intent-filter></activity></application></manifest>
How to handle error "NDK at /Users/***/Library/Android/sdk/ndk-bundle did not have a source.properties file"
Simply add your NDK path to the local.properties file, for example:
ndk.dir=/Users/***/Library/Android/sdk/ndk/16.1.4479499How to handle error "Cannot fit requested classes in a single dex file"?
This issue might occur if your API level setting is too low. You need to enable
MultiDex support in your App’s build.gradle file, by adding multiDexEnabled true and the corresponding dependency:android {defaultConfig {...minSdkVersion 19targetSdkVersion 30multiDexEnabled true}...}dependencies {implementation "androidx.multidex:multidex:2.0.1"}
In addition, add the following code to the Application file:
public class MyApplication extends SomeOtherApplication {@Overrideprotected void attachBaseContext(Context base) {super.attachBaseContext(base);MultiDex.install(this);}}
How to handle error "Plugin with id 'kotlin-android' not found."?
Since the
TUIChat component uses Kotlin code, you need to add a Kotlin build plugin. Refer to step 4 of the TUIChat Source Code Integration above.Why does the App feature work normally in the Debug version but encounter issues in the Release version?
This issue is very likely caused by ProGuard. Please try to avoid obfuscating TUIKit with ProGuard. You can add the following rule:
# Avoid deleting code logic
-dontshrink
-dontoptimize# Avoid aliasing TUIKit-keep class com.tencent.qcloud.** { *; }
Contact Us
If you have any questions about this article, feel free to join the Telegram Tech Support Group, where you will receive reliable technical support.

