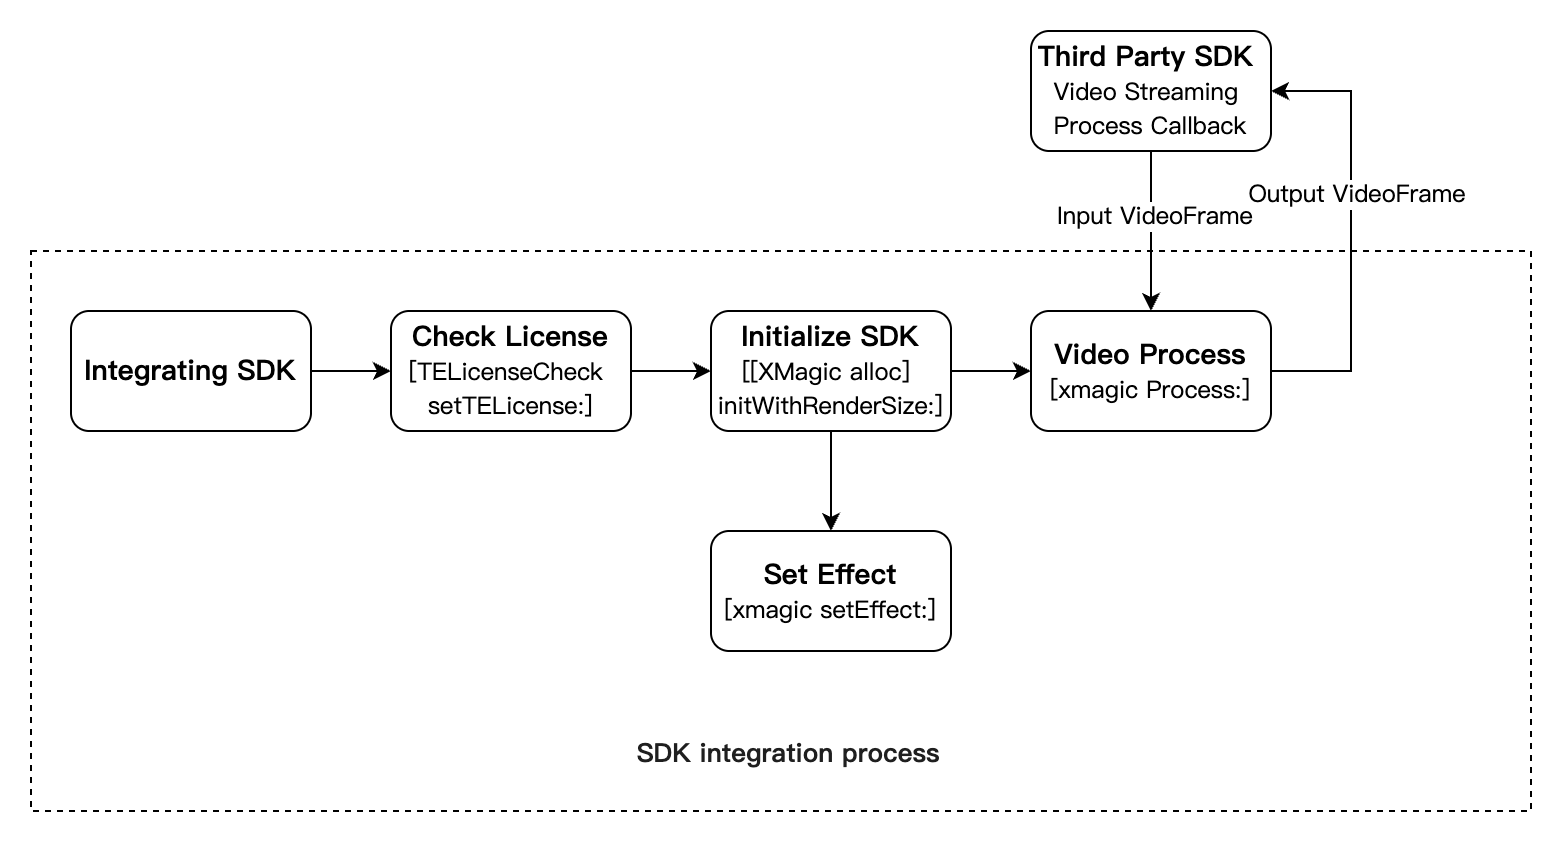
If you prefer not to use UIKit and instead directly implement Core SDK interface calls, you may proceed with this guide for integration.
Comprehensive Integration Process
Prerequisites
Environment requirements
Xcode 11 or later (download from App Store or here)
Recommended runtime environment:
Device requirements: iPhone 5 or later. iPhone 6 and older models support up to 720p for the front camera.
System requirements: iOS 10.0 or later.
Importing the SDK
You can use CocoaPods or download and import the SDK manually into your project.
CocoaPods
Manual import
Dynamic download and integration
1. Install CocoaPods.
Enter the following command in a terminal (you need to install Ruby on your Mac first):
sudo gem install cocoapods
2. Create a Podfile.
Go to the directory of your project and enter the following command to create a Podfile in the directory.
pod init
3. Edit the Podfile.
XMagic version before 3.0.1:
Choose an edition for your project and edit the Podfile:
XMagic Standard.
Edit the Podfile as follows:
platform :ios,'9.0'
target 'App'do
pod 'XMagic'
end
XMagic Lite.
The installation package of XMagic Lite is smaller than XMagic Standard. It supports only Basic A1- 00, Basic A1 - 01, and Advanced S1 - 00. Edit the Podfile as follows:
platform :ios,'9.0'
target 'App'do
pod 'XMagic_Smart'
end
XMagic version 3.0.1 and later:
Choose the appropriate version based on your project package and edit the Podfile file:
#Please install the corresponding library with 'pod install' based on your package
#For example: if your package is of type 'all', then you only need to use pod 'TencentEffect_All'.
#For example: if your package is of type 'S1-04', then you only need to use pod 'TencentEffect_S1-04'.
pod 'TencentEffect_All'
#pod 'TencentEffect_A1-00'
#pod 'TencentEffect_A1-01'
#pod 'TencentEffect_A1-02'
#pod 'TencentEffect_A1-03'
#pod 'TencentEffect_A1-04'
#pod 'TencentEffect_A1-05'
#pod 'TencentEffect_A1-06'
#pod 'TencentEffect_S1-00'
#pod 'TencentEffect_S1-01'
#pod 'TencentEffect_S1-02'
#pod 'TencentEffect_S1-03'
#pod 'TencentEffect_S1-04'
#pod 'TencentEffect_S1-05'
#pod 'TencentEffect_S1-06'
#pod 'TencentEffect_S1-07'
#pod 'TencentEffect_X1-01'
#pod 'TencentEffect_X1-02'
4. Update the local repository and install the SDK.
Enter the following command in a terminal window to update the local repository and install the SDK:
pod install
5. Under the Build Settings tab, add -ObjC to Other Linker Flags.
6. Change the bundle ID to the bundle ID bound to your license.
1. Download the SDK and effect resources and decompress the file. The SDK is in the frameworks folder, and the bundle resources are in resources.
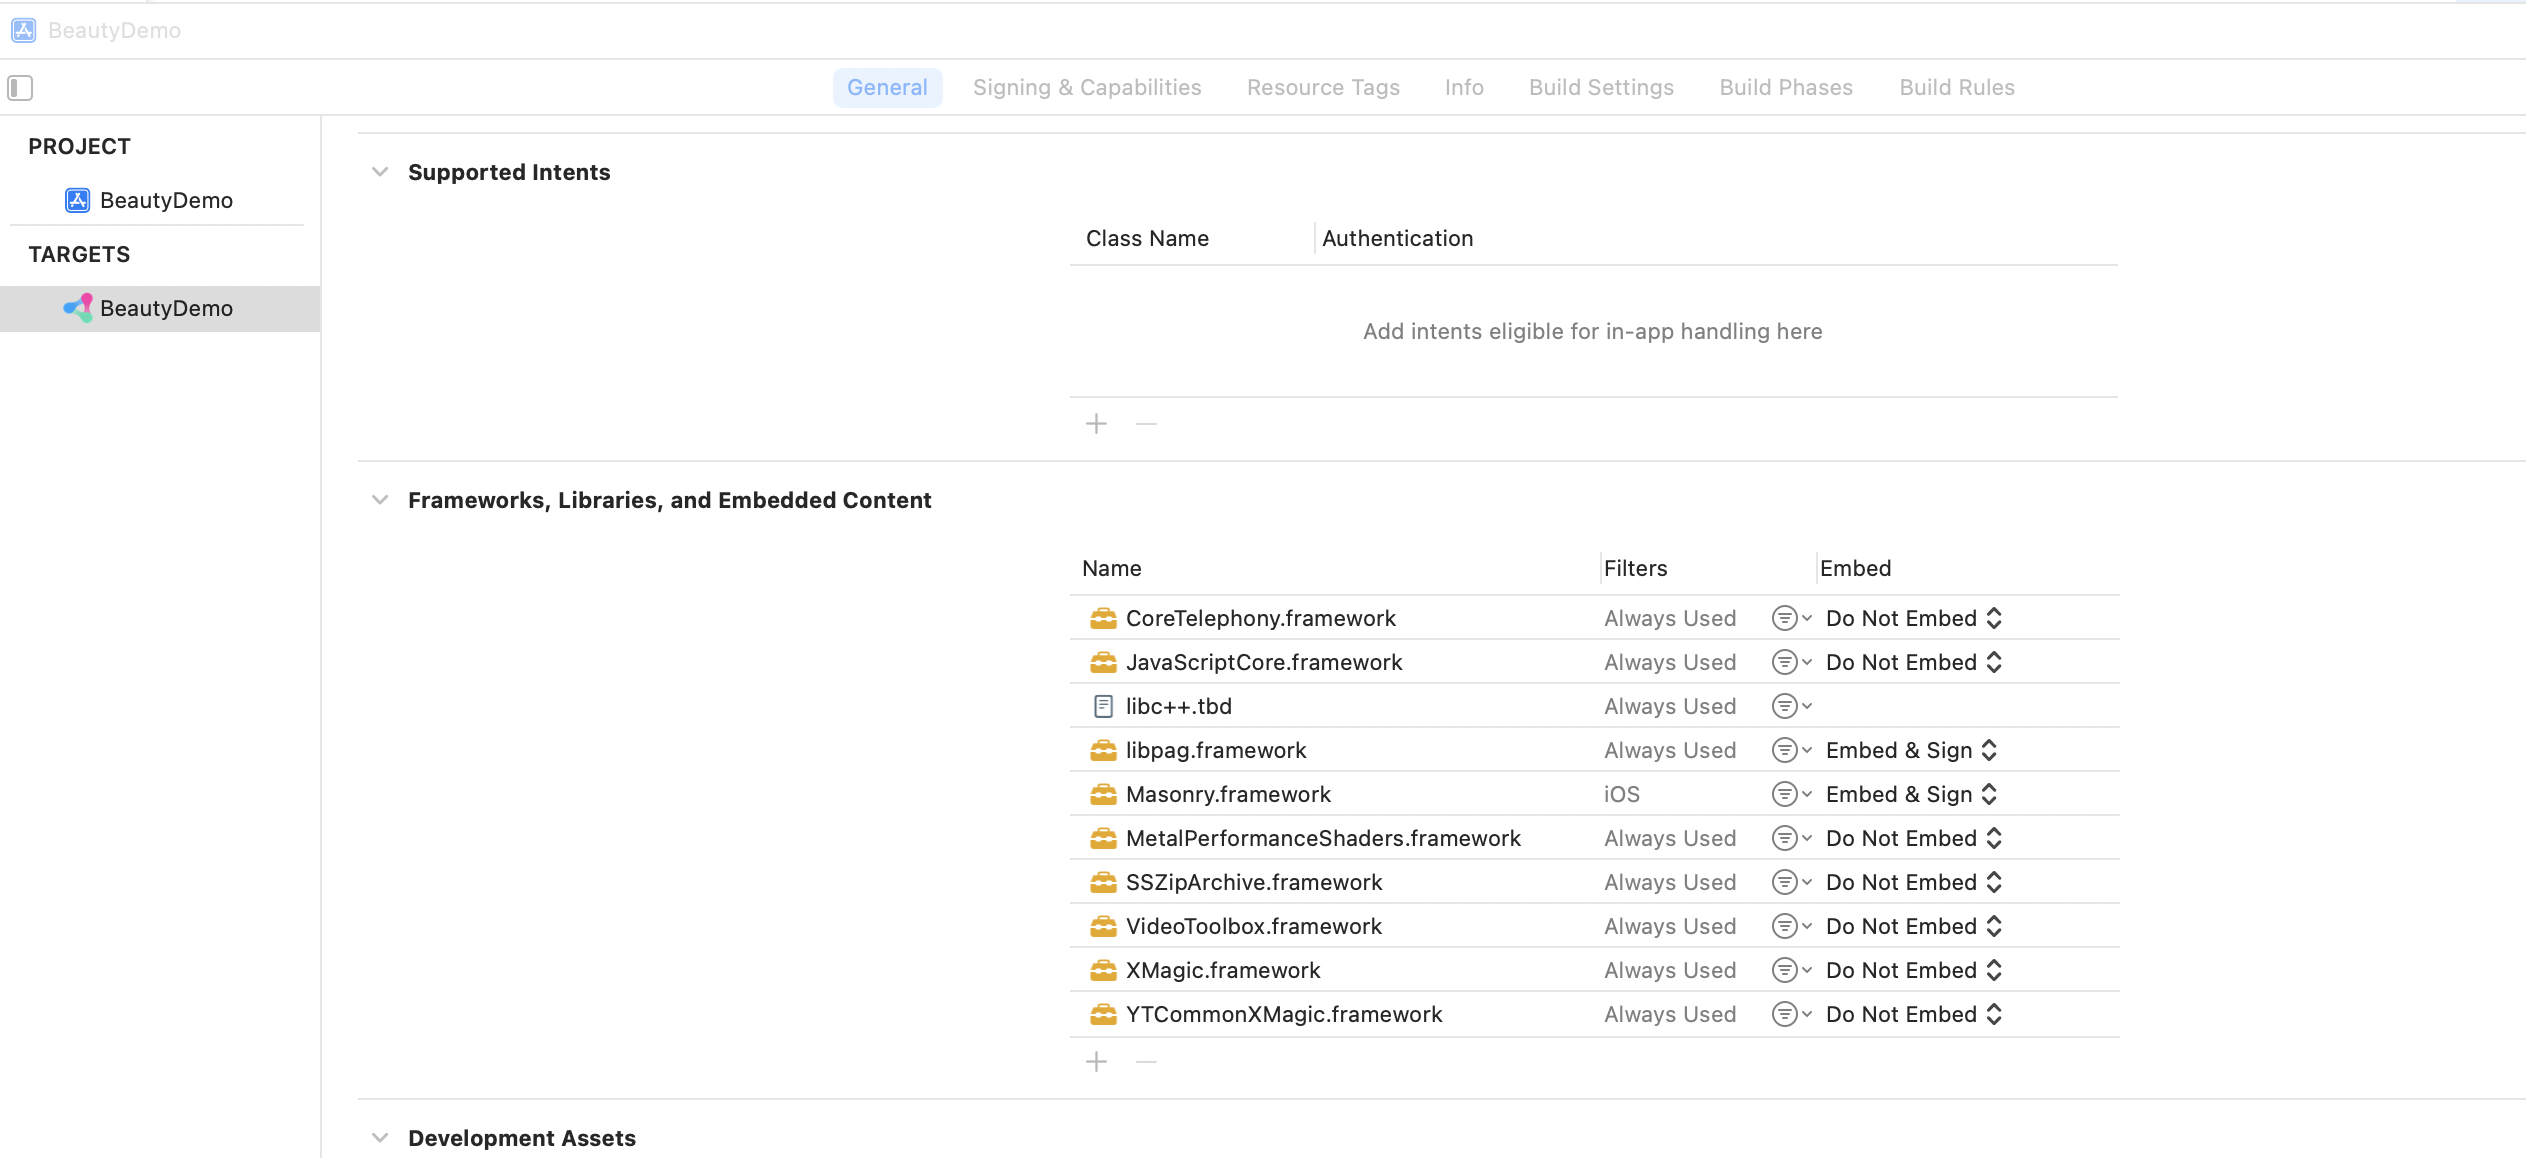
2. If your SDK version is earlier than 2.5.1:
Open your Xcode project and add the frameworks in the frameworks folder to your project: Choose the target to run, select the General tab, expand Frameworks, Libraries, and Embedded Content, and click + to add the frameworks downloaded, including XMagic.framework, YTCommonXMagic.framework, and libpag.framework, as well as MetalPerformanceShaders.framework, CoreTelephony.framework, JavaScriptCore.framework, VideoToolbox.framework, and libc++.tbd. You can also add Masonry.framework (control layout) and SSZipArchive (file decompression) if necessary.
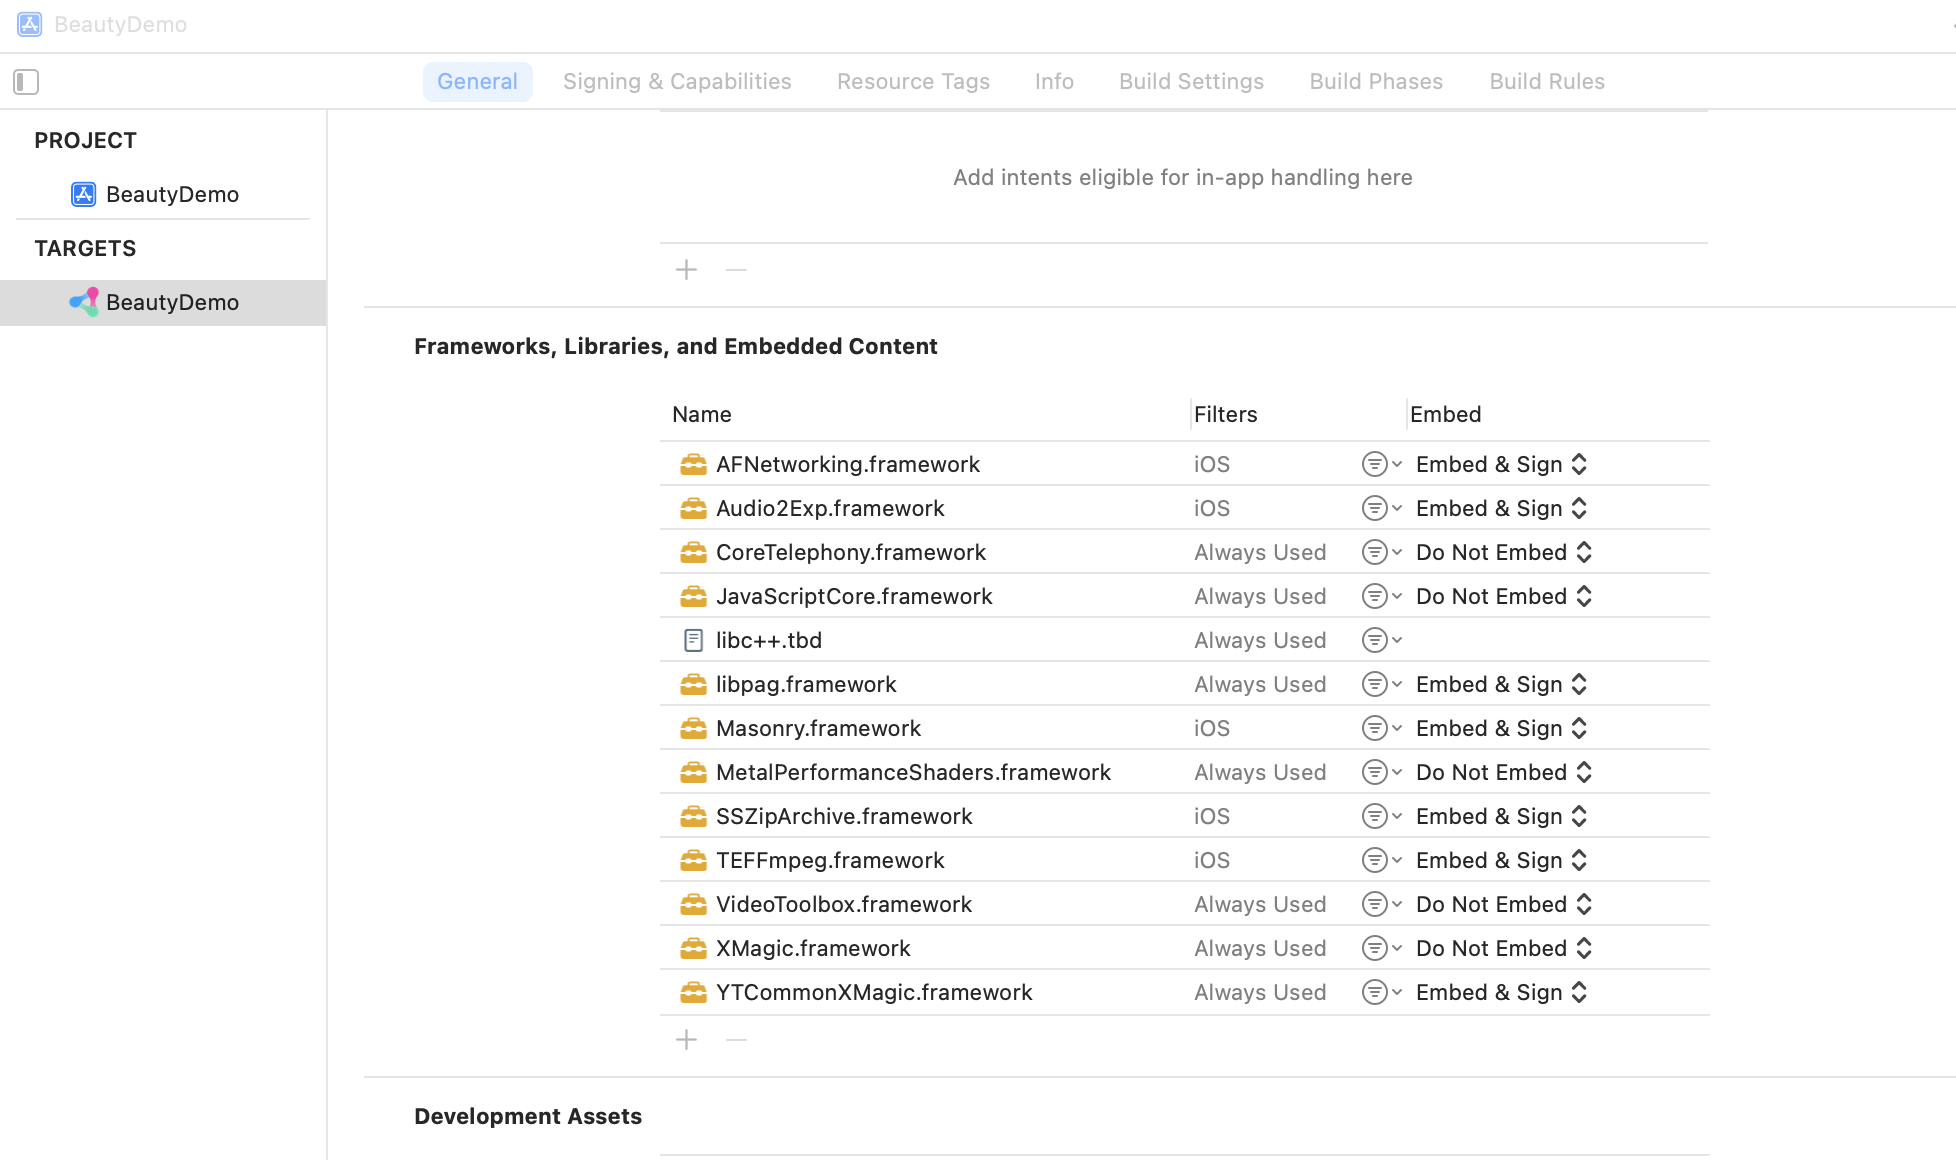
If your SDK version is 2.5.1 or later:
Open your Xcode project and add the frameworks in the frameworks folder to your project: Choose the target to run, select the General tab, expand Frameworks, Libraries, and Embedded Content, and click + to add the frameworks downloaded, including XMagic.framework, YTCommonXMagic.framework, libpag.framework, Audio2Exp.framework, and TEFFmpeg.framework(Renamed to TECodec.framework after version 3.0.0.), as well as MetalPerformanceShaders.framework, CoreTelephony.framework, JavaScriptCore.framework, VideoToolbox.framework, and libc++.tbd. If necessary, you can also add Masonry.framework (control layout) and SSZipArchive (file decompression).
3. Add the effect resources in the resources folder to your project.
4. Under the Build Settings tab, add -ObjC to Other Linker Flags.
5. Change the bundle ID to the bundle ID bound to your license.
To reduce the SDK package size, you can dynamically download the necessary module resources and animated effect resources (MotionRes, not available in some basic editions of the SDK) from a URL and, after download, pass the path of the resources to the SDK.
You can use your existing download service, but we recommend you use the download logic of the demo. For detailed directions on implementing dynamic download, see Reducing SDK Size.
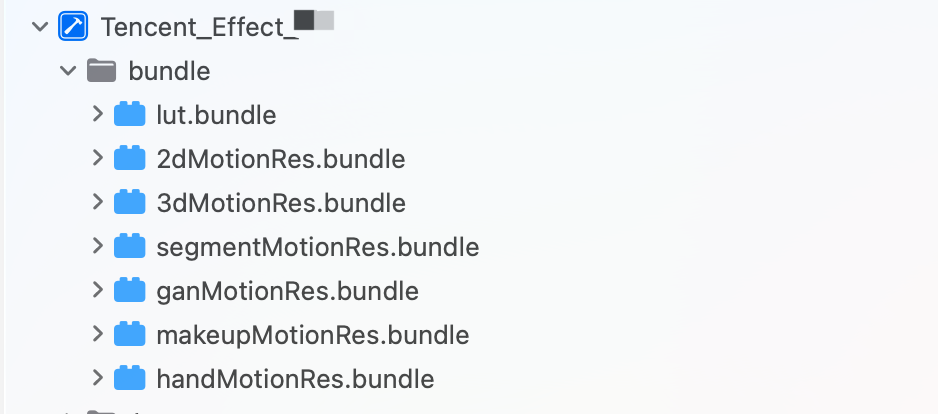
Importing the effect resources
If your package includes dynamic effect and filter features, you need to download the corresponding resources from the SDK Download Page, After unzipping, import the bundles from the `resources/motionRes` folder into any directory of your main project as needed. After importing, it should look like the image below, where `lut.bundle` contains the filter resources and the others contain the animation resources.
Add permission descriptions in the Info.plist file. If you don’t do so, the application will crash on iOS 10. Grant the application camera access in Privacy - Camera Usage Description.
Directions
Step 1. Authenticate
1. Apply for a license and get the LicenseURL and LicenseKEY. See Activate the Service.
2. Set the URL and key in the initialization code of your business module to download the license. Avoid downloading it just before use. You can also trigger the download in the didFinishLaunchingWithOptions method of AppDelegate (the values of LicenseURL and LicenseKey are generated when you bound the license in the console).
If your SDK version is earlier than 2.5.1, you can find TELicenseCheck.h in XMagic.framework; if your SDK version is 2.5.1 or later, TELicenseCheck.h is in YTCommonXMagic.framework.The SDK can only be used after successful authentication.