
Contact List
This article will guide you in building a contact interface.
Demo
If you haven't added any contacts beforehand, the loaded contact interface will be empty. After adding contacts, the contacts will be displayed in the interface list, as shown below:
Empty Contact List | Un-empty Contact List |
 | 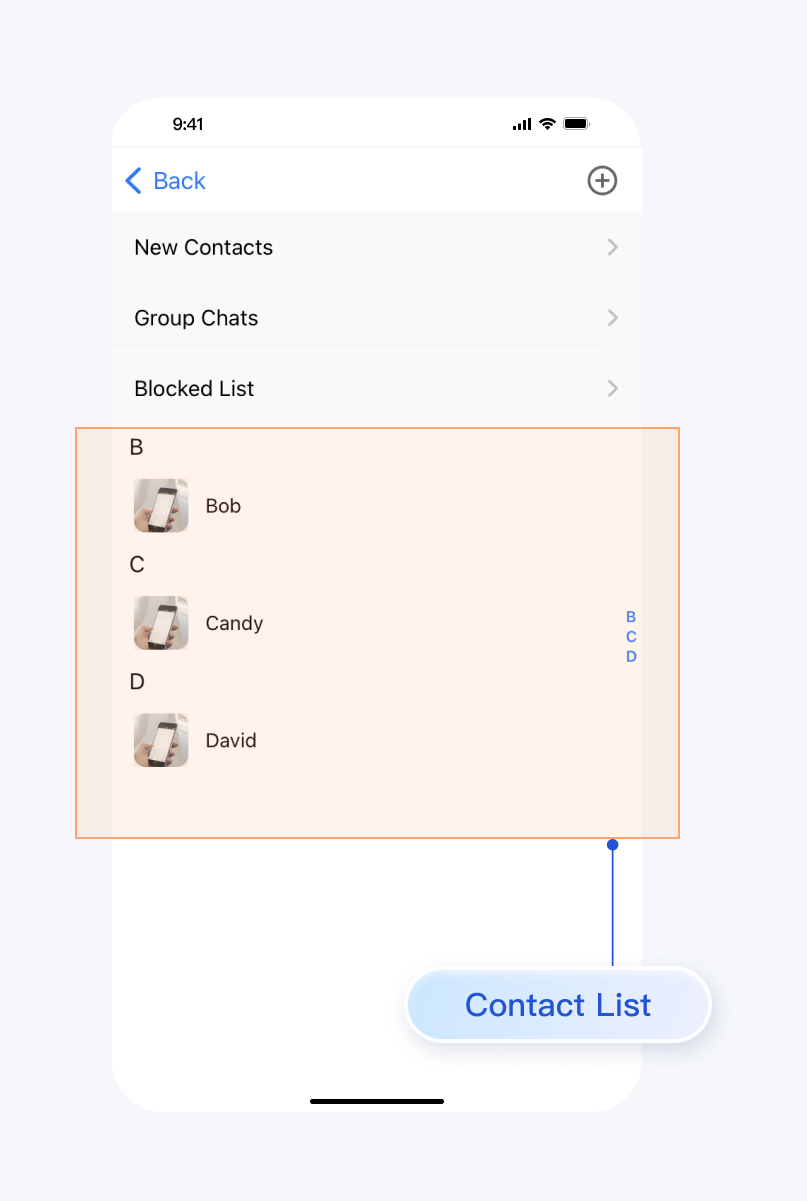 |
Development Environment Requirements
Android Studio-Giraffe
Gradle-7.2
Android Gradle Plugin Version-7.0.0
kotlin-gradle-plugin-1.5.31
Preconditions
Before building the interface, please ensure that you have completed the following 4 things:
1. Created an application in the console.
2. Created some user accounts in the console.
3. Integrated
TUIKit or TUIContact.4. Called the
TUILogin login API to log in to the component.Note:
1. All components use this login API. Log in just once each time the application is launched.
2. Please ensure a successful login to proceed; we recommend performing the following actions in the succesful callback login.
If you haven't completed the above 4 steps, please refer to the corresponding steps in Getting Started first, otherwise you may encounter obstacles when implementing the following features.
If you have already completed them, please continue reading below.
Step Instructions
To integrate the contacts interface, simply embed the corresponding Fragment of the contacts list into your Activity.
MainActivity layout file:
<?xml version="1.0" encoding="utf-8"?>
<FrameLayout xmlns:android="http://schemas.android.com/apk/res/android"
    android:layout_width="match_parent"
    android:layout_height="match_parent">

    <FrameLayout
        android:id="@+id/contact_view"
        android:layout_width="match_parent"
        android:layout_height="match_parent"/>

</FrameLayout>
MainActivity Java file:
public class MainActivity extends AppCompatActivity {

    @Override
    protected void onCreate(@Nullable Bundle savedInstanceState) {
        super.onCreate(savedInstanceState);
        setContentView(R.layout.main_activity);
        TUIContactMinimalistFragment fragment = new TUIContactMinimalistFragment();
        getSupportFragmentManager()
                .beginTransaction()
                .add(R.id.contact_view, fragment)
                .commitAllowingStateLoss();
    }
}
public class MainActivity extends AppCompatActivity {

    @Override
    protected void onCreate(@Nullable Bundle savedInstanceState) {
        super.onCreate(savedInstanceState);
        setContentView(R.layout.main_activity);
        TUIContactFragment fragment = new TUIContactFragment();
        getSupportFragmentManager()
                .beginTransaction()
                .add(R.id.contact_view, fragment)
                .commitAllowingStateLoss();
    }
}
The features of the contacts interface are divided as shown below:
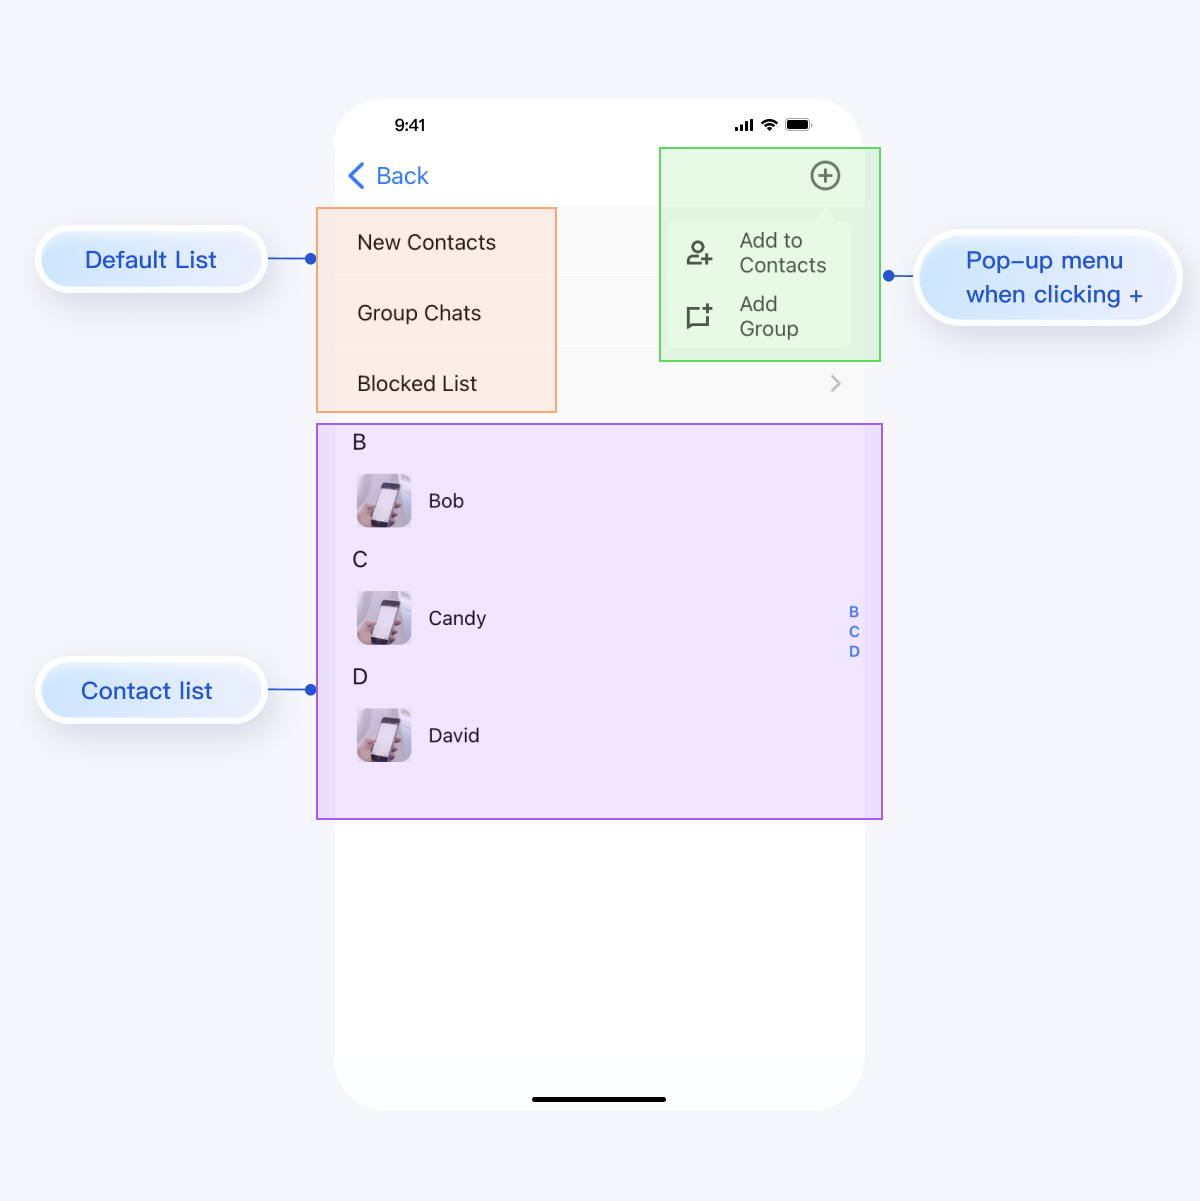
TUIContact handles click actions in this interface by default, as follows:Action | Effect |
Click on New Contacts | Display pending friend requests |
Click on Group Chats | Display all group chats for the currently logged-in account |
Click on Blocked List | Display the blocklist for the currently logged-in account |
Click on the contact's avatar | Enter the Contact Management interface |
Click on the + sign at the top right of the interface | Opens a pop-up menu with Add to Contacts and Add Group |
More practices
Contact Us
If you have any questions about this article, feel free to join the Telegram Tech Support Group, where you will receive reliable technical support.

