
Add Contact
This article will guide you through adding contacts on TUIKit.
Display Effect
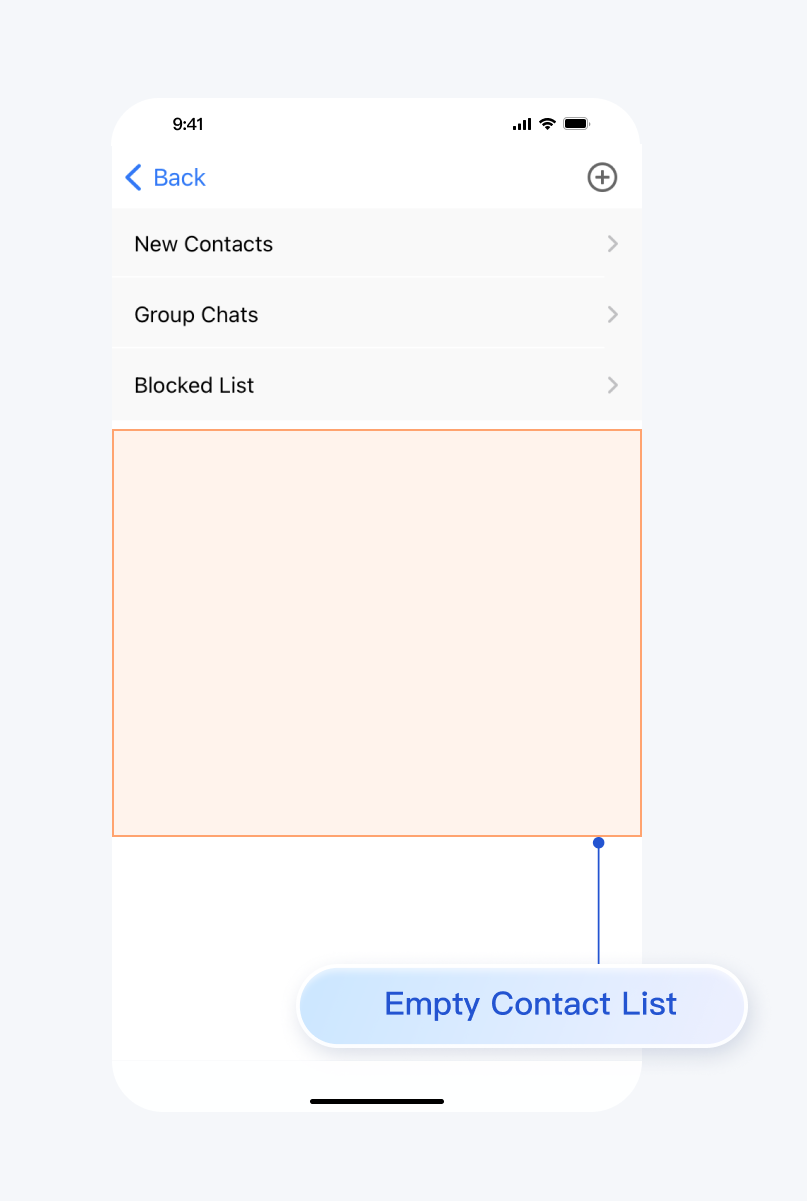
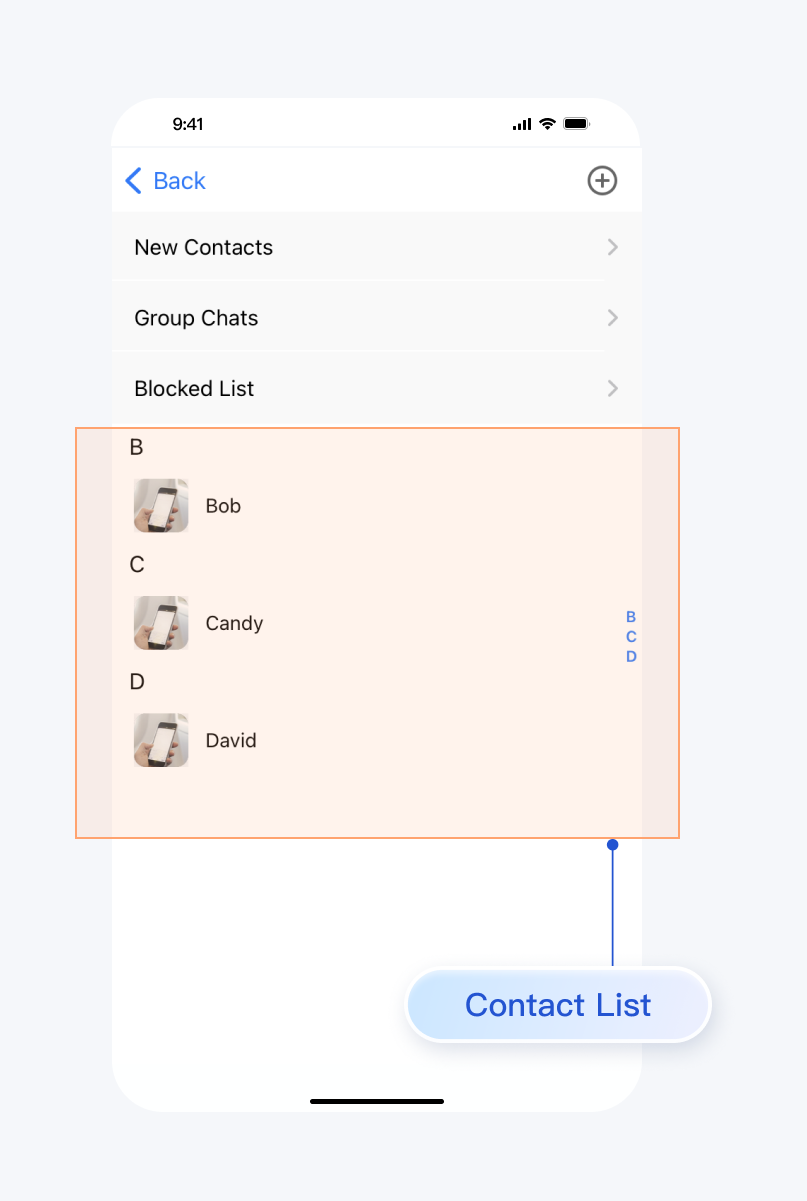
If you haven't added any contacts beforehand, the loaded contact interface will be empty. After adding contacts, the contacts will be displayed in the interface list, as shown below:
Contact list is empty | Contact list is not empty |
 |  |
Environment Requirements
Xcode 10 or later
iOS 9.0 or later
Preconditions
Before building the interface, please ensure that you have completed the following 4 things:
1. Created an application in the console.
2. Created some user accounts in the console.
3. Integrated
TUIKit or TUIContact.4. Called the
login API in TUILogin to log in to the component.Note:
1. All components use this API to log in. You can log in once every time you start the application.
2. Please make sure that the login is successful, and we recommend that you do the following in the callback of successful login.
If you haven't completed the above 4 steps, please refer to the corresponding steps in Getting Started first, otherwise you may encounter obstacles when implementing the following features.
If you have already completed them, please continue reading below.
Step Instructions
We recommend you operate directly within
TUIKit, manually adding contacts as follows:1. Follow the steps in Building Contact Interface to display the contact interface.
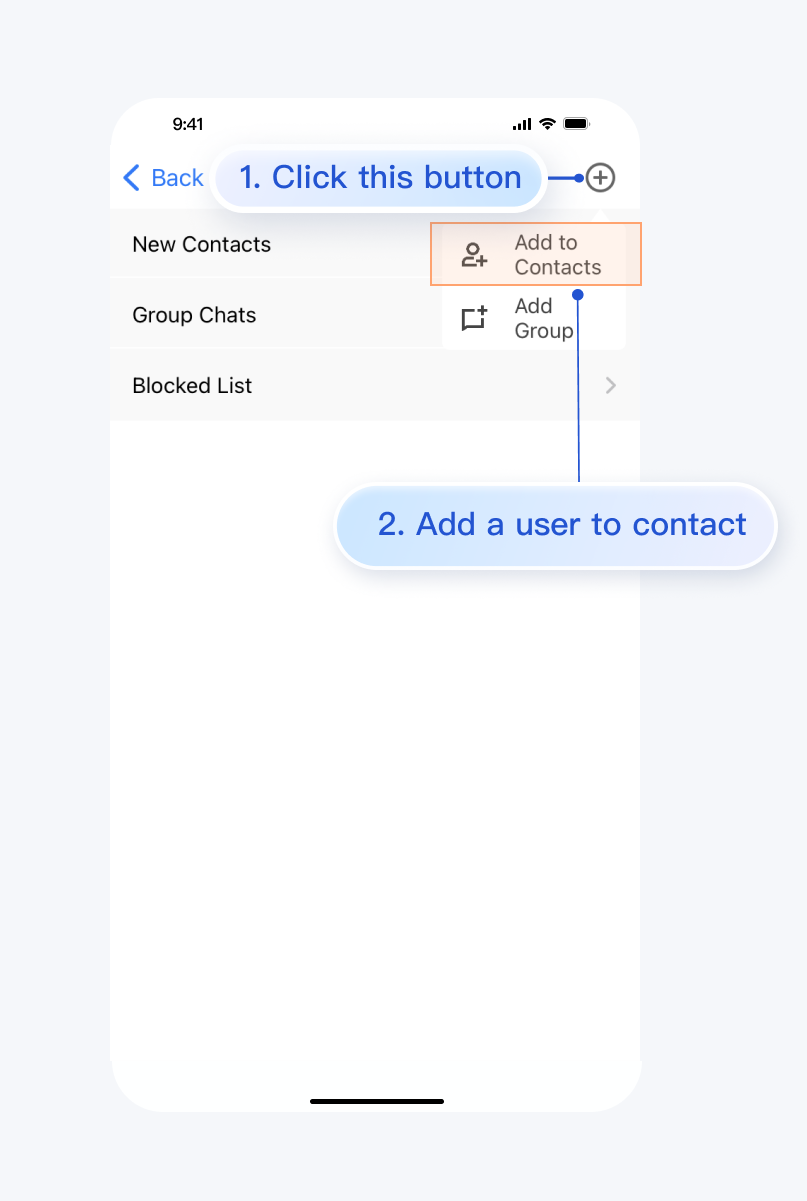
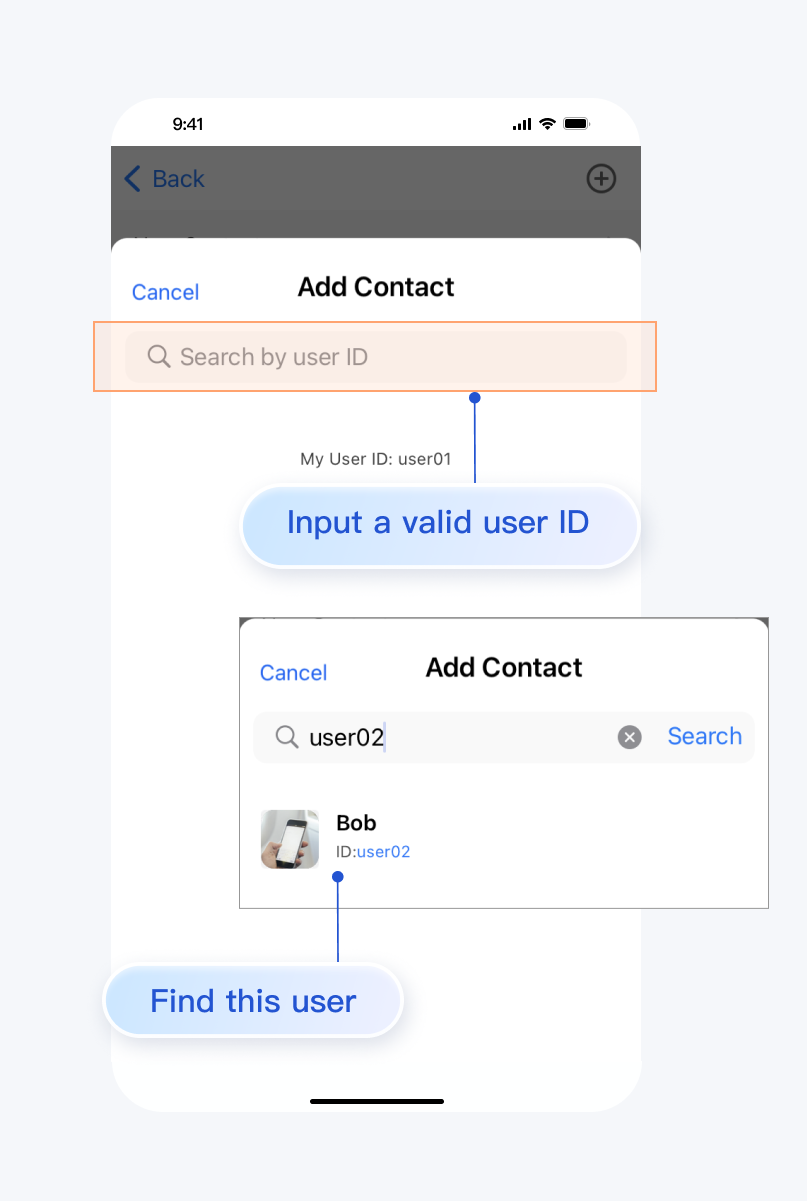
2. Click the
+ button in the top right corner of the interface, and in the submenu, select Add to Contacts.3. Enter a valid userID to search for a user. You can obtain a valid userID from the
Account Management page in the console. Page path: Applications > Your App > Chat > Users > Account Management.4. Add user as contact.
The effect is shown below:
Click Add to Contacts | Search user | Send contact request |
 |  | 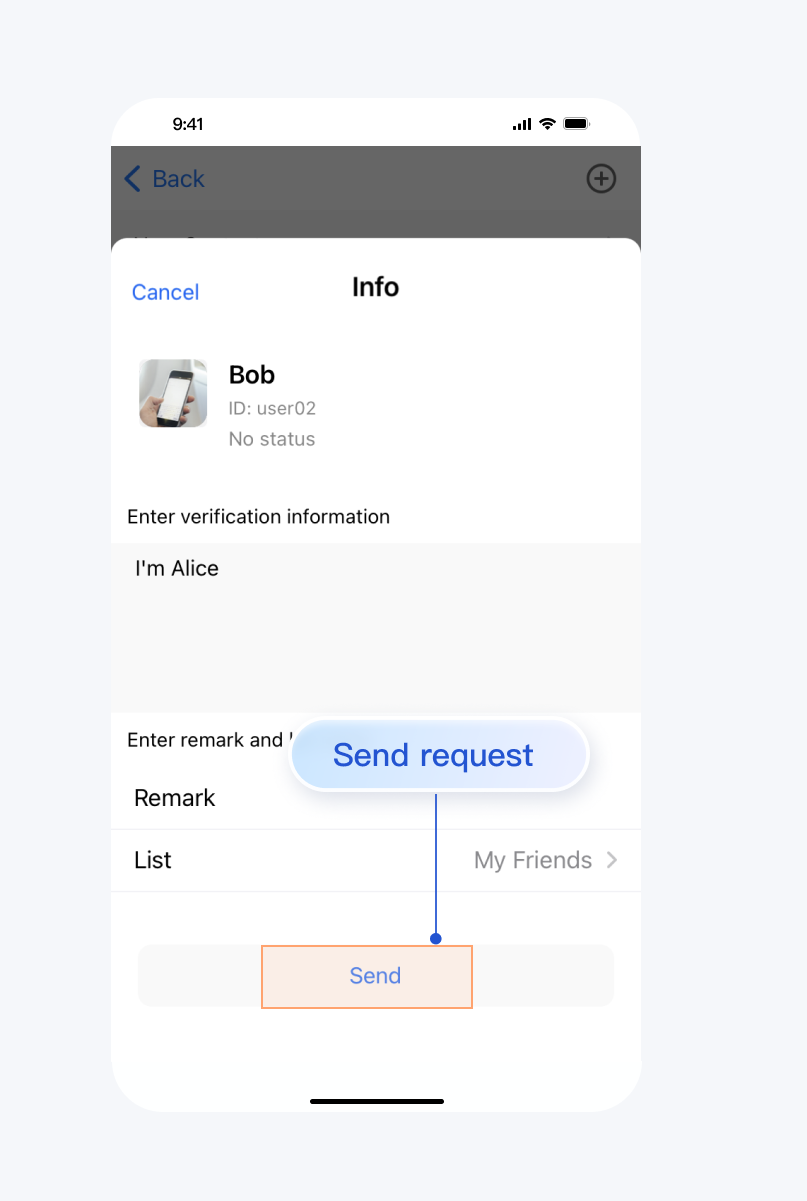 |
Usually, after sending a friend request, the recipient will automatically accept. However, if the recipient's account has set up
Friend Request Verification, it may behave differently. The configure path is:Applications >
Your App > Chat > Users > Account Management > Choose an account > Edit > Friend Request Verification.Friend Request Verification values are as follows:Friend Request Verification Values | Meaning |
Accept all friend requests | Default, accept all friend requests |
Manually accept or reject friend requests | The requested recipient is required to manually agree or reject the friend request. |
Reject all friend requests | Reject all friend requests |
More practices
Contact Us
If you have any questions about this article, feel free to join the Telegram Technical Group, where you will receive reliable technical support.

