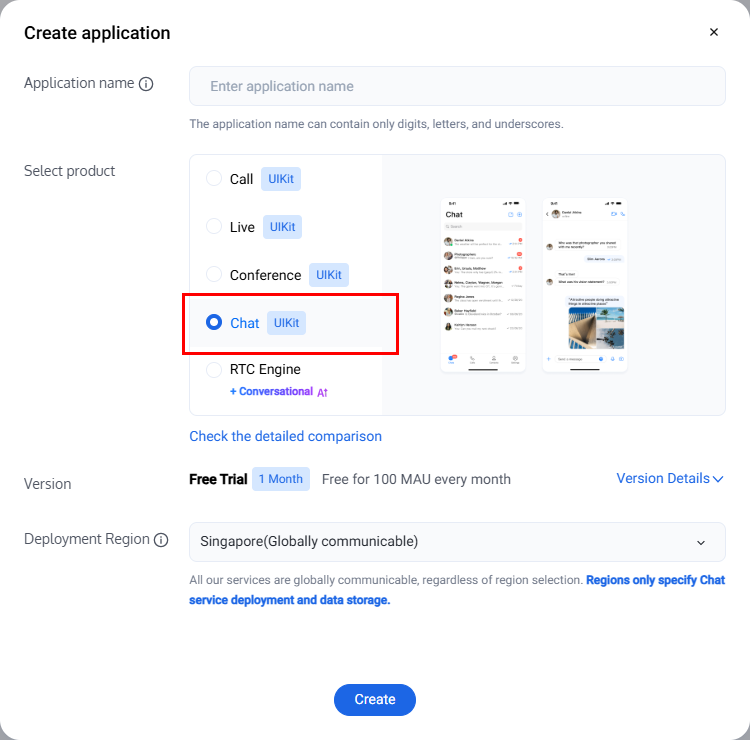
2. Log in to the Chat console and click Create Application.
3. Enter the application name in the create pop-up window and choose Chat, select appropriate Deployment Region, then click Create.
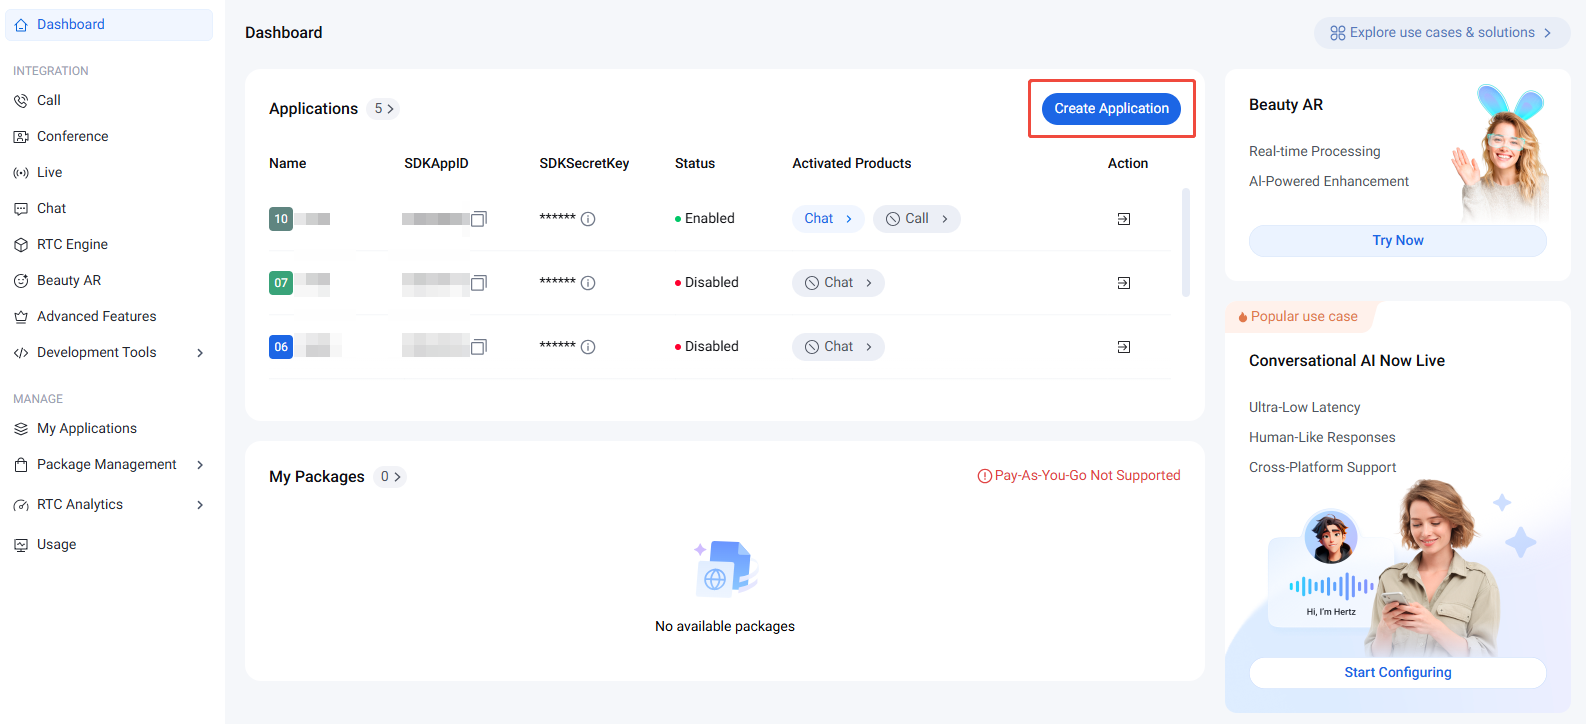
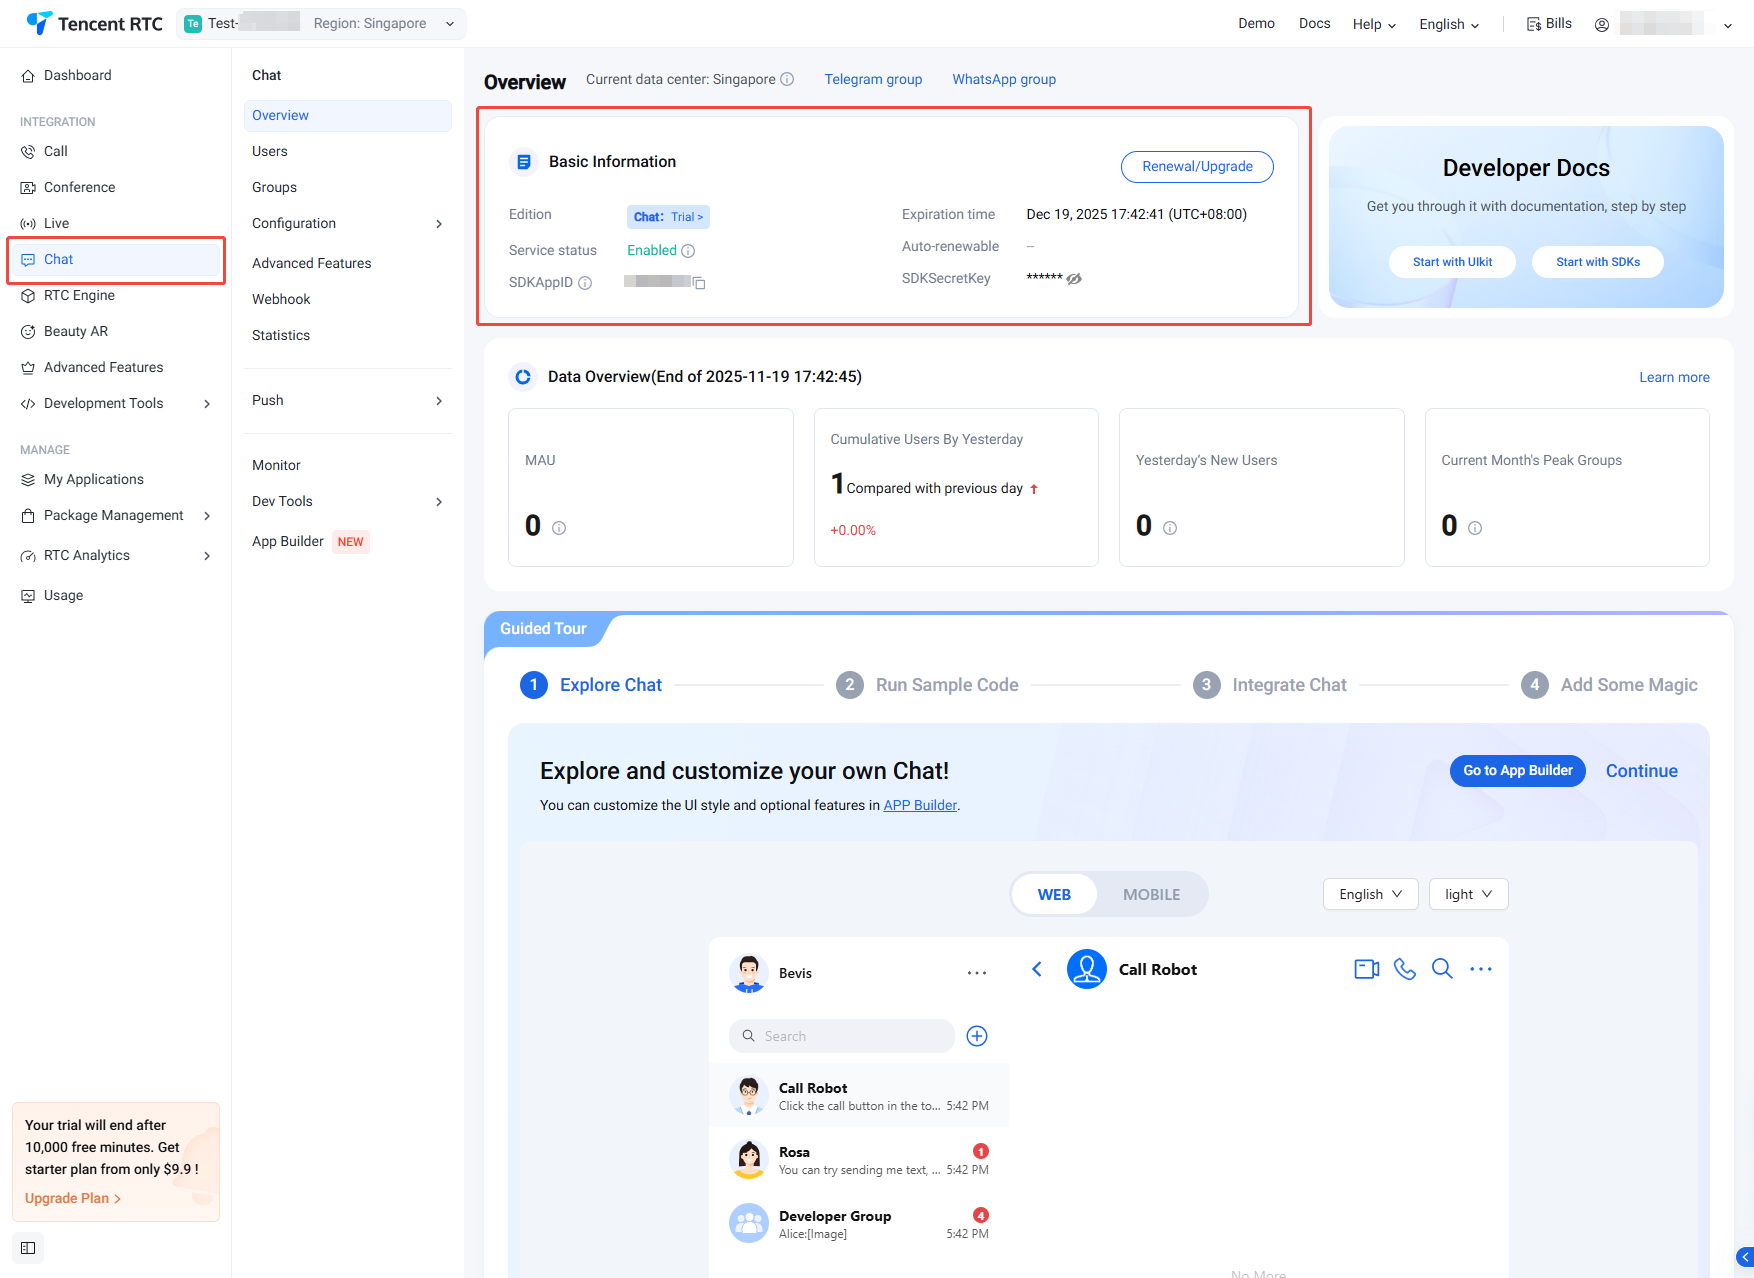
4. After creation, you can view the application status, service version, SDKAppID, SDKSecretKey, creation time, and expiry time on the current Chat Product Details Page or My Applications.
Note
The service version of a new application defaults to Trial Edition, and the status is enabled by default.
A single Tencent Cloud account can create up to 300 Chat applications. If you already have 300 applications, you can first deactivate and delete unused applications before creating new ones. After application deletion, all data and services corresponding to the SDKAppID cannot be restored. Proceed with caution.
Create Accounts
Creating an Application only ensures you can normally initialize the SDK. To successfully send messages, you also need to create user accounts in the Application. There are many ways to create accounts, such as directly in the console or through API client registration. You can choose any suitable method.
Note:
Sending messages requires at least two users to interact with each other, so you need to create at least 2 accounts for this step. Please record the userIDs of these 2 accounts, as they will be used in the next steps.
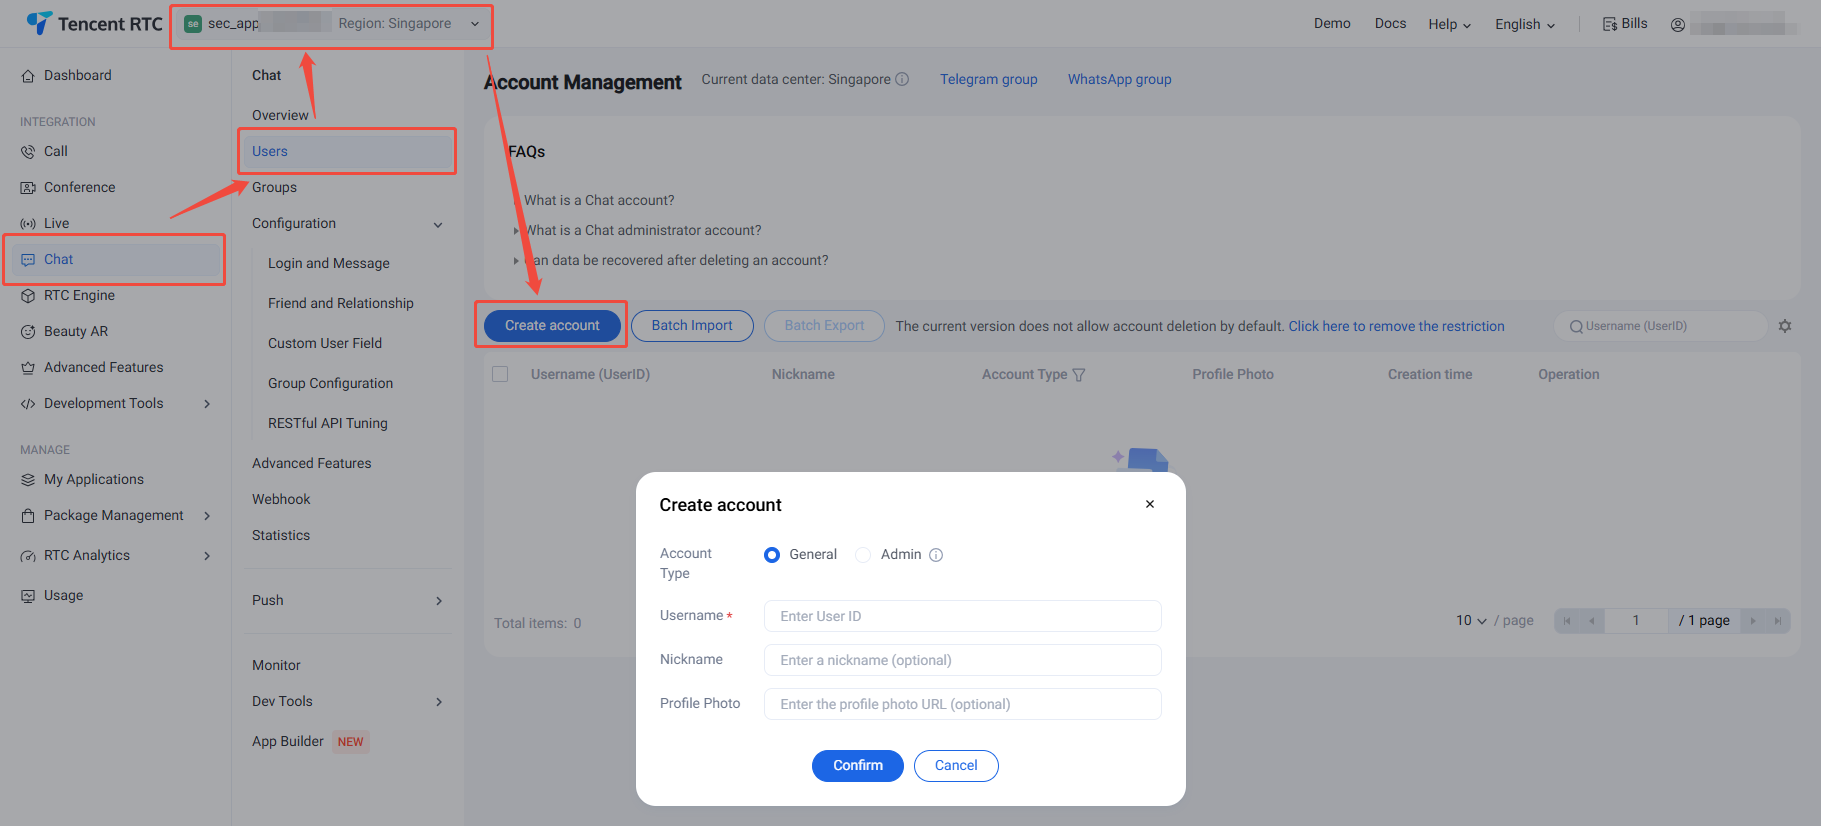
1. Log in to the Chat console, select Chat > Users in the left sidebar, and choose the target application at the top.
2. On the account management page, click Create Account.
3. In the pop-up Create Account dialog box, configure the following parameters:
Account type: Case-sensitive for ordinary account and admin account. "App admin" is a role with the highest level of privileges for the App, allowing calls to RESTful APIs to perform operations such as creating/disbanding groups and sending All Users Push messages. Each application supports configuration of up to 10 administrators.
Username: Enter username (UserID), required.
User nickname: Enter user nickname, optional.
Avatar: Enter user avatar URL, optional.
4. Click Confirm to save configuration.
5. After creating an account, you can view the username, nickname, account type, avatar, and creation time in the account list.
Option B: Create accounts upon logging in
To register via the client, just input a brand new UserID in the Log In to TUIKit section below. At this point, TUIKit will automatically register the UserID for you.
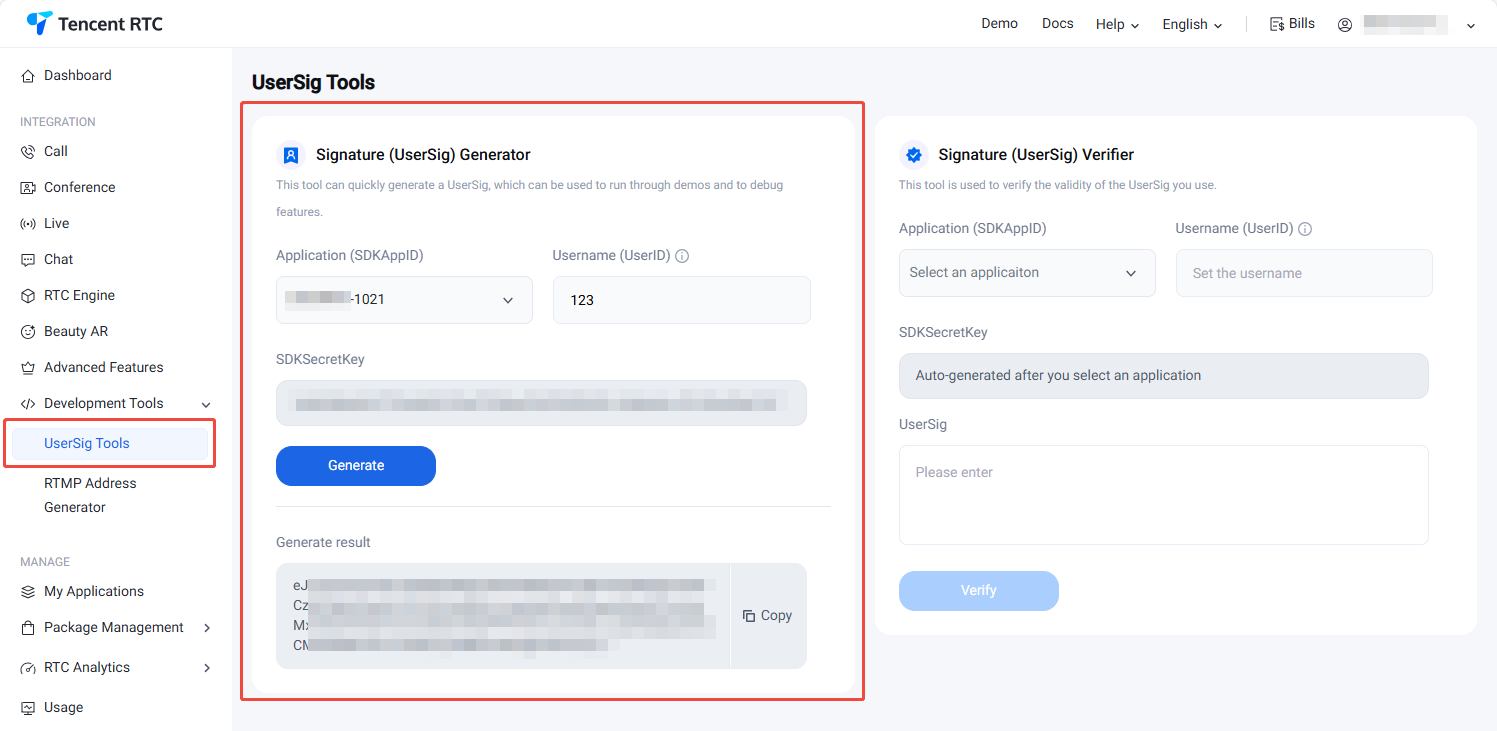
2. In the UserSig generation tool section, select an application and manually input the UserID.
3. Click Generate Signature (UserSig) to generate a signature. The signature validity period defaults to 180 days.
4. Click Copy Signature (UserSig) to paste and save the signature.
Integrate TUIKit
The feature of sending messages in chat interactions is implemented by TUIChat. You need to integrate at least TUIChat to properly send and receive messages. Other components, such as TUIConversation, TUIContact, and TUIGroup, can be integrated as needed.
If you need multiple UI components, you can integrate TUIKit. For details, see Integrate TUIKit.
1. Use one of the previously registered accounts (hereinafter referred to as user1) to log in to TUIKit, and user1 comes online.
2. User1 sends a message to another account (hereinafter referred to as user2). User2 does not need to log in and does not need to be friends with user1.
Note:
The following steps explain how to send a message to user2 after logging in as user1. If you wish for user1 and user2 to interact via chat, you need to use the same steps to log in as user2 and enter the chat interface with user1.
You can redirect or nest the chat interface in the callback of user1's successful login to send a message to user2.
The sample code is as follows, where userID needs to be user2's userID.
// Option 2: add chatVC as a childVC to your parent VC.
// [self addChildViewController:vc];
// [self.view addSubview:vc.view];
}
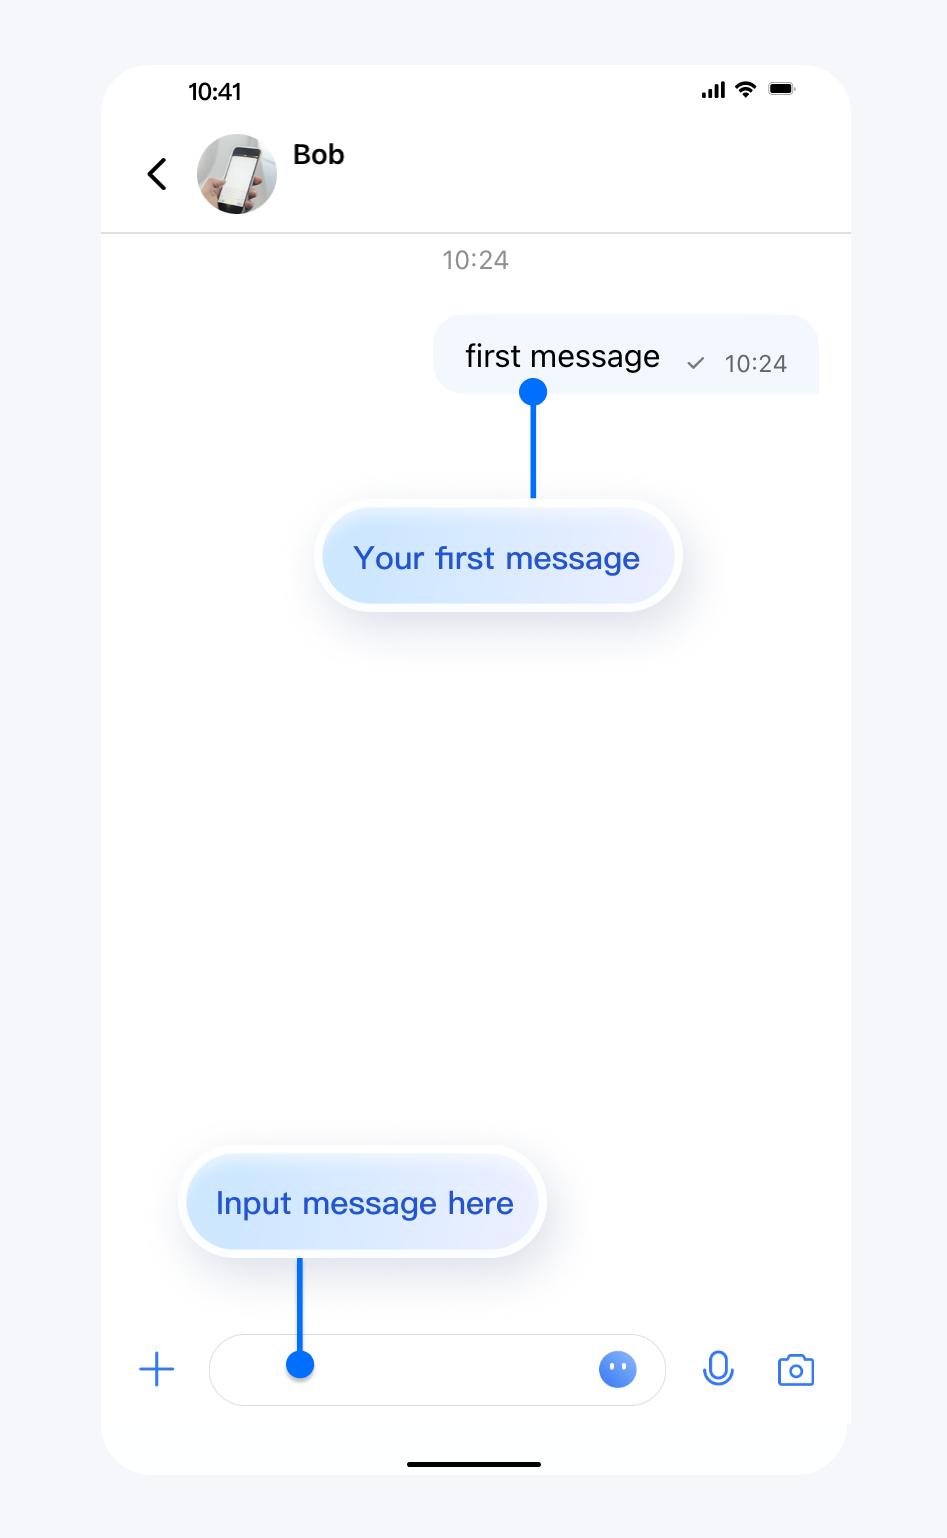
Send Your First Message
After completing the previous steps, you can navigate to the chat interface shown below. Quickly and manually click the input field to send your first message:
Contact Us
If you have any questions about this article, feel free to join the Telegram Tech Support Group, where you will receive reliable technical support.