
Run the Demo
This guide provides a detailed walkthrough for quickly getting started with the Electron Live Streaming Assistant Demo. In just a few steps, you can launch a powerful desktop application for high-definition live video streaming.
The demo enables you to mix multiple media sources—including camera, screen, window, and image—and offers flexible layout, editing, and image compositing features to help you deliver professional-grade live streams.
Quick Experience
You can directly experience all Live features using the following methods.
Prerequisites
Enable the Service
Refer to Enable the Service to obtain a TUILiveKit trial license. In the Console , you can locate the following information:
SDKAppID: Required application identifier. Used by Tencent Cloud for billing and analytics.SDKSecretKey: Application secret key. Used to initialize the configuration file with key information.Environment Preparation
Node.js: ≥ 18.19.1 (Official LTS version recommended)
Vue: ≥ 3.4.21
Modern Browser: A browser that supports WebRTC APIs
Devices: Camera, microphone, and speaker
Operating System: Currently only Windows 10+ operating systems are supported.
Instructions
Get the Demo
Note:
This demo currently supports Windows 10 and later. Ensure your operating system meets this requirement.
1. Download the Live Streaming Assistant project source code from GitHub, or run the following command in your terminal:
git clone https://github.com/Tencent-RTC/ultra-live-electron.git
2. Install dependencies:
cd ultra-live-electronnpm install
Setup
Open the
ultra-live-electron/src/debug/basic-info-config.js file and enter the SDKAppID and SDKSecretKey you obtained when enabling the service.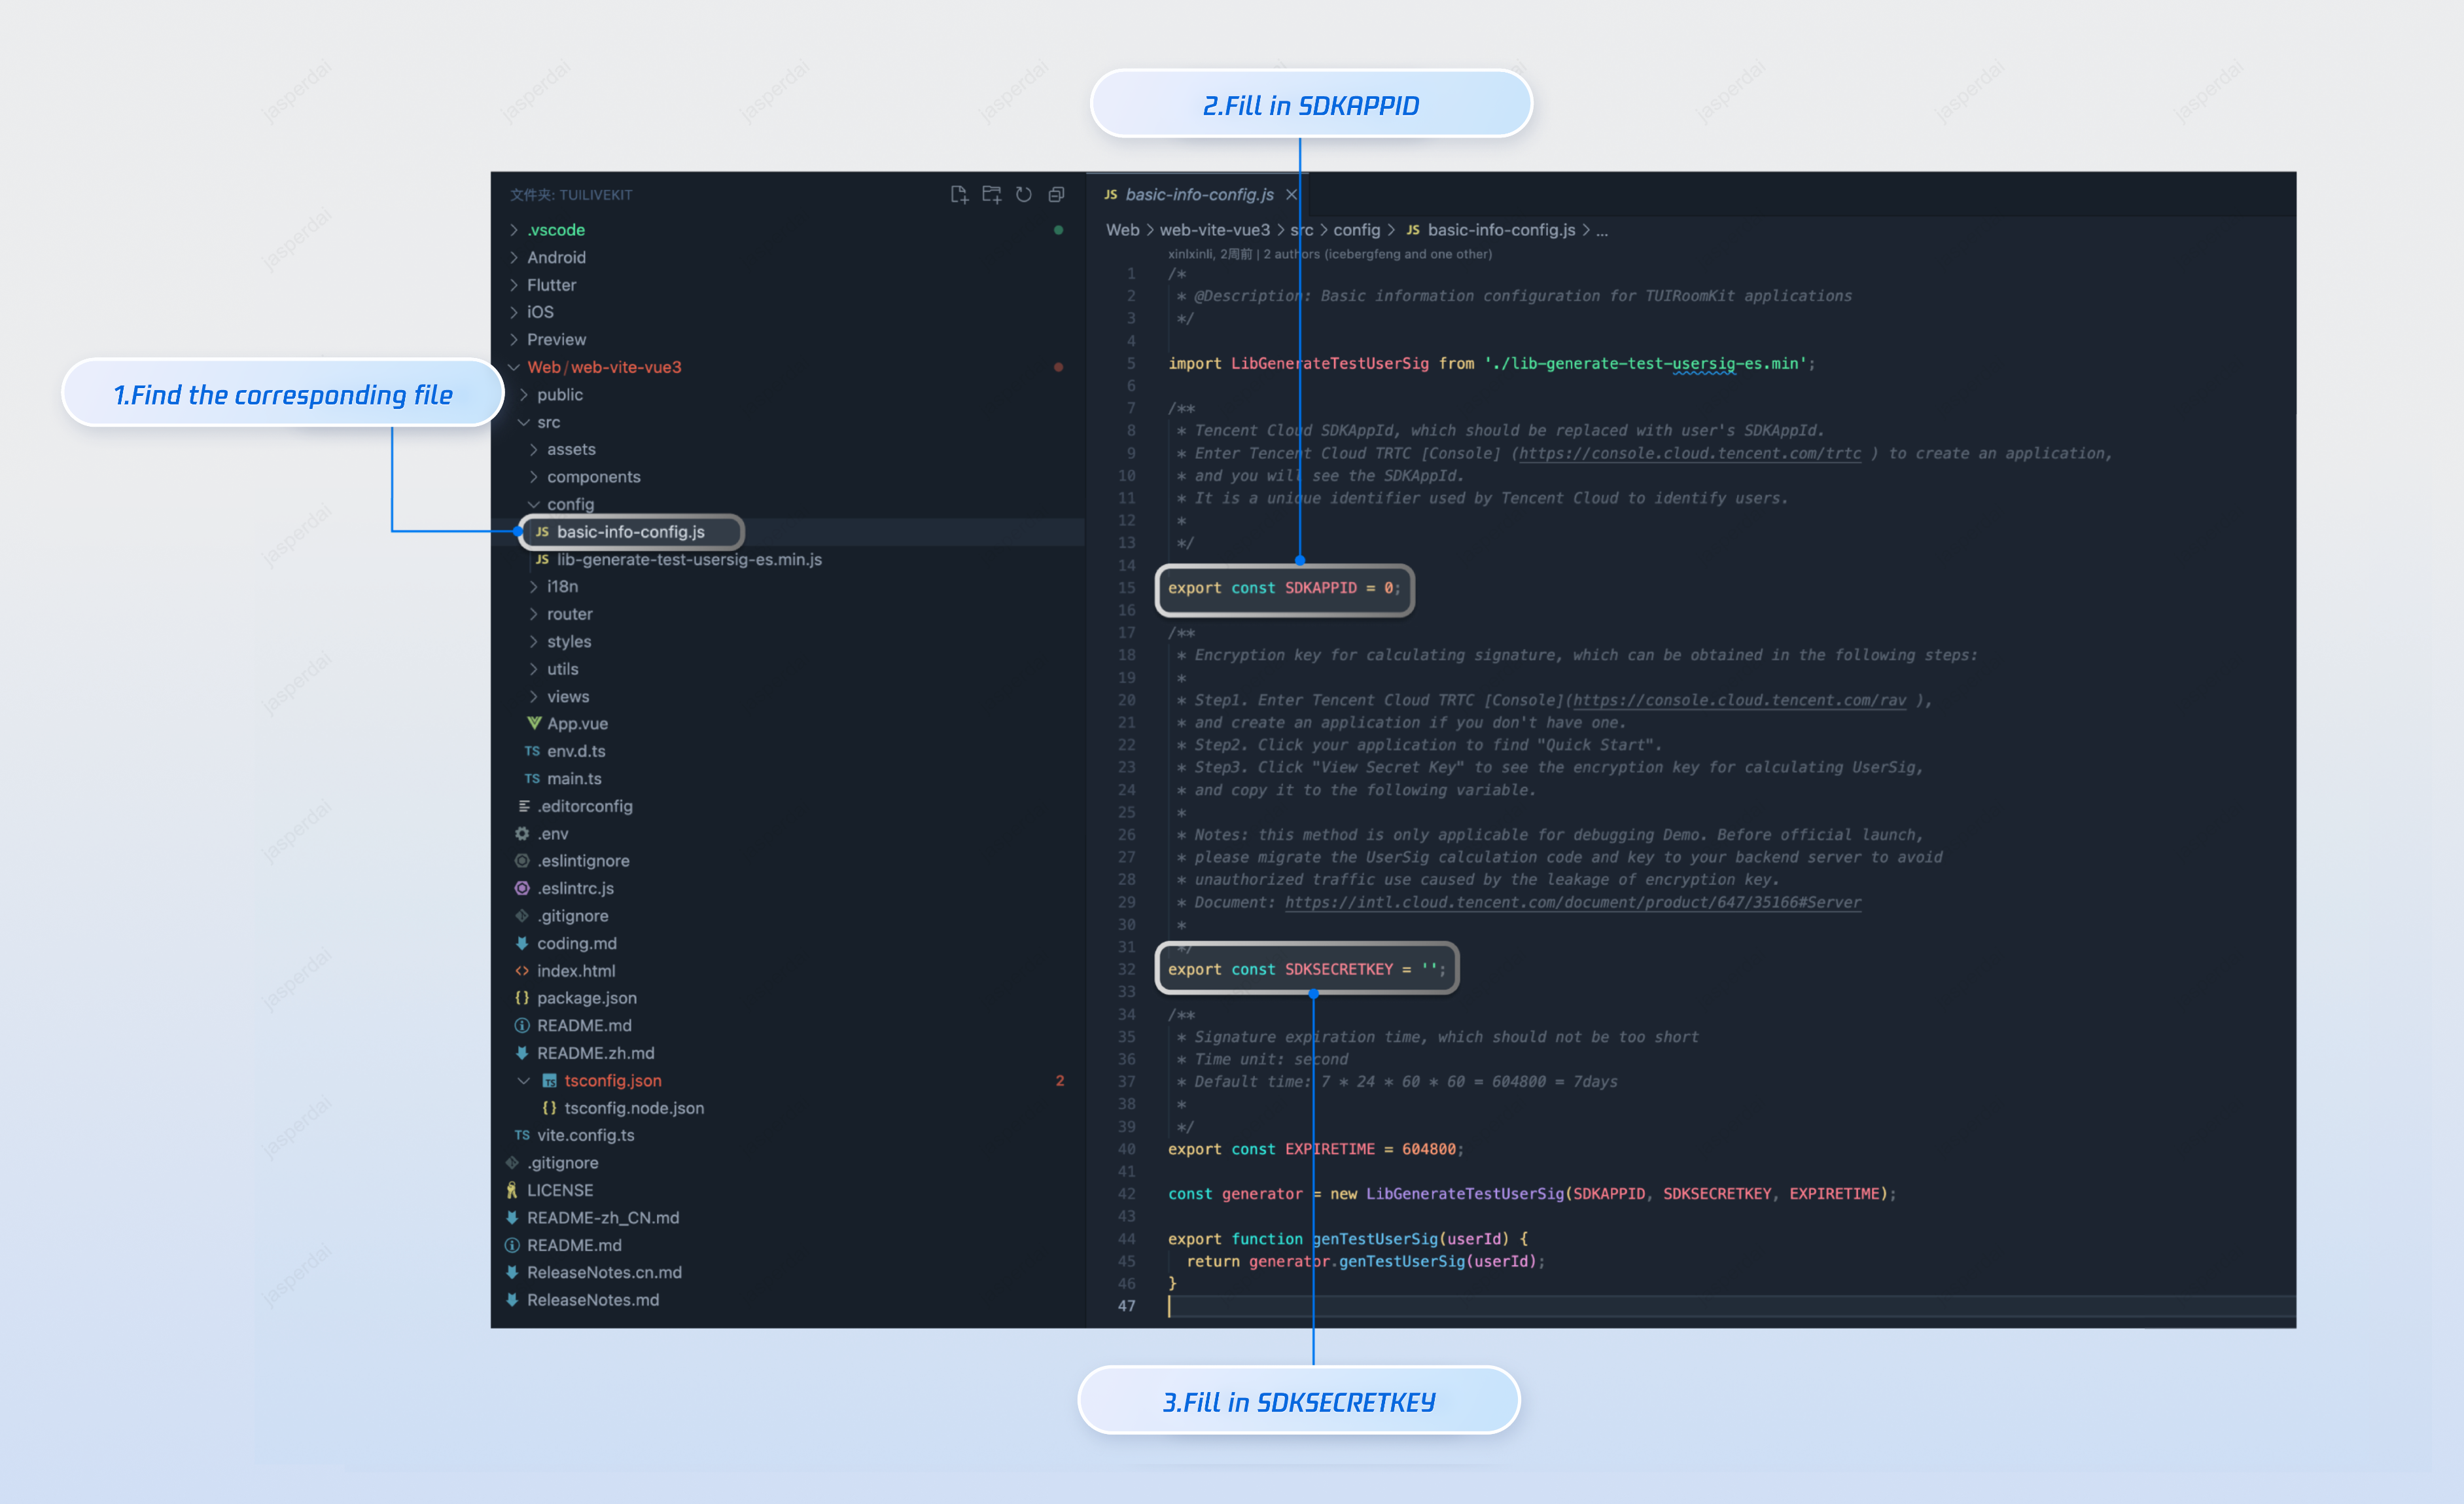
Build and Run the Demo
Start the project by running:
npm run start
Experience the Basic Features
After launching the demo, follow these steps to enrich your live stream and start broadcasting:
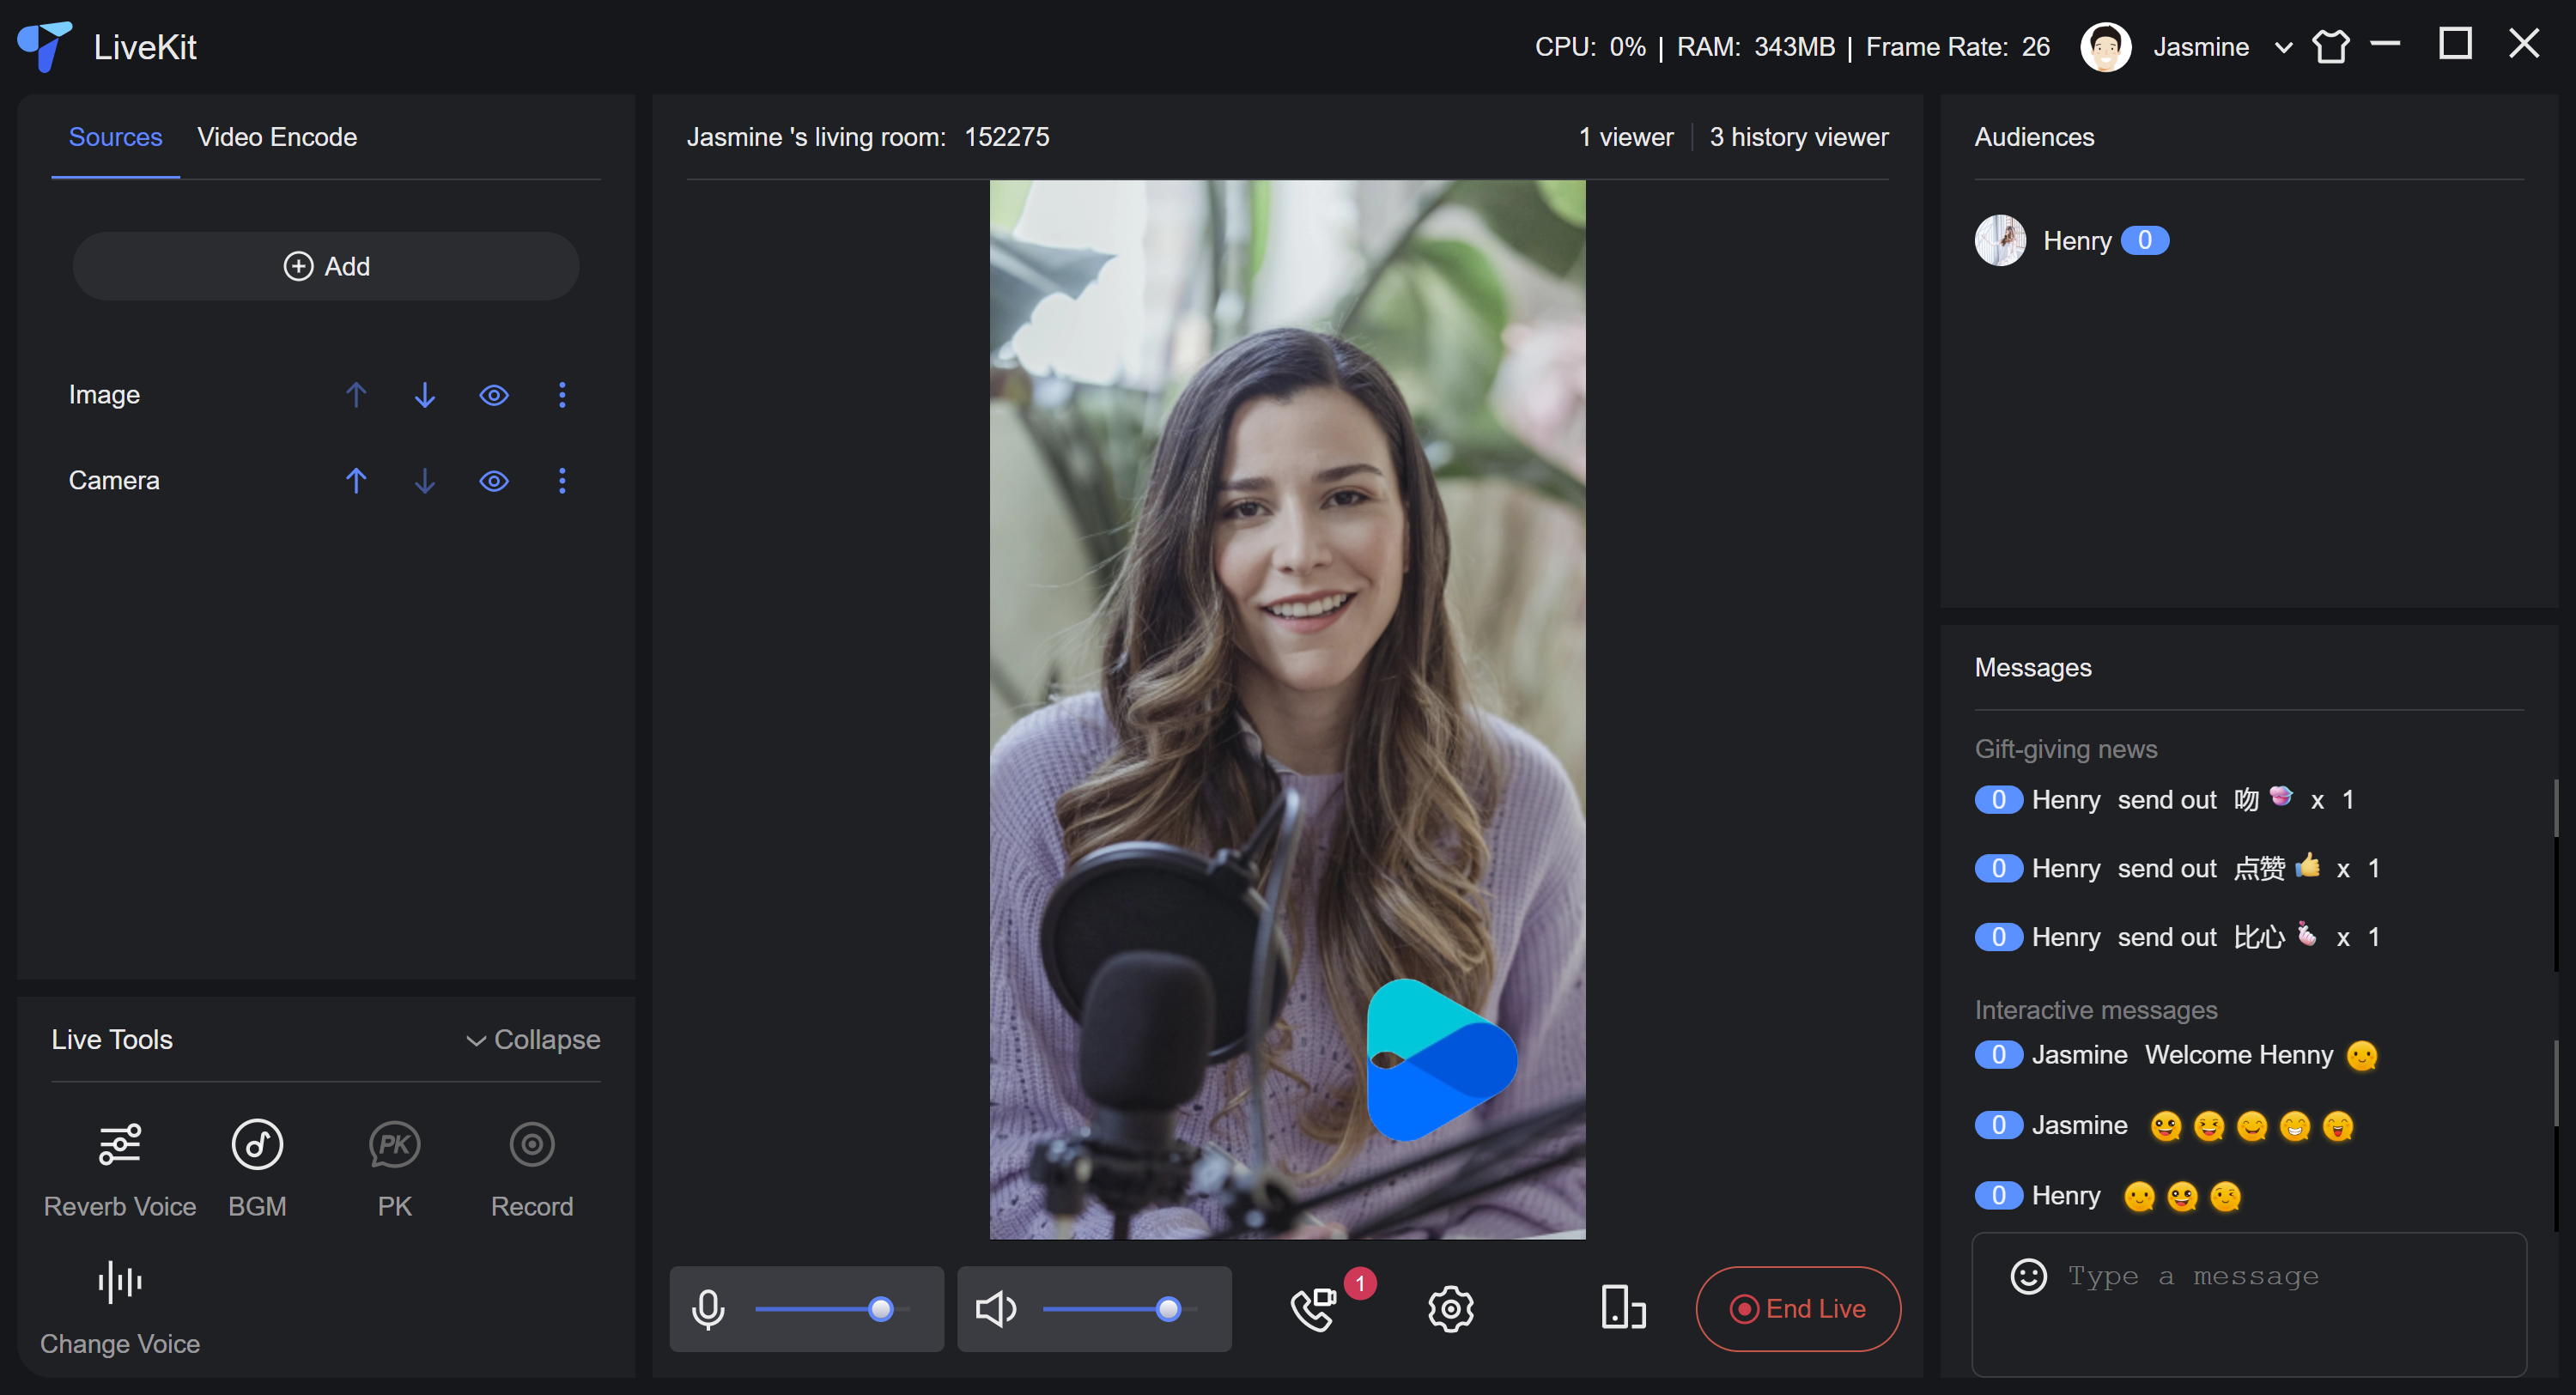
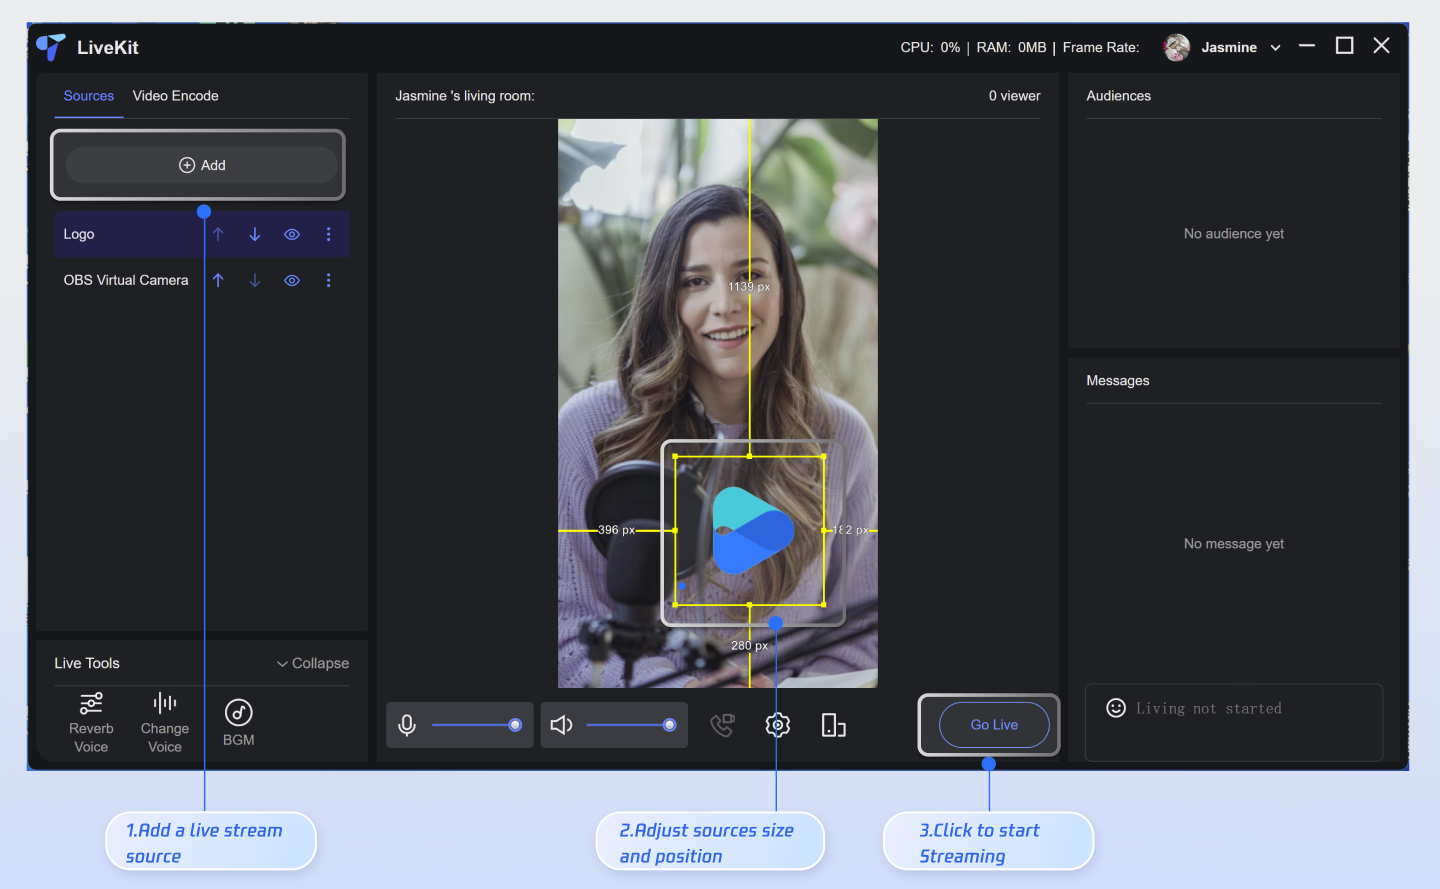
1. Add Video Source: Before going live, add a video source. The application currently supports camera, screen sharing, window sharing, and image sources. Click the add button on the left side of the interface and select your desired video source.
2. Adjust Layout: Drag to move and resize video sources. After selecting a video source (highlighted with a yellow border), right-click to open the context menu for rotation or to adjust the display order.
3. Start Streaming: Click the "Start Live" button. When the button changes to "End Live", your live stream is running.
Note:
Do not use simple
UserIDs such as "1", "123", or "111". TRTC does not support multi-end login for the same
UserID, and these simple UserIDs are likely to be used by others during collaborative development, which can cause login failures. Use distinctive UserIDs during debugging.Next Steps
You have now completed the setup process for the Live Streaming Assistant and can start streaming at any time.
Note:
This desktop application only supports streaming. To watch the live stream, use the mobile app or a web browser. Run
TUILiveKit on iOS, Android, or Web, and locate your live room in the live list. For integration details, refer to the documentation links below.Platform | Documentation Link |
Web | |
iOS | |
Android |
FAQs
After entering the room, you may encounter error code "-3301" with the message "Services are not available in your region."
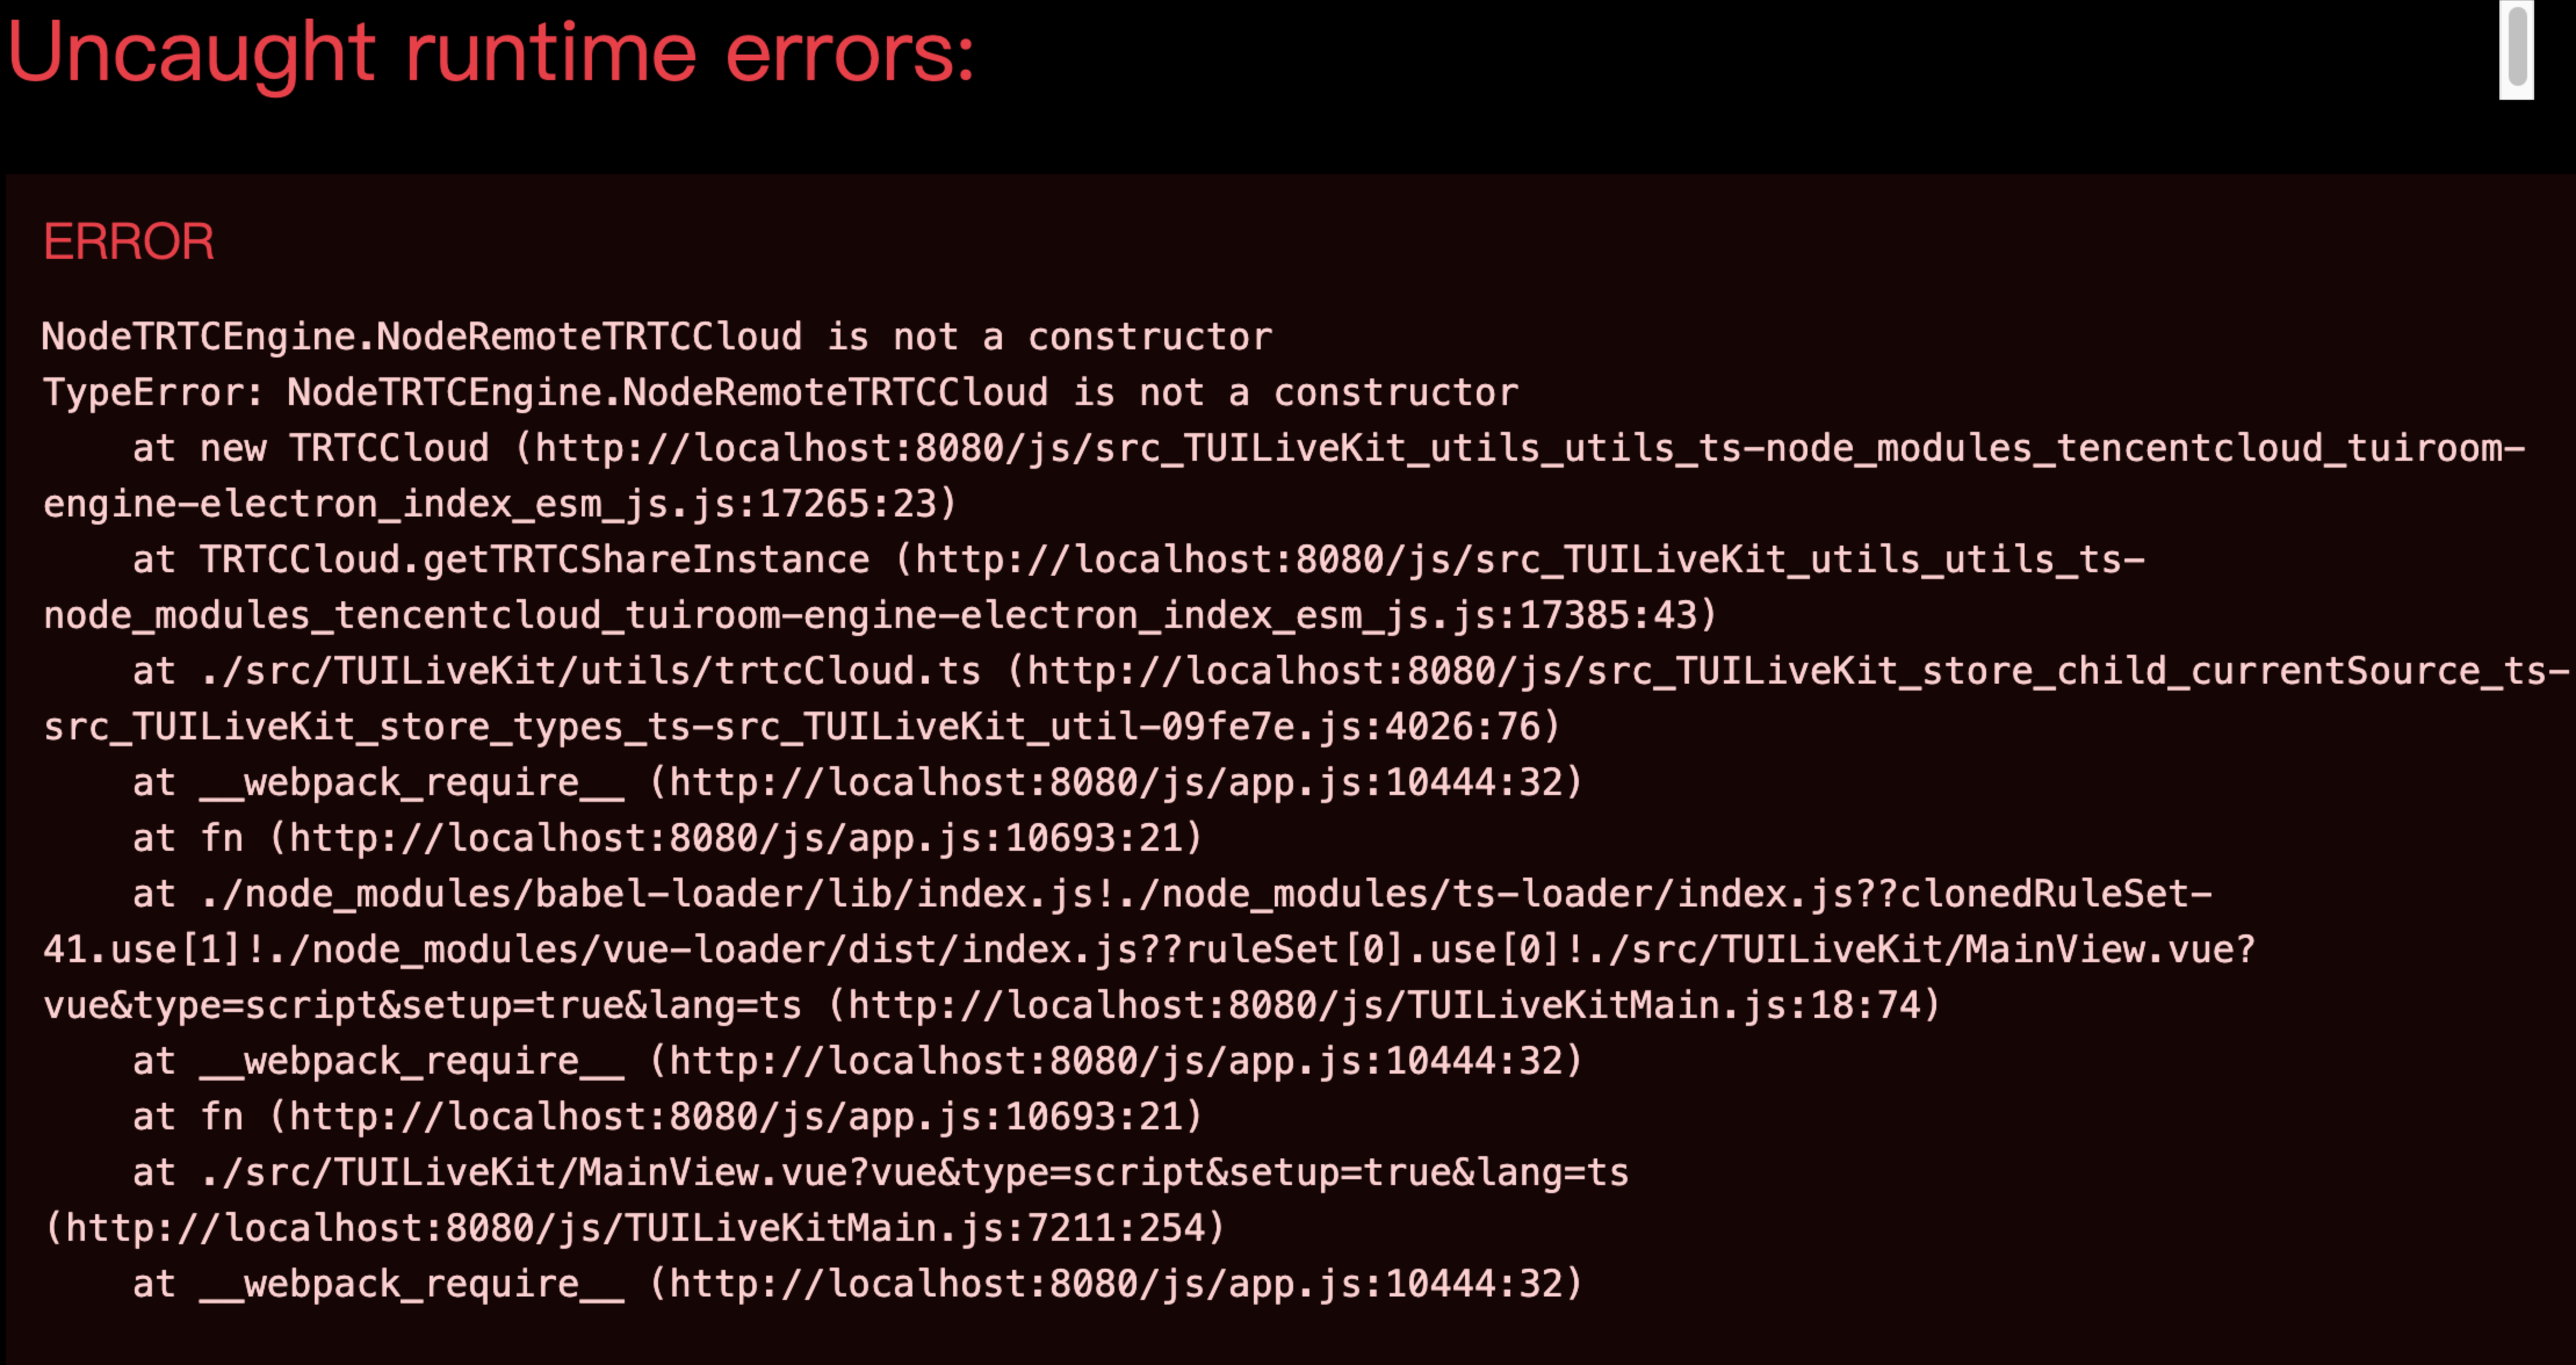
If you encounter the error message shown in the image below during runtime, please use a Windows 10+ operating system to run the project.
Contact Us
If you have any questions or suggestions during integration or usage, join our Telegram technical group or contact us for support.

