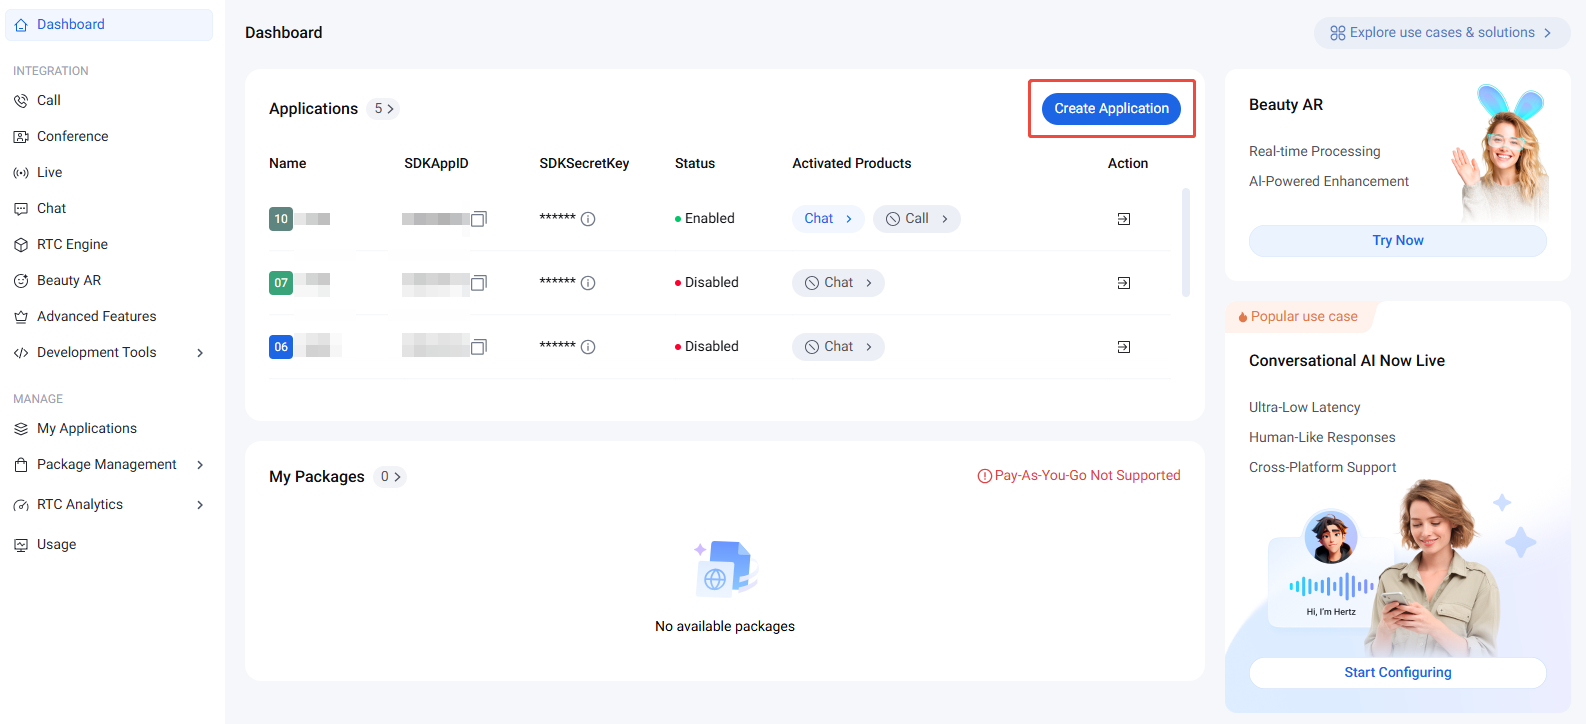
2. Log in to the Chat Console, then click Create Application.
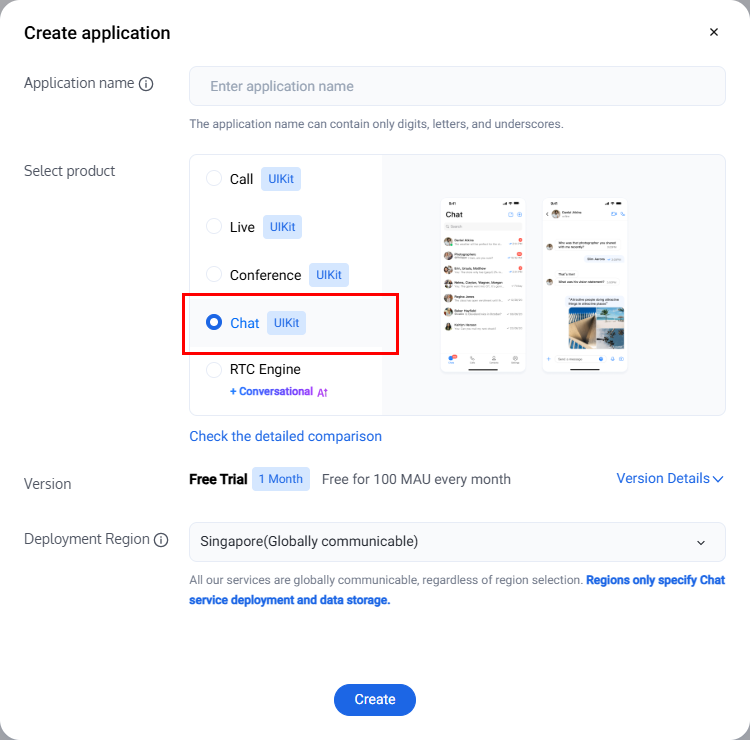
3. In the pop-up window, enter the application name, select Chat, choose the appropriate Deployment Region, and click Create.
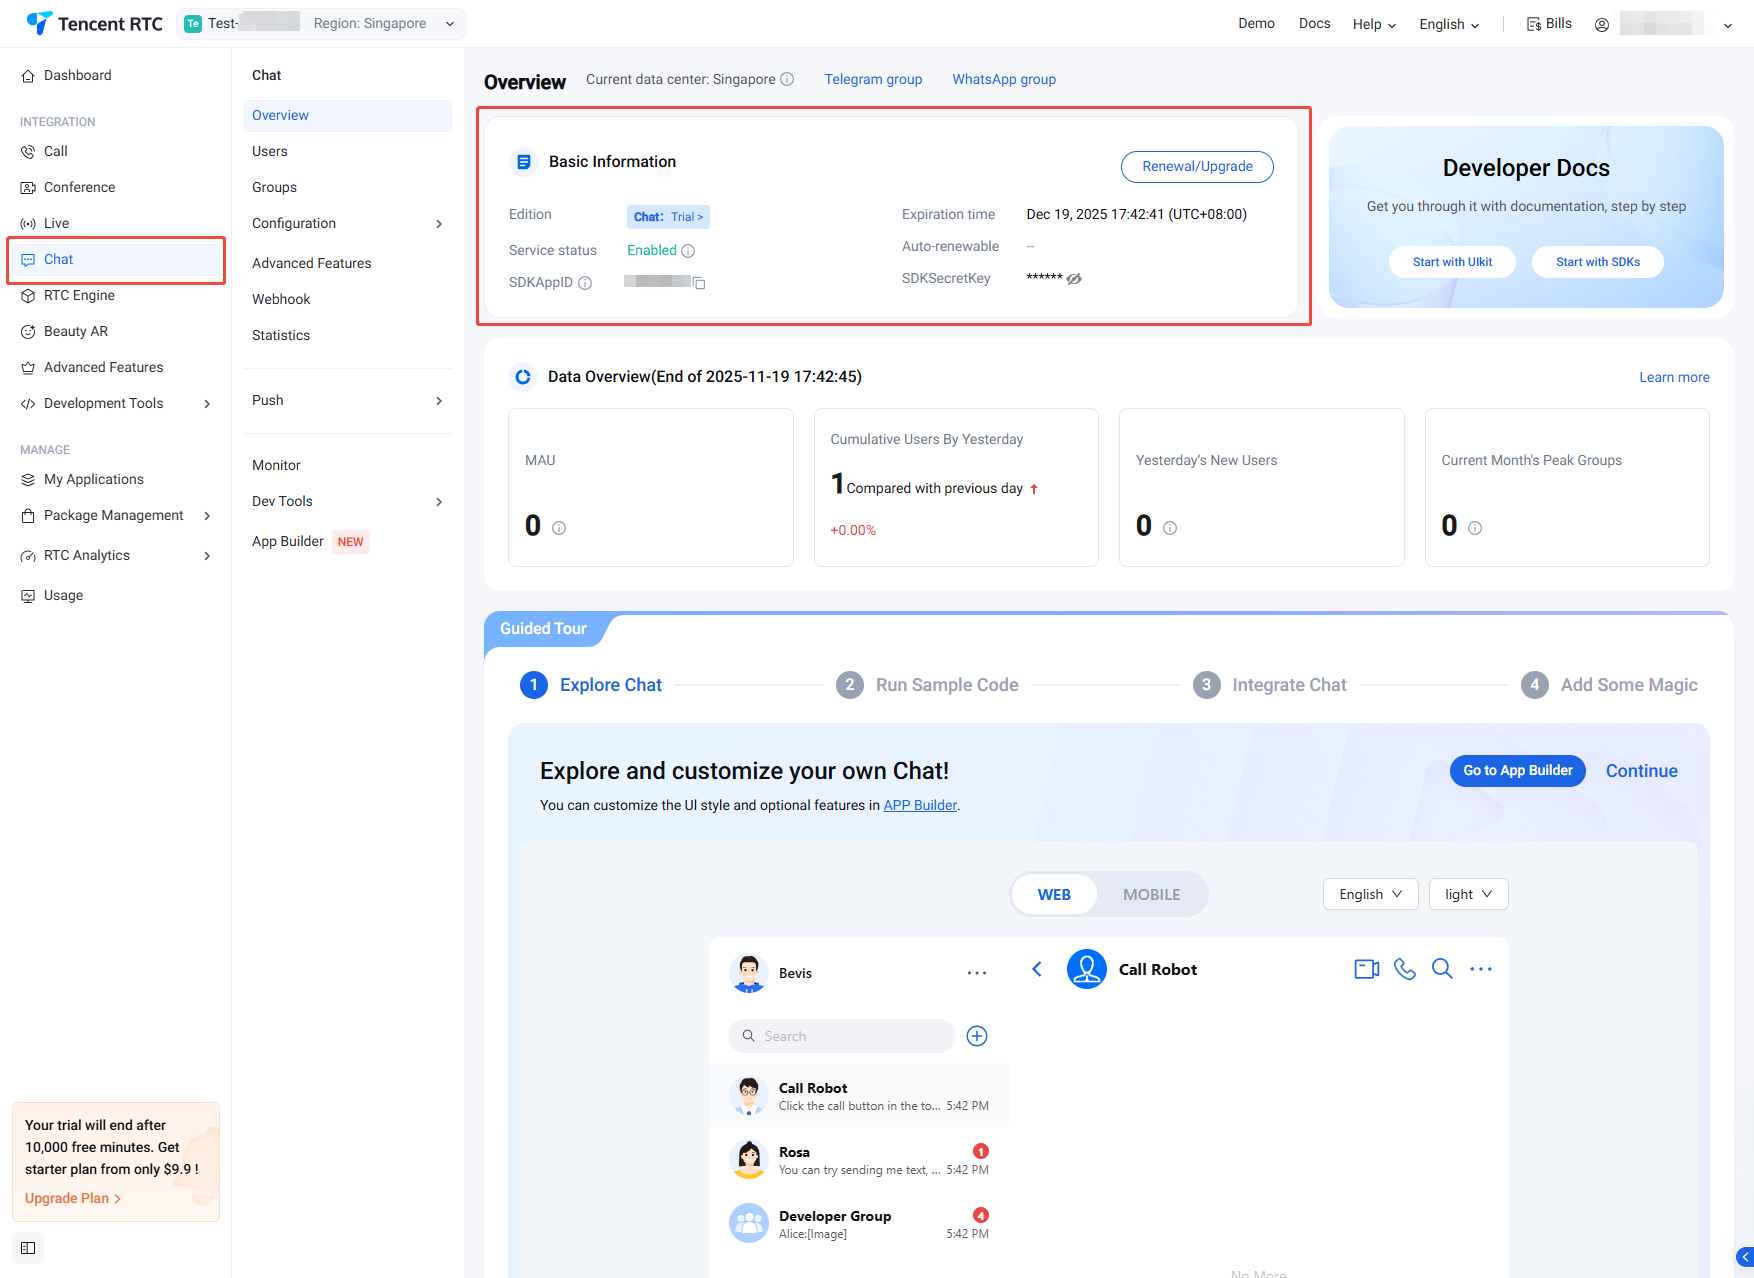
4. After the application is created, you can get your SDKAppID and SDKSecretKey.
Note:
Newly created applications default to the Trial Edition business version and are enabled by default.
Each account can create up to 300 Chat applications. If you reach this limit, you can disable and delete unused applications before creating new ones. Once deleted, all data and services associated with the SDKAppID are permanently lost and cannot be recovered. Proceed with caution.
Create Account
Creating an application allows you to initialize the SDK, but to send messages, you must create user accounts within the application. You can create accounts directly in the console or register them via API on the client side. Choose the method that best fits your workflow.
Note:
You need at least two users to send messages, so create at least two accounts now. Record the userIDs for both accounts, as you will need them in later steps.
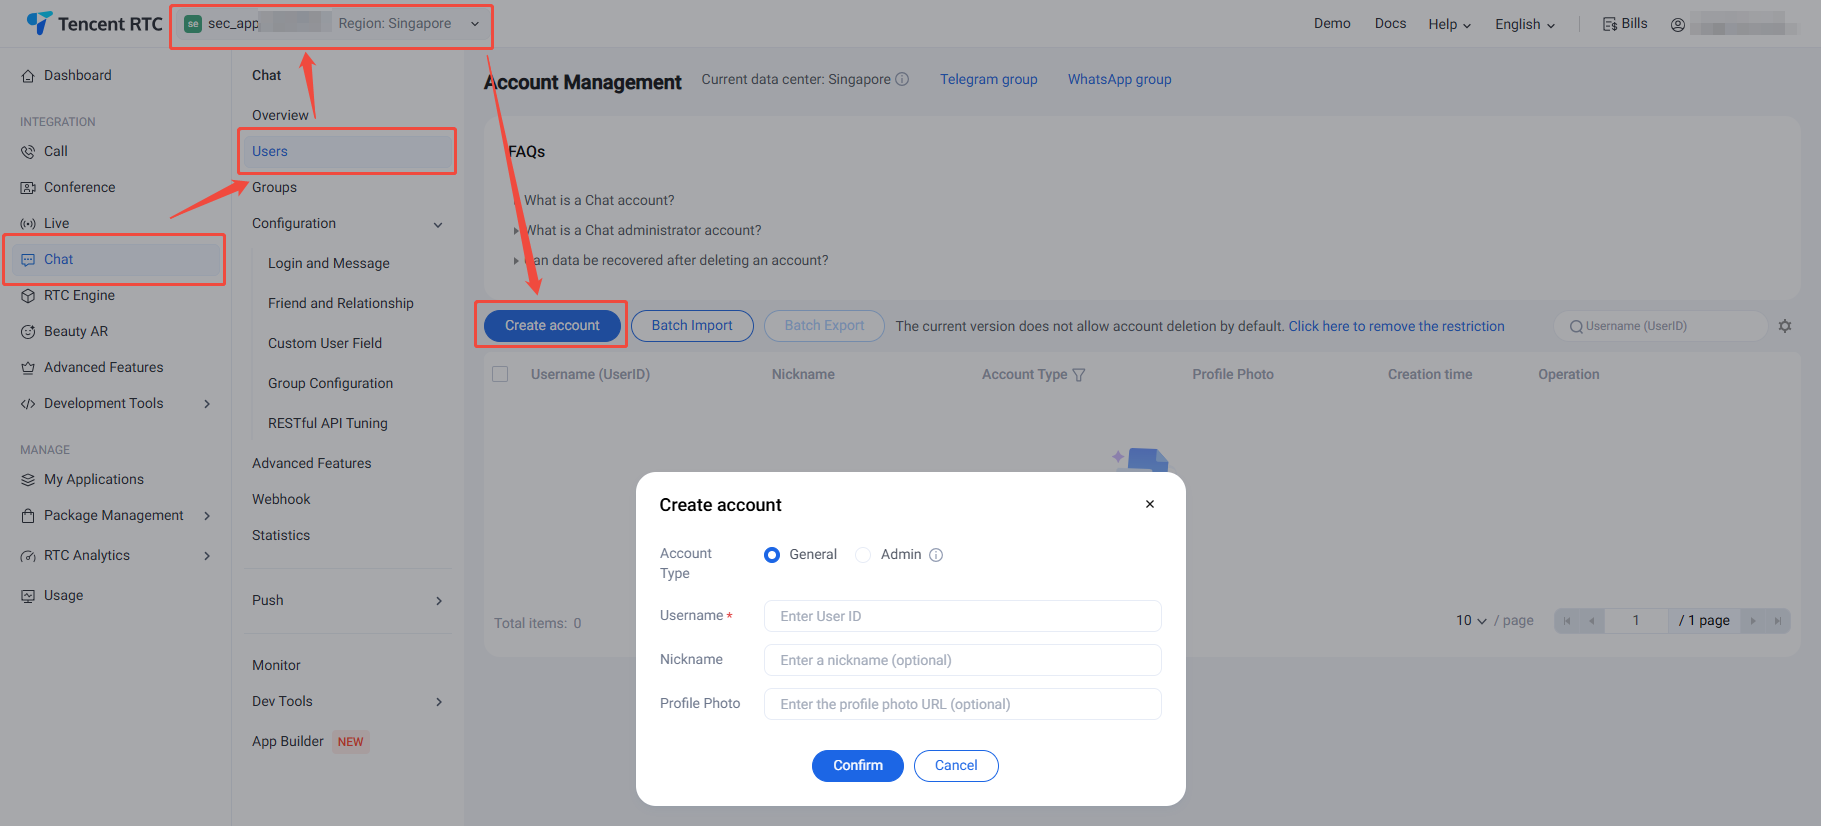
1. Log in to the Chat Console, select Chat >Users from the left navigation bar, and select your target application at the top.
2. On the account management page, click Create Account.
3. In the dialog, configure the following parameters:
Account Type: Choose between regular accounts and administrator accounts. "App Administrator" has the highest management privileges and can use REST APIs to create/disband groups, send All Users Push messages, and more. Each application supports up to 10 administrators.
Username: Enter the username (UserID). This field is required.
User Nickname: Optionally enter a nickname.
Avatar: Optionally enter an avatar URL.
4. Click OK to save the account.
5. After creation, you can view the username, nickname, account type, avatar, and creation time in the account list.
Option B: Create accounts upon logging in
To register an account on the client side, simply pass a new UserID when logging in to TUIKit as described below. TUIKit will automatically register the UserID for you—no extra steps required.
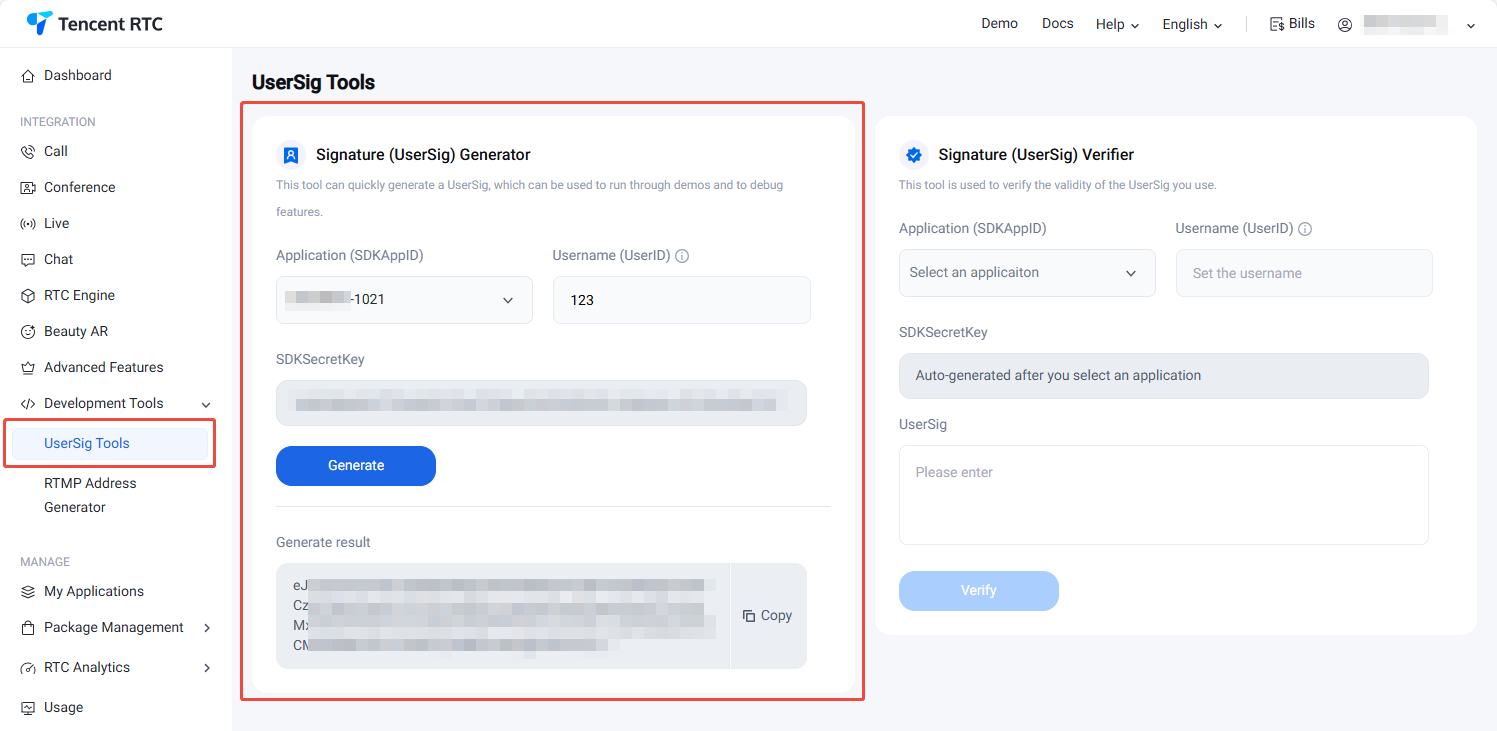
2. In the UserSig tool, select your application and enter the UserID.
3. Click Generate to create the signature. The default validity period is 180 days.
4. Click Copy Signature (UserSig) to copy and save the signature.
Integrate TUIKit
Message sending in chat is handled by MessageList. For integration details, refer to the Full Feature Integration documentation.
Log in to TUIKit
All TUIKit features require user login, which is provided by the LoginStore login interface:
final result = await LoginStore.shared.login(
sdkAppID: SDKAPPID,
userID: userID,
userSig: userSig,
);
if(result.errorCode ==0){
This interface requires three parameters:
SDKAppID: The SDKAppID for your application, obtained in the Create Application section.
UserID: The UserID for User1, obtained in the Create Account section. Note: This is not the user's nickname.
UserSig: The UserSig for User1, obtained in the Generate UserSig section.
Navigate to Chat Interface
To send messages, follow these steps:
1. Log in to TUIKit using one of the registered accounts (referred to as user1). Once logged in, user1 is online.
2. user1 sends a message to another account (referred to as user2). user2 does not need to be logged in and does not need to be friends with user1.
Note:
This section describes how user1 can send a message to user2 after logging in as user1. If you want user1 and user2 to chat interactively, log in as user2 using the same steps and enter the chat interface with user1.
After user1 logs in successfully, you can navigate to or embed the chat interface and send a message to user2.
Use the following example code. Set userID to the userID of the chat target (user2):
final conversation =ConversationInfo(
conversationID: 'c2c_${userID}',
type:ConversationType.c2c,
);
Navigator.push(
context,
MaterialPageRoute(
builder:(context)=>ChatPage(
conversation: conversation,
),
),
);
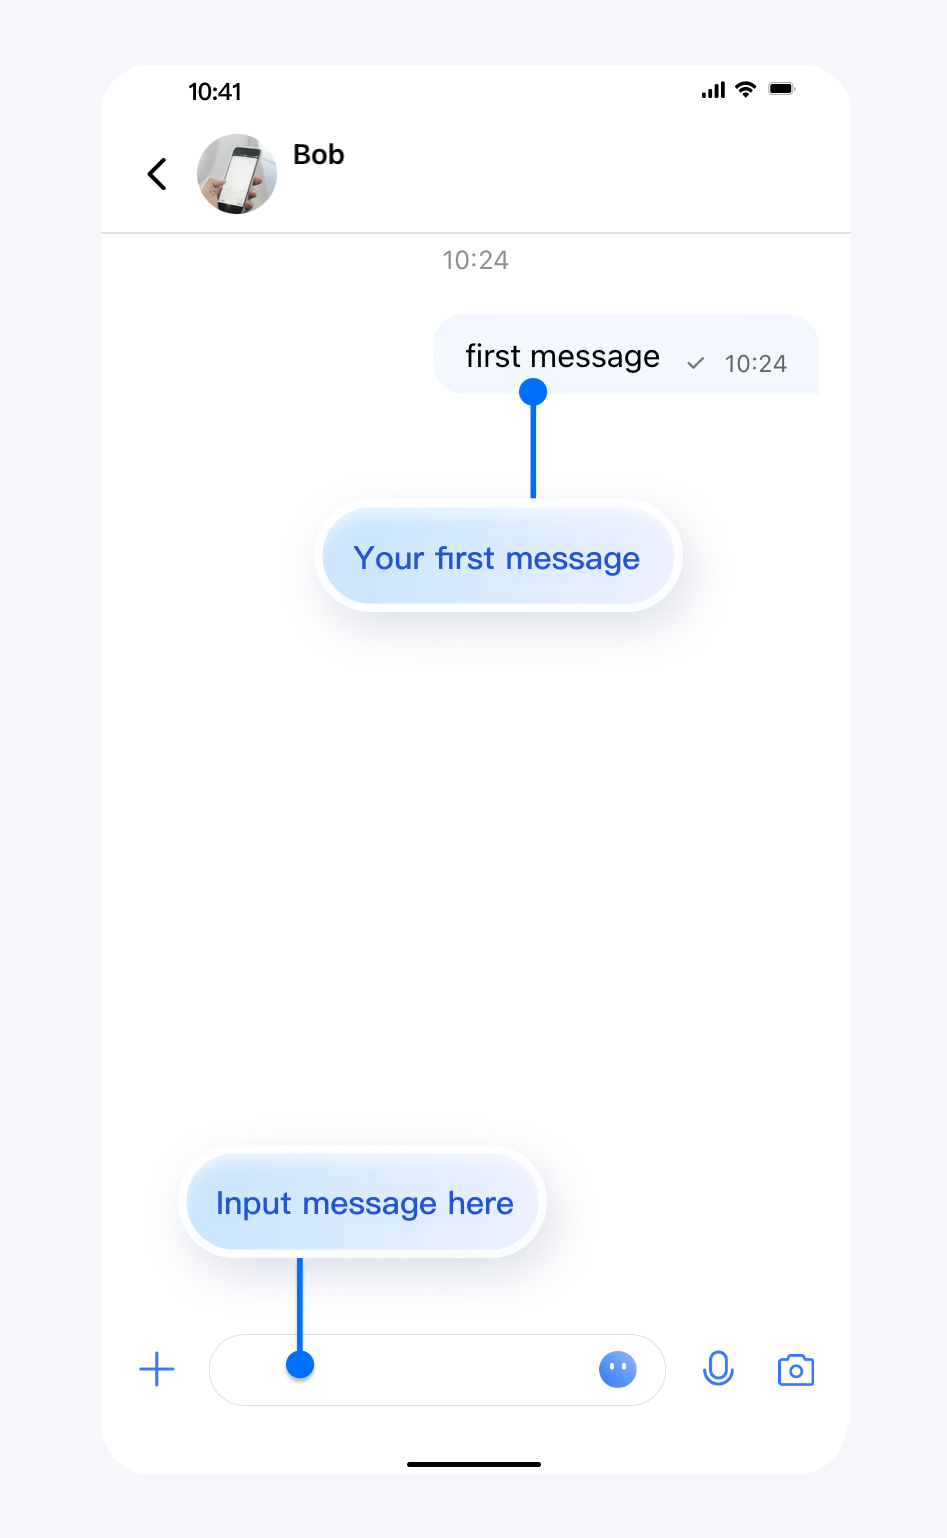
Send Your First Message
After completing the steps above, you can access the chat interface. Click the input box and send your first message:
Contact Us
If you have any questions about this documentation, join the Telegram Technical Group for technical support.