Integration
本文では、TUILiveKit コンポーネントの導入を短時間で完了する方法を紹介します。本文書に従って、1 時間以内に以下の主要なステップを完了し、最終的に完全な UI を備えた音声チャットルーム機能を得ることができます。
ホスト | 視聴者 |
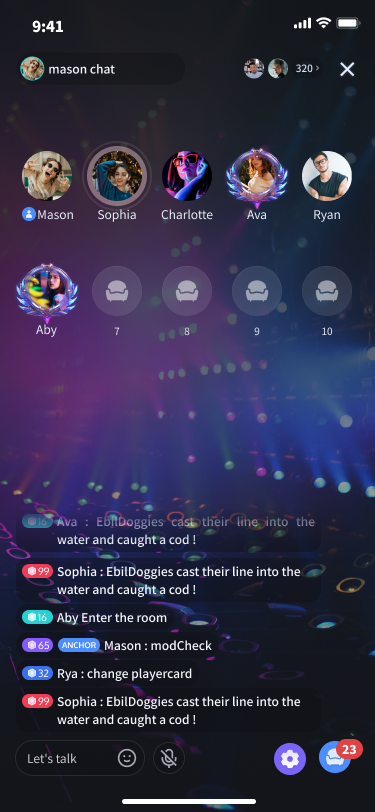 | 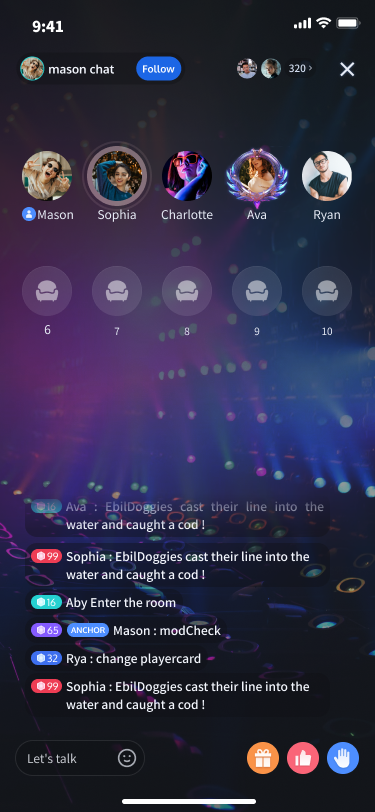 |
環境準備
Xcode 15 以上
iOS 13.0 以上
CocoaPods環境のインストール。詳細情報。
導入や使用中に問題が発生した場合は、よくある質問を参照してください。
ステップ 1:サービスをアクテイブ化する
Tencent Cloud が提供する音声・ビデオサービスを使用する前に、コンソールでアプリケーションの音声・ビデオサービスをアクテイブ化する必要があります。具体的な手順については、サービスをアクテイブ化する(TUILiveKit)を参照してください。
ステップ 2:TUILiveKit コンポーネントの導入
1.
Podfileファイルに pod 'TUILiveKit' 依存を追加してください。何か問題が発生した場合は、Exampleプロジェクトを参照してください。target 'xxxx' do......pod 'TUILiveKit'end
Podfileファイルがない場合は、まず端末で cd を使って xxxx.xcodeproj ディレクトリに移動し、以下のコマンドで作成してください。pod init
2. 端末でまず
cd コマンドを使って Podfile ディレクトリに移動し、その後以下のコマンドを実行してコンポーネントをインストールします。pod install
TUILiveKit の最新バージョンをインストールできない場合は、まずPodfile.lockとPodsを削除してください。その後、以下のコマンドを実行してローカルの CocoaPods レポジトリリストを更新してください。
pod repo update
その後、以下のコマンドを実行してコンポーネントリポジトリの Pod バージョンを更新します。
pod update
3. まずはコンパイルして実行してみてください。問題が発生した場合は、よくある質問を参照してください。それでも問題がある場合、まずExampleプロジェクトを実行してください。導入や使用中に問題が発生した場合は、フィードバックをお寄せください。
ステップ 3:プロジェクト設定
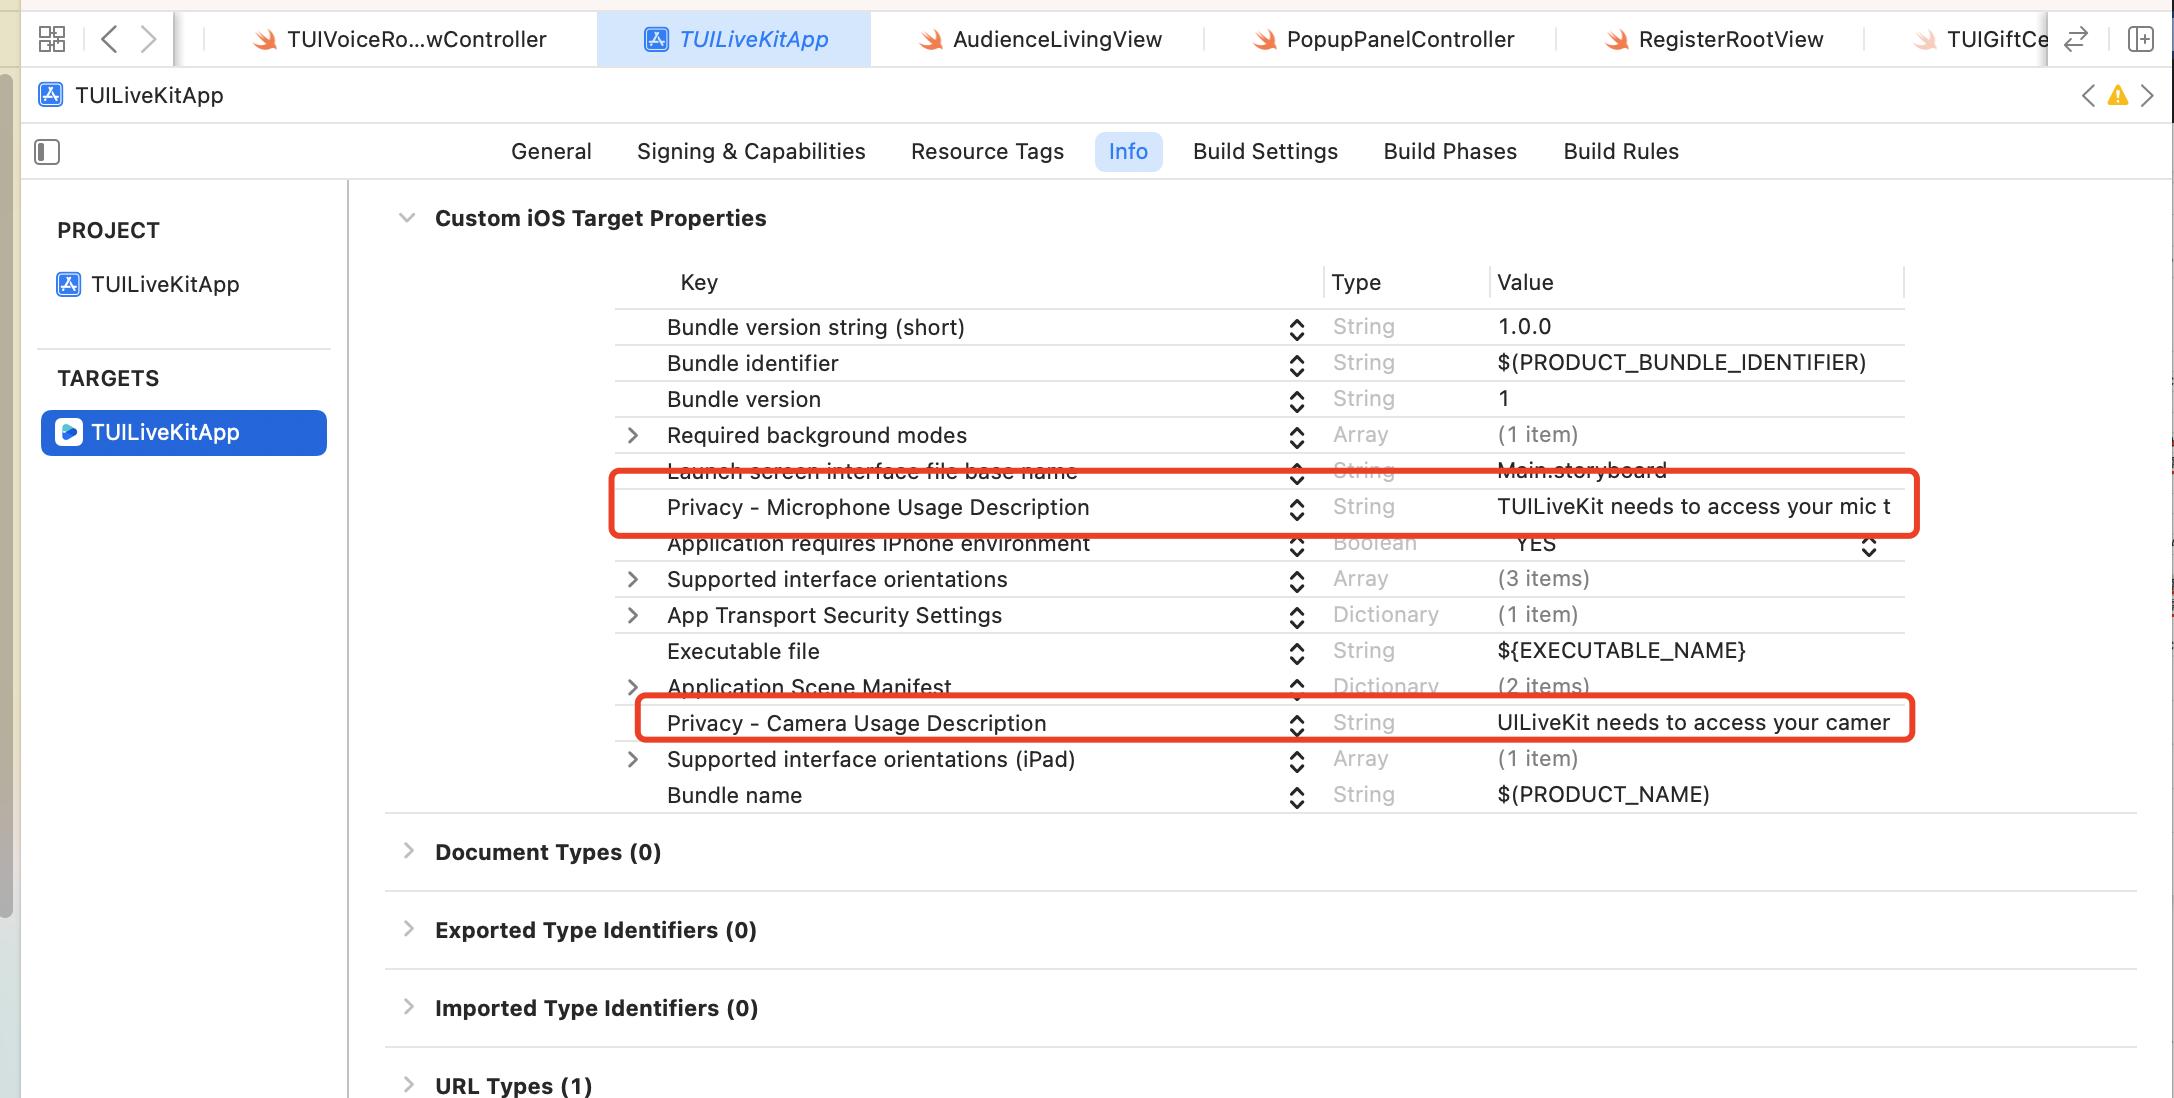
音声・ビデオ機能を使用するには、マイクとカメラの使用権限が必要です。App の Info.plist に以下の 2 つの項目を追加してください。それぞれ認証ダイアログボックスがポップアップ表示される際にマイクとカメラのプロンプトメッセージに対応します。
<key>NSCameraUsageDescription</key><string>TUILiveKit はカメラの権限にアクセスする必要があります。有効にすると、記録されたビデオに画面が表示されます。</string><key>NSMicrophoneUsageDescription</key><string>TUILiveKit はマイクの権限にアクセスする必要があります。有効にすると、記録されたビデオに音声が出ます</string>
ステップ 4:ログイン
プロジェクトに以下のコードを追加してください。これは、TUICore の関連インターフェースを呼び出して TUI コンポーネントのログインを完了するためのものです。このステップは非常に重要です。ログインが成功した場合のみ、TUILiveKit の各機能を正常に使用できますので、関連パラメータが正しく設定されているかどうかをよく確認してください。
//// AppDelegate.swift//import TUICorefunc application(_ application: UIApplication, didFinishLaunchingWithOptions launchOptions: [UIApplication.LaunchOptionsKey: Any]?) -> Bool {TUILogin.login(1400000001, // ステップ 1 で取得した SDKAppID に置き換えてくださいuserID: "denny", // お客様の UserID に置き換えてくださいuserSig: "xxxxxxxxxxx") { // コンソールで UserSig を計算し、ここに入力してくださいprint("login success")} fail: { (code, message) inprint("login failed, code: \(code), error: \(message ?? "nil")")}return true}
//// AppDelegate.m//#import <TUICore/TUILogin.h>- (BOOL)application:(UIApplication *)application didFinishLaunchingWithOptions:(NSDictionary *)launchOptions {[TUILogin login:1400000001 // ステップ 1 で取得した SDKAppID に置き換えてくださいuserID:@"denny" // お客様の UserID に置き換えてくださいuserSig:@"xxxxxxxxxxx" // コンソールで UserSig を計算し、ここに入力してくださいsucc:^{NSLog(@"login success");} fail:^(int code, NSString * _Nullable msg) {NSLog(@"login failed, code: %d, error: %@", code, msg);}];return YES;}
パラメータ説明
ここでは、login 関数に必要ないくつかの重要なパラメータについて詳しく紹介します。
SDKAppID: ステップ 1 の最後で取得しましたので、ここで繰り返し説明しません。
UserID:現在のユーザーの ID。文字列タイプで、英字(a-z と A-Z)、数字(0-9)、ハイフン(-)、アンダースコア(_)のみを含めることができます。
UserSig: サービスをアクテイブ化(TUILiveKit) して取得した SDKSecretKey を使って SDKAppID、UserID などの情報を暗号化し、UserSig を取得します。これは認証用のトークンで、現在のユーザーが TRTC のサービスを利用できるかどうかを Tencent Cloud が判断するために使用されます。コンソール左側のプロジェクト欄の UserSig ツール を使用して、一時的に利用可能な UserSig を作成できます。
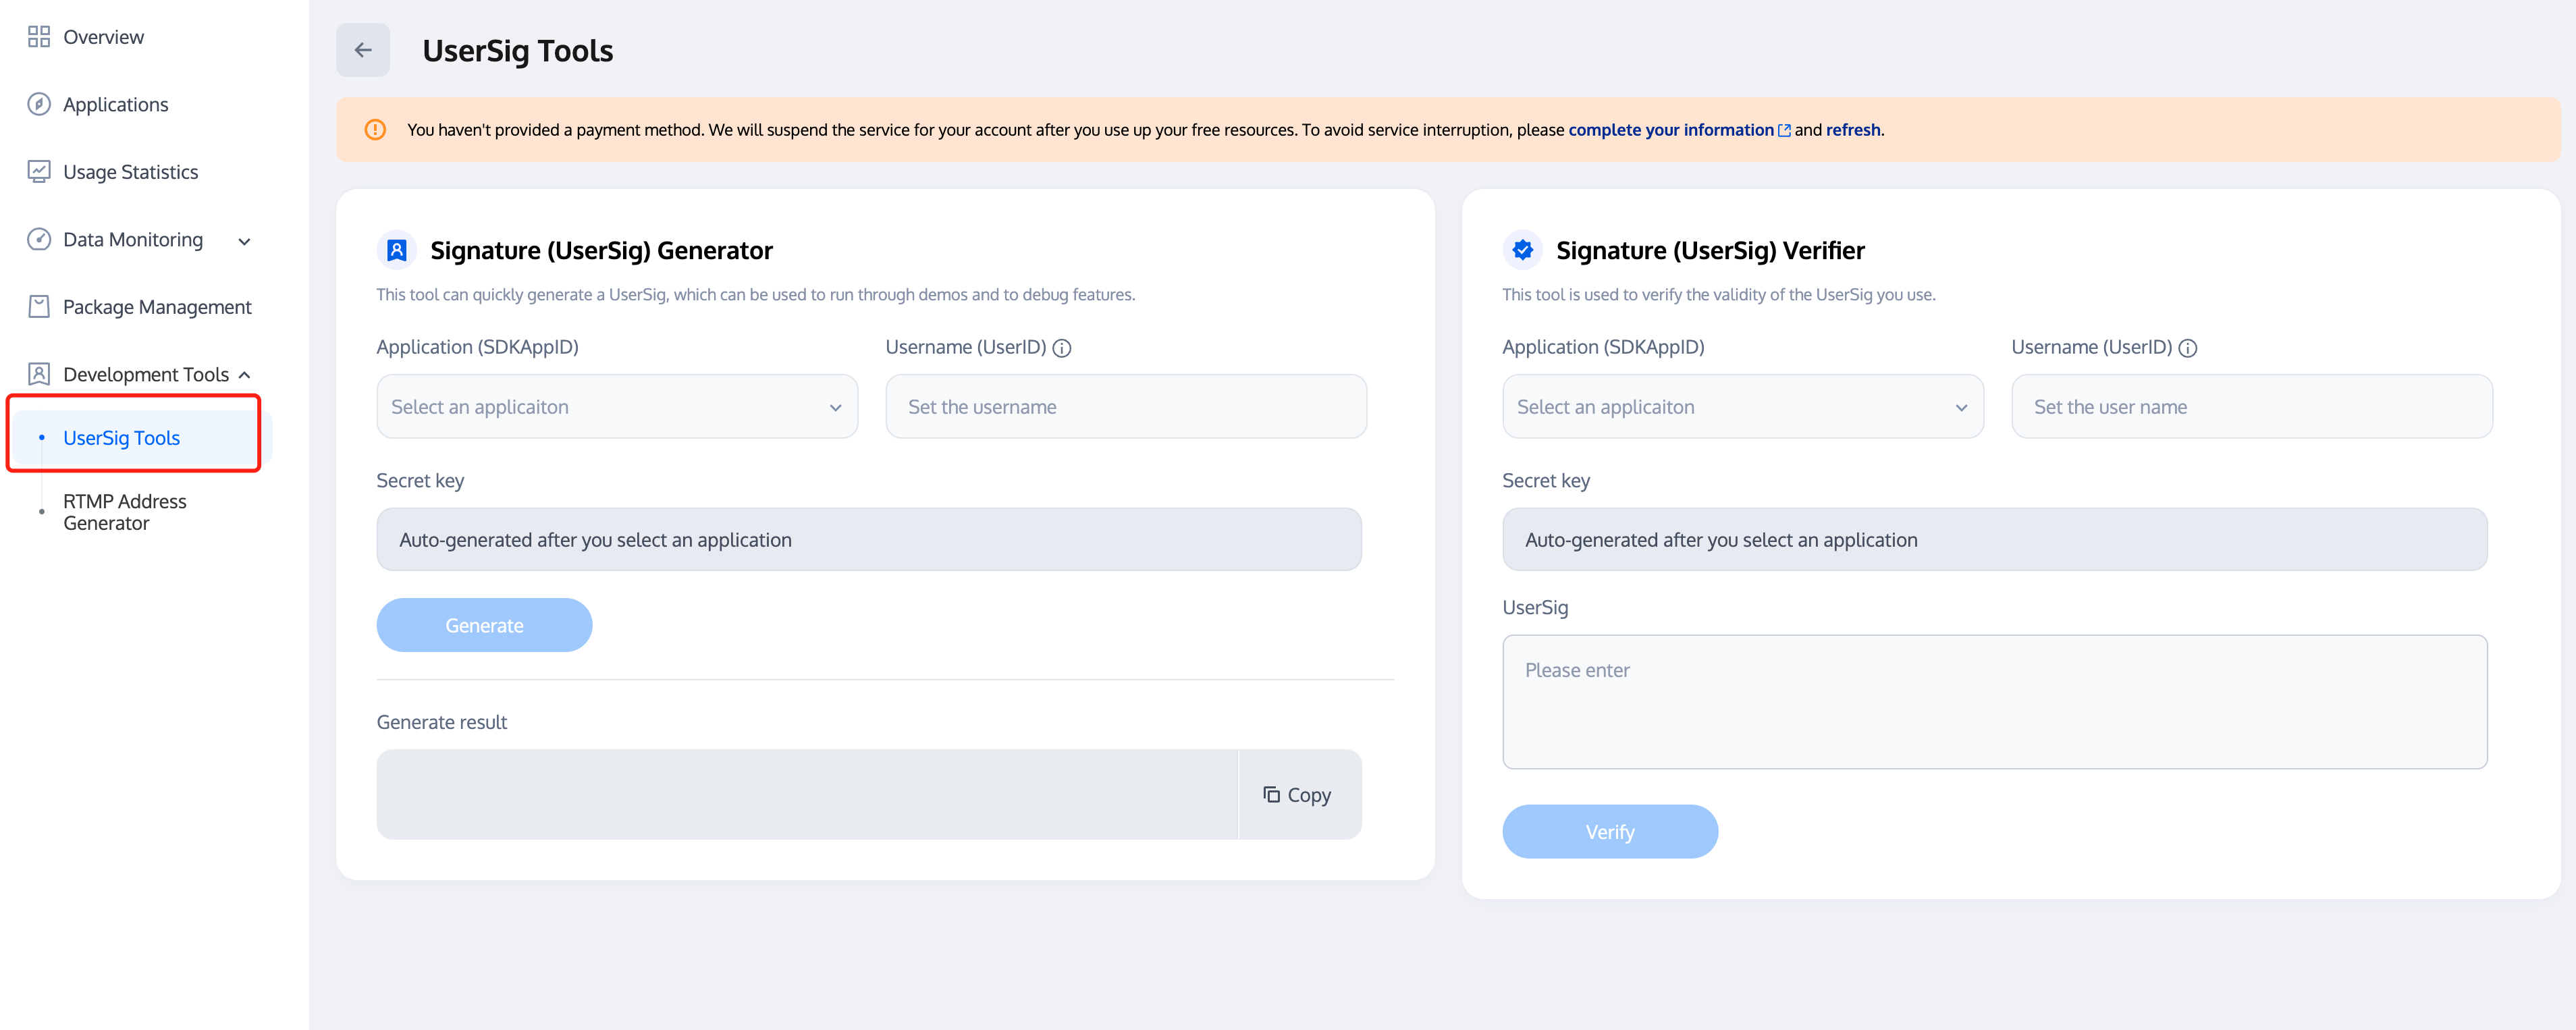
詳細は UserSig 関連 を参照してください。
注意:
このステップは現在、開発者からのフィードバックが最も多いステップで、以下のような一般的な問題があります。
SDKAppID の設定が間違っています。
userSig がシークレットキー(Secretkey)として誤設定されています。userSig は SDKAppID、userID や有効期限などの情報を SecretKey で暗号化したものであり、直接 SecretKey を userSig として設定するものではありません。
userSig が「1」、「123」、「111」などの簡単な文字列に設定されています。TRTC は同じ UserID の複数端末ログインをサポートしていないため、複数人で協力して開発する場合、「1」、「123」、「111」といった userID は他の同僚によって使用されやすく、ログインに失敗する可能性があります。そのため、デバッグ時には識別しやすい UserID を設定することをお勧めします。
Github のサンプルコードでは、genTestUserSig 関数を使用してローカルで userSig を計算することにより、現在の接続プロセスをクイックスタートできるようになっています。しかし、この方法では SecretKey がアプリのコード内に公開されてしまい、後のアップグレードや SecretKey の保護には不向きです。そのため、userSig の計算ロジックはサーバー側に配置し、TUILiveKit コンポーネントを使用するたびに、App が TULiveKit コンポーネントを使用するたびにリアルタイムでサーバーから userSig を取得することを強くお勧めします。
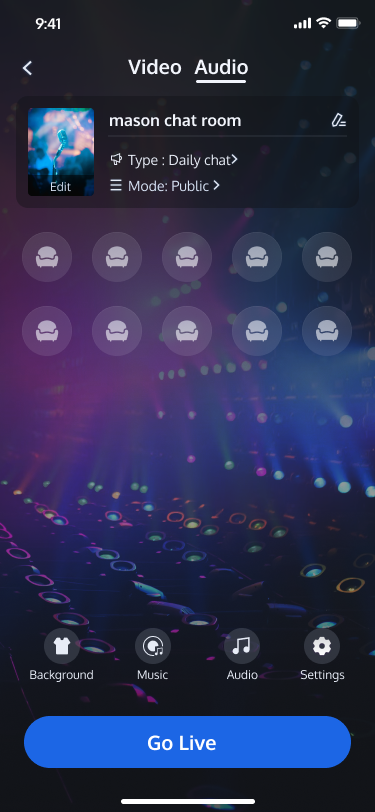
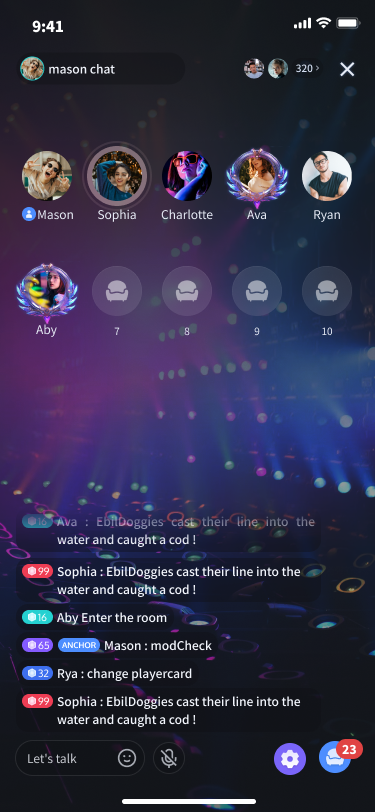
ステップ 5:音声チャットルームを作成する
let params = CreateRoomParams()params.maxAnchorCount = VoiceRoomDefine.MAX_CONNECTED_VIEWERS_COUNTparams.seatMode = .applyToTakeVoiceRoomKit.createInstance().createRoom(roomId: "your room id", params: params)
CreateRoomParams *params = [[CreateRoomParams alloc] init];params.maxAnchorCount = VoiceRoomDefine.MAX_CONNECTED_VIEWERS_COUNT;params.seatMode = TUISeatModeApplyToTake;[[VoiceRoomKit createInstance] createRoomWithRoomId:@"your room id" params:params];
音声チャットルームのプレビュー画面 | 音声チャットルーム内の画面 |
 |  |
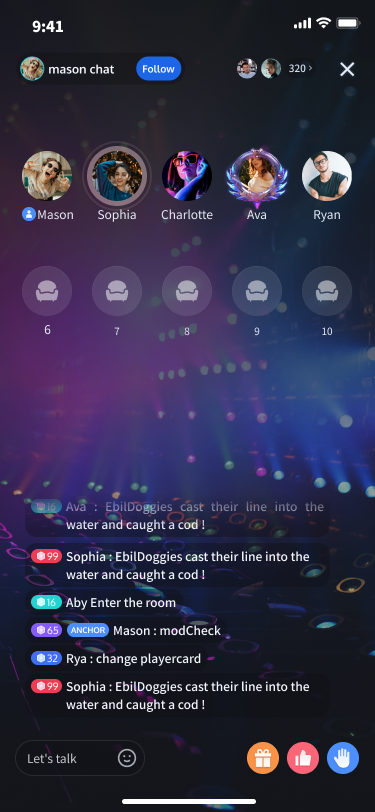
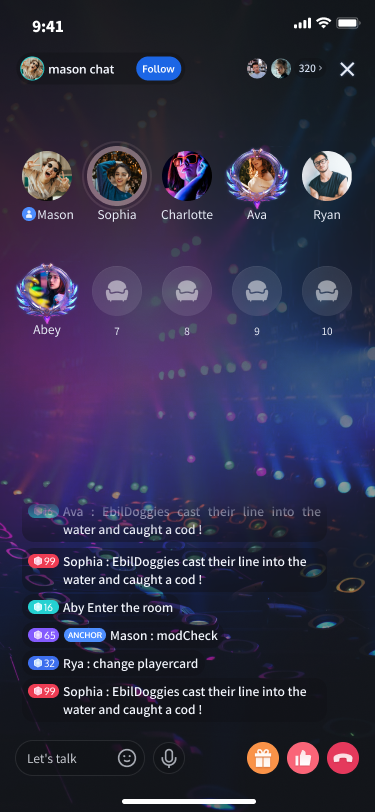
ステップ 6:音声チャットルームに参加する
VoiceRoomKit.createInstance().enterRoom(roomId: "your room id")
[[VoiceRoomKit createInstance] enterRoomWithRoomId:@"your room id"];
音声チャットルーム | 音声チャットルーム |
 |  |
その他の特性
ルームリスト
よくある質問
交流とフィードバック
ご要望やフィードバックがございましたら、info_rtc@tencent.com までお問い合わせください。