
インテグレーション
本文では、TUILiveKit コンポーネントの導入を短時間で完了する方法を紹介します。本文書に従って、1 時間以内に以下の主要なステップを完了し、最終的に完全な UI を備えた音声チャットルーム機能を得ることができます。
ホスト | 視聴者 |
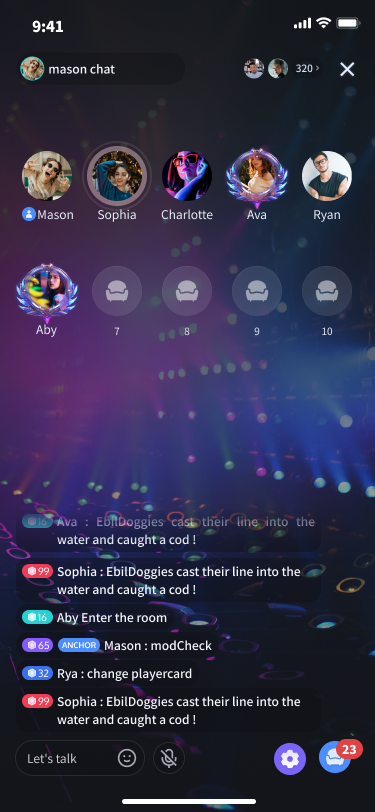 | 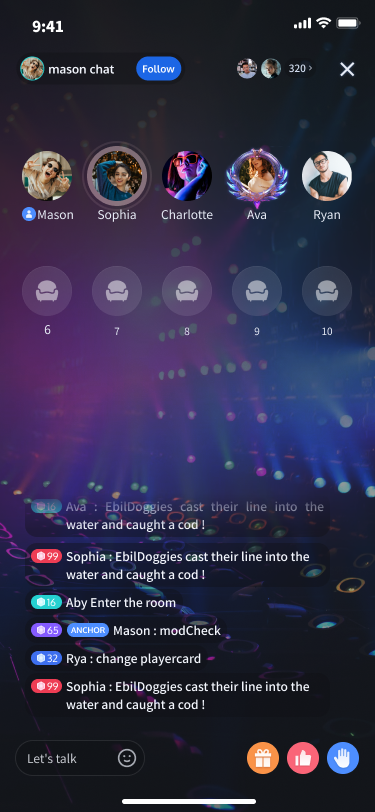 |
環境準備
Android 5.0(SDK API Level 21)以上のバージョン。
Gradle 7.0 以上のバージョン。
Android 5.0 以上のスマホデバイス。
ステップ 1:サービスをアクテイブ化する
Tencent Cloud が提供する音声・ビデオサービスを使用する前に、コンソールでアプリケーションの音声・ビデオサービスをアクテイブ化する必要があります。具体的な手順については、サービスをアクテイブ化する(TUILiveKit)を参照してください。
ステップ 2:TUILiveKit コンポーネントのダウンロード
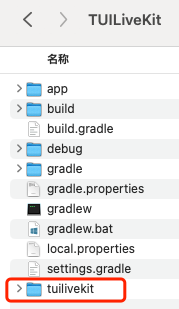
Github からコードをクローン/ダウンロードし、Android ディレクトリ内の tuilivekit サブディレクトリを現在のプロジェクトの app と同じレベルのディレクトリにコピーします。下図のとおりです。
ステップ 3:プロジェクト設定
1. プロジェクトルートディレクトリの
settings.gradle.kts(またはsettings.gradle)ファイルに jitpack リポジトリアドレスを追加し、jitpack リポジトリ依存関係を追加してください(ギフト再生用 SVG アニメーションのサードパーティライブラリ SVGAPlayer をダウンロードする):dependencyResolutionManagement { repositoriesMode.set(RepositoriesMode.FAIL_ON_PROJECT_REPOS) repositories { google() mavenCentral()// jitpack リポジトリアドレスを追加 maven { url = uri("https://jitpack.io") } } }
dependencyResolutionManagement { repositoriesMode.set(RepositoriesMode.FAIL_ON_PROJECT_REPOS) repositories { google() mavenCentral()// jitpack リポジトリアドレスを追加 maven { url 'https://jitpack.io' } } }
2. プロジェクトのルートディレクトリにある
settings.gradle.kts (または settings.gradle) ファイルに以下のコードを追加します。これにより、ステップ 2でダウンロードした tuilivekit コンポーネントを現在のプロジェクトにインポートします。include(":tuilivekit")
include ':tuilivekit'
3. app ディレクトリで
build.gradle.kts (またはbuild.gradle)ファイルを見つけて、次のコードを追加します。これは、新しく追加された tuilivekit コンポーネントに対する現在の app の依存を宣言するものです。api(project(":tuilivekit"))
api project(':tuilivekit')
説明:
TUILiveKit プロジェクト内部には、
TRTC SDK、IM SDK、tuiroomengine 及び共通ライブラリ tuicore に対するデフォルトの依存関係があり、開発者が個別に設定する必要はありません。バージョンをアップグレードするには、tuilivekit/build.gradleファイルを変更するだけです。4. 当社は SDK 内部で Java のリフレクション特性を使用しているため、SDK 内の一部のクラスを難読化しないリストに追加する必要があります。そのため、
proguard-rules.proファイルに次のコードを追加する必要があります。-keep class com.tencent.** { *; }
5. app ディレクトリで
AndroidManifest.xml ファイルを見つけ、application ノードに tools:replace="android:allowBackup" を追加し、コンポーネント内の設定を上書きし、自分の設定を使用します。// app/src/main/AndroidManifest.xml<application ...// 以下の設定を追加して、依存している SDK の設定を上書きするandroid:allowBackup="false" tools:replace="android:allowBackup">
ステップ 4:ログイン
プロジェクトに次のコードを追加します。これは、TUICore の関連インターフェースを呼び出して TUI コンポーネントのログインを完了するためのものです。このステップは非常に重要で、ログインに成功した場合のみ、TUILiveKit が提供する各機能を正常に使用できます。
// ログイン
TUILogin.login(applicationContext,
    1400000001,  // ステップ 1で取得した SDKAppID に置き換えてください
    "denny",  // お客様の UserID に置き換えてください
    "xxxxxxxxxxx",  // コンソールで UserSig を計算し、ここに入力してください
    object : TUICallback() {
        override fun onSuccess() {
            Log.i(TAG, "login success")
        }

        override fun onError(errorCode: Int, errorMessage: String) {
            Log.e(TAG, "login failed, errorCode: $errorCode msg:$errorMessage")
        }
    })
// ログインTUILogin.login(context,1400000001, // ステップ 1で取得した SDKAppID に置き換えてください"denny", // お客様の UserID に置き換えてください"xxxxxxxxxxx", // Console で UserSig を計算して、ここに入力してくださいnew TUICallback() {@Overridepublic void onSuccess() {Log.i(TAG, "login success");}@Overridepublic void onError(int errorCode, String errorMessage) {Log.e(TAG, "login failed, errorCode: " + errorCode + " msg:" + errorMessage);}});
パラメータの説明
ここでは、login 関数で使用されるいくつかの重要なパラメータを詳しく紹介します。
パラメータ | タイプ | 説明 |
SDKAppID | int | ステップ 1 の最後のステップで取得しましたので、ここでは繰り返し説明しません。 |
UserID | String | 現在のユーザーの ID。文字列タイプで、英字(a-zおよびA-Z)、数字(0-9)、ハイフン、アンダースコアのみを含めることができます。 |
userSig | String | ステップ 1の第 3 ステップで取得した SecretKey を使用して、SDKAppID、UserID などの情報を暗号化することで、UserSigを取得できます。これは認証用のトークンであり、現在のユーザーが TRTC のサービスを使用できるかどうかを Tencent Cloud が識別するために使用されます。コンソールの補助ツールを使用して、一時的に利用可能な UserSig を生成できます。詳細についてはUserSig の計算と使用方法を参照してください。 |
説明:
開発環境:ローカル開発のデバッグ段階では、ローカルの
GenerateTestUserSig.genTestSig関数を使用して userSig を生成できます。この方法では、SDKSecretKey が逆コンパイル・逆クラックされやすいため、キーが漏洩すると、攻撃者が Tencent Cloud のトラフィックを盗用する可能性があります。本番環境:プロジェクトをリリースする場合は、サーバー側で UserSigを生成する方法を使用してください。
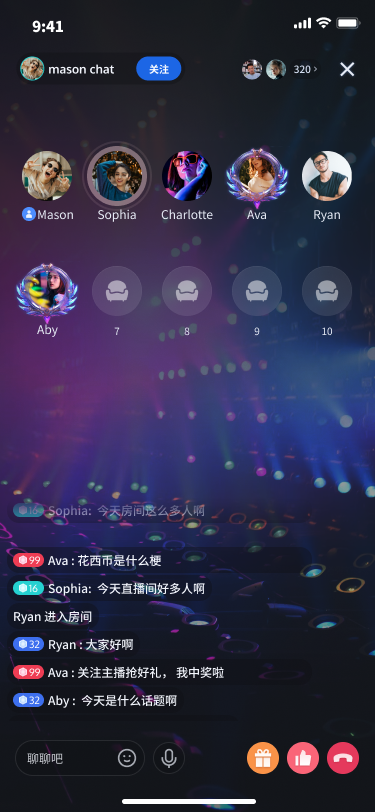
ステップ 5:音声チャットルームを作成する
import com.trtc.uikit.livekit.VoiceRoomKit;VoiceRoomKit.createInstance(applicationContext).createRoom("roomId", VoiceRoomDefine.CreateRoomParams())
import com.trtc.uikit.livekit.VoiceRoomKit;VoiceRoomKit.createInstance(getApplicationContext()).createRoom("roomId", new VoiceRoomDefine.CreateRoomParams());
音声チャットルームのプレビュー画面 | 音声チャットルームのルーム内画面 |
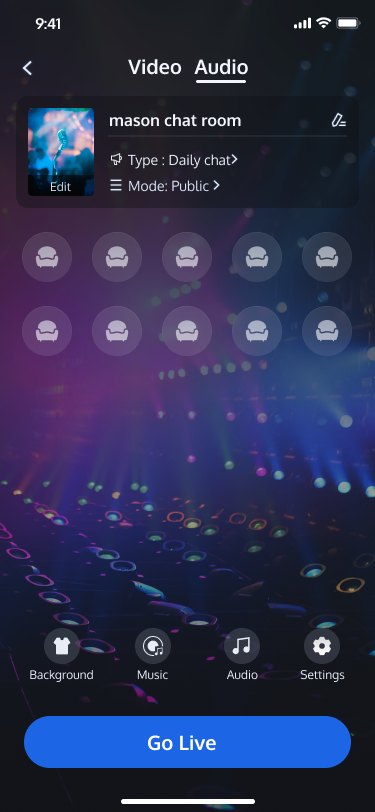 |  |
ステップ 6:音声チャットルームに参加する
import com.trtc.uikit.livekit.VoiceRoomKit;VoiceRoomKit.createInstance(applicationContext).enterRoom("roomId")
import com.trtc.uikit.livekit.VoiceRoomKit;VoiceRoomKit.createInstance(getApplicationContext()).enterRoom("roomId");
音声チャットルーム | 音声チャットルーム |
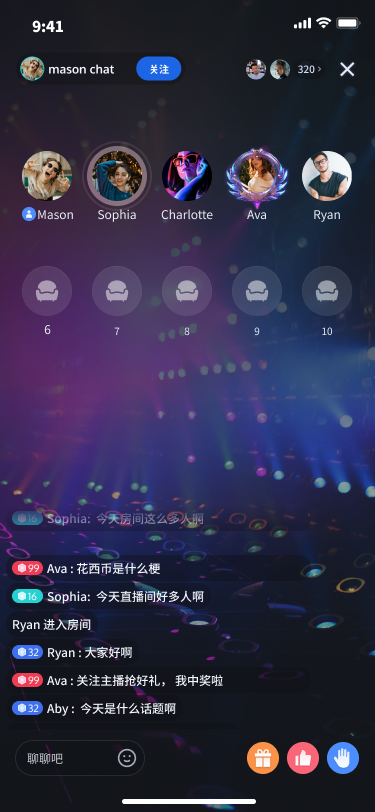 |  |
その他の特性
ルームリスト
よくある質問
コミュニケーションとフィードバック
何かご要望やフィードバックがございましたら、info_rtc@tencent.comまでお問い合わせください。

