連絡先リスト
This article will guide you in building a contact interface.
Display Effect
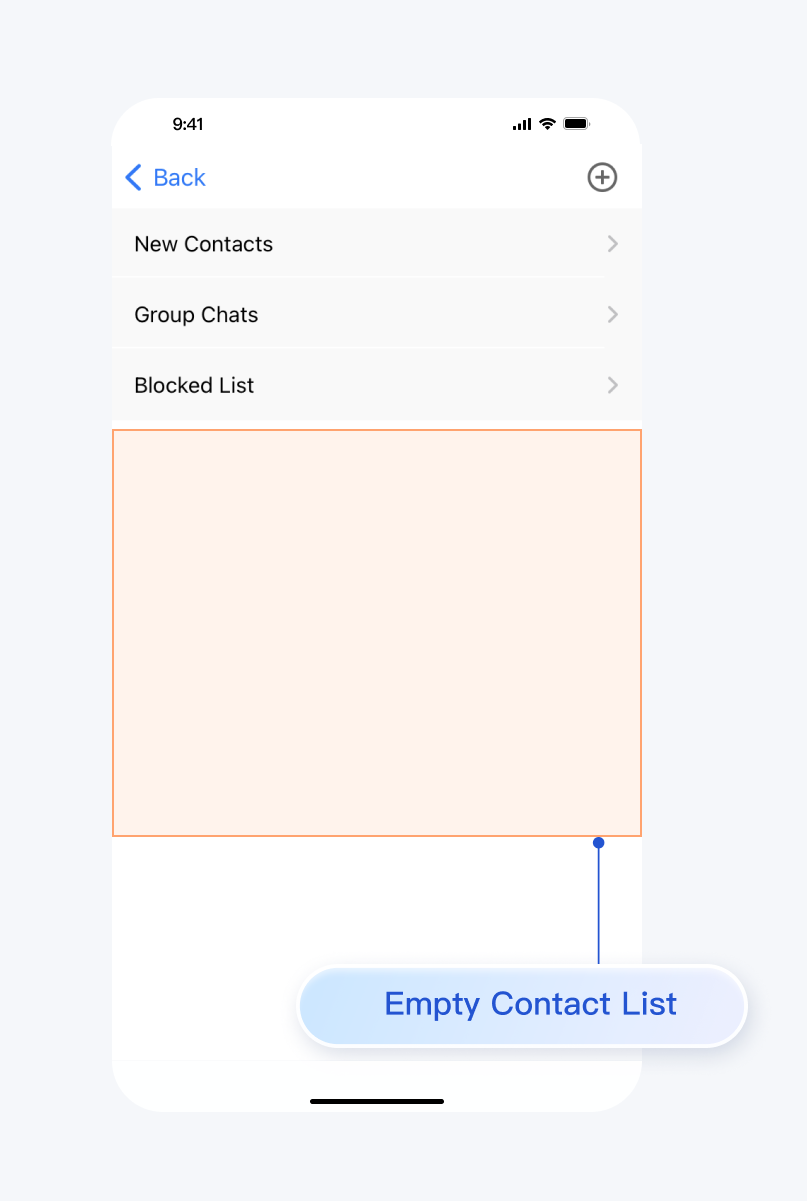
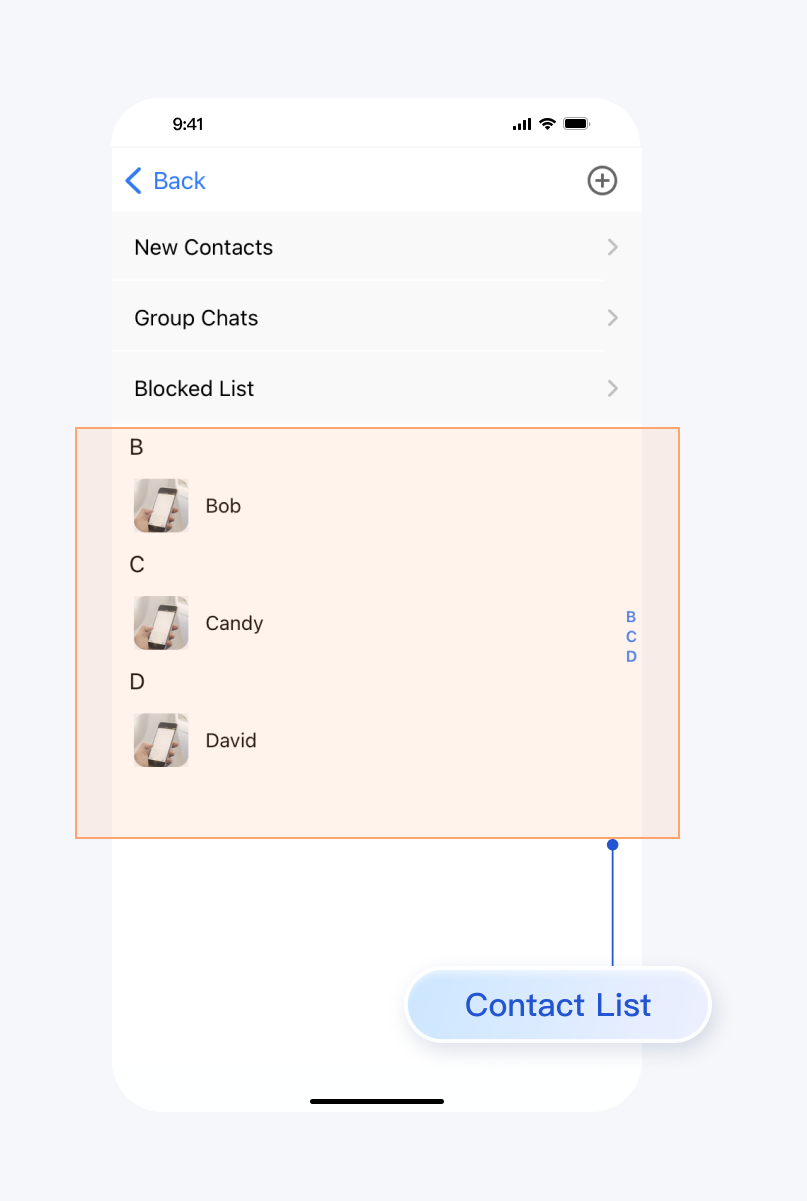
If you haven't added any contacts beforehand, the loaded contact interface will be empty. After adding contacts, the contacts will be displayed in the interface list, as shown below:
Contact list is empty | Contact list is not empty |
 |  |
Environment Requirements
Xcode 10 or later
iOS 9.0 or later
Preconditions
Before building the interface, please ensure that you have completed the following 4 things:
1. Created an application in the console.
2. Created some user accounts in the console.
3. Integrated
TUIKit or TUIContact.4. Called the
TUILogin login API to log in to the component.Note:
1. All components use this log in to API. Just log in once every time the application is launched.
2. Please ensure a successful log in to proceed, we recommend performing the following actions in the callback for a successful log in to.
If you haven't completed the above 4 steps, please refer to the corresponding steps in Getting Started first, otherwise you may encounter obstacles when implementing the following features.
If you have already completed them, please continue reading below.
Step Instructions
To display the contacts interface, simply create a
TUIContactController object and display it.Sample code:
import UIKit// ContactController is your own ViewControllerclass ContactController: UIViewController {override func viewDidLoad() {super.viewDidLoad()// Create TUIContactController_Minimalistlet vc = TUIContactController_Minimalist()// Option 1: push vc.navigationController?.pushViewController(vc, animated: true)// Option 2: add vc to your own ViewController.// addChild(vc)// view.addSubview(vc.view)}}
#import "TUIContactController_Minimalist.h"// ContactController is your own ViewController@implementation ContactController- (void)viewDidLoad {// Create TUIContactController_MinimalistTUIContactController_Minimalist *vc = [[TUIContactController_Minimalist alloc] init];// Option 1: push vc.[self.navigationController pushViewController:vc animated:YES];// Option 2: add vc to your own ViewController.// [self addChildViewController:vc];// [self.view addSubview:vc.view];}@end
import UIKit// ContactController is your own ViewControllerclass ContactController: UIViewController {override func viewDidLoad() {super.viewDidLoad()// Create TUIContactControllerlet vc = TUIContactController()// Option 1: push vc.navigationController?.pushViewController(vc, animated: true)// Option 2: add vc to your own ViewController.// addChild(vc)// view.addSubview(vc.view)}}
#import "TUIContactController.h"// ContactController is your own ViewController@implementation ContactController- (void)viewDidLoad {// Create TUIContactControllerTUIContactController *vc = [[TUIContactController alloc] init];// Option 1: push vc.[self.navigationController pushViewController:vc animated:YES];// Option 2: add vc to your own ViewController.// [self addChildViewController:vc];// [self.view addSubview:vc.view];}@end
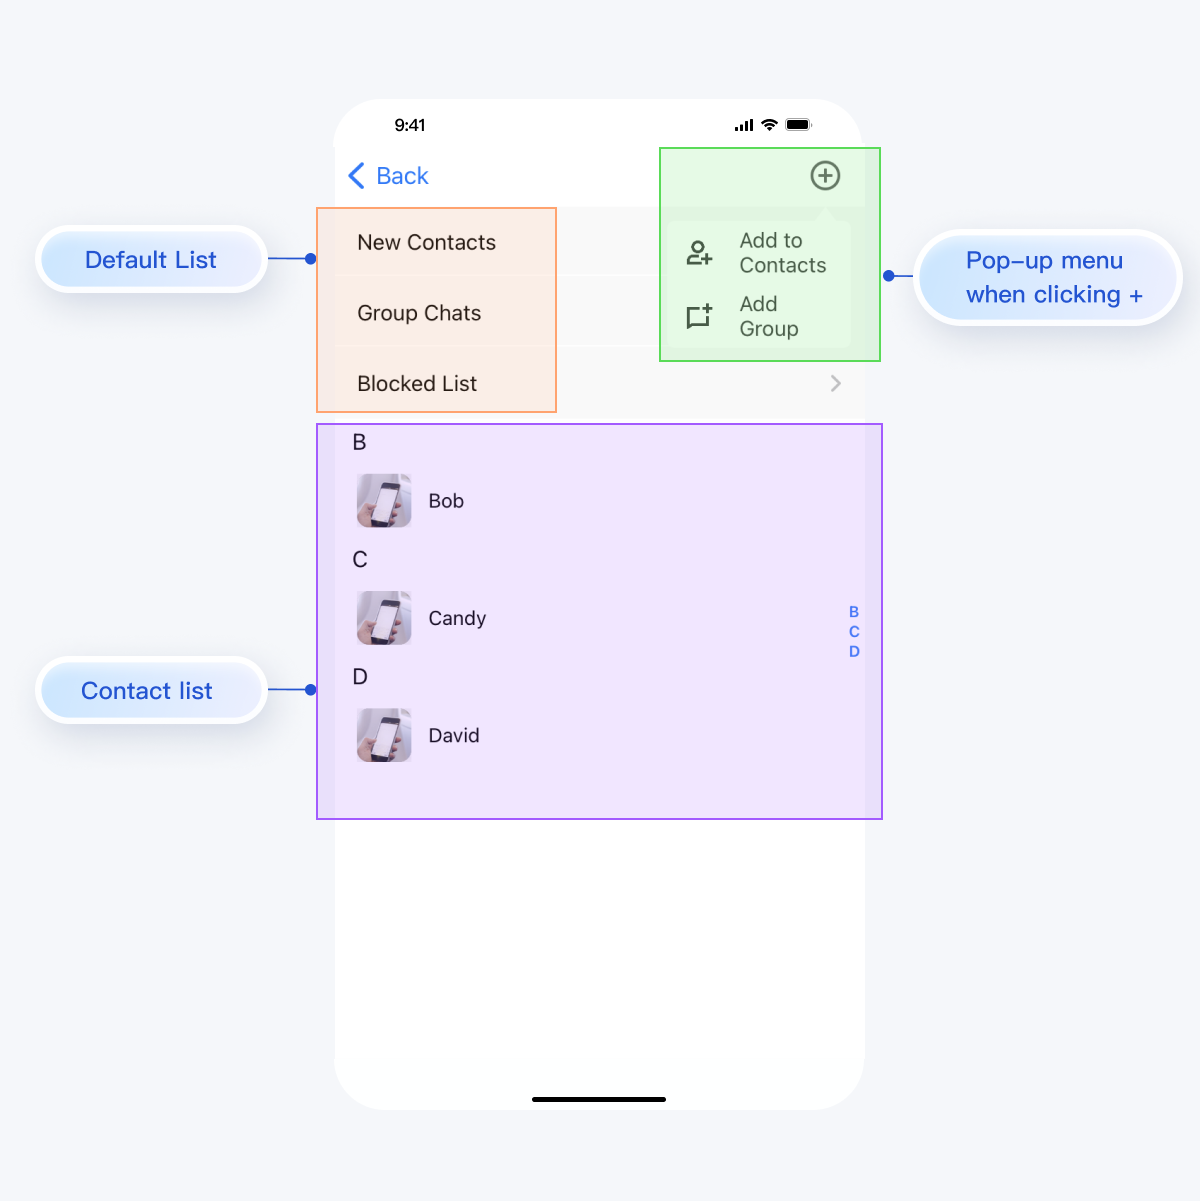
The features of the contacts interface are divided as shown below:

TUIContact handles click actions in this interface by default, as follows:Action | Effect |
Click on New Contacts | Display pending friend requests |
Click on Group Chats | Display all group chats for the currently logged-in account |
Click on Blocked List | Display the blocklist for the currently logged-in account |
Click on the contact's avatar | Enter the Contact Management interface |
Click on the + sign at the top right of the interface | A pop-up menu with Add to Contacts and Add Group |
In it, by clicking on the contact's avatar, clicking
Add to Contacts, and clicking on Group Chats, you can customize the behavior by implementing the methods in TUIContactControllerListenerprotocol TUIContactControllerListener_Minimalist: AnyObject {func onSelectFriend(_ cell: TUICommonContactCell_Minimalist) -> Boolfunc onAddNewFriend(_ cell: TUICommonTableViewCell) -> Boolfunc onGroupConversation(_ cell: TUICommonTableViewCell) -> Bool}
@protocol TUIContactControllerListener_Minimalist <NSObject>@optional- (void)onSelectFriend:(TUICommonContactCell *)cell;- (void)onAddNewFriend:(TUICommonTableViewCell *)cell;- (void)onGroupConversation:(TUICommonTableViewCell *)cell;@end
protocol TUIContactControllerListener: NSObjectProtocol {func onSelectFriend(_ cell: TUICommonContactCell) -> Boolfunc onAddNewFriend(_ cell: TUICommonTableViewCell) -> Boolfunc onGroupConversation(_ cell: TUICommonTableViewCell) -> Bool}
@protocol TUIContactControllerListener <NSObject>@optional- (void)onSelectFriend:(TUICommonContactCell *)cell;- (void)onAddNewFriend:(TUICommonTableViewCell *)cell;- (void)onGroupConversation:(TUICommonTableViewCell *)cell;@end
More practices
Contact Us
If you have any questions about this article, feel free to join the Telegram Technical Group, where you will receive reliable technical support.